[ conversion page 2 ]
1/32 conversion to build a T-45 Goshawk US NAVY jet trainer
... back to page 1

So the starting point is the Revell
1/32 Hawk T.1 using T.1 kit #04849 with friendly grey coloured
plastic.
I also checked out if there were any 1/32 markings for a T-45 Goshawk. To my surprise, DRAW DECALS has made a couple of silk printed decals for Centennial anniversary Goshawks. One of these sets will be purchased.
![]()
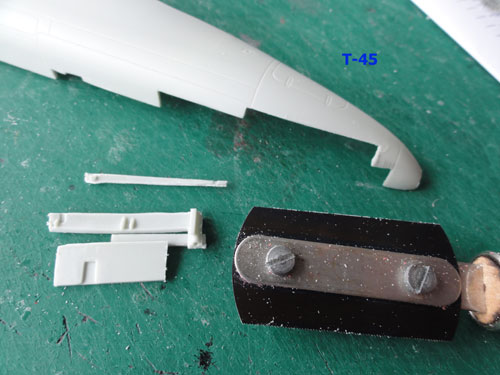
Flap separation
First, the major "razor saw" work
will be done on the main parts as they can now be well handled.
First, a ageneral change is needed
on all the Revell Hawk kits in 1/32 scale:
Real Hawk show always the trailing
edge slotted flaps drooped. Unfortunately, in the Revell kit , the flaps
are NOT a separate parts. (On the 1/32 KINETIC Hawk 100 series, the flaps
are indeed separate parts, well done Kinetic).
So we need on this Revell kit to
separate with a razor saw the rear flap.
The flap edges are well indicated
on the kit wing parts. (here seen on another Hawk also being build, with
the red plastic).
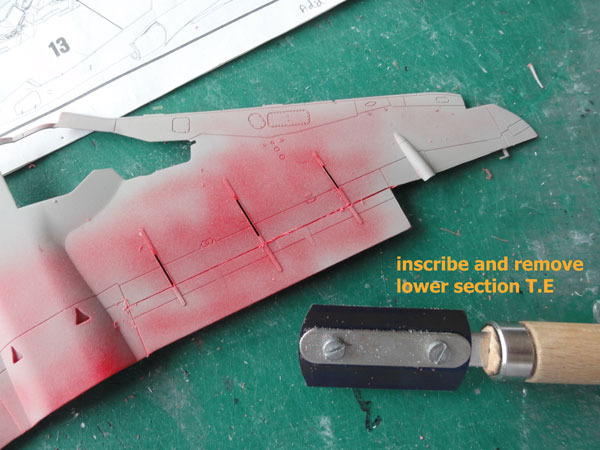
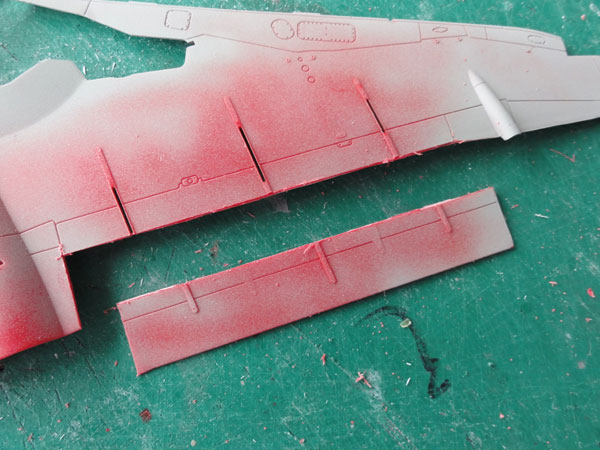
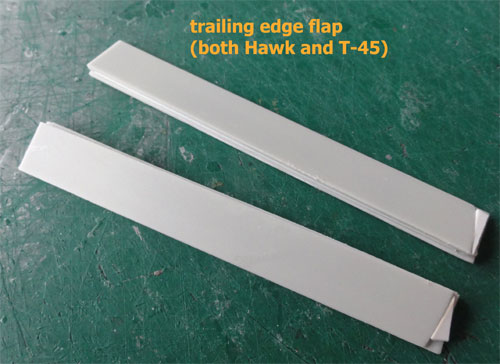
The trailing edge flaps are needed
later on. A small gap at the end are closed with card and filled and sanded
in shape later on. Also a flap vane needs to be made, to be done later.
![]()
D- twin nose wheel gear with catapult
launch bar (and larger nose wheel diameter)
The nose wheel bay is significantly
different on the T-45.
The outline was pencilled and with
a TIGER razor saw cut out on both fuselage halves.
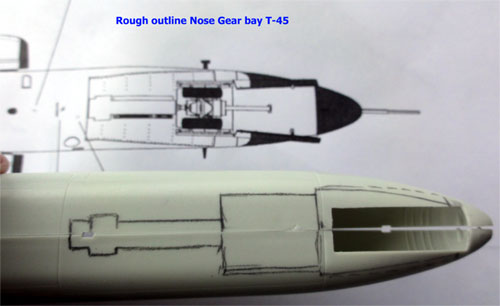
This is a drawing that shows it in
more detail.
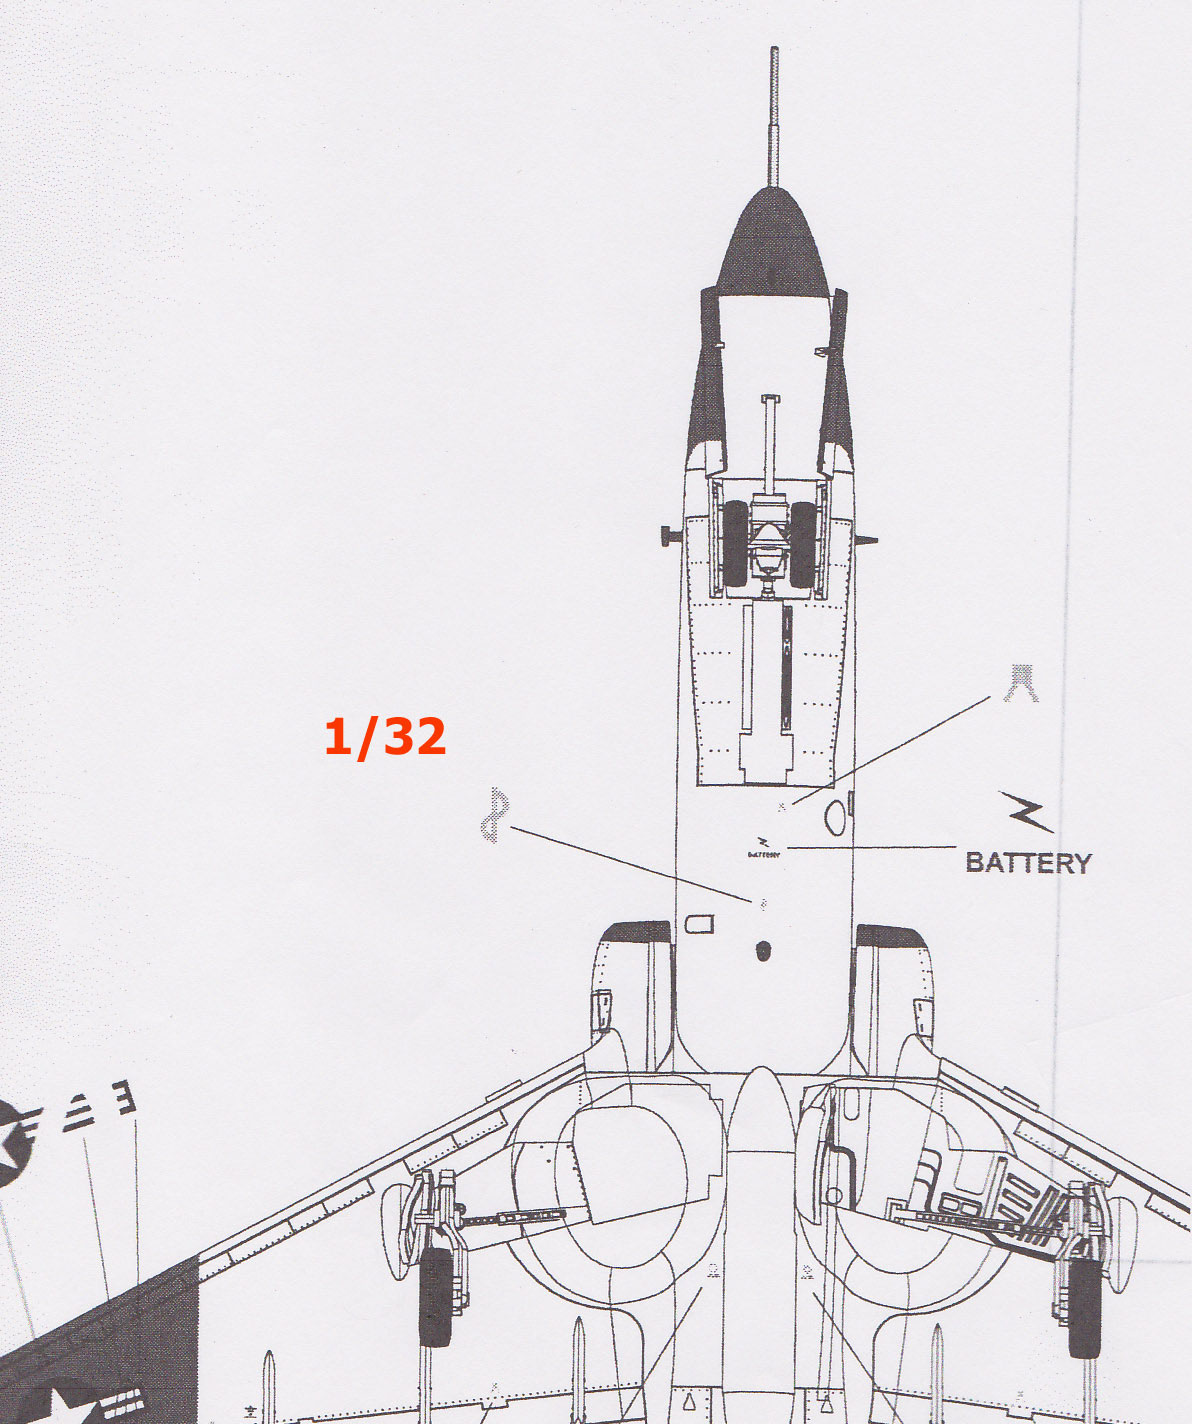
The result is seen here.
.
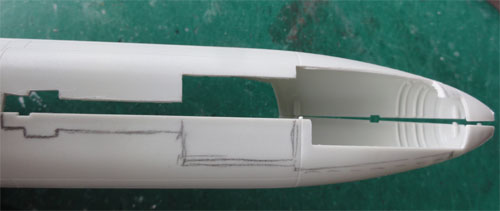
A new nose wheel bay interior is required,
this will be made from plastic cart. The recess/bay for the stress (retract-)
bar required cutting out a central piece of the kit cockpit tub (part #1)
.

On the upper floor a very thin piece
of cart is set to cover the gap.
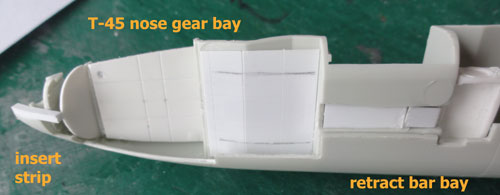
On the forward nose, an insert plastic strip is set of 2 mm wide. This will give the T-45 a bit deeper nose as on the real aircraft to accommodate the large twin wheel nose gear.
Later on, when other main (internal)
fuselage assembly is complete, the fuselage halves will be closed.
The rest of the nose gear assembly
is done at a later stage.
![]()
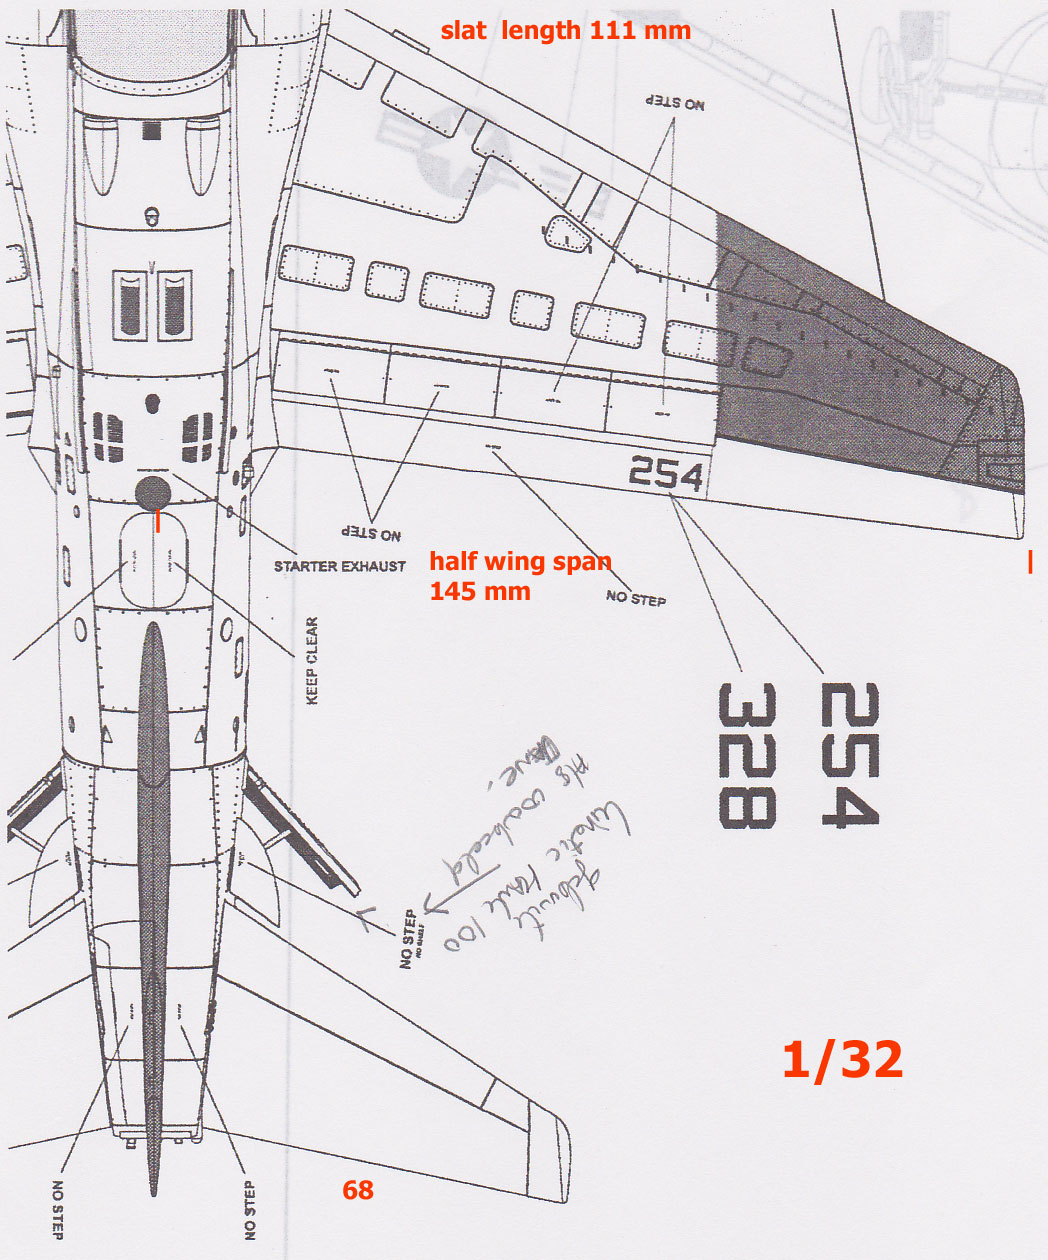
STEPs 17 - 20 of Kit instructions
(wing assembly)
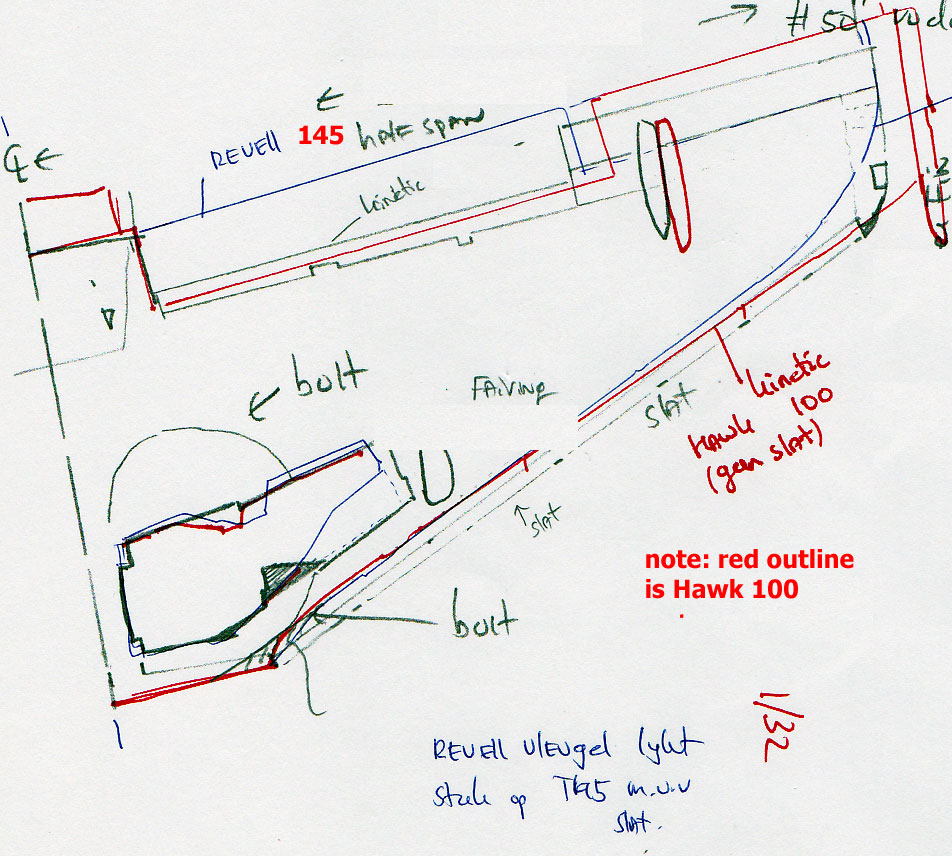
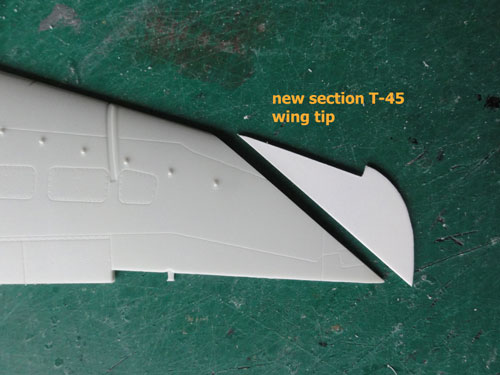
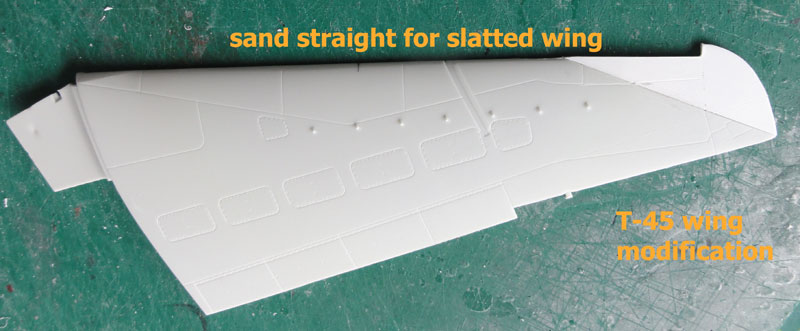
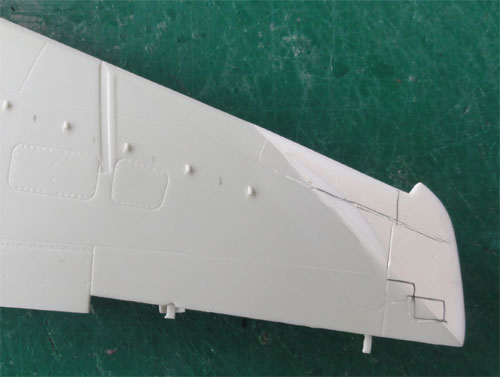
B- slatted wing with straight leading edge and with adapted wing tips
The T-45 wing does not have a larger span as compared to the Hawk, but the wing tips are different and there is a straight wing leading edge. On this leading edge, on the T-45 a slat was fitted. This slat enables low approach speeds (as needed for carrier landing training).
The kit part tips were sawed off,
this was done only at the UPPER wing half panels ( parts #66 , #70 ).
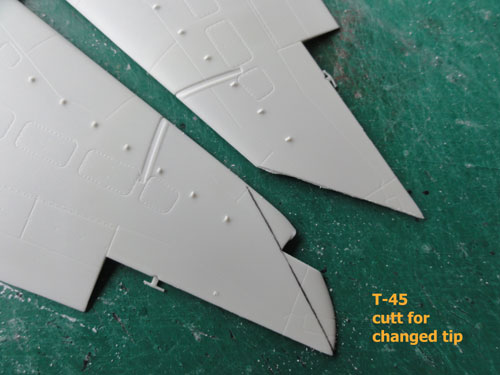
The lower wing parts will be used
unchanged to retain strength and with plastic cart and putty will be shaped.
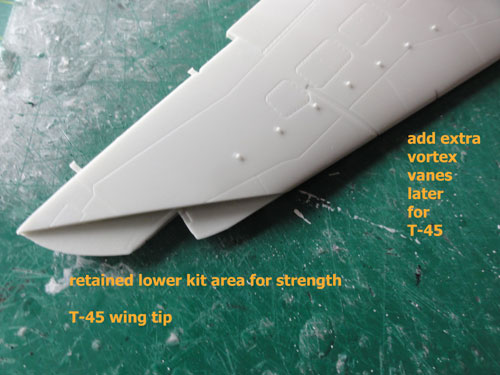
The rest of wing assembly is for later. (this will also need adding extra vortex generators on the upper wing surface).
![]()
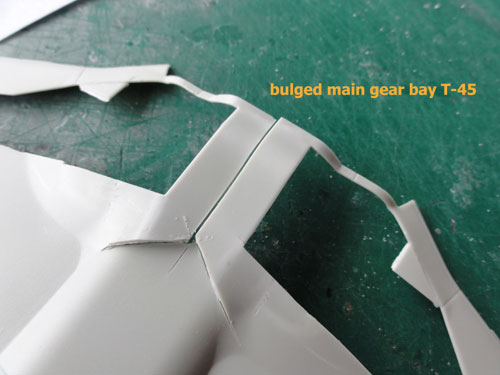
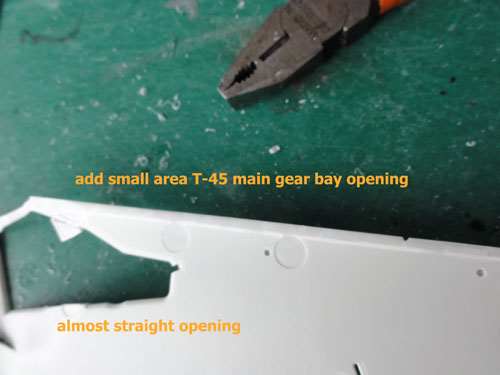
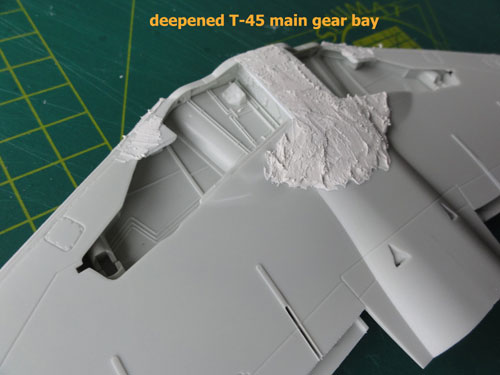
F- stronger undercarriage with
larger main gear (bulged) bays
The T-45 has a beefed up main wheel gear, and the fairing at the wheelbay is a bit bulged. A cut was made and the inner central area bended.
 .
.
The shape of the main wheel bay opening
is also bit different. A straight aft edge is needed, sand to shape. Also,
add a small tri-angle of the forward edge.
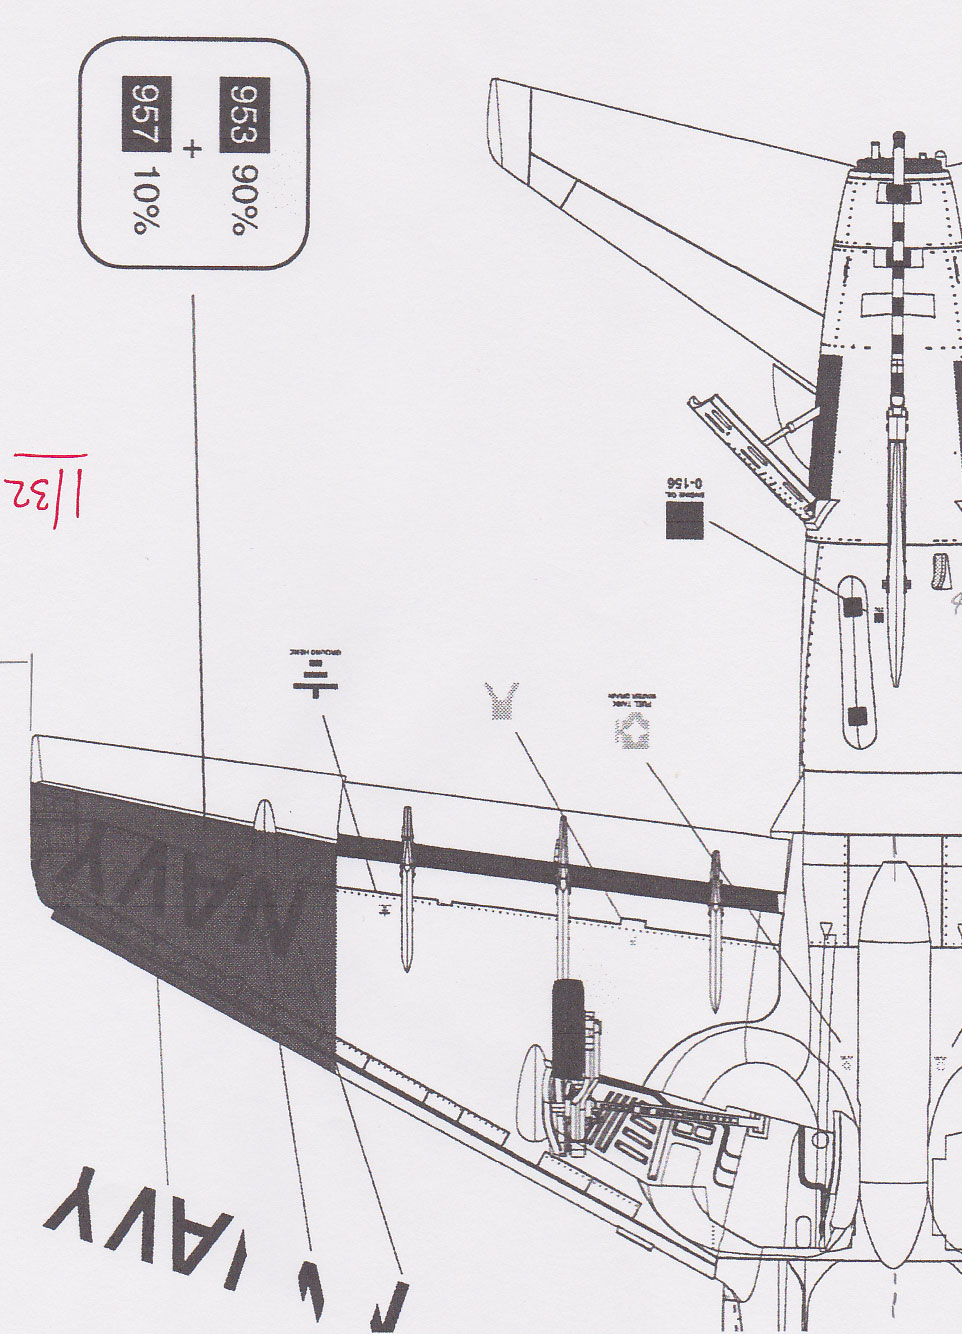
Use the drawing as a guide.
The wing tips were shaped with cart and putty.
Use the drawing as a guide.
The leading edge was sanded straight
in shape. (a drooped slat will be fitted later on). Note the the wing chord
will be a bit larger due to the slat, and this is probably right; no data
was found on the exact spanwise T-45 wing chords.
So no extra areas were removed on
the kit wing leading edge itself. The slat part will be drooped and if
not entirely correct, will not show such a small error.
Now fill and when dry, sand in shape.
Some refilling still needed here....
Now, look at kit assembly STEPs
17 + 18.
The kit parts for the bay sides were
set in place. On top of the inner sides, a 2 mm thick strip was glued,
this will make the bay deeper. (this was required to accommodate the thicker
wheel strut). The bended structure was glued on as well as the prepared
wing halves. The gaps were filled with putty and when dry sanded in shape.
Finally, the overall T-45 wing can
be assembled...
The lower wing tips still need filling
and sanding.
H- large span and squared tipped tailplanes
The T-45 tailplanes have a 10 cmm large span and the ends are not curved as on the Hawk. This was done to improve T-45 stalling characteristics. Also, the T-45 has the small flow vanes as seen on later Hawk 100 series aircraft, again to improve stalling behaviour.
See kit STEPs 23 + 24.
The kit parts were cut straight and
with card the span increased with 3 mm, see the drawing.
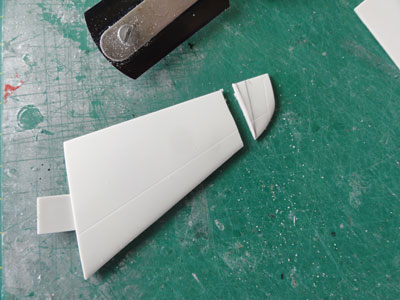

The tailplane stabilizer trailing
edge should be 68 mm long.
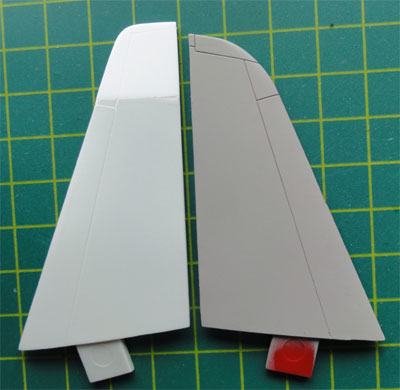
(on the right, the Hawk stab.)
On to next [ page T3...]
Back to 1/32 Models.......

(c) Copyright Meindert "designer"/ All rights reserved. Your comments are welcomed by webmaster
Created this page
May 25, 2013