Royal Netherlands Air Force "Kaasjager"
[ page 4 ]
F-86K (called Kaasjager in Dutch) Sabre in 1/32 scale
... continued from page 3....
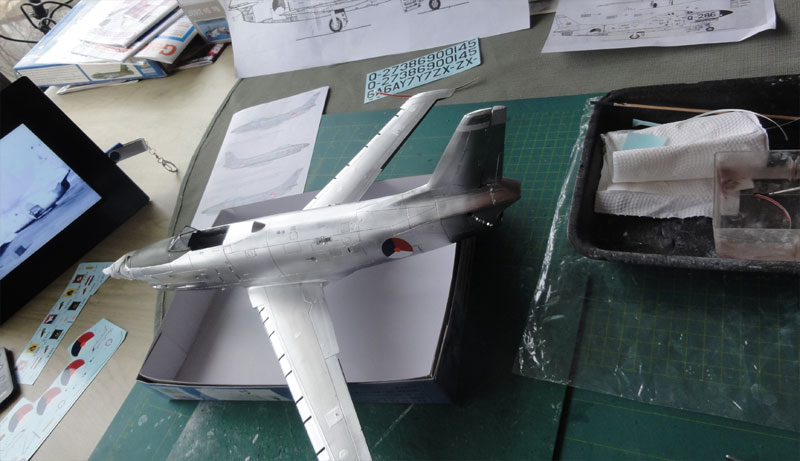
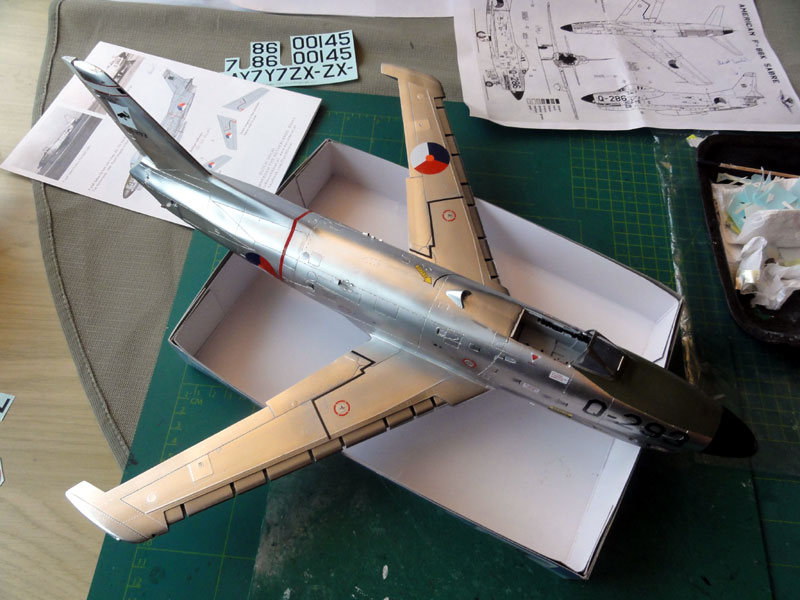
After the shining metallic finishes were applied, it was time to add the decals. Dutch Decal set #32019 provided the F-86K decals that were also included in the AEROPOXY conversion set at the time.
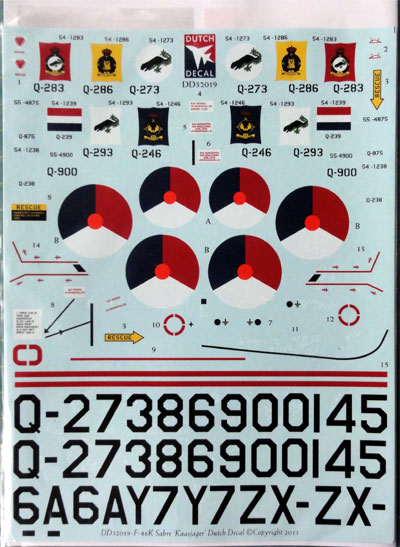
These decals are good, have the correct
sizes. Roundels are fine. Only needed from the kit decals are the walkway
lines and a few stencils. Note that these Walkway lines on the F-86D and
F-86K have a different shape than for the F-86F but the kit decals with
some cutting can be used.
There was considerable variation between individual F-86K Kaasjagers. Using loads of reference photos it turned up that on operational "Kaasjagers", the amount of stencilling is limited. (NOTE that the walkarounds of the Dutch museum F-86K are based on an Italian F-86K and not accurate for an accurate Royal Netherlands Air Force F-86K).
As this model was for the "later style F-40 wing retrofit", a F-86K Kaasjager of no.700 Squadron of the KLu with code "Q-293" as used from Twenthe Air Force Base, The Netherlands in 1964 was picked. This aircraft also carried Sidewinders as per modification 1961.
Tips for the Dutch Decal set:
- the black curved RESCUE line #11
on the left fuselage side is not always there on the F-86K. Check photos.
The decal line is 1 cm too short.
- the Dutch Decal drawings are only
to be used for decal placement.
- the big red line decal #15 should
be moved a bit more aft than shown in the Dutch Decal drawing.
- the RESCUE and WARNING markings
are not seen on all Kaasjagers; check photos for the aircraft you want
to built.
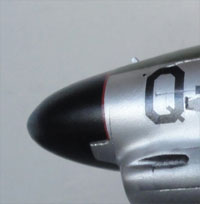
- the red stripe #9 directly aft
of the black radar nose was thinned down a bit:
 ........
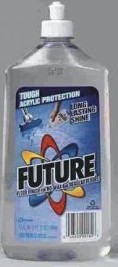
To prevent air bubbles ("silvering")
below each decal, it was usually dragged through some Johnson
Future/ Klear/ Pledge varnish before putting it on the model. Each
decal is than pressed with a piece of T-shirt cloth. This improves also
adherence of a decal.
The result is seen here of the decalled
model. Next the final details and parts are to be added........
![]()
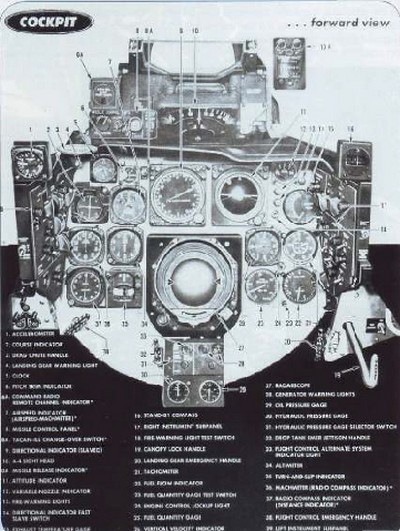
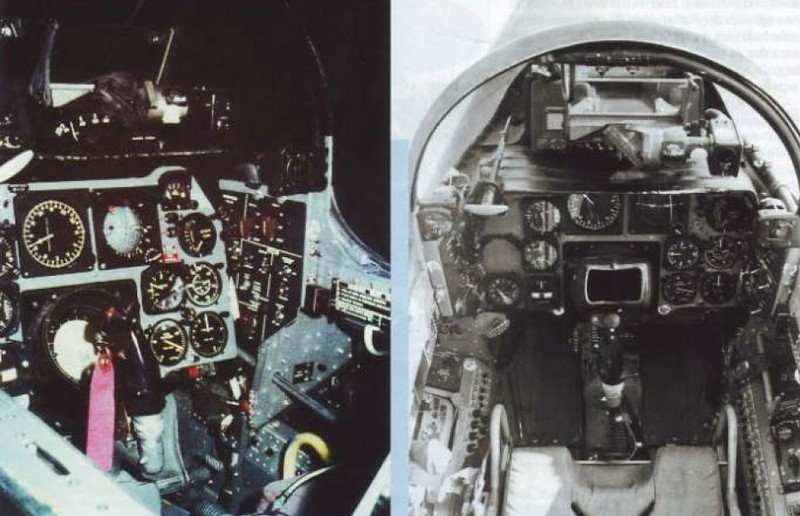
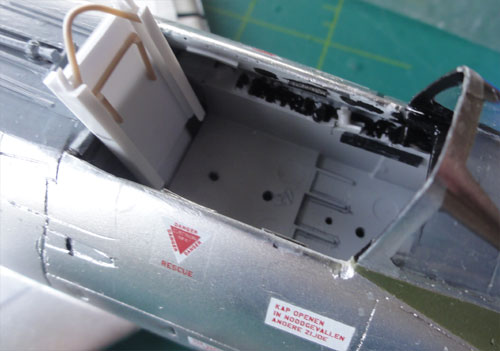
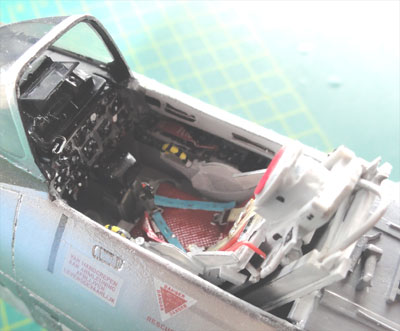
In the cockpit, detailling was now
done. Studying photos is needed to see what how the detailling can
be done, see below:
 .
. .
.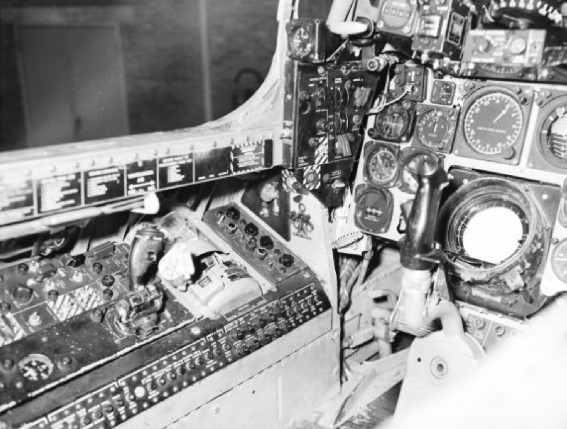
This KLu F-86K model represented a later style aircraft with larger "F-40"wing that also from 1961 onwards was equiped with the GAR-8 Sidewinder missiles and systems. This means some additional "boxes" should be fitted, like the missile release indicator in the windscreen. Some other missiles control boxes are integrated.
The model main instrument panel was
painted medium grey and the details of clocks and knobs black. Also, some
spare decals for the instruments were added. The fuseboxes on the side
were also added made from scrap.
The black radar vision tube is not
always seen fitted on the radar; sometimes it is seen, sometimes not. I
fitted it.
At the rear of the ejection seat,
launch rails and a bulkhead was made from card and plastic rail from EVERGREEN.
On the cockpit edges sometimes the small canopy locks are also seen, it
depends if they are extended or retracted with the canopy control handle.
![]()
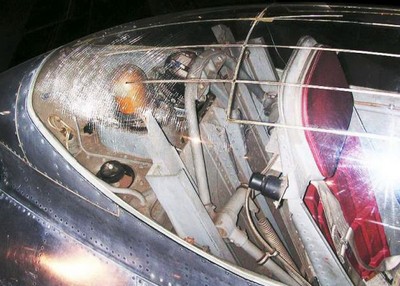
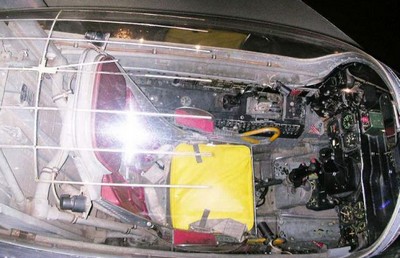
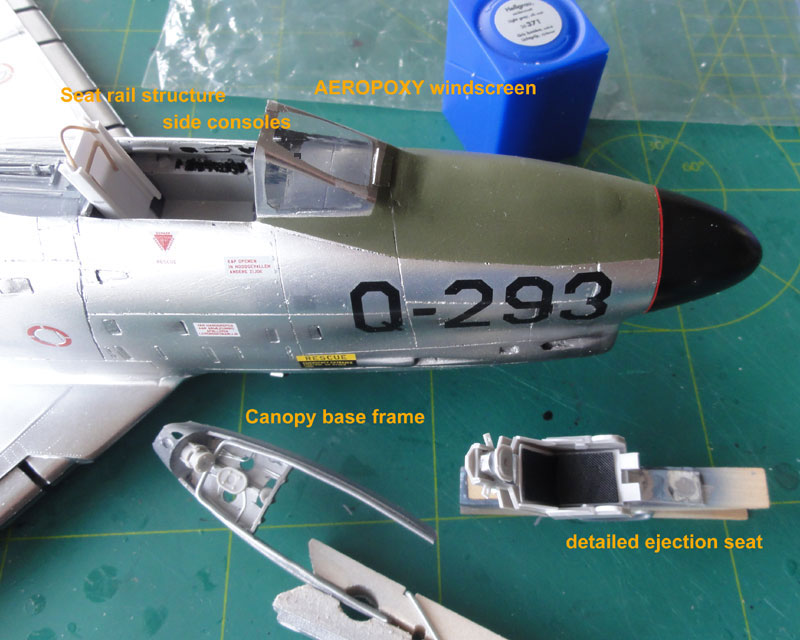
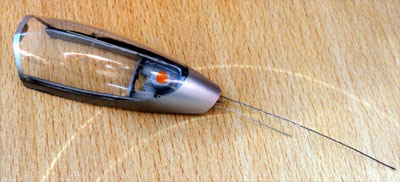
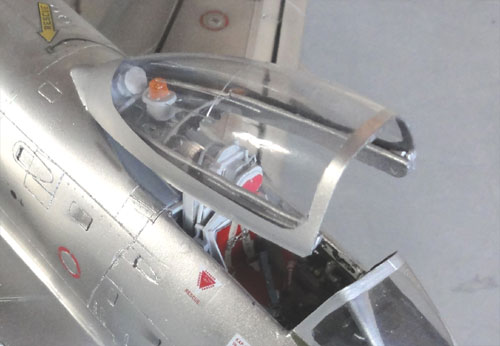
The canopy and the base frame was
also detailed, see the real photos here and the walkaround
how
that can be done.
 ..
..
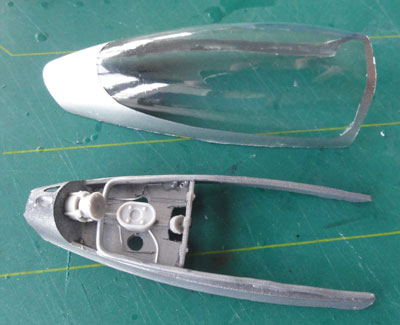
The aft details of the canopy base
frame came from the kit (parts D4, E57, E58, E59, E60) , but I did not
see the metal frame part in the Hasegawa kit on the F-86K. From the spares
box, a transparant yellow dome as set on top.
 ..
..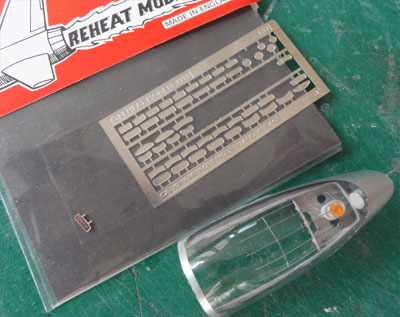
Inside the canopy, wires are seen.
These were inscribed on the inside. Also a single mirror was installed
that came from a REHEAT MODELS set.
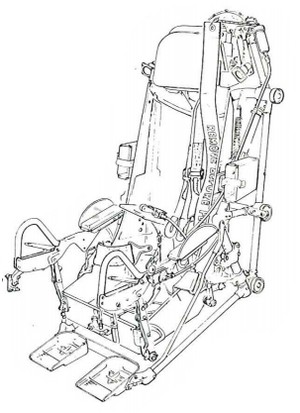
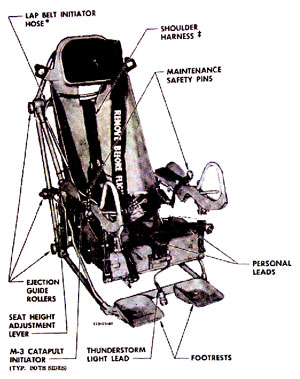
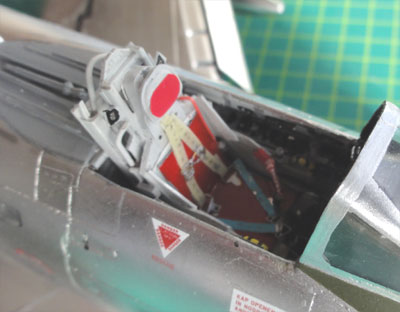
The F-86D Sabredog and F-86K seat
is different than those used in early F-86 Sabres. This is most noticeable
at the base of the seat but invisible when installed in the cockpit. It
turned out despite these differences, the kit seat can be used when detailed
further.
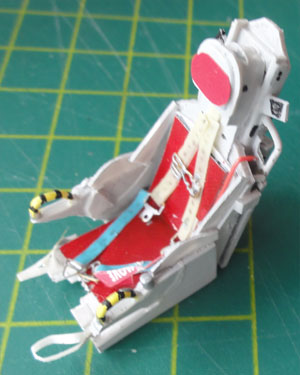
Plastic card and strips were added.
Also, from spare parts, etched metal seat buckles and belts were added
made from tape and painted.
...
 ..
..
The gun sight below the windscreen
from the AEROPOXY set was used with a piece of glass. Note that the small
missile release indicator "box" is not visible as fitted inside the windscreen.
The canopy will be kept detachable
by setting it in place with thin metal wires that go through drilled holes
at the base fairing.
 ..
..
![]()
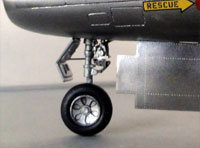
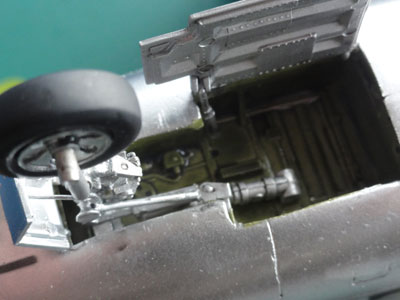
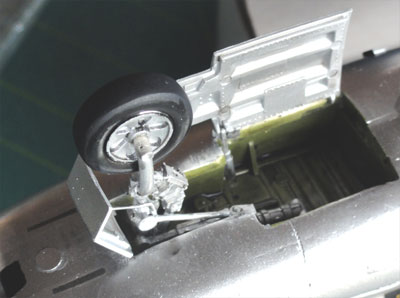
The undercarriage legs are provided
in the AEROPOXY set as casted metal from "Scale Aircraft Conversions".
This is welcome to strengthen the legs as the resin fuselage is quite heavy;
but the metal is a bit soft, I hope it will stay in shape in time. The
metal nose gear leg torque scissors were moulded at the wrong side; these
were cut of and installed at the other side of the nose leg.
 .
.
The plastic wheels are from the Hasegawa
kit with the brake disks (parts E37, E38). The gear was a common set of
parts between the various Sabres. The tyres were painted very dark grey
and the legs and details aluminium. The various actuators are also in the
Hasegawa kit.
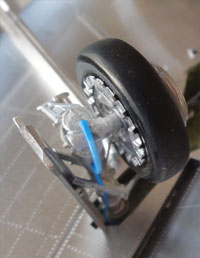
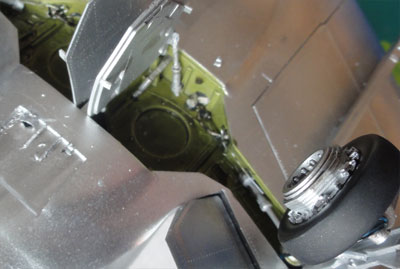
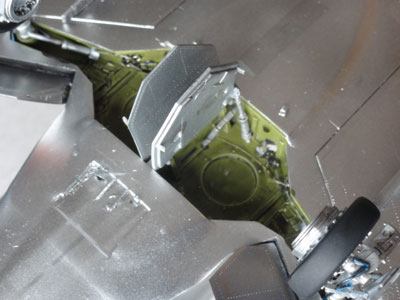
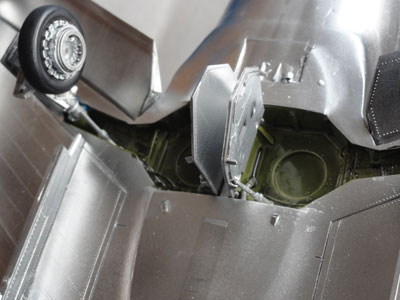
The gear brake lines were added made
from stretched sprue (seen here as blue sprue), metal wires and wheel bays
details added from scrap and bits and pieces. The wheel bays themselves
can be either aluminium or interior green on KLu Kaasjagers. Here, it is
interior green and details were painted black and metal.
 .......
 .
. ..
..
When dried, a wash was also applied
with a mix of thinned black acrylic paint and varnish with a paint brush.
![]()
FINAL DETAILS
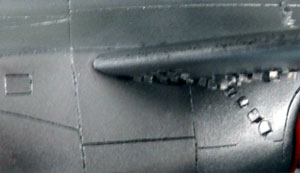
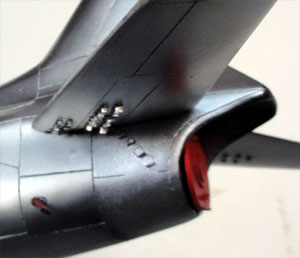
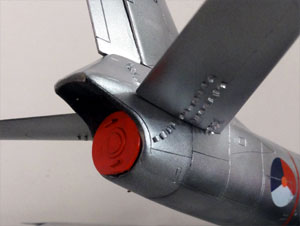
[1] On the airframe and horizontal
stabilizer, on the F-86K various small vortex generators are seen. The
Sabres were not aerodynamically advanced, the beginning of the jet was
emerging after the Second World War. The vortex generators were used to
trigger airflow vortices and they differ per individual aircraft. Often,
at the rear fuselage exhaust area often 4 vortex generators are seen below
the horizontal tailplane and 5 above below the rudder. At the lower surface
of the horizontal tailplanes usually 4 rows with at least 36! vortex generators
are seen. Sometimes , at the mid fuselage section at the airflow intake,
some are also seen. Sometimes on a particular aircraft, even vortex generators
are seen amidst the mid-fuselage near the NACA intake scoops.
 ..
..
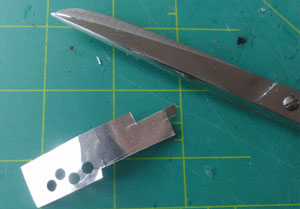
The vortex generators were all made
from tiny bits of aluminium plate (e.g. from an "household oven" plate).
These were all cut with fine scissors and folded in "L " shape. They were
all applied with super glue.
[2] The AEROPOXY air intake and exhaust
ground covers, painted red, were added as well as the fuel dump pipe.
 ..
..
[3] The later F-86K had also a small
TACAN antenna on the anti glare panel aft of the black radar nose. Added
from card.

[4] The separate slats, flaps and ailerons are provided by the Hasegawa kit and look great. The slats are often seen drooped on a parked F-86K. These parts were simply installed but the slat rails needed a bit bending to get a better pose. The gaps were closed with white glue. I also added extra plastic rods to suggest sliding "rails" on the inside slat area. A bit of trimming was needed at the end of the ailerons.
As the decals had dried and various details were added at the model like the slats, it was decided to do an ALCLAD II airbrushing again at smaller locations. This well "blend in" the various details and decals. Only light passes were made with the ALCLAD loaded Harder Steenbeck airbrush.
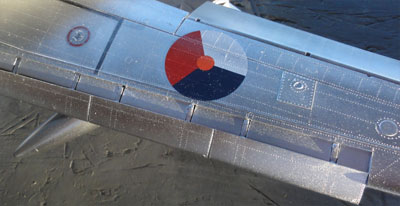
The rivet details were retained.
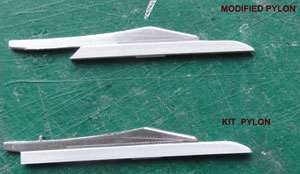
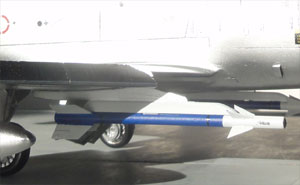
[5] The model depicted a later F-86K that could also launch early generation air-to-air missiles (PHILCO-FORD / RAYTHEON GAR-8, later called AIM-9B Sidewinder). The launchers and pylons of the F-86F kit can be used for the F-86K Kaasjager with some modification. I removed 2 mm of the pylon edge and a "V" section at the rear. The launch rail itself seems to be white and the pylon metal.
 ..
..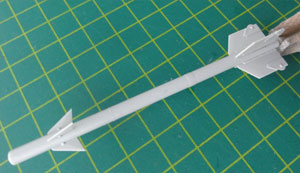
[6] The Sidewinder missiles in the
Hasegawa F-86 kit have very thick fins so a replacement was sought. (the
Sidewinders of the old Hasegawa F-104 have better thinner fins). But I
had also couple of AIM-9B Sidewinder missiles from the latest Italeri
F-104 1/32 kit
and these are even better detailed and picked from that
kit.
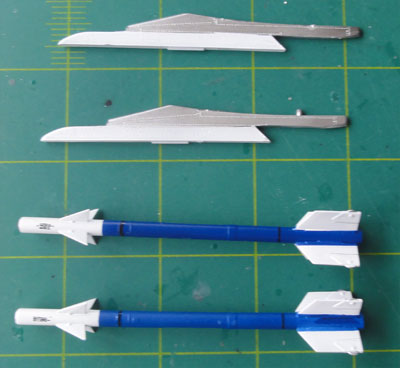
Rails and missiles got a white coat
with the airbrush. Next, after masking, the missile body got a dark blue
colour (Revell Aqua 56 acrylic) with the airbrush. Some small stencils
and stripes were added from spare decals. They were fitted with their pylons
below the wing.
 ..
..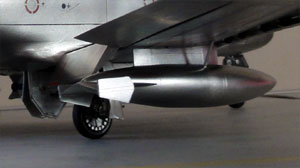
[7] Also, the fuel tanks from the
kit were added. Sometimes they have no "end plates".
[8] The pitot tube was made from some metal rods and superglued to the right wing tip. (there is no kink in the tube for the later style F-40 6-3 wing). The wing tip lights were painted red (LEFT) and blue (RIGHT) at the wing tips.
That completed this 1/32 scale F-86K Kaasjager!
...
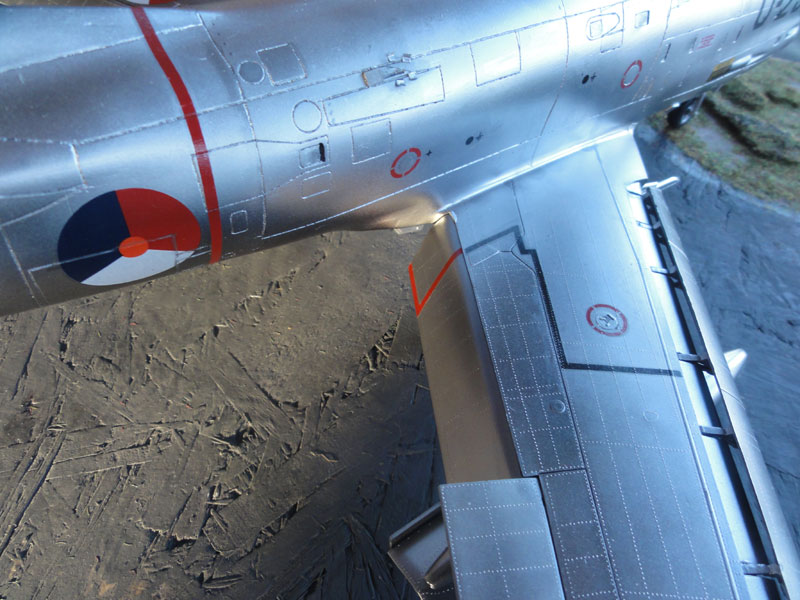
Sometimes on a particular aircraft, even vortex generators are seen amidst the fuselage near the NACA intake scoops. On this model, a few were set in place as well.
Back to 1/32 Models

(c) Copyright "designer"/ All rights reserved. Your comments are welcomed by webmaster
Created this page
March 5, 2015