Hasegawa
[ Page 3 ]
F/A-18 Hornet in 1/72 scale: upgraded first generation C/D
page 2
page 3
page 4
page 5
....
... continued from page 2....
The F/A-18C and two seater F/A-18D were upgraded versions of the first generation Hornets. Other avionics and ECM systems were fitted and increased weapons capability.
Hasegawa also released kits for the F/A-18C and F/A-18D in 1/72 scale. To the Hasegawa F/A-18 A/B kit an extra sprue "G" was added in the box to have the typical C/D parts like spine antenna fairings, nose door, tails with extra antennas and nose antenna fairings.
Hasegawa F/A-18C kit #D8 has markings for
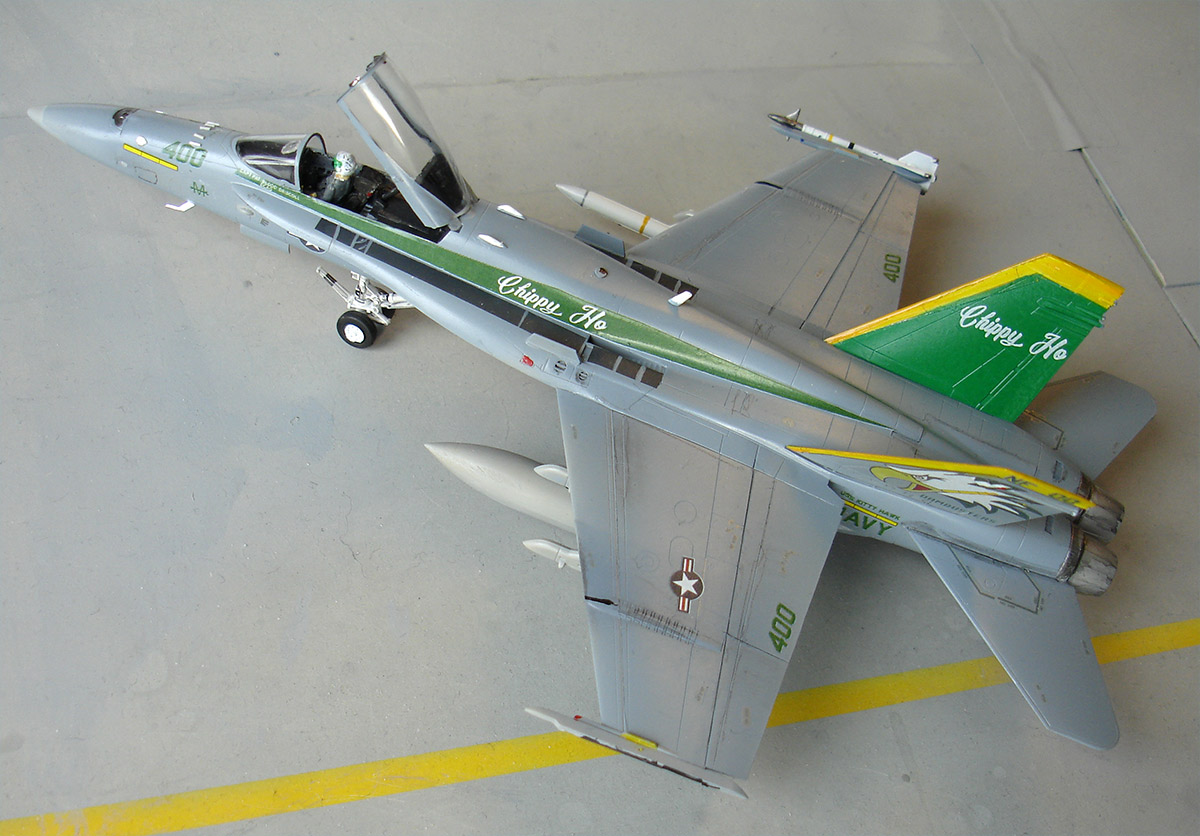
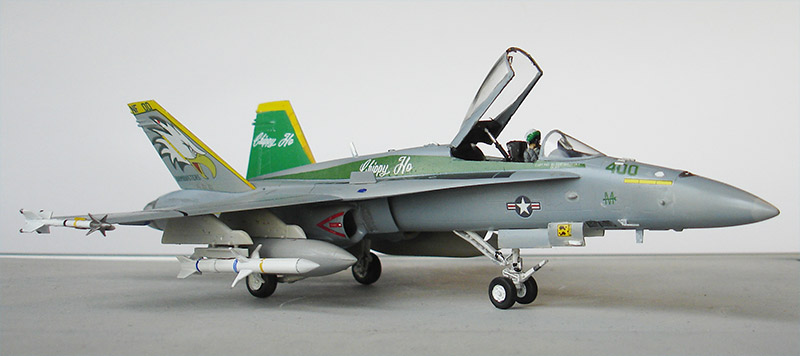
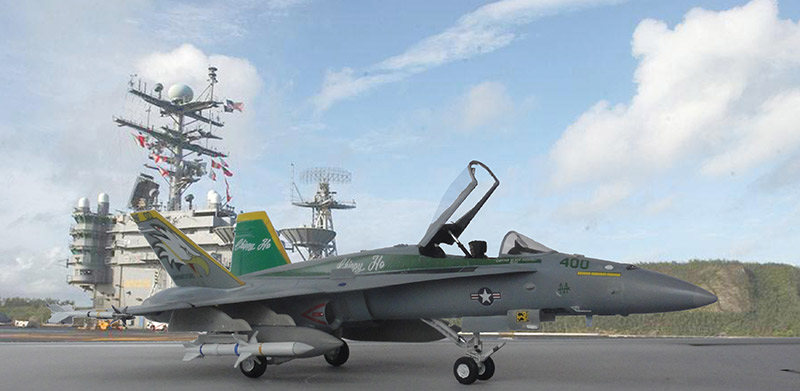
[1] US Navy VFA-195 Dambusters flown 1989 from also USS Kitty Hawk named "Chippy Hoo";
[2] USMC VMFA-232 Red Devils flown 1996.
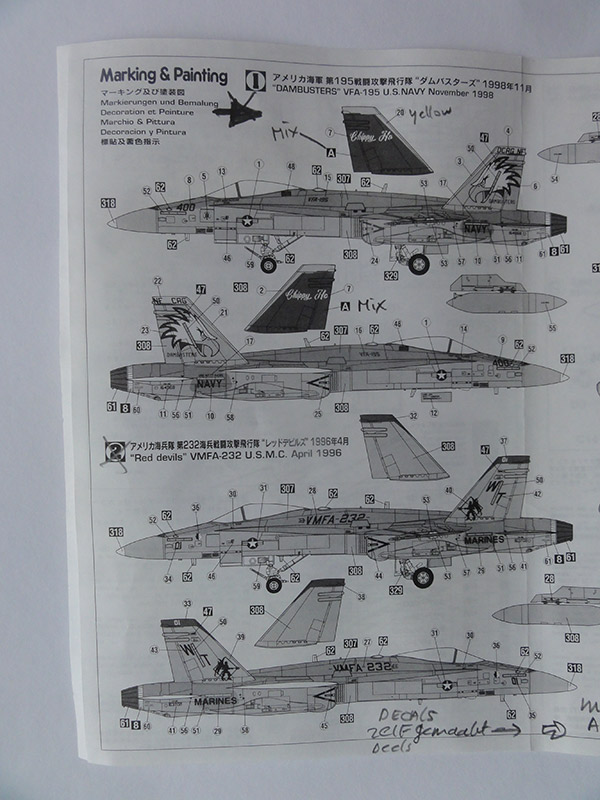
Main scheme colors are FS36320 Compass Gray also painted on the tail fins and the lower surfaces FS36375 Light Ghost Gray. There are not a lot of stencils supplied on the decals sheet like NO STEPs and I do not know if this is correct. As far as I can remember US NAVY F/A-18C also had low visibility stencils. But I trusted Hasegawa on this one. The low visibility light strips look too yellow in stead of more toned down.
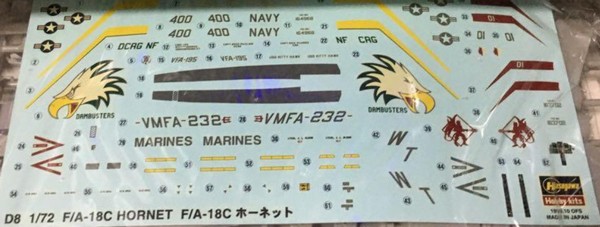
The decals in my kit #D8 have a slight yellow hue on them, probably due to its age. I will do some reprinting myself, more about that later on.
Kit assembly was almost done as per instructions and as described above.
NOTE: later I found out that a "parked" F-18 always has drooped flaps and slats. I forgot this with the Hasegawa kit which has no separate slats and flap parts. One way to avoid a lot of work to get a more accurate model is to set a pilot in the cockpit with "power on".
The vertical tails and pylons were not yet installed. These will be airbrushed while still in the sprues as well as the smaller parts like landing gears and if you want them the armament.
The boarding ladder was not installed, it was set retracted with door closed. Smaller bits like landing gears and antennas are to be set later on.
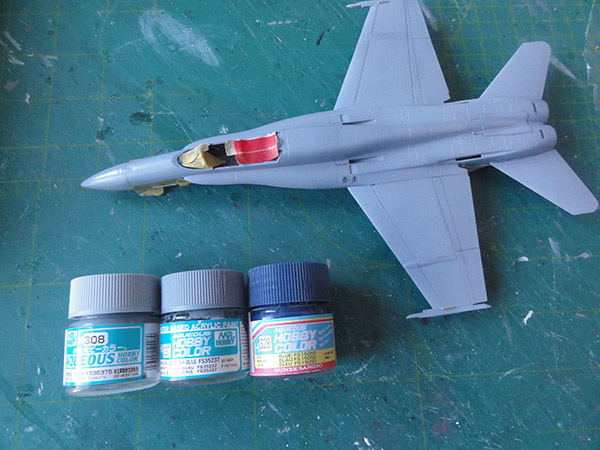
Sand, putty and sand first. Than a base grey primer coat was airbrushed with my favourite Revell 75 steingrau Aqua acryllic paint. Thin Aqua with 40% distilled pure water and 10% IPA (*iso propyl alcohol).


When all looked smooth, the scheme colours were to be airbrushed after a few black patterns had been airbrushed to get a bit varied grey effect with "pre-shading".
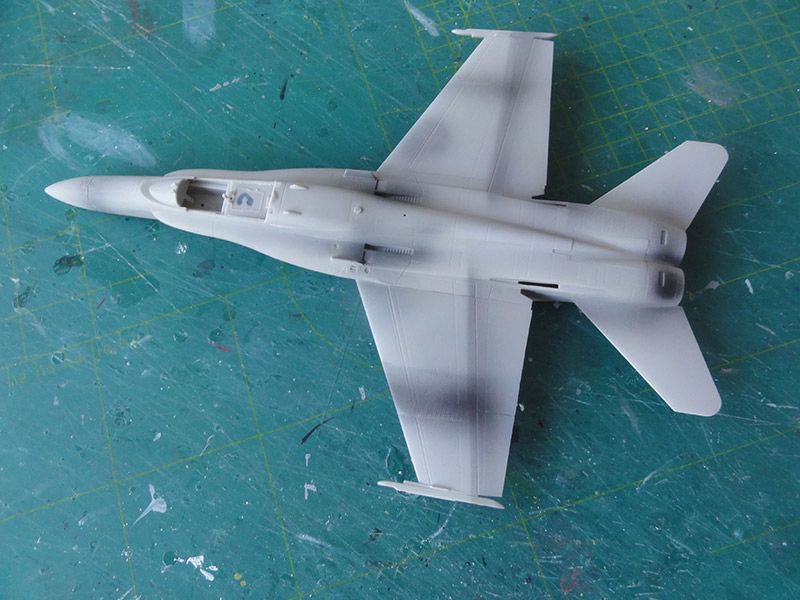
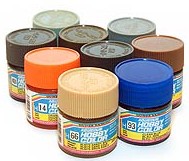
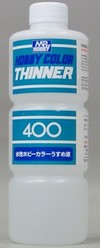
Than the lower surfaces and tails were airbrushed FS36375 with Gunze Sangyo Mr.Hobby H308 acrylic paint. The upper surfaces were airbrushed FS36320 with Gunze H307. Thin the Gunze paints with their own Mr.Hobby acrylic thinner.
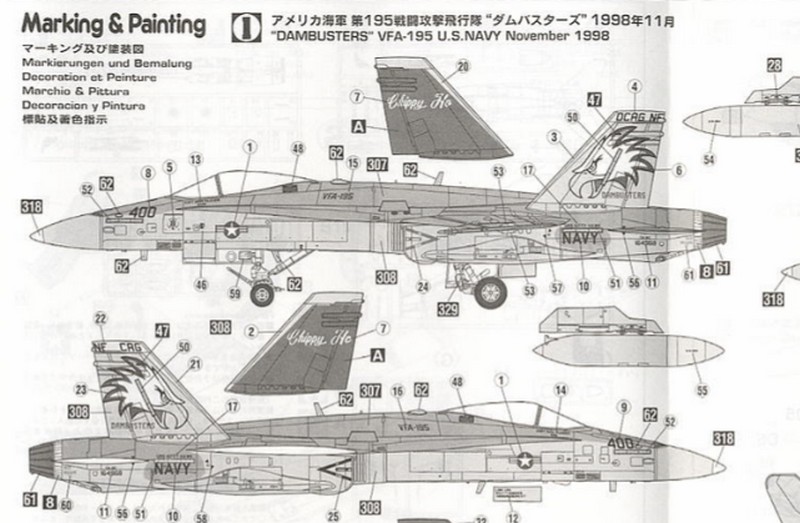
The Chippy Hoo jet has tails with a green colour with yellow leading edges for which decals are provided. Hasegawa suggests a mix for the green but I settled with Revell 61 smaragdgrun Aqua acrylic that was airbrushed after masking. Always airbrush an extra spare decals sheet in this colour in case repairs are needed.
I looked at the Internet and saw a nice scheme of the Capt. pat Driscoll jet; it has an extra green Chippy Ho traingle markings at the spine. I home designed the extra markings and the extra decals were custom printed.
Back to the model...
The gear bays were hand painted white. The gear struts, insides of gear doors had been airbrushed white earlier while still in their sprues.
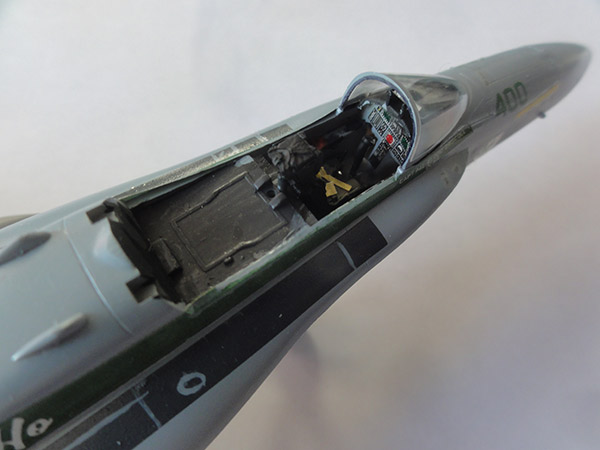
Cockpit tub interior was painted with a brush inside FS36231 grey.
To avoid any "decal silvering" the model got a gloss varnish airbrushed with Johnson Future/Pledge thinned with Gunze Sangy Mr.Color leveling thinner.
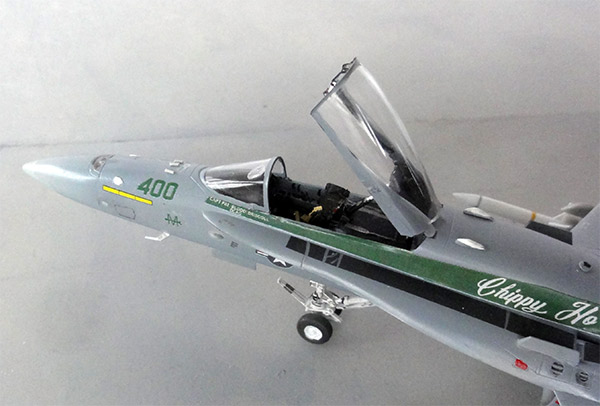
As noted before the Chippy Ho kit tail decals were a bit yellowed. I also saw on internet that the US NAVY VFA-195 Chippy Ho DCAG commander Captain Driscoll jet 400 with registration 164968 had an extra green panel on the spine sides and some extra markings as assigned to at USS Kitty Hawk. These extra's were home designed and colour laser printed. (If you want a small extra print let me know....).
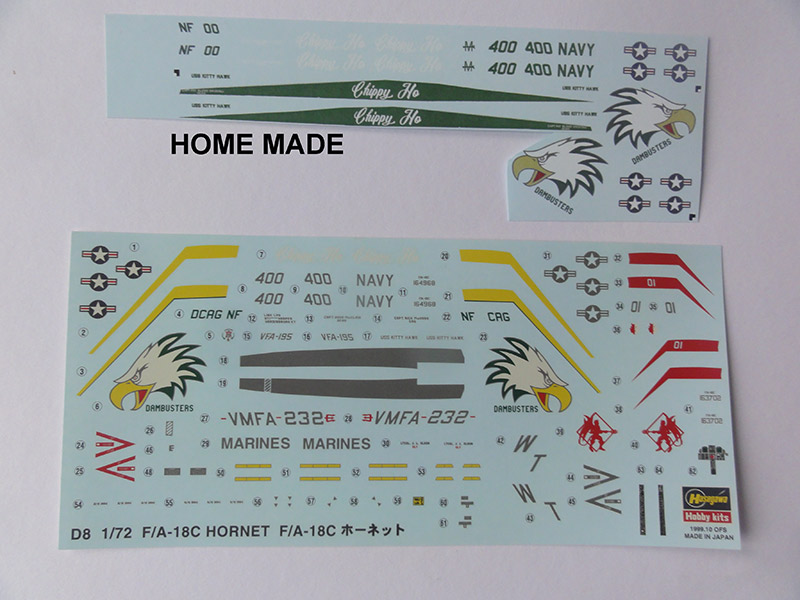
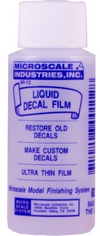
Decalling was done. Old Hasegawa decals are stubborn and do refuse to come loose from in luke warm water bath. Some even tend to break up so be careful. Consider if first a liquid decal film is needed to keep a decal together... A decal film can be used such as from Micro Scale.
Decalling this F/A-18C took some 4 hours and included cockpit decals provided for instrument panel and side consoles. I needed a few bits from the spare airbrushed green decal to get a perfect symmetry.
The walk way panels on the strakes are non-standard and were made from spare "tyre" black decal and the various visible grey lines were painted with a fine brush.
The rest of the kit parts were to be installed.
The typical antenna fairings were added typical of the C/D on the spine and nose sides as shown in instructions STEP 4.
Note that for the F/A-18C Hasegawa supplies an extra part for a nose gear door #G8 with antenna.
The landing gear was installed and some door retraction rods made from thinned white stretched sprue set. The main colour here is white. Inside the gear bays are many hydraulics and some suggestion is done by raised moulded edges on the kit parts; for this scale adequate.
The GE F-404 engine exhausts were installed after they had gotten on their outsides a burned metal dark aluminium Vallejo 77.703 paint and on their insides "burned white" strakes.
The kit ejection seat was painted and got extra straps made from thin slices of masking tape. The HUD part #E3 was set.
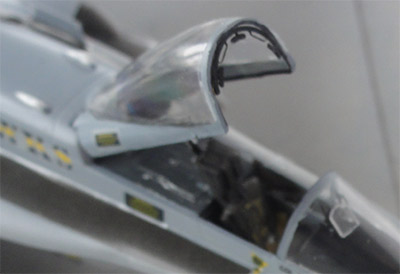
The wind screen and canopy frames were hand painted. The inside of the frames I painted dark grey. There are a few tiny mirrors and handles in the front canopy edge/ frame; these tiny bits were made from scrap. The rear kit part #B14 was painted black and (when setting open...) the actuator part #B8 as well. The wind screen was fixed with Humbrol Clear Coat (or set with white glue that also will close tiny gaps).
The anti-collision lights were brush painted red and blue including the ones near the strakes. On the lower wing outboard aileron fairing on the outboard front edge were painted a red light at lower port and blue at lower starboard. On each vertical tail, an red anti-collision light was painted; it is moulded on the kit parts above the small "fuel vent intake".
The 2 missing nose pitots not provided in the kit were made from scrap and installed.
At the nose are both at port and starboard 3 ECM bulges. A few are moulded in the kit nose parts, I accentuated these with medium grey paint. The nose tip was also painted medium grey with a metal tip. I could not see on photos if this jet had chaff dispensers located in front of the main gear bays so kept it as per kit.
The gun nozzle panel in the upper nose was painted aluminium.
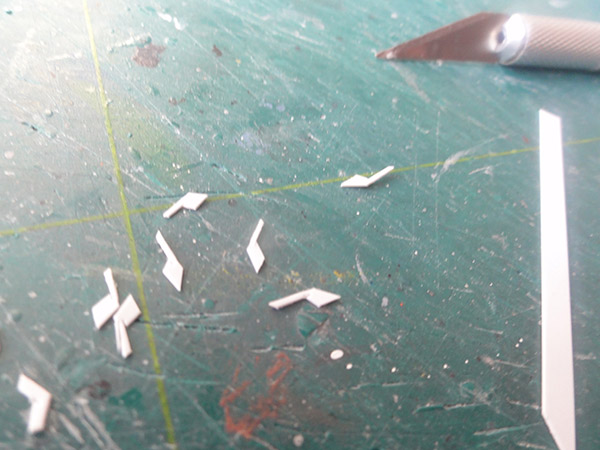
On this jet in front of the windshield 5 IFF antennas "bird slicers" were present; these were made from bits of light grey stretched sprue bits.
NOTE: model photos show 3 IFF "bird slicer" strips in front of the windshield but there should be 5. I forgot 2 and these extra are be added.
On early F/A-18 twin tails (and on this jet), at their base are 3 exterior re-enforcement "squares" as fatique was a problem; these were suggested with pencil stripes.
From the "weapons spares box" a AIM-9L Sidewinder missile was installed at the starboard wing tip launcher. Also on a pylon a AGM-88 HARM missile was set along with 2 external fuel tanks. I also found that above the nose low visibility lights strips are a few white "antenna plates"; these were made from thin white card and are both at port and starboard.
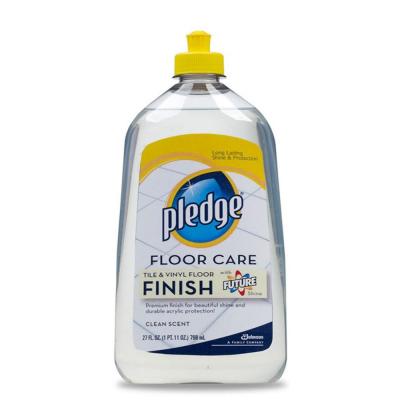

The model than got a few coats of semi-gloss varnish with Johnson Future/ Pledge thinned with 5% Gunze Sangyo Mr.Color leveling thinner and 5% Tamiya X-21 flat base agent. This will protect the decals and gives an even sheen, shield off the clear parts.
The canopy front inside frame/ edge got 3 mirrors made from scrap as it was to be installed open/ up. Inside the canopy frames, some extra details were added.
As I had forgotten about drooping the flaps and slats, I added a pilot figure to suggest a jet "under power". The figure was found in the spares box. (Some photos still show the model without).
That completed this nice DCAG VFA-195 Hornet.

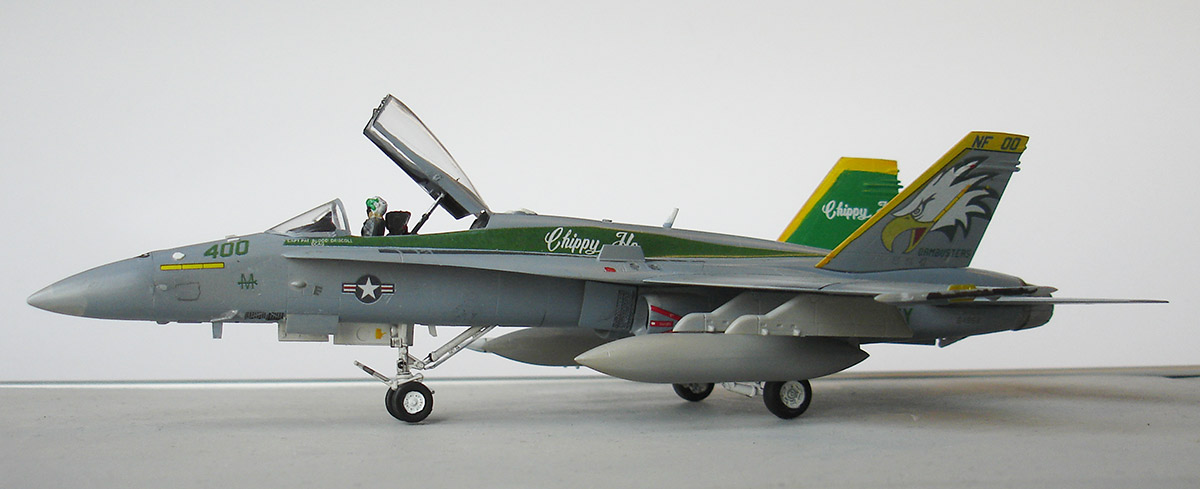
"400" green DCAG jet of VFA-195 Chippy Ho
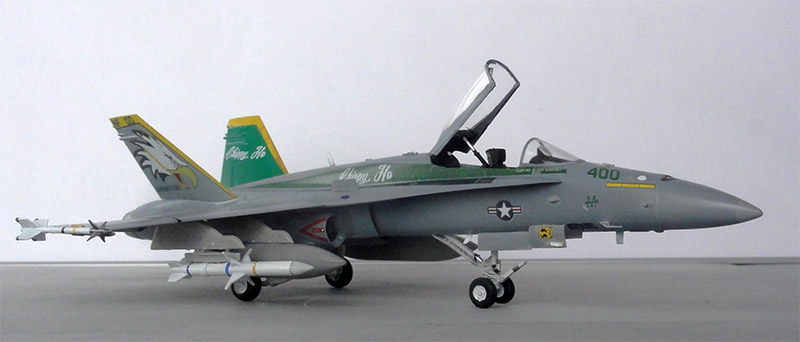
US NAVY VFA-195 F/A-18C, Chippy Ho DCAG commander Captain Driscoll, jet 400 registration 164968 and c/n 1268. Pilot figure not yet installed...
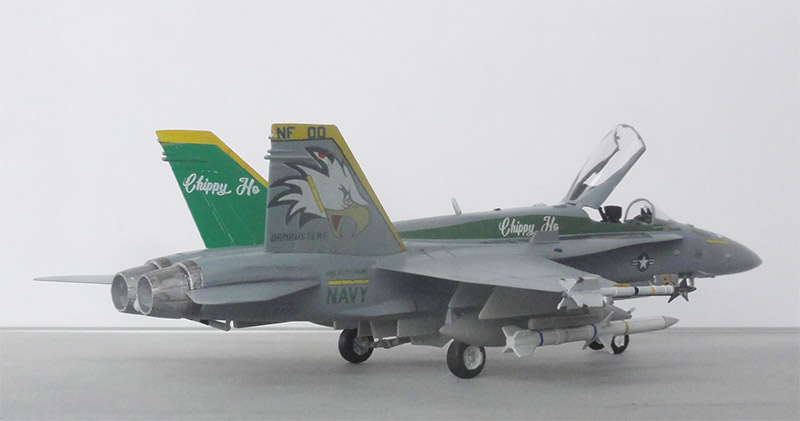
Note there the slightly different forward starboard "C" nose door and the pitot tube. And the added white antenna plate above the low visibility lights strip.
... set in a carrier scenery... (pilot figure not yet installed...)
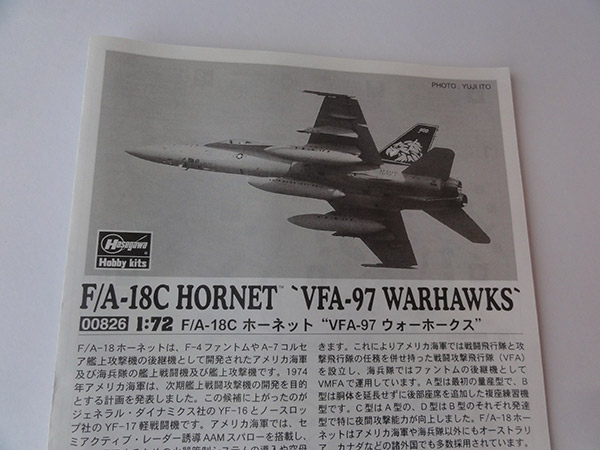
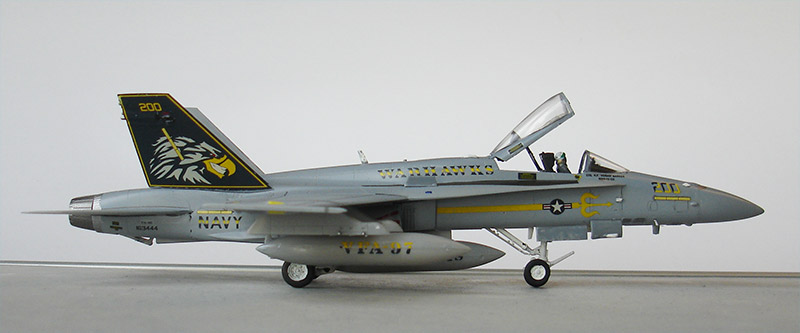
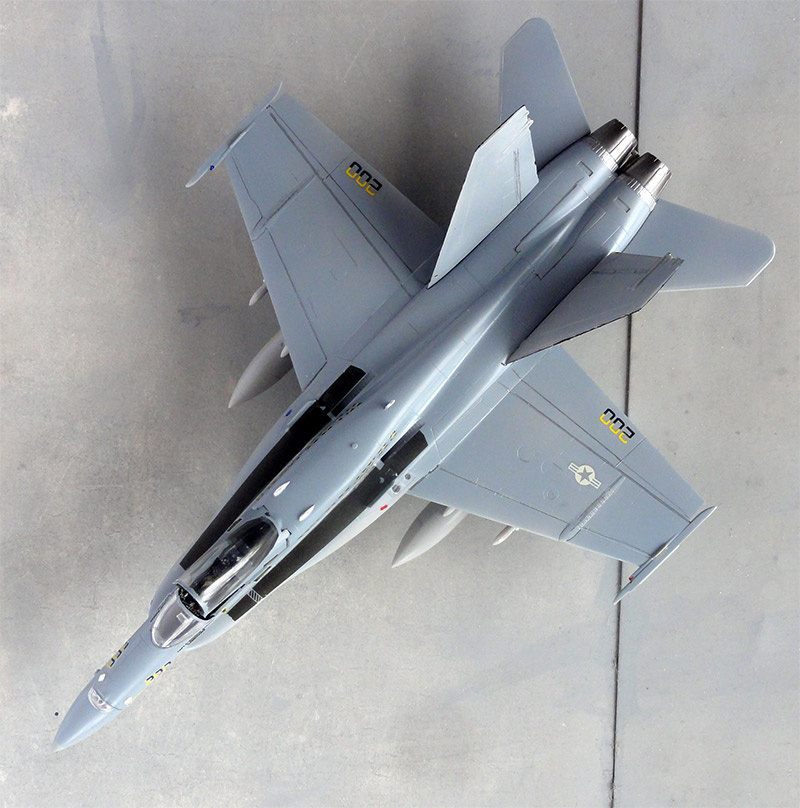
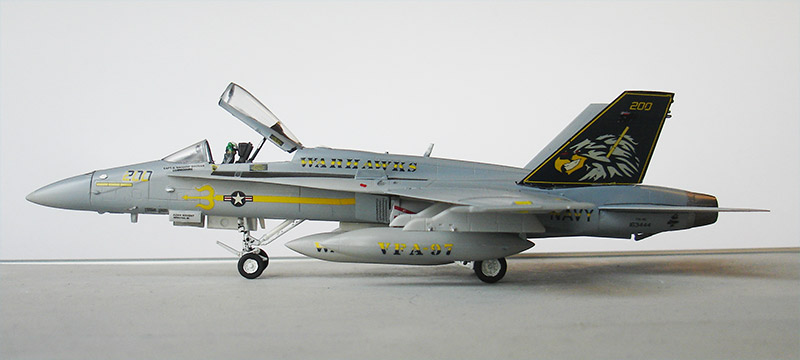
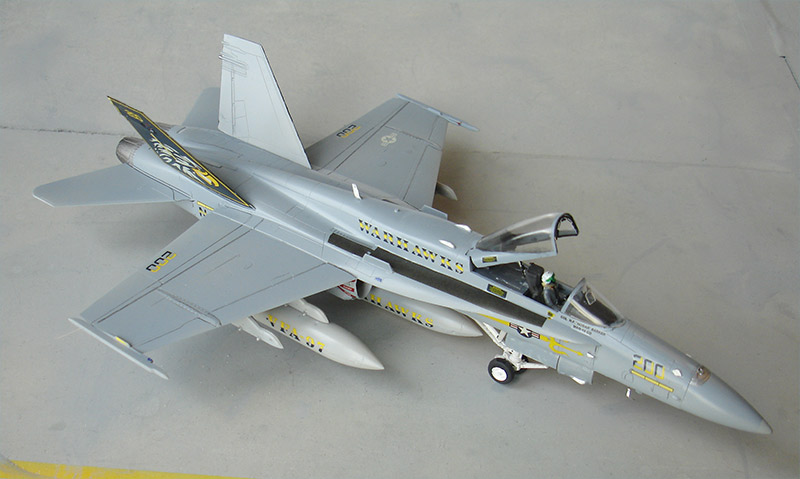
Another Hasegawa F/A-18C kit #00826 in 1/72 scale was made that was released in 2006.
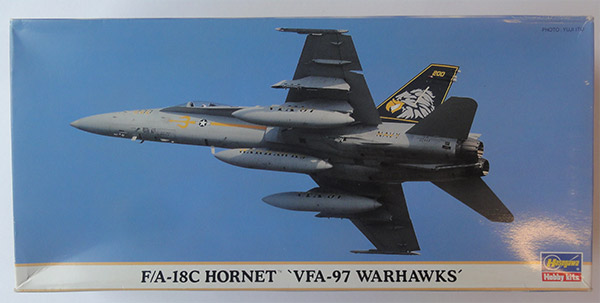
The plastic content is similar as described above but with different decals: for US NAVY VFA-97 "Warhawks" Hornets in 2 schemes.

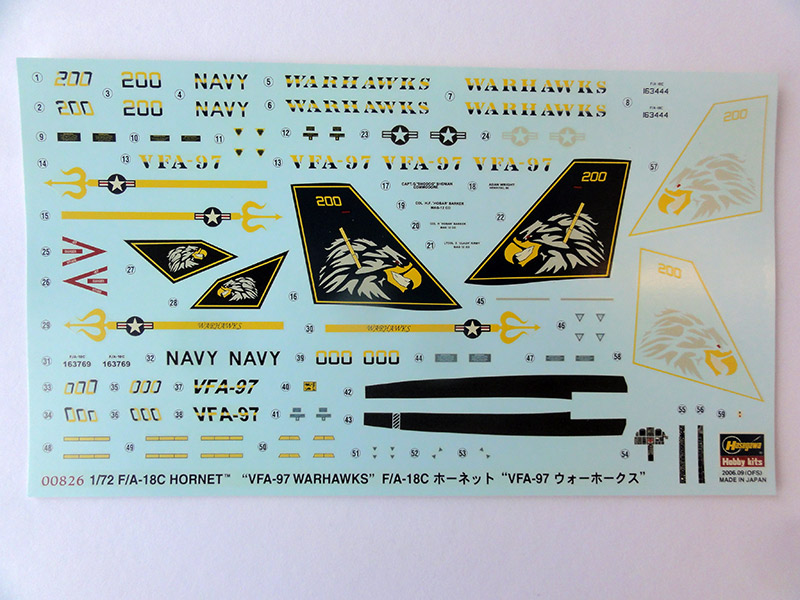
The twin tails are black with nice markings; you can use the full decals or paint the tails gloss black outside and add the patterns with yellow details. I will opt for the full decals.
The F/A-18C model was made similar as described above for the kit #D8.
NOTE: later I found out that a "parked" F-18 always has drooped flaps and slats. I forgot this with the Hasegawa kit which has no separate slats and flap parts. One way to avoid a lot of work to get a more accurate model is to set a pilot in the cockpit with "power on".
The tails were not yet installed to enable easier airbrushing. The otherwise grey paint scheme with FS36320 Gunze Sangyo H307 and FS36375 H308 acrylics is similar and standard US NAVY.
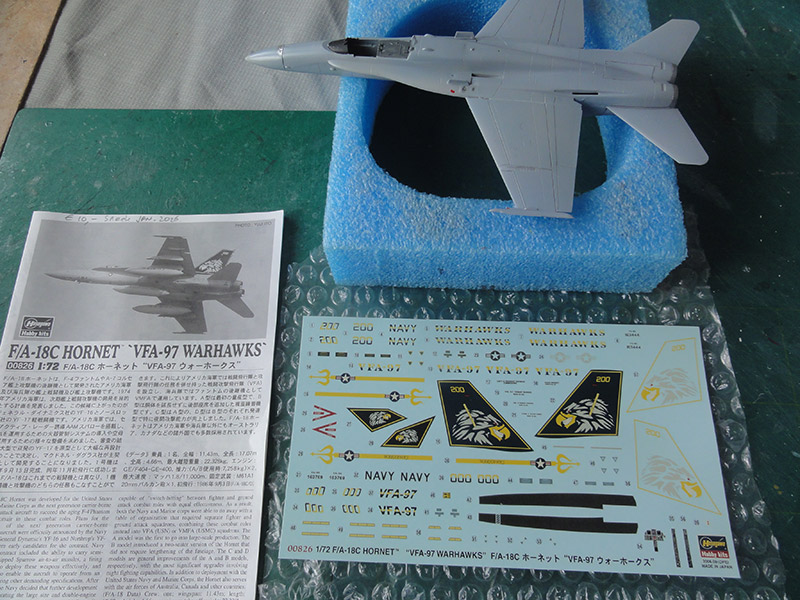
After the model had gotten a gloss varnish coat, decalling with the kit decals was done for scheme 1: VFA-97 (MAG-12) F/A-18C as seen in 2006.
The full tail markings were set and the tiny edges brush painted H1 black on the outside' edges. (The insides' of the tail are gray).
It has also nice markings on the external wing fuel tanks and the center fuselage tank. These were thus assembled, airbrushed and decalled.
The decals are "stubborn" and need 15 minutes in warm water to separate from the decal sheet paper. The decals are some 20 years old. The decals tend to brake but I was able to set them. Again are not a lot of stencils supplied on the decals sheet like NO STEPs. As far as I can remember US NAVY F/A-18C also had low visibility stencils. But again I trusted Hasegawa on this one.
The remainder of the model was completed as standard and as I saw it on the box top so unarmed. The 2 missing nose pitots were added from scrap.
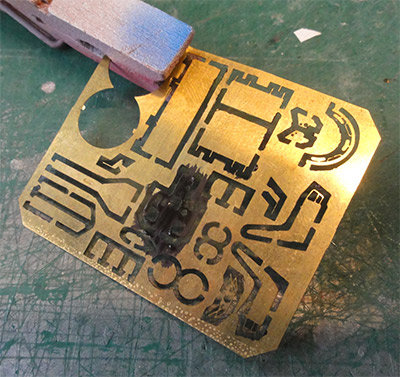
Another extra added was a metal fret for the front canopy frame with mirrors from a etched EXTRATECH detail set I still had. On photos I could not see clearly any IFF "bird slices" in front of the windshield so these were not added.
As I had forgotten about drooping the flaps and slats, I added a pilot figure to suggest a jet "under power". The figure was found in the spares box. (Some photos still show the model without).
Another nice model of F/A-18C is now in the US NAVY collection flown by WARHAWKS VFA-97.

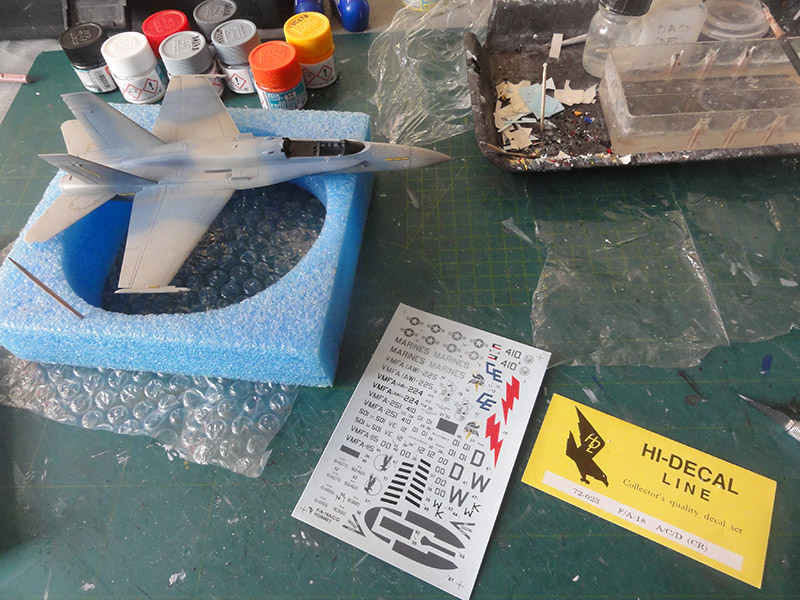
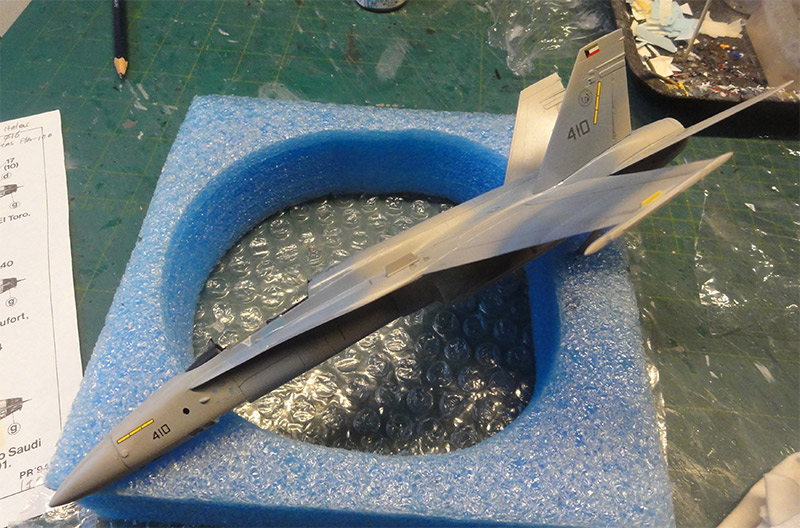
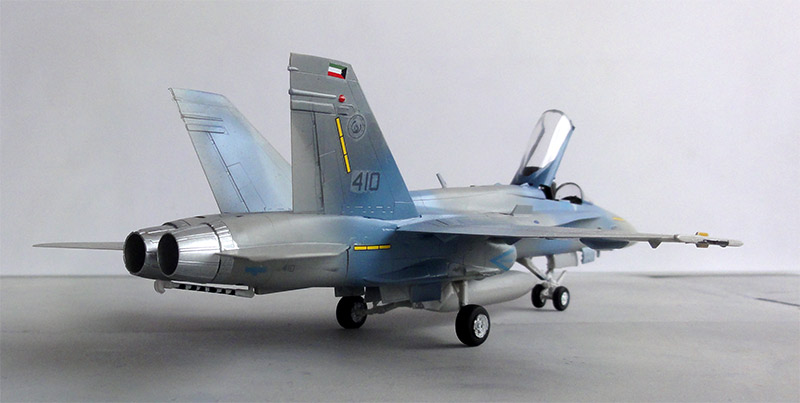
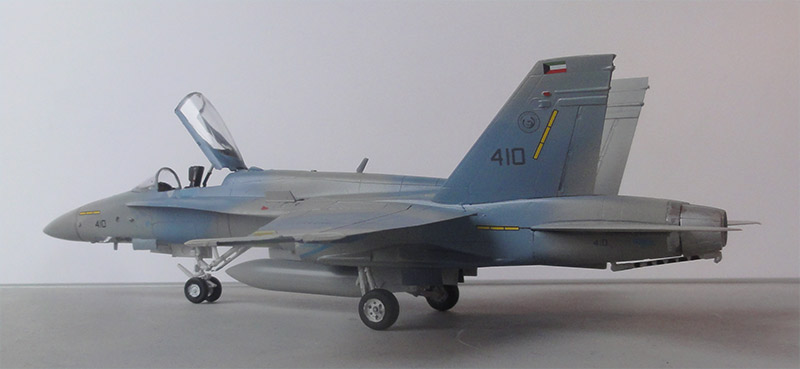
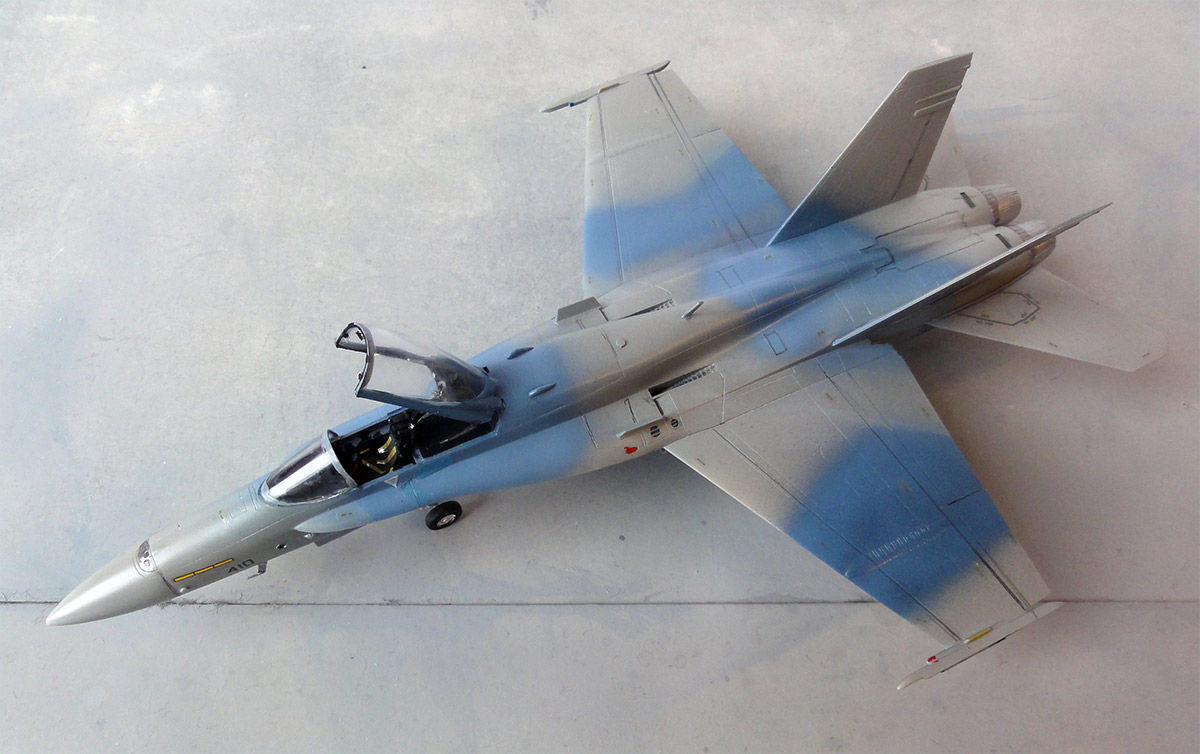
A third 1/72 Hasegawa FA-18C kit was made in a livery for my WORLD AIR FORCES collection. I had aftermarket decals for several foreign F/A-18 Hornets and this included a KUWAIT AIR FORCE F/A-18C from Hi Decal Line set #72-023. This jet has a very different scheme and flown by KUWAIT AF 25th squadron in a aerobatic Top Hat demo pair at the RIAT but with code "425".

The camouflage colours were unknown to me so had to be "guestimated" by looking at photos and the HDL suggestions:
"Colour A" about FS36307 was airbrushed with Gunze Sangyo Mr.Hobby H332;
"Colour B" with Gunze Sangyo H56 blue (HDL and other sources suggests FS35237 gray but on photos looks to be more blue'ish);
"Colour C" with Gunze Sangyo H308 ghost grey for FS36375.
Still it is difficult to interpret the colours. Apparantly the jet did not carry national roundels, just some flag and badges.
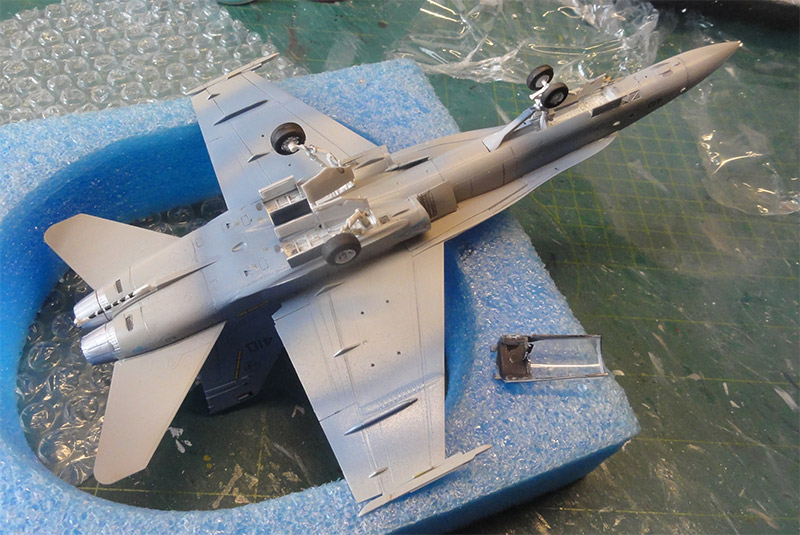
The assembly of the kit was done as described above for the USN model. After a base grey coat, the camouflage colours were airbrushed. I used hand held masks.
After the camouflage had been airbrushed, the gear bays were painted white inside. The cockpit interior the usual FS36231 and instrumentpanels will be from kit decals (or suggest with black).
Next a gloss coat was also airbrushed. So next decalling with the HiDecal line decals was done supplemented with some kit decals such as stencils.
I could not really verify if a lot of small stencilling was applied on the Kuwait jets. Just some NO STEPS decals were set.
Landing gears were installed. The kit parts are OK but basic. The main gear doors got retraction rods made from thin white plastic stretched sprue bits. In the front nose gear bay, a metal actuator was suggested made from scrap and the gear doors also got retraction rods.
I saw on photos that nose strut catapult launch bar is probably a very similar looking "shimmy demper. The kit part was reduced 2 millimeter in length. See notes about the RAAF F/A-18 model made. The arrestor hook was also installed on these land based jets.
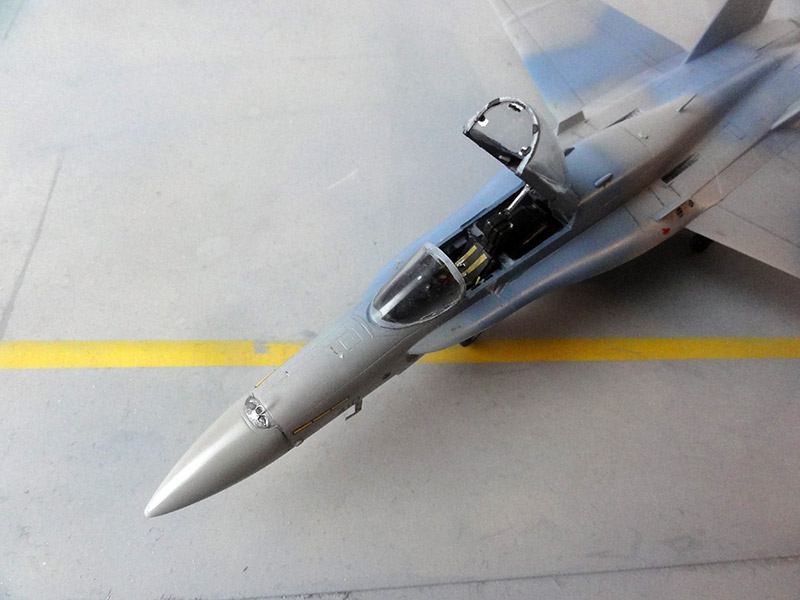
No pylons and no armament was installed. The remainder of the model was completed as described above. The ejection seat (probably a SJU-17) is black with khaki cushions and harness blue-grey. Cockpit detailling was done canopy got 3 mirrors from scrap and windscreen painting were done. A central external fuel tank with its pylon as per kit were set.
The 2 missing nose pitots not provided in the kit were made from scrap and installed. (after delivery, no IFF "bird slicer" antennas in front of the windscreen were seen on the jet; it seems to be a later upgrade. So none were fitted ).
The model got a semi-mat varnish coat airbrushed. The canopy was set.
As I had forgotten about drooping the flaps and slats, a pilot figure can be added to suggest a jet "under power". (photos still show the model without).
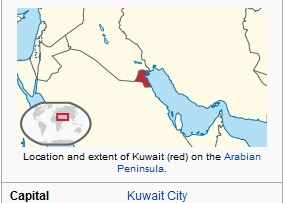
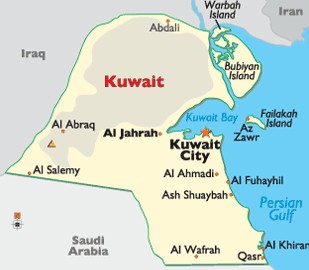
KUWAIT
 ..
.. ..
..
[area: 17,800 sq.km | population: 4,4 million with 40% Kuwaiti's | capital: Kuwait city | GDP 28,000 USD per capita nominal ]
The small Kuwait Air Force (Al-Quwwat al-Jawwiya al-Kuwaitiya) was formed in 1961. Using the British doctrine, it got British aircraft like the Jet Provost T. mk 52, followed by Strikemaster and BAC Lightning supersonic fighters. Look for more information on the Jet Provost page here...
Some 32 F/A-18C and 8 F/A-18D trainers were acquired and first delivery was in 1993. They fly with no. 9 and no.25 squadrons from Ahmed al Jaber air base. They were also used during the Yemeni civil war.
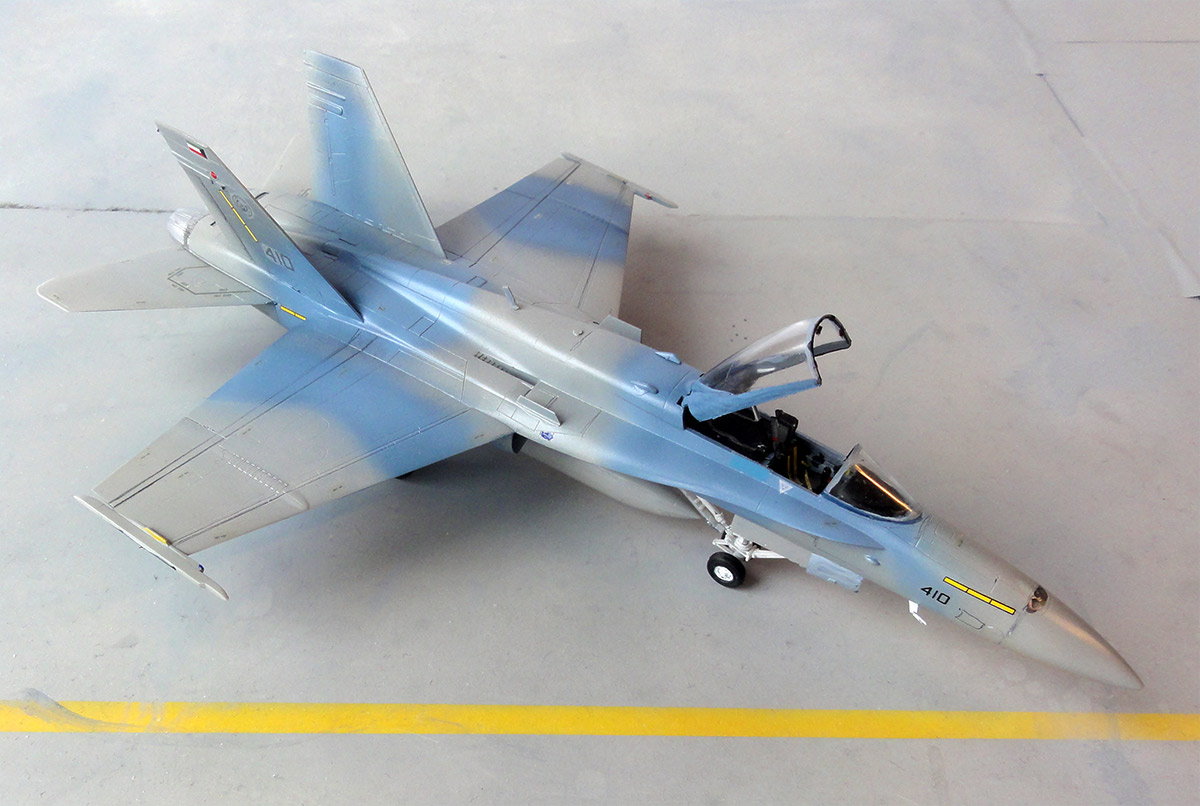
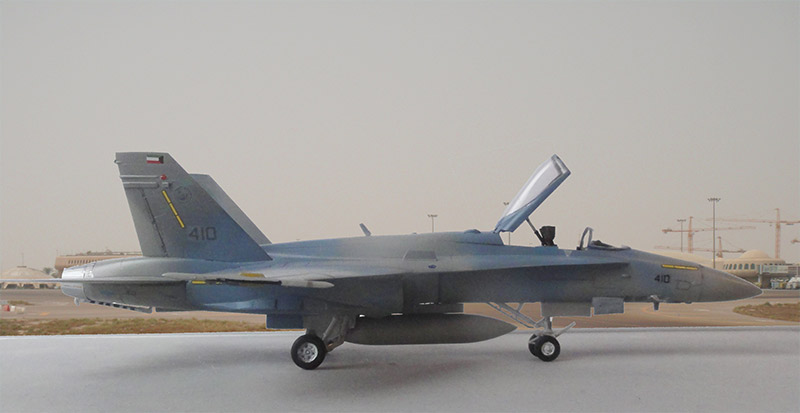
F/A-18C, c/n 1126, code 410, Kuwait Air Force. Delivered 1993 and flown by no.25 squadron from Ahmed al Jaber base.
... in a scenery...
On to next [ Page 4... ]
Back to 1/72 Models

(c) Copyright Meindert "designer"/ All rights reserved. Your comments are welcomed by webmaster
Created this page March 4, 2026