Hasegawa
[ Page 2 ]
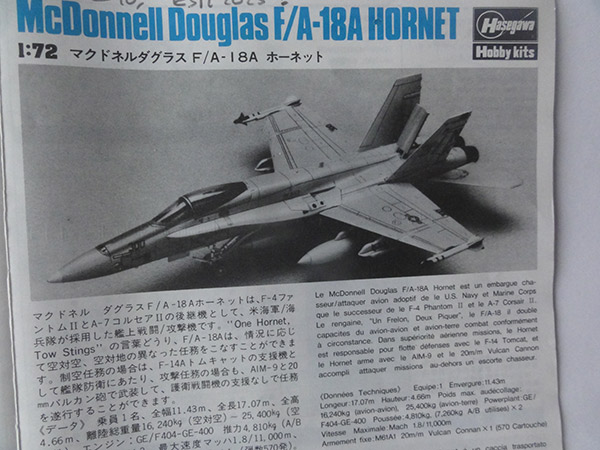
F/A-18 Hornet in 1/72 scale: first generation
page 2
page 3
page 4
page 5
....
... continued from page 1...

Hasegawa from Shizuoka Japan released quite some F/A-18 kits in 1/72. An old prototype Northrop YF-18 kit is seen here...
Ages ago I already made Hasegawa F-18D #02811 as seen on page 1....
The first 1/72 Hasegawa F/A-18 Hornet kit with even no kit number went a long way back. I think it was released in 1985.
The decals are seen here for also a Canadian Hornet...
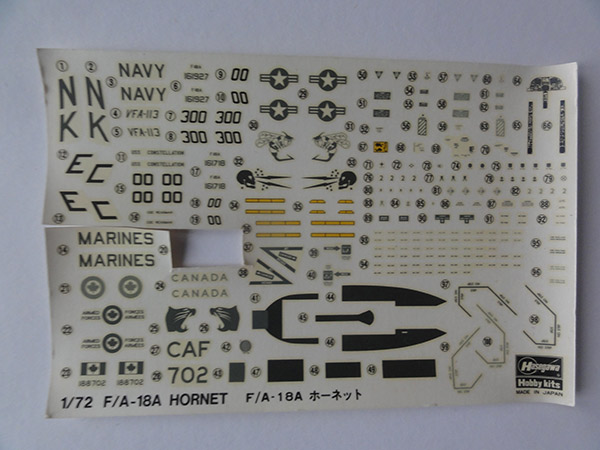
This old kit was still found in the stash after 35 years! The decals look unusable now but some smaller ones were used and they still worked..
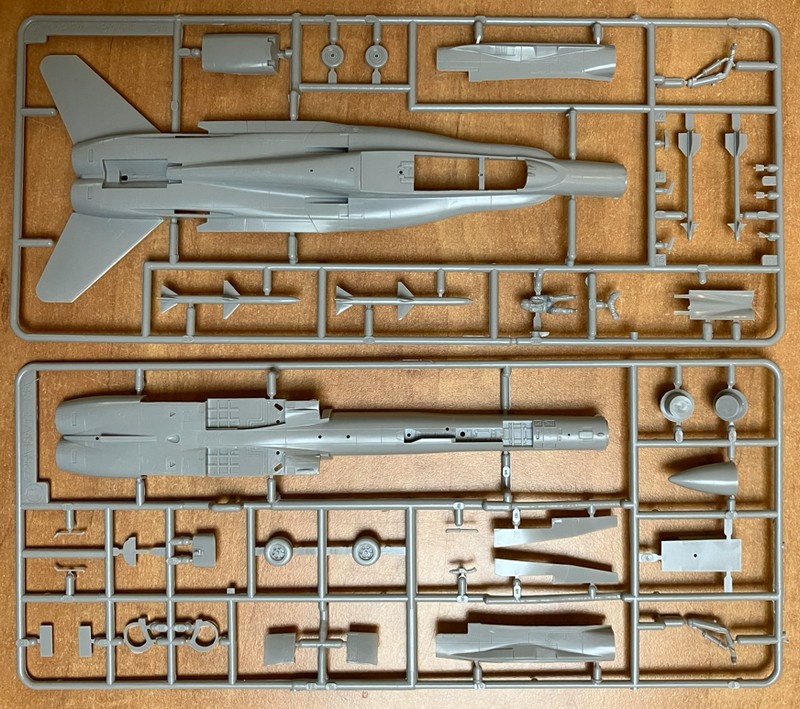
Armament comprises Sparrow and Sidewinder missiles and 3 external fuel tanks.
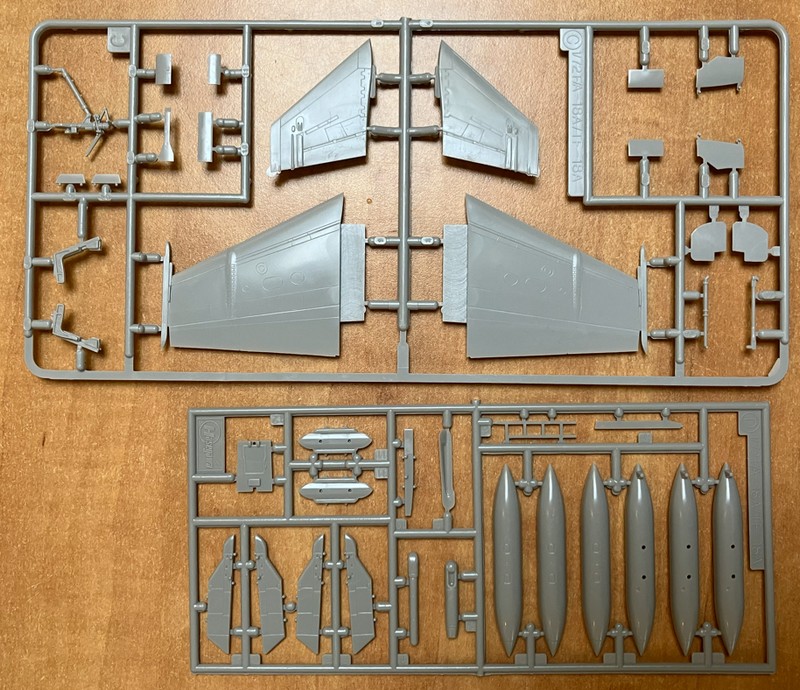
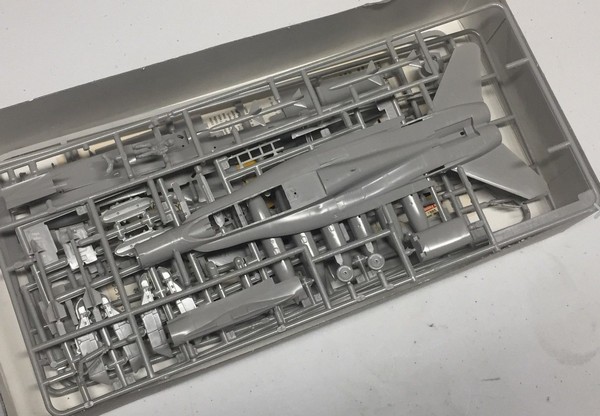
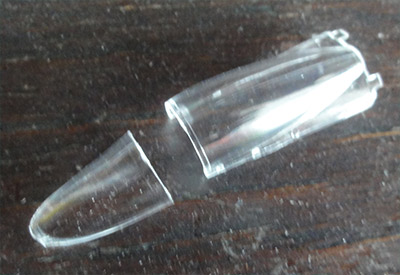
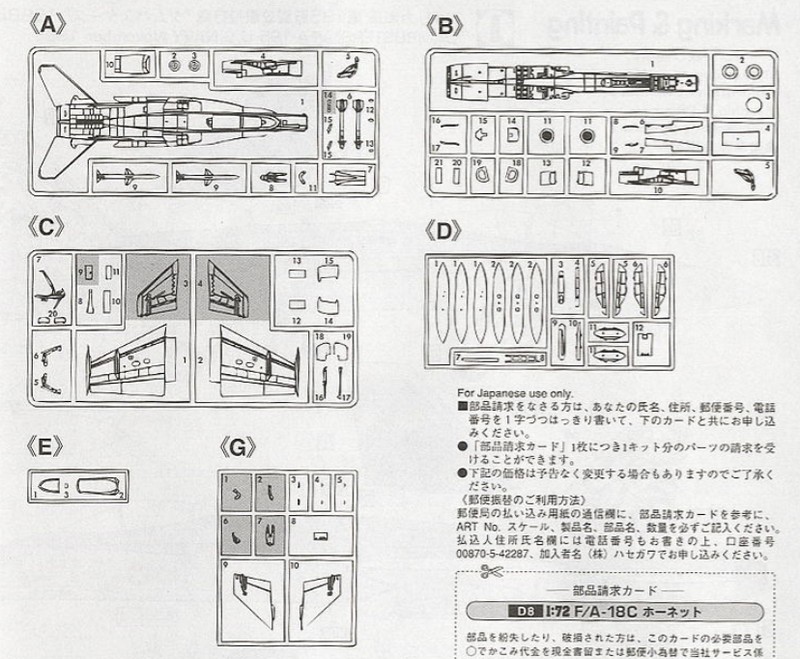
The Hasegawa kit sprues have the parts for both single as twin seaters but not both required canopies. Depending on the kit release bought, you get a single seat canopy and for the two seat canopy.
Single seat canopy seen here...
NOTE: later I found out that a "parked" F-18 always has drooped flaps and slats. I forgot this with the Hasegawa kit which has no separate slats and flap parts. One way to avoid a lot of work to get a more accurate model is to set a pilot in the cockpit with "power on".
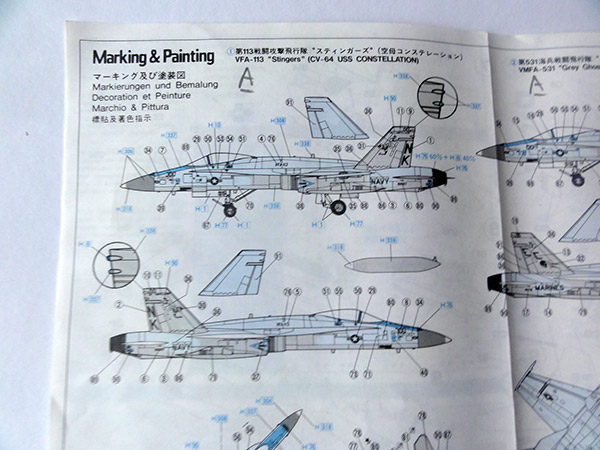
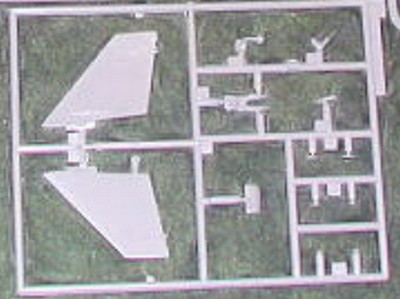
Note that the F-18 A/B and C/D are externally quite similar with the exception that the later C/D got additional antenna fairings on twin tails, the spine and fuselage nose. The Hasegawa C/D kit does have the extra C/D parts in extra sprue "G"....
The 2 forward fuselage pitots are not provided in this kit and forgotten by Hasegawa.
... and the adapted STEP 4 in the C/D instructions....
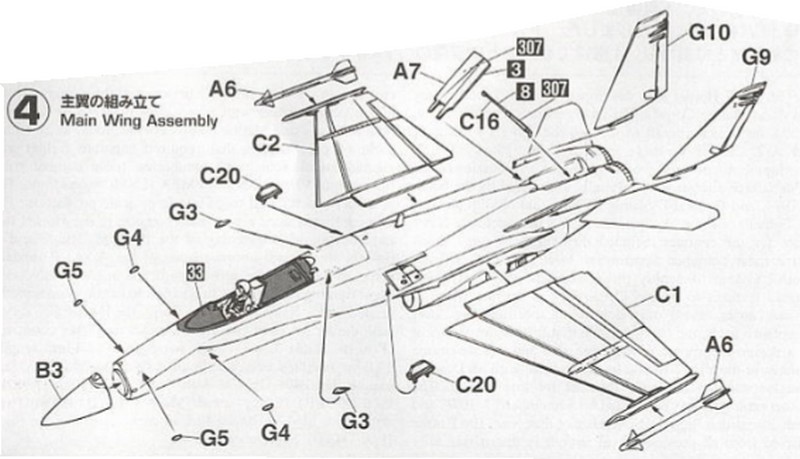
... showing the different tails and the extra antenna fairings and bulges. But still, no pitot tubes!
There are recessed panel lines but these are basic but typical of mould technology in those days. The plastic material is quite hard and in gloss light grey.
Quite some releases came of this Hasegawa kit, I got a few kits.
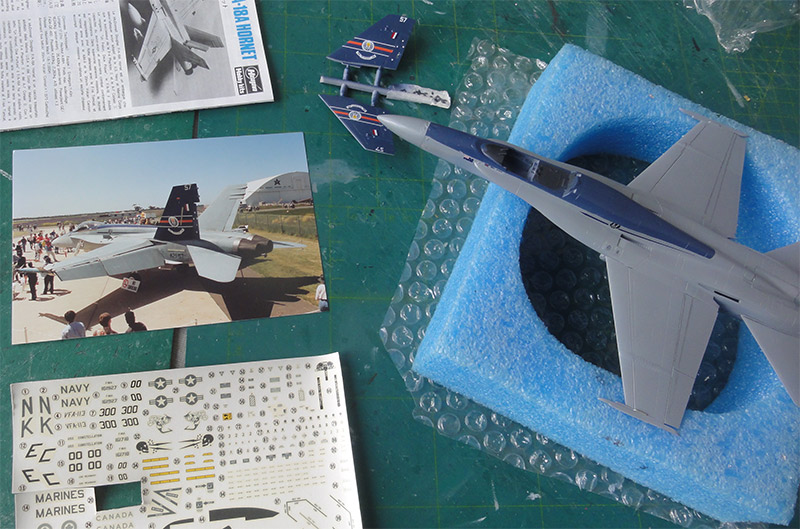
So after many decades another 1/72 Hasegawa F/A-18A Hornet was made. I opted for another air force for the World Air Forces in Plastic collection.

Some 57 F/A-18A and 18 F/A-18B trainers were acquired by Australia with deliveries starting in October 1984.
RAAF F-18 obviously did not need the US NAVY carrier catapult launch system with nose launch bar and that was not fitted. The arrestor hook was retained for land bases as was the wing fold system. Some other avionics were also installed in the RAAF jets. The fleet was during service upgraded. (in 2010 some 24 F/A-18F Super Hornets were also purchased).
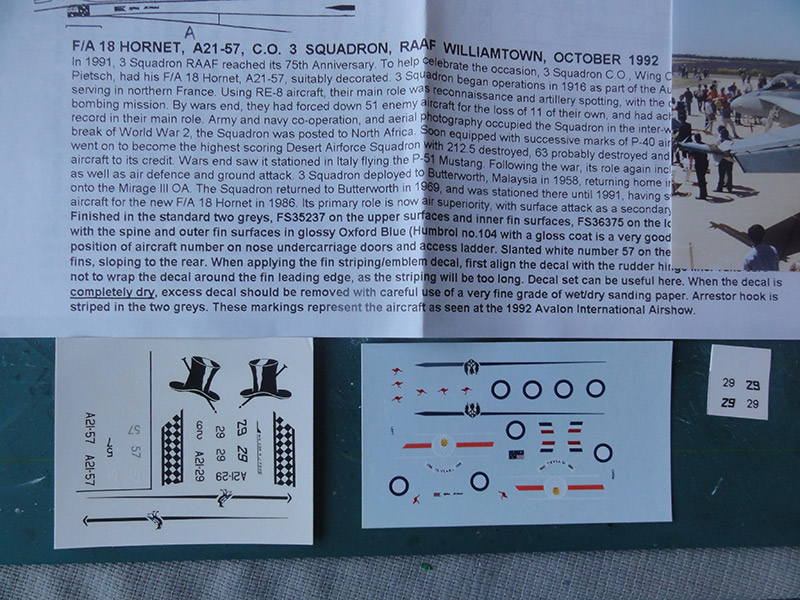
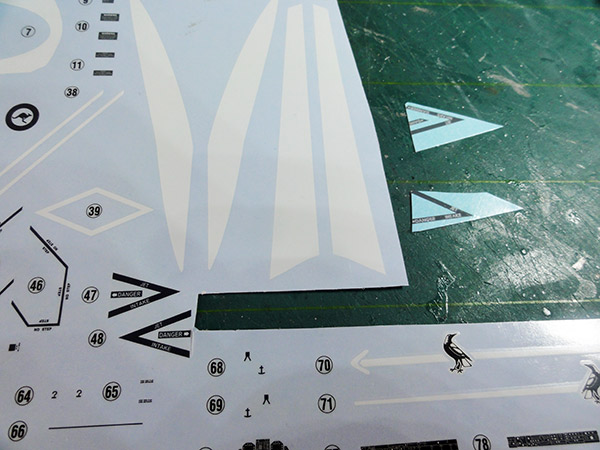
I had in my old stash an Australian PD decals set #72-003. I think the decals set was released around the year 2000 and is very well researched.
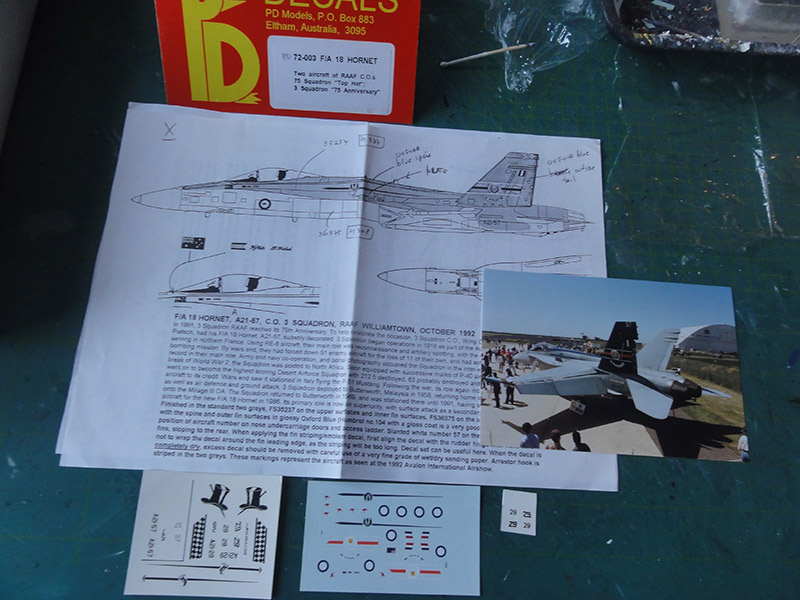
It has decals for 2 RAAF F/A-18A:
[1] F/A-18A, coded A21-29 as flown by the RAAF no. 75 squadron Commanding Officer from Tindal. It has a special scheme as seen mid 1990.
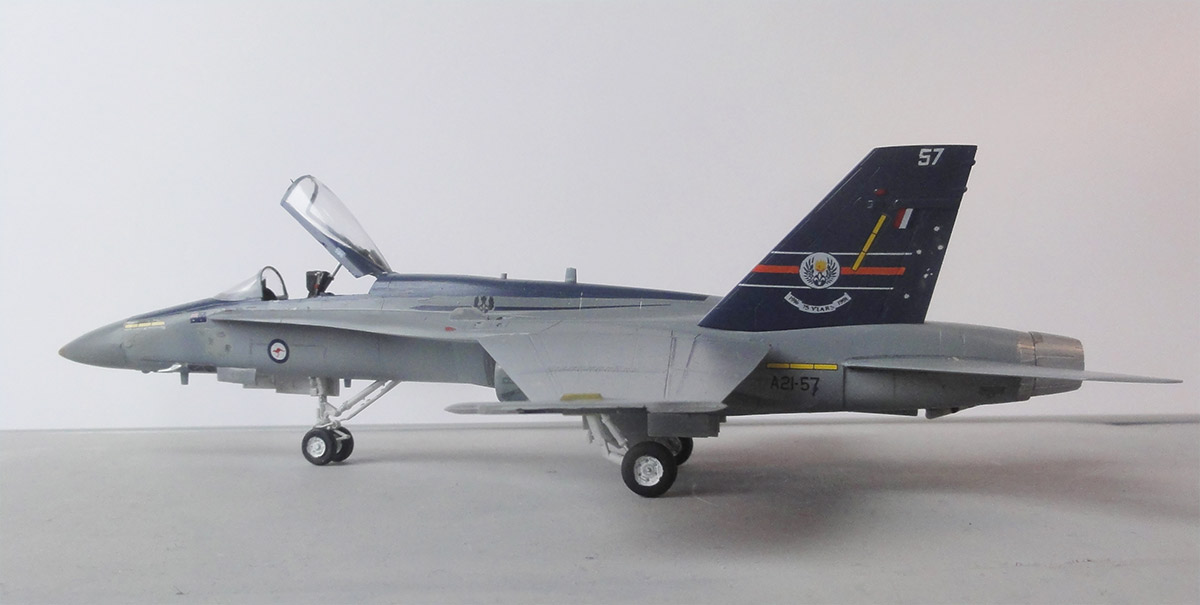
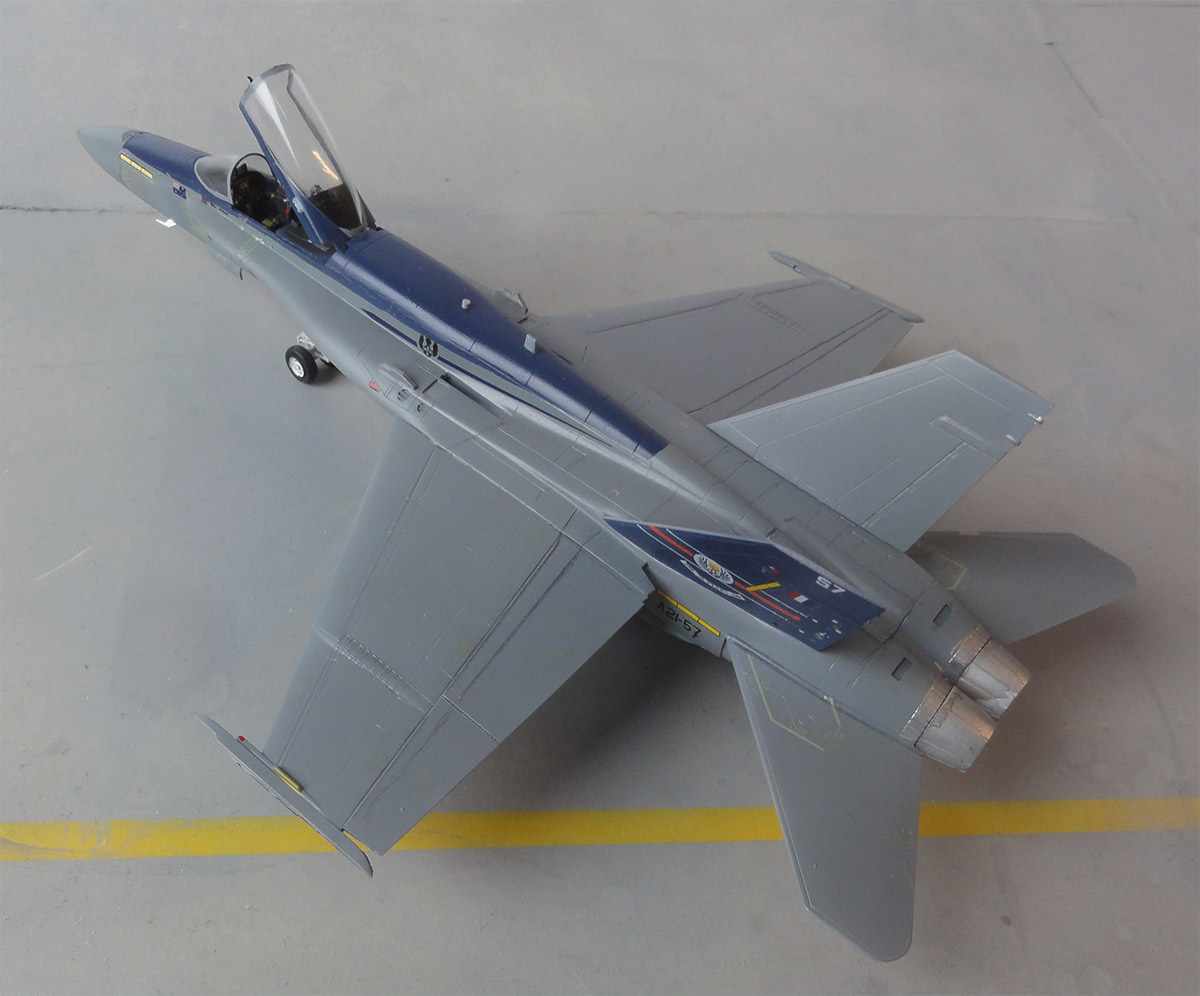
[2] F/A-18A, coded A21-57 flown by RAAF no. 3 squadron Commanding Officer from Williamstown, 1992.
Stencilling is to be used from the mother kit.
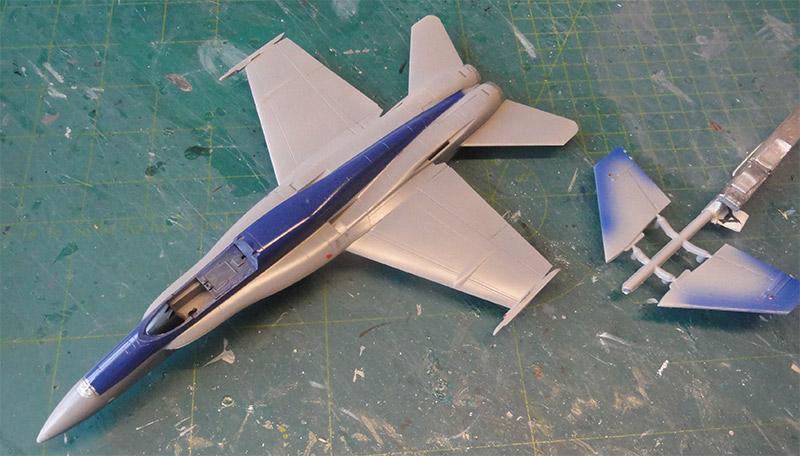
These jets had the old standard configuration. The model was made in this second RAAF scheme which also has blue trim.
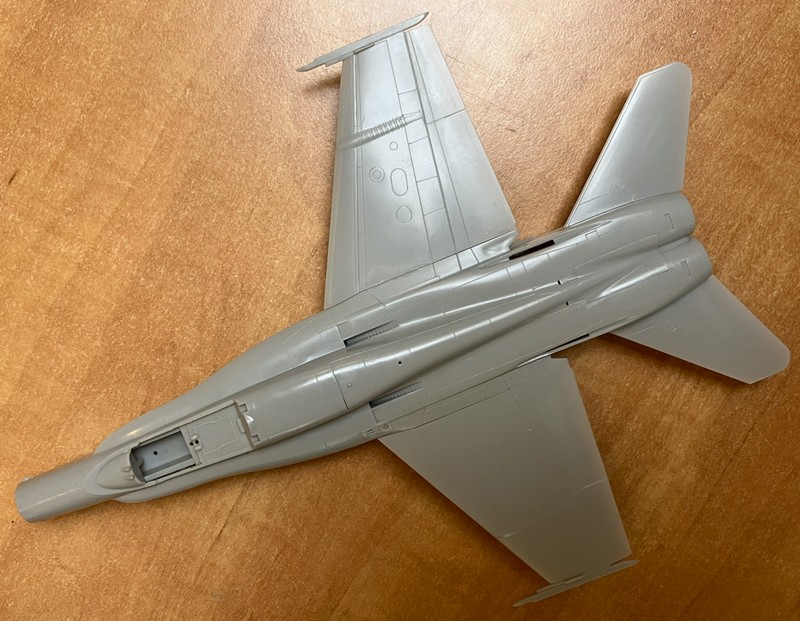
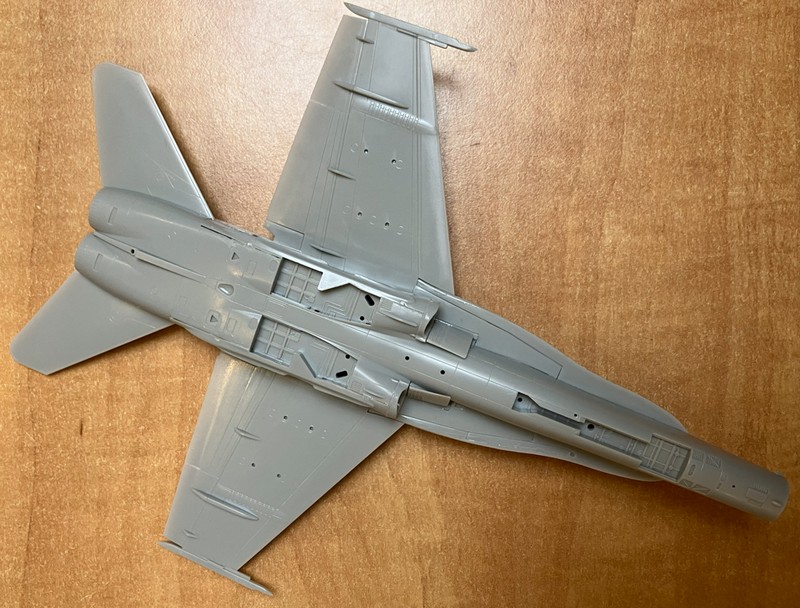
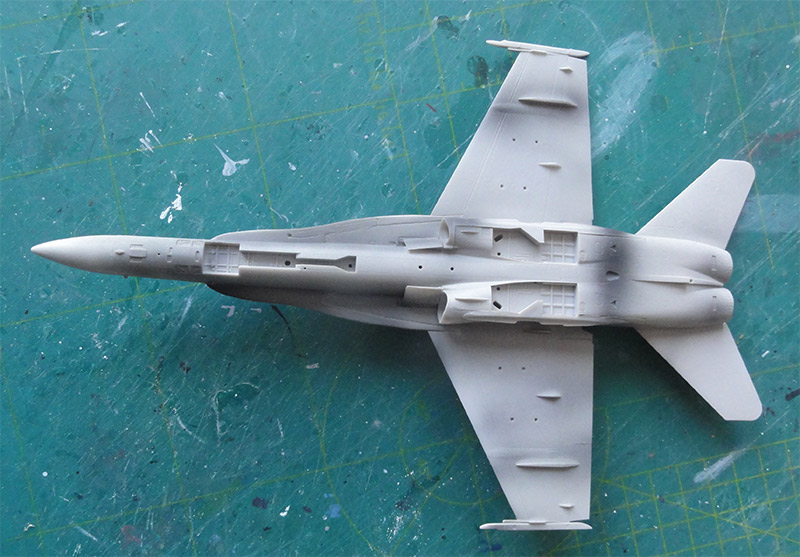
The overall assembly of the Hasegawa kit posed no problems but it requires some putty and sanding work, particularly at the intakes and the lower strake insert parts #B6 and #B7. The airbrake #A7 was set closed, it is rarely seen deployed. I did not install the twin tails yet, this will help airbrushing the paint scheme. Sand, putty and sand again as needed.
The kit provides a boarding ladder but it as not used as it was set "retracted".
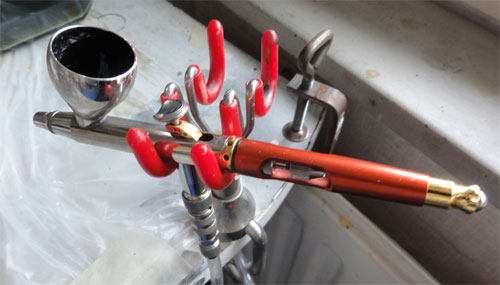
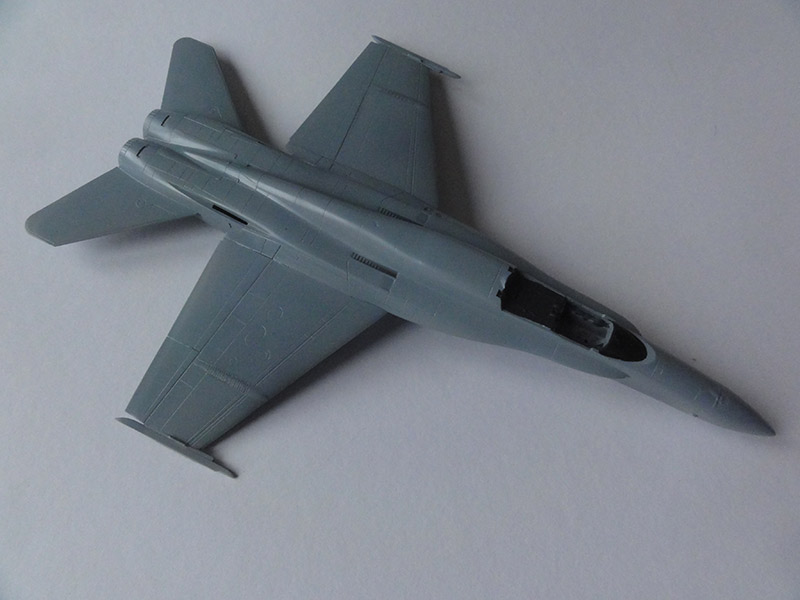
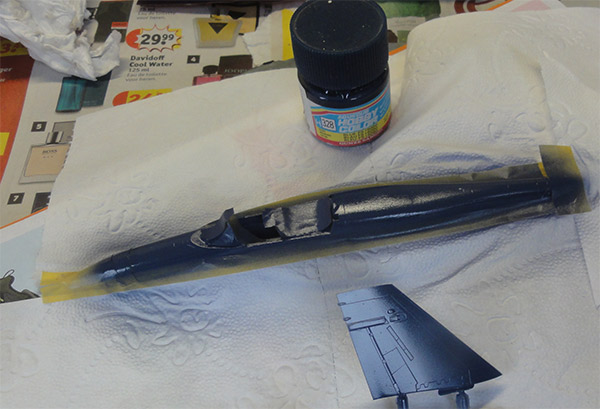
It is a good idea to airbrush a base coat of grey. I like thinned Revell Aqua 75 steingray for this.

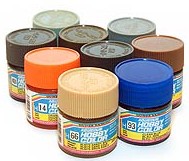
The RAAF F/A-18A scheme had FS36375 light grey lower surfaces and FS35237 blue grey upper surfaces; I airbrushed respectively Gunze Sangyo Mr.Hobby acrylic paints: H308 for FS36375 and H337 for FS35237.
Thin these paints with the Gunze thinner.
The vertical tails were not yet installed. Note that this F/A-18A had not the later ECM fairings of the C/D so use the appropriate kit parts #C3 and #C4 provided.
Next, the gear bays, door insides' and gear struts were painted white with a brush. The main gear doors got retraction rods made from thin white plastic stretched sprue bits. In the front nose gear bay, a metal actuator was made from scrap and the gear doors also got retraction rods. The main colour here is white. Inside the gear bays are many hydraulics and some suggestion is done by raised moulded edges on the kit parts; for this scale adequate.
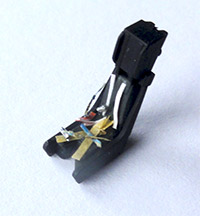
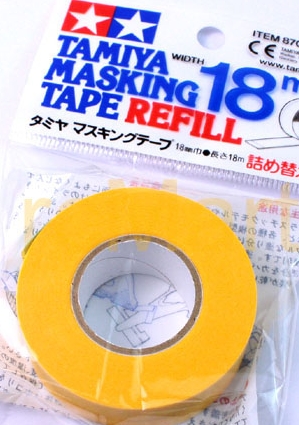
Cockpit tub interior was painted with a brush inside Gunze H317 FS36231 grey and some panels black. Instrument decals were set. The ejection seat got painted and some straps made from tape slices. Some red dots also were set on the seat and few yellow plastic stretched sprue bits in the cockpit tub. HUD transparant part #E3 was set.

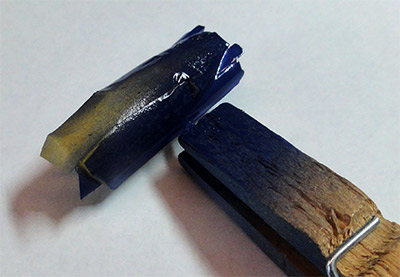
This CO jet had blue trim which is supposedly Oxford Blue BSC381: 105. I did not have this paint but airbrushed Gunze Sangyo Mr.Hobby H328 acrylic paint for this after the spine and vertical tails had been masked. Always airbrush a spare decal in this colour in case any repairs are needed later on.
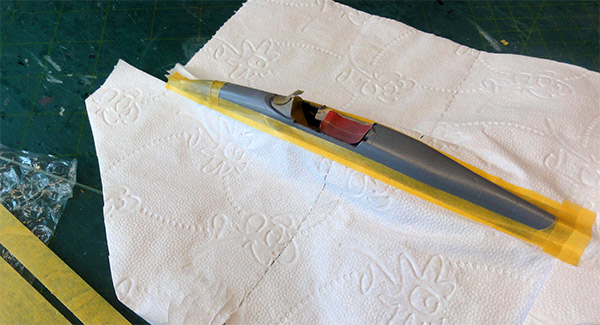
I also masked the main canopy frames and these were also airbrushed (no photo made...)
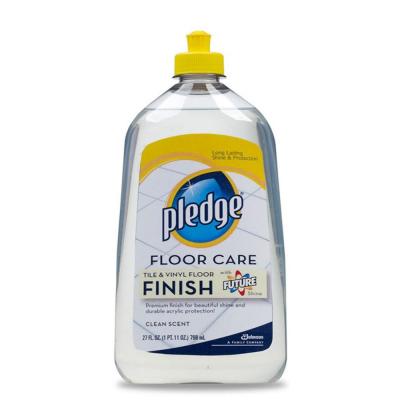
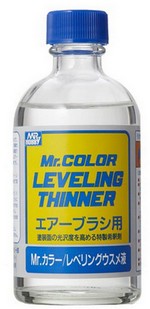
Before decalling was done, a gloss varnish was airbrushed to avoid "silvering", that is that air bubbles tend to trap below a decal, spoiling the appearance. Airbrushed was a gloss varnish airbrushed with Johnson Future/ Pledge thinned with a few drops Gunze Mr.Color leveling thinner.
Than decalling was started. The smaller stencils came from the mother Hasegawa kit, I only needed the smaller ones. The many NO STEP stencils were also set.
The old PD decals set posed no problem except for the black decals. Those broke up but I could reposition them on the model and do a bit routching with a permanent black scriber.
RAAF roundels are at the fuselage sides and lower wing (not on upper wing). The PD set ones have 2 parts to ensure good centering of the Kangaroo.
After decalling had been done, the twin tails and the smaller parts were installed as per kit.
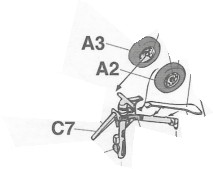
RAAF F-18 obviously did not need the US NAVY carrier nose launch tie bar and that was initially after delivery not fitted. On this A21-57 at the time it was not installed so that bit was cut off from nose strut kit part #C7.
(NOTE: it seems that later on because of shimmy problems another type of shimmy damper was installed at many RAAF F/A-18 that look like the tie bar so study photos of the real jet). Another later RAAF F/A-18 update was installing a pair of strakes at the LEX to fight fatique, the kit parts were installed.
On the nose gear strut a moulded stub it for the landing light; it was painted chrome with a chrome pen.
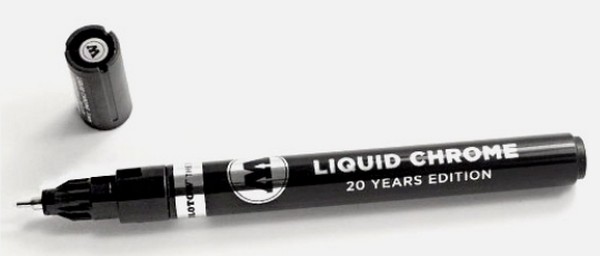
The 2 missing in the kit forward fuselage/ nose pitots were made from scrap and installed. Their tips were also tipped with the chrome pen.
The missiles rail lock strips were painted dark grey. But otherwise this jet was kept clean with no pylons.
The anti-collision lights were brush painted red and blue including the ones near the strakes. On the lower wing outboard aileron fairing on the outboard front edge were painted a red light at lower port and blue at lower starboard. On each vertical tail, an red anti-collision light was painted; it is moulded on the kit parts above the small "fuel vent intake". On this F/A-18A the anti-collision lights on the top twin v-tail stubs were tipped chrome.
In the inscribed panels of the flaps and ailerons with a soft pencil some lines were drawn for weathering. Canopy was installed after the cockpit and seat got some extra details. Seat from the kit looks OK and got some straps made from tape slices.

The wind shield and canopy frames were brush painted. Their edges got a black outline with a permanent black marker. Inside the canopy front frame 3 pilot rear view mirrors were made from scrap and 2 sort of white actuators inside installed.

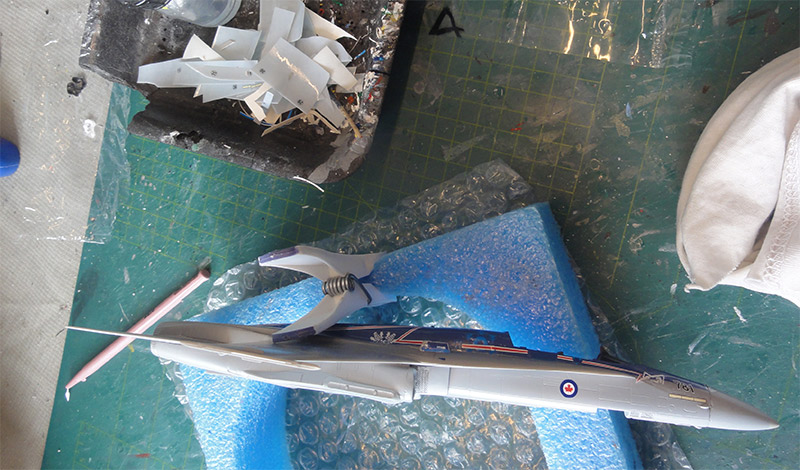
The model finally got a few coats of semi-gloss varnish with Johnson Future/ Pledge thinned with 5% Gunze Sangyo levelling thinner and 5% Tamiya X-21 flat base agent. This will protect the decals and gives an even sheen, shield off the clear parts. That completed the model.
As I had forgotten about drooping the flaps and slats, I added a pilot figure to suggest a jet "under power". The figure was found in the spares box. (Some photos still show the model without).
AUSTRALIA

[ area: 7,700,000 km2 | population: 26 million | capital: Canberra | GDP per capita nominal 68,000 USD ]
The Australian Air Force has a long history starting with the Australian Flying Corps (AFC) set up in 1912. After the Second World War the jet age began and various types entered service like Vampires, Mirages and MB-326. Also F-111 strike aircraft were operated.For more information, look at the RAAF Mirage page here...
Australia would acquire 75 modern F/A-18 Hornets as was announced October 1981 by Australia Defence Minister Killen after a TFP selection program. They would replace the Mirage III O aircraft were retired in 1988 (with some 50 sold to Pakistan). Procurement would be through a complex US Foreign Military Sales Program but also involving local Australia industry. Typical carrier systems were not needed like the catapult attachment strut, an new landing light and some other electronics. Standard armament would be AIM-9L Sidewinder, AGM-88, AGM-84 Harpoon and also smart bombs. 57 single seater F/A-18A and 17 F/A-18B trainers would be delivered, with first in 1984 coded A21-101 manufactured in St.Louis USA. But most manufacturing was in Australia by various companies like GAF, CAC and Hawker De Havilland. But severe delays were encountered. By end 1988, 59 Hornets were delivered and program back to schedule with final 4 F/A-18A delivered in 1990. RAAF squadrons 3, 77 at Williamtown and no. 75 at Tindal NT flew the type but other dispersal facilities across Australia were also constructed. Several excercises also in SE Asia region were held. Several upgrades were done over the years. This involved also structural refreshment to fight fatique and better electronics. One modification was installing the pair of strakes at the LEX.
The first generation F/A-18 was put out of RAAF service November 2021 and the remaining 25 jets were sold to Canada for mostly spare parts. It was replaced by the F/A-18E and -F and now the F-35A is being introduced.
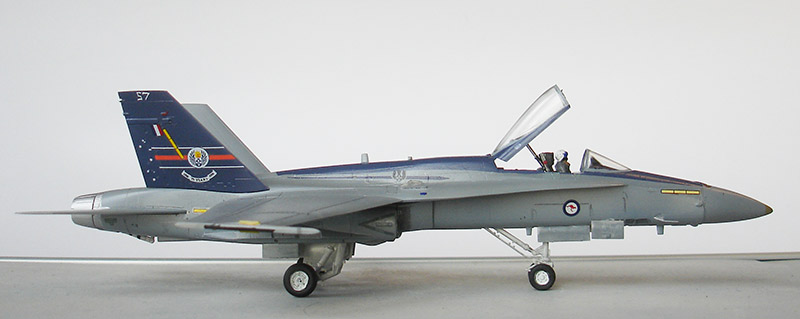
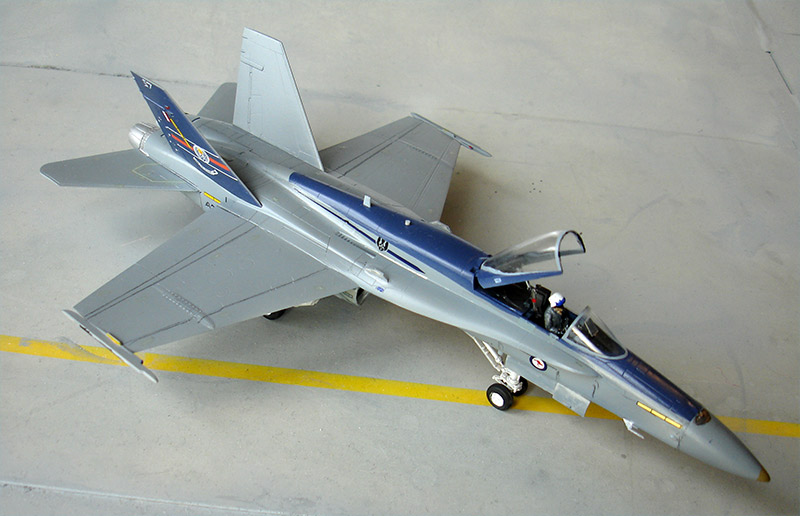
F/A-18A, c/n 834/AF-57, RAAF coded A21-57 of no 3 squadron, 1992. It was the last delivered jet. It has been upgraded with strakes at the LEX.
Another 1/72 Hasegawa F/A-18A kit was made, also in a special RAAF scheme.
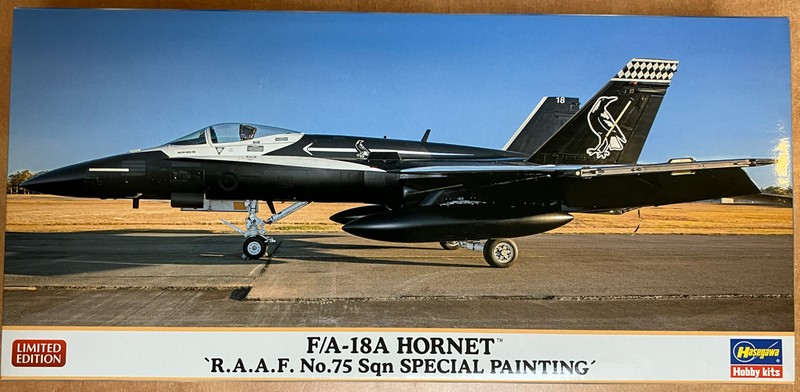
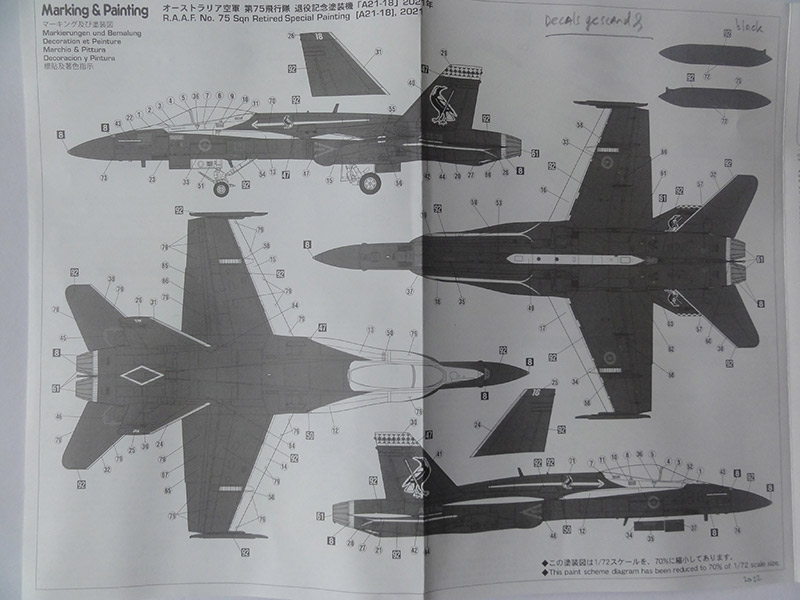
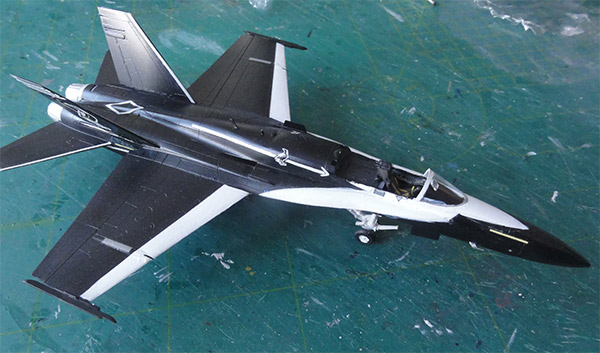
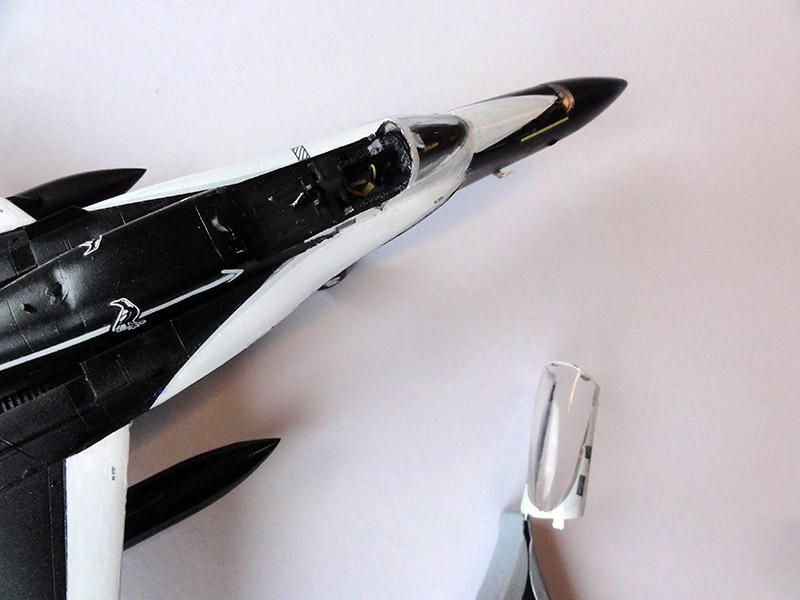
Kit #02411 has special markings for a Royal Australian Air Force (RAAF) F/A-18A coded A21-18 of no. 75 squadron in a black-white livery as it would retire in 1991. It is the only decals scheme provided in this kit release.
The aircraft had obviously received the various updates during its career.
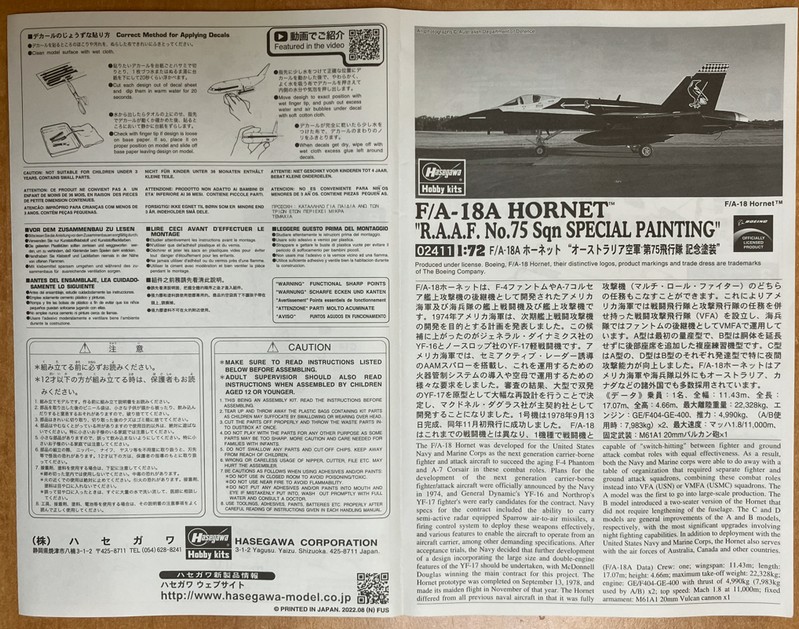
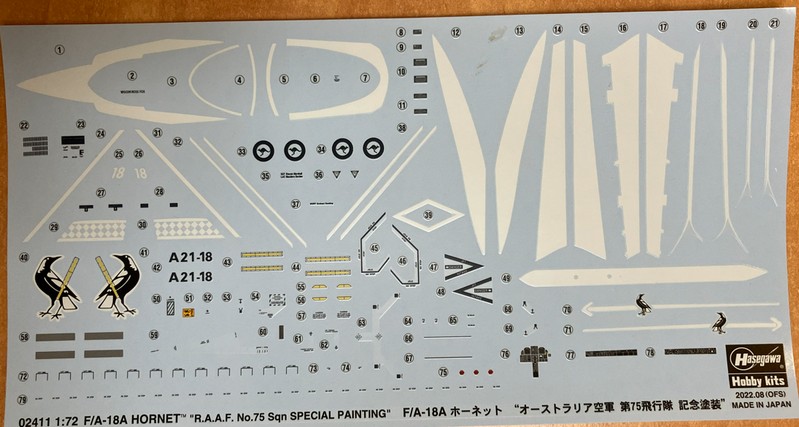
The white areas are also provided as decals, more about that later on.
The kit was almost made as described on earlier made Hasegawa kit.
NOTE: later I found out that a "parked" F-18 always has drooped flaps and slats. I forgot this with the Hasegawa kit which has no separate slats and flap parts. One way to avoid a lot of work to get a more accurate model is to set a pilot in the cockpit with "power on".
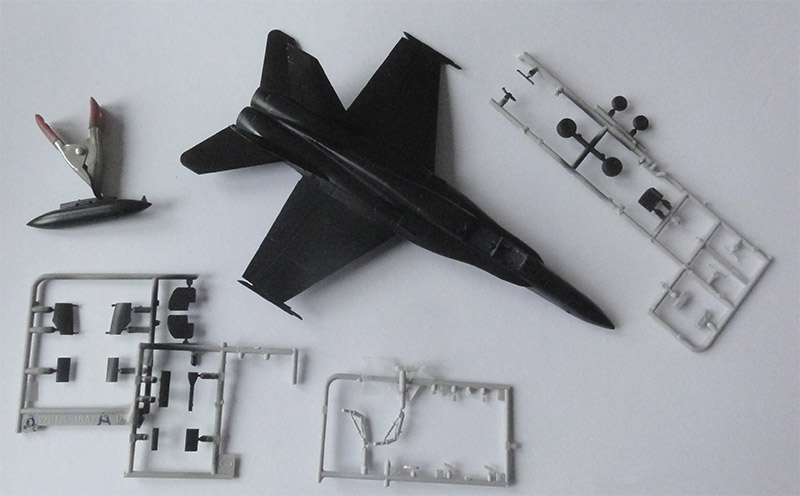
An overall gloss black coat was airbrushed with thinned Gunze Sangyo Mr.Hobby H2 Black acrylic. Also on some parts like gear doors still in their sprues and the external fuel tanks.
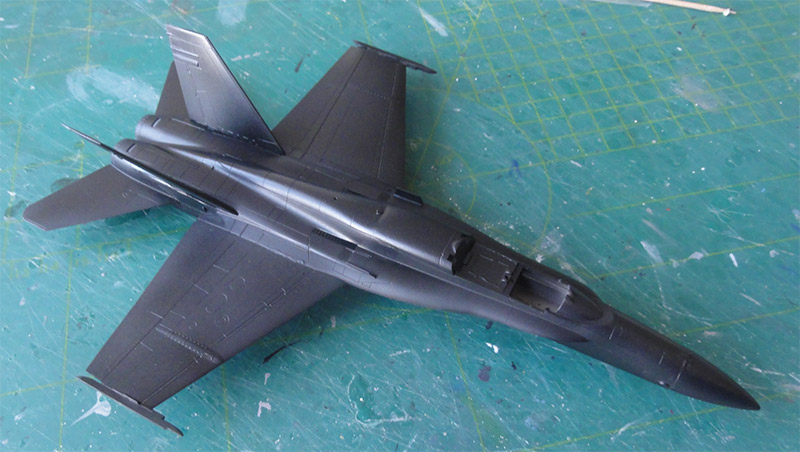
Decalling was done. The kit decals have what appears to be black numbers and stencilling; but when applied they indeed show up as they are very dark grey so OK.
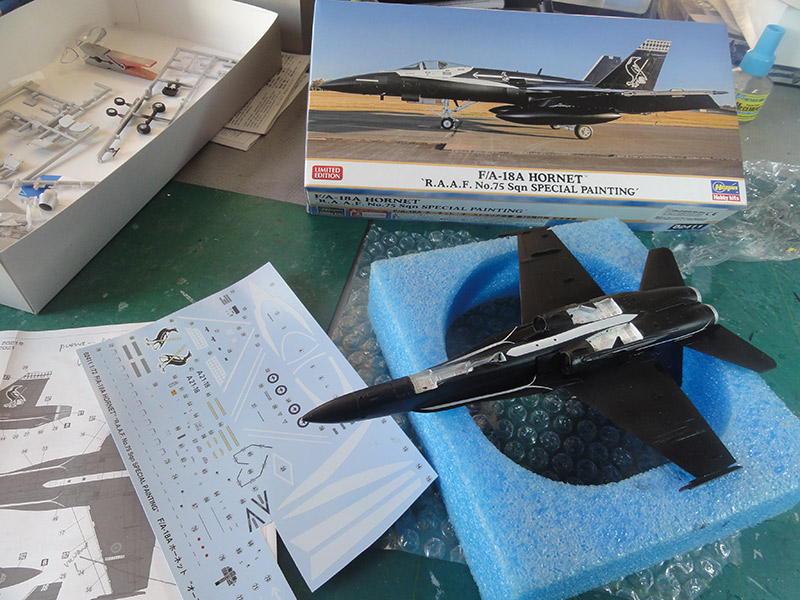
The various white areas on wing, leading edge extensions, cockpit and canopy frames are decals. I used these.
After they had dried 24 hours unfortunately the white decals turned out to be a bit opaque (not 100% covering on the black undersurfaces). It also had to do with air bubbles trapped under a decal despite rubbing the decal.
For a better look, I got a large white spare decal sheet and cut white decals to cover the bigger areas; these were set on top of the white kit decals. While they improve how the special scheme looks, I was NOT happy.
The lesson learned here is that I should have had made masks and airbrush the white areas. Yes, it is a lot of effort but will give a far better looking model.
The landing gear was now to be installed. RAAF F-18 obviously did not need the US NAVY carrier nose launch tie bar and that was not fitted. First jets flew without. But later on another type of shimmy damper was installed that look like the nose catapult tie bar. On this upgraded A21-18 the new type shimmy damper bar is clearly seen on the box top photo so the nose strut kit part #C7 was simply used.
 -
-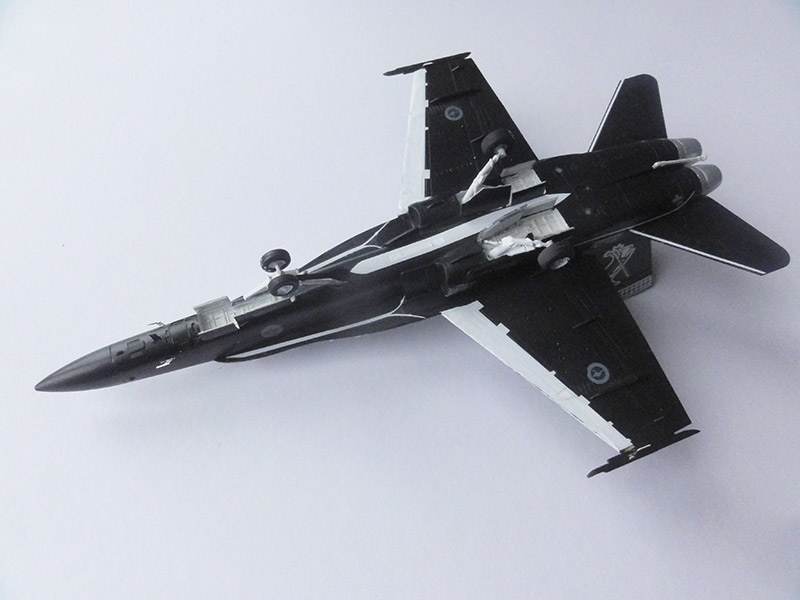
The main gear doors got retraction rods made from thin white plastic stretched sprue bits. In the front nose gear bay, a metal actuator was made from scrap and the gear doors also got retraction rods. The remainder of the parts were installed including the missing 2 pitots. Also a few antennas were made of thinner plastic card.
See notes above like about the anti-collision lights painted.
The canopy was first set closed and again, the white decals for the frames did not fit very well and a bit translucent.... I was not happy and should have known....
After a few days I removed the canopy again, cleaned up and set the canopy after some repainting and detaling open. Inside canopy frames 3 mirrors were made from scrap and small other bits.
The jet was kept clean with no pylons and no weaponry and it got a few coats of gloss varnish airbrushed with thinned Johnson Future/ Pledge.
As I had forgotten about drooping the flaps and slats, I added a pilot figure to suggest a jet "under power". The figure was found in the spares box. (Some photos still show the model without).
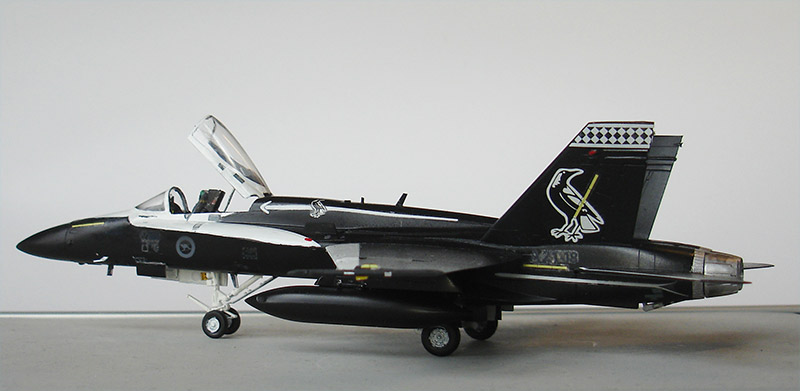
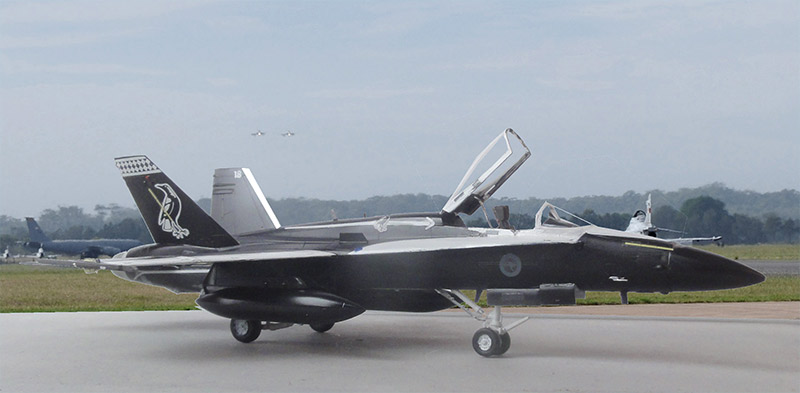
Royal Australian Air Force (RAAF) F/A-18A coded A21-18 of no. 75 squadron in a black-white livery as it would retire in 1991.

... set in a scenery at Williamtown air base, Australia... (pilot not yet installed...)

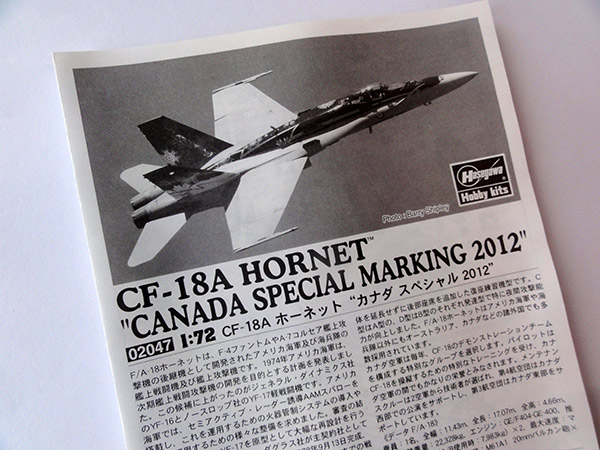
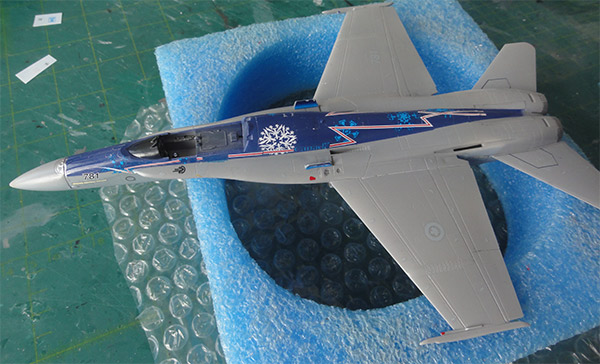
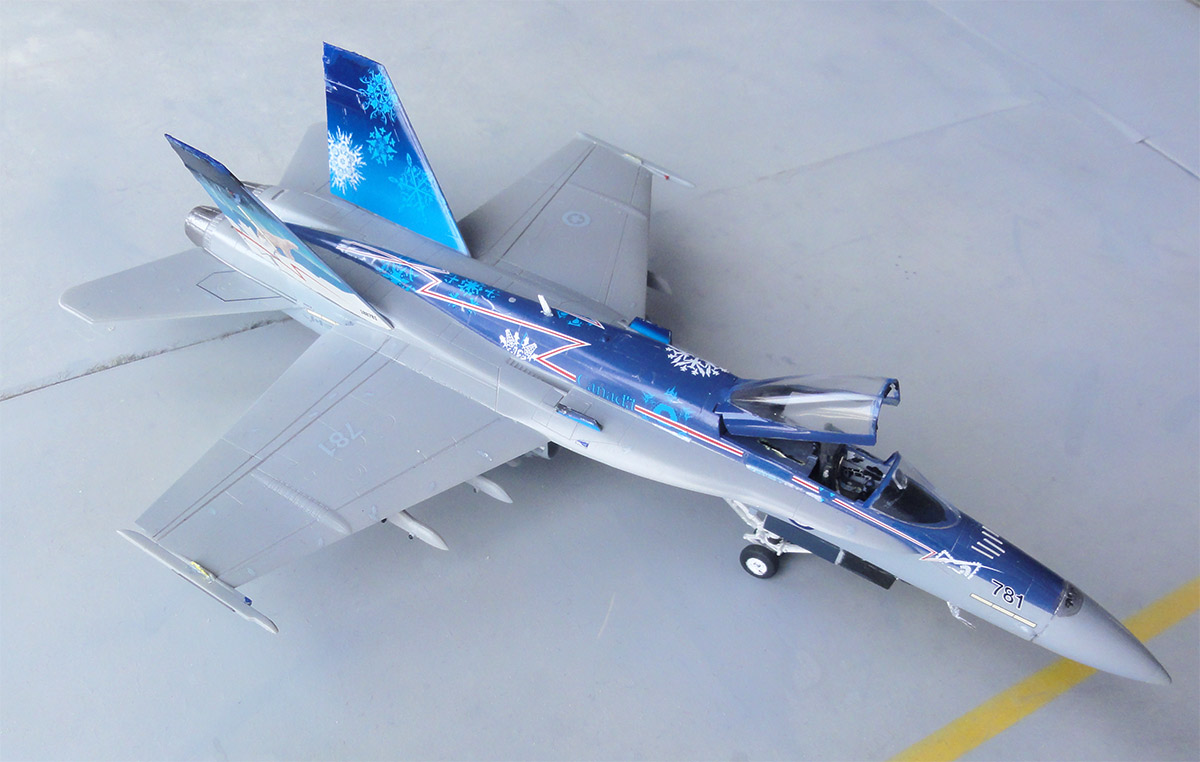
In 1/72 Hasegawa also released a CF-18A Hornet with kit #02047 in 2013. The CF-18A is the Canadian variant of the F-18A. This is very nice looking special scheme.
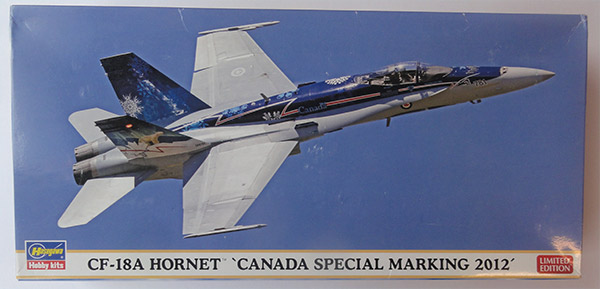
The decals in this kit are for a single CANADA SPECIAL MARKINGs as flown by RCAF 4th wing in 2012:
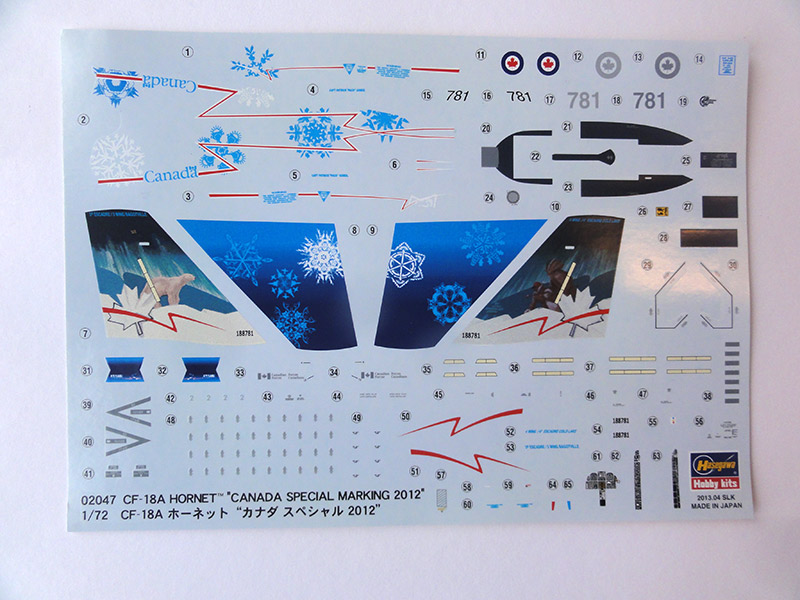
The decals look really good but some masking and painting is still neede for the scheme at particularly the fuselage spine.
The model was assembled as described for the F/A-18A on page 2...
NOTE: later I found out that a "parked" F-18 always has drooped flaps and slats. I forgot this with the Hasegawa kit which has no separate slats and flap parts. One way to avoid a lot of work to get a more accurate model is to set a pilot in the cockpit with "power on".
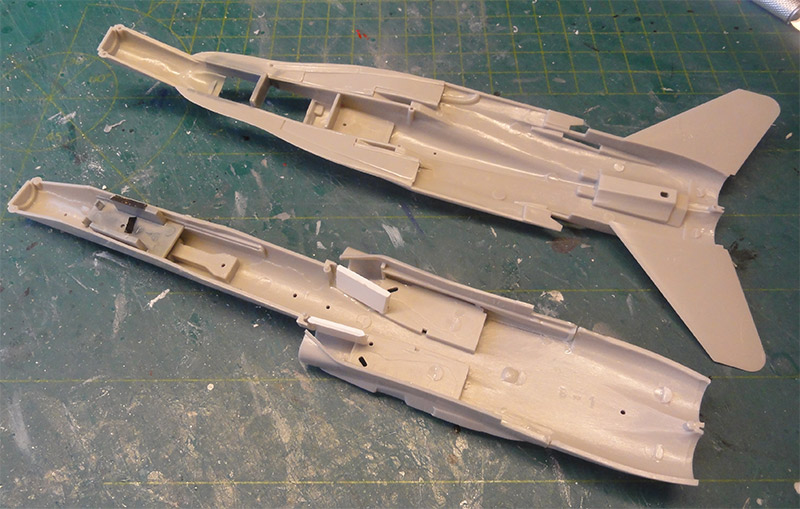
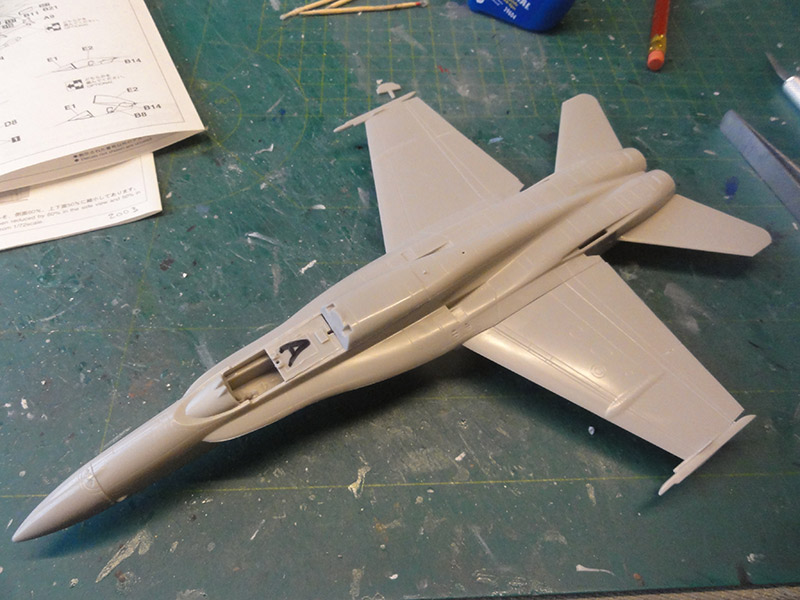
Putty and sanding was again needed. There is even a bit plastic shrinkage near the air slots in the LERX, fill and sand.
The base grey indicated in the Hasegawa #02047 instructions for the RCAF jet is FS36375 on the lower surfaces and sides and FS35237 on the upper surfaces. Gunze Sangyo acrylic paints H308 and H337 were airbrushed.
For the particular RCAF SPECIAL SCHEME there is a blue spine and vertical tails. Hasegawa suggests a mix 80% H80 cobalt blue + 10% H67 purple + 10% H2 black acrylics. I did not have all these paints and used a mix of 80% H465 + 10% H39 + 10% H2.
The blue mix needed careful masking before being airbrushed. I always airbrush a spare decals sheet paper bit in this color just in case repairs are needed. Also the canopy frames and the tail leading edges were airbrushed.
The vertical tails edges are also blue airbrushed and the canopy frames were not forgotten.
The CF-18A jet also had the plates at the LERX and these are parts #C20 in the kit. There are even special markings on these!
The smaller kit bits were not yet installed but some painting done now: the cockpit interior was brush painted aircraft gray H73 and gear bays white inside.
Time for decalling. To avoid decals "silvering", always ensure a gloss finish before decalling is done. Applied were a few coats of gloss varnish.
The Hasegawa kit decals are old so needed a long time in warm water to get loose from the decals sheet.
From the big spine decal #2 I tried to remove quite some clear decal film to get it to curve. A spot light decal was set at the port nose section that the CF-18 had.
At the tails, the big colourful decals were to be set. I remove 0,2 millimeter at the base of each tail decal to avoid decal edges. The trimmed decals were set and needed some decal softener to drop over the raised tail fairings. Note also the red outboard anti-collision lights on the tails.
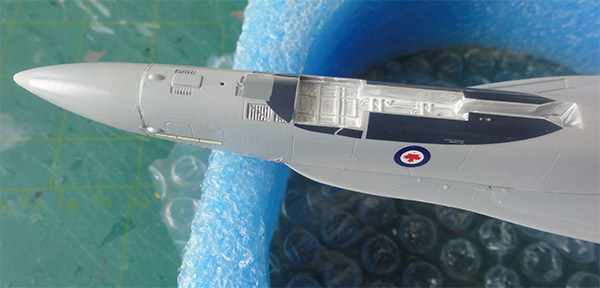
The lower nose had the grey areas that are painted to confuse enemy pilots in combat manoeuvers. Decals are provided, even for the (open) doors.
The remainder of the bits were set as per kit. The landing gear was set.
I could not check what exact type of ejection seat the CF-18A had, probably a SJU-5/6. I simple installed the kit seat.
Again, the kit misses the 2 nose pitots and these were made from scrap.
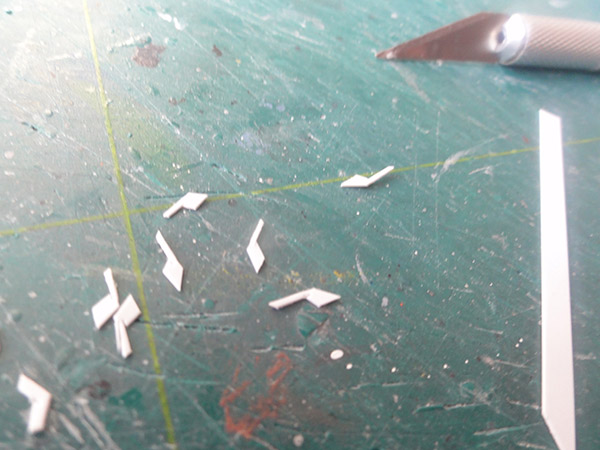
This RCAF CF-18A had 5 IFF strips "bird slicers" and these were made from thin light grey stretched sprue and set in front of the windscreen. See the box top photo.
On the spine a few tiny light grey areas painted and antenna was set.
Inside the canopy front frame rear view mirrors were made. No armament was set, just pylons as seen on the box top.

A semi-gloss varnish was airbrushed and the canopy set open. That completed a nice model.
As I had forgotten about drooping the flaps and slats, I will add pilot figure in the future to suggest a jet "under power".
CANADA
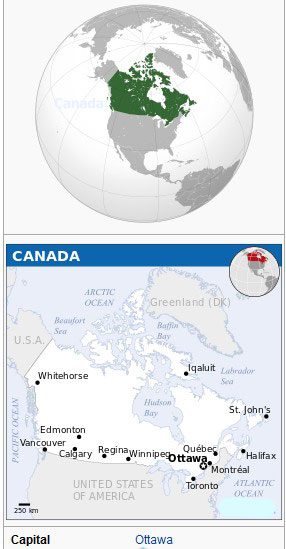


[area: some 10 million sq.km | population 41,6 million | capital: Ottawa | GDP 54,000 USD nominal ]
The Royal Canadian Air Force was established in 1924 after the Air Force was set up in 1920. Aircraft were flown also during the Second World War to support the Allied effort. A lot of training was also done in the safety of Canada. After 1945 Canada joined NATO in 1945 and the Cold War was a fact. RCAF squadrons were even based in Europe and with the USA cooperation was done in NORAD with radar defence to track Soviet missile that may come over the North Pole. In 1968 armed forces were joined in the Canadian Forces. Types flown were CF-104 Starfighter, CF-101 Voodoo among with other aircraft like Canadair Tutor trainers. The envisaged Avro Arrow project was cancelled.
Through the New Fighter Aircraft program the McDonnell Douglas F-18 was selected in 1980. The Canadian CF-18 version was very similar to the F-18A but got an ILS landing system, a spot light in the port forward nose section. It also retained the arrestor hook and probably also the US NAVY carrier launch bar at the nose strut. 98 CF-18A and 40 CF-18B trainers were acquired and the first CF-18 were handed over October 1982. The CF-18 fleet was also upgraded from the mid 1990s and later for additional weapon capabilities. The CF-18 were also operated during the Middle East during Operation Desert Shield in early 1990s and also in a collapsing Yugoslavia. In 2011 the air force again was renamed Royal Canadian Air Force (RCAF). The fleet was quite old in 2010 and Lockheed F-35 JSF were planned. As interim measure end 2017 some 12 F/A-18A and 6 F/A-18B were acquired second hand from Australia and some extra as spares?. The F-35A are ordered but still is under discussion due to U.S. political issues (2025).
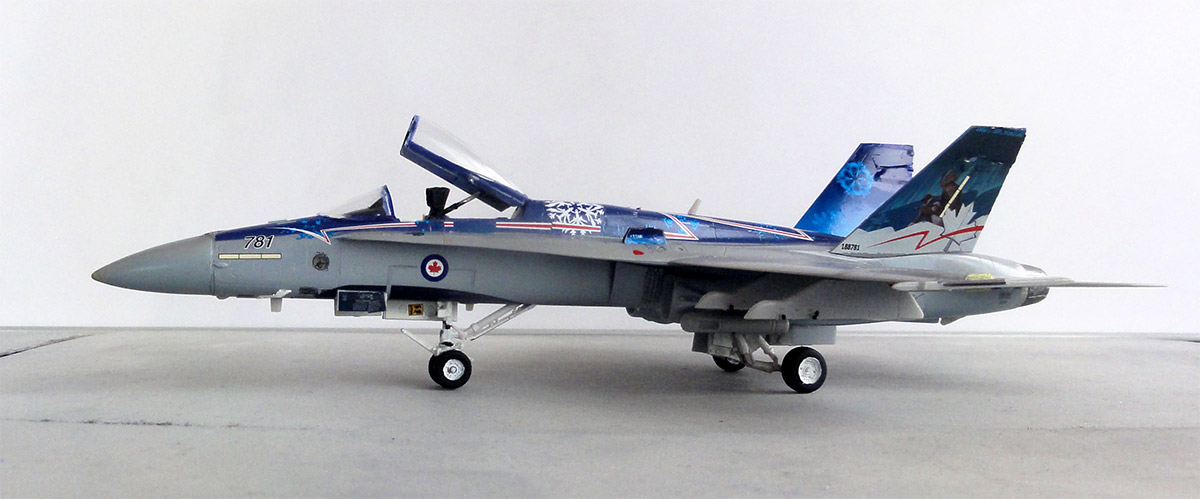
CF-18A, Royal Canadian Air Force, 4th wing demo jet flown 2012.

... set in a forest scenery...
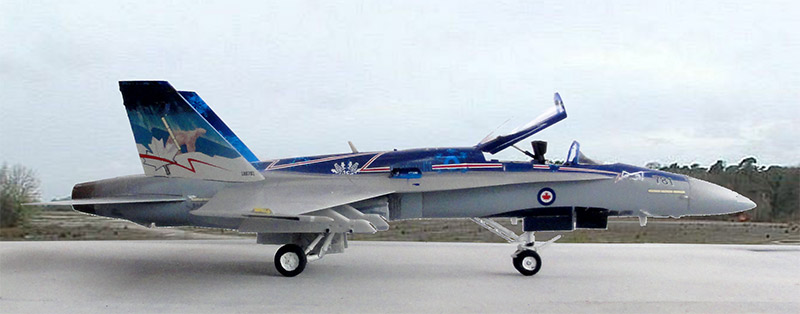
The model is a nice addition to the already made Canadian models in the World Air Forces Collection.
On to next [ Page 3... ]
REFERENCES
Books....a lot!
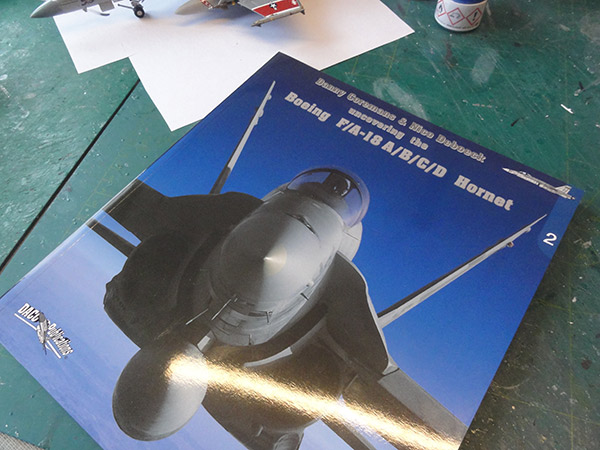
-[1]- Uncovering the Boeing F/A-18 A B C D Hornet, DACO publications, 2004. With loads of details!
Covers the first generation.
-[2]- Phantom, Skyhawk and Hornet in Australian Service, Stewart Wilson, Aerospace Publications, Weston Creek, 1993 (thank you Bas for providing this book). Canada Airshow Team Heritage), 2002
Internet:
F/A-18 IPMS.NL : various walk arounds first generation / Super Hornet
Back to 1/72 Models

(c) Copyright Meindert "designer"/ All rights reserved. Your comments are welcomed by webmaster
Created this page Feb 12, 2026