[ page 2 ]
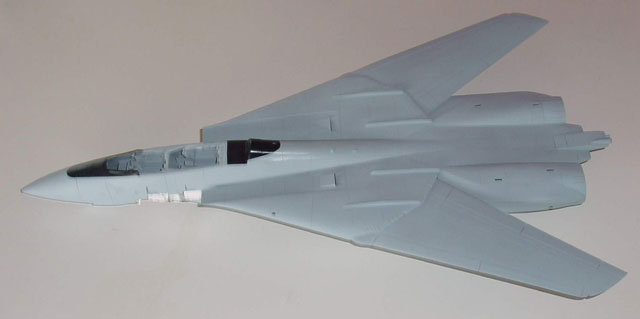
F-14D model in 1/32 scale: Revell kit conversion
.... continued from page 1...
The assembly
of the overall kit was quite easy, except for the forward nose section
to the rear section. It needed trimming, sanding and a lot of patience.
After that, a quick approach can be made by putting on several base coats;
it also enables inspection of forgotten seams, putty imperfections etc.
![]()
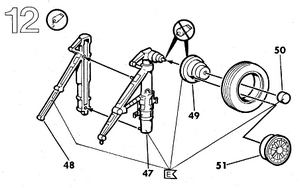
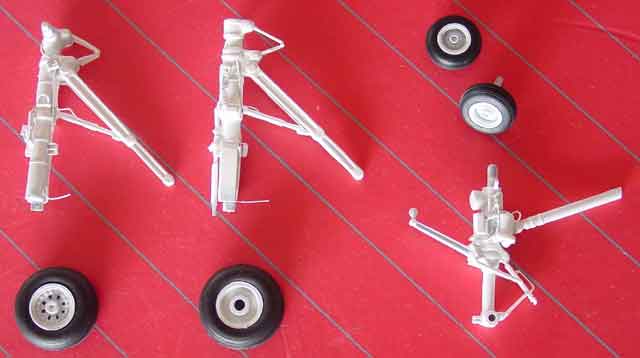
Also, the avionics, wheelbays and
various parts (like the detailed undercarriage legs) gota white coat.
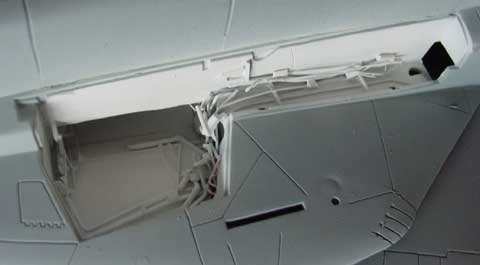
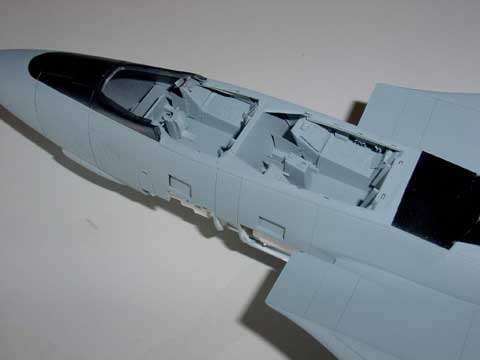
.. forward
area with the opened gun bay sections and in the middle the entry ladder
recess stowage.
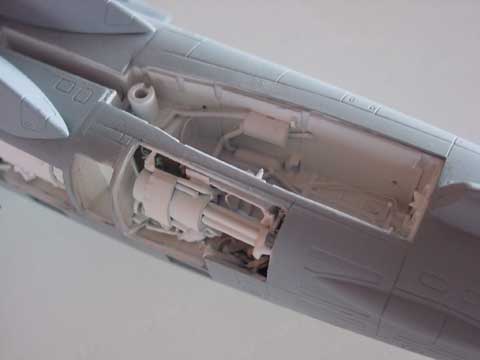
The undercarriage got extra details
with metal wires for the brake hydraulic lines..

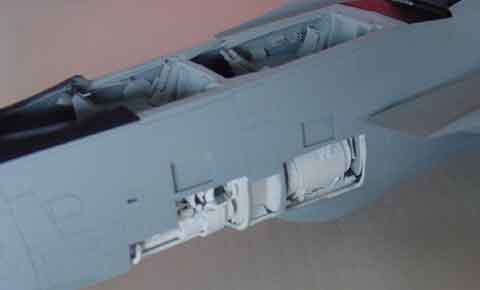
The cockpit area also got some basic
paint coats. Detailling later on will be easy as superglue will be used
for the to be added on smaller parts (like sprue etc).
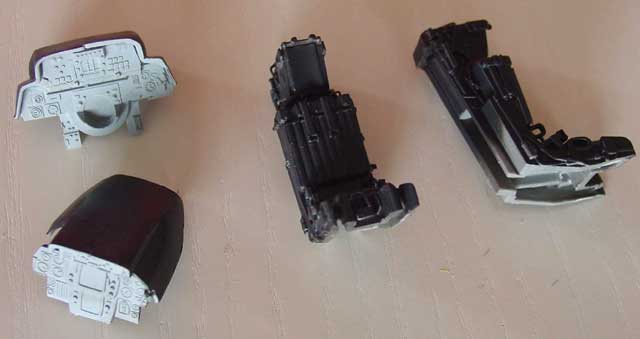
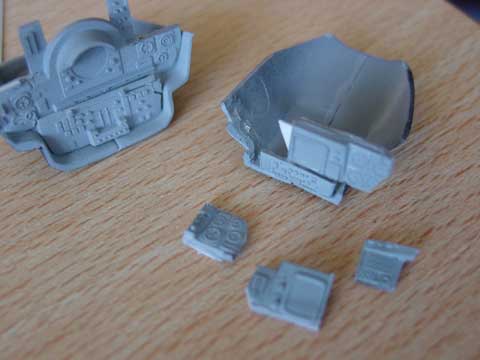
The older style seats and cockpit panels seen above, OK for a F-14A. (not used in this project)
But what about a later F-14D Tomcat ?It was decided to convert this model to a later F-14D variant. This means mostly adding a different GE engine exhausts and that the cockpit area needs some reworking with new seats and panels.
Reason is that it somewhat of a change to the usual F-14 models seen and is something special. Also, excellent CAM decals (set no. 32-098) were obtained for a F-14D of VF-31 Tomcatters with a mix of a highly visible attractive tail and low vis overall scheme.
A profile was obtained and some pictures from the internet, especially from Home of the M.A.T.S. (see references on page 1 ). The picture below shows a presentation made using Powerpoint.
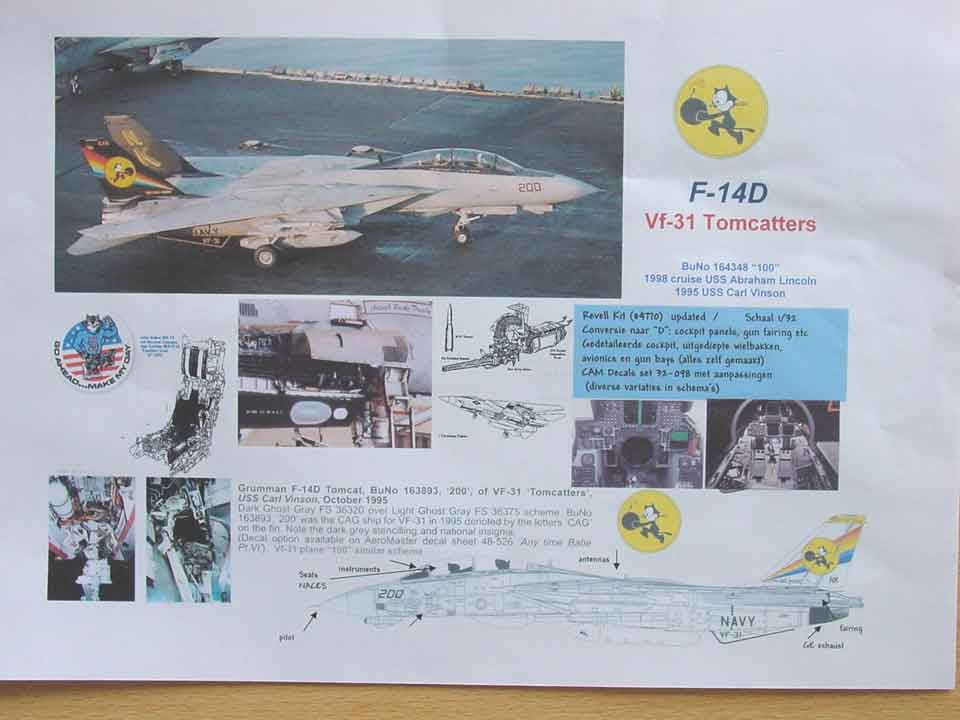
The F-14D has a lot of systems and
avionics updates and capabilities.
Externally visible changes of a
F-14D to be incorporated in the model are:
- (1) New later style Martin Baker
MB-14 NACES seats; these will be made from scratch
- (2) updated both forward and rear
instrument panels; these will be made from some card etc.
(will be handled later on)
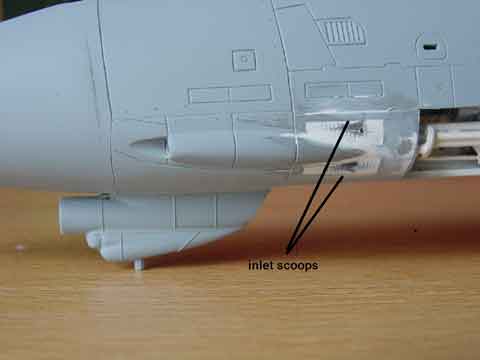
- (3) three small intake scoops near the M-61 gun in stead of the original grill; these are of the gas purge system.
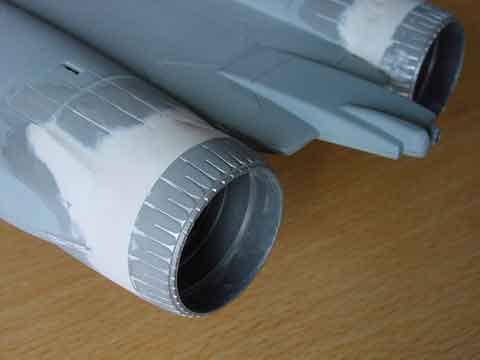
- (4) New General Electric F110-GE-400
engines
with extended nozzles (11 inch) compared to the P&W engines of the
earlier F-14's ; the GE exhaust will be made by carving and converting
the kits parts. This will take some effort but can be done. The most
visible change anyway the extension (11 inch = 9 mm in 1/32 scale)
NOTE: in later
years, conversion parts could be bought in stead.
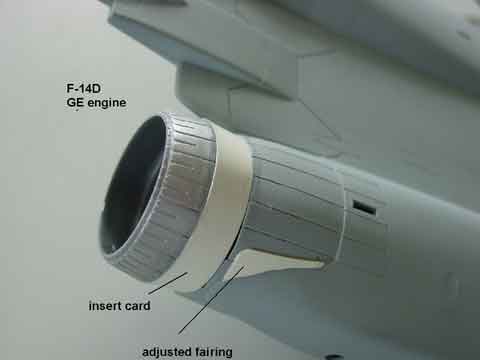
- (5) nozzles with slightly adjusted
rear fuselage fairing
- (6) new nose pod with double chin (to be seen on next page...)...
Also some slight indication was found that the F-14D has a slightly different nose radar cone shape as a new radar is fiited and slightly changed upper fuselage airflow guide fences; howver, I could not determine the exact shapes and the various pictures seem to indicate hardly distinguishlable differences between various Tomcats. So it was decided to leave these kit parts for the F-14A and shapes as is...
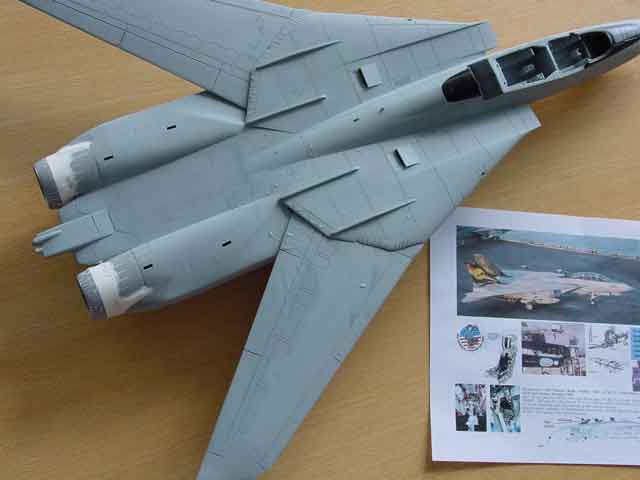
The overal airframe of the kit was
assembled, sanded and some putty applied as necessary. Some work is needed
at the intakes (to remove seams) and the rear fuselage.
After the basic greys coats being applied, the model was given its final overall grey colour of Gull Gray FS36440. As a typical version with black tails and fins plane was to be made, contrary to what is stated in the many decal instructions, the overall grey colour is the "normal" FS 36440 gull grey for most low visibility Tomcats. The enamel paint Humbrol Hu 129 is a good match.
Detailling was done.
The F-14D model first requires an updated cockpit.
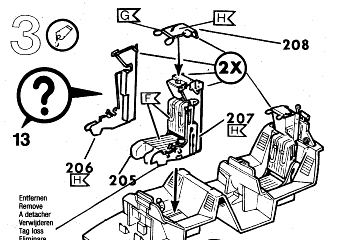
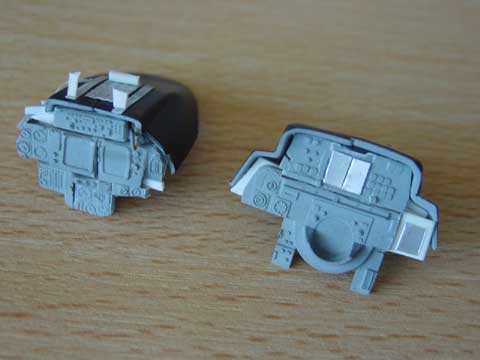
[A] For the F-14D type MB-14 NACES
seats, it was found that the kit's seat parts could be used. The basic
seat was assembled using parts 205-208. The next step was to cut of the
upper head "rest" section of the plastic seat. The upper head rest was
reduced in length at the rear section.

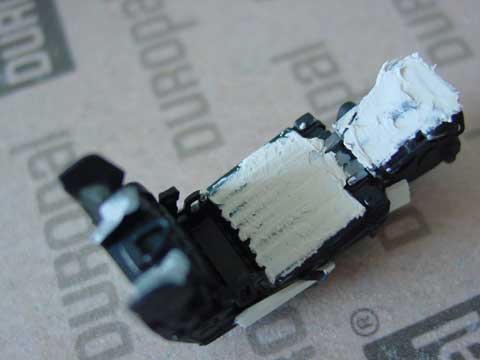
The gaps and irregularities on the
seats were filled with putty and sanded. Of the lower seat parts, the seat
cushions/parachute pack was also filled with putty and sanded. To the seat
structure (parts 206 and 207) an additional plastic strip as added. Nerxt,
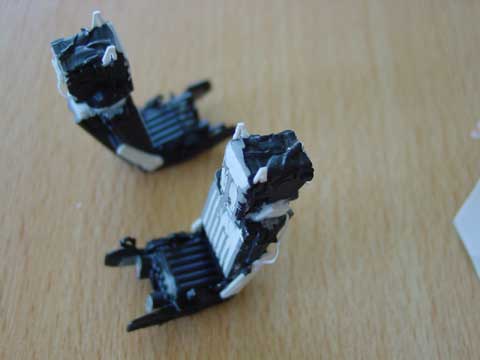
the headrest was again glued on to of the seat BUT in reverse position!
This way you get a very good representation of the basic NACES seat in
plastic. Final steps are further fine detailling by adding small strips,
handles and seat buckles and straps.
[B] The instrument panels need re-arranging
to get a good F-14D layout and adding some larger instrument rectangular
CRT panels. The basic kit's F-14A intruments can be used and re-arranged.
For both rear and forward cockpits this can be done.
The instrument hoods/covers were
given some additional details with strips of plastic.
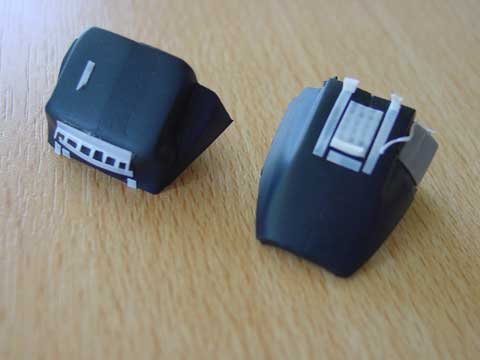
At this point all major parts were
sprayed a mix of matt dark grey/black.
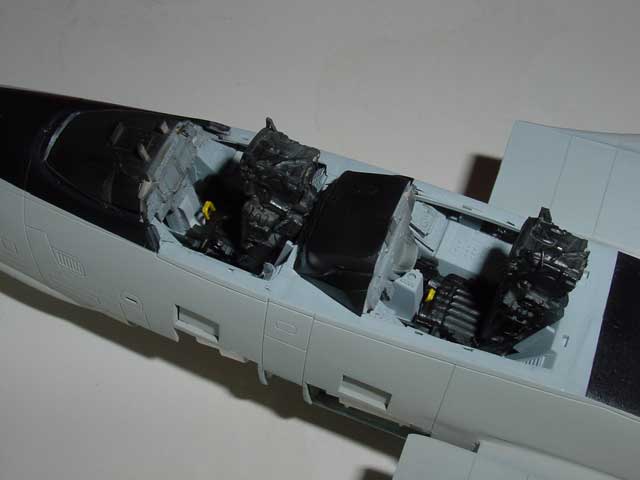
Most parts
seen in the cockpit section, not yet glued in place.
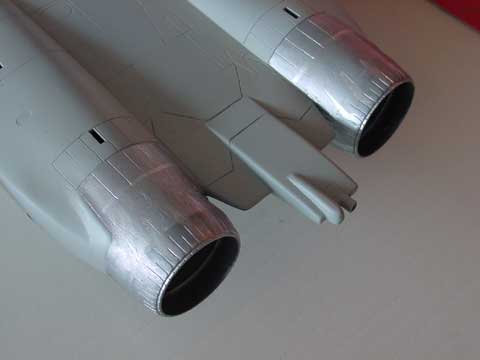
The new converted exhausts of the GE engines of the F-14D are seen here with a first coat of paint. Final metal coats and shadows will be added later on.
The overall F-14D kit was given a coat of Gull Grey FS36440. Please not that CAM Decals instructions INCORRECTLY state other colours, but it depends on the period and squadron.
On to next [ Page 3 ... ]
(c) Copyright "designer"/ All rights reserved. Your comments are welcomed by webmaster
Created this page May 25, 2003