[ page 2 ]
1/72 scale Hasegawa Grumman E-2C Hawkeye
del
... continued from page 1...
Heller from
France also released a 1/72 injection moulded kit of the Grumman E-2C
Hawkeye in 2025 and early 2026 also issued another kit release. The
kit has about 200 parts and offers the option to set the wing straight
or folded, flaps retracted or deployed and other small options such as
either a E-2C or E-2C+ 2000.
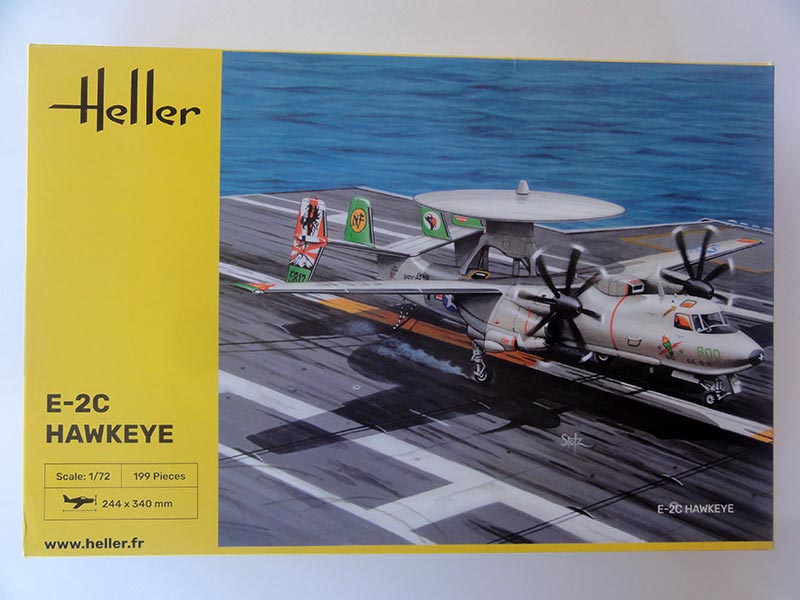
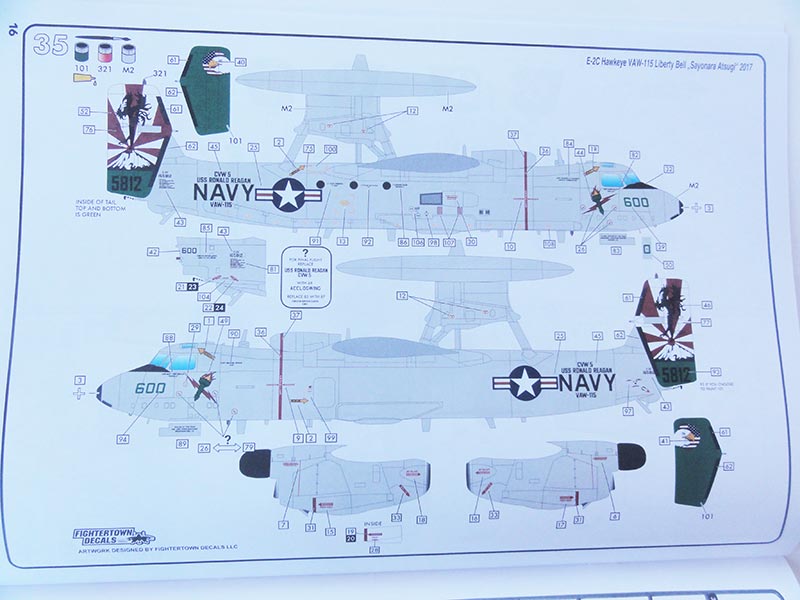
[release 1] E-2C kit #82300 released in 2025 has markings for 1 US NAVY VAW-115 "Liberty Bells" E-2C 2000 flown from Atsugi Japan, 2017. It has US NAVY gull-grey scheme and you get the extra fairings of the E-2C 2000.
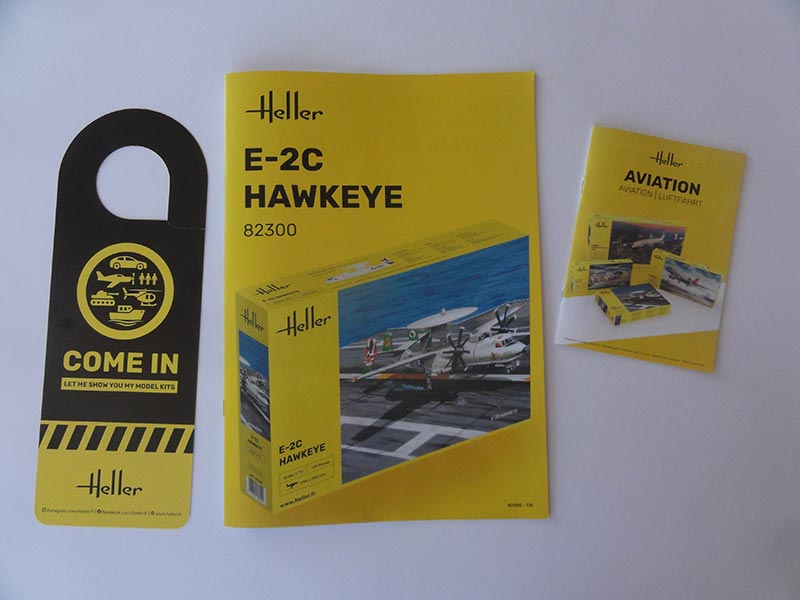
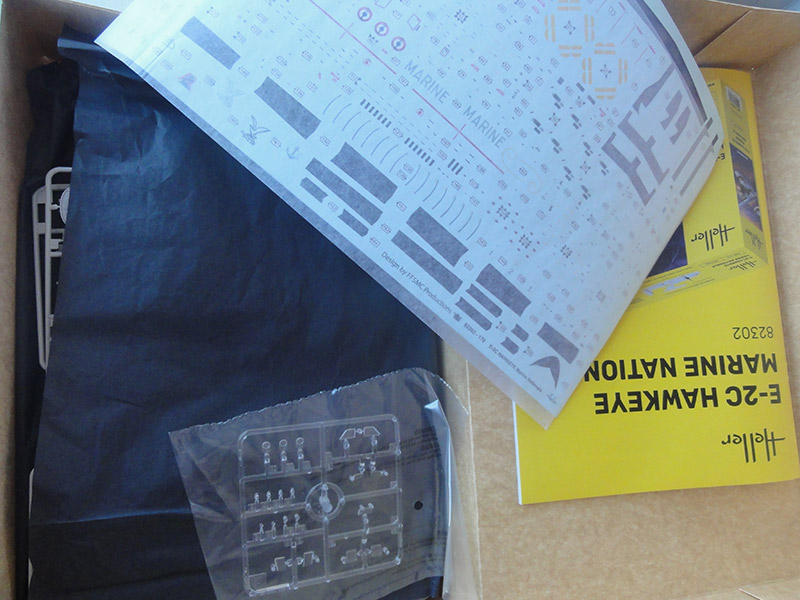
The kit has a large yellow upward opening box en the package has black paper sheets between the sprues and decals to avoid scratches. And you will find a goodie: a DO NOT DISTURB carton in the box and kit promotion leaflet....

The US NAVY scheme' decals look really good and accurate and are designed by "Fightertown". Colours look accurate. The various black leading edges are also decals but it is better to mask and airbrush these black. But you have only one scheme though nice option for the "Liberty Bells". But you get the extra fairings of the E-2C 2000.
... and the other kit release...
![]()
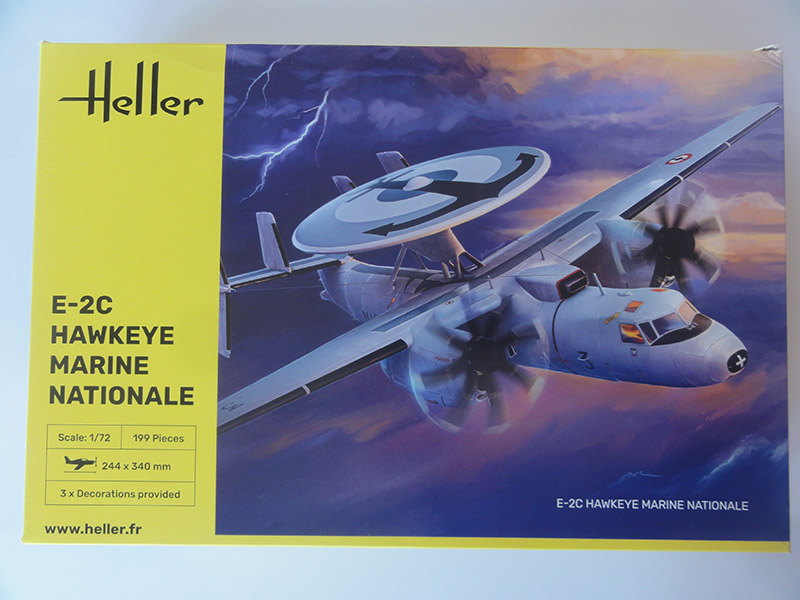
[release 2] E-2C Heller kit #82302 released February 2026 came with markings for France Marine Nationale E-2C FR1 DLM flown in Afghanistan 2004 or an France updated E-2C+ of Groupe II. Both have overall grey schemes.
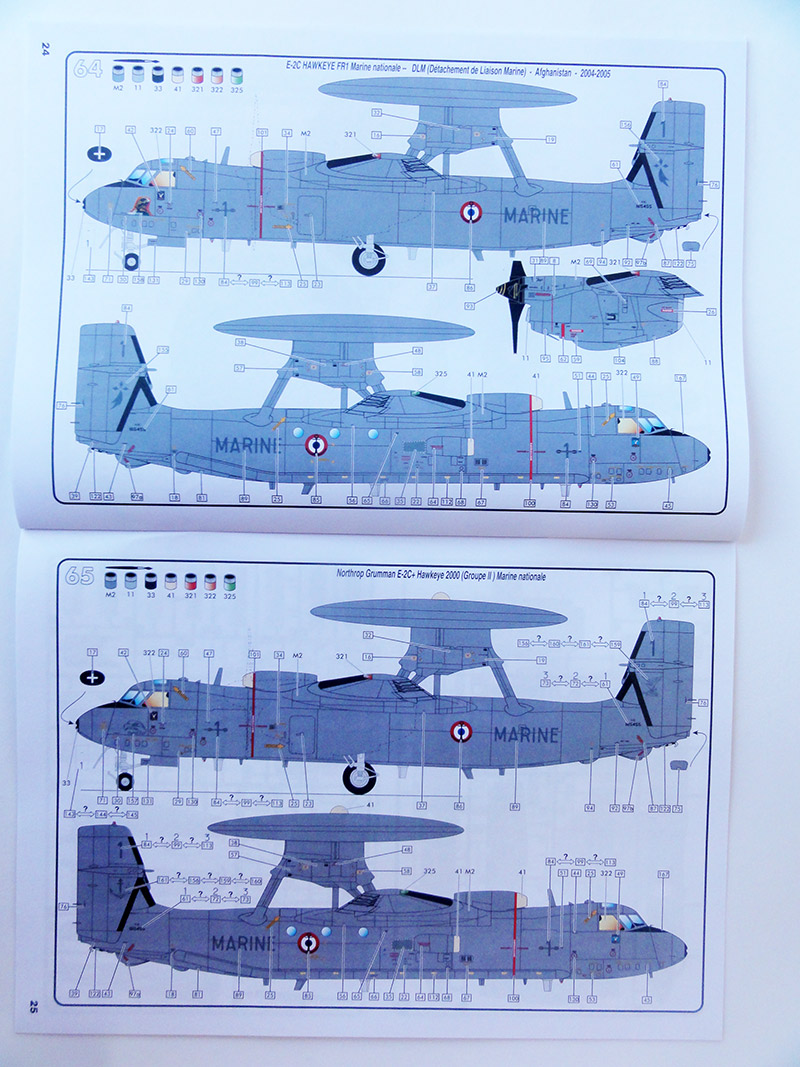
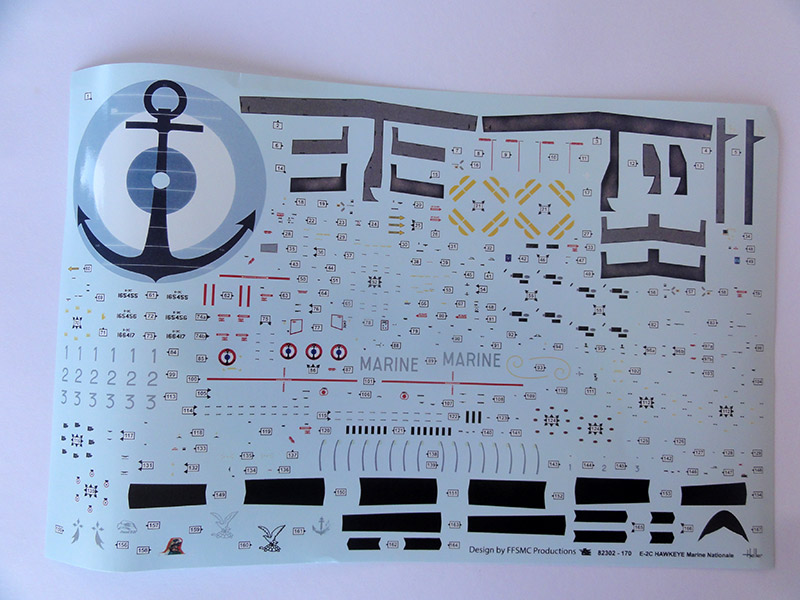
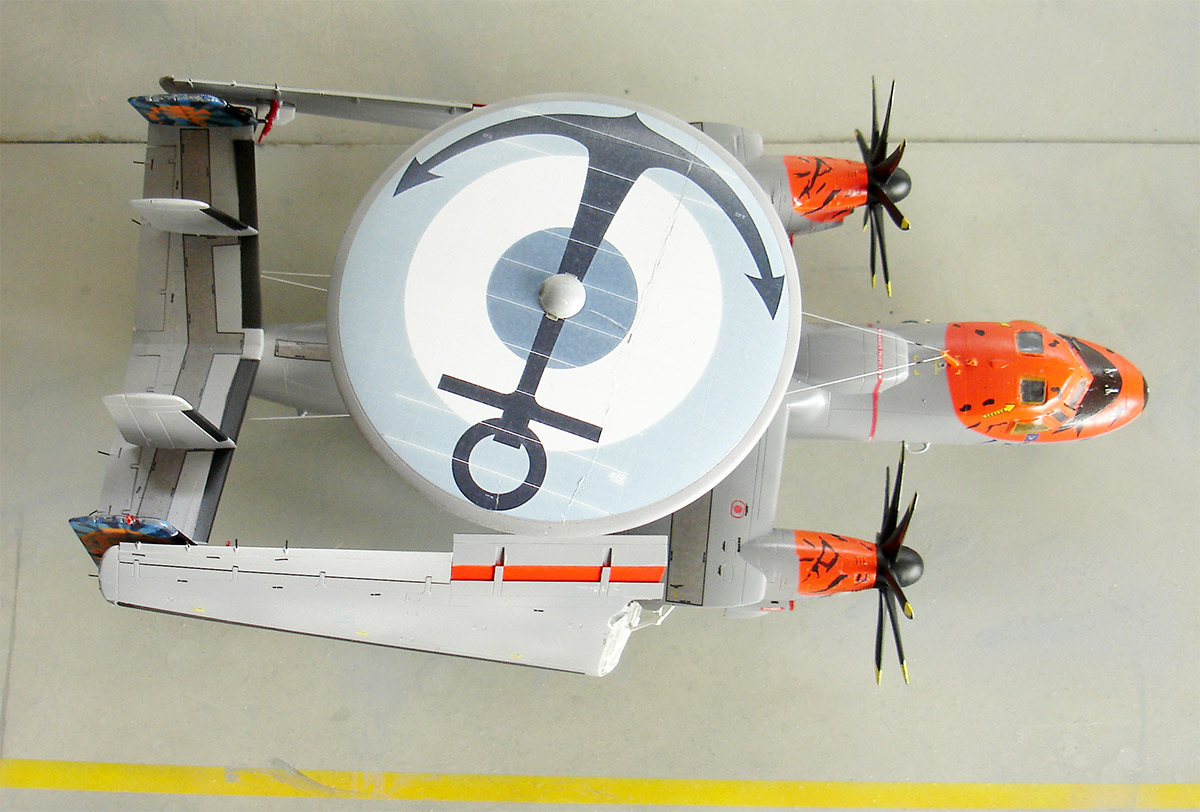
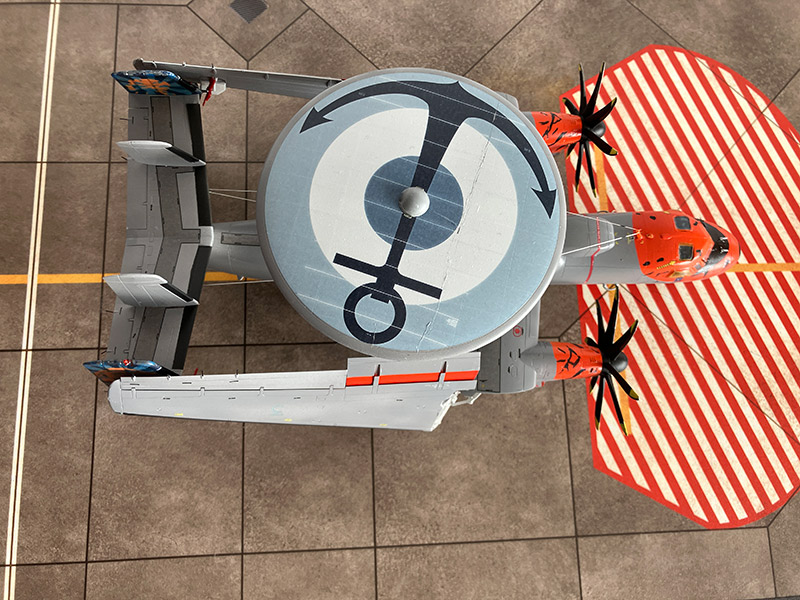
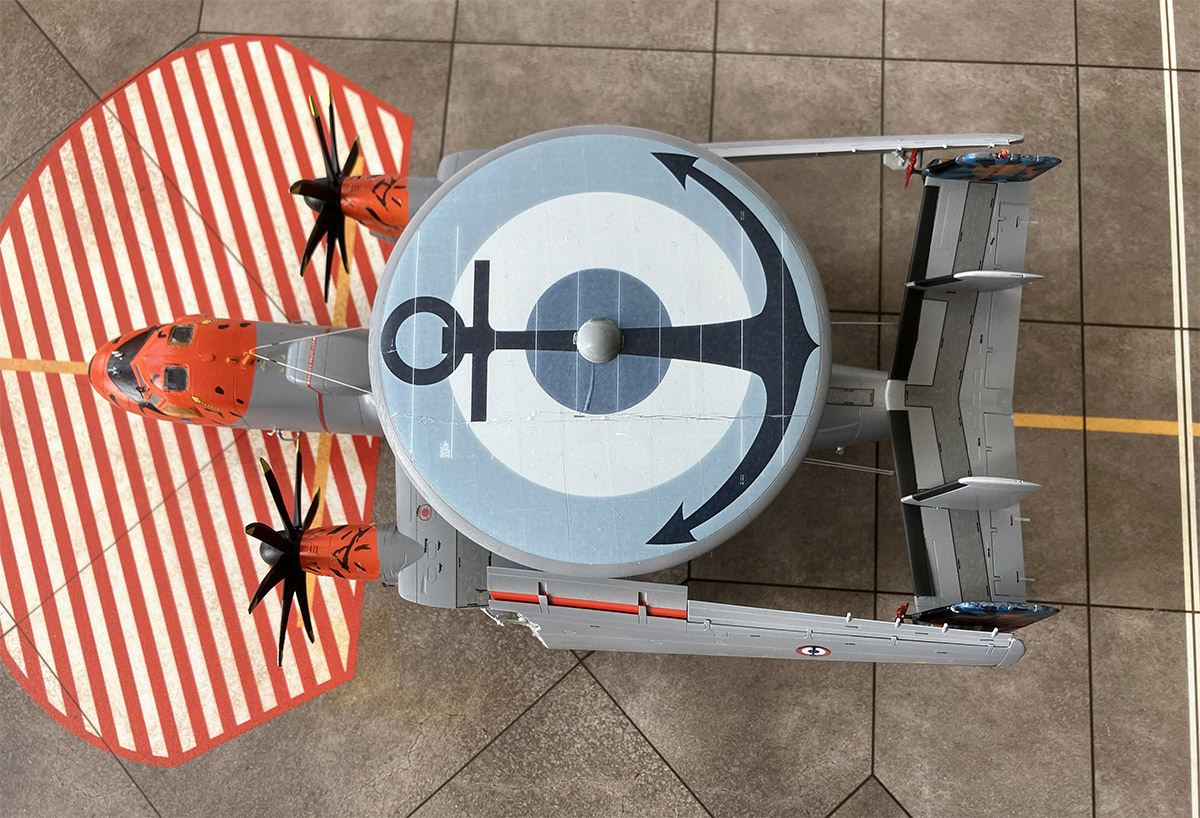
These France MARINE NATIONALE decals sheet has a large anchor marking on the radar radome that stands out. The
decals look really good and accurate. You even get 2 styles of walk way
markings. The various black leading edges are also decals but it is
better to mask and airbrush these.
![]()
The parts are similar in both kits but obviously another decals sheet and slightly different instructions.
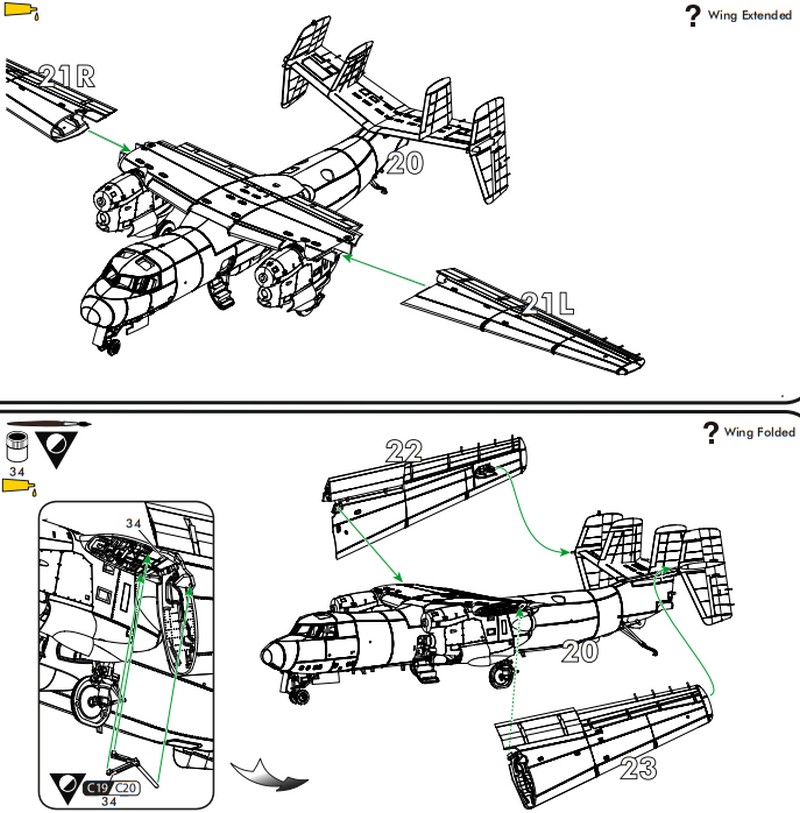
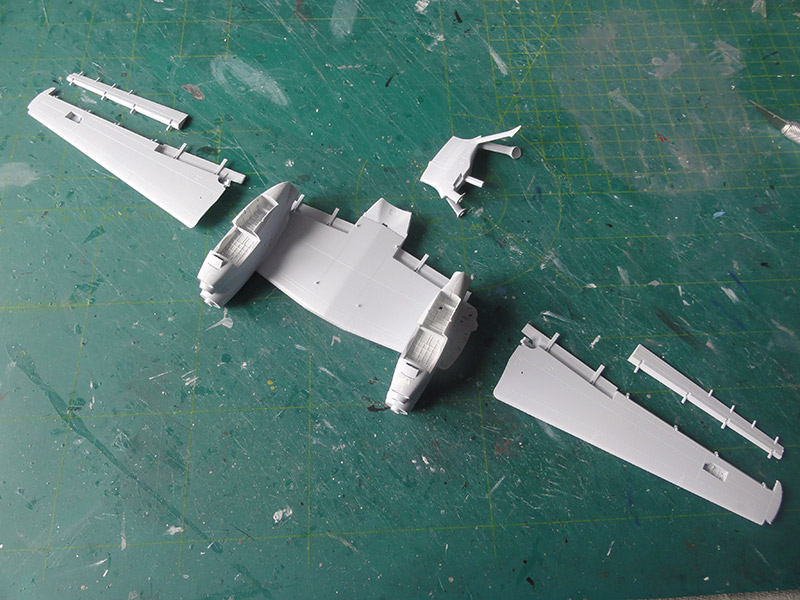
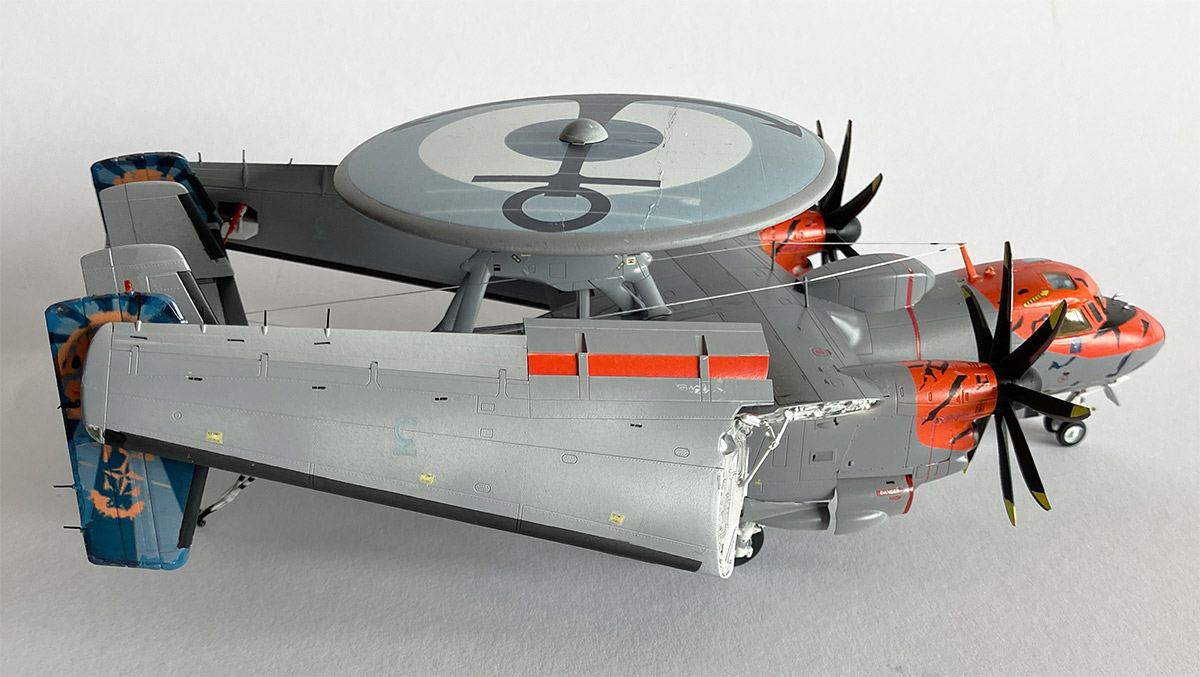
The kit offers the very nice option to either build the kit with straight unfolded wing (as the only option in the Hasegawa kit) or to set the main wing folded.
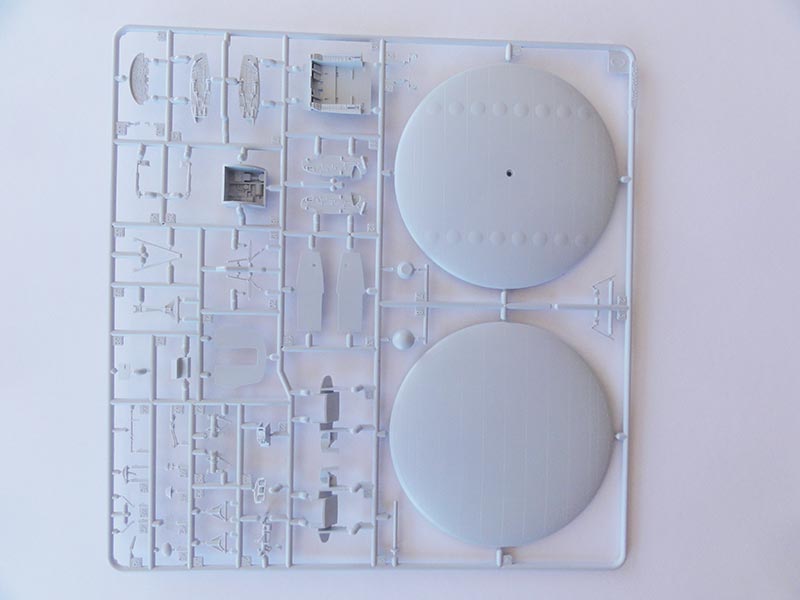
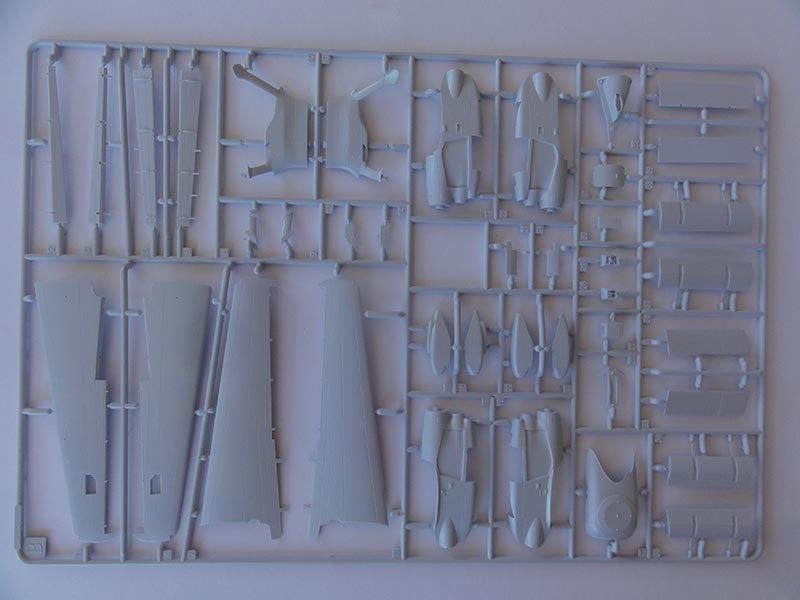
The kit has some 5 sprues with soft light blue
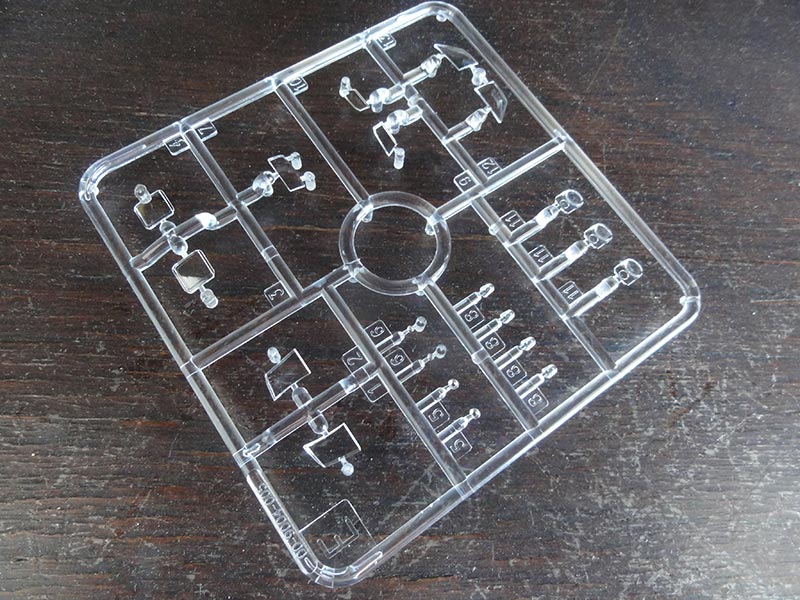
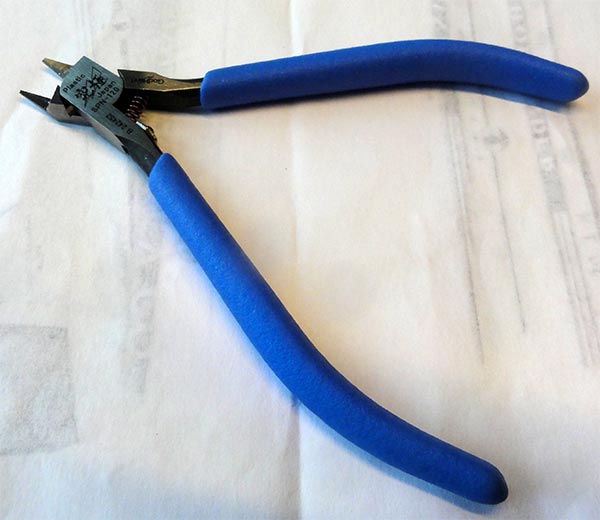
plastic and 1 clear sprue for the transparant parts. The slide mould
technology enables extra detailling in parts with recessed panel lines
but this means the sprue part gates need clean up.

... (sprue Dx2 not photographed)
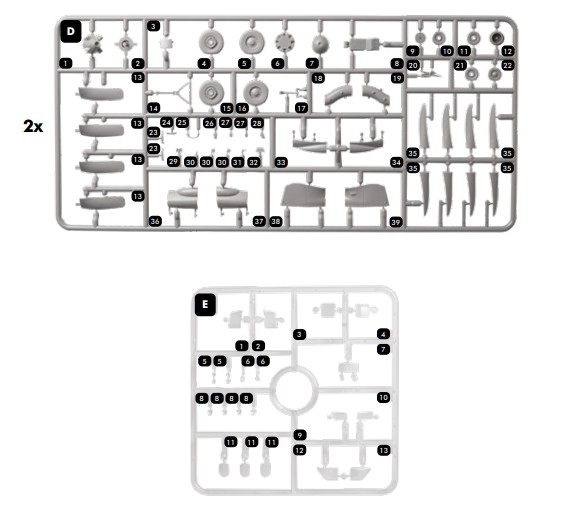
The kit offers both the old style 4-bladed propellers or the later curved 8-bladed propellers.
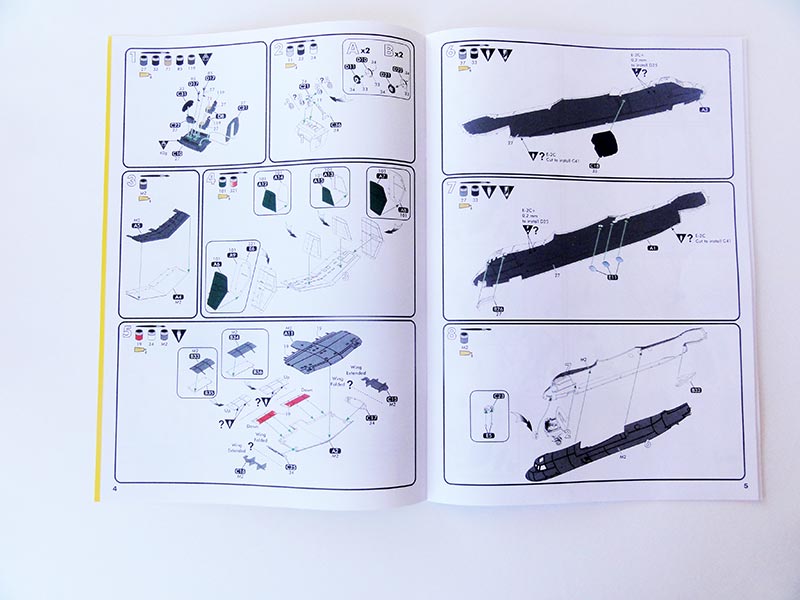
The kit instructions with some 35 build STEPs are
clear and have colour illustrations and details op the colour paints.
The order of assembly is not always the best approach to make this kit,
please see the suggestions below on a better waqy to build this kit.
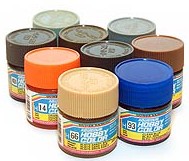
Paints are indicated in the Heller acrylic paints (probable the M series) and also Humbrol (numbers) and some paints are to be mixed.
You very nicely get the option in this kit to set the wing folded and also to set the main crew door open which is nice. No
full interior in the cabin is provided but a part to suggest some
interior; this is fine as not a lot will be seen anyway.
Some nice other parts are for extra fairings
of the E-2C 2000 as well as some extra antennas. This is clearly
indicated in the instructions.
The plastic in light blue is very nice to work with and not very brittle/ hard and enables easy sanding and clean up.
The kit windows are all separate parts and I found that they need a specific order during assembly to fit the windows.
BOTH KIT RELEASES WILL BE PRESENTED THOUGH MADE IN DIFFERENT SCHEMES
The first kit was made in a FRANCE MARINE NATIONALE scheme using many of the Heller kit #82302 decals but with a home custom made Tiger meet scheme. More about that later on.
The order of assembly as suggested in the instructions is not always the best approach to build the kit. I found out when making the first kit and SO will make suggestions that are quite ESSENTIAL to get a far easier build. The various STEPs will be presented in better order.
PREPARATION STEP
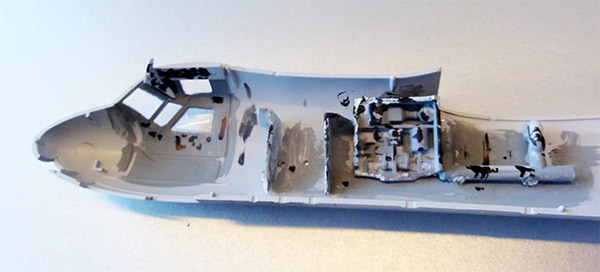
In the kit instructions the cockpit transparant windows are to be set quite late in the assembly (such as in STEP 56). I found out that it is not very smart to do so. The transparant parts have a tight fit and need some pressing to set in the openings. When installing the risk is surely loosing a transparant part inside the cockpit and you will never get it out. It is FAR BETTER to set the cockpit windows FIRST before joining the fuselage halves. If done so, you have a multiple chances...
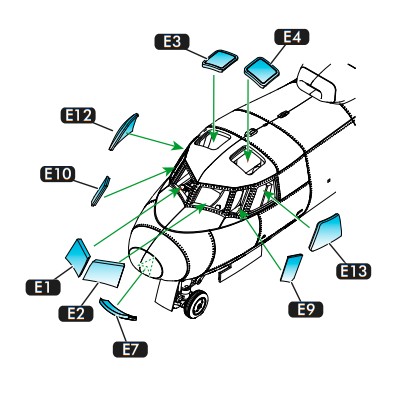
So the cockpit windows were separated from the clear sprue, clean up the part' edges. Than first dry fit each. Each window opening got at the edges HUMBROL CLEAR FIX to fix the window and each window part was set in the appropriate opening. Slightly press a window in the opening and you will see that each one will fit nicely.
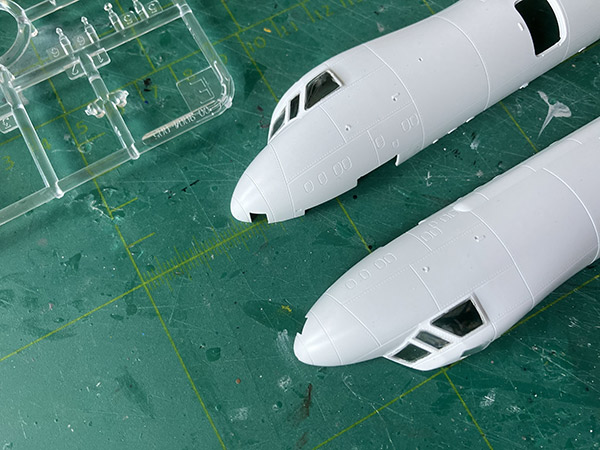
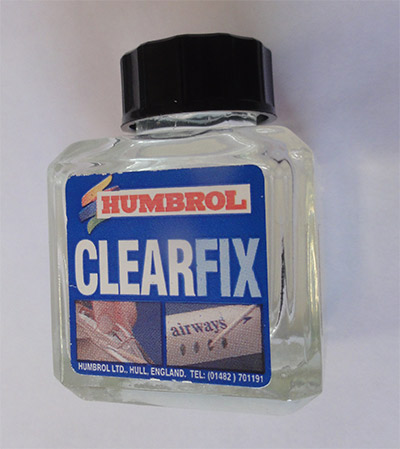
So please install the windows as first step in each fuselage halve! And fix with HUMBROL CLEARFIX in the gap edges.
After fixing with CLEARFIX, let dry for a few hours. Next at the fuselage insides' carefully strengthen the window fixation with thin plastic glue with a fine brush; obviosuly avoid and spills.... The windows are now nicely set and let dry.
STEP 1
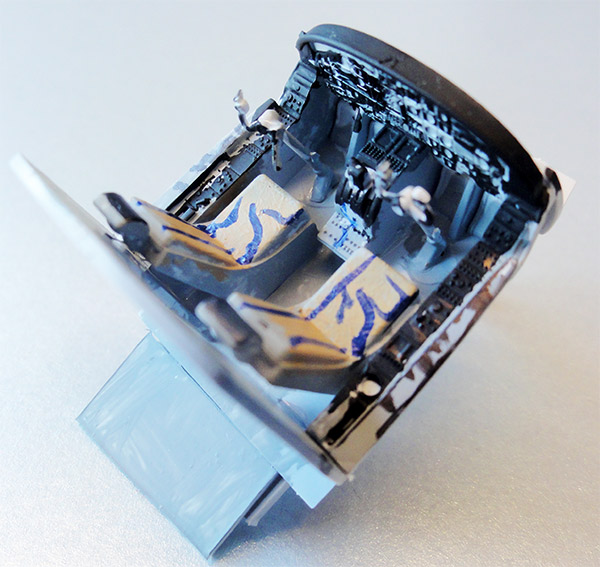
The next step is the cockpit assembly as per kit instructions. The kit interior is OK and I painted the main interior as well as the cockpit sides medium grey. I did not know the colour of the pilot seat pads, HELLER suggests green. Some seat straps were also suggested with paint. The instrument panel and consoles have raised details, these were drybrushed black.
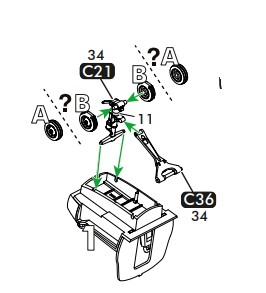
STEP 2
This deals with the nose gear and I found that installment of the gear strut with their pegs is needed before fuselage halves are joined. Part #C21 is a small number error, it is #C24. The main colour here is white.
STEPs 3 - 7
These deal with the tail fins and stabilizers but I did not install these yet on the horizontal tailplane as in STEP 8. It is better to first airbrush the paint scheme as it needs masking the black leading edges.
STEPs 9 & 11
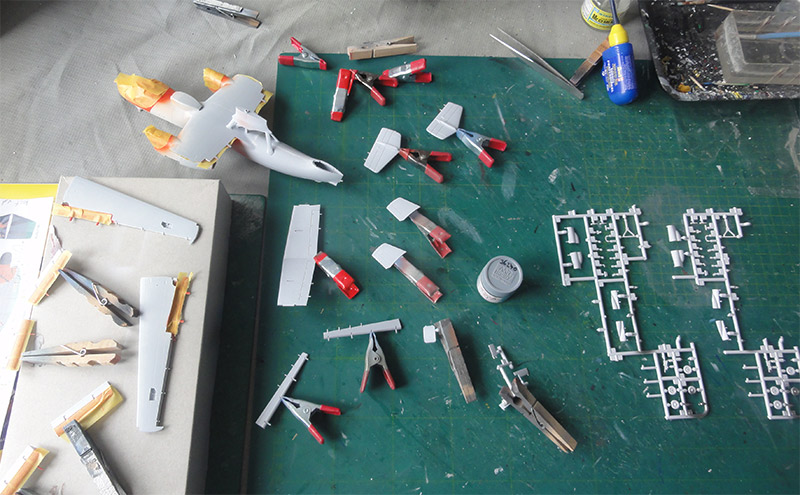
This deals with the center wing section. I opted to set the wing folded and on real Hawkeye photos the flaps are seen deployed so do not remove any bit from the flap tracks (see STEP 10 and STEP 13).
The flaps "down" parts were not yet installed but will get paints airbrushed first and that includes red areas inside.
(STEP 12: if you opted for the straight unfolded wing Heller provides inside parts #C15 and #C16 to get strong wing joints. Very good).
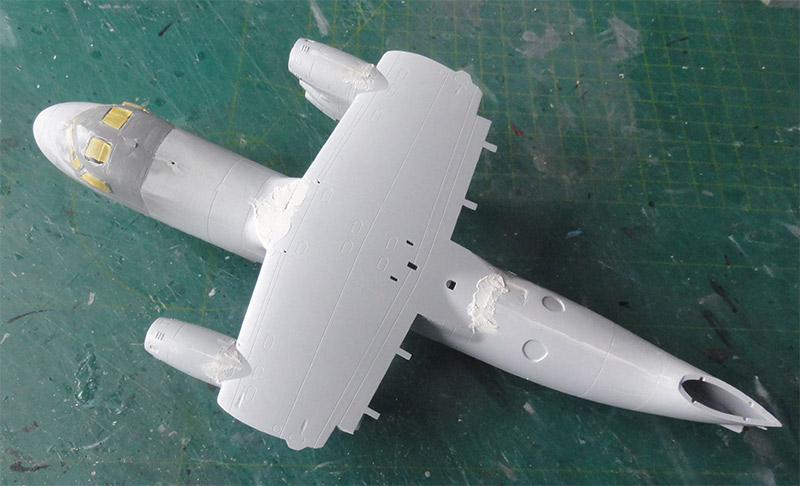
STEP 15
As noted, the cockpit windows had been installed FIRST (see above...)
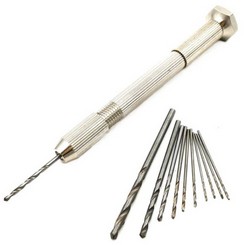
Drill open the tiny holes as instructed with a drill for U-shaped antennas. (Note that not all Hawkeye aircraft have these).
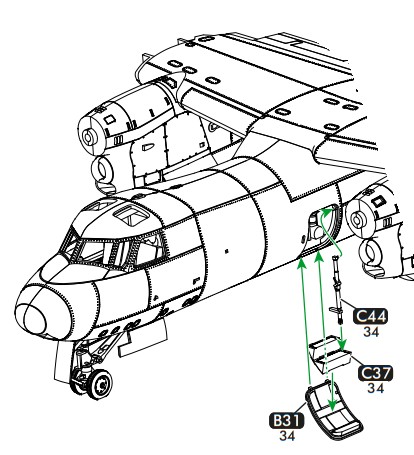
I opted to set the crew door open which is a kit nice option. Inside the cabin I did not set part #C18 but suggested some more depth. Some bits were set and painted. Later I found out that it is not worth the extra effort though as nothing is seen.
STEP 16
Install from the insides' the 3 rear starboard cabin windows #E11. The small hatch #C38 was installed as well as seen in STEP 19. I found that the cockpit upper console #B26 interfered when closing up the fuselage and I did not use it as it is invisible anyway.
STEP 17
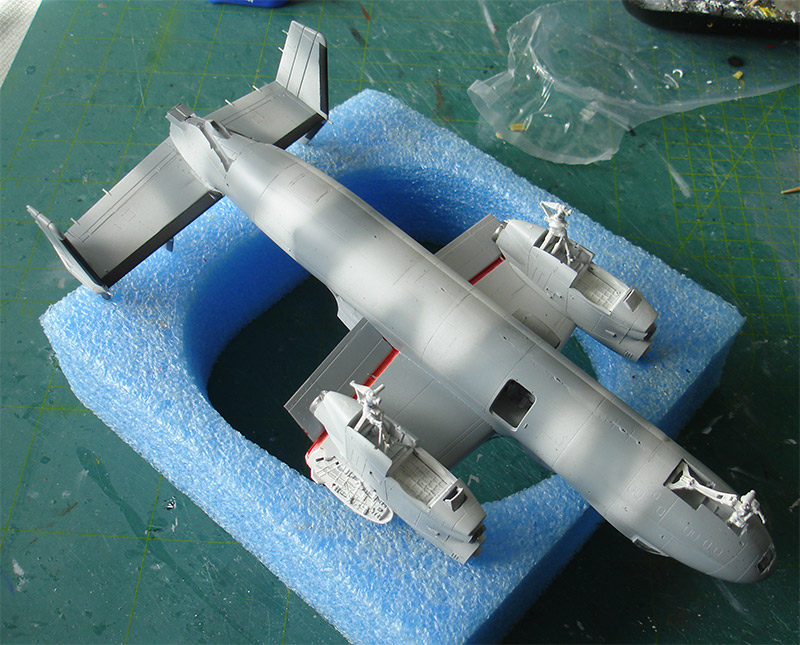
This deals with the fuselage halves joining and closure. The model will be a tail sitter and enough weight in the nose is undo'able being at least I think 50 grams! I do not dare as the gear legs will not survive and will use the tail hook and scrap made transparant rod later on. The fuselage halves joins OK but still needed putty and sanding.
STEP 18
I could not figure out where part #A10 is needed to be installed and it is quite small and not installed.
STEPs 20 - 30
These deal with the engine nacelles and main landing gears. Note that the gears are handed and do not mix up the parts! STEPs 25,26,27 are for the left port and 28, 29, 30 for right starboard. The main nacelle interior and gear colour here is white.
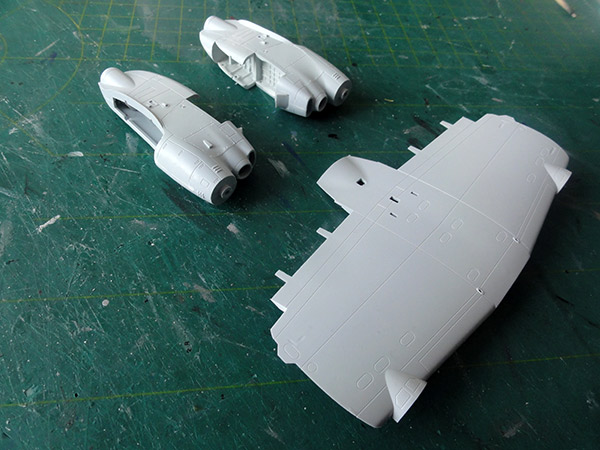
(I later decided that it is easier to install first the strut parts #C29+D14 and #C30+D14 and than close up the nacelles; the remainder of the struts parts were than set. That will be done for the second kit made).
STEP 19
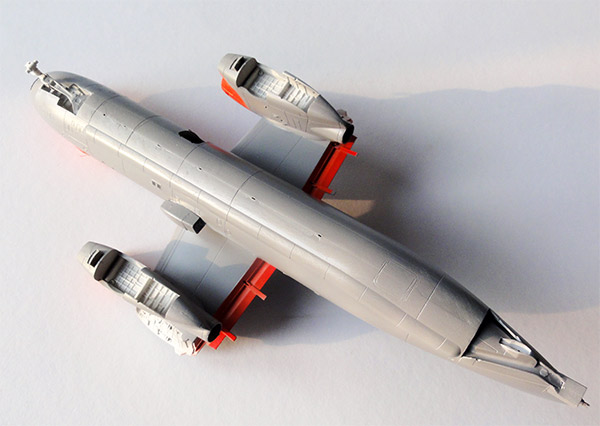
The main center wing section was set. The horizontal stabilizer will be set after it had gotten the paint scheme and the masked and airbrushed black leading edges. The starboard cooling fairing was also set.
Just some putty and sanding was needed at the joints and do this before installing the cooler fairing.
STEP 33
The nacelles fit excellent on the center lower wing section. The MARINE scheme is one colour so the nacelles were installed.
TIP: airbrushing first the nacelles is possible if you prefer.
Now fill gaps with putty and wet sand. Particularly thus at the upper center wing joints, fuselage belly and upper points. The transparancies were masked to protect these and for later airbrushing.
STEPs 31 - 35
These deals with the gear doors, wheels and smaller bits like antennas. These will be tackled after the model had gotten the main paint scheme. I retained these parts still in their sprues for easier airbrushing with white insides'.
STEPs 39 - 45
These deal with the main outboard wing sections and as the folded wing option was choosen, assemble as shown.
If you opted for the straight unfolded wing go to STEP 46. Heller provides inside parts #C15 and #C16 to get strong wing joints.
STEP 47 & 48
Leave for later but airbrushed were the small wing fold lock doors.
STEPs 52 - 53
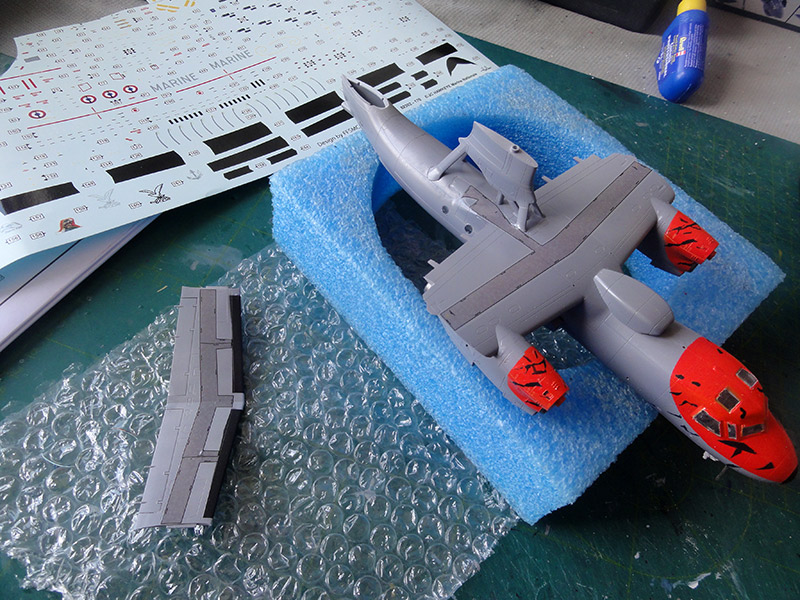
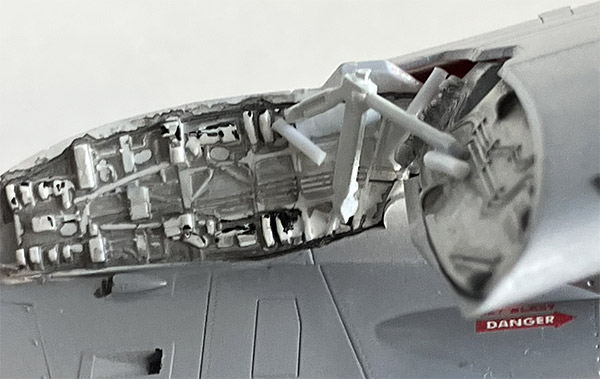
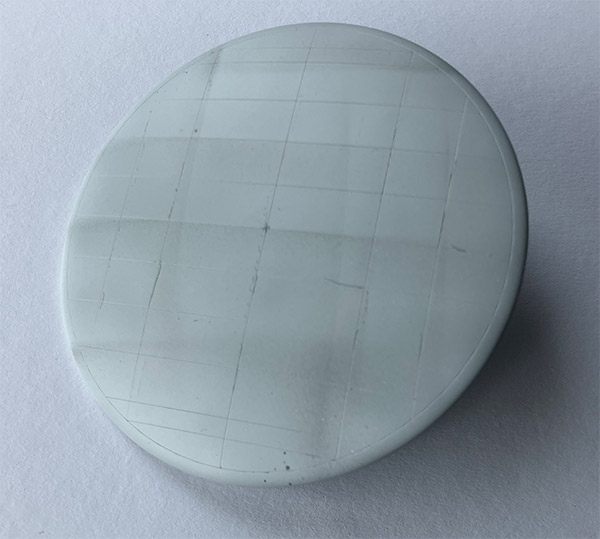
The main radar radome with support strut is now tackled. The main radome edges needed some tiny amounts of putty and sanding. Do not yet install the small dome #C8 or #C7 on top of the main radome.
I found out that inside the mast parts #B10 and #b13 in lower aisle hole needs to be a bit wider. I also needed to shorten the rod part #C9 about 2 millimeter. Do not yet install the large radome.
NOTE: here are seen the aileron static dischargers from the kit at the trailing edges; later it was decided to cut these off and replace them with black thinner stretched sprue.
STEP 54
The upper cooling intake #B20+B23 was made, note that also the other type parts are in the kit. It fits OK on the upper front fuselage.
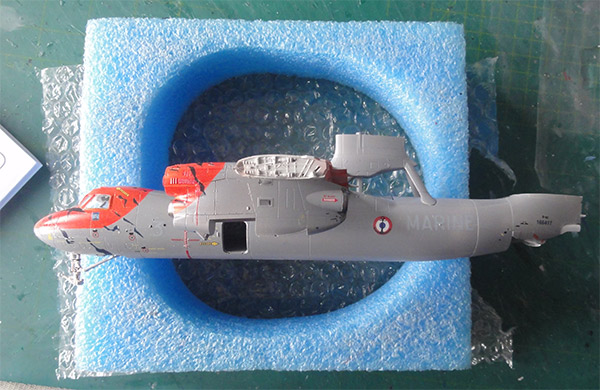
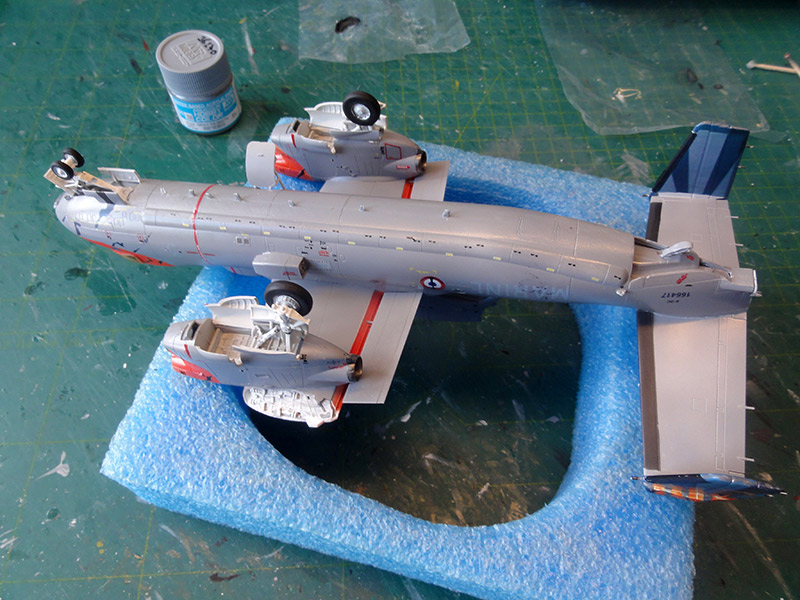
The main colour scheme was now to be airbrushed.
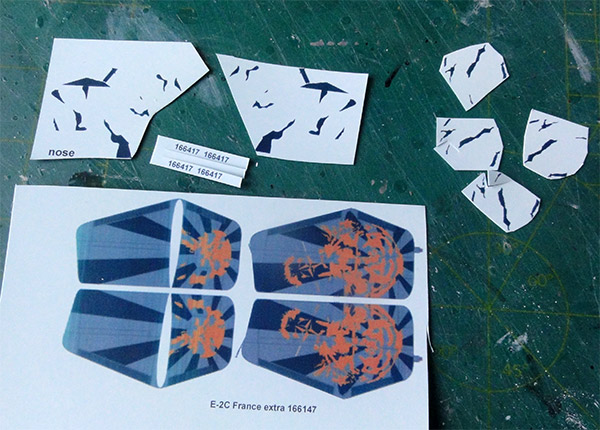
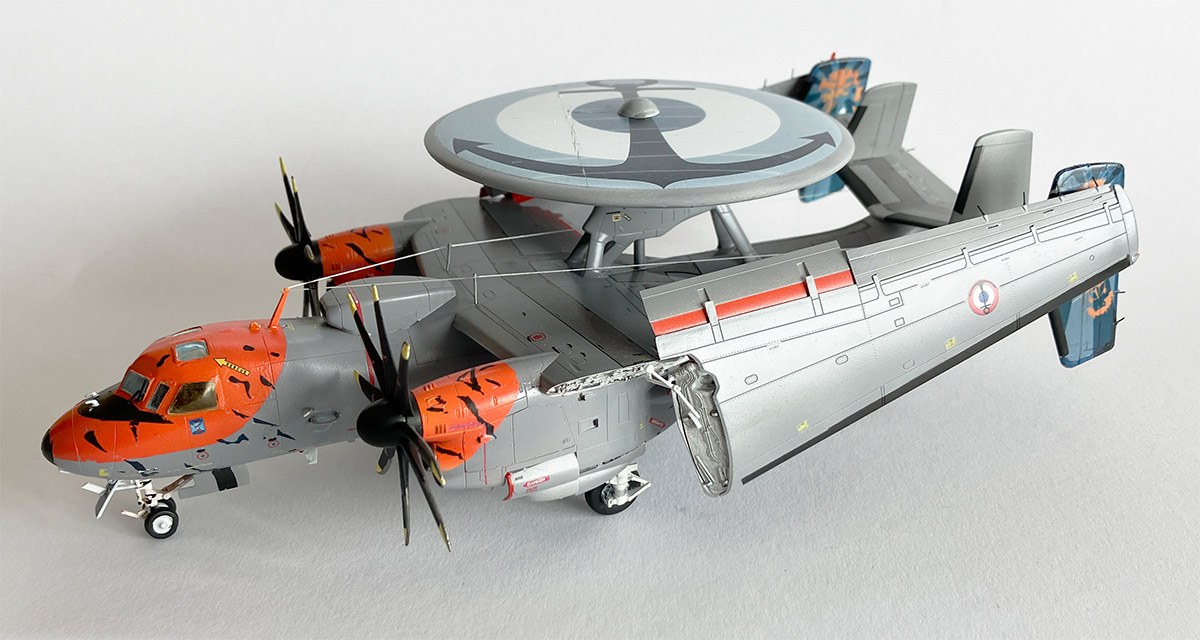
The French MARINE NATIONALE E-2C had a scheme of overal grey. The scheme still looked rather dull...
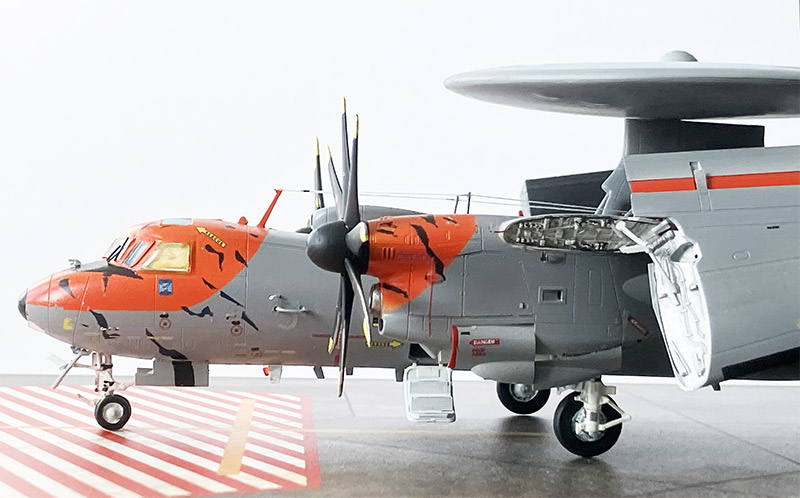
So it was decided to add some special Tiger Meet 2016 markings. E-2C serial number 166417 of the 4F Flotille had orange areas with black tiger stripes on the nose and upper nacelles as well as nice vertical stabilizers markings. Looking at various photos found on internet, I designed the decals and these were home laser printed. The serial number was also custom printed.
Back to painting....
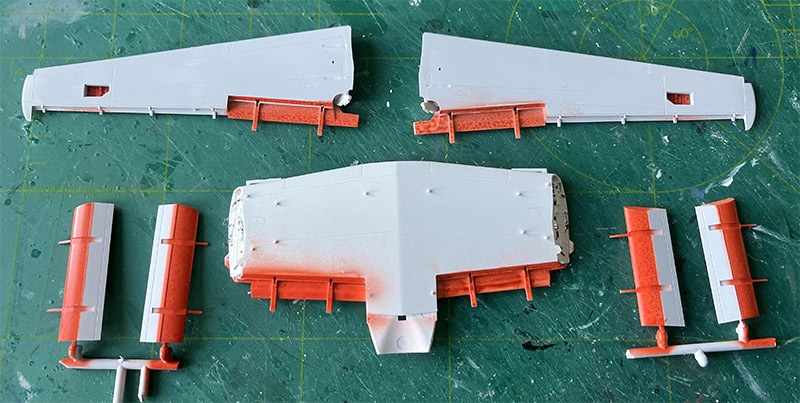
Many smaller parts were still in their sprues like gear doors. This for easier airbrushing prior to their installment. For example, insides' of gear doors white and the various areas of the (deployed) flaps and lower trailing edge were airbrushed bright red.
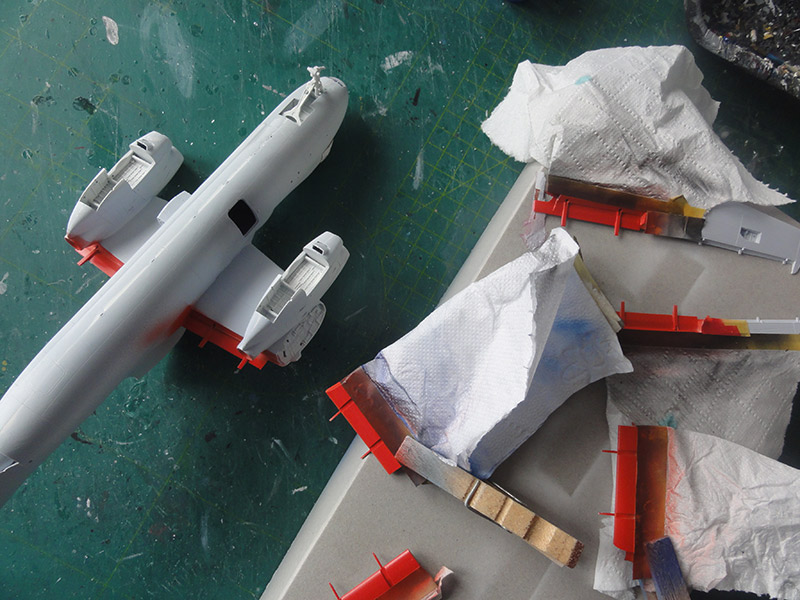
I opted for a more colourful Tiger scheme.
The special Tiger orange areas were airbrushed Gunze Sangyo H14 orange on nose and nacelle areas.

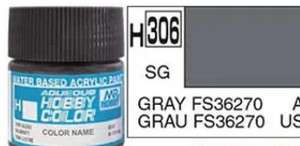
For the main overall aircraft grey the Heller paint instructions suggest M2 grey (or a mix of Humbrol 64+34 ?). I think the actual colour is FS36320 for which Gunze Sangyo H306 acrylic was airbrushed overall.

The black leading edges of outboard wing, stabilizers and tailplane were not made with the kit decals but after masking airbrushed mat black. As the 4 vertical stabilizers were not yet installed, these were easily separately airbrushed. Also the inner stabilizer fins FS36320 have a black leading edge.
The larger outboard stabilizers got a white paint and the edges painted FS36118.
The model was now almost ready for decalling but I airbrushed first a few coats of gloss varnish to avoid "decal silvering" (that is the air bubbles get trapped below a decal, spoiling the appearance). Johnson Pledge acrylic gloss varnish was airbrushed with the usual technique. (or use your own favourite technique).
The home designed and custom printed tiger stripe decals were on one continous laser printed sheet and all these stripes were cut out. The remainder of the model got the standard kit decals like the national insignia on the wing and fuselage. The grey aircraft number "3" is also from the kit decals sheet as well as the small blue badges below the cockpit window.
For the anti-glare panel in front of the windscreen the kit decal was used. When all had dried, on the outboard stabilizers the 2x2 custom printed tail decals were easily cut in correct size and applied.
I had an issue with the large radome anchor decal: it broke in half! So be carefull here!
After decalling, the complete horizontal tail unit with the tiger markings was installed on the rear fuselage.
STEPs 58 & 59
These deals with the propellers. The kit offers both the old style 4-bladed propellers or the later curved 8-bladed propellers. For the choosen MARINE NATIONALE Tiger scheme, the 8-bladed curved propellers were needed. These were assembled, airbrushed black. The yellow tips and dark metal leading edges were hand painted though Heller provides decals for these.
STEP 57
The final bits like gears, doors and the many small antennes were installed. In the nose is a panel for the landing lights, these were set.
The crew entry door as per kit was set open as well.
STEP 37
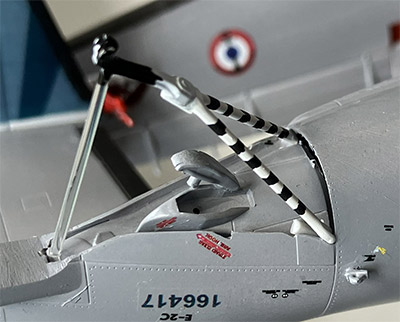
The tailhook was painted white and got black tripes. Note that the rear hook bit is a separate part #C39. The hook was used to keep the model on the nose gear, so avoiding tail sitting, together with a transparant stretched sprue rod from scrap.
STEPs 49 - 51
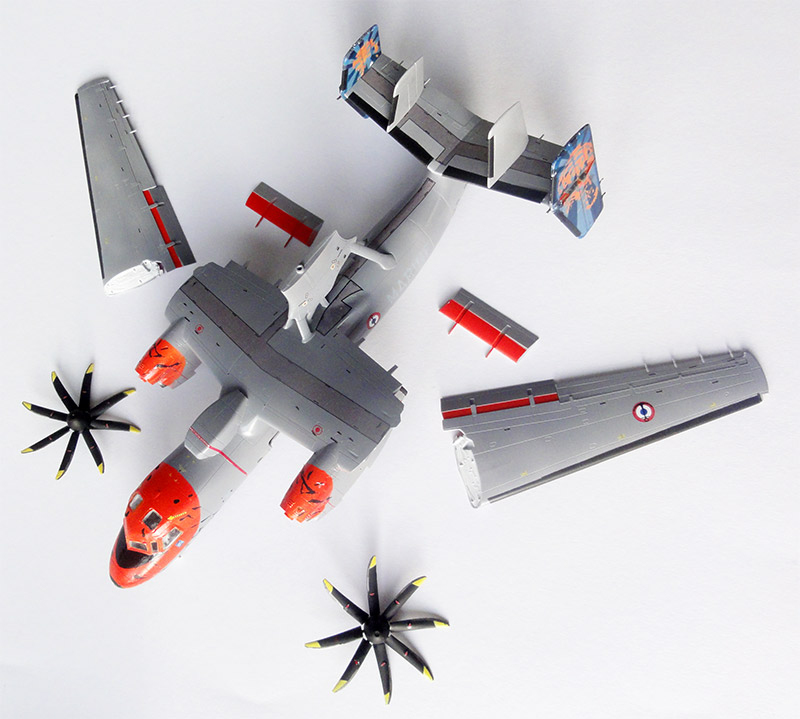
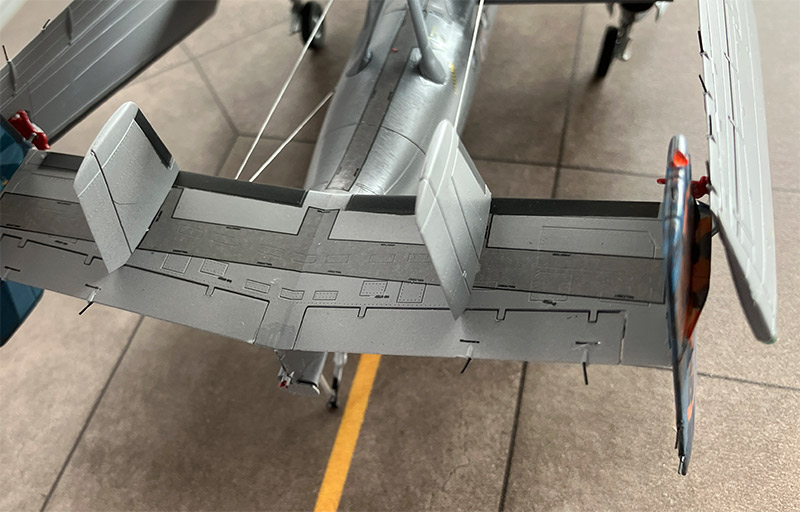
The wing flaps were set deplolyed and extended. The 2 folded outboard wing sections were now installed as seen in instructions STEP 49. It took quite some figuring out how to set the outboard wing sections fixed to the horizontal stabilizer. Each wing tip has an open panel with hold bar #D20 as seen in STEPs 47 and 48.
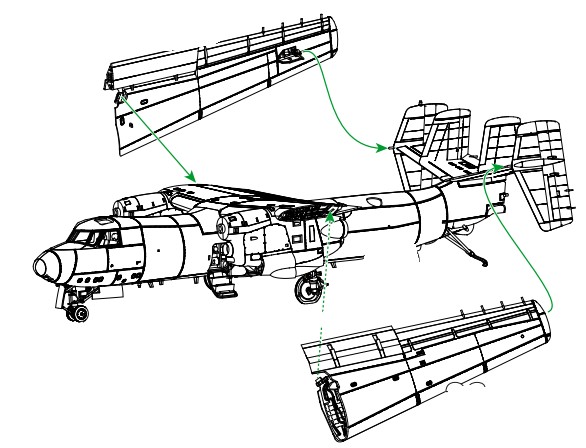
The lug to fit/ fix each outboard wing at the hinge panels is quite small. I added some extra white rod bit to get stronger joints from scrap. The outboard folded wing sections should be set tilted at an angle at about 80 degrees.
A bit drybrushing was done on the wing hinges and bits.
NOTE: I found that on the rear of the nacelles extra RED warning arrows are there; I did not see these on the decals sheet so these were obtained from the spares box.
FINISHING
For the side cockpit windows Heller suggests a transparant orange hue. Photos suggest also a transparant blue hue on the other windows, all for sunshade protection. I hand painted thinned TAMIYA clear acrylic on these windows.
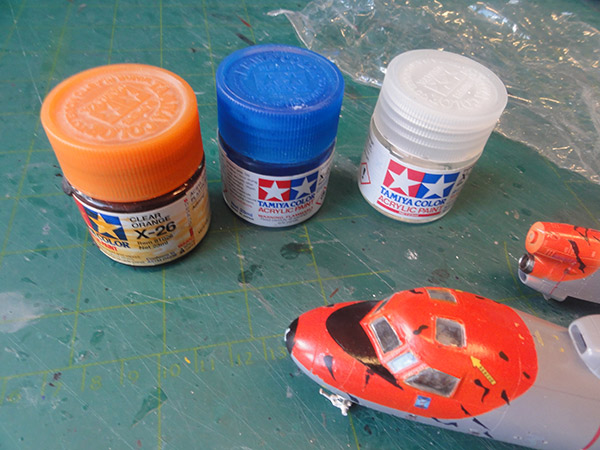
The various transparant anti-collision lights as per kit were installed. A red wing tip light at left/ port and green at right/ starboard with TAMIYA transparant paints. On the belly and up stabilizer are also lights.
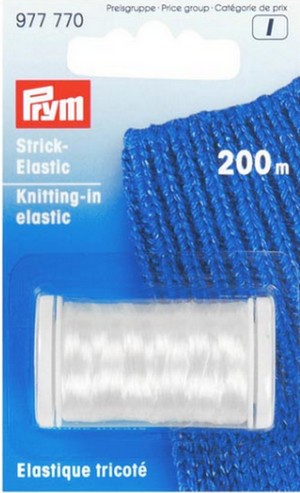
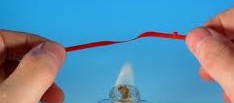
Long antenna wires were seen running from nose to stabilizer. These were made with flex PRYM line and fixed with super glue. I found that the antenna part #C48 on the spine should be some 2 millimeter longer so a new one was made.
On the nose gear door #B30, also an extra blade antenna was installed made from scrap. May be for only the E-2C+.

Antenna #C40 was not seen on the real Tiger scheme aircraft and thus not installed. Note the red belly light.
Probe part #C32 was replaced with a small L-shaped bit from scrap.
I replaced the wind screen rain wipers #C5 and #C6 with finer black stretched sprue.
The prepared curved blade painted propellers were installed.

Not a lot of weathering was done, just some wash in the gaps of the controls. The overall model got a semi-gloss varnish to get an even sheen and to protect the decals.
After having a better look at photos, it was decided that all static dischargers from the kit are too thick. So all these were cut off and replaced with black thin stretched sprue. Fix with superglue.
Finally the radar disk: I could not clearly see what smaller dome type was to be installed on top of the large radome in STEP 52: #C7 for E-2C+ or #C8 for E-2C. I picked #C8. The radar dome was placed loosely and that completed this model.


FRANCE MARINE NATIONALE
The French naval air service "Marine Nationale" acquired some 3 E-2C Hawkeye aircraft for use from the French nuclear aircraft carrier Charles de Gaulle. The first pair of E-2C arrived end 1998 to be used by Flotille 4F at Lahn-Bihoue. In 2004 a third E-2C+ 2000 followed. The other pair was also upgraded in 2006 and 2007. Some additional updates were done in 2017 and 2019. The aircraft have been used during various armed conflicts including the Arab Gulf and Afghanistan. The French Hawkeyes are to replaced in 2030 by the new generation E-2D.
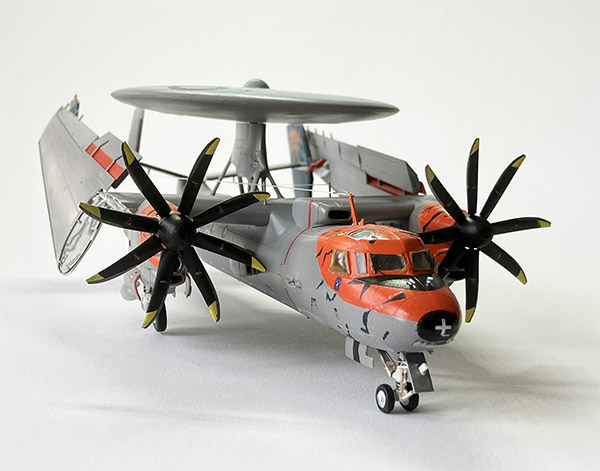
E-2C+ 2000, serial 166417, Flotille 4F, Tiger meet 2016
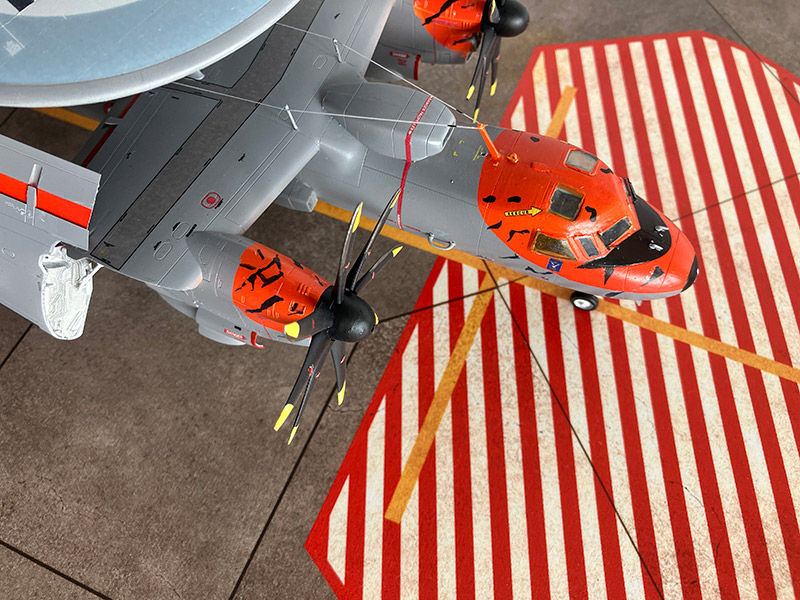

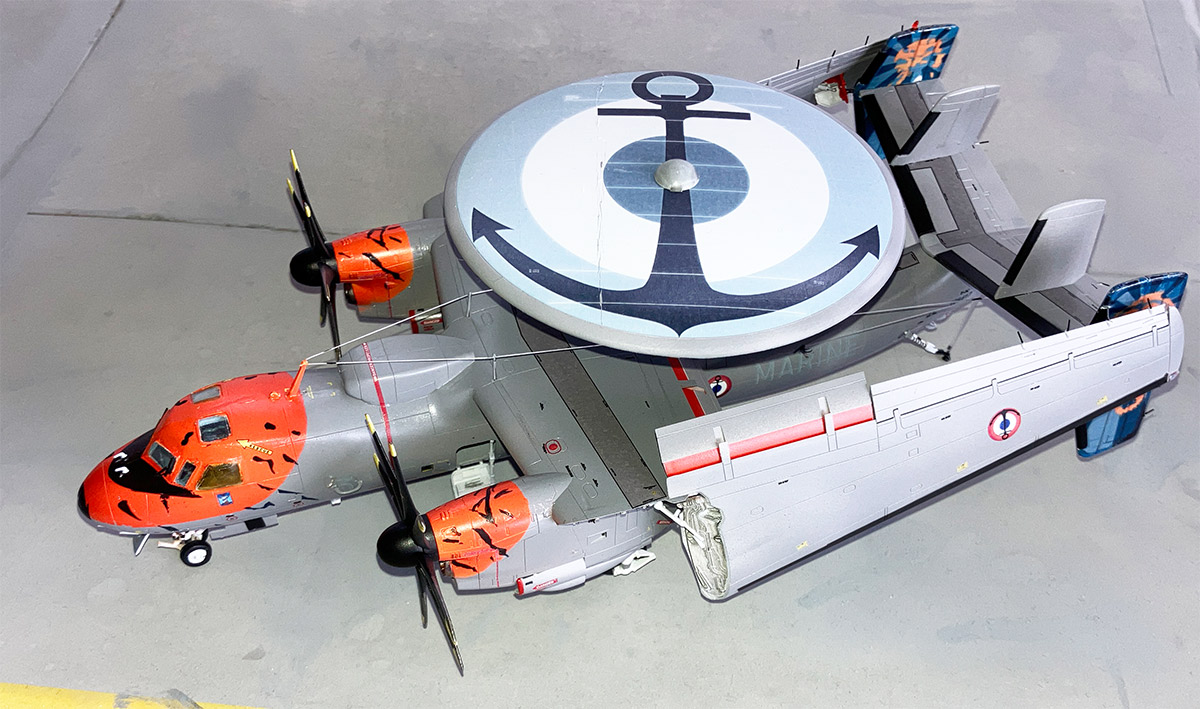
... set in a scenery at Landiviseau France....

The Heller kit kit release #82300 with markings for the US Navy "Libert Bells" Hawkeye was also made. (see above...)
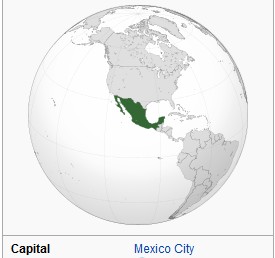
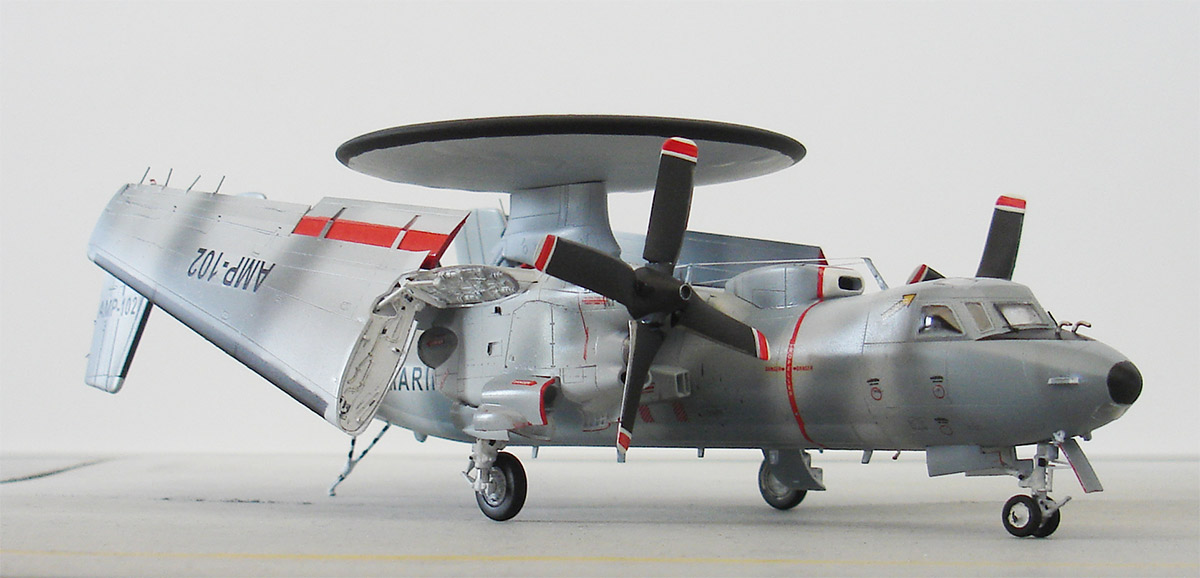
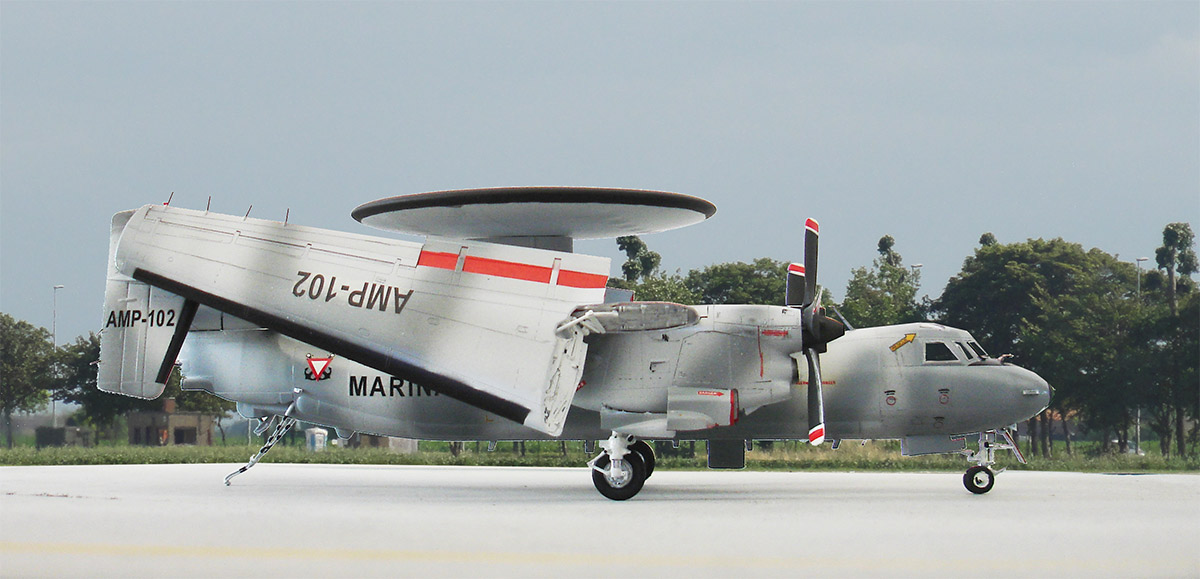
However, this kit will be made as a Mexican Navy "Fuerza Aeronaval - Armada de Mexico" E-2C Hawkeye. From my modelling friend Fernando in Monterrey in Mexico I had gotten some nice AZTEC decals from set 72-034. Thank you Fernando!
Various photos were studied on the internet of the Mexican Navy Hawkeyes. Three ex-Israeli E-2C aircraft were acquired in 2004 and these have a grey camouflage pattern. They have number AMP-100 serial A-41 (ex Israel 941), AMP-101 serial A-42 (ex 942) and AMP-102 serial A-46 (ex 946). These second hand aircraft suffered from maintenance problems and were not used for a lot in Mexico.
Some tips regarding modelling the Heller kit as Mexico E-2C:
Do not use any E-2C-200 or E-2c+ parts.
In STEP 6 do not open up any holes in the fuselage sides aft of the cockpit.
In STEP 19 some slightly different antennas are needed. A larger blade antenna was set at the belly.
In STEP 20 also use the arrestor hook for balancing and a small transparant bit could be set for extra strength.
In STEP 31 do not install parts #D25 for the U-shaped antennas.
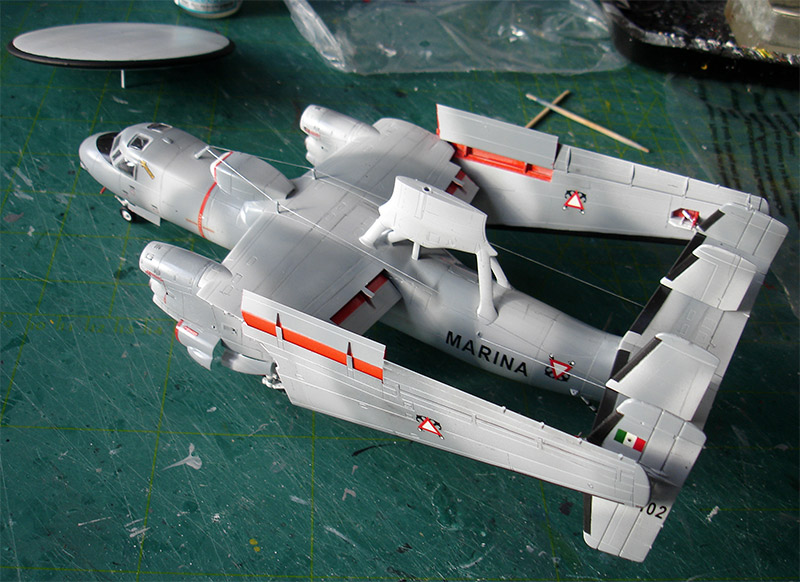
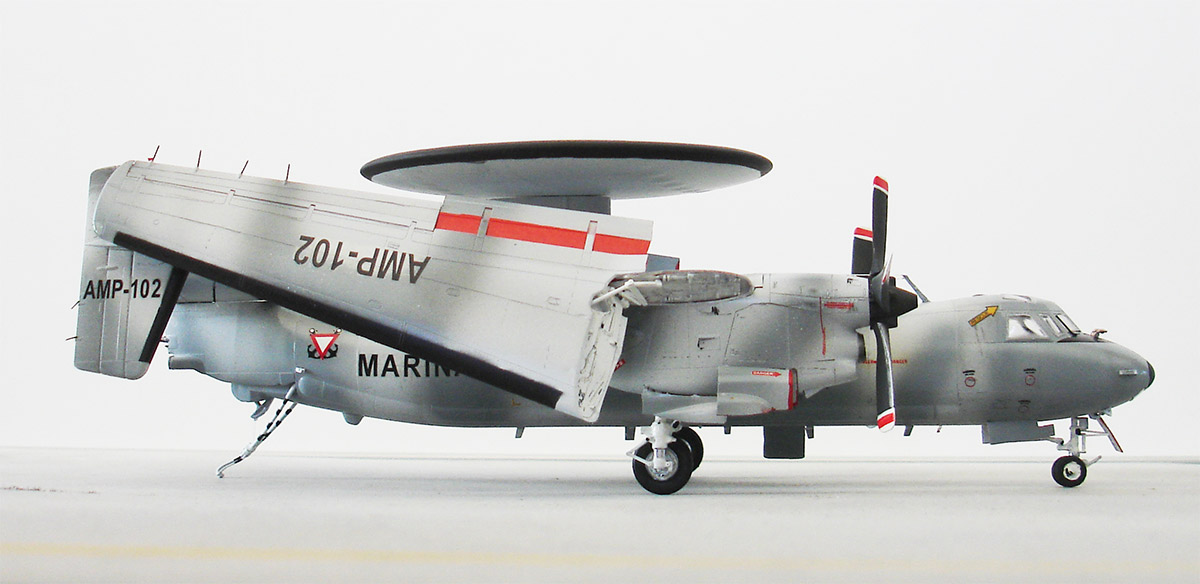
Otherwise the kit was made is a very similar way as described above for the France Marine aircraft and with folded wing.
Again and ESSENTIAL: first the cockpit windows were installed first before proceeding with further assembly.
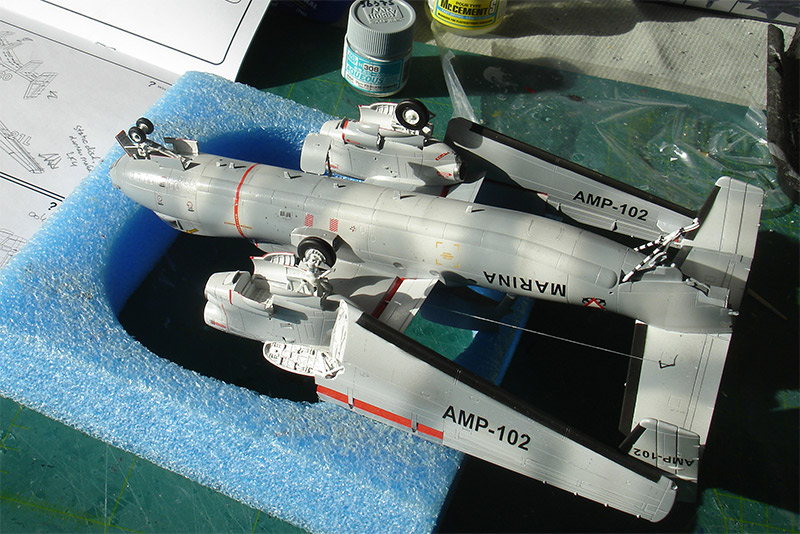
The Mexican E-2C camouflage colours were discussed among Mexican modellers but the general consensus is that FS36495 lighter gray and FS36375 darker gray are good matches. So airbrushed was first overal FS36495 with Gunze Sangyo Mr.Hobby H338 acrylic paint and with loosely masking than FS36375 with Gunze H308.
Some weathering was suggested by mixing in a few drops of white and airbrushing "patches" and lines. Also, a bit darker by mixing in some drops of black. (the radar radome will later get a black edge).
The leading edges of wing, stabilizer and fins were airbrushed mat black after they had been masked.
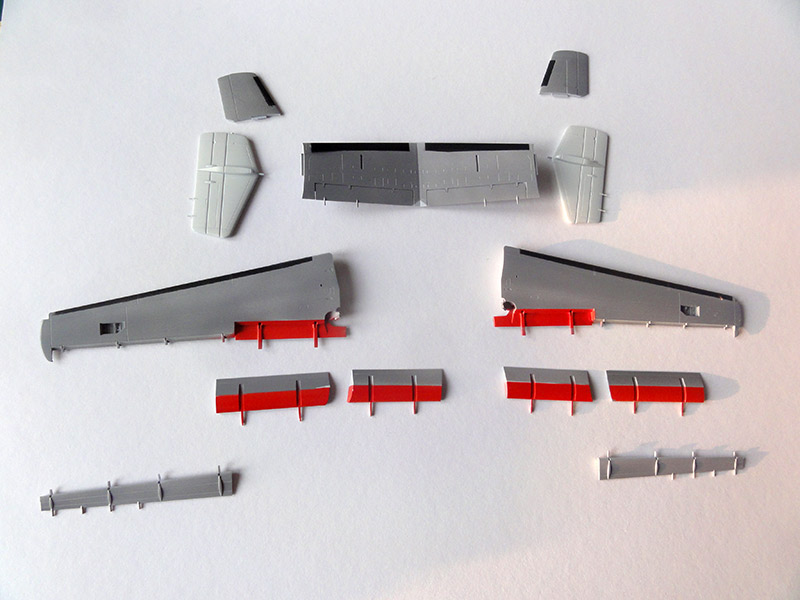
The main parts are seen here...
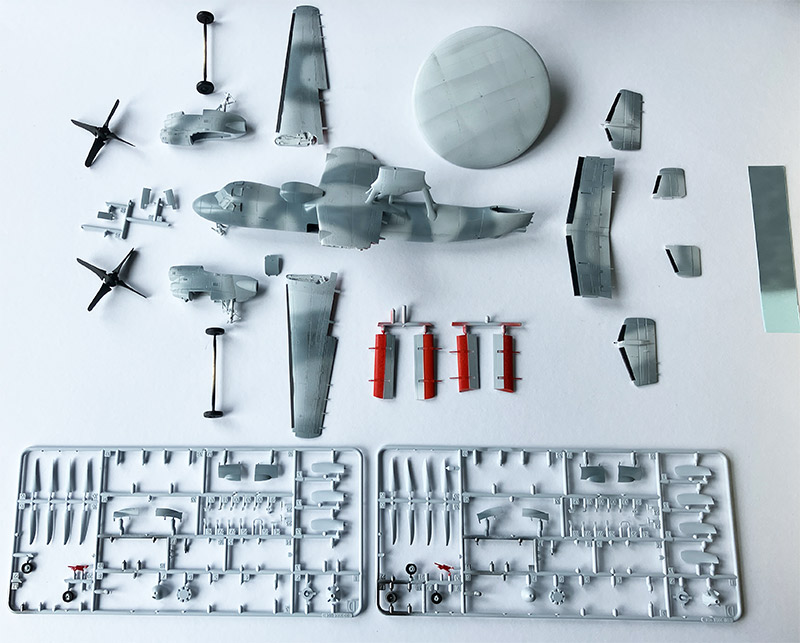
The stabilizer with fins was installed.
I now saw that the big radome on Mexican E-2c also had a black edge and it was painted with a brush by hand.
And it seems that gear doors had thin red "rubber seals" and these were hand painted.
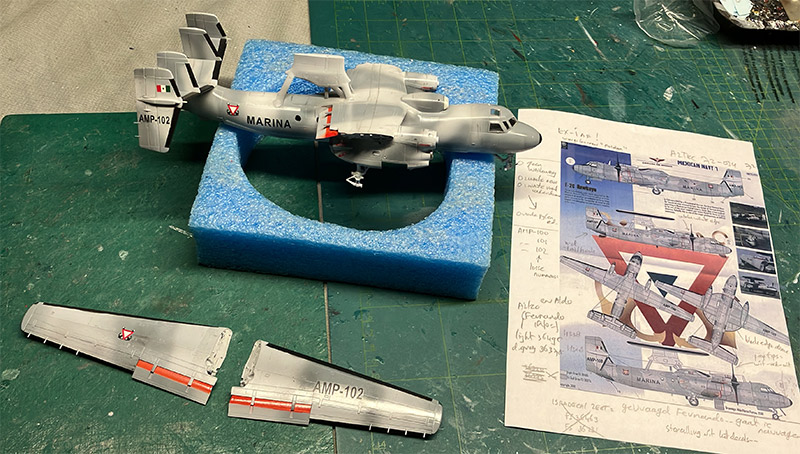
The few AZTEC decals 72-034 were set after the model got gotten a gloss airbrushed varnish coat to prevent "silvering". Mexican Hawkeye coded AMP-102 was picked and the AMP-10 + 2 decals were composed.
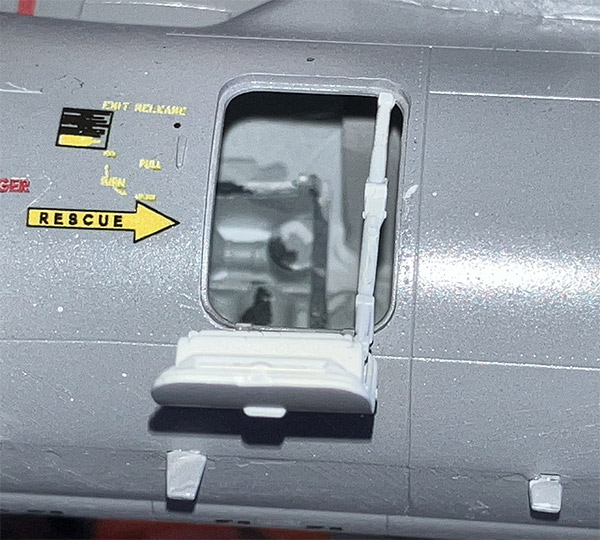
Some other stencils came from the Heller kit but not a lot. I could not verify if the few stencils are in English but assumed so. I also saw that sometimes the RESCUE arrow at the starboard rear hatch is missing. But red arrows were seen on the nacelles and these came from the Heller kit.
I saw that the red propeller warning stripes have white PROPELLER WARNING texts, these decals are not in the kit but were luckily obtained from the decals spares box.

Apparently no walkway panels are clearly seen on the upper fuselage so no decals were set. But I suggested the outlines with a pencil. Also, NO STEPs were not seen on the wing, elevators and flaps so not set.
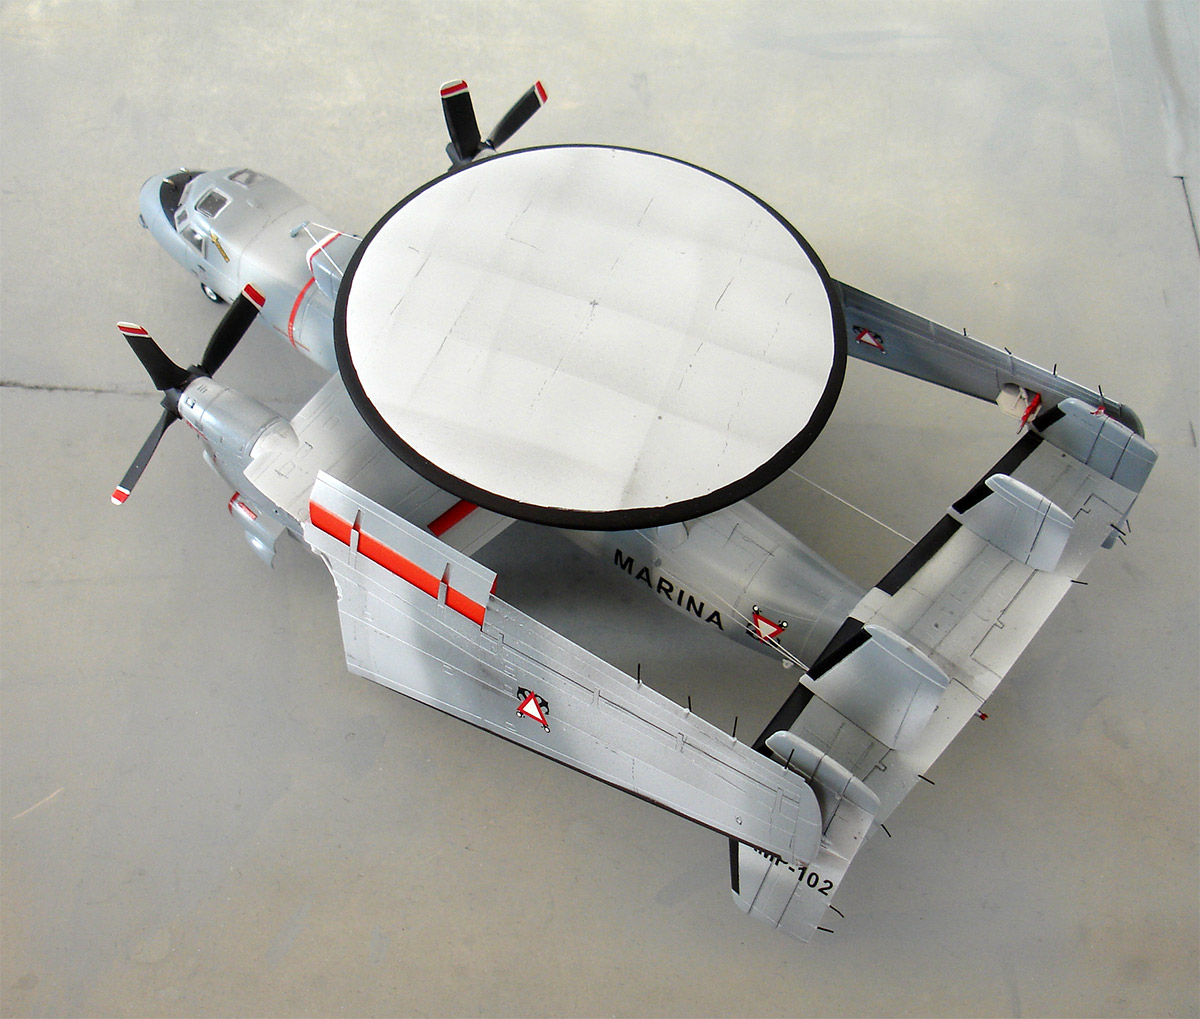
The propellers are the old 4-bladed Hamilton type so the Heller kit parts #D1+D13 blades were assembled. The propeller blades are black with dark metal edge and tips have white-red-white lines. All was hand painted.
After decalling the smaller parts were installed with a few different antennas. Also, the long antenna wires were set as described above with PRYM line.
The landing gears were installed as per kit, please note that the main wheels hubs face inboard. The crew door was set open. The outboard wing section were set folded which again needed some effort to align.
On the nose of the Mexican E-2C on the nose both at port and starboard a small stub was seen, made from plastic bits. Paint FS36375.
All moulded static dischargers were cut off and replaced by thin black strethed sprue, fix with superglue.
Finally, the model got a semi-mat look with a varnish airbrushed to get an even sheen. A Johnson Future/Pledge varnish mix with some 5% Tamiya X-21 flat base matting agent was airbrushed. That completed this nice model.
MEXICO


[ area: 1,972,550 km2 | population: 127 million | capital: Mexico city | GDP USD 10,000 nominal per capita ]
Mexican naval aviation began in the 1920s with a Mexican TNCA "A" float biplane based at Las Bajadas. Roles are coastal patrol, search and rescue and liaison. During the Second World War aircraft flown were Vought Kingfishers, Catalina's and Grumman Ducks for U-boat ptarols over the Caribbean. In the seventies types were a HH-227, Bell 47G and Alouette II with Bonanza and Cessna 150 trainers. In the 1990s even Russian aircraft were purchased like Mil helicopters and an AN-32.
From Israel 3 second hand Grumman E-2C Hawkeyes were acquired from 2004 but only briefly flown due to poor maintenance and lack of parts.
Later on some 30 Zlin Z-242L were acquired for training and additional Mi-17 helicopters. Other naval service types are CASA C-212, CN235 transports and helicopters like Cougars and Bo-105.
There are over 10 naval service bases were aircraft are operated.
... set in a scenery...
Back to 1/72 Models.......
(c) Copyright "designer"/ All rights reserved. Your comments are welcomed by webmaster
April 6, 2026