Airfix
 Nederlandse modelbouwers kunnen dit bouwverslag in Nederlands hier lezen....
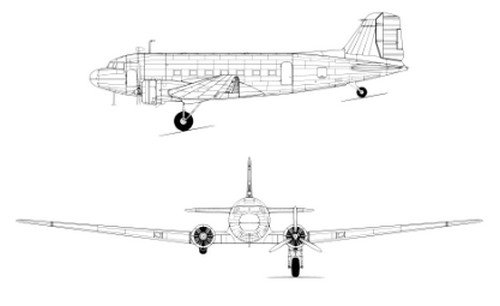
 The Douglas DC-3 needs in fact no introduction, being developed in the 1930s as a metal airliner in a time that wooden and fabric passenger aircraft were the usual way of building an aeroplane. The "Douglas Commerical" DC-3 was based on the Douglas DC-2 but with wider cabin and larger and improved control surfaces. First flight was December 1935. The cruise speed was about 330 km/hr and the range 2,400 km. It proved to be a reliable and rugged airplane and many were used as C-47 troop transports and towing aircraft during World War II like on invasion D-Day June 6, 1944 in Normandy and operation Market Garden over The Netherlands. Some 600 civilian DC-3 and some 17,000 military versions were manufractured. Some 100 Dakotas are still flying today!
Length 19,7 m; wingspan 29,0 m
2 Pratt and Whitney R-183- Twin Wasp (earlier Wright Cyclone)
Quite a few 1/72 Douglas DC-3 'Dakota" kits appeared over the years. Classic is the very old 1/72 Airfix kit, also reworked as the AC-47 "Vietnam gunship". ESCI also had a kit as well as some other brands. All old kits had some shape issues.
After decades, in 2014 Airfix came with a brand new DC-3 mk.IV / C-47 kit in 1/72.
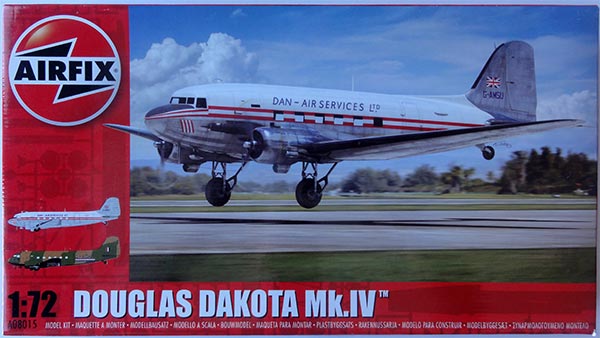
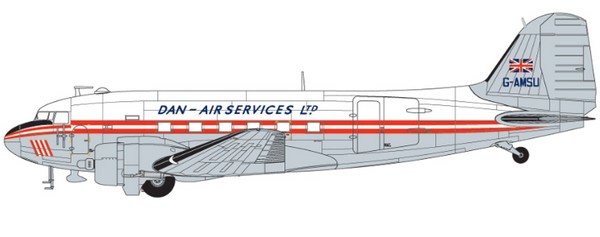
C-47A kit #A08014 was released 2015 and has decals for 2 schemes:
DAN AIR Services ltd, G-AMSU, Blackbushe airport, England, 1955
BOAC, G-AGKN, England, camouflaged flown during the War 1942
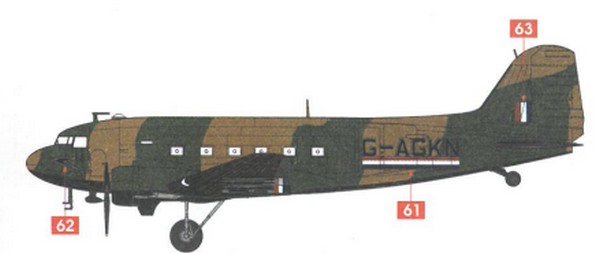
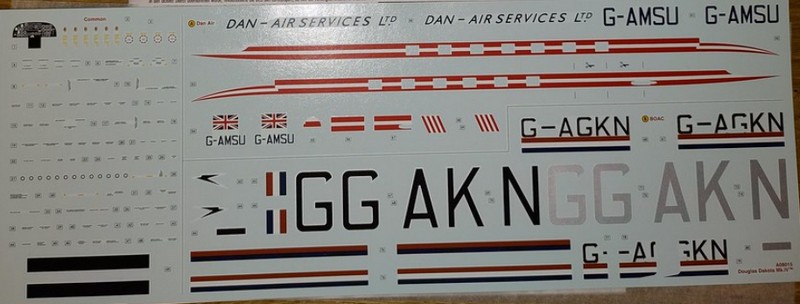
(The Airfix Dakota kits #A08015 and A08015A have the same parts but other decals).
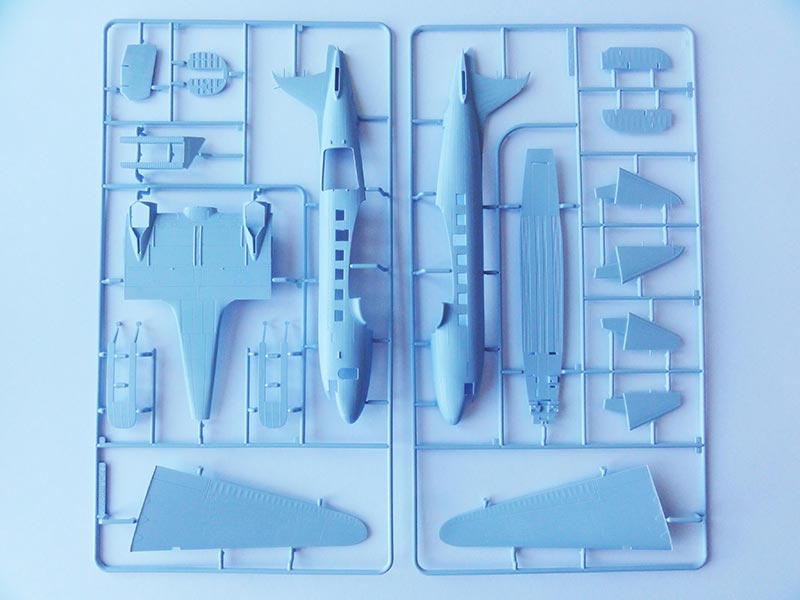
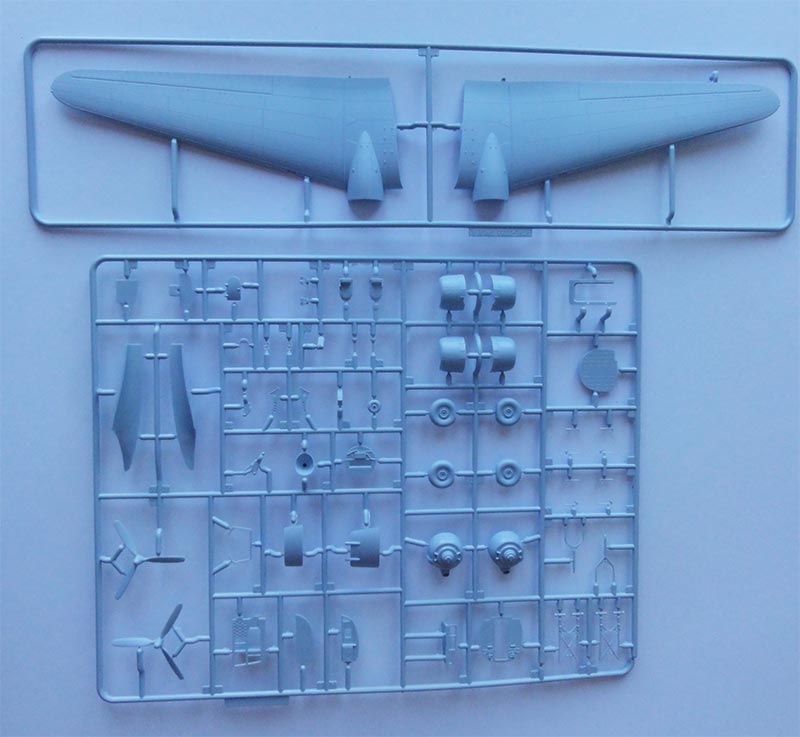
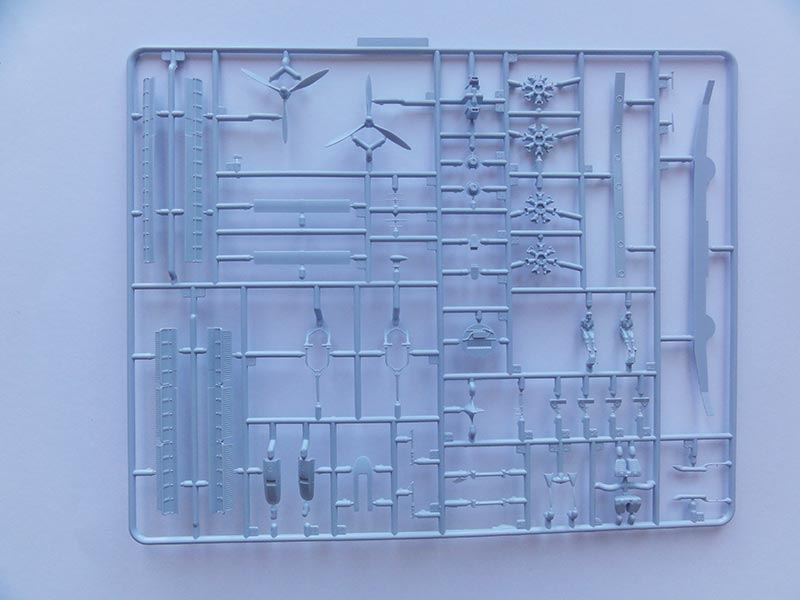
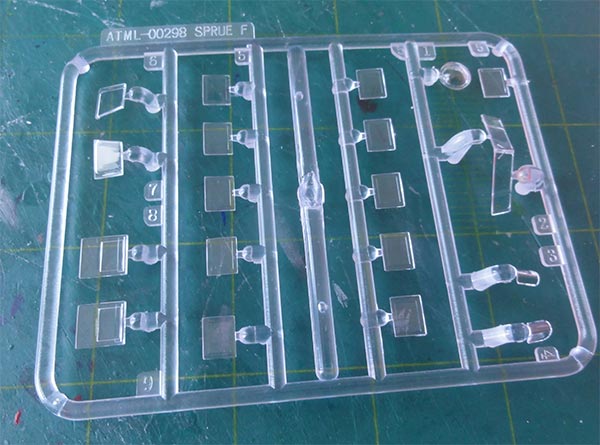
There are about 140 parts in the kit in light blue soft plastic in 5 large sprues and a transparant sprue.
The surface detail is a bit clean as I was used to raised crude rivets. But, it is very nice indeed, with various joints and raised fine strengthening plates. I miss though the gaps of the control surfaces like ailerons and flaps. I opted to inscribe these deeper.
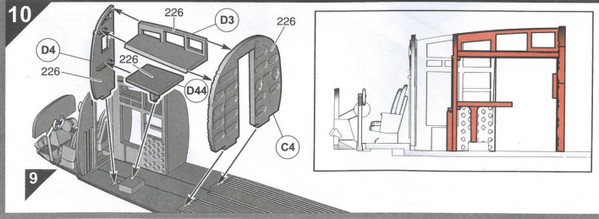
There is a very nice detailed cockpit interior with the rear crew support station. The kit has paratrooper rows of seats along the window rows inside but no seats for a passenger airline version. But that is not visible through the windows though.
Two types of propellers are provided including the wider blades' type. The forward crew door and the rear freight-/entry door can be set open if desired.
An excellent kit of Airfix. The fuselage windows are individual clear parts and are to be installed from the outside. It enables closing the fuselage at an early stage and do the main assembly.
Sometimes the DC-3 "PH-PBA" of the Dutch Dakota Association passed over my town and I wanted to have the DC-3 in that scheme. No aftermarket decals are available, so I designed the DDA DC-3 decals for PH-PBA myself, more about that later on.
![]()

About the Dutch Dakota Association DC-3 "PH-PBA"
The Dutch DC-3 registered PH-PBA became soon after the Second World War a The Netherlands Government aircraft. Originally this plane was rolled out of the Douglas factory in Long Beach, California on January 11, 1944 (as DC-3C-S1C3G serial 19434). It was built for the U.S. War effort and moved to Europe in early 1944. On June 6, 1944 this aircraft took part in a night operation in over 350 DC-3’s dropped more than 6,000 paratroopers over Normandy in “Mission Boston”, some five hours before the D-Day “Overlord” landings. It had USAAF code 42-100971 and invasion stripes. Some three months later, the aircraft was used in the airborne landings above The Netherlands during operation “Market Garden”, towing gliders and dropping paratroopers. It was used also from the provisional “Keent strip” near Grave in The Netherlands. At the end of the hostilities in Europe May 1945, it went into USAAF storage at Oberpfaffenhofen in wat later would be West-Germany.
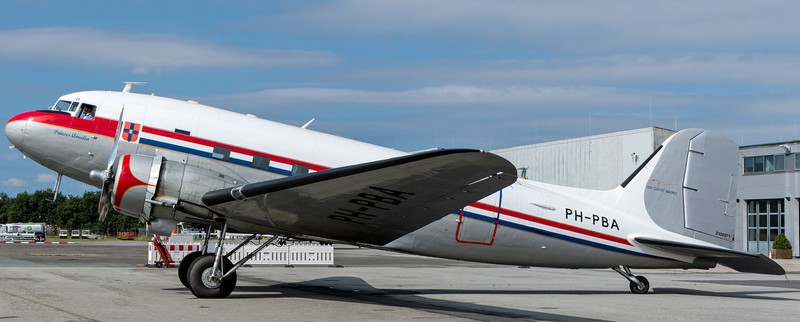
(photo made by me)
Beginning 1946 Prince Bernhard of the Dutch Royal family bought the plane for 50,000 dollars. It was civilian registered for use by the Prince as inspector-general of the Dutch Armed Forces as PH-PBA “Prince Bernhard Alpha”. From February 1947 it was owned by the Rijksluchtvaartdienst (RLD) as the first Dutch Government aircraft. End 1947 Prince Bernhard obtained his flying license for the type and flew frequently PH-PBA himself. In 1950 the plane was transported on board the Dutch aircraft carrier “Karel Doorman“ to the Dutch Antilles for the traditional navy visit to “de West” and flown in the Caribbean and after that transported back. March 1961 PH-PBA was replaced as Government aircraft by the Fokker F-27 Friendship PH-PBF. But PH-PBA continued to fly with the RLD to test airport aviation systems in a new paint scheme. In 1975 it was retired and displayed at museum Aviodome at Schiphol airport in a KLM scheme.
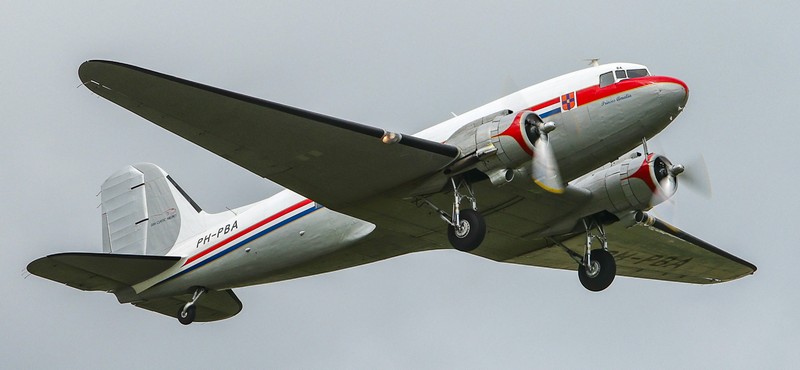
In 1996 the Prins Bernhard Alpha Society was founded with the aim of returning the old PH-PBA to flying condition. It went for extensive refurbishment to Air Atlantic technical services in the U.K. and the astrodome was removed. November 1998 it was restored and the Dutch Dakota Association (DDA) operated PH-PBA through “DDA Classic Airlines”. It flew many sight seeing flights and was seen at many air shows in Europe. December 2010 PH-PBA was given the name “Princess Amalia”. Beginning of 2018 it was repainted in a scheme with special cheatline.
(Sadly due to rising costs the DDA stopped flying this DC-3 PH-PBA October 2024).
For this model, it was decided to make decals for the current [2024] scheme as seen here in the photos, more about that later on.
![]()

Back to the building the 1/72 Airfix kit which only needs minimal modification for the PH-PBA:
- do not set the astrodome #F1 for later schemes and close the gap.
- do not set the rear fuselage cone #E22
- remove raised intake aft of port crew door
- change, do not use or add a few antennas
MODELLING STEPS
The fuselage windows are to be installed from the outside which enables closing the fuselage and do the main assembly.
STEPs 1-10
The cockpit interior and front crew station was used as per kit which is nicely detailed. For the PH-PBA the main colours painted were light grey and some colours and seat belts on the crew seats.
STEPs 11-17
No passenger seats are provided in the kit but nothing will be seen when the doors will be set closed. I suggested the blue seats with painting some blue areas on the fuselage halves insides'.
The fuselage halves were joined. Take care here as spine joints on airliners are noticable. Align and glue the doors flush as shwon in STEPs 55-57. For the PH-PBA do not install the rear cone #E22.
STEPs 18-25
The gaps of the control surfaces like ailerons and flaps were inscribed a bit deeper.
The wing has a plastic spar on the inboard sections but I added some sprue of the edges to get more strength just in case.
STEPs 26-29
The stabilizers were installed later to avoid damage so after main puttying and sanding.
STEPs 30-35The kit parts for the pair of Pratt and Whitney R-1830 Twin Wasp engines look fine and were merely painted metal. Align them well when setting these inside their cowls. Do not yet install the exhausts at this stage.
STEP 38
Install the air intake fairings, I had to fill some shrinkage here in the parts and do some sanding.
STEPs 39-54
These steps deal with the undercarriages, do not yet install these at this stage. Do after main painting and decalling.
The cabin windows were installed as per STEPs 58-59, their fit is OK. Take care here to avoid glue spills and the windows will be masked later. Please note that the distances between these window vary as some are in hatches as emergency exits. The cockpit wind screen was set as to ensure that the fit is OK.
![]()
The model is ready for puttying and sanding before applying the paint scheme.
The later PH-PBA did not have the astrodome #F1, a circular piece of plastic card closed the gap and was puttied.
Aft of the port crew door, the raised small air intake fairing was cut off and sanded flat as it is not seen on the PH-PBA.
The fuselage spine was sanded flush but still needed some puttying. Same with the wing-fuselage root joints and the lower fuselage wing joints and below the rear doors. Otherwise, the kit parts fit pretty OK. Rescribe any filled panel lines.
STEPs 26-29
The horizontal stabilizers were installed now as was the big rudder. Cut off the support rod at the vertical tail leading edge for the PH-PBA. Some minimal putty is needed.
All windows were masked with tape. A few flat antenna panels were set on the spine from card for the PH-PBA.
The model would normally get a base grey coat by not this time as after sanding there were minimal putty remains.
At the window rows are cheatlines, these will be realized with decals. The fuselage top and part of the tail is gloss white. A horizontal masking tape boundary was set, running slightly below the windows rows from nose to tail. The remainder of the model was protected with food conservation cling film.
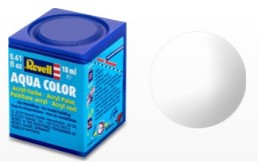
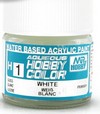
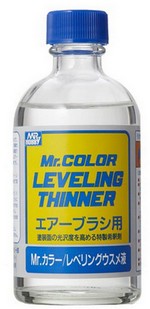
I airbrushed first a few layers of flat mat white Revell Aqua 05 acrylic and than a few layers of Gunze Sangyo H1 white. Thin the paint with the thinner but mix in 5% Gunze Sangyo Levelling thinner for better airbrush flow.
This needed quite some airbrushed white paint layers!
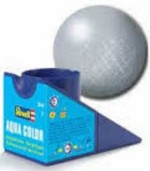
The remainder of the DDA DC-3 airframe is mat aluminium, for which Revell Aqua 99 aluminium was airbrushed. (note: not metallic!). This is also applicable for the wing, nacelles and stabilizers. At the vertical tail, the curved aluminium area needed a curved mask.
The masking was removed. The upper white areas were masked and over the window rows a horizontal masking tape boundary was set. It is recommended to use low tack tape. At the nose curved tape sections were needed.
(sorry... I forgot to make a photo).
For the thin long leading edges of outboard wing, stabilizers and tail black anti-icing is needed, so again masking was done. The black airbrushed was Revell Aqua 08 schwartz acrylic but any black paint will do.
The nacelles insides were also airbrushed metal and some black wash was applied inside on the Twin Wasp radial engines.
The result is seen here after the window mask tapes were removed...
The model surfaces are glossy enough, so decalling can now be done at this stage the decals for the PH-PBA.
DECALS
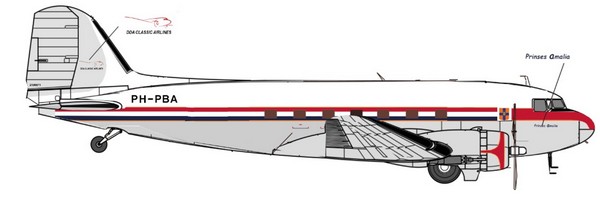
The PH-PBA decals in 1/72 were home designed and drawn to exact scale to fit on this Airfix DC-3 kit.
NOTE: some modellers asked for this sheet but also had older DC-3 kits like from ESCI. So some other extra cheatlines and window decals are also designed and set on the sheet to suite these kits.
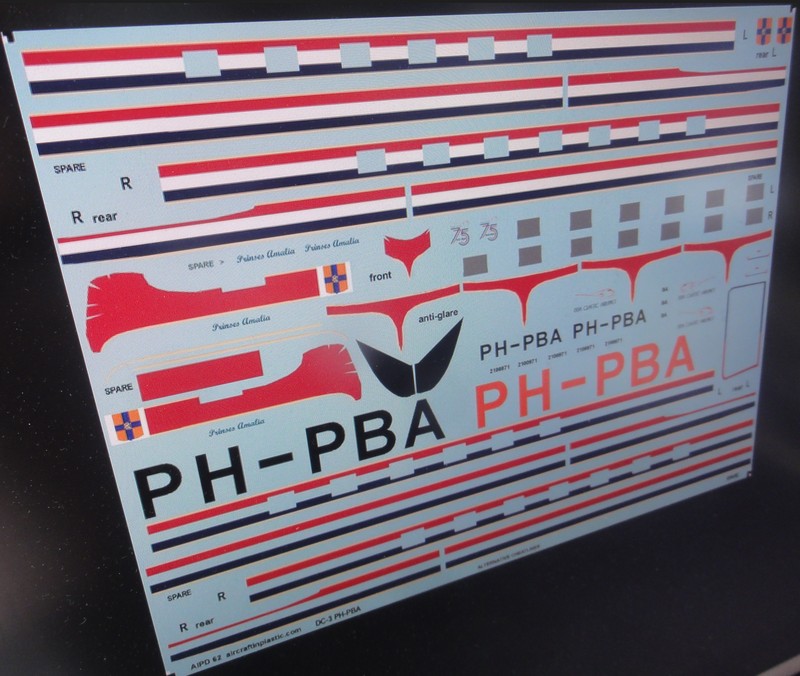
If you are interested in this DDA DC-3 decals sheet #AIPD-62 for your model, look at my decal page here how to get one...
![]()
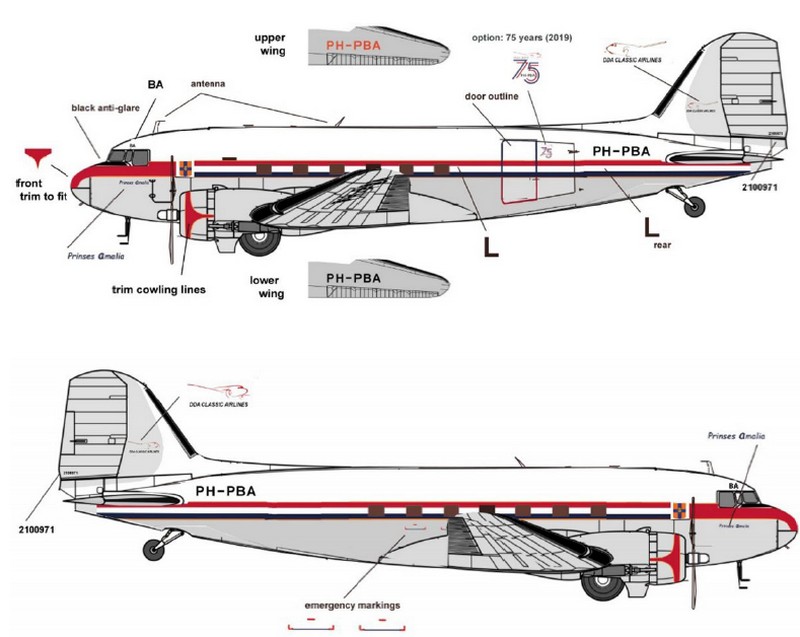
The decals at the nose areas are in red and black. Painting the curved areas may be better but I tried the decals. It takes more effort but eventually worked out using also decal softener... in progress... Note the Royal Dutch family lion badge.
Decalling took about 4 hours as each printed decal had to be cut out from the continous decal film on the laser printed sheet. Follow my AIPD 62 decal instructions. The decals are very thin and need no further treatment.
The nacelles also have the cheatlines/ stripes.

Due
to the printing technique sometimes a very tiny white edge is present
of a decal. This can be cut off with fine scissors or over painted with
the surrounding colour (in this case aluminium).
The black walk ways at the wing roots were obtained from the Airfix kit; note that they are to be set at an angle. The black anti-glare panel was applied with black decals.
![]()
After decalling was done, the remainder of the model was assembled.
STEPs 39-54
First set the tail wheel in STEP 53 at the rear fuselage recess. (note that the cheatlines of PH-PBA end in front of the elevators).
Than the main undercarriages were set deployed/ down. I found the gear struts rather thin and fragile. Previously these gear parts had been airbrushed silver. Note that kit wheels are "flattened to suggest weight".
The exhausts were installed as seen in STEPs 36-37.
STEP 64
The wing leading landing lights are nicely provided as clear parts in the kit and were set after a silver disk to suggest the light reflector was set inside the wing leading edges.
The propeller parts #D7 were used for the PH-PBA. These are metal coloured with yellow tips. The smaller Hamilton Standard prop decals as per kit were also set.
As the rear door was set closed, the entry ladder of STEPs 65-66 was not required.
![]()
FINAL TOUCHES
-1- the pitot tube #E23 shown in STEP 61 and antenna #E29 were set in place but NOT the parts #E4 and #E7 as these are not seen on the later PH-PBA as seen in 2024.
-2- the antenna #D36 shown in STEP 62 has on PH-PBA a slightly different shape, this was made with card.
-3- a few tiny pipes were set below the nose made from plastic rod and painted aluminium.
-4- a pair of tiny fuselage vents were made from thin plastic card of 2x1 millimeter size set between wing and stabilizer below the fuselage cheatline. Another one was set aft of the large port cabin door. The vents were painted aluminium.
-5- at the starboard side next to the vertical tail a wire antenna 4 mm long was set on the fuselage.
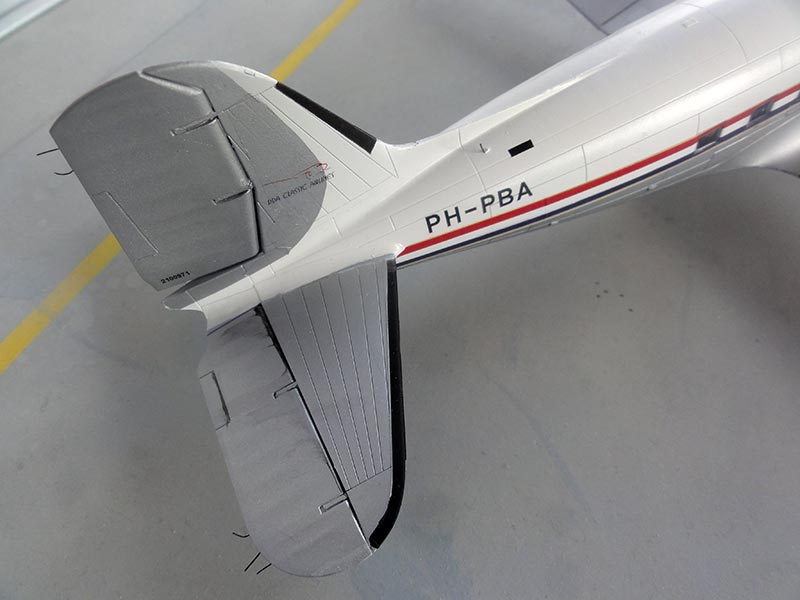
-6- a pair of tiny wind screen wipers were set made from thin black stretched sprue.
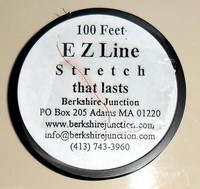
-7- at the wing tip trailing edges, stabilizer and rudder static dischargers were set with superglue from flexible EZ Line wire. Or use thin black stretched sprue.
-8- the tiny anti-collision lights were painted at the wing tips, these tiny moulded knobs were painted red at left (port) and blue at right (starboard). On the fuselage spine a small clear light was made from a bit of clear plastic.
Only a little wash was added in the recesses of ailerons, PH-PBA is well maintained by the Dutch Dakota Association.


Finally the model got a decal protecting coat of gloss varnish with Johnson Future/ Pledge thinned with 25% Gunze Sangyo Levelling Thinner. This protect the decals and also gives a nice sheen. Shield off "loosely" with a piece of board the transparancies when airbrushing the clear coat.
That completed this nice DC-3 PH-PBA model in 1/72 scale.
Time required was about 20 hours in total to make the model.
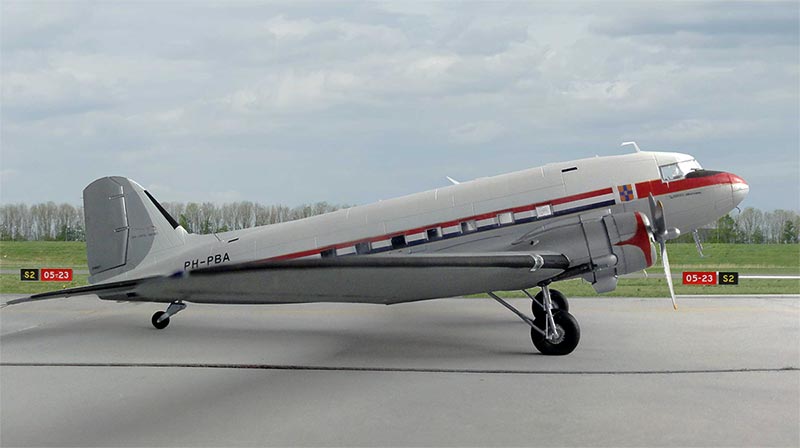
DC-3C-S1C3G serial 19434, Dutch Dakota Association "PH-PBA"

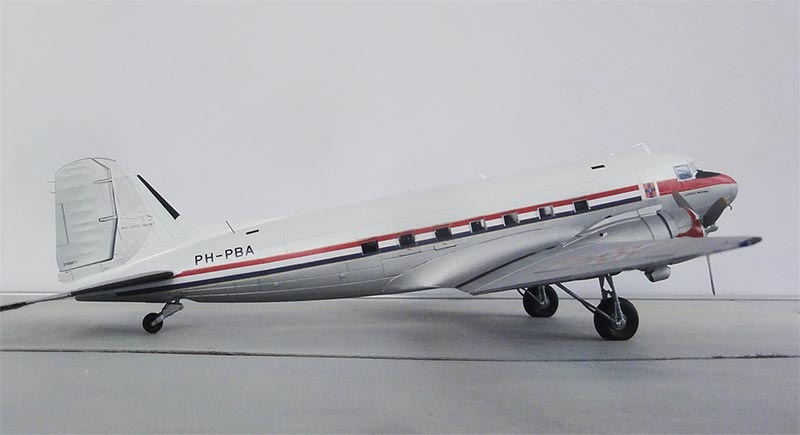
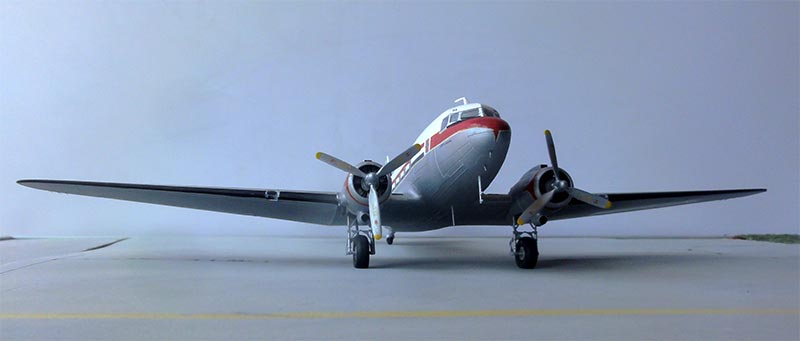
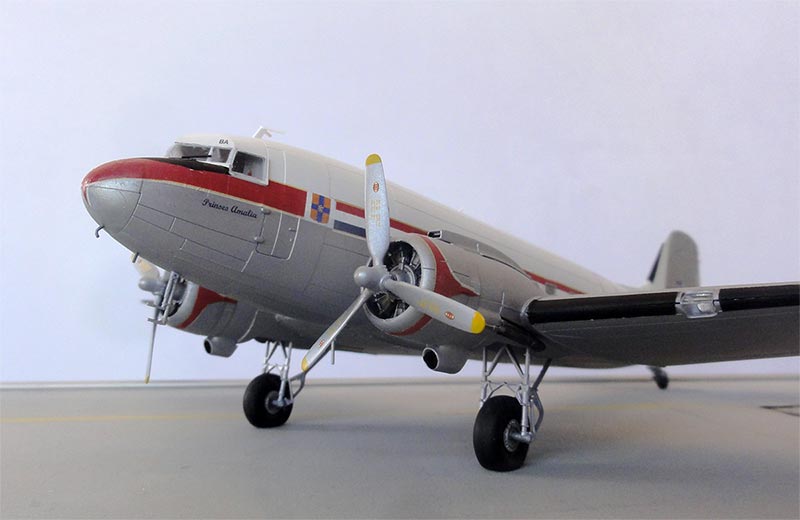
Note the bits below the nose and the reflector inside the landing light panel.
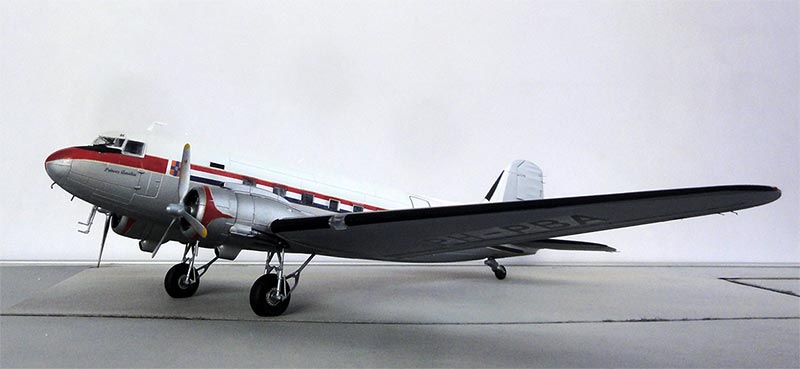
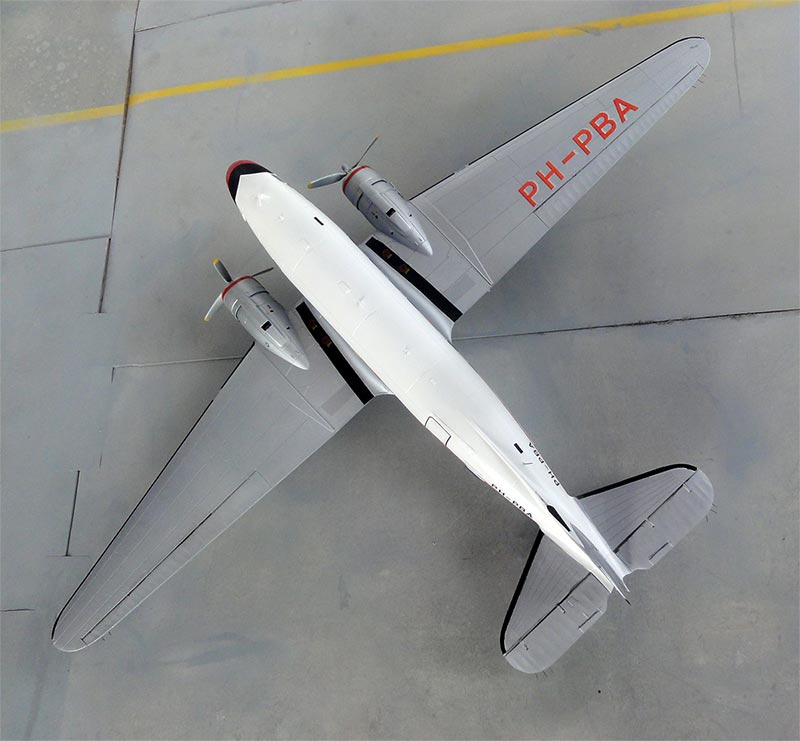
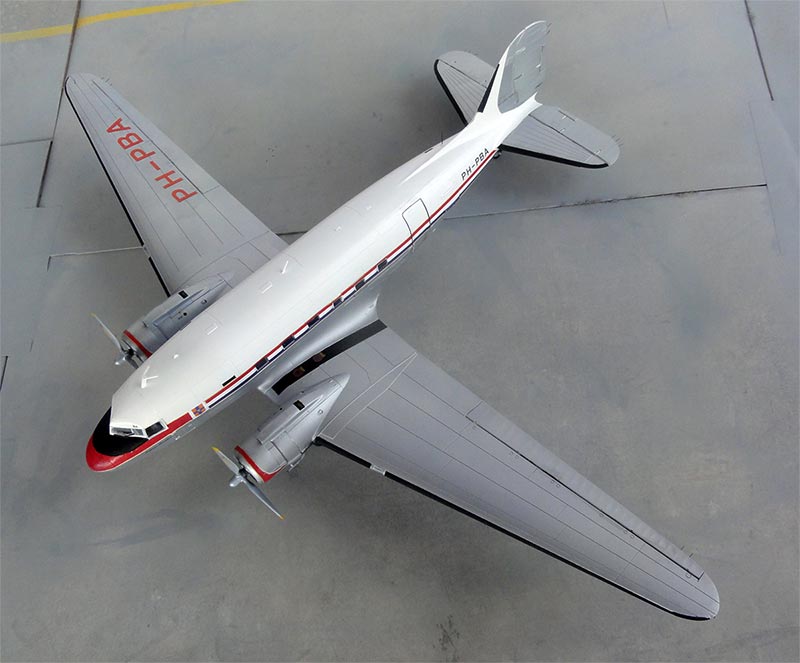
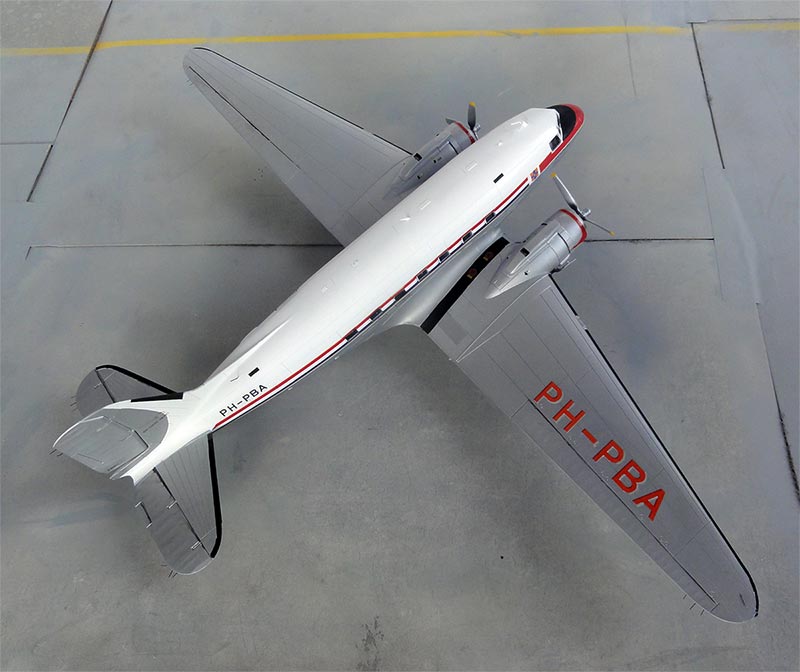
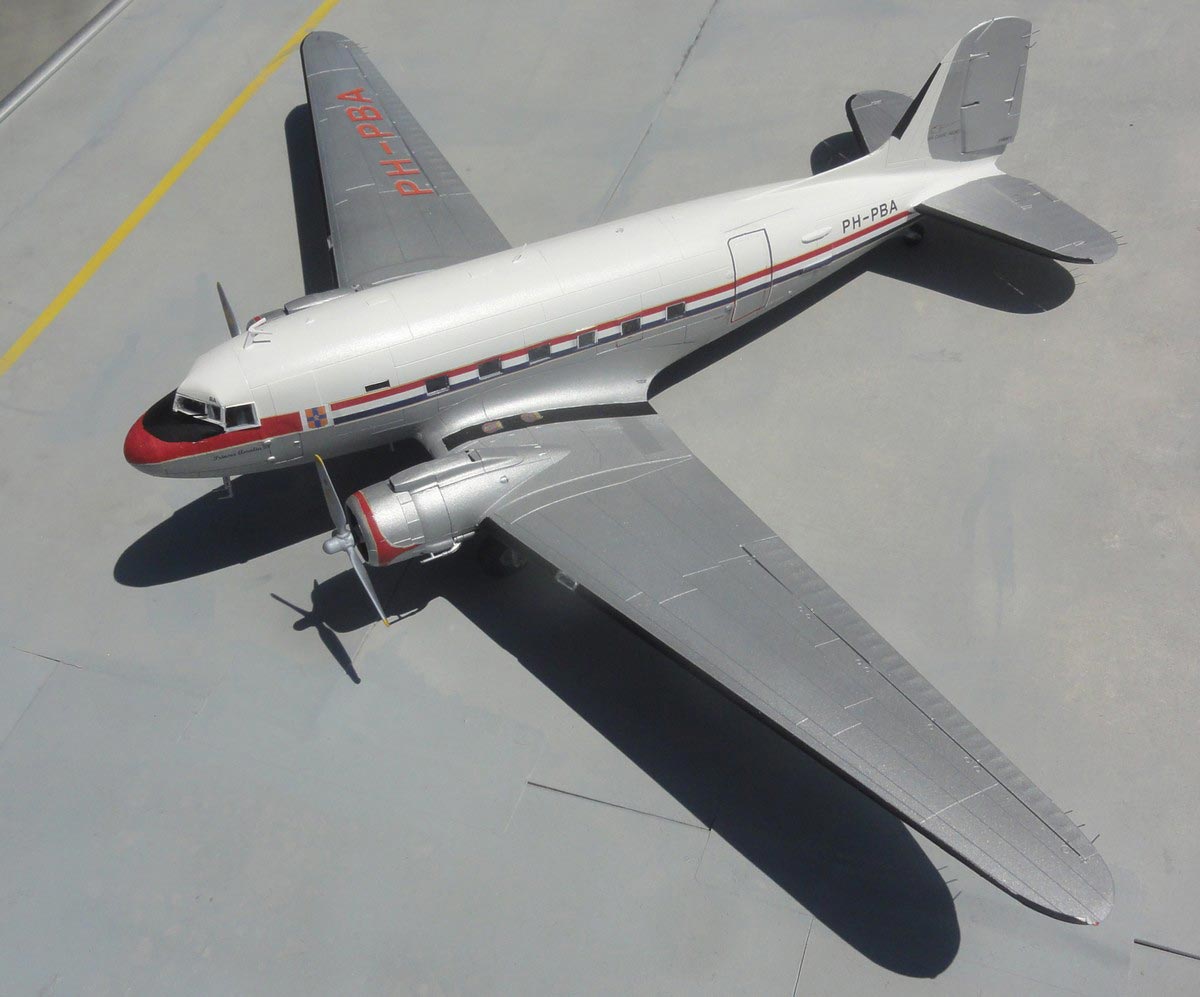
... set in a scenery at Lelystad airport...
 Nederlandse modelbouwers kunnen dit bouwverslag in Nederlands hier lezen....
 References:
Books:
- Nederlandse Douglas DC-3, Theo Wesselink, 1997 (in Dutch)
- C-47 Skytrain, Squadron Signal in Action #149, 1995
Internet:
- Dutch Dakota Association website https://dutchdakota.nl/
- Wiki https://en.wikipedia.org/wiki/Douglas_DC-3
Youtube:
DDA DC-3 flight film

(c) Copyright Meindert "designer"/ All rights reserved. Your comments are welcomed by webmaster
Created this page June 10, 2024