Lockheed Martin F-16I
SUFA "Storm"
[ Page I-4 ]
F-16I SUFA using the Academy kit
... continued from page I3....
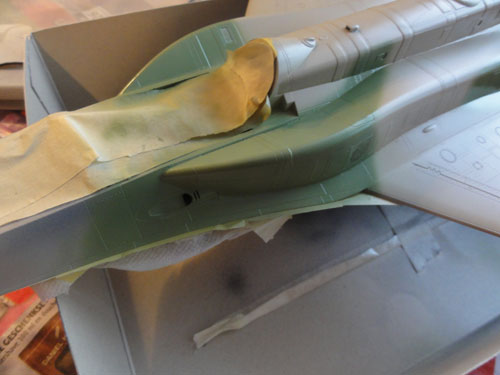
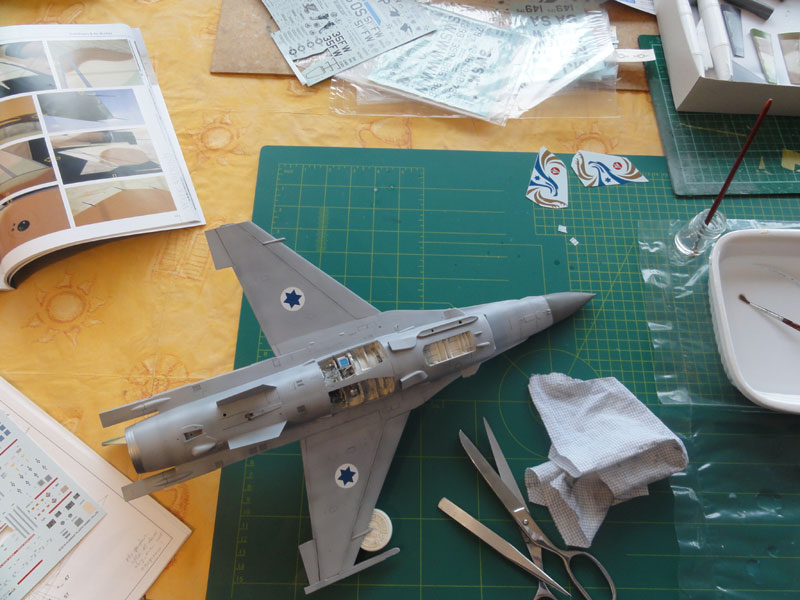
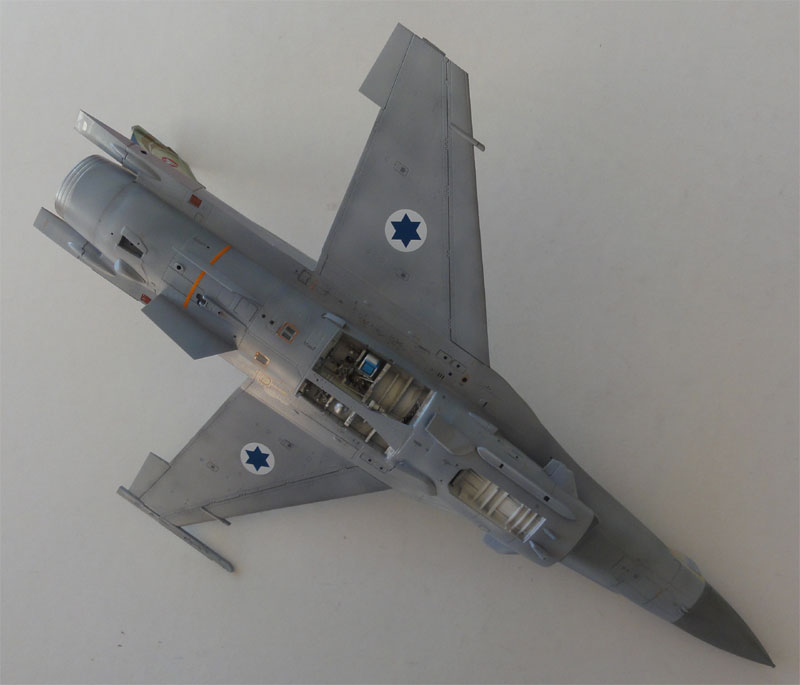
The lower grey coat of Fed.Std. 36375 using acrylic paint Mr.Color/Gunze Sangyo H308 was already applied (please note that the kit instructions indicate FS36320, but I think this is not correct),
Now the model was given the camouflage SUFA top coats with Mr.Color/Gunze Sangyo acrylic paints:
FS33531 sand , using
X104
FS30219 brown, using X310
FS34424 green , using X148
The lower grey areas were masked and covered and the sand colour sprayed on first. Then the brown and than the green was airbrushed free-hand using my Infinity airbrush from Harder and Steenbeck.
The radarnose was given after masking a coat of FS36231 using Gunze H317.
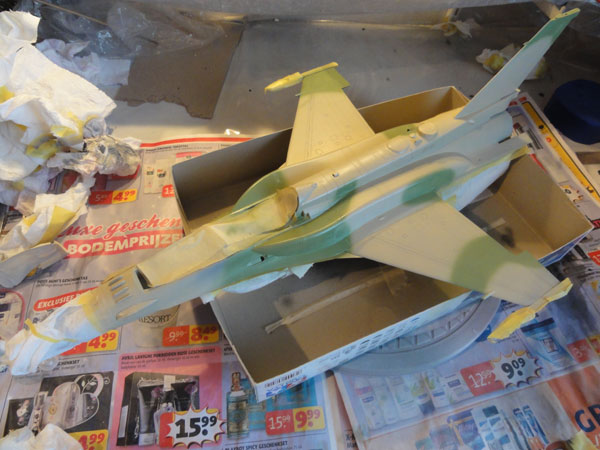
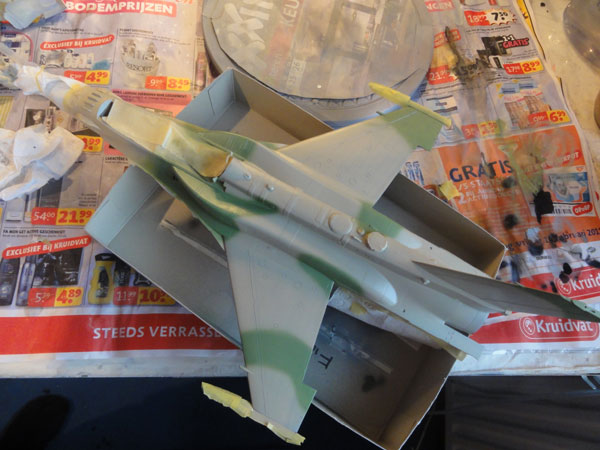
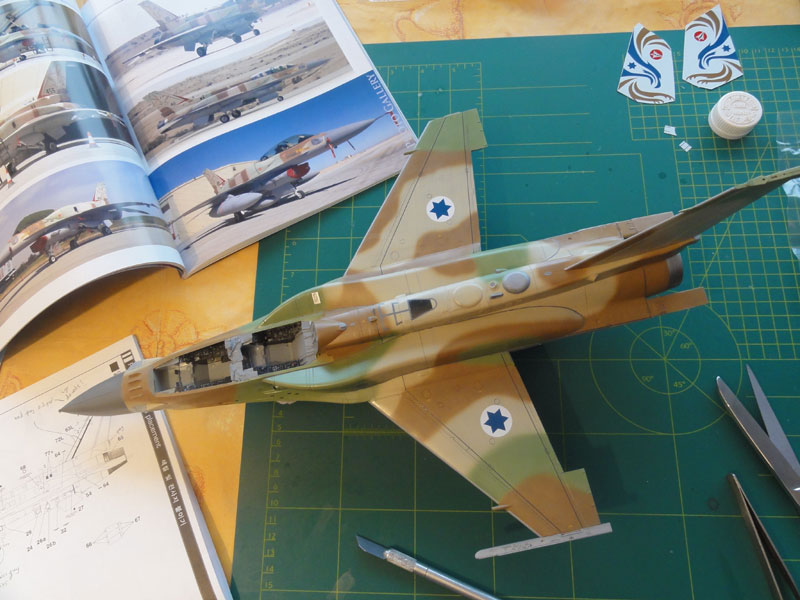
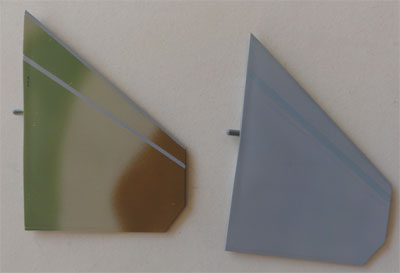
The results were quite nice. Next, the leading edges of the wing, stabilizers and tail, along with some mid-panels on the plane were masked of to be sprayed FS36320. Although Academy does provide decals for these, a sprayed on coat is much better looking.
Along the CFT (Conformal Fuel Tanks) medium gray rubber sealing bands are seen on SUFA's, so a gray band was hand painted with a fine brush. It does not have to be totally even widt at all areas, but this took some time to paint on.
![]()
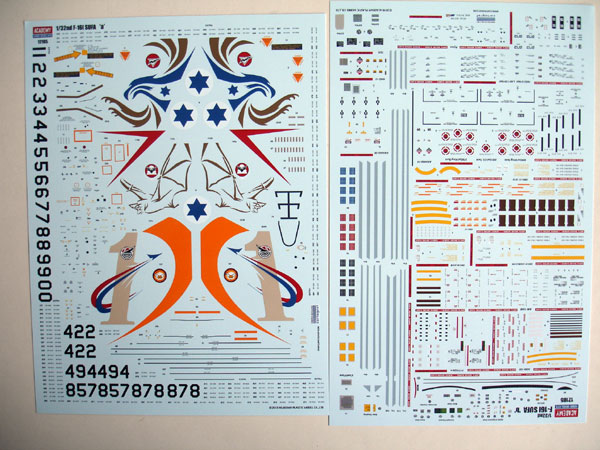
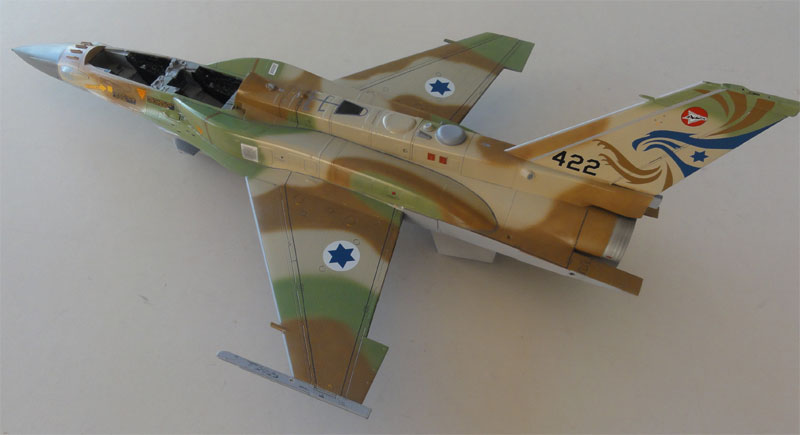
It was now decided to apply the decals on this model prior to final adding the gears and stores. First, the model was given a couple of coats of Johnson Pledge/Future to prevent later silvering of the decals.
Academy provides attractive decals
for different IAF squadrons:
Tayeset 253 Negev
Tayeset 119 Bat
Tayeset 201 Ahat
Tayeset 107 Knights of the orange
tail.
I picked the scheme of Negev with the colour blue hawk.
A large task it was adding all those decals. Academy provides lots of them and there are fine. They even provide hundreds of panel number decals, but I could not find instructions were to put them! Using the detail pictures in the book of Ra'anan Weiss about " F-16I Sufa in IAF Service". I applied the decals as best as possible.
Decals for
the armament with loads of stencils are also in the kit, to be applied
later on the "stores"
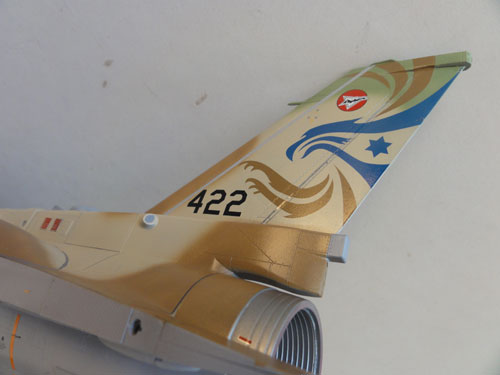
Some things I did was to cut the
large tail hawk markings is several pieces to prevent silvering.
Also some changes done were:
- the top refuelling panel decal
#70 was changed and a dark metal area painted first on the forward panel
- the light grey decals were not
used, but sprayed
- the walkway decals were cut not
to cover the CFT's
- decals #16 and #18 were cut to
get a better fit
Please note that some details are
still to be added to the model, like the canopy edge seals and the cockpit
details,
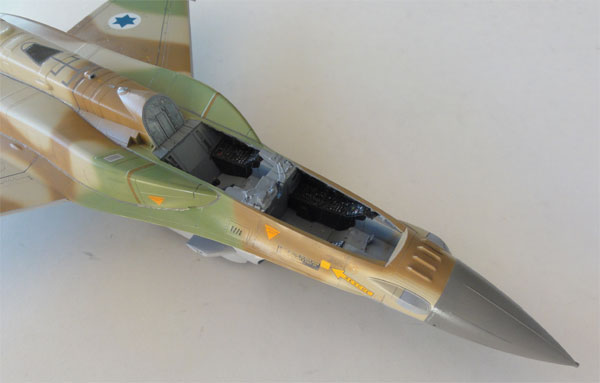
with the results seen here...
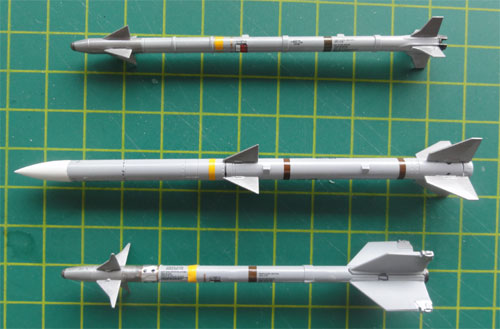
These steps deal with the external stores and lots of them are provided in the kit.
In the kit are many many armament parts including the 1/32 Israeli Python missiles. In the box are GBU-31 and GBU-38 JDAMs, GBU-12 Paveway II, AGM-130 and AIM-120B AMRAAM, the special Python-4 missiles.
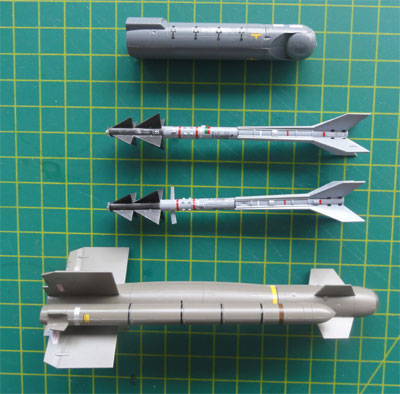
These were all painted and the vary many decals applied... Quite some work, but the stores are kits in themselves....
Also the AAQ-13
LANTIRN pod and a new LITENING II targeting pod. In the kit are also the
very large 600 gallon fueltanks besides the 300 gallon centerline tank
and 370 gallon wing tanks.
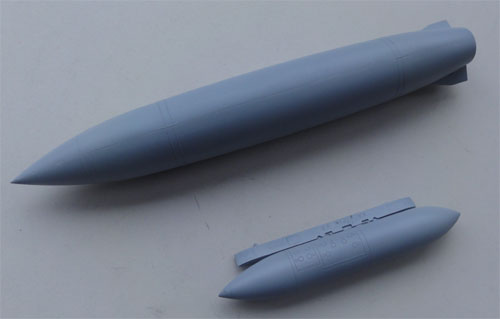
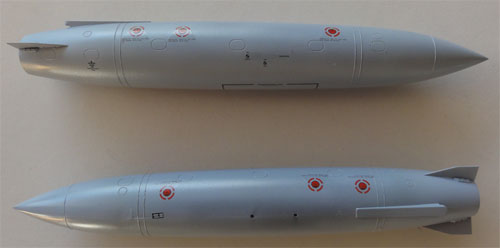
Here the large
tanks are seen with the decals on them...
Extra's, not
mentioned, are the Sidewinders AIM-9M and AIM-9X, the HARM missiles AGM-88
and the ALQ-184.
The stores
are of very good quality and you get lots of decals for them. The large
600 gallon fuel tanks' shape needs further checking.
Step 34
This gives
you figures: a pilot and a navigator/weapons handler. They are very good.

(c) Copyright "designer"/ All rights reserved. Your comments are welcomed by webmaster

Created this page
February 19, 2011