Lockheed Martin F-16 Fighting Falcon
[ Page H3 ]
F-16 models
in 1/32 scale
Hasegawa
kit conversions: F-16C "late Block 30" and F-16A MLU conversion
![]()
...
continued from page [H2]....
![]()
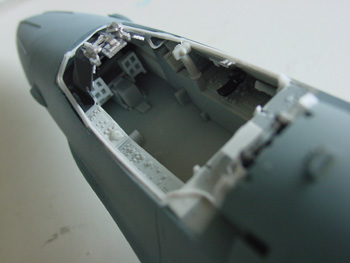
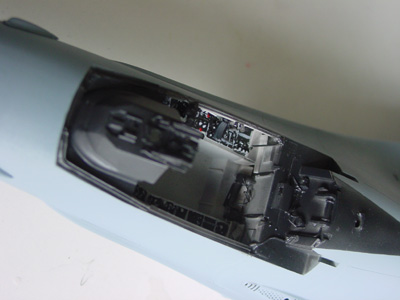
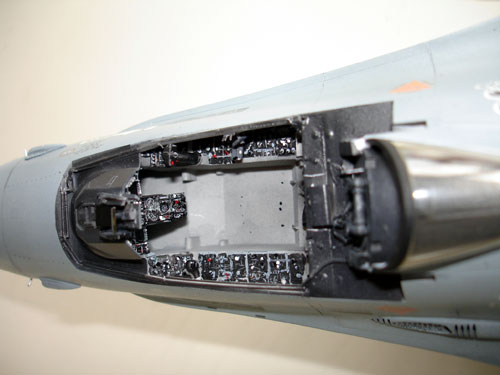
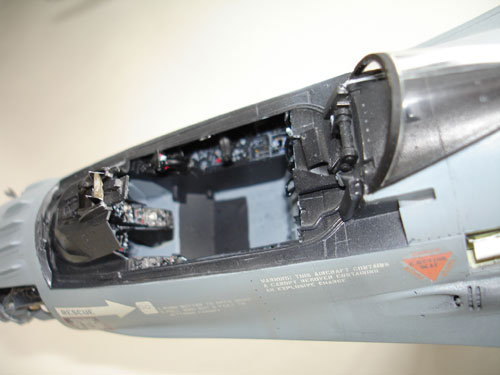
Next was detailling the cockpit area of the two Hasegawa models.
The F-16C and F-16A MLU models got a similar treatment regarding the cockpit detailing.
Hasegawa provides also some metal parts that can be used here. In addition, I got the Eduard set # 32-052 with F-16 details. Some of the etched metal parts were used in various areas, although I found that not everything was accurate in the Eduard set. So check the pictures as you go along!
As explained
on page [H1] the basic side walls and
cockpit edges were improved and also note that the instrument panels are
a bit different between versions. This was catered for with some new instruments
made of pieces of card. The MLU for example has some different instruments.
 ..
..
Also note the
ridges added on the closing surfaces of the canopy, these are I believe
rubber seals.
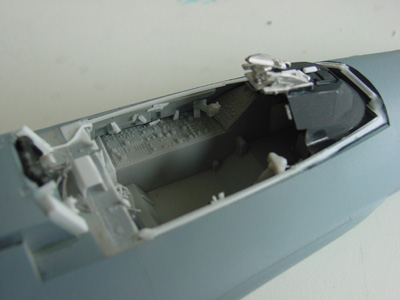
 F-16C
F-16C
Various instrument panels, knobs, handles etc were pianted black, with colour detailling added with a a fine brush.
[ NOTE: these
pictures were taken later on, so you will see some decals applied here..]
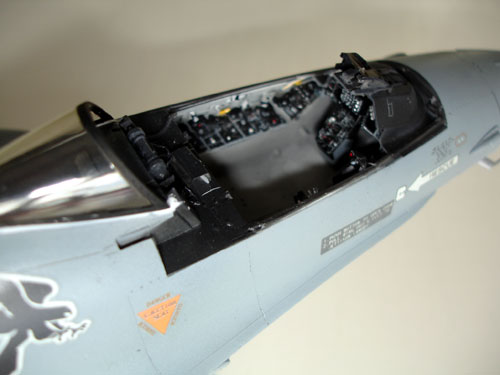 F-16C
F-16C
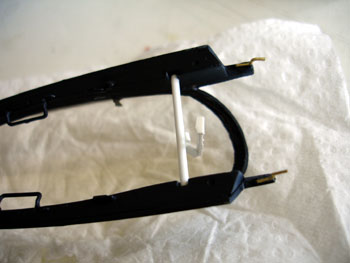
Behind the
seat at the bulkhead some piping details were added, although most of it will be hidden by the ejection seat.
![]()
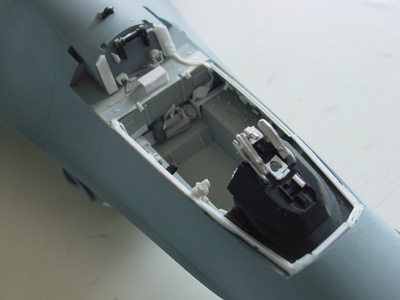
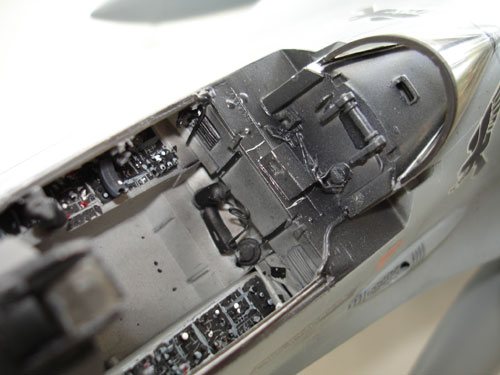
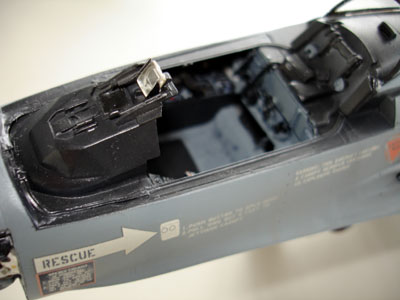
The MLU F-16
has compared to the usual F-16 Vipers additional black areas in the cockpit
as can be seen below. Side walls and a part of the floor and to still be
added seat are black.
 MLU
MLU
 MLU
MLU 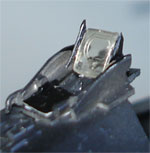
Also note the
bit different style HUD display on the F-16 MLU. I added very tiny triangles
made from paper on the sides of the HUD.
(NOTE: on modern
block Vipers, you see very different HUD types also, so check pictures
when you make a particular F-16)
![]()
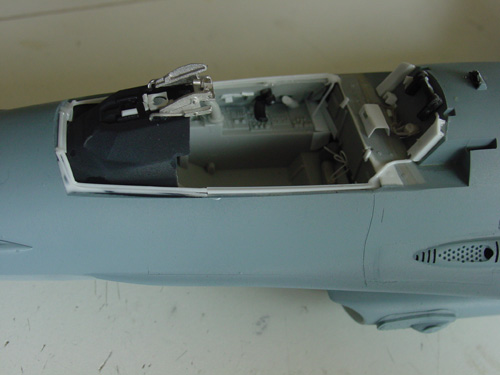
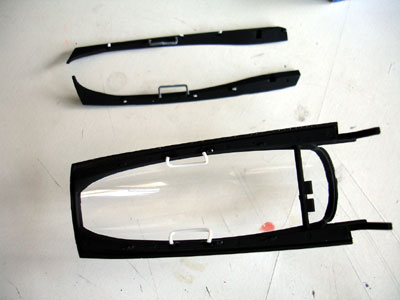
Canopies
I took care
now of the canopies from the various kits. With the Academy kit you get
two shines of canopies: smoke and clear. This applies to both the large
canopy and the rear canopy section on the fuselage. Looking at pictures,
you will see all sorts of variations on Vipers with different shines, etc.
Look at for example into the DACO book page 10.
The cockpit canopy as provided in the Hasegawa kit is clear and OK, but has a seam that needs to be carefully sanded away and polished. For polishing I used MOTIP "Scratch away" car polisher .
Similarly, the seams need to be removed on the Academy and Tamiya kits.
Unfortunately, I found that the seam in the Tamiya kit extends into the clear canopy structure, so you still see a seam after polishing. I was not to happy with this as you will end up with a distorted canopy on the Tamiya kit !!!!
The canopies
of the Academy and Hasegawa kits came out pretty well. As Academy has a
spare canopy provided I am considering using that on the Tamiya kit as
a replacement. 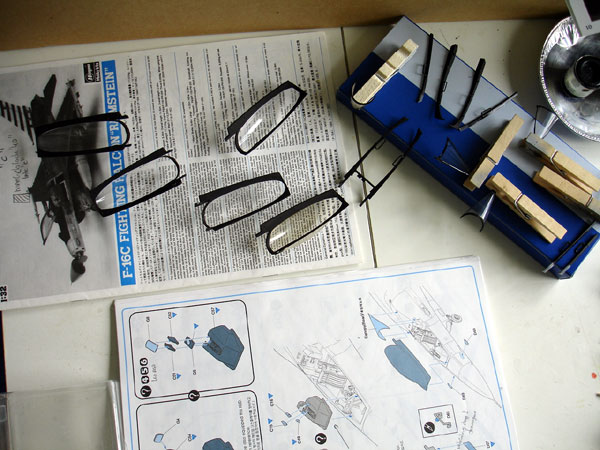
Inside the canopies,
the frame was added using the Tamiya kit as an example and looking at pictures.
What was added were for example the 2 handles and the canopy locks. Also
the bar at the rear with the raising rods was added.
 .
.
On the MLU F-16,
an additional detail to be added is what is probably the Night vision goggles
movement sensor. It is a small vertical probe that can be seen on the left
lower side of the canopy as seen here on a areal MLU canopy:
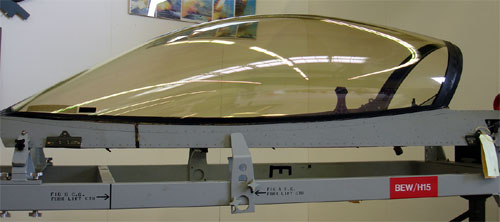
Also note the
"smoke" shine on this particular canopy.
On to next
Hasegawa F-16 Page [H4] .....

(c) Copyright "designer"/ All rights reserved. Your comments are welcomed by webmaster
Created this page July 15, 2006