[ page 1 ]
MiG-21 models in 1/32 scale
"Upgrading the Revell kits" and building the Trumpeter kits...
ALSO CHECK OUT 1/72 SCALE MiG-21 models.....
LOOK FOR BRIEF MiG-21 HISTORY here at the 1/72 scale pages...
1/32 scale models discussed are:
REVELL MiG-21 kits: this and following pages
TRUMPETER MiG-21 F13 : page 4....
TRUMPETER MiG-21 UM twoseater: page 6....
![]()
Page 1
Page 2
Page 3
Page 4
Page 5
Page 6
Page 7
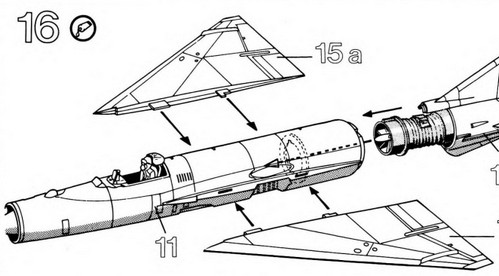
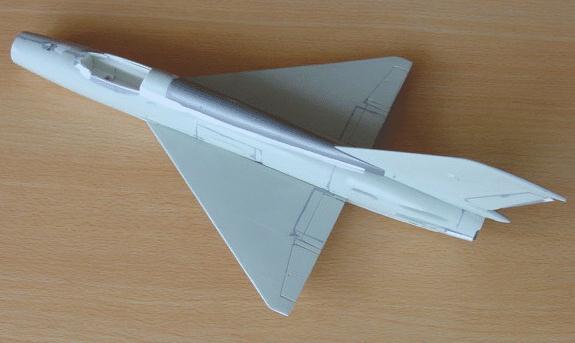
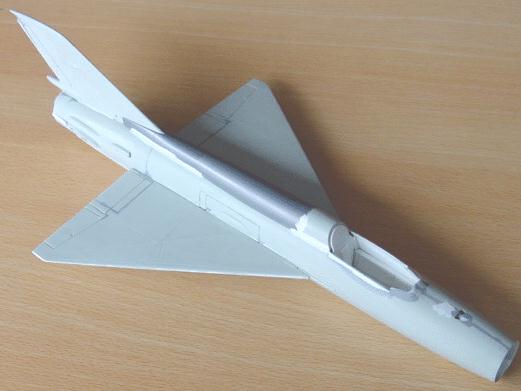
REVELL MiG-21
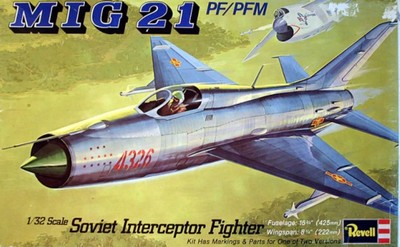
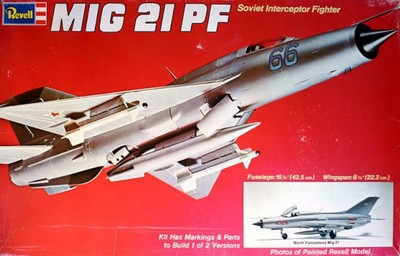
The MiG-21 was and is still available from Revell in 1/32 scale for years, with some different issues of the kit. Starting in the seventies, the older style MiG-21 kit #H-267 was issued by Revell in 1974.
 .
.
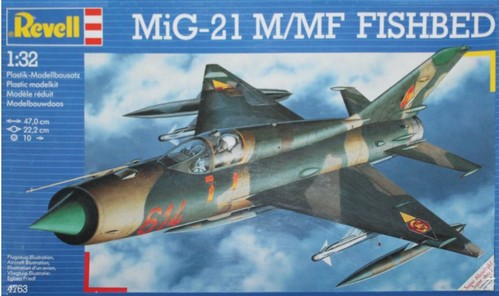
In later kits like kit #04763 extra parts were included to make a MiG-21 MF such a dorsal spine, larger tail and extra improved cockpit parts and stores.
But the accuracy is still not very good.
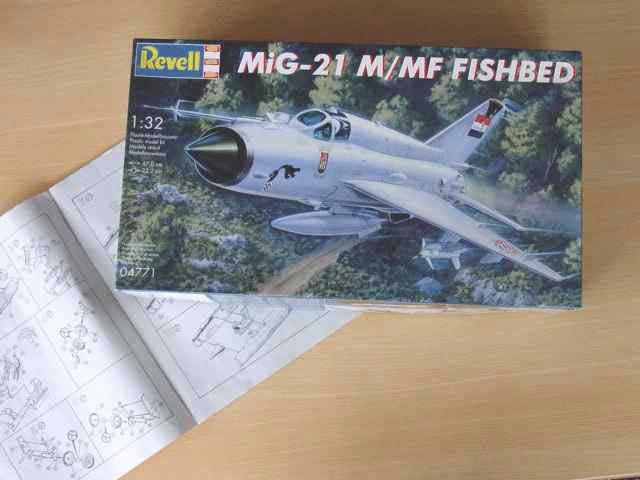
I purchased the Revell kit #04771 as MiG-21 M/MF . It seems to give opportunities to improve it using the Trumpeter kit as an additional source of information.
I have scanned the instructions of kit 04771 as it was requested by fellow modellers. Here is the PDF:
 mig-21-revell-04771-instructions.pdf
The extra parts are an improved seat, new canopy with separate windshield and also has a larger spine (for the MF) on top of the fuselage. Well.... the kit is quite good to use as a basis!

So, continue to upgrade the Revell kit with the Trumpeter MiG-21 F13 kit as pattern example? Very well indeed and very worth the effort.
When you compare the Revell kit with the Trumpeter kit, you can use the Trumpeter kit with some additional references and pictures to "upgrade the Revell kit". It is quite strange and surprising indeed that Revell managed to mould this kit so well in dimensional sense considering its very old age back in the cold war. The Revell kit is basic and has its faults, but all can be corrected.
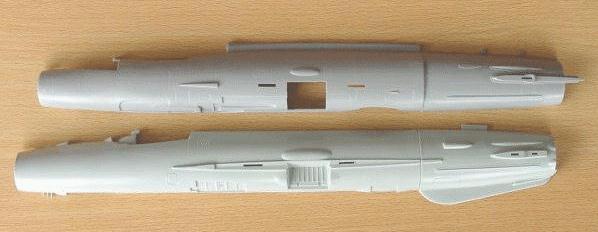
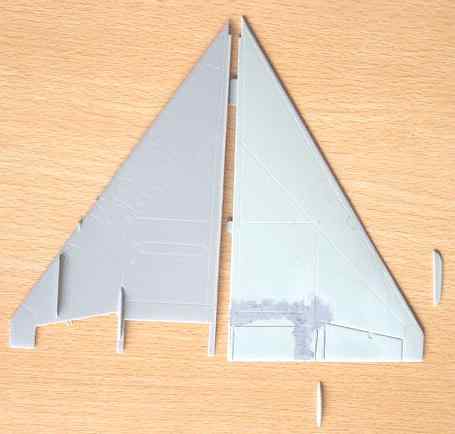
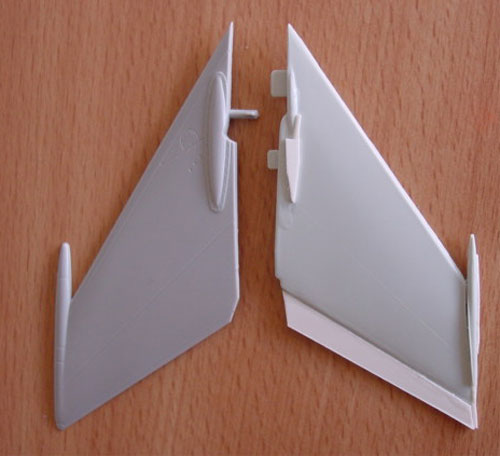
Trumpeter kit
(top) and Revell kit fuselage comparison, but the main uc bay is at the
wrong position when you look at the lengths and positions of the wings.
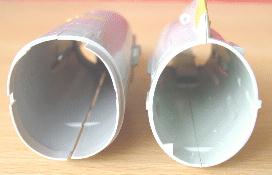
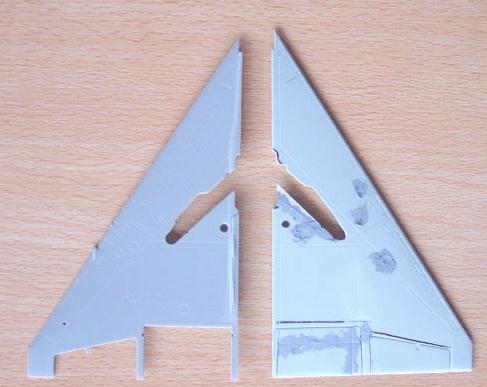
Trumpeter kit
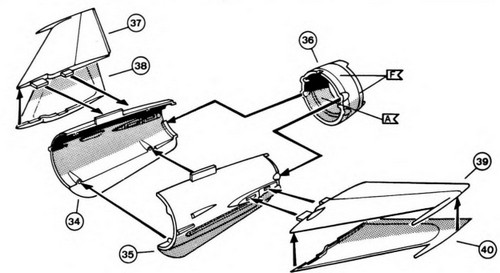
(left) and Revell kit cross section at the tail, the Trumpeter kit being
more accurate.
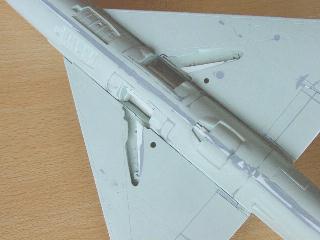
Lets start with the most large ones, to correct them first before going into detailing.
As with any larger kit, first make sure that the main issues are corrected and that you have a good basic shape before going on to the detailing of cockpits, bays and other parts.
What about the main parts in the Revell kit? [referred here to as kit no. 2,3, and 4]
(1) The basic kits fuselage height is OK, but the width should be 3 mm wider. This can be done quite easily by adding between the fuselage halves some plastic sheet inserts. At the same time you will then get a more correct oval cross section shape, and the Trumpeter kit and Revell kits cross-sections will be remarkably the same.
A very nice co-incidence is that the Revell intake ring is too large for a MiG-21 F-13 Early mig, but is quite good for the later MF with the more powerful engine! For the Early MiG-21 F-13 the intake diameter should be 19 mm at the leading edge, and 27 mm for the MiG-21 MF.
So the Revell intake is only 1 mm to small in width at the intake but this can be left as is or corrected by adding some small pieces of strip and tapering it into the large width required at the cockpit and along the larger part of the fuselage.
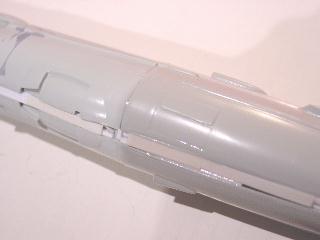
Widening the Revell fuselage vastly improves its appearance. But the MF kit of Revell has the fairing added in the kit and this will help on the top of the fuselage. The lower area at the fuselage edges also needs the 3 mm cart inserts.
(2) The Revell exhaust pipe is 2 mm too small in diameter, and this can be seen. As you can make the rear fuselage cone wider, some corrections can be done here also. Replacing the exhaust pipe with something "round" from the spare box will help here.
(3) The Revell wings are also quite good in plan view and outline. A large fault is the flap outline; the inboard flap should be 3 mm larger in span and you will need thus to "move" the flap tracks fairing 3 mm more outboard. Also, you can slightly correct the lower flap panels. But again, all can be corrected and the Revell kit's wing is quite a good starting point.
The position of the Revell wings is
OK, but the wing main undercarriage opening should have a larger angle.
This also shows that the main undercarriage bay in the fuselage should
be moved 5 mm more forward. The lower wing undercarriage bays were then
improved by removing some plastic in front and adding a strip aft. Also
re-scribe the panels lines.
Trumpeter kit
(bottom) and Revell kit main bay positions; moving it 5 mm more forward
will improve it; see also notes on the wing bays.. applicable for all MiG
variants
Revell kit
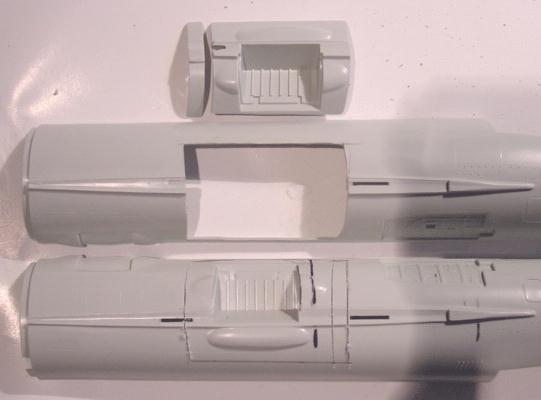
main bay correction work in progress.
A cut out of the main bays "around the bulges" was made and repositioning it; sounds difficult but can be done.

checking the
Revell wing bay and main fuselage bay positions.
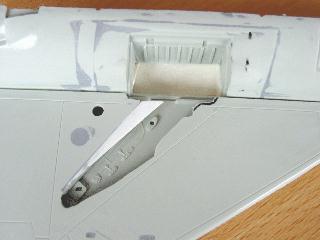
Trumpeter kit
(left) and Revell kit wing: note incorrect angle at Revell wing; see notes.
But the main legs positions is correct! That's why the kit's fault has
hardly been noticed in the past.
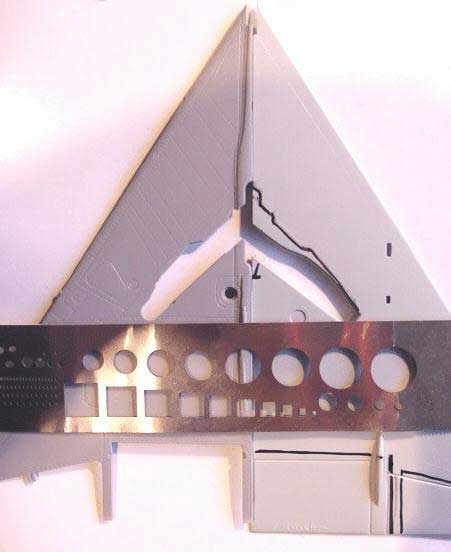
Trumpeter kit
upper wing (left) and Revell wing right with corrections: increased span
flap and moved fairings and removed wing fence: to be replaced with a thinner
one.
corrected lower
Revell wing.
Flaps will
be set in the neutral up positions as most MiGs on the ground do
not show drooped flaps and ailerons..
the total result
: vastly improved. Note rescribed panels
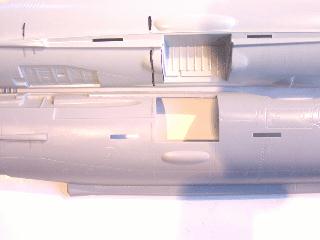
(4) The MiG-21 MF kit has the correct larger wheels provided and the Revell kit has the correct larger bulges on the fuselage. Also, I removed the ceiling of the fuselage main undercarriage bays and made them about 4 mm deeper as in the Trumpeter kit. Detailing will be done later.
(5) The lateral position of the cockpit, the nose undercarriage, the wing in height, the taper ratio's, stagger height and separation between the tail and fairings seem all OK. Surprising for such an old kit with very limited information being available at the time.
(6) The Revell kit's nose undercarriage bay has some edges moulded on; these were removed and the fuselage intake ring edges slightly aft of the leading edge intake are also removed. Smoothing the inner areas here is needed.
(7) The horizontal tail stabilizers
of the Revell kit are oversize, but can be corrected at their tips. The
tip weight anti flutter balances should be much fatter and larger.
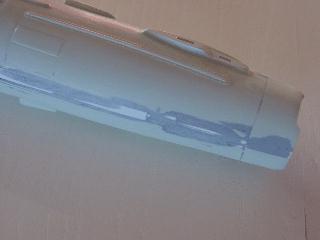
Widening the Revell fuselage is being
done now. Inserts of card strips were made.
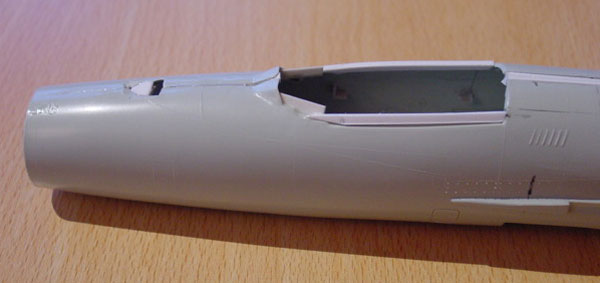
(8) The cockpit sides needs some adjustment if you widen the fuselage. Add some strip here, re-assuring the canopy lower width at again being 25 mm; the canopy as provided can than be used, it's shape being OK.
Also, this way you get a more thicker edge at the cockpitframes. This is evident from cockpit pictures.
The Revell kit with inserted cart strips to widen the fuselage; note cockpit strips: making the opening smaller and "higher"; this will make a huge difference how it looks. The canopy will fit again, being correct on its own!
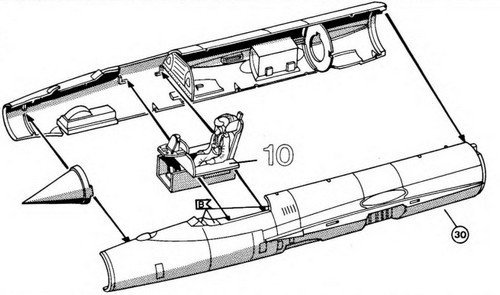
A new cockpit "bath tub" was made for the Revelll kit from cart, using the Trumpeter MiG-21 f13 kit tub part as an example. Also, the upper cockpit sides were filled with putty and sanded.
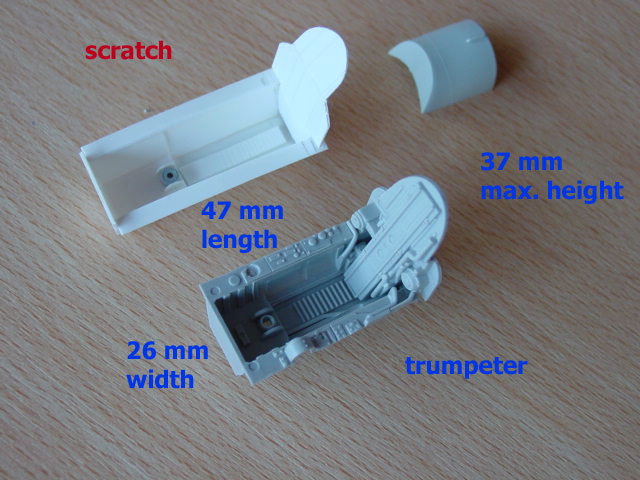
The scratch
made tub has approx these dimensions:
length:
47 mm
max height
including aft bulkhead: 37 mm
height walls
from floor to side console: 9 mm
width 26 mm:
5 mm right side console + 15 mm central floor + 5 mm left side console
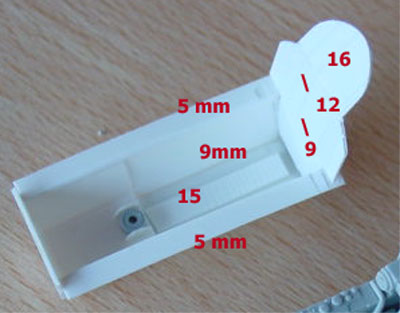
height from side console to cockpit-canopy edge/sill: about 15 mm (not seen on photo)
The final cockpit interior detailing
will done after the whole kit main parts are assembled, so preventing damage
to finer details because doing the rough work is completed first.
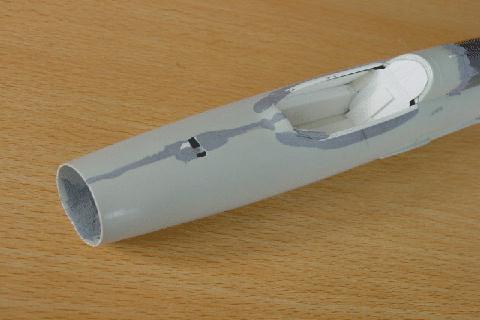
the hole on
top between intake and cockpit will be covered with a separate shield later
on; this contains the windscreen cleaning unit.
Note the putty
inside the intake, to be sanded later to get a smooth intake area.
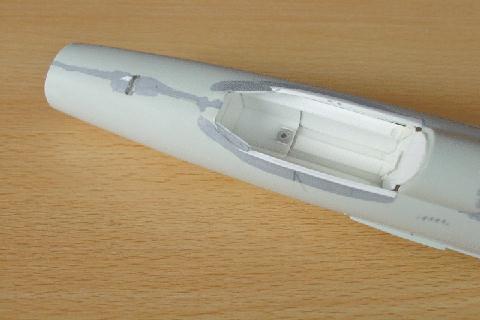
The main parts
taped together to get a general impression; check photographs for any other
errors.... it seems OK now
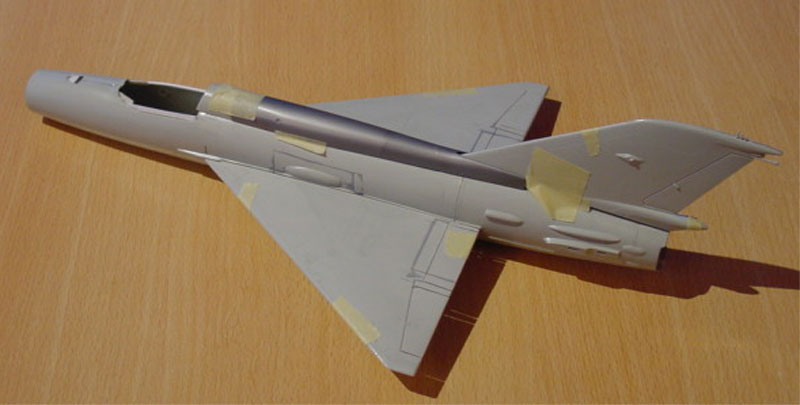
The fuselage plug has been sanded
and now is ready to take the top spine, lower wings and dorsal fin.
The horizontal stabilizers of the Revell kit are too small, especially the anti-flutter pods and the chords are to small; some card has been added to the trailing edge, and some strip into the pods. Putty will be added next and this will be sanded smooth to shape.
lower area
near exhaust pipe; dorsal fin to be added next..
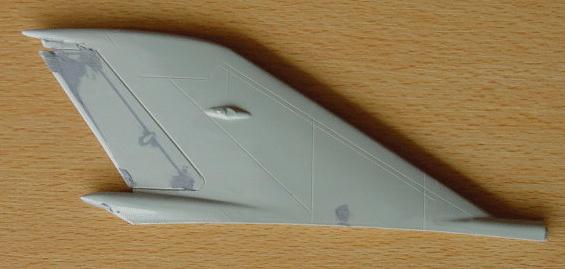
Trumpeter MiG-21
F13 vertical tail [kit 1] to the left , which looks correct;
Revell [ kits
2, 3, 4 ] fin to the right: should get larger chords.
The horizontal and vertical tails are seen on the right picture still with putty on, ready to be sanded.
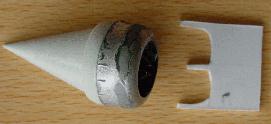
The intake cone bullet is something needing some attention as you would like to fix it at the latest possible stage. The solution was to make a carefully made receiving piece of cart that will be glued into the intake once it has been smoothed. The bullet will be fitted later on.
 .......
horizontal
extended and modified tail and on the right
the intake bullet with piece of special made cart
The bullet itself was first sanded
flat at the outer edges. Revell moulded it with an edge but you will need
to have the actual gap! The bullet also extended to the rear with an old
exact fitting radial engine cowling from the spare box; the bullet can
be completely made ready, also add weight inside it. It will be fitted
as final part later on, carefully aligning it and setting it into the center
of the intake..
Go to next MiG-21 [Page 2 ]
....
- 4+ MiG 21
- Verlinden Lock-on 21
- BUNRiN DO 55 (nov 1974) (KOKUFAN)
- Aerofax :
(c) Copyright Meindert "designer"/ All rights reserved. Your comments are welcomed by webmaster
Created this page February 10, 2002