ITALERI
[ Page 7 ]
F-35A in 1/32 scale: kit review & modelling report of the ITALERI kit
... continued from F-35 page 6....
page 2
page 3
page 4
page 5
page 6
page 7
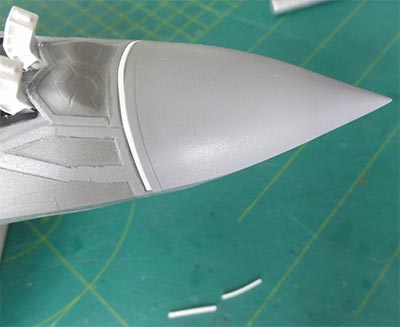
The nose gap was closed with a piece of bended cart and putty. It was airbrushed in the lighter mixed grey colour. Please note that the vertical tails, tail planes and flaps and slats were not yet fitted. This is done at a later stage to ease handling the model.

The next step was to prepare applying all those decals. It was ensured that the model had several thin coats of Johnson Future/Pledge varnish applied with the airbrush. The varnish was thinned with 25% water/alcohol mix. This will aid good decal adherence and prevents "silvering".
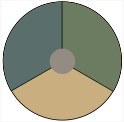
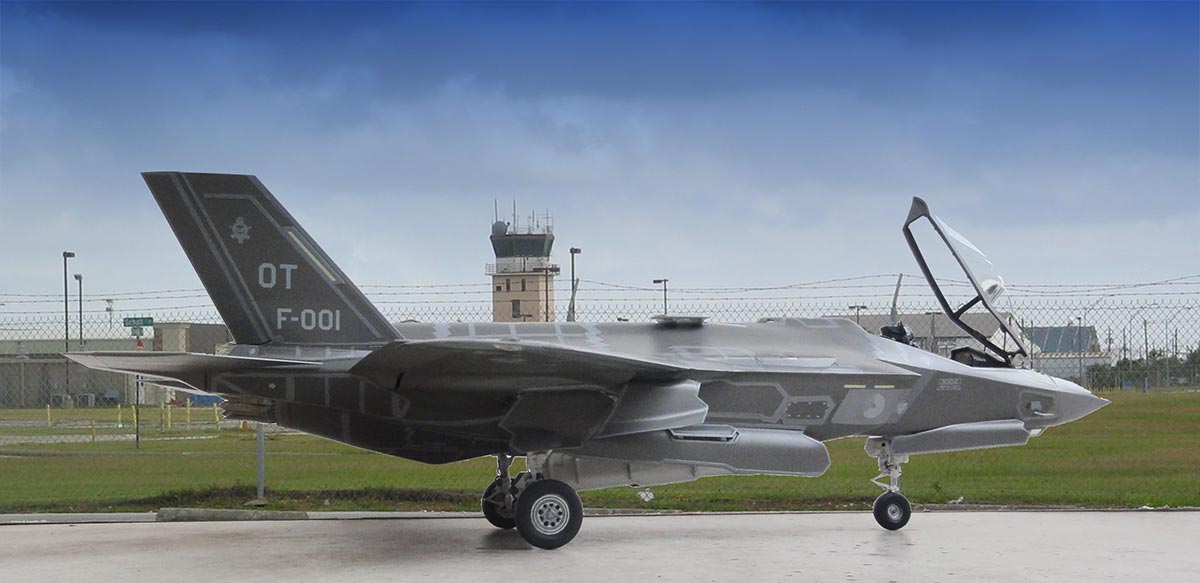
This F-35A was to be made as a Royal Netherlands Air Force "Koninklijke Luchtmacht" (KLu) aircraft. 37 F-35A have been ordered and the KLu got the first two aircraft including the first one coded "F-001" for which Italeri provides the decals in the kit as scheme "E".
I must say that the Italeri really did their homework here: the decals are fine, accurate, have good colours and are thin. Decalling includes the smaller stencils like "NO STEPs" but there are not a lot of these.
The decal location diagrams are OK as could be verified with the IPMS Nederland F-35 Walkaround [external link]. It took one afternoon to apply the fine decals.
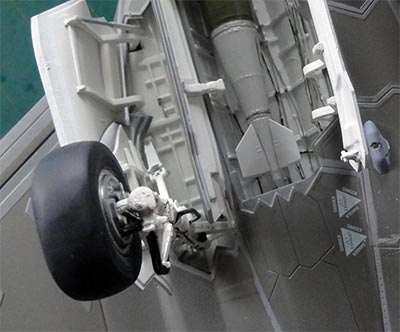
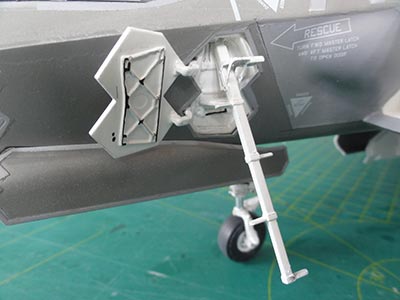
With all decals applied that needed a lot of model handling it was time to install all bits and pieces of undercarriages, doors and so on. Next was to install the undercarriage legs. Italeri did again a fine job here and this was easily done. I only had to adapt a bit the nose gear leg fitting as I had chosen to install this leg at this later stage. I had made location tabs when starting the build earlier. I had added some self adhering silver foil at the oleos. (Note that the wheels are better not yet fitted at this stage due to vulnerable attachment pins).
The forward sensor pod (STEP 29) below the nose needed a bit trimming of the transparant part #6H. Some various colours are inside. The glass house cover needed a bit White glue to close the tiny gaps. The thin frames were painted with a paint brush.
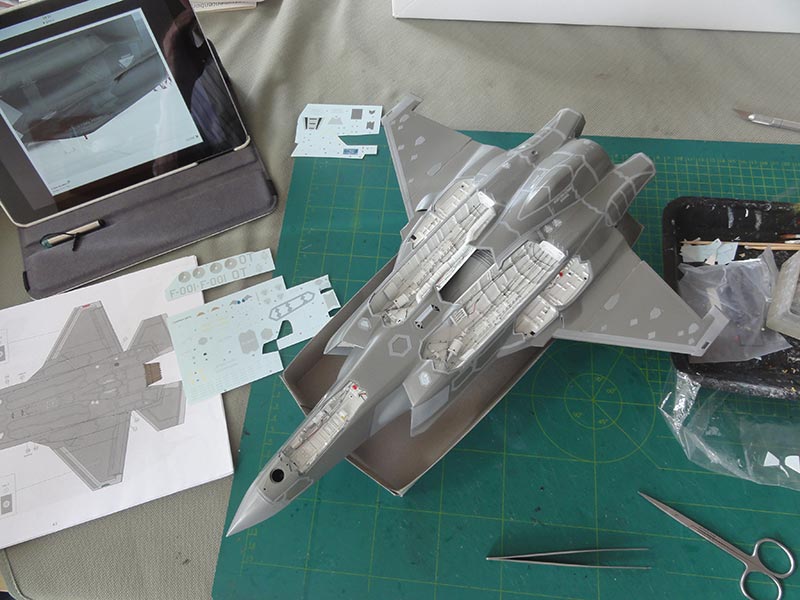
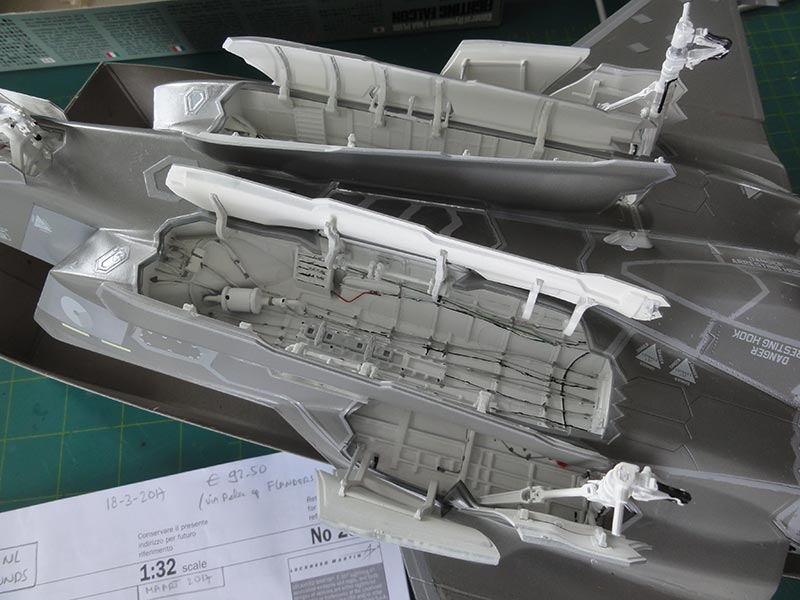
The installment of the main armament bay doors was next. These are a complex fit that needs studying but the fit is OK. Just take your time here.
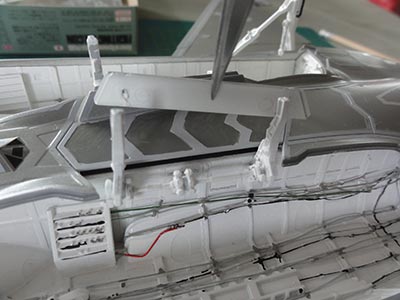
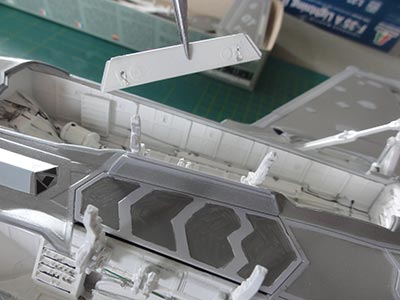
Note that the central panel #5E shown in STEP 18 is simply to be set in place. There is also a smaller internal door inside each large inboard bay door.
The undercarriage bay doors were also installed (but as noted not yet the wheels). I had seen that for a clean F-35 parked on the tarmac the forward main gear doors #14c + 16c are often seen set closed. I opted too show all bay doors open for a loading/ maintenance setting (so gear and weapons bays). Installing the kit parts for the doors is a bit unclear. Check walk around photos for correct position angles.
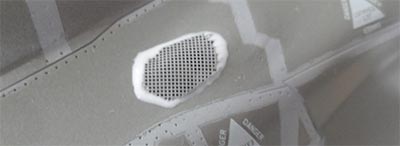
The lower slightly adapted IPP exhaust grill was installed (STEP 28) on the corrected area as seen on page 3. In the kit there is an etched metal part. Some white glue faired in the part, please not that I had corrected the shapes in this area earlier.
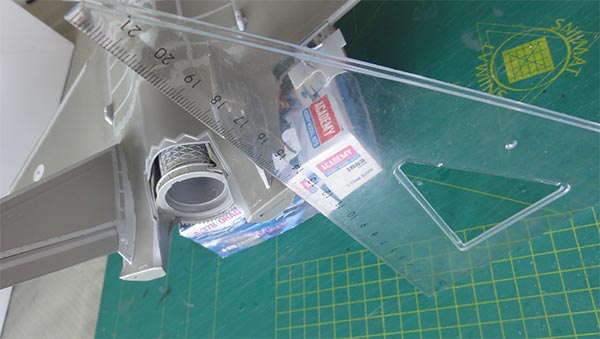
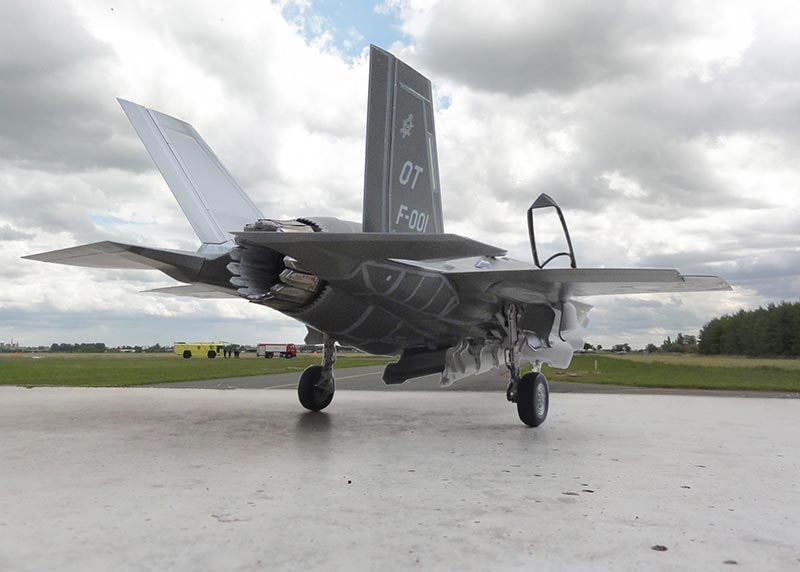
Now it was time to install the pair of vertical tilted tails. These were aligned with a draw triangle.
There are small gaps at the junctions. These were filled with White Glue and painted when dried.
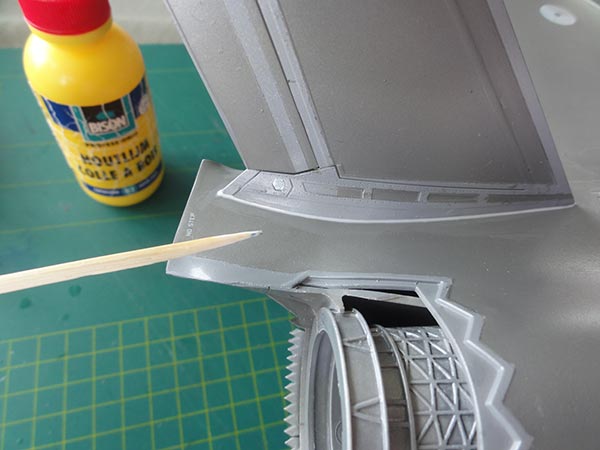
Once the vertical tails were installed, the horizontal tail planes, wing trailing edge flaps and slats were set in place without any problem. I set them in the neutral position. Later I found they should have a slight dihedral, tilted up.
As shown in STEP 39 the central refuelling panels at the fuselage spine were set open, this is also often seen on parked F-35's. (if you want them closed, you will need to do filling and sanding, better do this earlier thus).
The smaller antenna #19d was not installed, it is not present on the KLu F-35A.
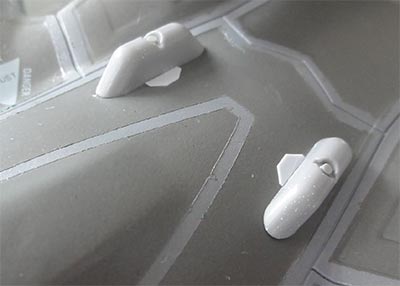
The smaller stubs #61 ("Luneberg lense" is installed to ensure training radar detection) were set in place as seen in STEPs 28 + 40. These were seen on the first KLu test F-35A. A small triangle shape was added at the base of each stub.
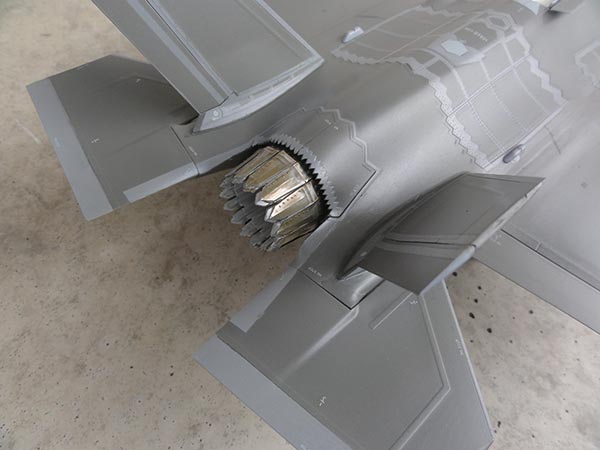
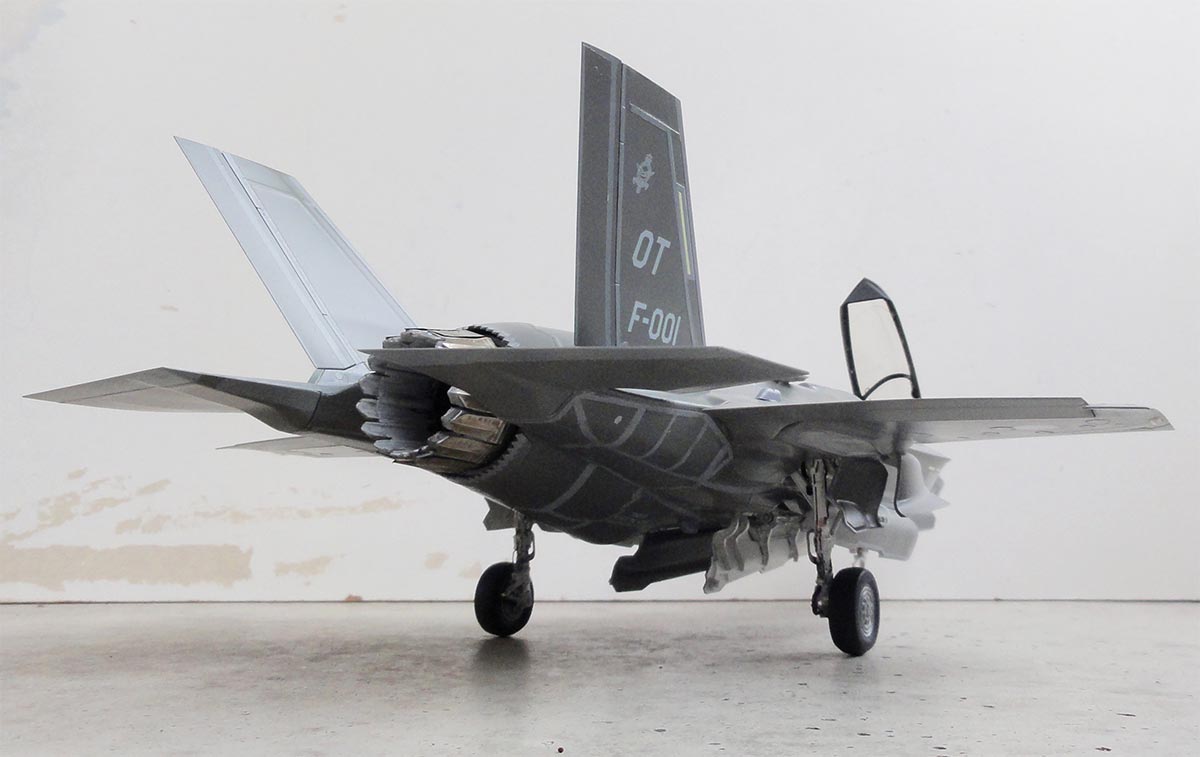
The rear exhaust nozzle part #27E in the kit is a bit simplified. I saw sort of "turkey feathers"on the exhaust of the real F-35. I cut slots with a razor saw and decided that feathers were to be installed.
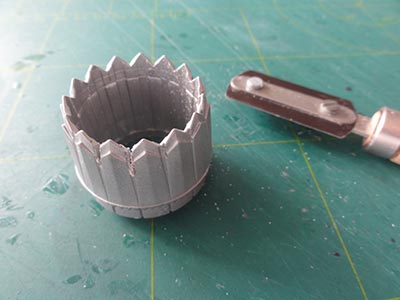
The feathers were made from thin metal foil, cut and bended in shape.
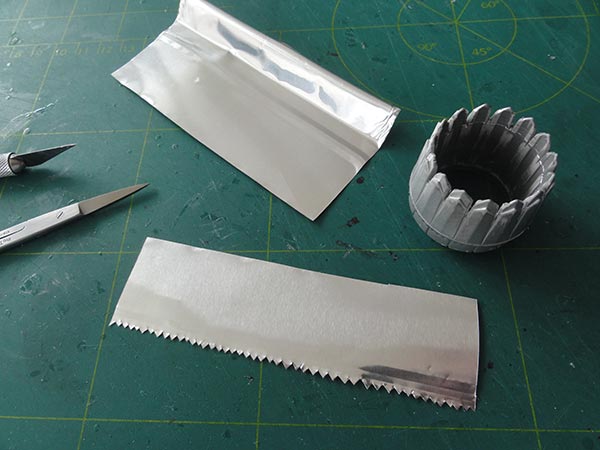
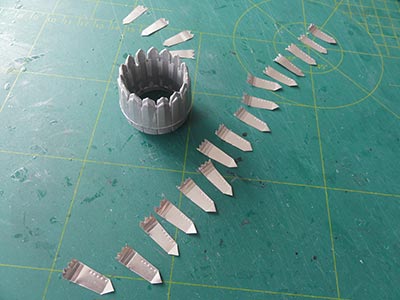
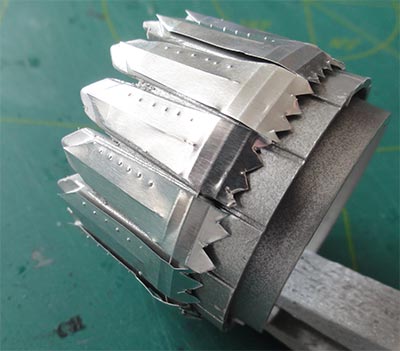
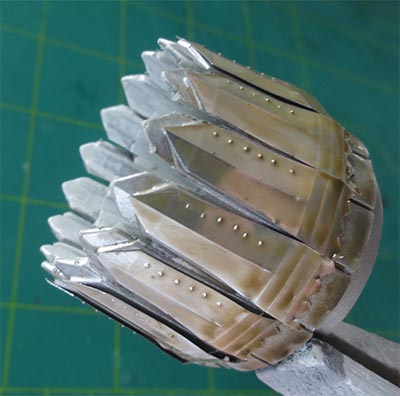
The feathers were fixed with super glue. It takes some work but it looks much better.
The metalized exhaust was painted with a thinned varnish mix with Tamiya clear yellow X24 acrylic.
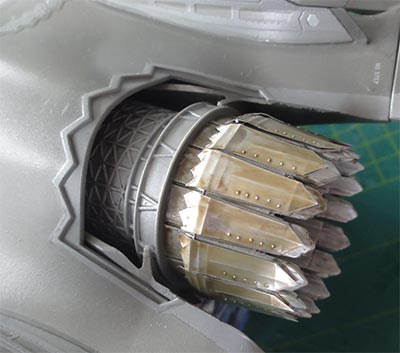
The improved exhaust was set in place and next the covers #6c, 12c as per kit seen in STEPs 28 + 39.
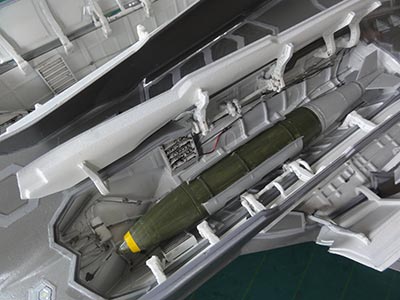
For the weapons bay I elected to install one GBU-31 JDAM. The parts in the kit (STEP 33) are fine, include thin etched metal vanes and decals are also provided. It is a tight fit as if the F-35 bay was designed to, just with few tolerances, accommodate the JDAM.

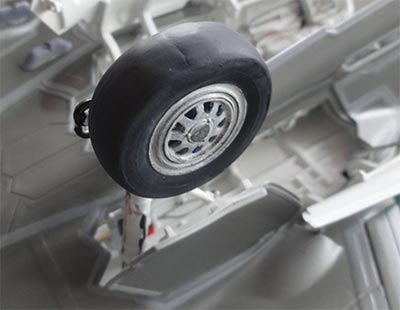
The corrected undercarriage wheels were now set on place. Note that the tyres were improved at an earlier stage with "less flattened" surfaces (see page 4). The inside wheel brake discs on the main wheels were suggested with tiny blue paint spots. The wheel hubs were a bit weathered.
The boarding ladder was also installed as seen in STEP 45. Some black details were added with an permanent ink marker. Pitots from the kit were also set in place on the nose.
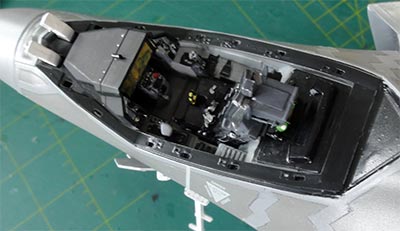
The cockpit completion was next.
As noted looking at the clear parts, these have a slight "yellow" hue and really suggest the "gold tinted" stealth canopy of the real F-35. Well done Italeri!
I found that I misinterpreted the colour of the cockpit edges. They were not medium grey but very dark grey. The same was true for the insides of the canopy frames (see STEP 42). I thus over painted with the paint brush these areas dark grey using Revell Aqua 78 "panzergau" acrylic. Note the temporary protecting tissue for the canopy to avoid scratches.
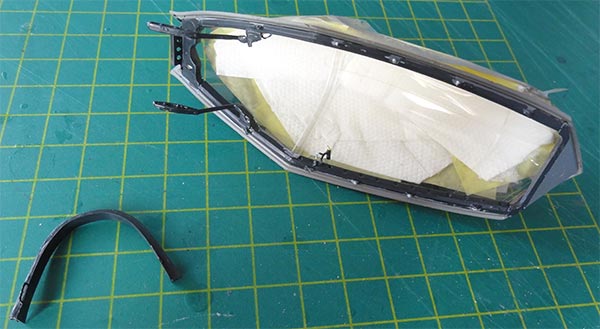
Inside the canopy some tiny additional detail was added. In the inside forward frame section also weight saving holes are seen on a real F-35A. Italeri forgot to inscribe these so these were suggested now with black paint. Note that the central frame #12F runs INSIDE the canopy (for "stealth"). Only fix this frame with its etched metal part of the lower joints to avoid spoiling the canopy looks!
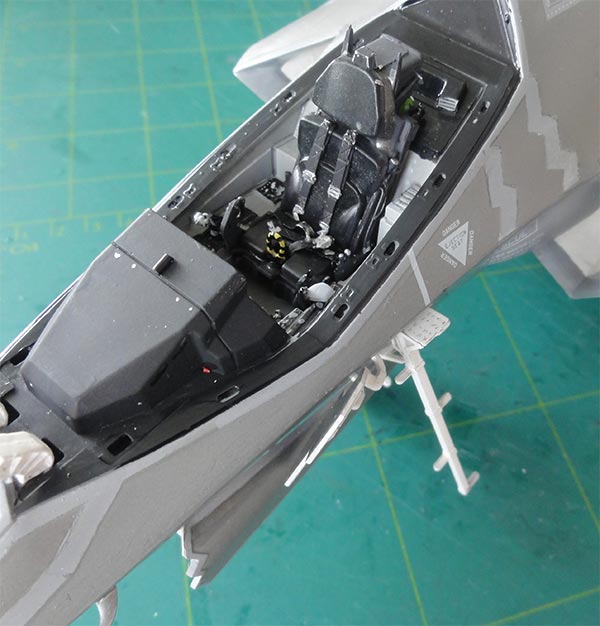
As seen at my F-35 scrap page here the seat is very dark grey with some darker areas. In fact the seat looks as Italeri describes in STEPs 1+2.
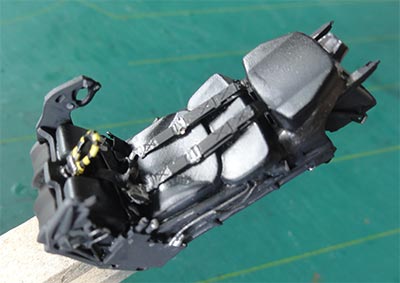
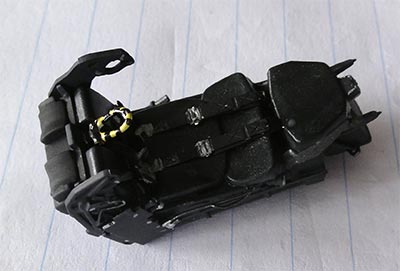
The seat was set in place in the cockpit tub.
At this stage the model parts installment was almost complete. Some weathering was done: a few coats are thinned consisting of acrylic Future varnish with some blobs of dark grey acrylics mixed in. This wash coat was roughly brushed on gear legs, insides of bays and so on. But don't over do it, this F-35A of the KLu is still quite new!
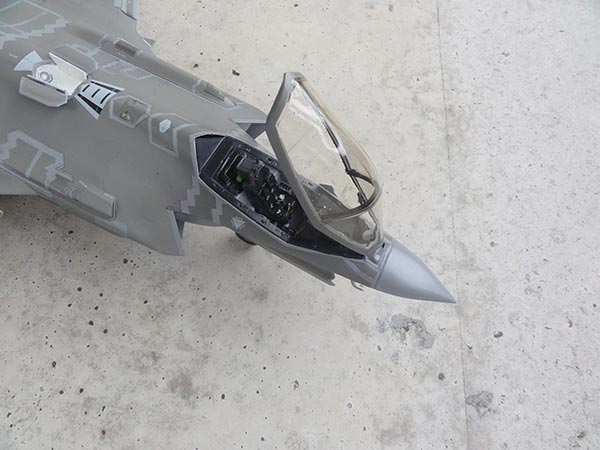
And as usual, before canopy installment some coats of thinned Johnson Future/Pledge varnish were airbrushed on the overal model. This protects the decals and gives an even sheen. The varnish is gloss but a real F-35 also looks gloss (may be because of the special "stealth" Have Glass paint?).
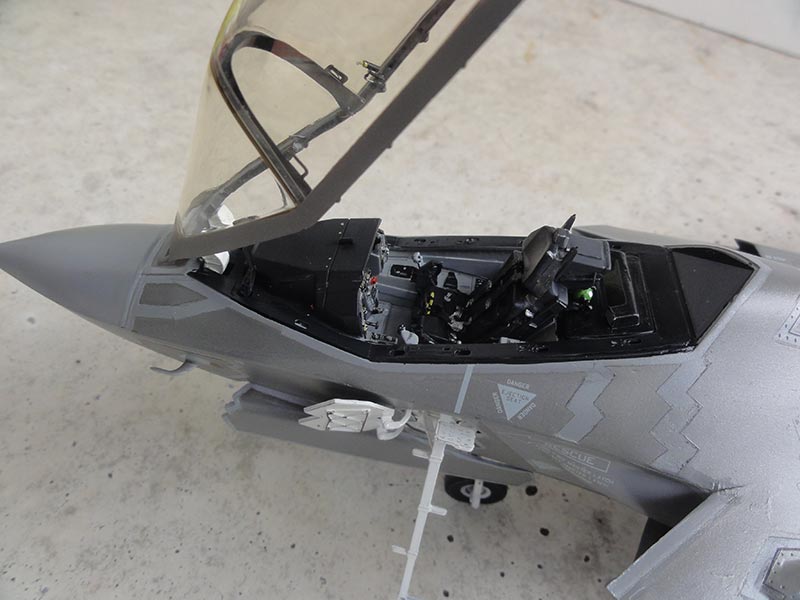
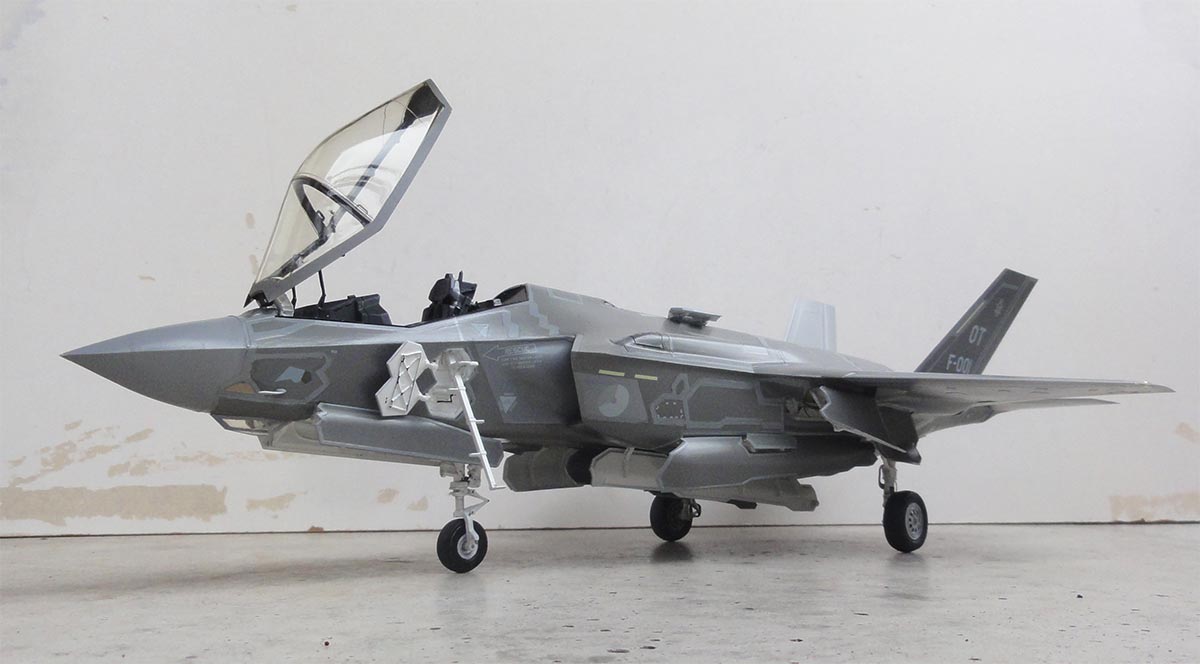
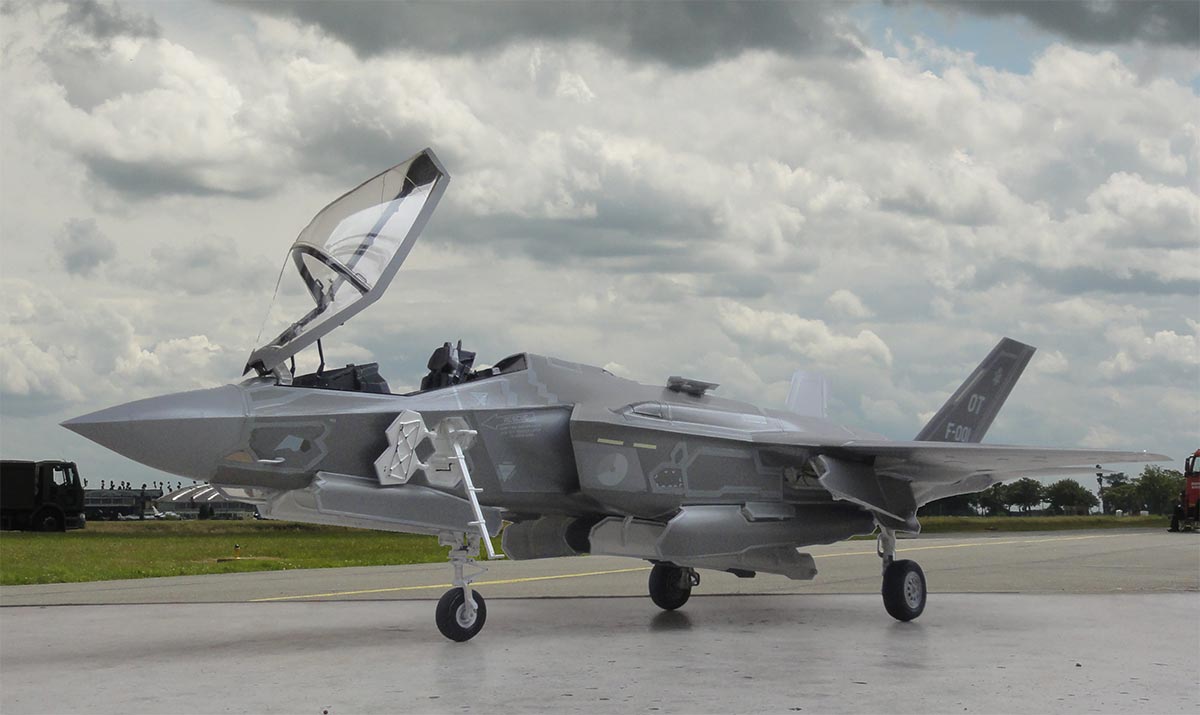
The main canopy was set in the open position, tilted forward. It can be done without any problems and I did not even need glue so the canopy can be removed for cleaning and transport.
THAT COMPLETED THIS NICE F-35A MODEL!
NEDERLAND


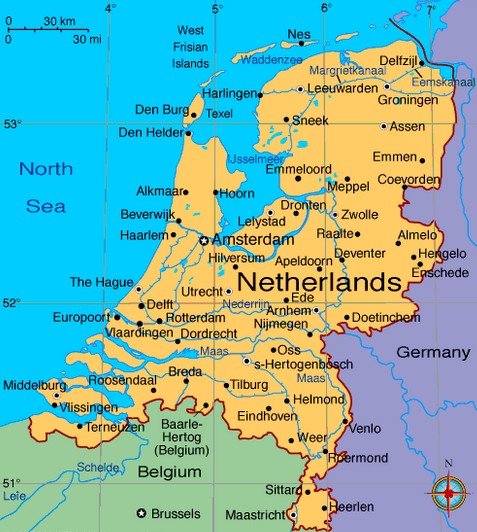
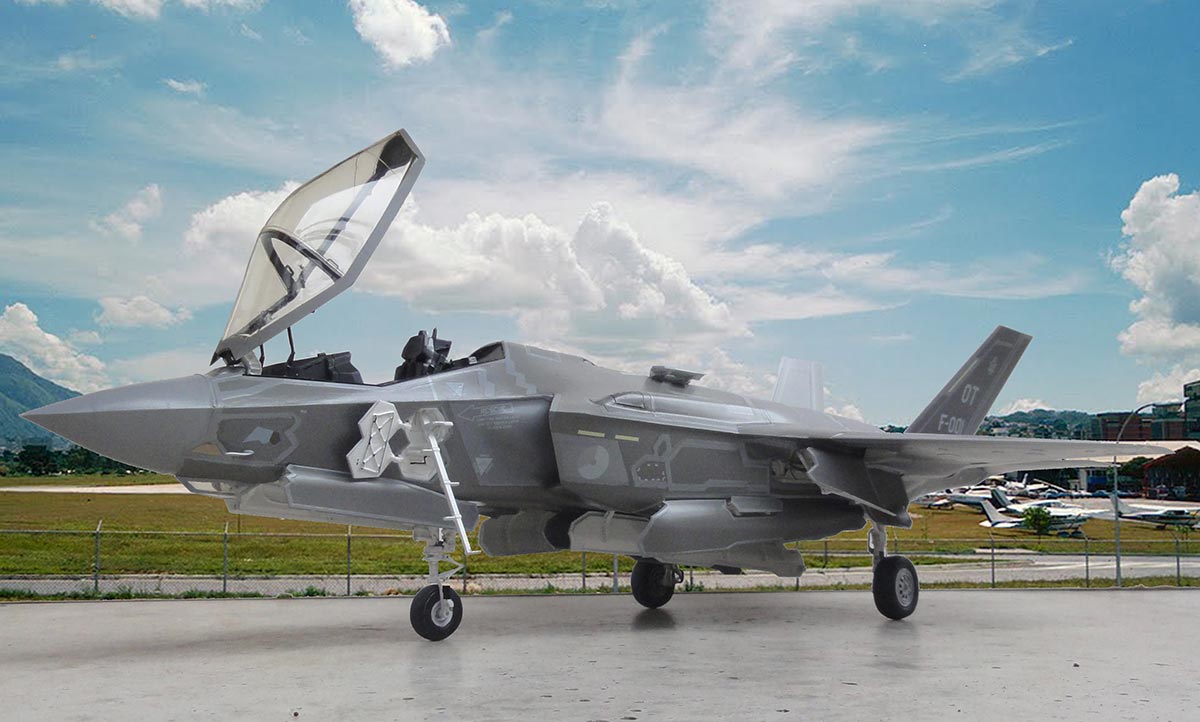
The Netherlands ordered 37 F-35A aircraft and started end 2013 testing their F-35 aircraft and train the first pilots at Eglin AFB Florida. First test aircraft arrived end May 2016 at Leeuwarden for a first evaluation like noise measurements. Operational F-35A aircraft of the KLu will arrive not earlier than 2019 in The Netherlands and main base will be Leeuwarden and probably also Volkel.

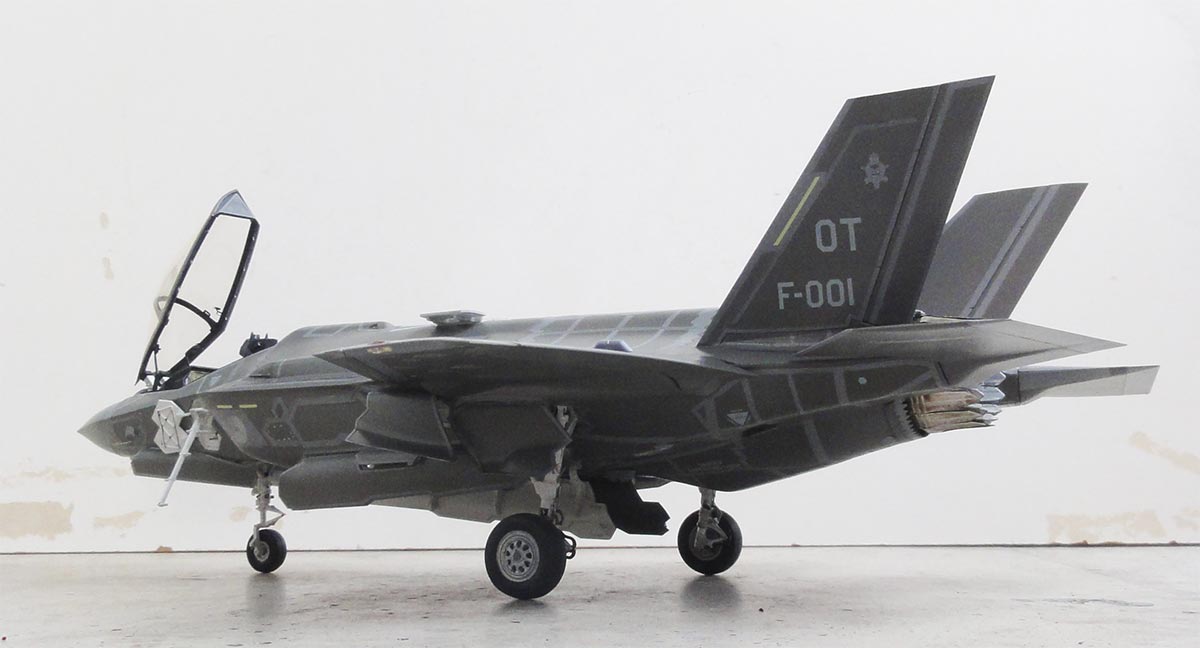


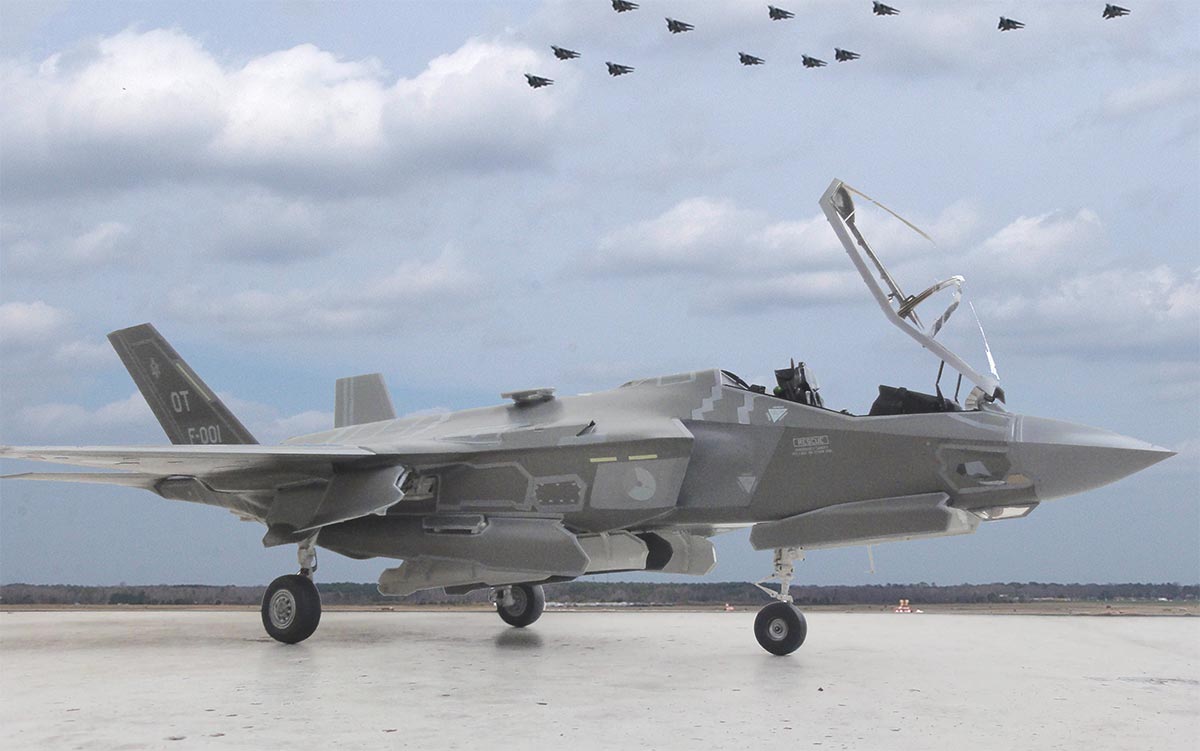
Lockheed F-35A Koninklijke Luchtmacht (KLu) "F-001" Joint Strike Fighter "Lightning II". First aircraft delivered and used for test and evaluation.

set in a scenery at Eglin AFB....
Back to 1/32 Models
(c) Copyright "designer"/ All rights reserved. Your comments are welcomed by webmaster
Created this page
August 2, 2017;
last update August 2018