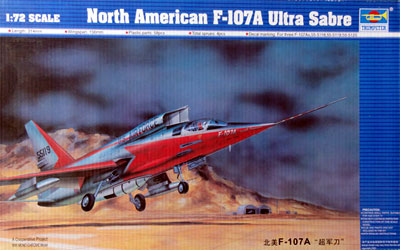
Trumpeter
F-107 model in 1/72 scale
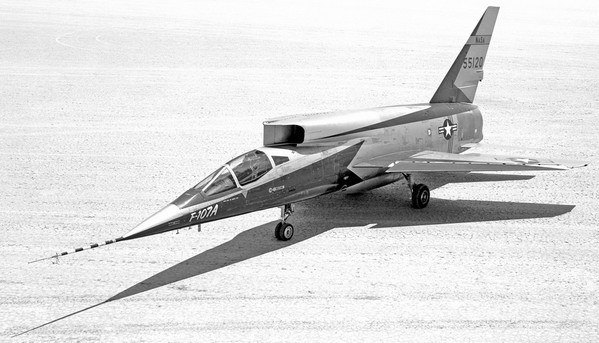
The North American F-107 was based on the F-100 Super sabre but with significant changes. The type was developed for a USAF fighter-bomber competition in the nineteen-fifties. It had an intake on top and an all moving vertical fin. In the lower mid-fuselage, a large recess was made for a nuclear bomb. The first flight was in 1956 and the F-107 was capable of flying up to Mach 2 ! Although the F-107 was a good aircraft, the F-105 was selected for a future USAF fighter-bomber. Some F-107 aircraft made were used for aerodynamics research by NASA.
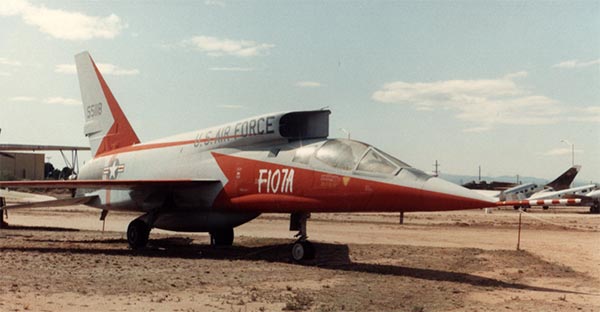
photographed at Pima, 1991
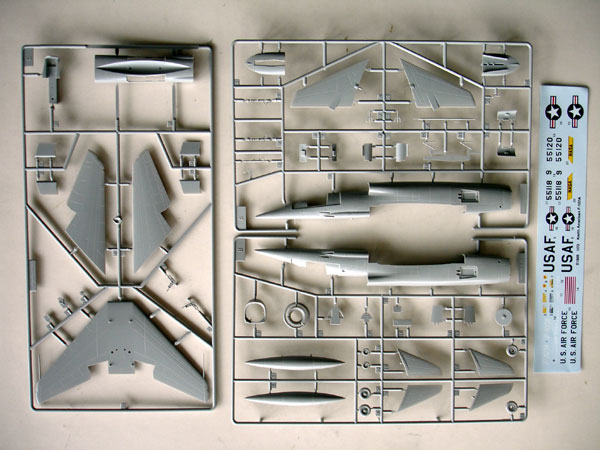
While struggling with a vacuform F-107 model from Project-X, Trumpeter came to the rescue unexpectedly with an injection 1/72 North American F-107 model, kit n. 01605.
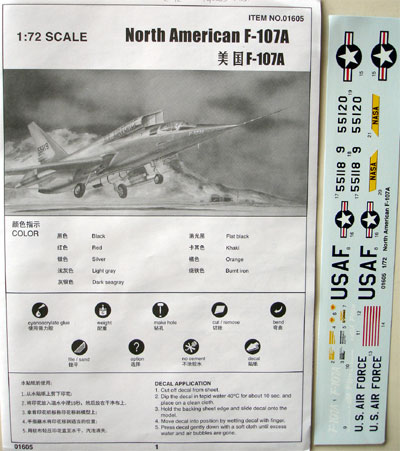
The kit has a basic layout with nice
plastic parts, nothing fancy but adequate. Panel lines are recessed. Decals
are fine but some replacements for the USA stars-and-bars are recommended.
 .
.
What was missing in my kit was the rear canopy part, so I will have to make a new one as after sales support of Trumpeter is virtually non-existant.
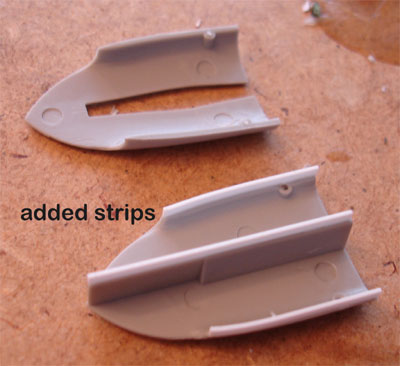
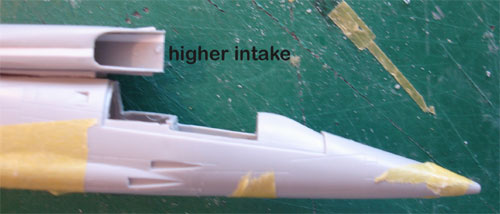
The kit has a number of shape issues that can be improved.
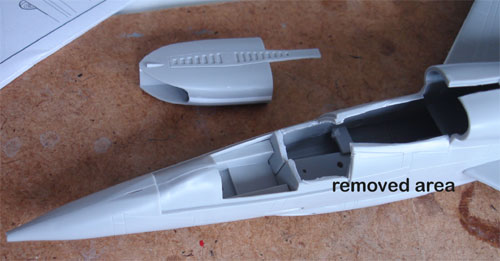
1/ aft of the seat, the coaming inside
can be made a bit more deeper. A cut was made with a razor saw.
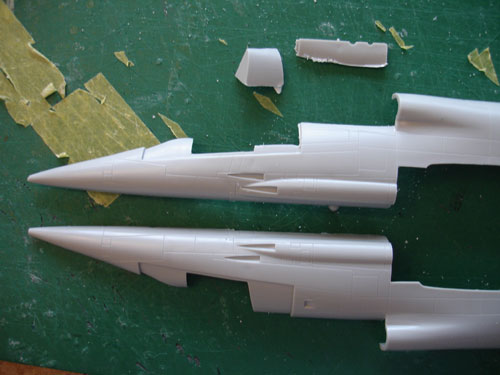
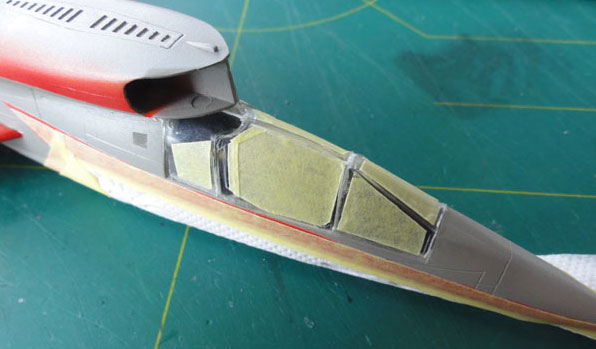
2/ the large intake is not high enough so too small. Some 2 mm strips were inserted to increase it's height.
3/ the distance between the intake a upper fuselage is a bit too small. A piece of card in traingular shape will be set in between to correct this.
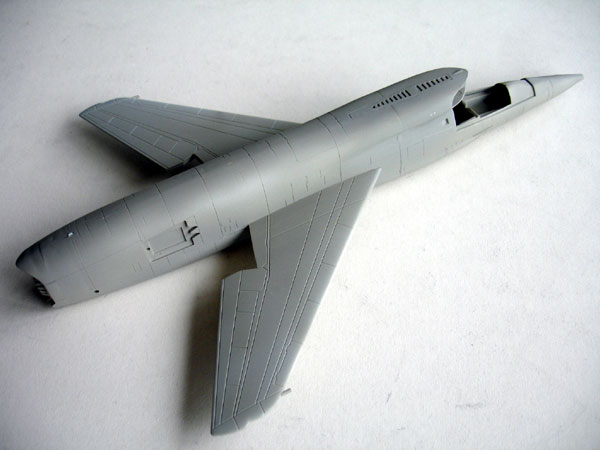
After filling and sanding, the model got a base coat of light grey, using acrylic Revell Aqua "grau 57" but any grey will do.
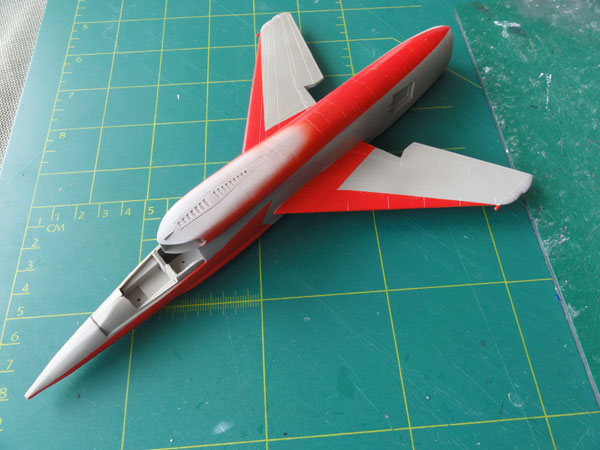
The F-107 prototype had large bright red panels, so now a first couple of red coats were applied with the Harder Steinbeck airbrush. Gunze Sangyo acrylic Red was used, first the matt paint #H13 followed by the gloss paint. When dry, the red areas were masked off.
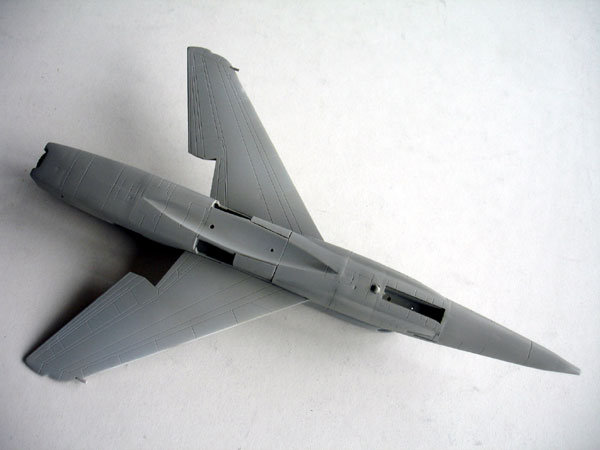
The rear window was missing in my kit, so from some transparant acrylic glass that can be bended a new one was made. It was blended in with putty and white glue.
Now gloss black was applied to get
a nice looking ALCLAD II metal finish. When the gloss black was dry, a
special masking trick was applied: some areas got small pieces of masking
tape where there are some airframe panels.
Next, a few light coats of ALCLAD
II gloss aluminium were applied with the airbrush. Not a full thick
coat was airbrushed in one go, but during airbrushing, some of the "panel
masking tapes" were removed. These were also sprayed over with the SAME
ALCLAD colour. The effect is a slightly different shade of aluminium, looking
as if different shades were applied.
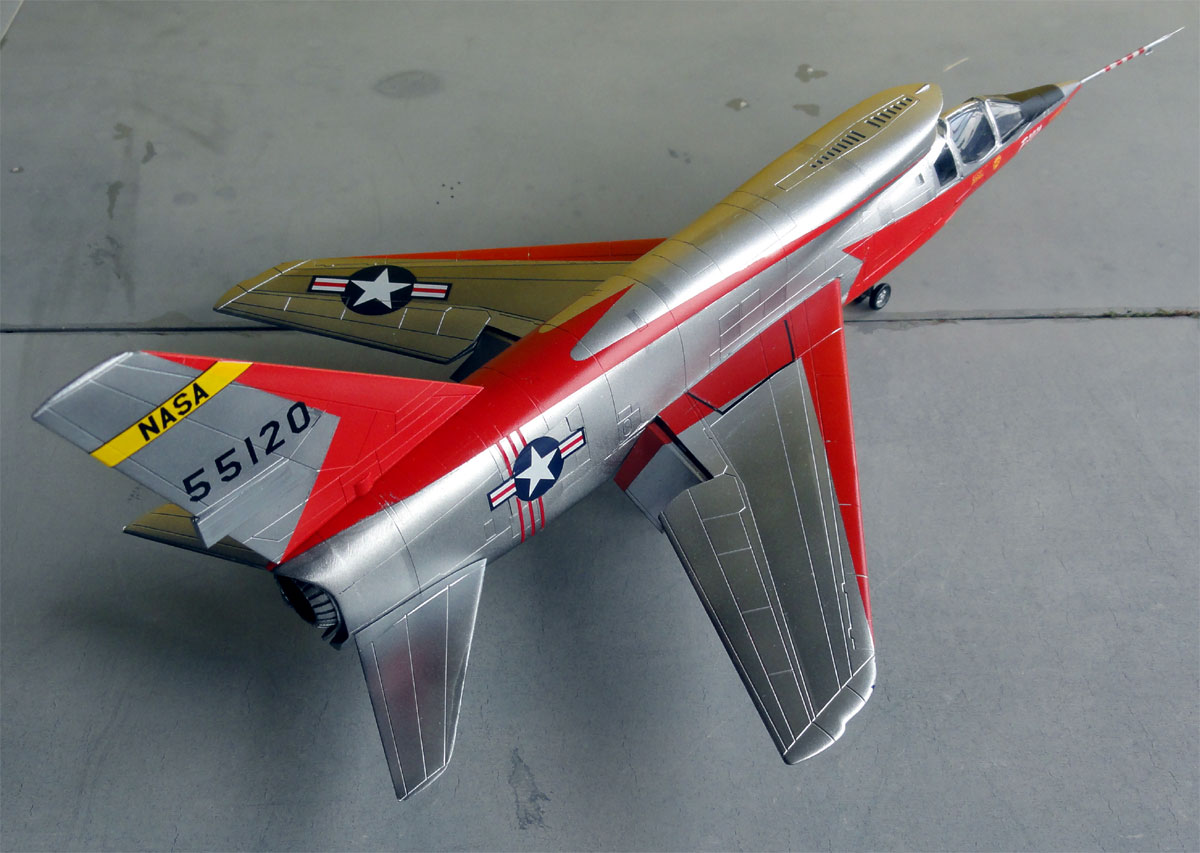
The remainder of the masking tape was removed and the red areas were now seen, the result is a nice bright model.
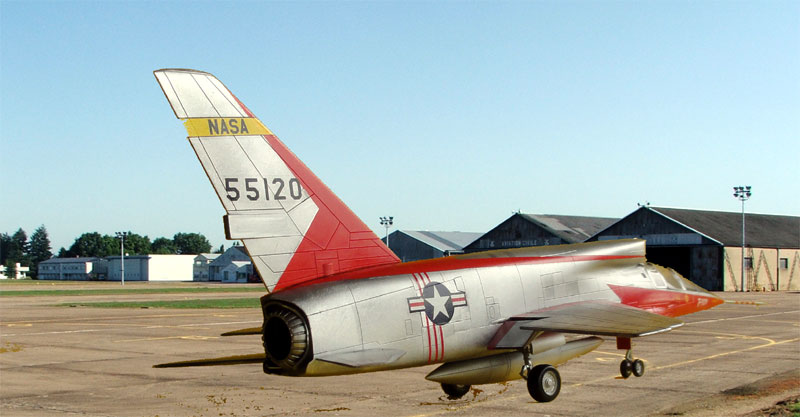
Decals and markings for the NASA aircraft
are now applied, no real gloss undercoat is needed as the metal and red
is glossy. The exhaust pipe got a dark metal finish.
![]()
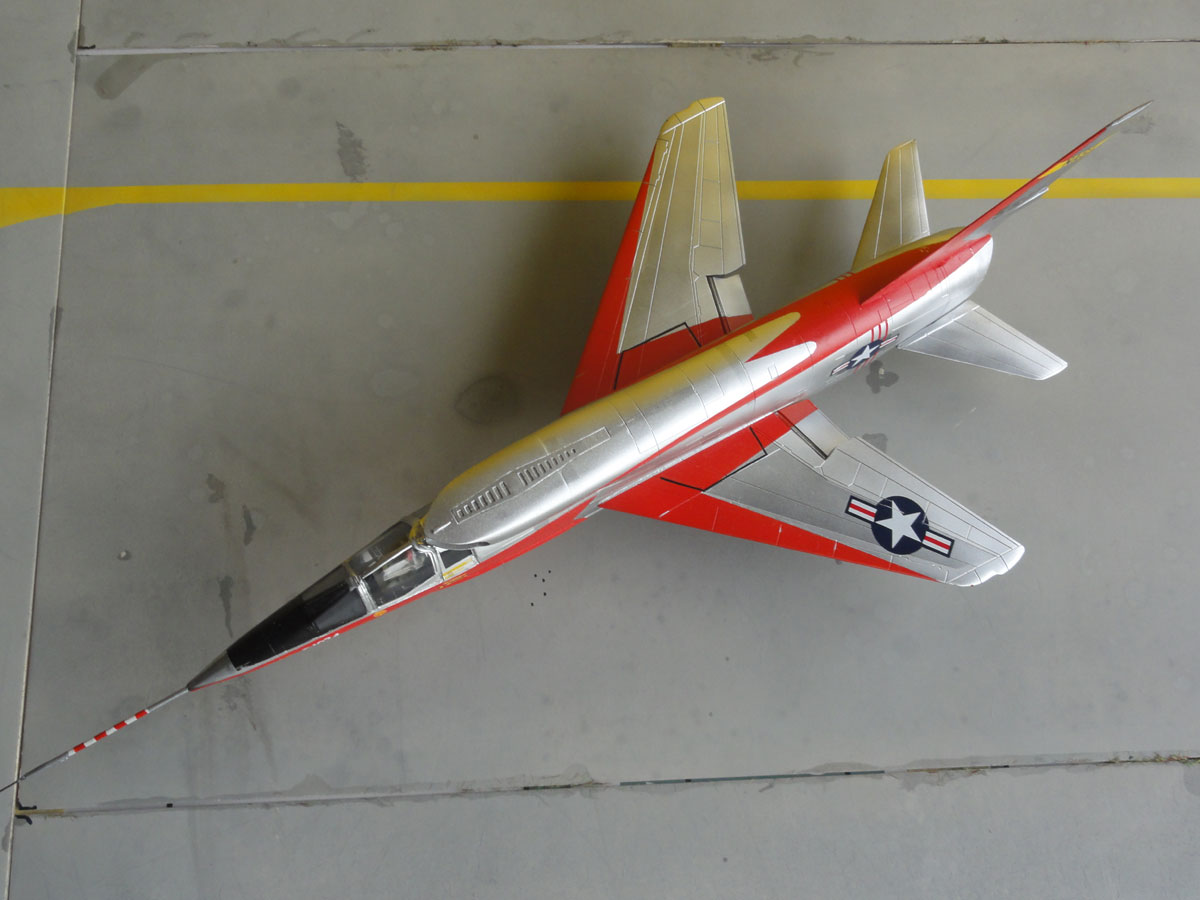
The stars-and-bars were replaced,
getting others from a Microscale decalset.
Finally the pitot tube and any anti-collision lights were painted. The model than got a protecting gloss varnish, using acrylic Mr.Hobby Gunze Sangyo Clear, again using the airbrush.
and set in some scenery....
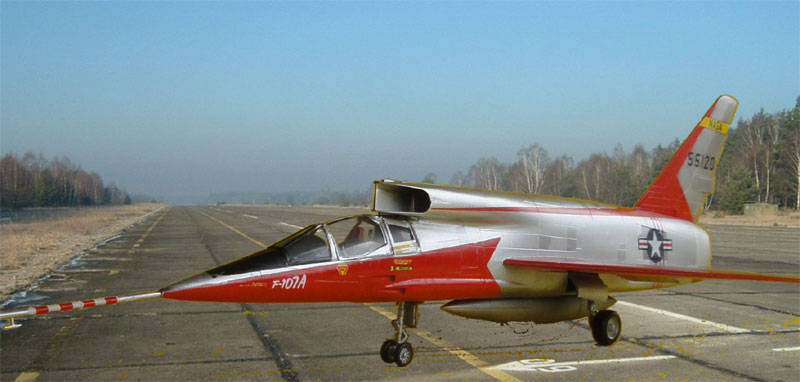
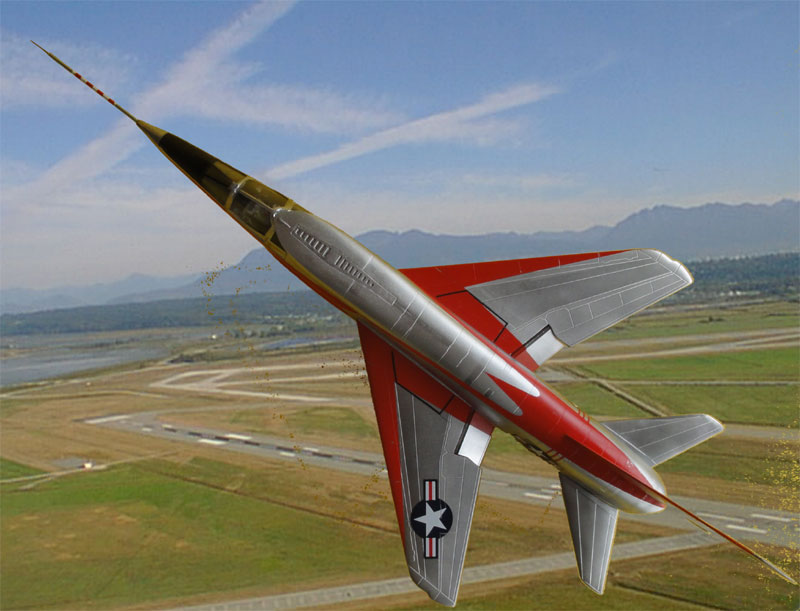
Another very nice model is now in the 1/72 collection.
(c) Copyright Meindert "designer"/ All rights reserved. Your comments are welcomed by webmaster
Created December 27, 2013