"V-bomber"
[ page 1 ]
Vickers Valiant models in 1/72 scale
MACH 2and CONTRAIL vacuform


The B.mk 1 bomber was capable of flying Mach 0,84 at 30,000 feet and had a typical range of around 3,500 miles without external fueltanks and 4,500 miles with the two tanks.
The Valiant
was involved in operations during the Suez crisis but the bomber designed
for strategic nuclear strike was not really capable of tactical bombing.
In October
1956, a Valiant bomber was involved in testing as it dropped the first
British atomic bomb at the Australian test range at Maralinga. It was Valiant
B.1 WZ366 that dropped a live Blue Danube nuclear bomb.
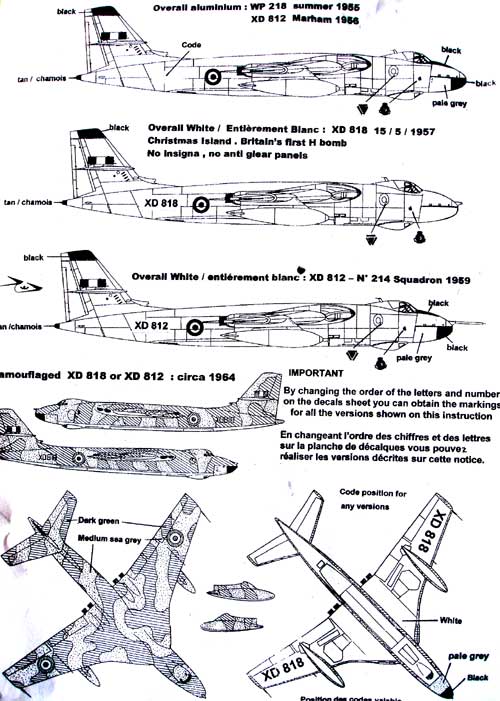
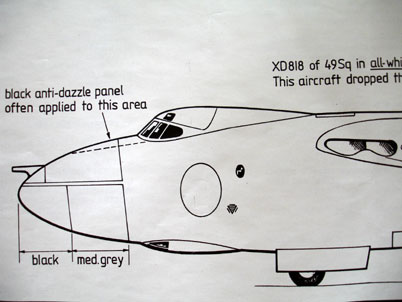
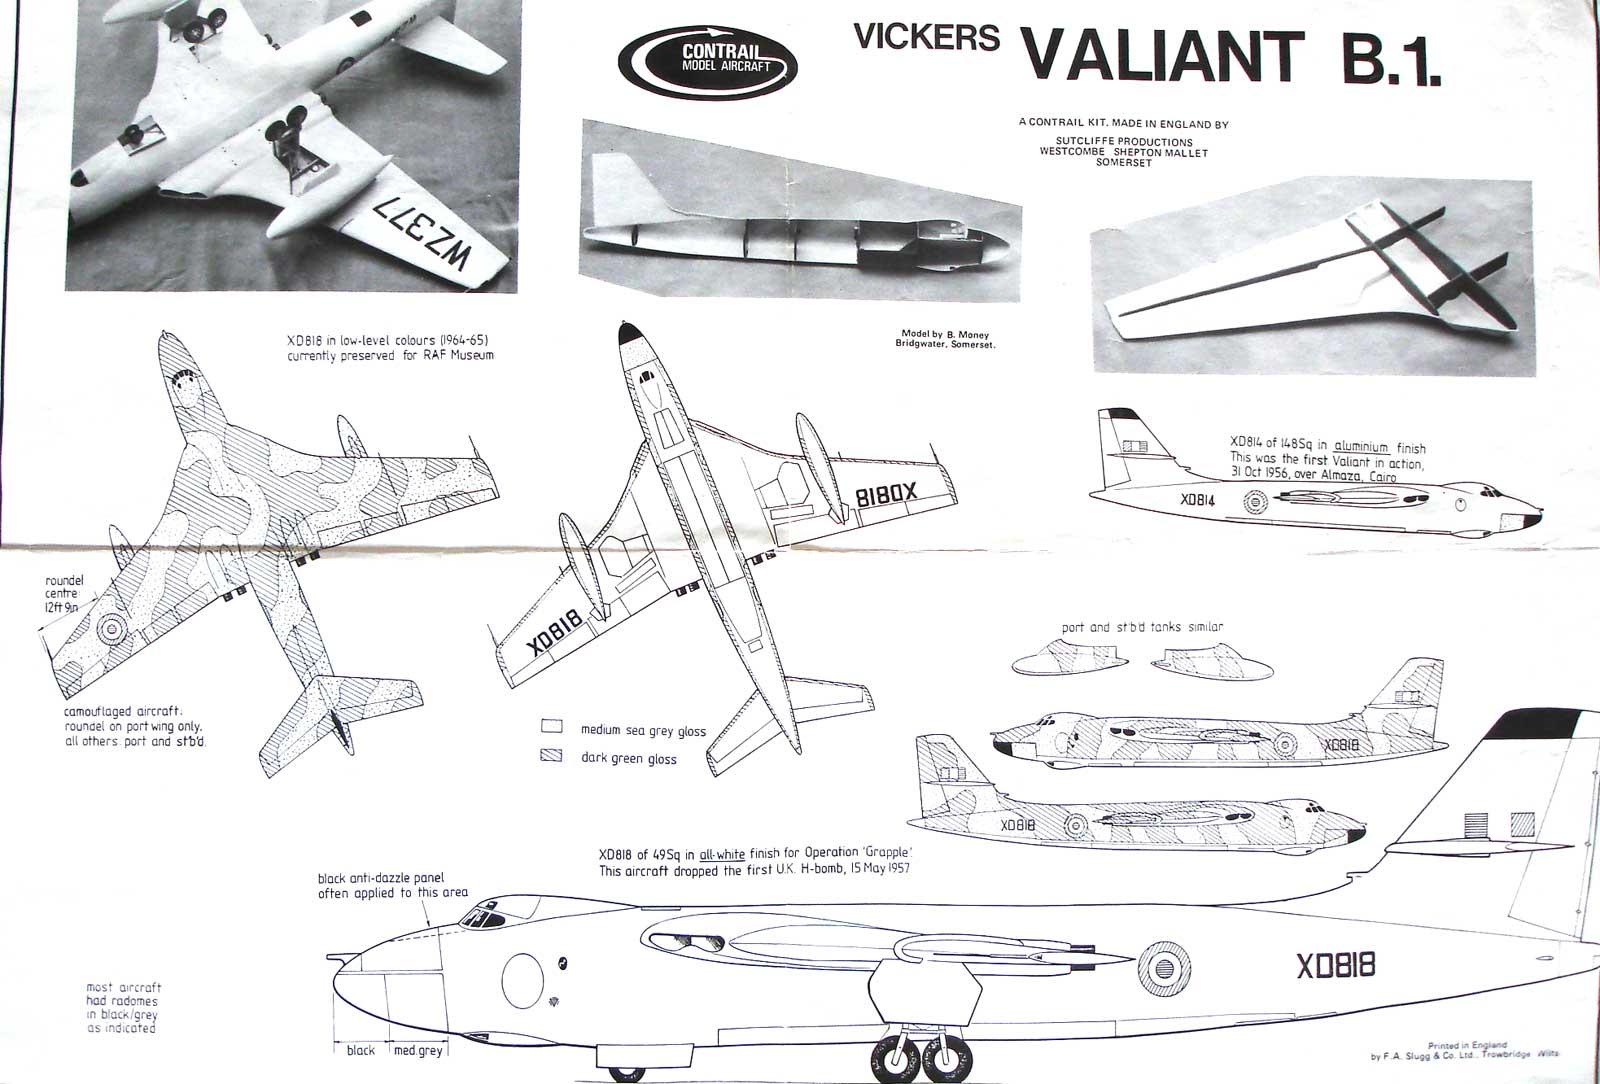
The first H-bomb was dropped by Valiant XD-818 on May 15, 1957 on the Malden pacific islands during Operation Grapple. (The MACH2 kit has also markings for this aircraft).
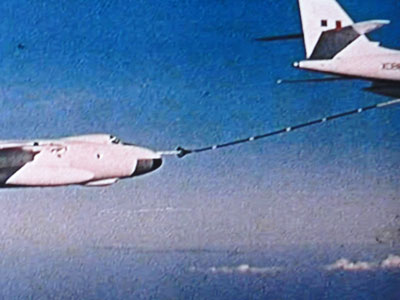
Valiants were used not only as bombers, but also in small numbers in a variety of roles including air refuelling tankers, ECM, reconn and test aircraft. In was a real pioneer in air-to-air refuelling techniques for the RAF.
In the beginning of the sixties it turned out that the other V-bombers (especially the Vulcan) were better suited for their role. From 1964, Valiants were than used for low level flying and got the medium sea grey and dark green colour schemes and no individual squadron markings. This however led to not unexpected off course fatique problems and rather quickly in 1965 the last RAF Valiant strike squadron was disbanded. Only 1 Valiant still exists, currently in the RAF museum at Cosford (UK).
Also a tanker version existed, with
some photos seen here:
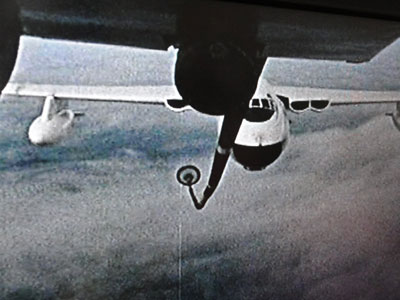
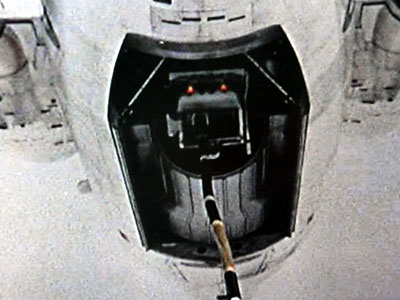
and the internal refuelling system/ winch
OK, what about the kit?
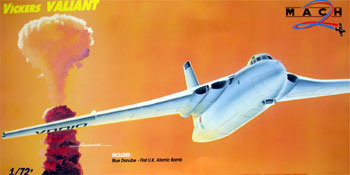
MACH2 from France offered for the first time a short-run injection moulded 1/72 kit of the Vickers Valiant. The kit was bought for EURO 56,= when it was just released August 2006. In the past a vacuform kit existed of Contrail.
...
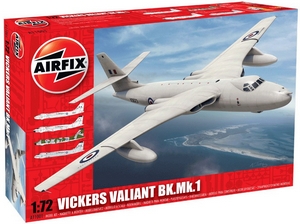
NOTE: Mid 2011 Airfix issued an excellent 1/72 kit of the Valiant. No need to buy the MACH2 kit any more...
...
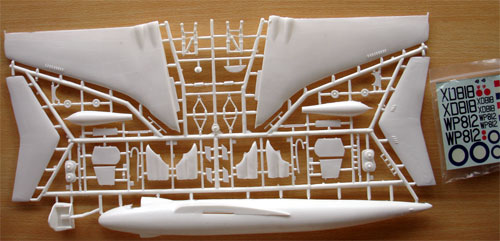
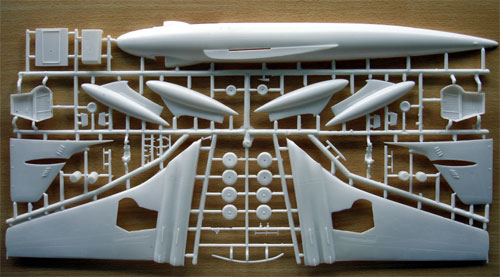
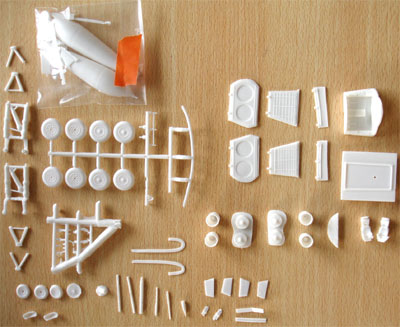
The MACH2 kit is typical of short run kits, with thick sprues and the kit seems crude when opening the box. It is thus not a "shake and make" type of kit. But the parts are remarkably better than on previous MACH2 offerings. The kit has about 60 parts in white plastic, some small transparant parts and a small decal sheet. The overall kit assembly is not too difficult as it has not that many parts.
Some of the MACH2 kit parts are for
a shape pretending to be the "Blue Danube" atomic bomb, its transport
trolly and the two large external underwing fueltanks.
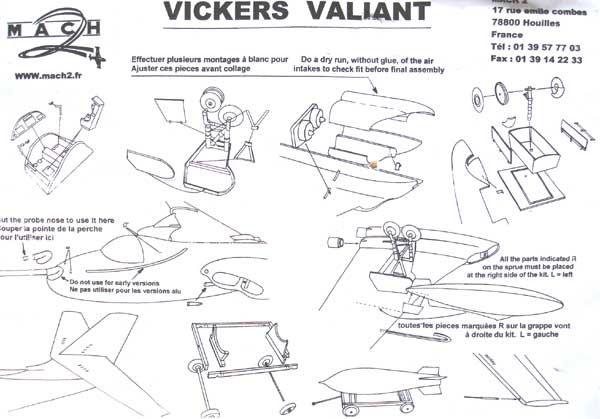
The one page kit assembly instructions
are a bit a disappointment. It is clear what should be done, but why not
provide the usual assembly sequence drawings?
MACH2 kit colour schemes
Preparations
I started with cutting the parts
from their thick sprues and cleaning up all the parts with an X-acto knife
and sandpaper. This took about one hour, I got rid of those ugly thick
sprues and ended up with nice parts ready for further handling and assembly.
(NOTE: The left fuselage part was warped in my kit. I taped it on a piece
of thick wood, and dipped it into hot boilled water. This straightened
out this part).
Also remove all those inside moulding stubs with a cutter. They are sometimes in awkward locations.
The panel lines are recessed but not
always straight. Some re-scribing of the panel lines is worthwhile, some
of this work should be done now as you now have better handling.
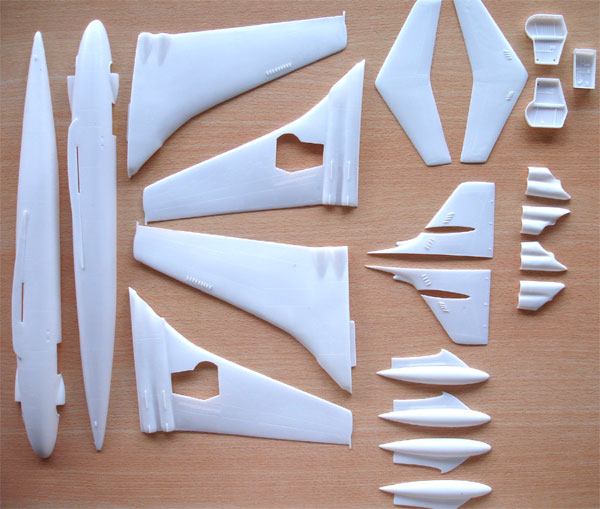
Prepared
parts
Shape and accuracy
The MACH2 has some problems here. Also as a further check and as I have an old unassembled CONTRAIL vacuform kit in 1/72 scale, I also looked at that kit.
Lets start with the positive matters on the MACH2 kit:
The wing shape and proportions of MACH2 and CONTRAIL are quite the same, so no worries here. A quick dry fit showed that the kit's wing would have a span of 48 cm , whereas the real plane has a span of 34.85 m (or 48.4 cm in 1/72 scale). However, the difference is not really noticeable.
The tailplane and vertical tails also
seem OK.
Please note that some thinning of
the surfaces' trailing edges will improve the look of the model.
And now the bad
thing:
I took a look at the fuselage and
did not like the shape of the forward fuselage with the cockpit and nose
curves. It just did not look right. A look at pictures (mainly from the
Aerofax book) shows that the nose should be longer. To be sure, in addition,
the drawing in Contrail kit looks to be 1/72 was also referred to.
 CONTRAIL
DRA WING
CONTRAIL
DRA WING
Lets look also than on main dimensions
of the Valiant.
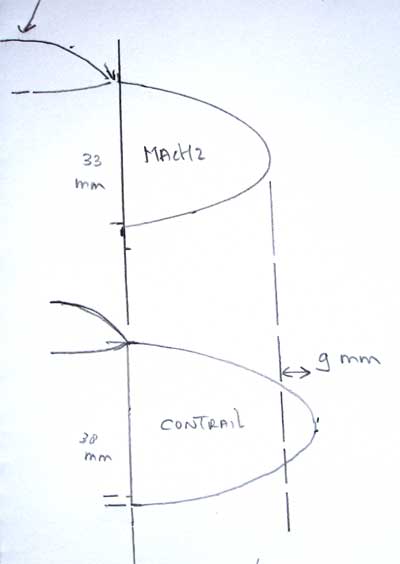
The official length of the Vickers Valiant is indicated as 32.99 m, so 45.8 cm in 1/72 scale ; it is not clear if the very small probe is taken into the overall official length figure, but it seems to be the case.
The CONTRAIL kit fuselage length is 45.6 cm and the MACH2 kit fuselage length is 44.4 cm, so there is a difference of 12 mm. (excluding the small probe).
Looking at pictures and both kits
I came to the conclusion that the main length difference is indeed in the
nose area in front of the main cockpit windshield. It seems that the MACH2
kit nose is 9 mm too short here. This
is very prominent as the nose appearance is completely different as what
it should be. The remainder of about 3 mm is distributed in the aft fuselage
sections, but this is not disturbing.
Also, the fuselage of the CONTRAIL
kit is a bit deeper (about 3 to 4 mm) and higher than that of the MACH2
kit. There is not much that can be done on this; the look can be improved
at the the nose area by filling up the lower nose area forward of the nose
gearbay with some card. This suggests a bit deeper and higher look of the
fuselage here.
Another item that needs correction in the cockpit / nose area of the MACH2 kit, is the shape of both the upper cockpit protruding fairing and the lower fairing in front of the nose gear wheelbay. The fairings should be a bit more fluent where they meet the fuselage; this can be achieved by adding some filler and than send it all flush. (NOTE: not yet seen in these pictures).
But remember, the good thing is that the remainder of the MACH2 kit is quite OK.
Correction
measures
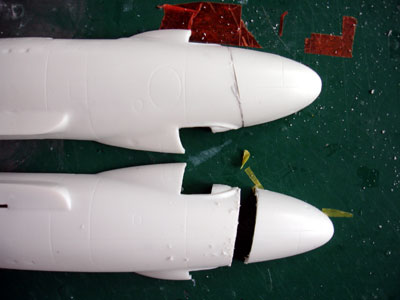
The nose shape can be corrected with
some work. I cut of the nose of both fuselage halves at the panel line
that runs in front of the windshield towards the lower nose fairing. Make
the edges smooth with sandpaper.
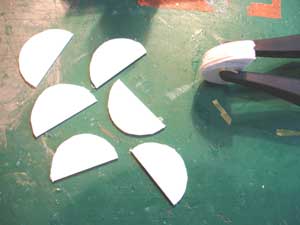
Next, 12 half round disks were cut
out of 1,5 mm (60 thou) card. Six halves for each nose half were glued
together to get a disk of 9 mm. This is the extra length needed in the
nose area. (now first move on to next cockpit area assembly....). NOTE:
I made two separate half disks (and not 1 round disk) as this makes alignment
and assembly much easier.
Fuselage assembly
The MACH2 kit main cockpit area is simple as provided in the kit with 2 seats, a floor etc. The rest of the cockpit with the remaining crew is not catered for. As the Valiant cockpit is mostly black inside with very small windows, no need to detail this area further is really needed. Painting it dark grey/ black, adding the seats with some brown seat cushion colours with some straps should do the trick here.
The nose gearbay fits very poorly onto a sort of horizontal floor. Make sure to fix it securely, otherwise you will end up with a dis-integrated nose gear later! You will need to close the gaps around the bay, white glue is usefull here.
Along the fuselage length, some pieces of card were glued on the edges to get a stronger joint later on between the fuselage halves. In the forward area, paint the inside of the fuselages black now.
Next is to find weight to add in the
nose of the fuselage to prevent "tail sitting later on" . The two fuselage
halves (with there noses cut off) were now assembled. Clamps were needed
and leave aside for an hour to dry thoroughly.
The two nose halves that were cut-off
were assembled together and left aside to dry.
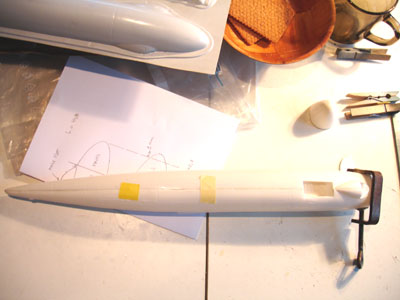
After an hour, the two half round
disks were now glued to the forward fuselage assembly. Next, the nose was
added. Make sure to align and center carefully here! The fuselage length
is now corrected and this vastly improves the look of this model.

In the above picture note that some
card was glued between the lower glazed fairing and nose. This will help
a bit in correcting the lack of depth of the MACH2 kit fuselage.
Sanding, filling, sanding, filling...
work in progress...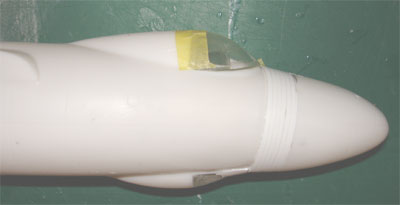
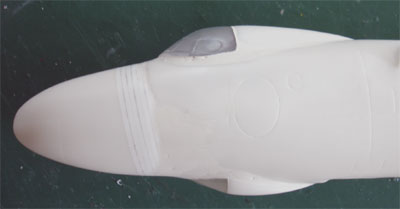
The "lengthened" shape is already
much better like a real Valiant!
After fitting in the plug to extend the fuselage nose, a LOT of sanding was needed. Also the cockpit shell/ fairing with the windows and aft section is wrongly shaped. It is too pronounced as you can see above. I added lots of filler to get a more gentle junction between the fairing and main fuselage.
Add the window parts and sand the main window frames flush as you will see the whole of windows and fairing is simply not symmetrical. You may correct the looks of this area by painting symmetrical windowframes on later.
The cockpit
window including the smaller eyebrow windows were
polished and masked with tape to prevent painting and damaging
later on.
On to next Valiant [ Page 2 ]......
References:
http://www.thunder-and-lightnings.co.uk/
RAF Museum: the only remaining Valiant was moved from Hendon to Cosford UK museum.
Book: AEROFAX
Vickers Valiant , Eric Morgan , Midland publications (Publ.
Ian Allan UK)
[ NOTE: I was a bit disappointed
with this book as it has no real good dimensional 3-view drawings and cockpit
photos; otherwise it is fine ]
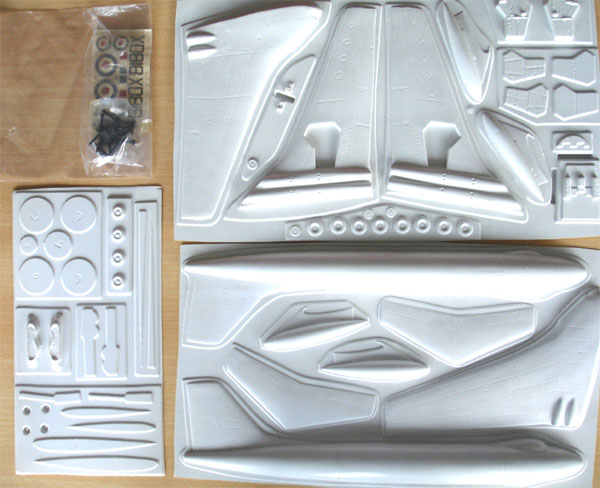
SOME NOTES ON THE CONTRAIL 1/72 VACUFORM KIT
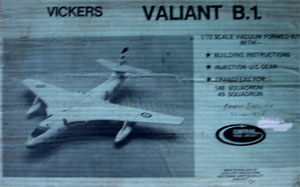
The vacuform kit of Contrail in 1/72 scale is quite old, but not that bad. You also get some short run injection moulded parts for the undercarriage legs.
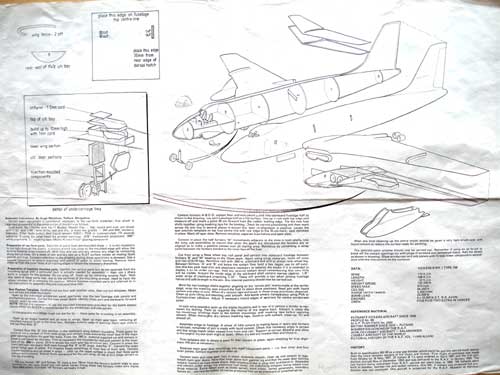
The assembly drawing of Contrail
DRAWING:
CLICK
HERE FOR
LARGER
IMAGE

(c) Copyright Meindert "designer"/ All rights reserved. Your comments are welcomed by webmaster
Created this page
August 13, 2006
Updated summer 2011