Zvezda
Sukhoi T-50 model in 1/72 scale by ZVEZDA
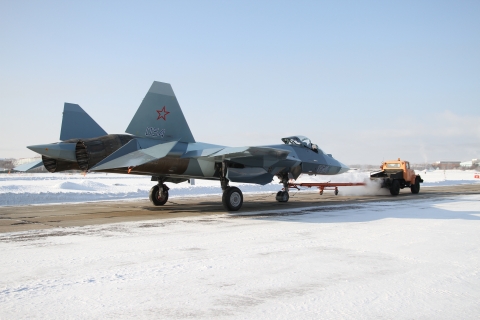
The Russian Fifth Generation fighter program PAK-FA ( "Perspektivny Aviatsionny Kompleks Frontovoy Aviatsi") prototype aircraft is the Sukhoi T-50. (The strange thing is that Sukhoi Aircraft Company does not show the T-50 as their aircraft or project).
It is to replace the current Sukhoi Su-27 and older MiG-29 Fulcrum and it is designed with compound curves and internal weaponsbay to have a lower radar cross section for later enemy radar detection. For that reason also composite materials are used.
It first flew January 2013 and about 5 prototypes are being tested. Top speed is probably over 2000 km/hr.
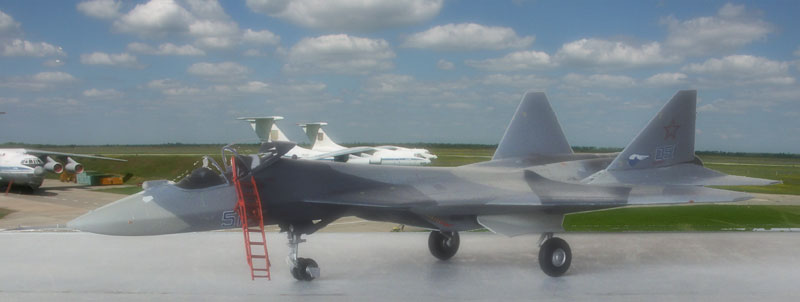
Between the prototypes there are slight variations. Pitot tube positions vary or even are absent. Also, some antenna fairings are different like the tail fairing. So check foto's for the model desired.
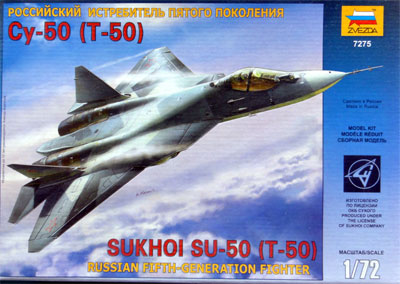
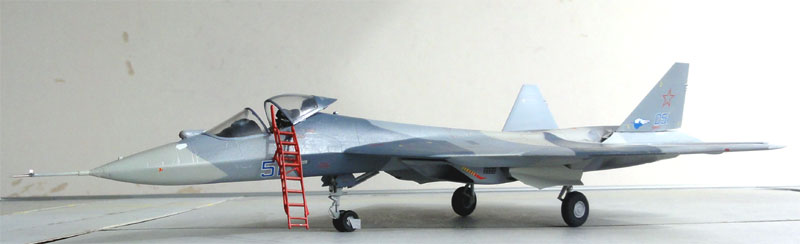
The Russian plastic model company ZVEZDA came with a very nice 1/72 scale model (Kit no 7275) end 2010. It came in a sturdy box with nice box painting.
(The Revell kit is the same with slightly better decals, licensed from ZVEZDA).
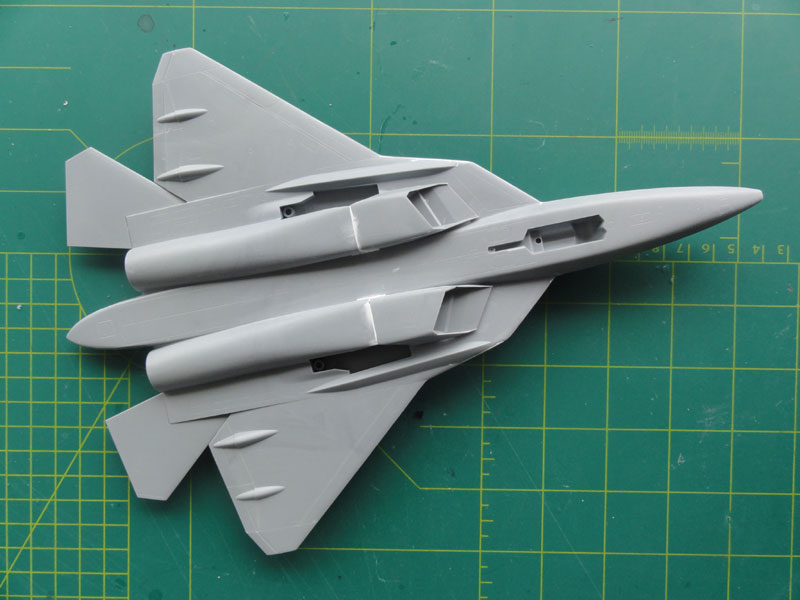
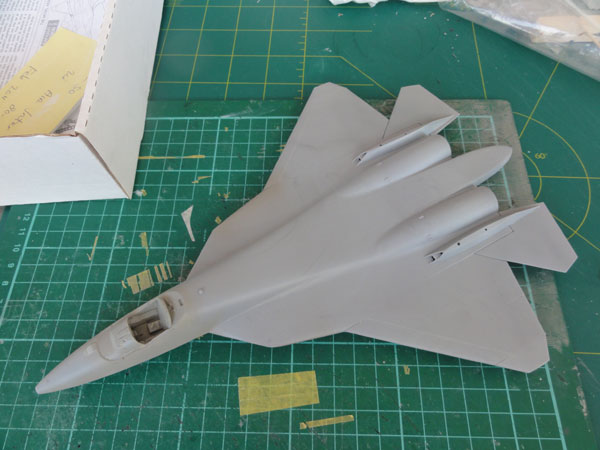
The model has nice engraved panel lines and also some extra's like a crew ladder and a standing pilot and sitting pilot figure. There is even a stand to set the model in a flying position.
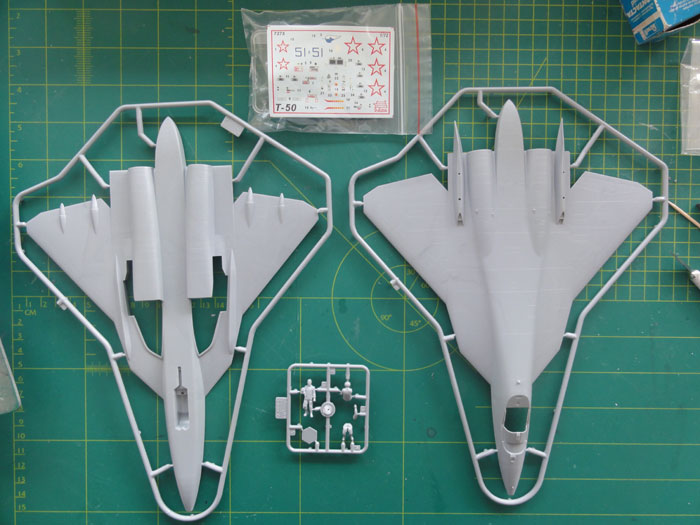
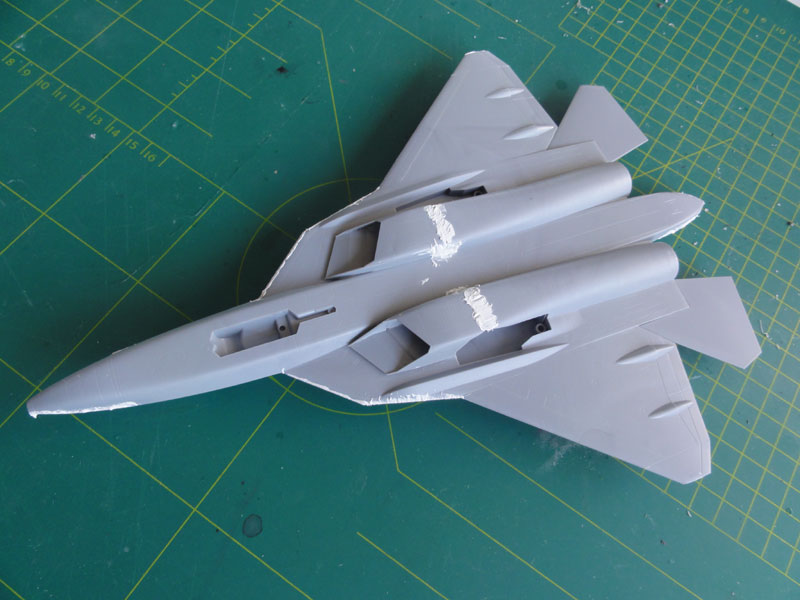
The kit has about 72 parts and the
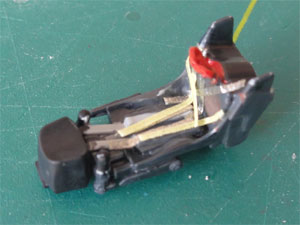
engine intake ducts are also there. A nice K36 ejection seat is also in
the box. But the weapons bay is closed so no detail here.
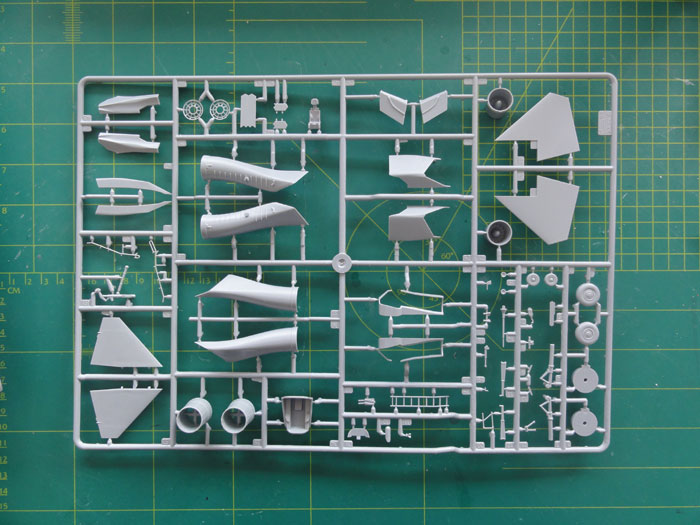
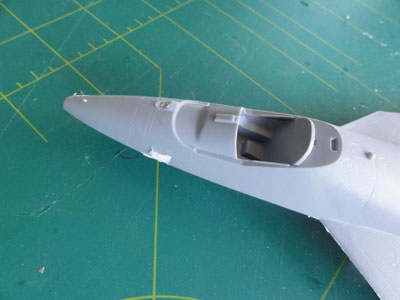
The canopy and windshield are OK but are of soft transparant plastic.
The dimensions look good. But the shape of the intakes and the engine bulges are a bit off but I did not bother with this as the model looks fine to me.
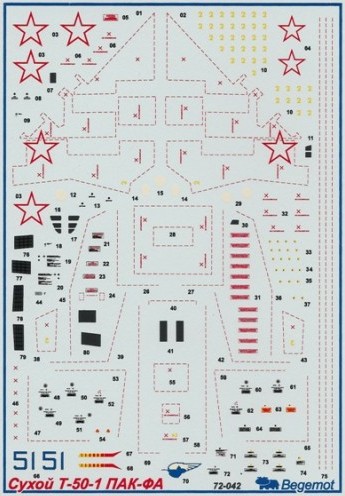
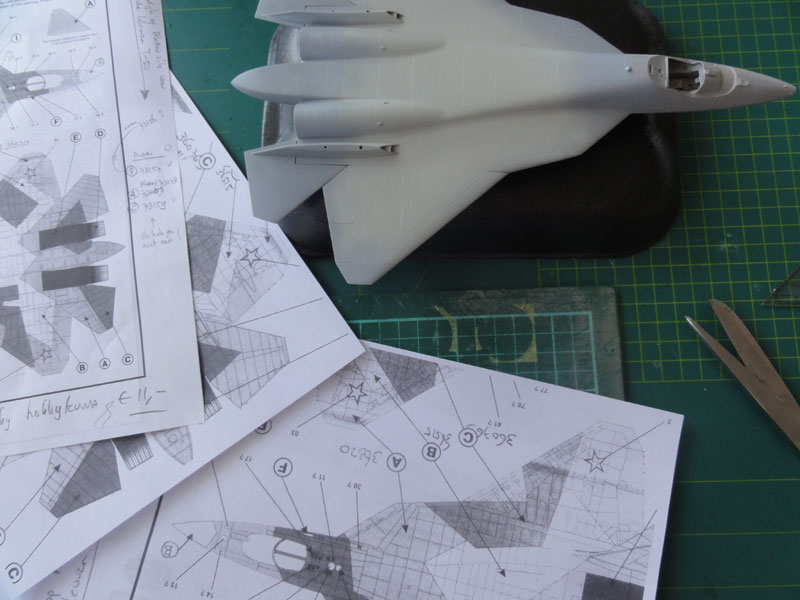
The kit decals are OK but on the real
T-50 a lot more stencilling is seen. But BEGEMOT decals came to
the rescue with a very large decalsheet full with that (no. 72-042). It
has T-50 markings for number "51"and "52". There are slight variations
between individual aircraft.
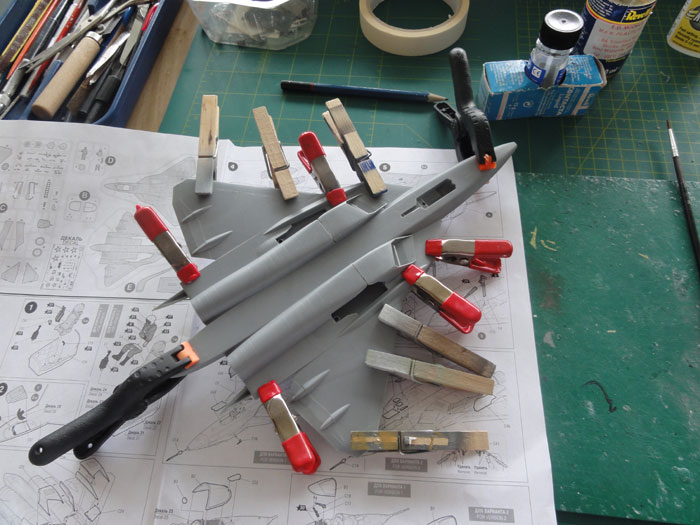
The largest time is consumed on this
model with the paint scheme masking and applying all those BEGEMOT decals.
The surface texture is a bit grainy and it needs a bit sanding with subsequent polishing. Better do that before assembly on the large parts.
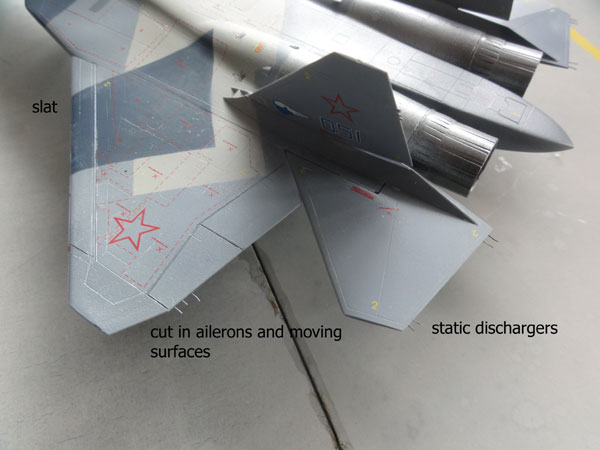
I also inscribed the ailerons and flap lines a bit more.
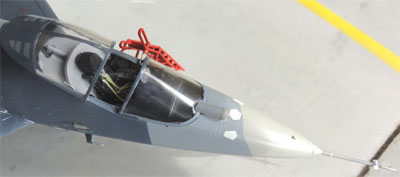
The K36 seat is better painted dark grey with black details like headrest and parapack. On the instrument consoles there is no raised detail, decals are provided. I added some bit and pieces of plastic. The throttle is there with the control stick.
After basic assembly, some putty
was needed in some areas like the nose and the edges.
 ..
..
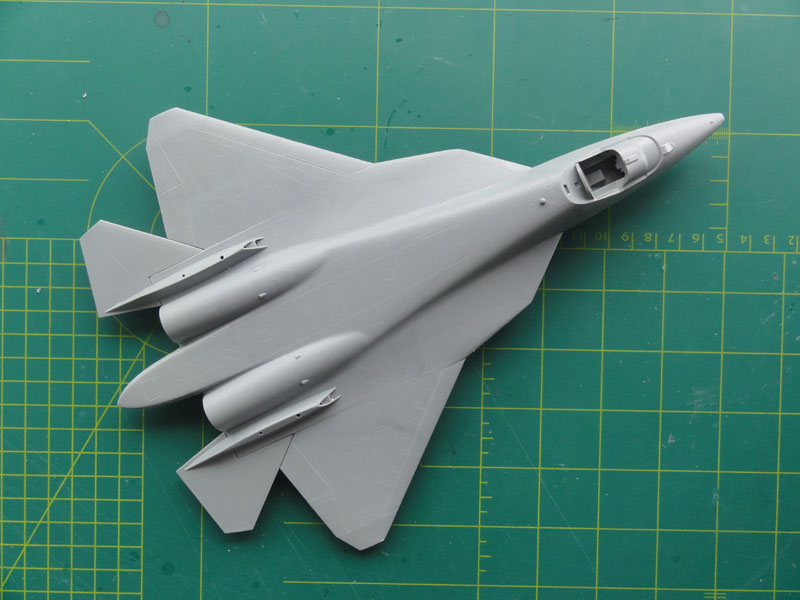
Sanding done
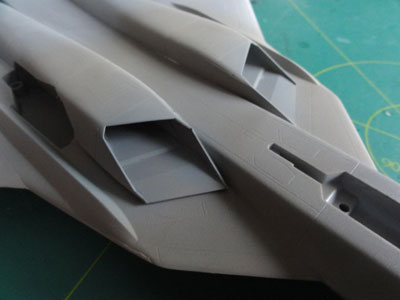
The intake ducts are there but I had
some trouble to get a good fit at their fronts at the intakes.
The model was sanded and got a first
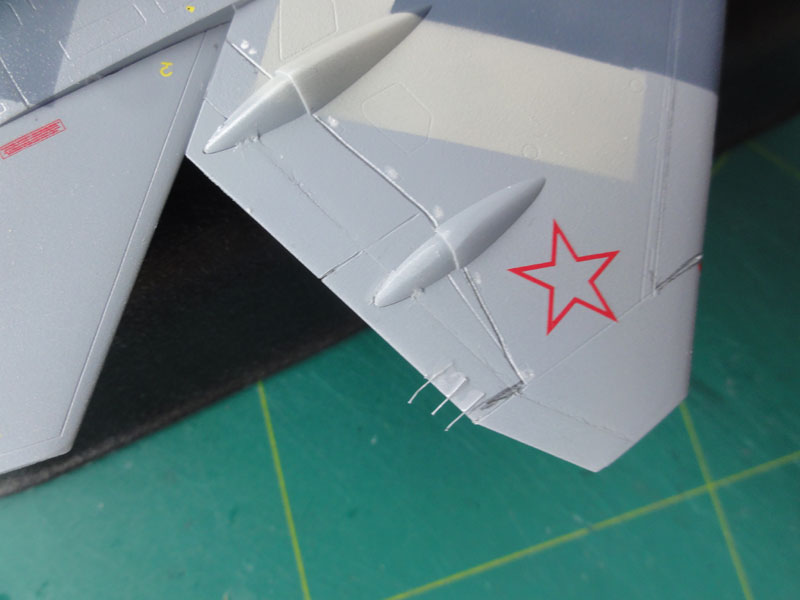
grey primer coat. Do not fix the vertical tail fins and no not fill their
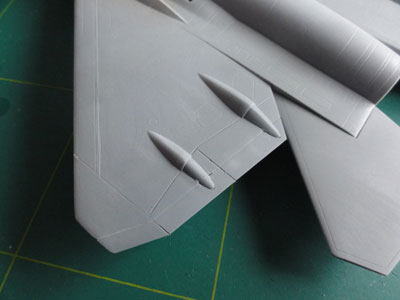
gaps: they are all moving surfaces!
The aileron edges were cut in with
a TIGER razor saw to get a tiny gap.
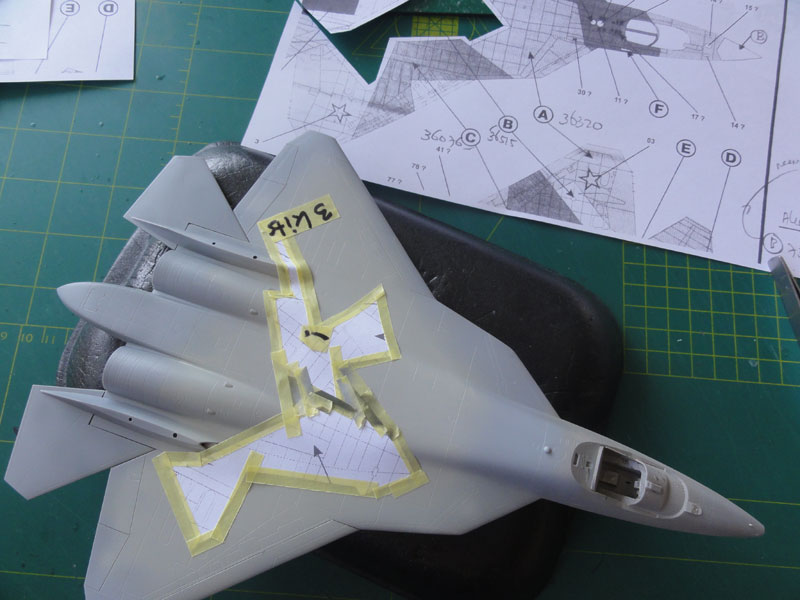
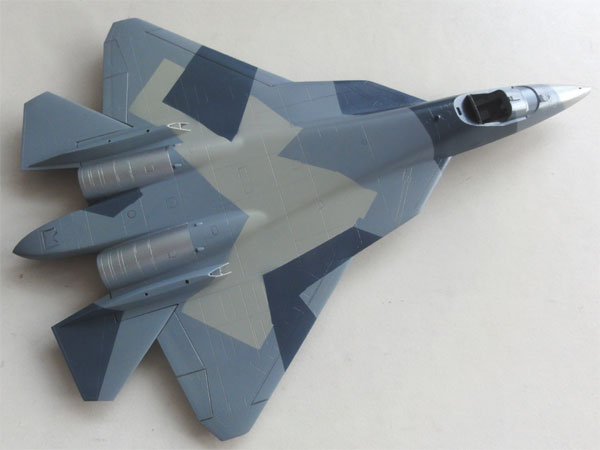
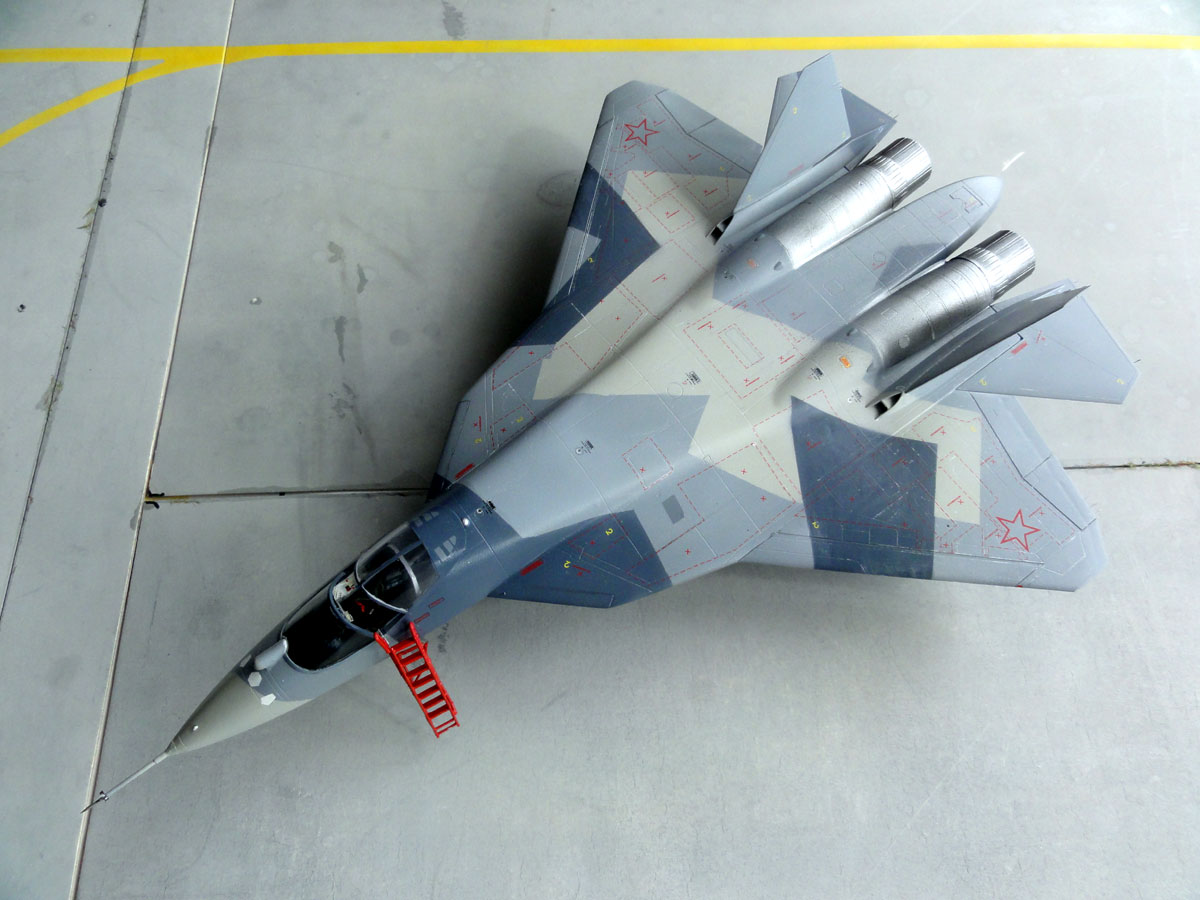
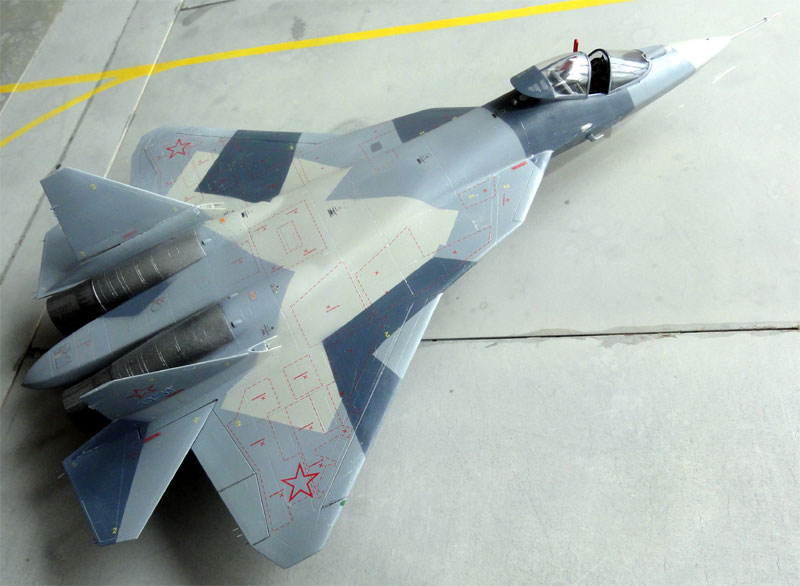
The T-50 has a complex paint scheme
and better do this now. This schemes looks similar for all prototypes.
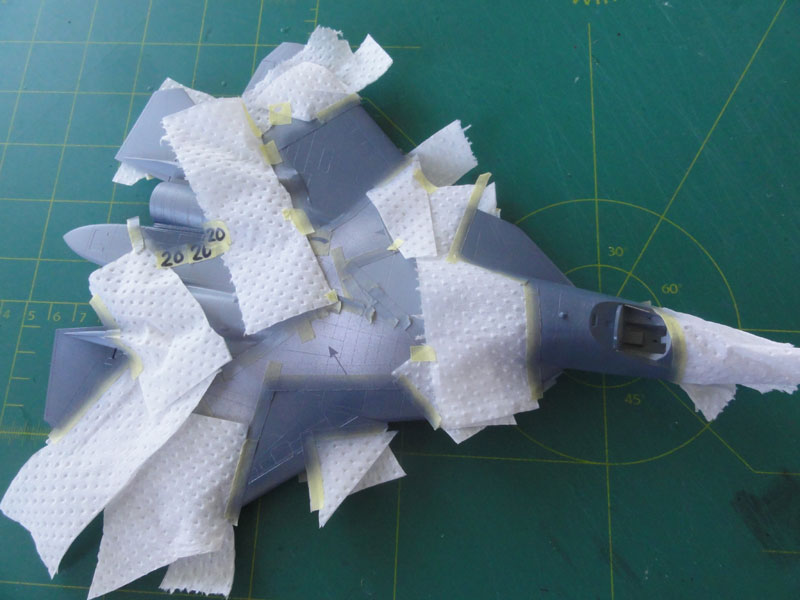
A lot of masking is needed which was done mainly with masking film.
But what T-50 colour to use? I had
a whole bunch of colours including the latest russian AKAN acrylic paints.
AKAN mentions Sukhoi Flanker colours as well but there colours seem slightly
different when compared with photos.
The following colours were selected
and applied with the airbrush:
Colour A: the mid grey colour, using
Gunze Sangyo 307 (about Fed.Std 36320)
Colour B: this is the lightest colour
, using AKAN 73156 (looks gull grey 36440)
Colour C: the darkest colour, using
Gunze Sangyo H56 (intermediate blue ~ Fed.Std 36076)
I started with the lightest colour "B". Than masking was done. I made a copy of the BEGEMOT drawing enlarged to 1/72. The paper areas were cut out and were used as a guide for the model masks.
Next, colour "A" was airbrushed.
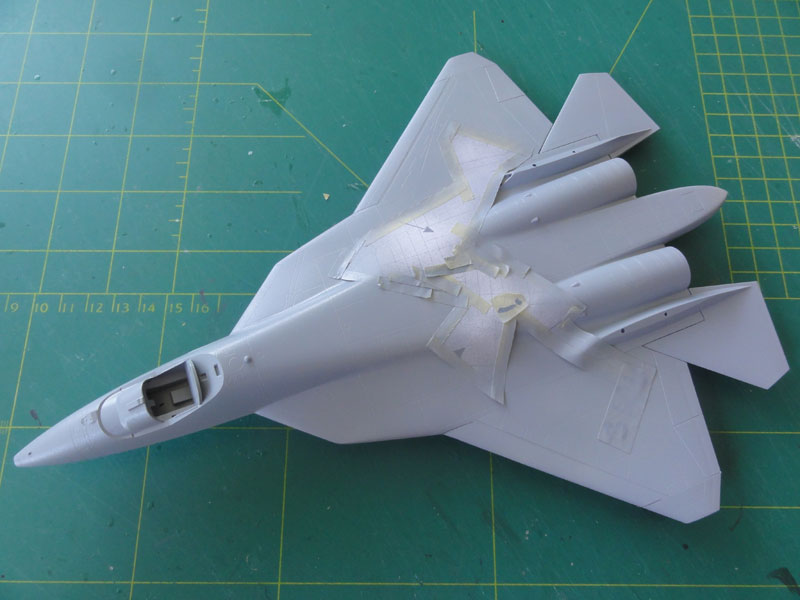
When dried, again masked and colour
"C" the darkest one.
The exhaust areas on the aft fuselage
show various rather dark metallic colours, a mix of colours was used here.
Mask and apply with the airbrush.
NOTE: the metallic
exhaust panels are here not dark enough. They were later airbrushed "darker"
as they seem very dark on the T-50.
The intake edges are Dark grey, the intake ducts are light grey.
After the colours were applied, I decided to do the decalling. But to ensure no "slivering" no less than 3 coats of gloss varnish of Johnson Future/Pledge was applied with the airbrush.
The BEGEMOT decals were fine, I picked
aircraft number "51". The instructions are great as well.
Be carefull when applying them as
they are very thin. The wing stencil marking are one piece which helps
a lot. But a really gloss coat is mandatory to get a good result. All the
lines are however separate decals, a lot of time is needed. But the result
is worthwhile.
After the decals dried, another coat
of Future was airbrushed with a bit 5% mixed in Tamiya X-21 flat base to
get an even semi-gloss sheen. The fine Harder
Steenbeck airbrush was used with 0.6 nozzle with pressure at a very
low 0.8 Bar. The Future mix was not thinned. Spray from not less that 15
cm distance in very thin layers.
The canopy frame was hand painted.
I added a strip of plastic inside at the aft area as seen in the real photo.
But there is no closing base panel in the real canopy.
The cockpit interior as painted and
the seat as well. Starps were added from tape.
 .
.
The jet exhaust pipes did not fit as probably the upper and lower fuselage was slightly a symmetric joined. I trimmed of the exhaust frontal edges.
The vertical tails did not fit with a clear joint. So align carefully. I closed each tail base gap a bit with white glue and painted that. But ensure a joint is seen as they are "all moving" on a real T-50. The same applies for the horizontal tailplanes.
The undercarriage main legs and gear
bays are a bit simplified. I added some wires and scrap details in the
bays although having no photographs. I painted the gear bays light grey. 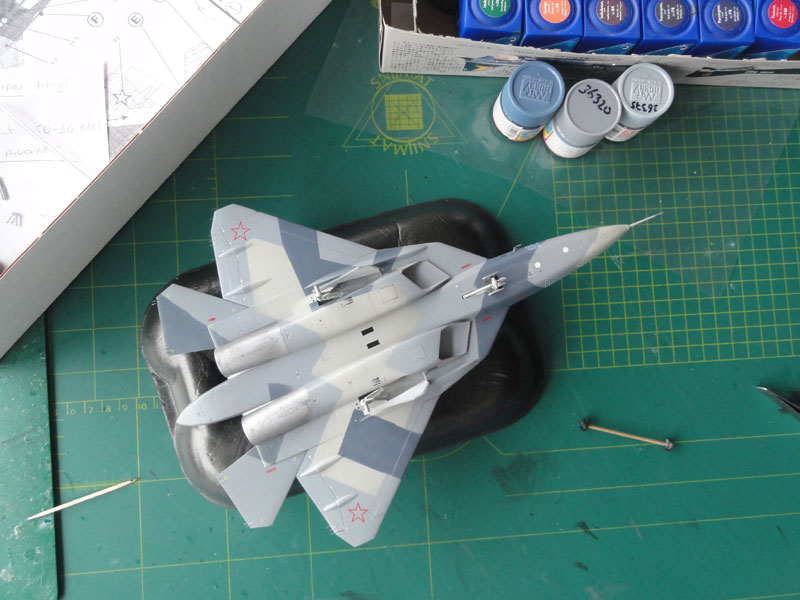
On the nose gear strut I saw no mud
guard as seen on the T-50. I made a mud guard from thin alumimium sheet
that fits around the wheels.
 .
. 
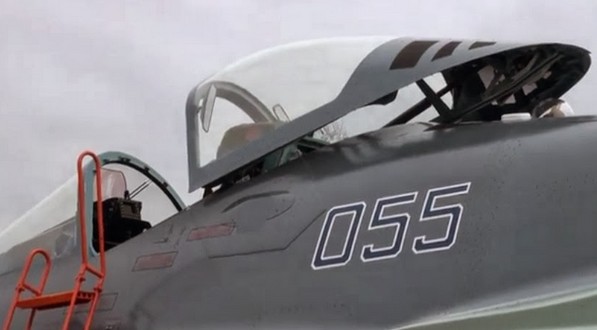
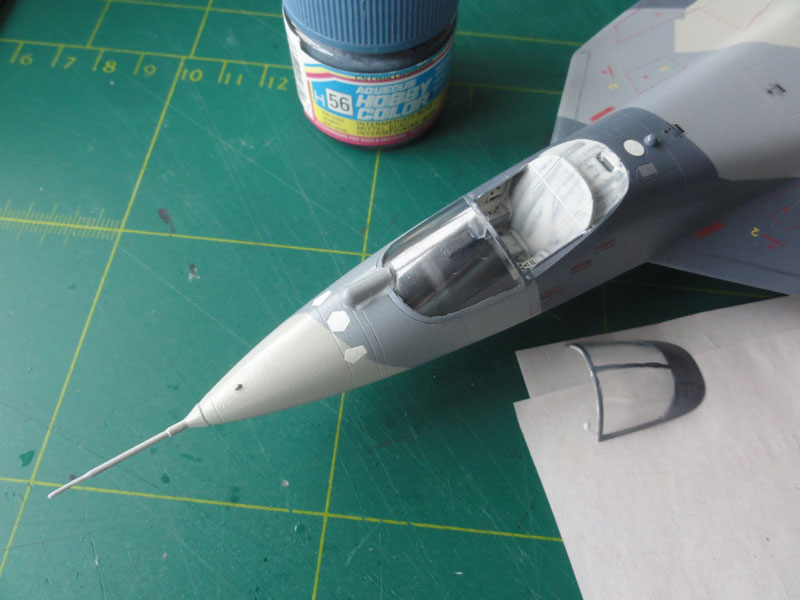
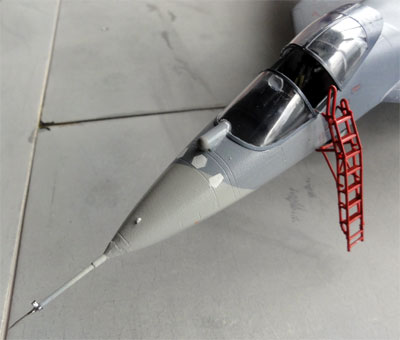
The pitots ( part C16 ) and
their
positions vary between test aircraft. Check the desired prototype with
photos. Sometimes more pitots are fitted or even none! On the nose
pitot
I added small yaw vanes cut from thin aluminium foil. See photo below
for
the real T-50
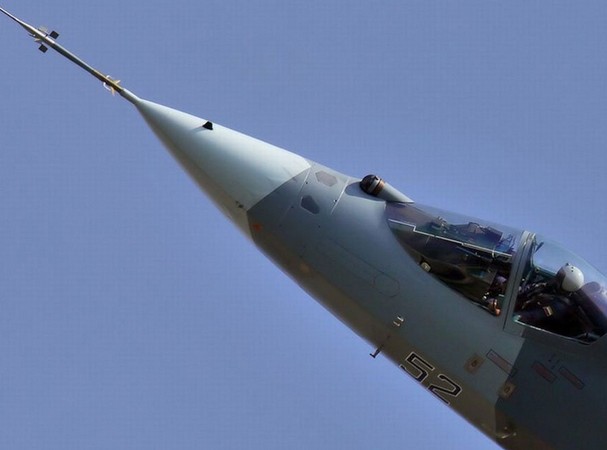
The windshield sensor fairing C32
needed a bit white glue to close the gaps. The windshield itself fits nicely.
The anti-collision lights were painted red and green at the wing tips and the landing lights at the nose gear strut made from shiny bits from the spares box.
I also added the many seen "static
dischargers" at wing and tailpanes trailing edges. These were made from
thin flexible fishing wire, glued with superglue and painted.
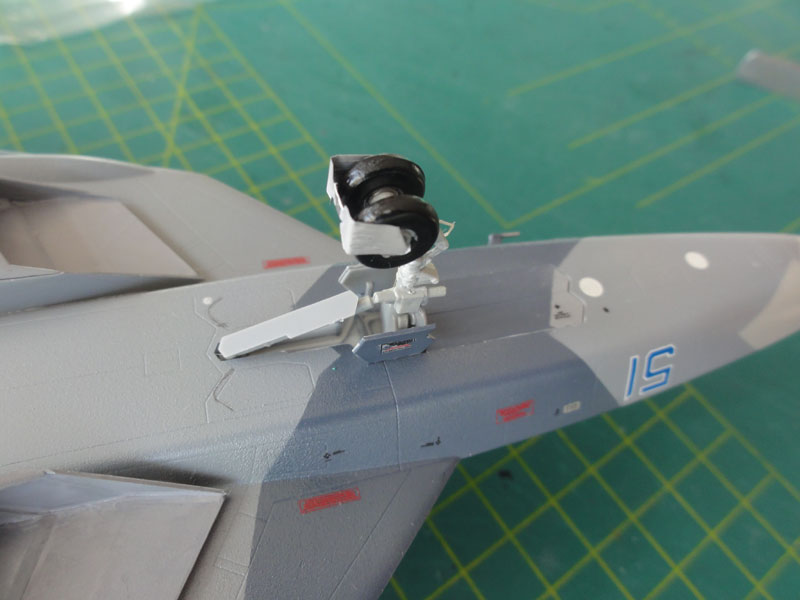
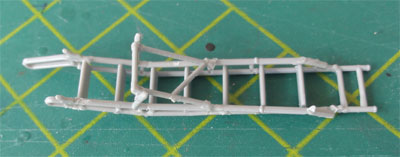
The ladder was also assembled and
painted red-orange. It can be posed on the T-50 model.
The canopy set in place slided aft
and that completed the model.
Sukhoi T-50 PAK-FA

Note the antenna panels (decals from
BEGEMOT)

..
..
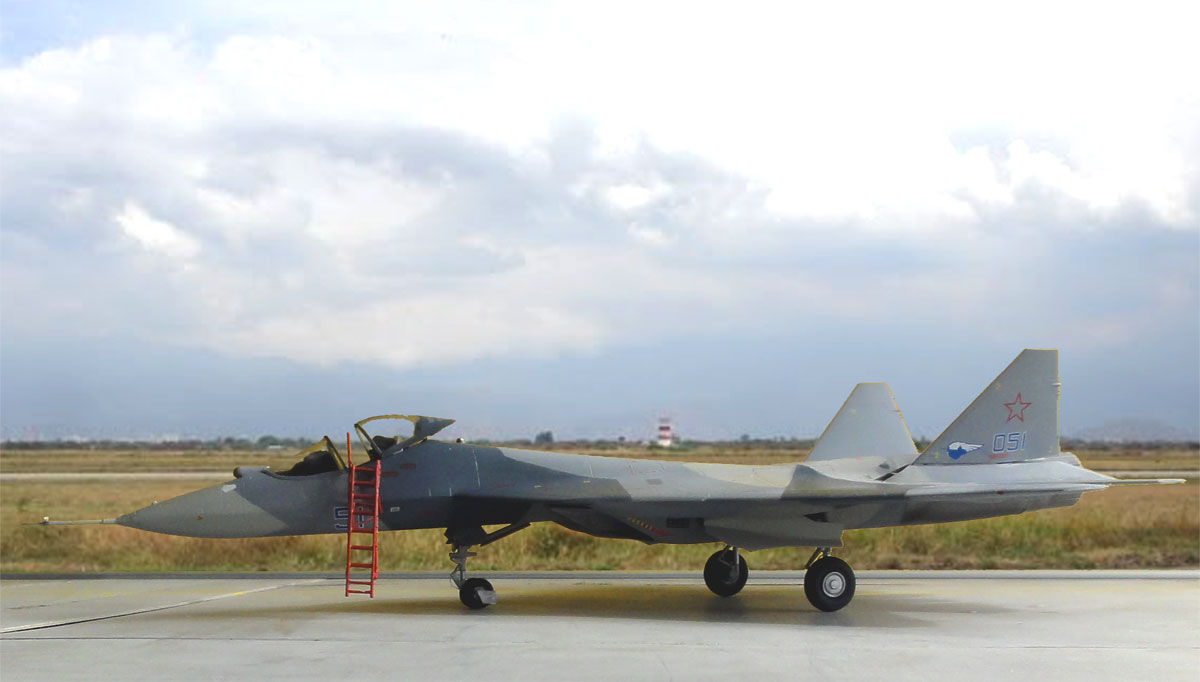
A nice 1/72 model in the Soviet /
Russain aircraft collection. Still in the test phase but probably the T-50
will be ordered for the Russian Air Force.
Air international magazine: vol 78/no 3, vol 79 / no 5 , vol 80 / no.2
Internet:
http://www.sukhoi.org/eng/news/company/?id=5052
https://en.wikipedia.org/wiki/Sukhoi_PAK_FA
Back to 1/72 models
(c) Copyright Meindert "designer"/ All rights reserved/ Amsterdam The Netherlands.Your comments are welcomed by webmaster
Created this page
December 14, 2015