Hobbycraft
[ Page 1 ]
1/32 scale Hawker Sea Fury with the Hobbycraft kit
1/72 scale models... look here....
page 2
page 3
The Sea Fury has not been available in this scale through an injection moulded kit before. In the past vacuforms (such as ID models) could be obtained and the excellent resin Fisher Model and Pattern kit was available but at quite some cost.
Mid 2008 Hobbycraft of Canada came with a Sea Fury FB.11 kit which was more than welcome for large scale builders.
A look at the kit
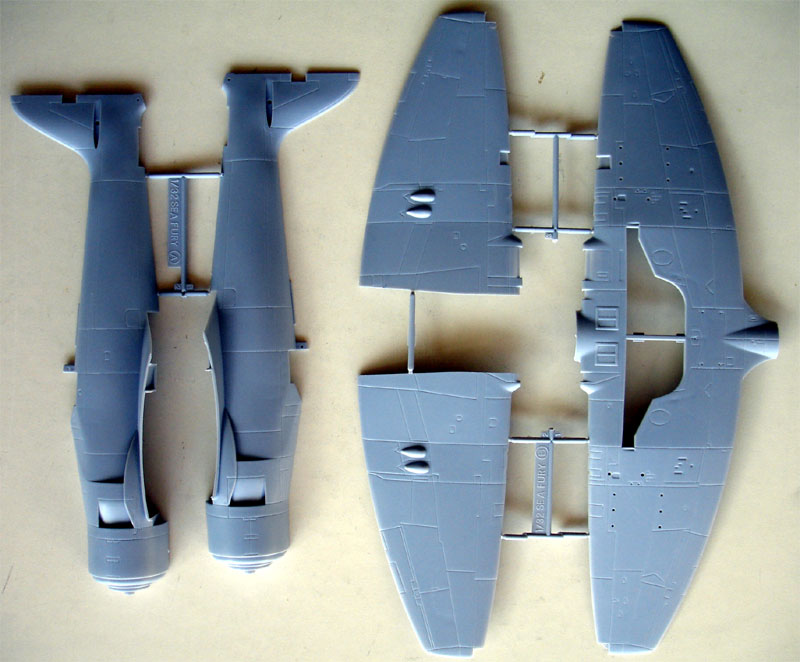
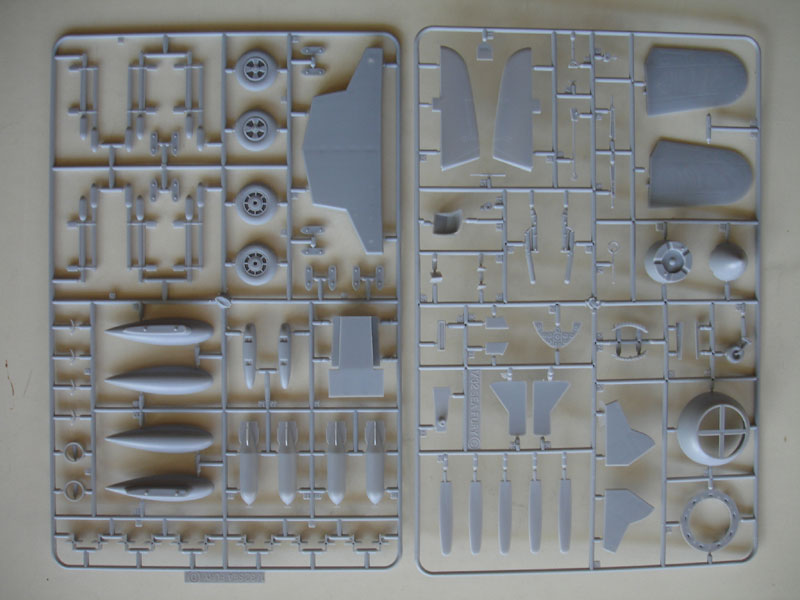
The kit has about 80 grey injection
moulded parts and a single piece canopy. The basic dimensions look accurate
but the kit can be improved. Hobbycraft kept the costs of the kit low by
making a lot of areas in this kit simple. The kit does not have for example
the option to fold the wings; this would require outher wing separation
and detailing (a Fisher set is available if you want). The stores
comprise the fueltanks, rockets and bombs and these are all usable.
The kit was issued in some different
boxes with different decalsheets:
COLD WAR FIGHTER Kit no. HC1716 box
schemes:
1. 802 Sqn, Royal Navy, HMS Ocean,
Korea, Aug 1951
2. another plane of 802 Sqn, HMAS
Sydney, Japan, 1952
3. Australian Navy, RAN Bankstown,
1968
4. Cuban Air Force, Bay of Pigs Invasion,
1961
5. Another Cuban plane post Invation,
1961
with a very special camo paint scheme
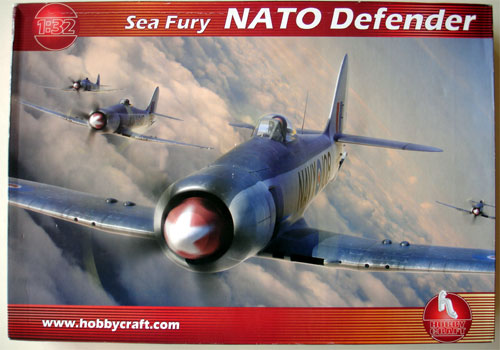
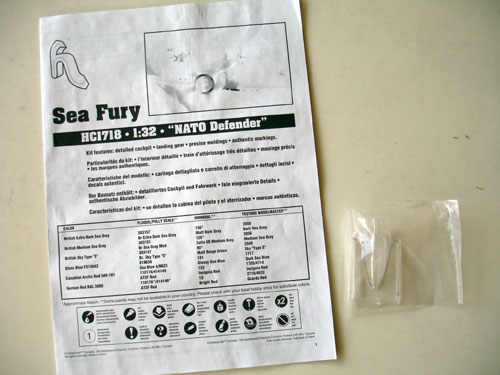
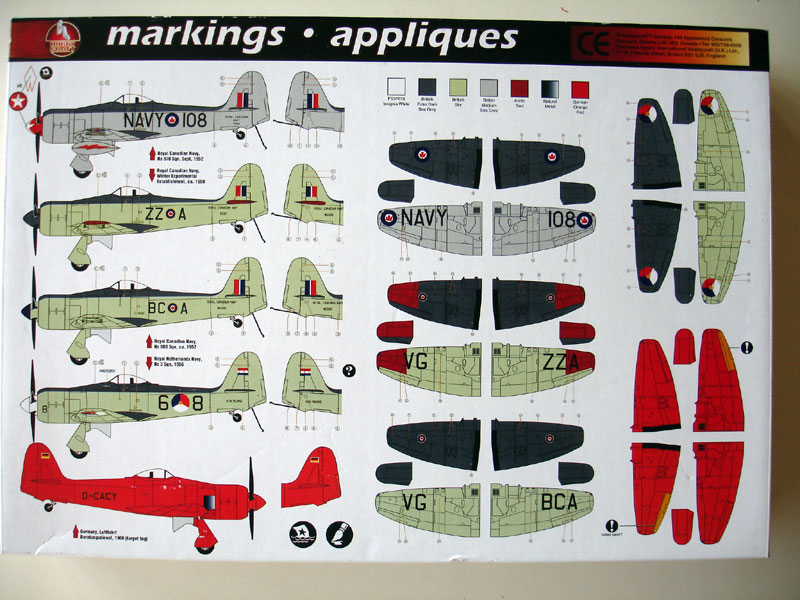
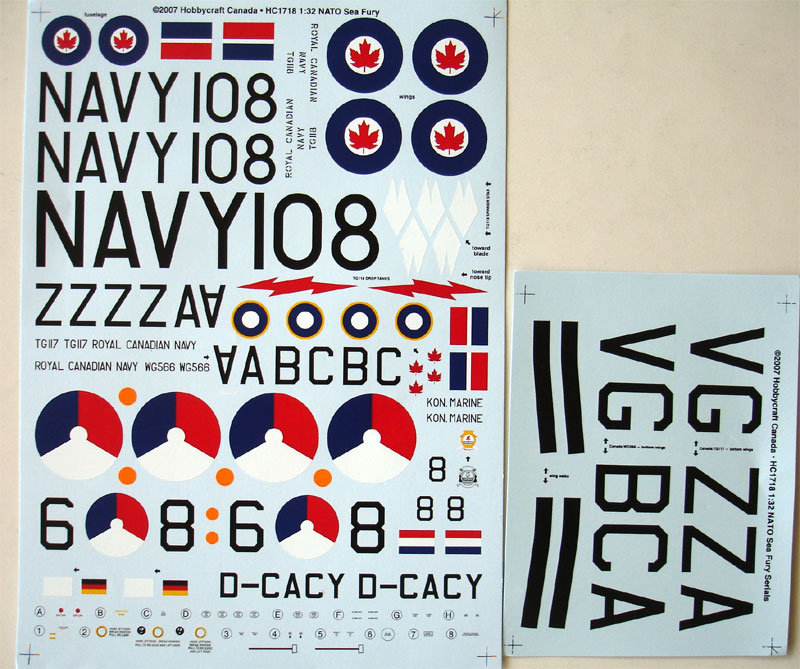
NATO DEFENDER Kit no. HC1718 box schemes:
1. 870 Sqn, Royal Canadian Navy,
1952
2. TG117, VG-ZZA, Royal Canadian
Navy, 1950
3. 803 Sqn, Royal Canadian Navy,
1952
4. No 3 Squadron, Royal Netherlands
naval air service MLD, 1956
5. German civil target tug: D-CACY,
Luftfahrt Beratungsdienst, 1966
I got the NATO DEFENDER kit.
. NATO DEFENDER
Improving the kit
In this scale there is room for improvement:
1. The fuselage shape in front of
the windscreen has two flat facets and these should be round; this can
be solved with sanding. The slope of the area is interpretable but looking
at pictures is OK also. Misinterpretation is also a bit caused by the inaccurate
shape in the canopy and windscreen;
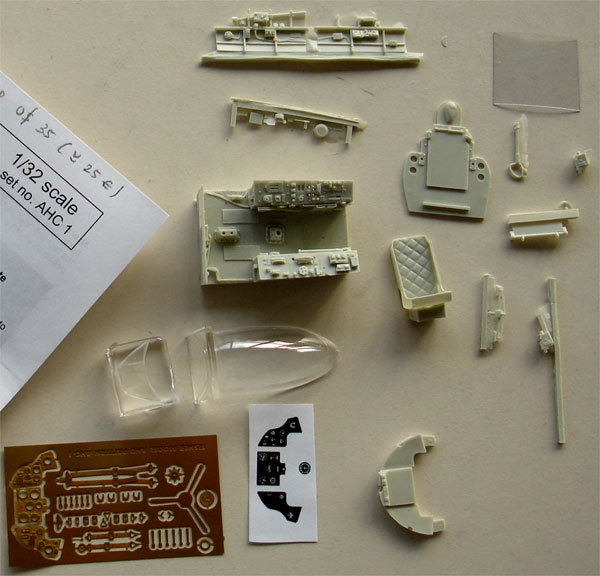
I bought the Fisher
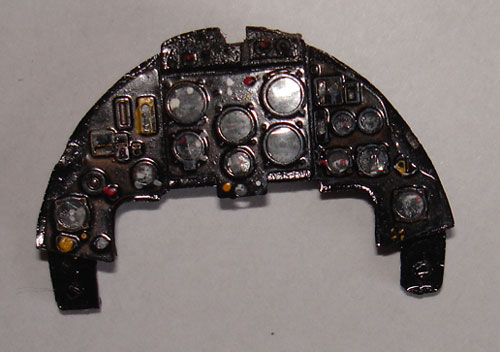
Model and Pattern cockpit set #AHC1 with the excellent new windscreen.
2. The cockpit tub opening is way too small; remove the area aft of the strange seat "head rest" and add with some card a better representation of this area.
3. The cockpit interior is very sparse to keep kit costs low with only floor tub, seat, control stick and very basic instrument panel. Doing some detailling yourself is a good option as typically for those days the interior is mostly black so not a lot of detail will be seen. But as noted, the Fisher Model and Pattern cockpit set with resin parts and very nice seat was the solution (also includes much improved canopy).
4. The oil cooler intake located on the port wing is a too shallow.
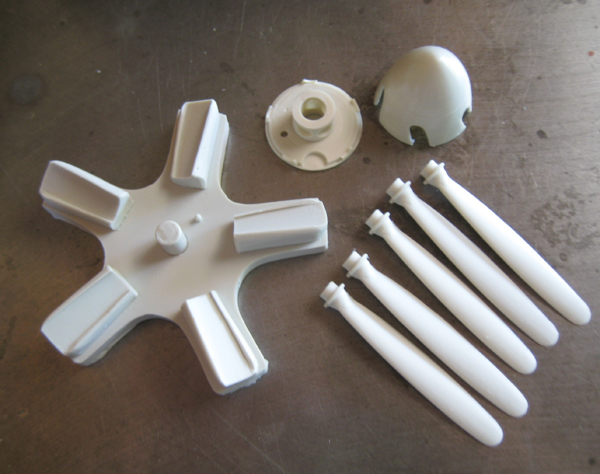
5. The propeller which is assembled with a hub and separate blades and spinner is very inaccurate.
The spinner is also way too small
and gives the overall kit a somewhat inaccurate feel. I bought the Fisher
Model and Pattern propeller set #AHC3 to replace the kit
parts.
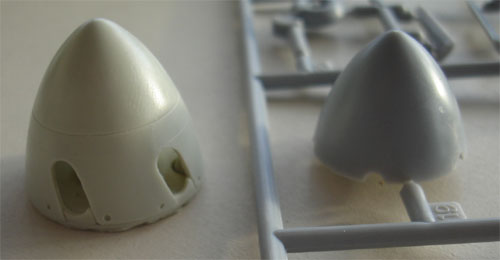
left:
the Fisher parts, right the Hobbycraft spinner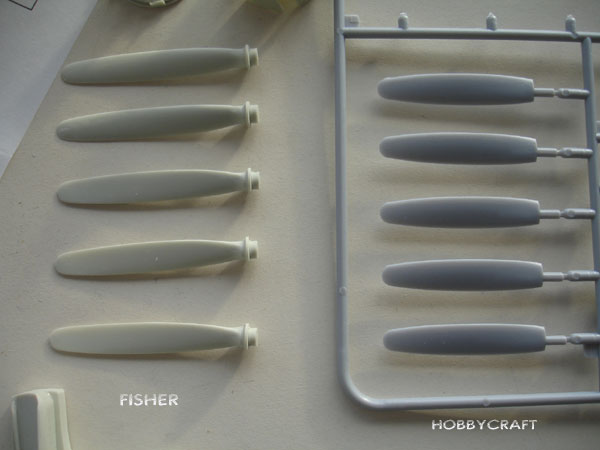
6. The wing upper profile curve is a bit too flat and in addition the main wheel bay is too shallow.
In addition, further detailling was done to the Hobbycraft kit in this scale such as adding some rivets details and filling some heavy panellines in areas.
For this kit a nice Dutch MLD scheme
was picked and I opted to make the MLD Sea Fury with code "6-26" of the
Royal naval air service "Marineluchtvaartdienst" MLD 860 squadron with
orange propeller spinner. It is a nice scheme and I had a couple of pictures.
Look at the 1/72 Builds of Sea Furies
modelling the Hobbycraft Sea Fury kit
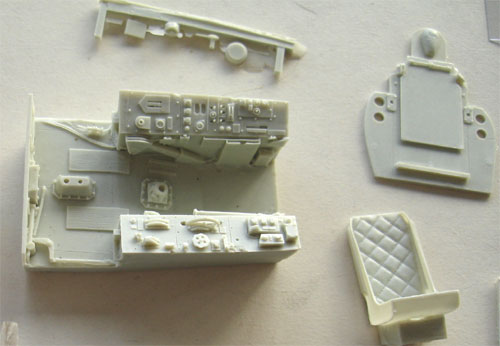
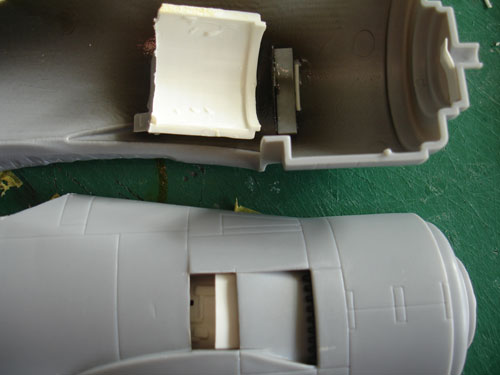
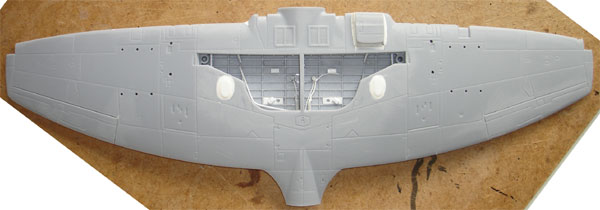
- Obviously, work was started with assembling the purchased Fisher cockpit set. It also has sidewalls and this required removing the rib detail on the cockpit insides of the kit.
The Fisher cockpit set is very nice with lots of detail. The instrument panel got dials and some paint on red and green was added. Later on it was seen that the instruments are very well hidden by the hood and you really need to look well to see them.
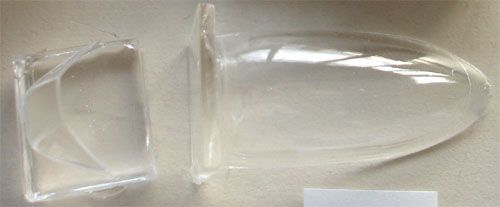
The Fisher canopy is very
good but you need to separate the two bits with a razor saw from their
mould block.
Some details of etched metal:
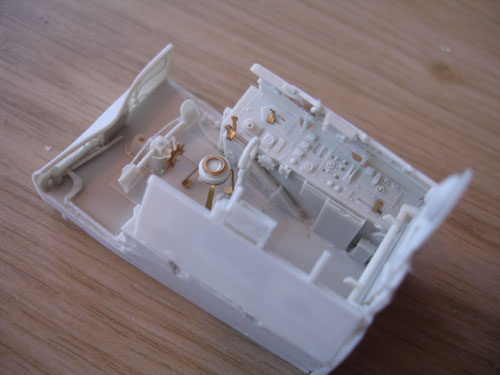

The instrument panel as per Fisher
instructions with some added colour detail:
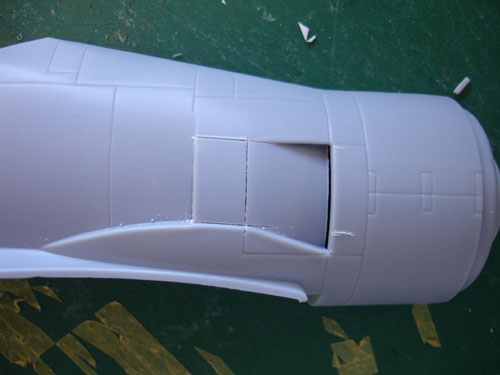
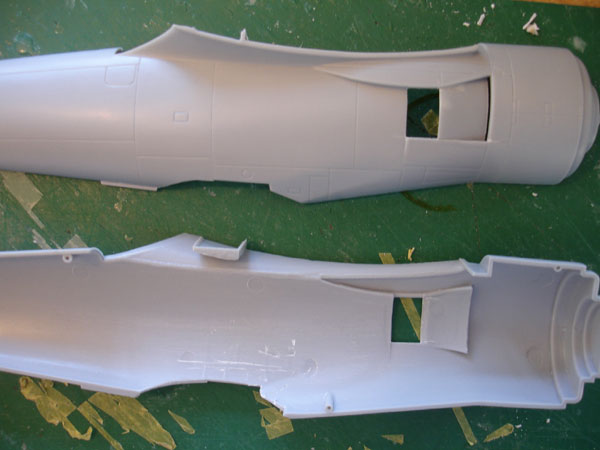
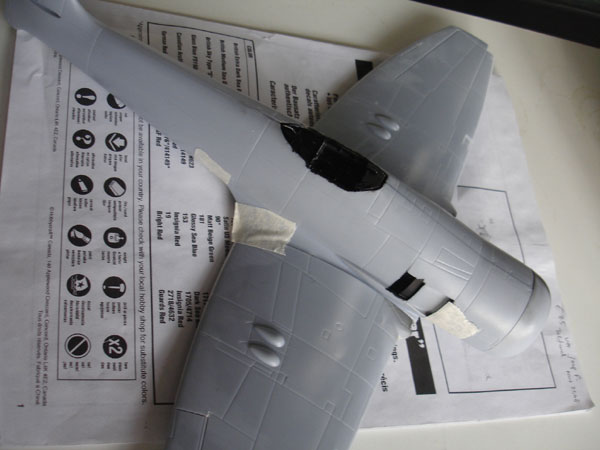
The cockpit opening aft of the kit
headrest was made much bigger in both fuselage halves:
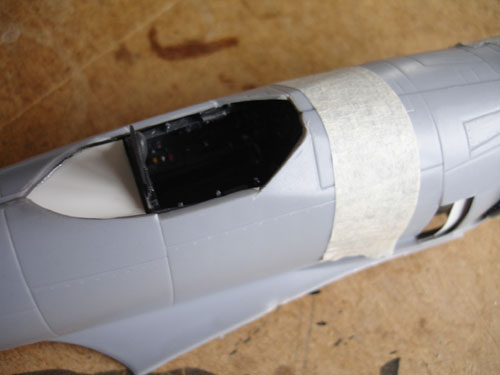
note
the sprues glued in for added strength:
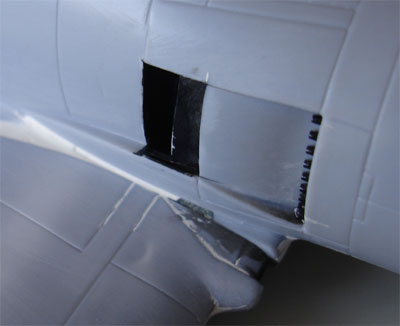
- The lower oil cooler on the port
wing is too shallow. This was solved by cutting it out from part #B1 and
making it more prominent with some card and putty.
oil cooler
duct
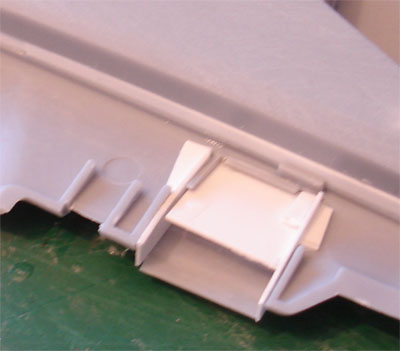
(inside the oil cooler duct fine
mesh was set , can not be seen here)
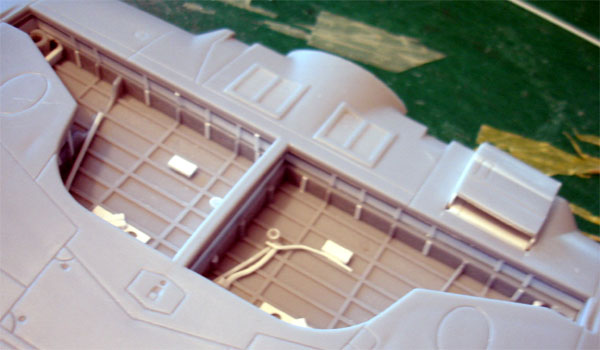
- The main wheel bay was made more
deeper. I added thick strip of card of 3 mm high to have a deeper bay and
bended the upper wing halves to a more profiled shape. The bay and also
the inner surfaces of the gear doors were detailed with styrene strips
of Evergreen. The details are not that many but some is there. (you can
buy another Fisher set, but with some rod and strip you can easily detail
the bay yourself).
The wing upper profile is now also
much better.
NOTE: I forgot
to glue part #E29 assuming there was a leading edge light. There is none,
so fit and fill.

strip
of card of 3 mm high :

.
.
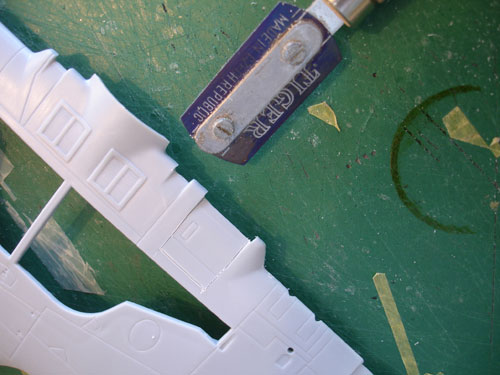
- The wing aileron edges were sawed in to give a better look to these.
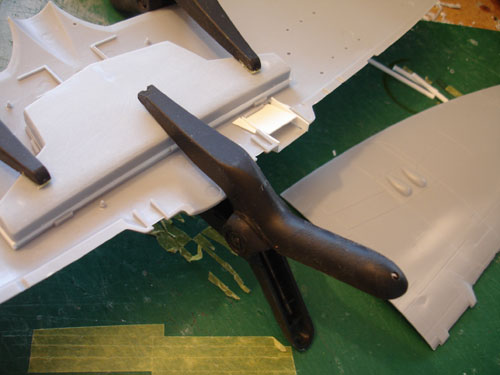
- In the fuselage halves it was decided
to open the panels aft of the exhaust pipes. These are movable panels that
enable extra cooling of the interior if required.
cutting the panels out was
done with a Tiger razor saw
Internally some details
were added from scratch plastic bits.
- The aft tail wheel well was boxed in with card.
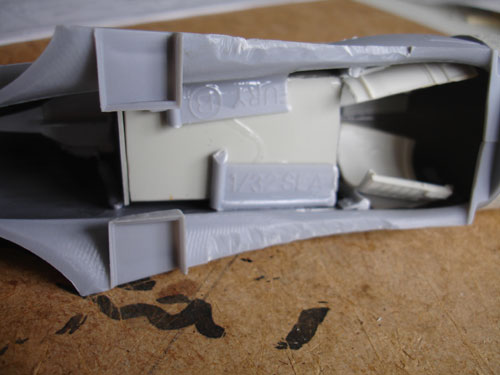
- The two fuselage halves were mated together and the assembled Fisher cockpit put inside. Some strips were added to get more strength here. The fit of the improved wing with its deeper bay and curved profile was OK but it will need filler in the upper wing root area.
- The kit engines' face bulkhead does not need any extra work as almost nothing can be seen and the propeller covers a lot of this area. The fit of the engine cowling is excellent.
- The kit propeller parts were not
used, the prop was the much better one of Fisher.
.. (website: http://fishermodels.com
)
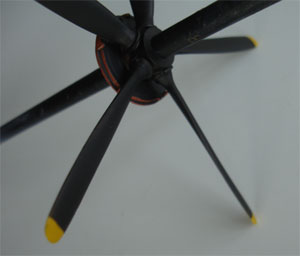
the
painted and assembled Fisher prop
- The tailplanes were not yet assembled, this will be done after applying the paint scheme as they fit well and need no filler.
- The landing gear was left for alter after painting and decalling.
Now it was time to do some gap filling,
particularly at the amended wing root area.
Two small fairings were added from
card and putty aft of the wheel bay:
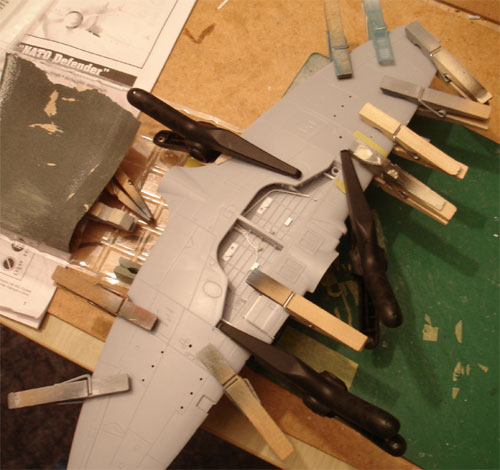
The overal airframe was now assembled
and it all went together reasonably well:
A little filler is needed at the
wing-fuselage join at the front and at the wing roots.
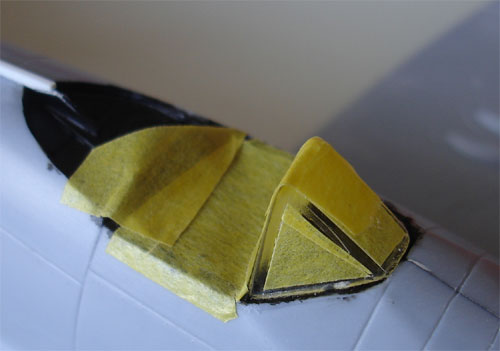
The Fisher windscreen was masked with
tape for protection, set onto the model and some minor filling was needed.
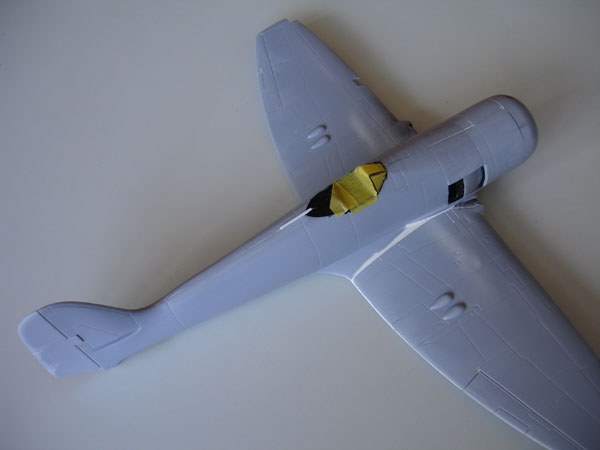
After sanding and polishing, a coat
of light grey primer was sprayed on
the model.
When this seemed OK, some black pre-shading will be done at various panels. This will give a better look later on when the final coats are applied.
To next [
page
2 ..... ]
Books:
- Hawker Sea Fury, Warpaint
- Hawker Sea Fury, Warbird Tech special
- Hawker Sea Fury, In Action
# 117, Squadron Signal publications
- Sea Fury in British, Australian
Candian and Dutch Service, Butler, Dalrymple and Verdun Publishers
- Hawker Sea Fury, camouflage and
markings, by Geldhof and Boerman, Dutch Profile ; book about the Dutch
Sea Furies:
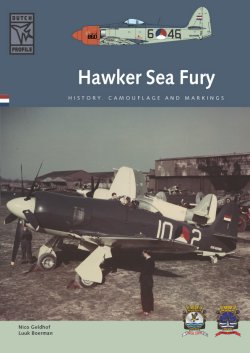 Dutch
profile
Dutch
profile
Internet:
Sea
Fury information at NedMil: Dutch IPMS Nederland website
about all military aircraft used in Dutch service

(c) Copyright Meindert "designer"/ All rights reserved. Your comments are welcomed by webmaster
Created this page February 14, 2009