F-18 Hornet
[Page 2]

F-18 models in 1/32 scale
Hasegawa and Academy kits
The two large F-18 kits are quite nice to build, but actually the Academy is so good that personally I have more fun updating the Hasegawa kit and improving it.
The Academy kit's fit assembly is very easy with good fit and clever engineering on the many parts. The gaps are mostly covered by next to be assembled parts so they won't be seen.
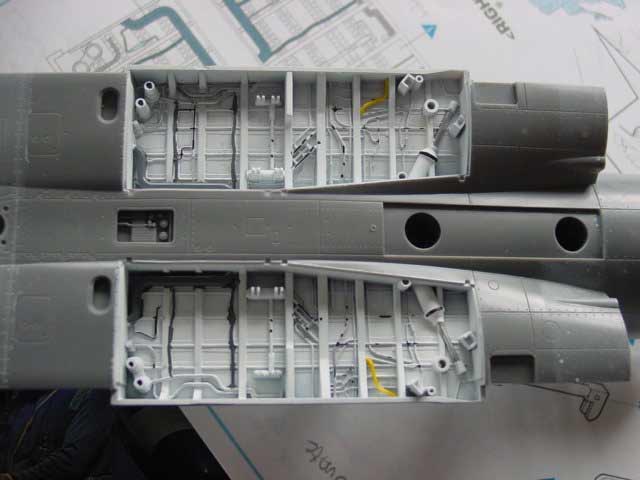
The main bay is seen here with some
added detail from sprue, but actually almost everything is already there
with the kit parts.

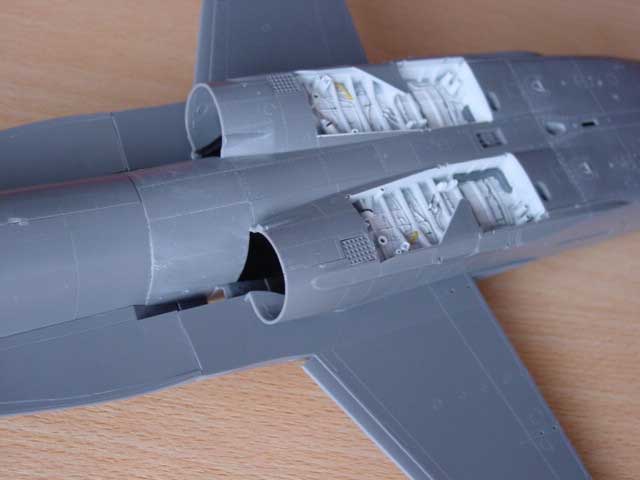
Some attention is needed at the LEX'es.
Sand and fill.
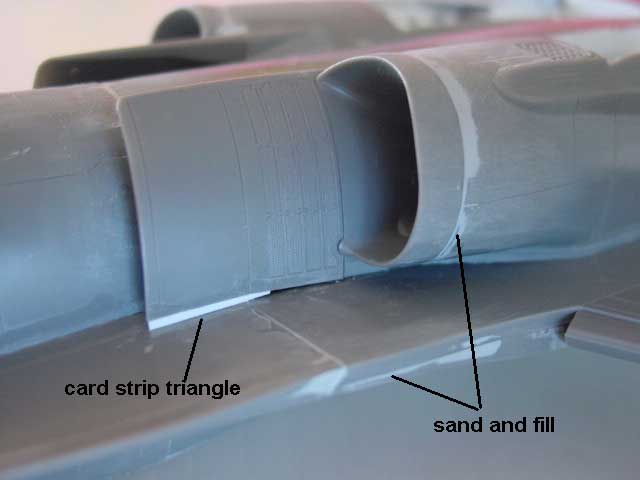
Also, the intake parts need some
carefully aligning and some filling. It was decided not the put stress
onto the assembly, a small piece of card will close the small gap nicely.
Some putty to be added also later on.
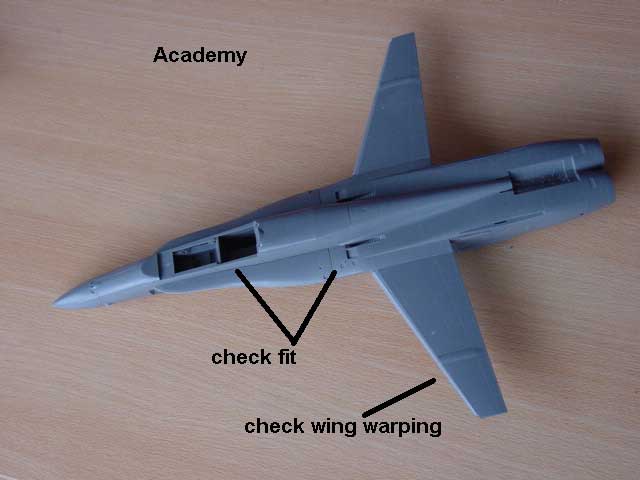
The wing of the Academy kit warps
a little at the outher tips. Recently someone told me the following about
this:
The outer wings
of the real F/A-18 are slightly "curled" up. This has been done to solve
some "flutter-problems" on the actual aircraft. This has been done also
in order to achieve a better aerodynamic release of the AIM-9 sidewinder
missile, normally carried on the outboard stations.. so ACADEMY actually
has got it right!!!
Furthermore the outer wings are slightly "tilted" downwards when viewed "head-on", that is to say standing in front of the aircraft. This is the outher wing dihedral. Assure and check that the wing on left and right sides is symmetrical.
The Hasegawa kit was also tackled parallel to the Academy kit. Parts of the Academy kit that are not used can be set onto the Hasegawa model, improving detail and accuracy. Generally, the Hasegawa kit is very good in outline and dimensions, certainly considered the age of this kit. And it needs conversion from the pre-production type to an operational F-18 variant (see page [1]) .
The Academy kit can be used as a "reference" as this kit is very good and accurate.

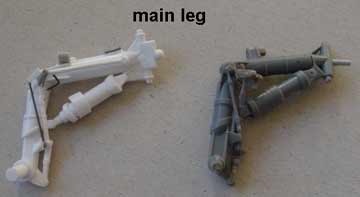
First, the Hasegawa kit undercarriage
doors can be detailed on the inside with some card. The Academy kit was
used as pattern / example. Some is true for the main undercarriage legs.Some
pieces of card and stretched sprue does the trick. Gaps can be closed with
white glue and you get a smooth part.
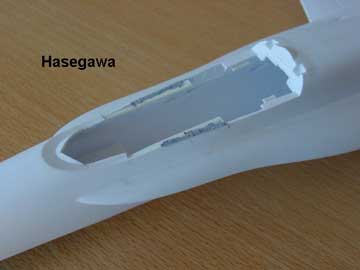
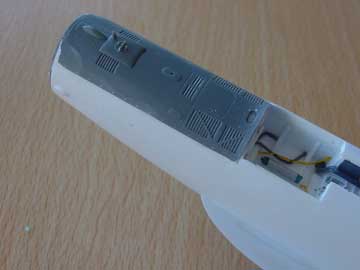
The forward fuselage nose section
looks of the Hasegawa kit can be improved in detail by using the extra
part # E14 of the Academy kit as it has nice grilles and vents. It fits
good after removal of the white lower section of plastic with some putty
and sanding.
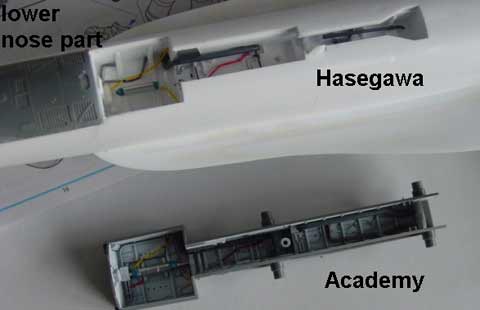
The nose bay was also detailed of
both kits

Aft of the ejection seat, a
fine grill ("screen") covering the F-18 avionics compartment was to be
added. The gap was made in the parts of both kits where the grill is and
the bay will be added later. The fine mesh/wire is made of an old girl's
panty, stretched and glued in place with superglue. It will add further
realism to the model.
Below the screen a number of avionics
boxes will be made, but they are hardly seen.
The Hasegawa kit's wingtips will
be set folded using parts of the Academy kit. The Academy kit will be assembled
in the "clean mode" with no folded wings, no folded radar cone etc.
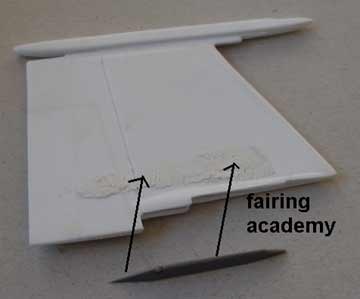
The extra fairing parts #D30- and
# D31 are to be added to the Hasegawa kits' lower wing after sanding it
off.
The bare Hasegawa cockpit area needing
some work...
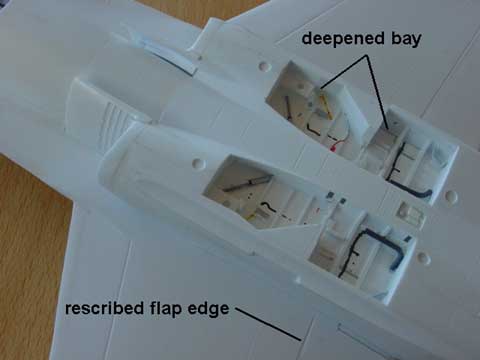
The main bay was deepened and detailed.
The flap edge was filled and set /rescribed in a more correct forward position.
The lower fuselage area at the nose
with the extra Academy part #E14 in place.
On to next
page [3]......
page 2
page 3
page 4

(c) Copyright "designer"/ All rights reserved. Your comments are welcomed by webmaster
Created December 12, 2003