[ page 2 ]
.....

F-14 model in 1/72 scale: old Hasegawa kit review & modelling report
page 2
page 3
Hasegawa released their first F-14A Tomcat kit in 1/72 scale in 1977. It was the most accurate kit at the time.
(Many years later Hasegawa released a brand new 1/72 F-14A kit that is very good but it had no stores. I never purchased this kit).

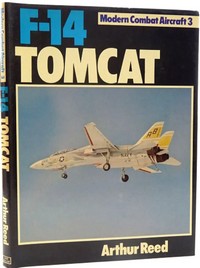
The package from the U.K arrived after some 3 weeks with out Hasegawa F-14A kits. We were very happy and quickly saw it would build into a nice model. We had only limited references, I had a subscription to the Ian Allan magazine "Aircraft illustrated" and saw a special offer: for the Ian Allan Modern Combat Series no.3 F-14A Tomcat book written by Arthur Reed. It had black and white photos mostly. We again did an IMO and got the book along with a few other MCA books at the time.
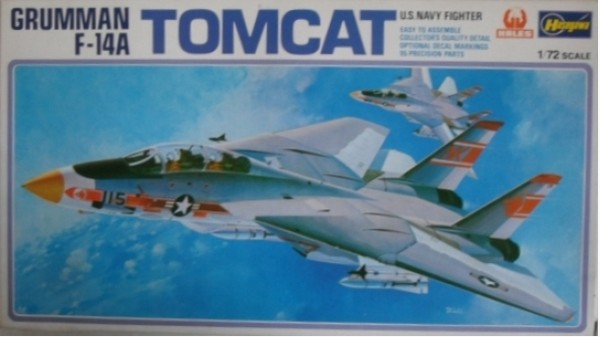
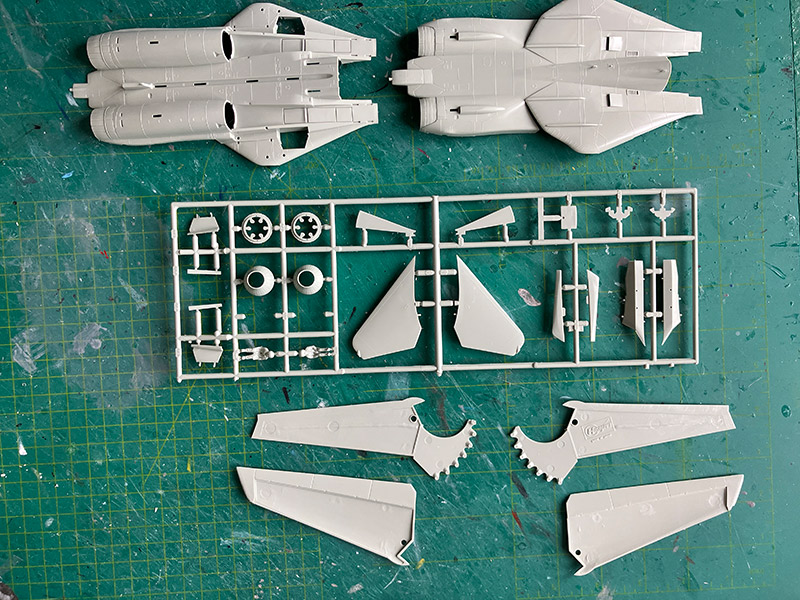
The Hasegawa kit #JS-134 has about 90 parts in hard light grey plastic. Panel lines are mostly raised which was usual for model kits in those days. The wing has fixed flaps and slats.
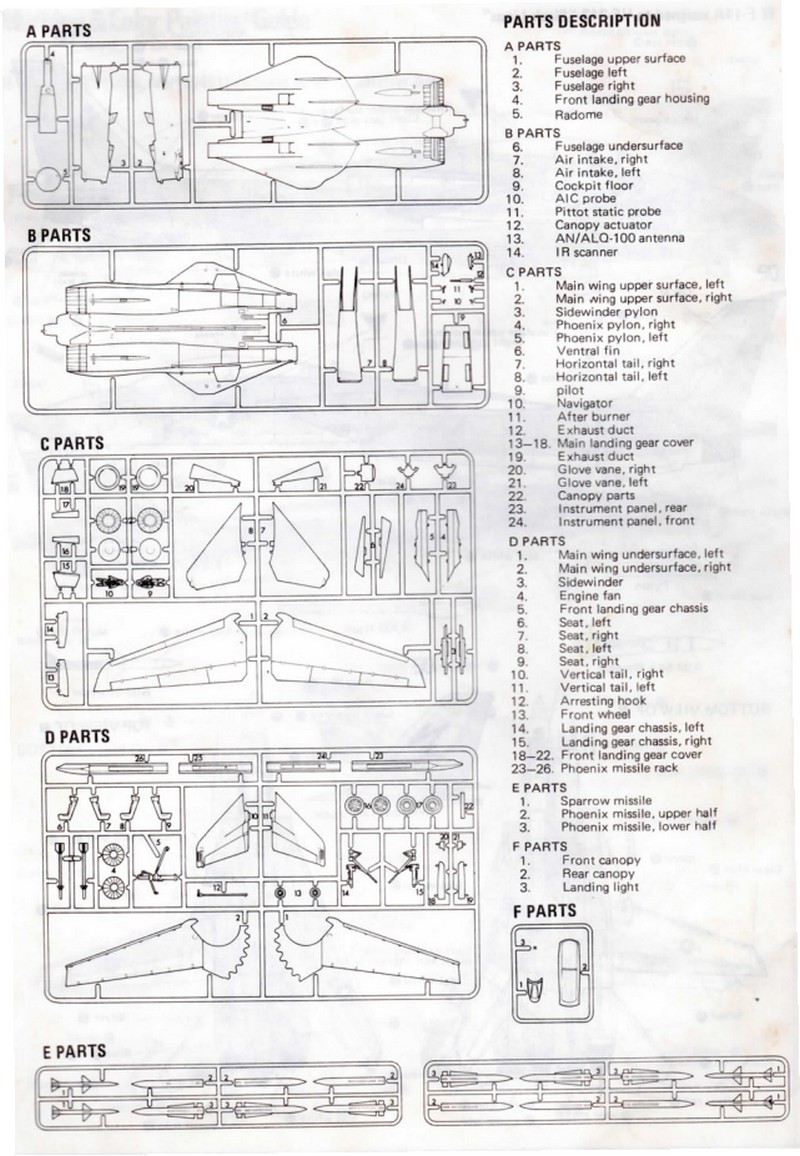
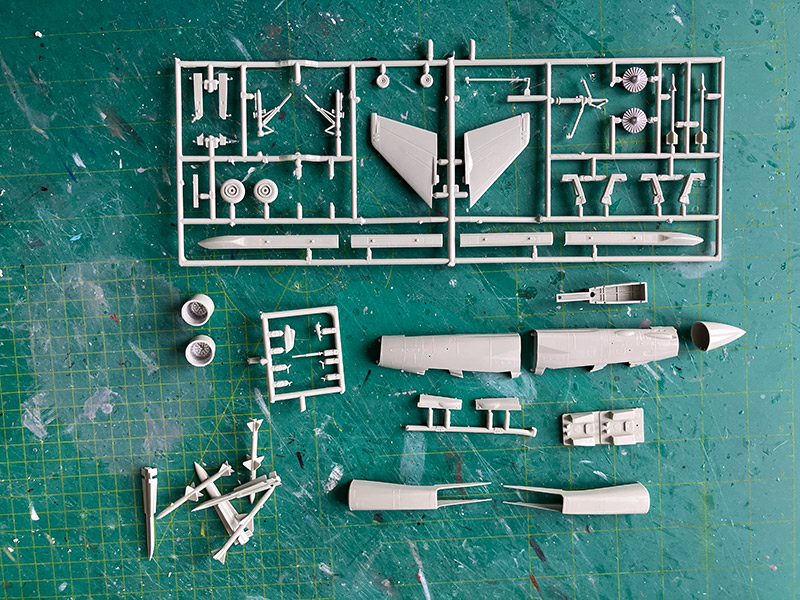
(parts shown already seperated from their sprues and not all shown)
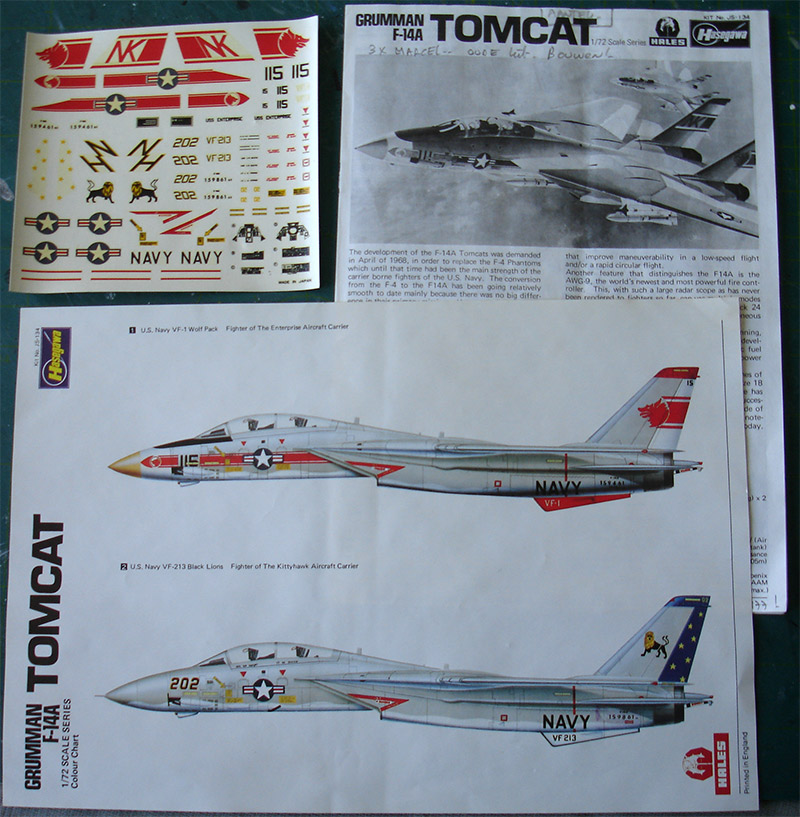
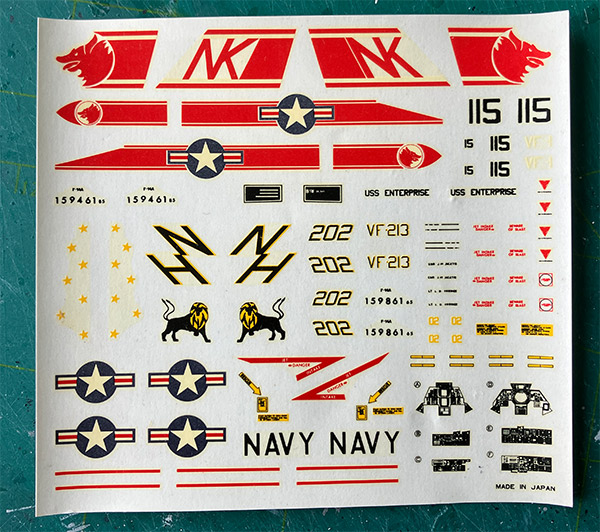
It had decals for US NAVY VF-1 Wolfpack as based at Miramar NAS and VF-213 Black Lions. The smaller stencils are not all provided. The paints were roughly indicated with a "mix for gull grey".
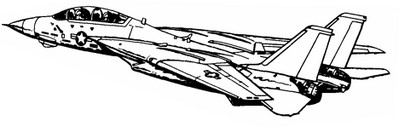
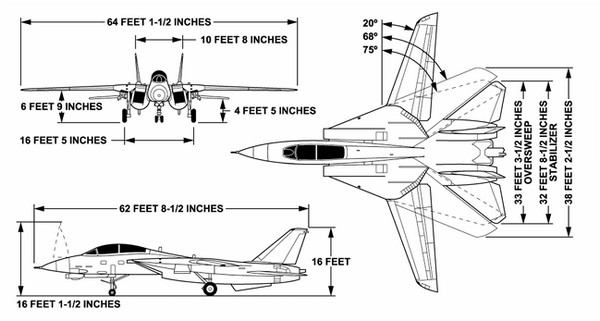
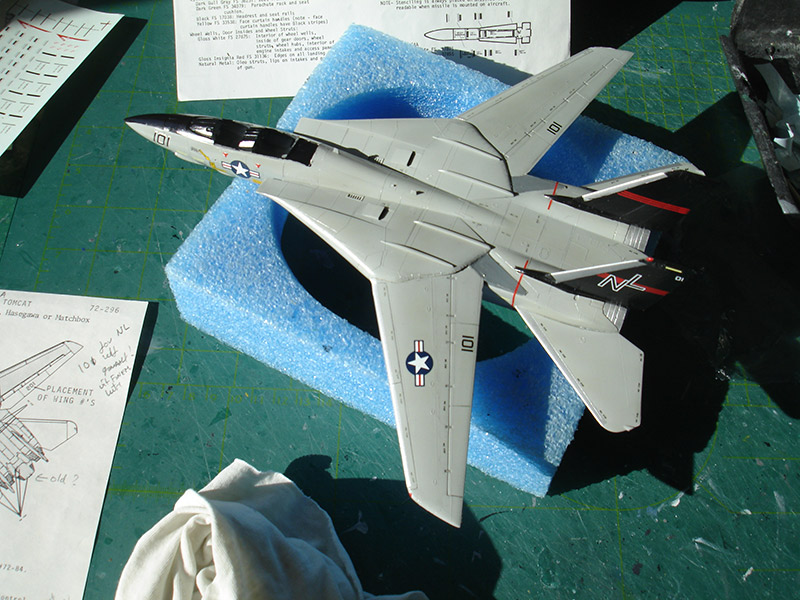
The Hasegawa kit fuselage has the later style beaver tail and the general shapes look fine.
The cockpit is basic with simple ejection seats and no pilot control stick. The instrument panels are flat but decals are provided. Two crew figures are provided and a gun sight!
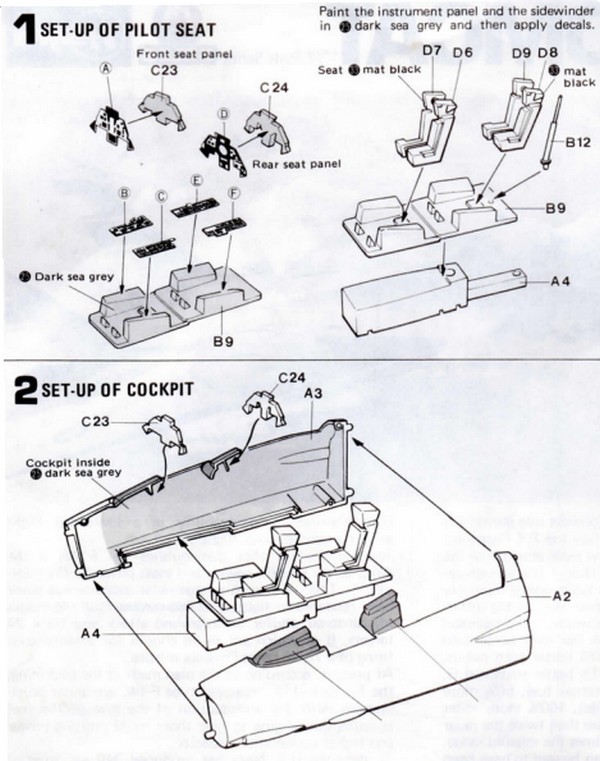
In the cockpit, the bulkhead between pilot and rear WSO is missing and it should be closed. Aft of the rear WSO seat, the coaming is missing, this is open. All these short comings can be easily corrected with plastic card and stretched sprue.
The wing can be swivelled but it is better to set it fixed in your desired setting. The flex seal bags aft of the inboard wing sections are not there but can be made. The kit has the vanes that can be set deployed of closed.
There in an intake flow tunnel with compressor blades. Exhausts pipes can be set open of converged.
Nice is that you get quite some stores like the typical F-14 Phoenix missiles, Sidewinders and Sparrow missiles. The pylons and fairings are separate parts.
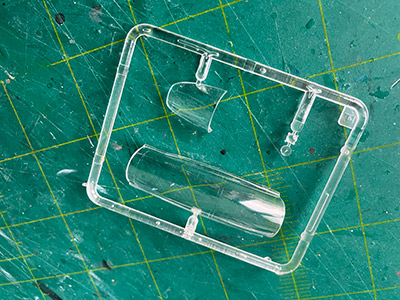
The cockpit canopy can be set open.

Decades ago, a few Hasegawa F-14A Tomcat kits as purchased in the U.K. were made. They are still in the display cabinets and will be presented later on.
I had still a few of these old Hasegawa F-14A kits. Though there are nowadays better 1/72 F-14 kits, such as the complete new Hasegawa kits, Finemolds kit and more recent the very fine Tamiya F-14D... it was decided to make the old Hasegawa kits nevertheless.
Back to memory lane....
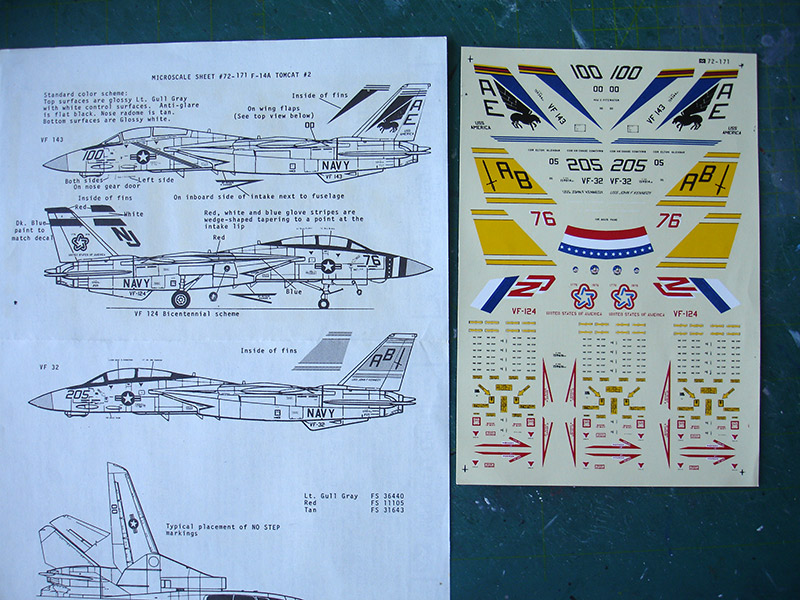
I also found various Microscale decal sets with US NAVY schemes, weaponry, stencilling and a decal set from HDL Hi Decal Line with marking for Iran as well.
Microscale 72-171:
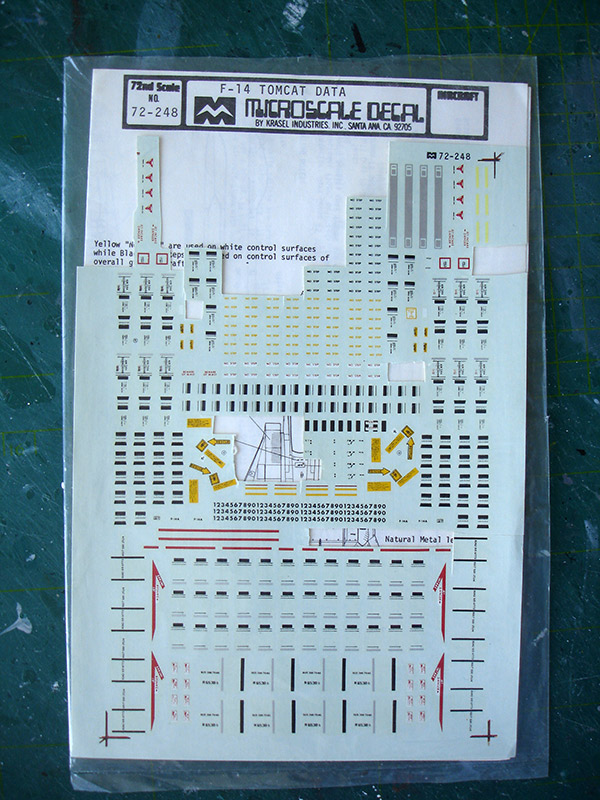
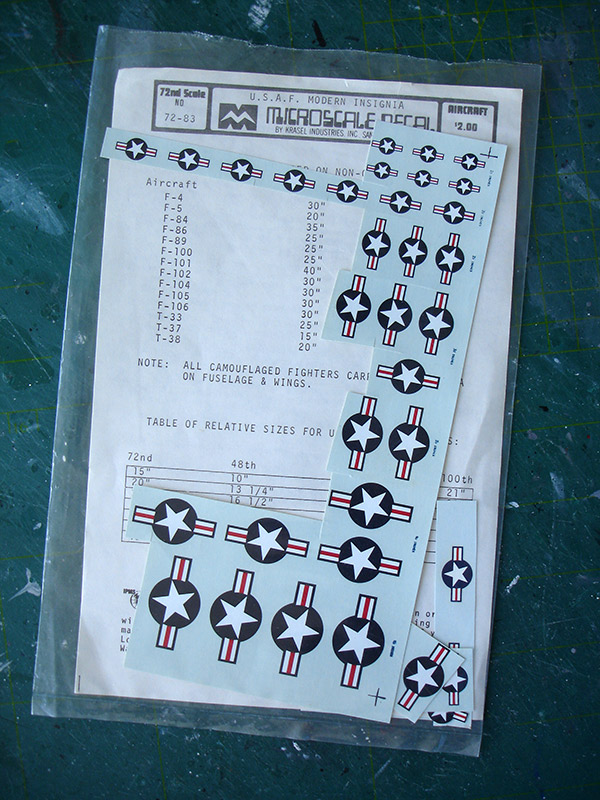
Microscale 72-248 F-14 Tomcat data decals set and national insignia set 72-83...
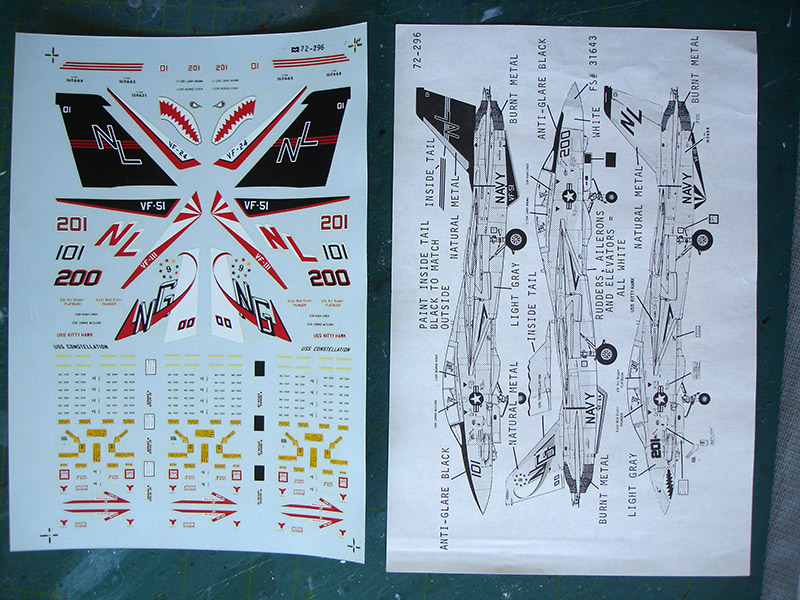
Microscale 72-296 :
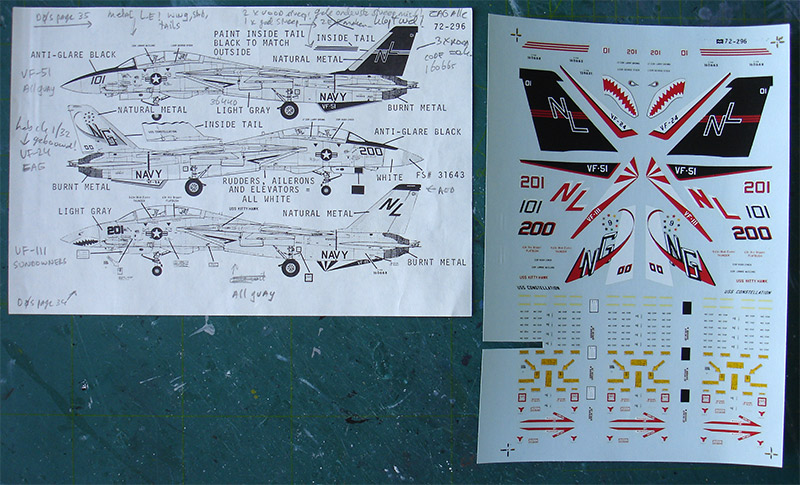
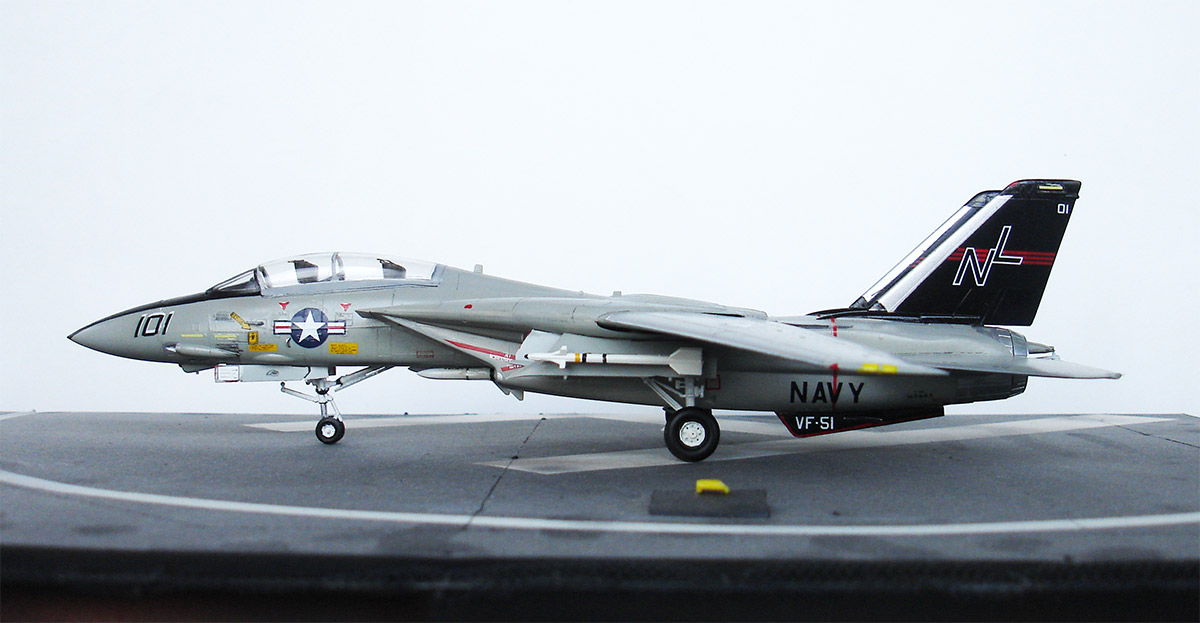
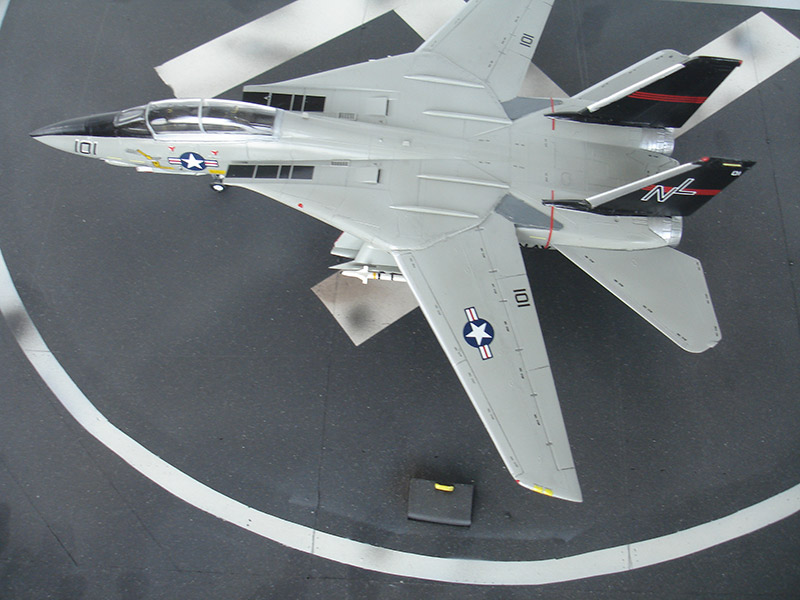
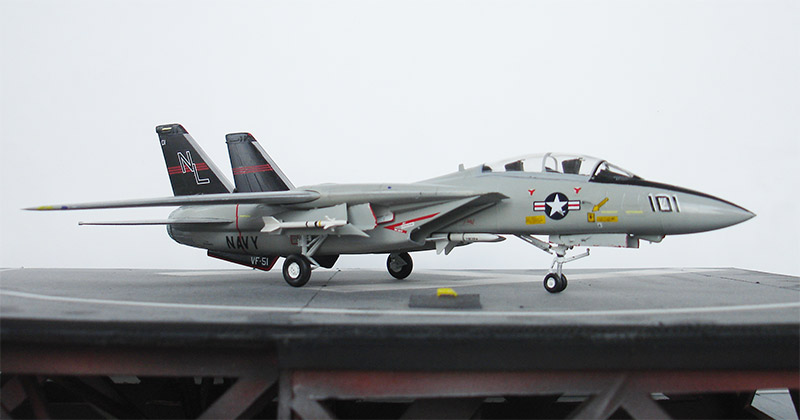
The first recent made old Hasegawa kit #JS-134 was made in a US NAVY scheme of VF-51 using decals from Microscale set 72-296. It would also be made with canopy closed.
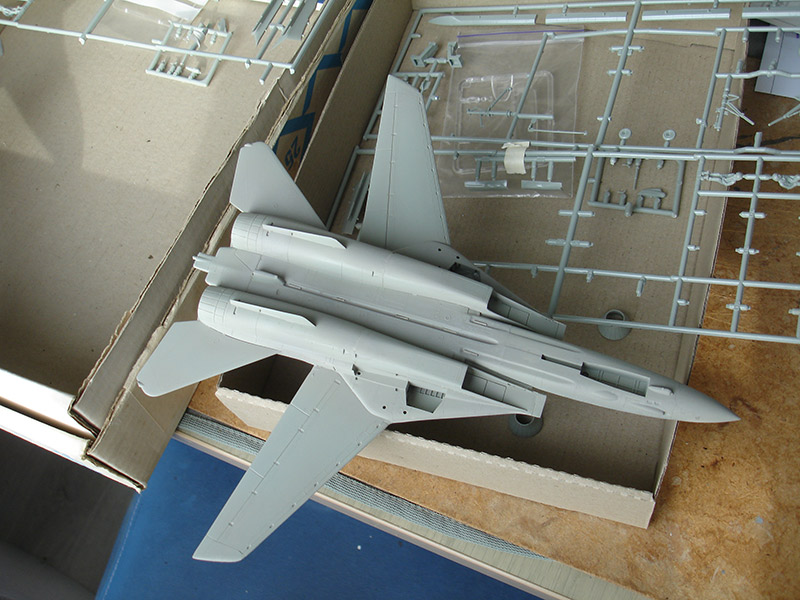
The kit was made as per instructions. I also tried to keep the raised panel lines intact.
But in the cockpit tub I added now the bulkhead aft of the pilot seat from plastic card as well as the rear coaming aft of the WSO (though not seen with canopy closed).
The gun nozzle opening in the lower port fuselage nose fairing was drilled open. I retained the starboard refuelling probe door outline' though on many Tomcats these were no longer installed at squadrons' usage.
I opted to set the wing rather forward. The vanes #C20 and C21 were set retracted. Some putty and sanding was needed but it was not that bad.
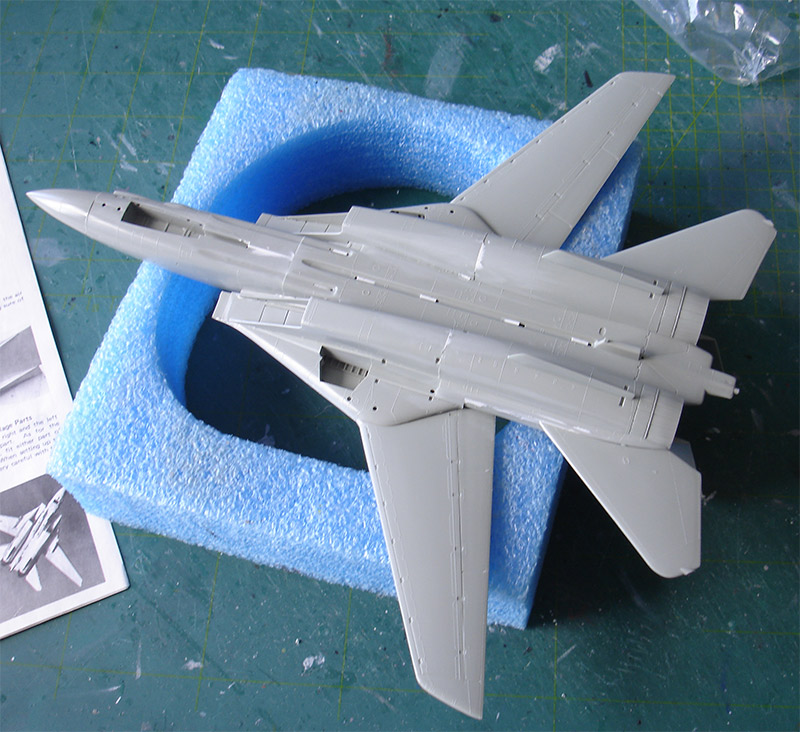
The nose sensor has 2 options: with ALQ-100 only or with ALQ-100 with IR. I opted for sensor #B13 as seen on the desired Tomcat to be made.


A base grey primer coat was airbrushed with my favourite Revell Aqua steingrau 71 acrylic, thinned with a mix of distilled water and iso-propyl-alcohol (IPA).
For the paint scheme of this particular VF-51 Tomcat, the model got airbrushed an overall FS 16440 gull grey with Gunze Sangyo Mr.Hobby H325 acrylic paint. This colour was common on US NAVY Tomcats. Do not forget the pylons and some parts like gear doors were airbrushed while still in their sprues, like the insides' of gear doors gloss white. The insides' of gear bays were hand brush painted white.
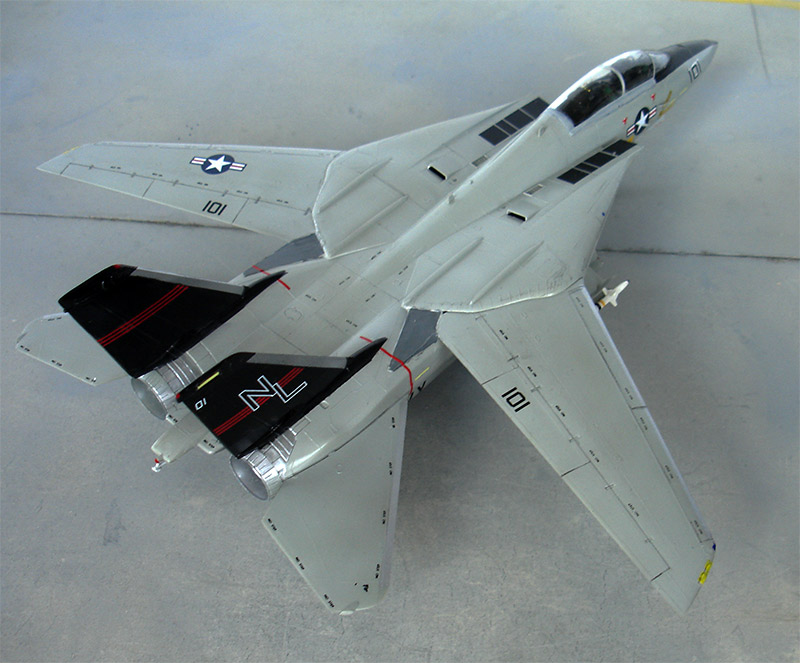
The twin tails were airbrushed gloss black after masking.

The nose area also needed black.
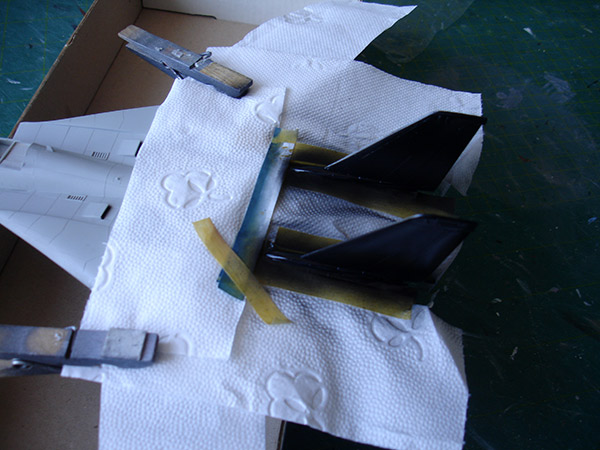

The leading edges of the twin tails, wing and stabilizers were masked and airbrushed aluminium.
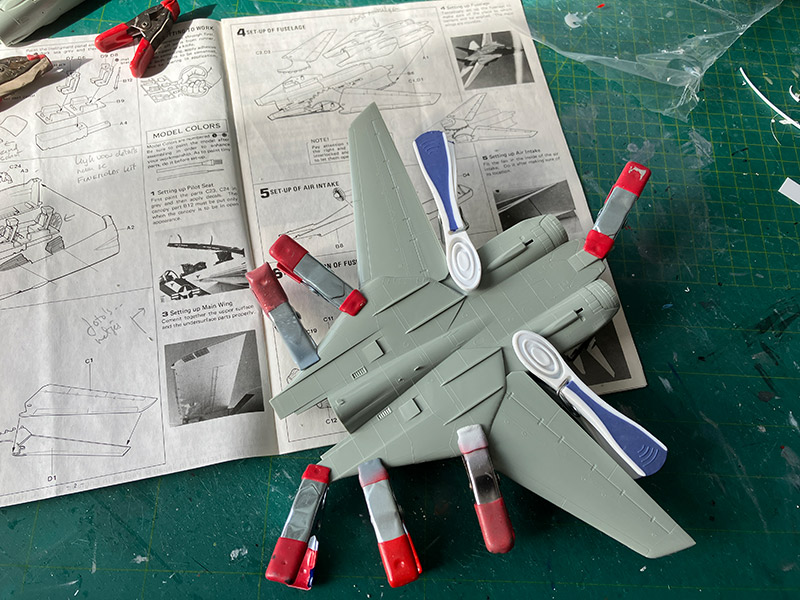
The areas near the exhausts were also hand painted metal. The anti-collision lights were painted red at port and blue at starboard as well as some landing lights and launch lights on the nose gear strut.
The flex seal bags aft of the inboard wing sections are missing; these were made with thin plastic card and blended in with white glue. It was painted dark grey (note that their colours vary).
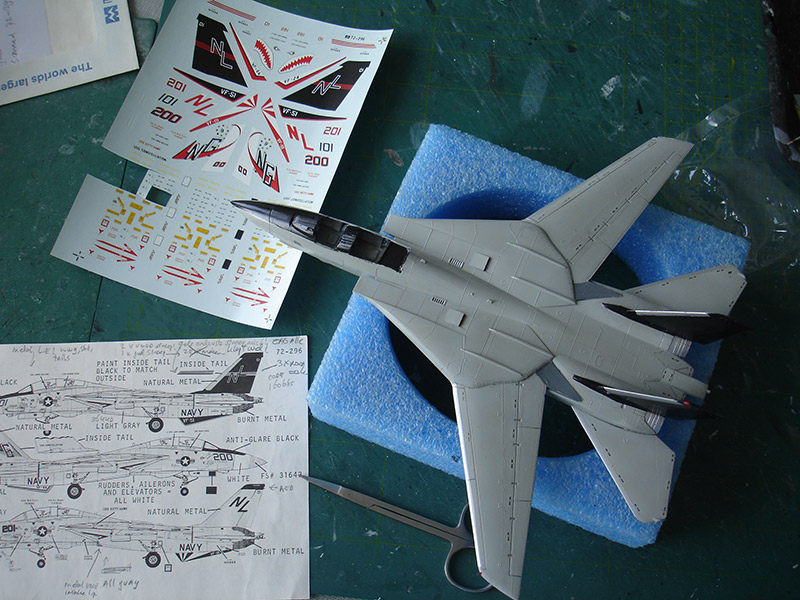
The model has now gotten the main paint scheme colours and ready for decals.
The model was airbrushed with a gloss varnish before decals were set. Used was Johnson Future/ Pledge thinned with 5% Gunze Sangyo levelling thinner. Any gloss varnish will do though.

These Microscale sets were quite old. I have experienced on some others they tend to fall apart when soaked in water, others still hold together and are usuable. I was lucky to experience almost no troubles though some decals sets were 30 years old... (if you have problems with these old decals it is advisable to airbrush a gloss varnish coat first or apply Microscale liquid decal film).
.... decalling in progress...
Many NO STEP stencils were added from the Microscale sets.
Though not sure, I also added on this VF-41 Tomcat 2 walk ways next to the cockpit (on some Tomcats only on one side). The ventral fins colours are combination of decals and black paint.
The ejection seats of the kit were painted black with buff brown parachute pack and added harnass from tape slices. The instrument panels got the kit decals. I also added a control stick and throttles though these are hardly seen as the canopy will be set closed.

The landing gears and doors were simply installed as per kit. I did not bother to add extra details from scratch in the gear bays, just some wash inside. Edges of the doors were hand painted with a fine brush red. The red edges are probable to increase their visibilty for flight deck handling crew...
For the armament, I opted for AIM-7 Sparrow and AIM-9 Sidewinder missiles as per kit. Quite a few were made, the main missile colour is white. I also used the Microscale decals set 72-248 for the missiles. (The AIM-54 Phoenix missiles were also made to be set on other models).
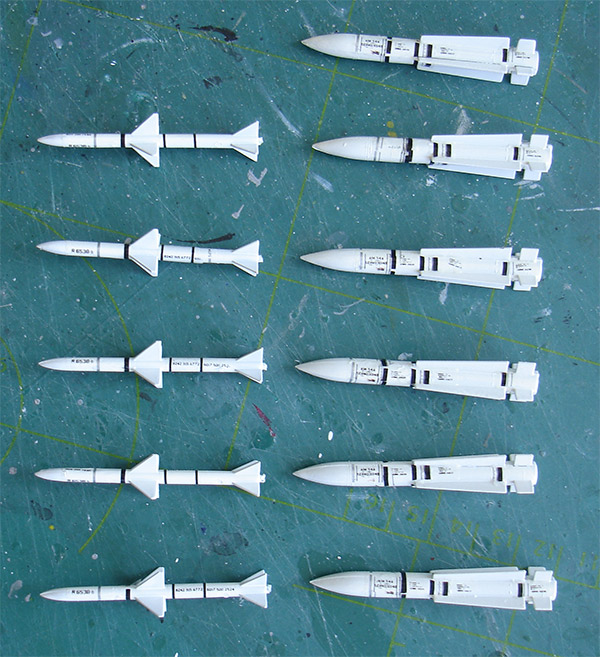
Seen here installed.
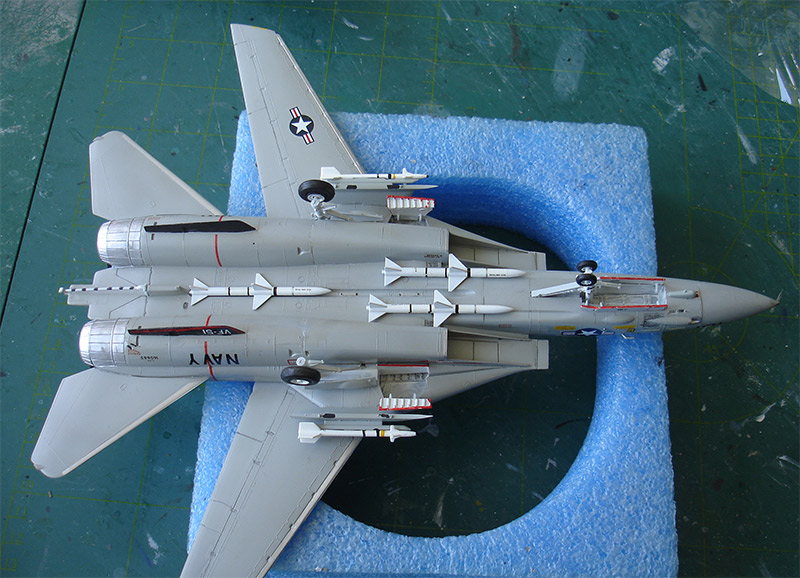
The wide open exhausts #C19 set and painted a bit burned metal. Arrestor hook was painted white with black stripes.
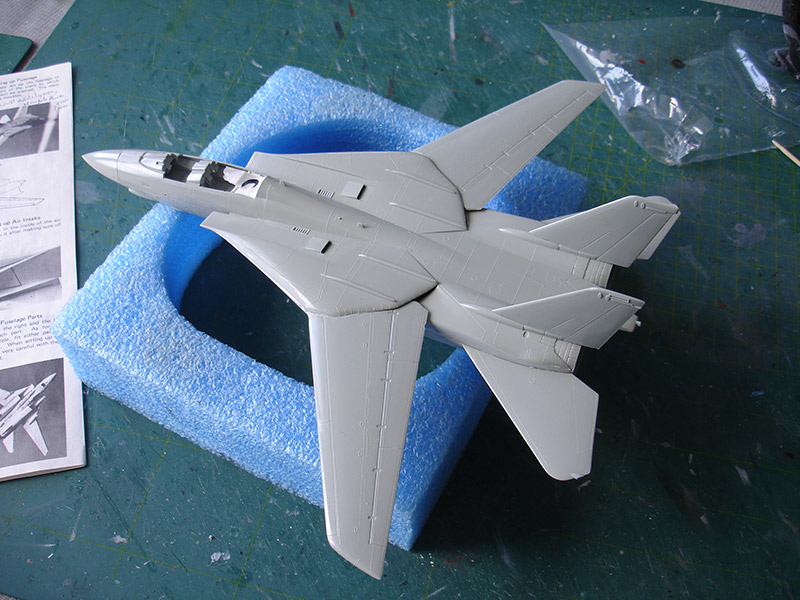
The cockpit canopy was to be set closed. The canopy frames were painted gloss black. The fit when closed leaves a small gap, this was closed up with white glue. Paint black when dried.
The final details were adding the smaller pitots and bits as supplied in the kit. (I was not sure if this Vf-51 jet still had the old small nose point pitot, probably not anymore; it is not provided in the kit).
A bit wash was added in the recesses of flaps and slats.
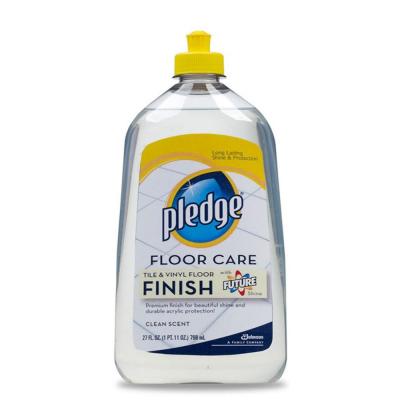
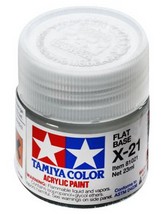
The model than got a few coats of semi-gloss varnish with Johnson Future/ Pledge thinned with 5% Gunze Mr.Color leveling thinner and 5% Tamiya X-21 flat base. The thinner seems to be a lacquer and will strangely help leveling the varnish when airbrushed. This coat will protect the decals and gives an even sheen, shield off the clear parts when airbrushing.
That completed a nice looking F-14A VF-51 despite being made from a nearly 50 years old kit.

On to next [ Page 3... ]
Back to 1/72 Models
(c) Copyright "designer"/ All rights reserved. Your comments are welcomed by webmaster
Created this page
May 10, 2026