Hasegawa
1/72 scale Hasegawa F11F-1 Tiger of the US NAVY
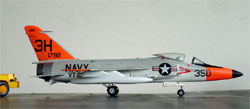
The Grumman F11F/F-11 Tiger was a single-seat carrier-based fighter used by the US Navy fighter in the 1950s and 1960s. It orginated as Grumman design with designation F9F-3, a further advanced "swept wing" version with an area ruled fuselage, it was later after designated F-11.
First flown in July, 1954, it was the first carrier based fighter with supersonic capability. An unusual feature of the Tiger was the use of spoilers instead of ailerons for bank and roll. This permitted flaps which extended the full length of the wing trailing edge.
Tiger deliveries of production aircraft began with assignment to VA-156, a fighter/attack squadron in 1957. Production continued through December 1958, the last of about 200 built delivered in 1959. Its main drawback was its limited range. Planes were armed with four 20mm cannons and capabale of firing four Sidewinder air-to-air missiles. It did not fly very long with the US Navy, and there were numerous engine reliability problems. The type was soon replaced by the Vought F-8 Crusader.
The Navy's Blue
Angels aerobatic team used Tigers for more than ten years. Two Tigers were
modified with a 15,000 lb thrust J79 engine and in 1956 one set a new world
speed record of 1220 mph (Mach 1.85) and a new world altitude record of
more than 76,000 feet.
 .
.
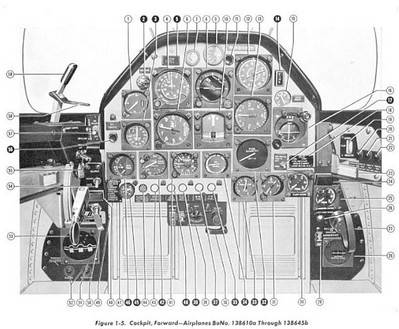
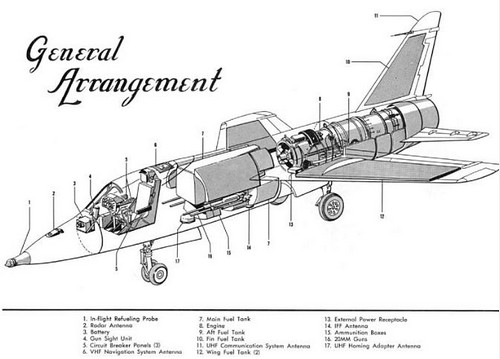
early
cockpit
layout
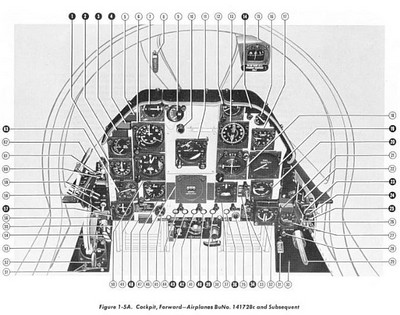
and to the right... the later cockpit layout

The Hasegawa kit in 1/72 scale has appeared in various boxes with different decals. My kit JS158 is the most commonly found one (in a UK importer HALES box).

It has decals for two gull grey/white schemes of VF-21 Free Lancers of NAS OCEANA 1959 with shark mouth and VT-23 with orange panels.
Another box issued of the same kit of Minicraft USA had the same marking options. But the Minicraft
decals were made by Super/ MicroScale of better quality.
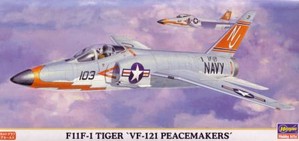
Another Hasegawa box had Red VF-121 'Peacemakers' markings.....
 .
.
Another kit was for a Blue Angels Tiger that had appropriate decals and a resin "short nose" part supplied:
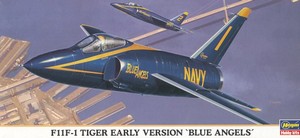 ..
and another box art:
..
and another box art: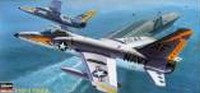
![]()
OK, let's look at the kit.
The kit is simple being quite old and with raised panel lines. It also has a very simple cockpit tub. It was decided to only detail it in some areas and built bit otherwise rather straight from the box.
The kit is a very simple and quick build with only about 50 parts. I started with spraying some parts while still on their sprues, eg. various coats of white on the doors, gear legs and wheels. Also, some parts were sprayed metallic. After drying, moved on to assembly....
STEP 1
Starting with the cockpit, I simply
added the tub part D16 and instrument panel E3. Also, I closed the hole
aft of the tub with thin card to form a bulkhead.
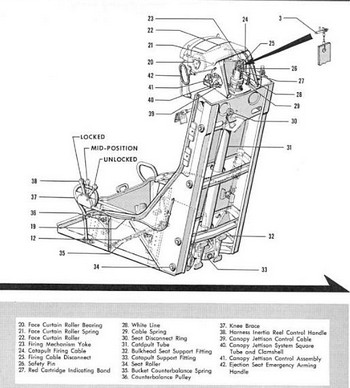
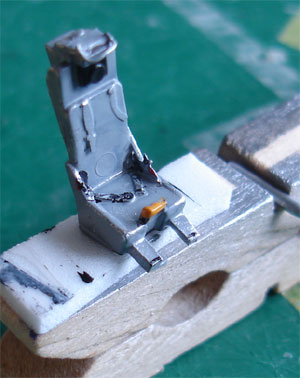
The seat is simple, and probably a
Grumman design? From old flight manual some sketches...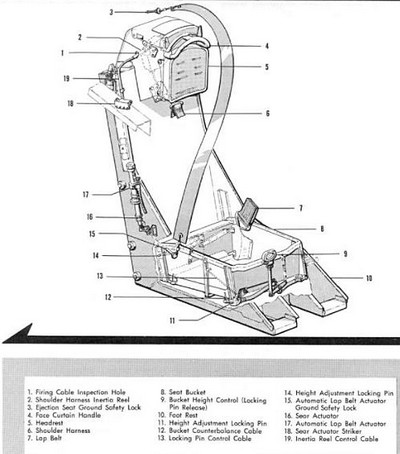
Also add a nose weight before closing
the fuselage and the main halves set together.
The intakes are OK but you see a
blocking end plate in each intake parts D5 and D6, it may be nice to open
these.
I also filled the small holes to
set the flowvanes C3 and C4 and these will be replaced with thin card and
fitted later on.
Also, I did not fit yet jet exhaust
part D20, this will be painted first burned metal and added later on.
Some minor filling was done now, the fuselage fits well.
STEP2
The fueltanks were assembled, with
minor filling and sanded smooth. The sidewinder rail on the pylons C5 are
missing, these were made from some rod. Do not fit these stores yet however.
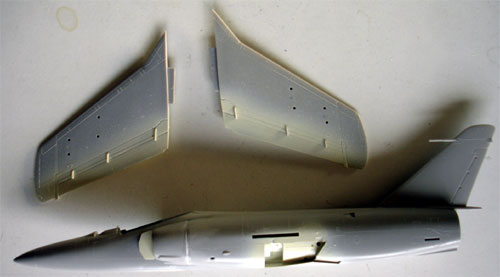
The edges of the wing moving surfaces and rudder were "cut in" with a razor saw to better suggest the gaps on these moving surfaces.
The wing mating areas to the fuselage are very thin so it was a bit difficult to get a good strong joint at the correct 6 degrees dihedral.
Basically the model is now ready to
receive a first primer coat to check for any flaws as well. Light grey
paint was sprayed on to check this.
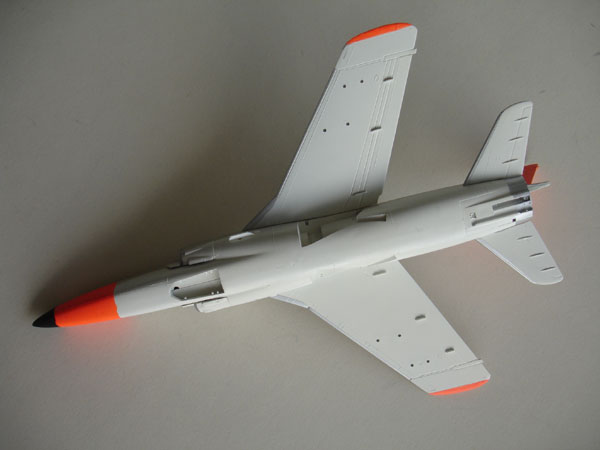
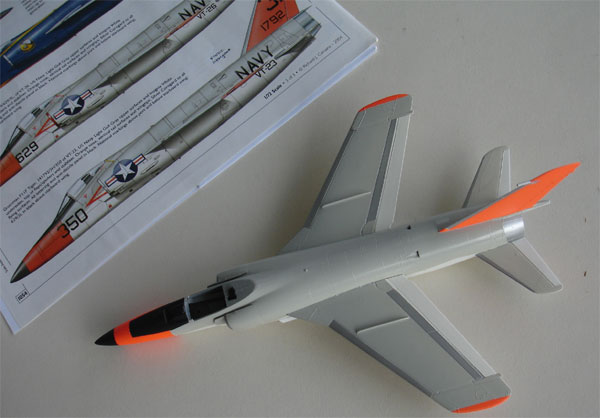
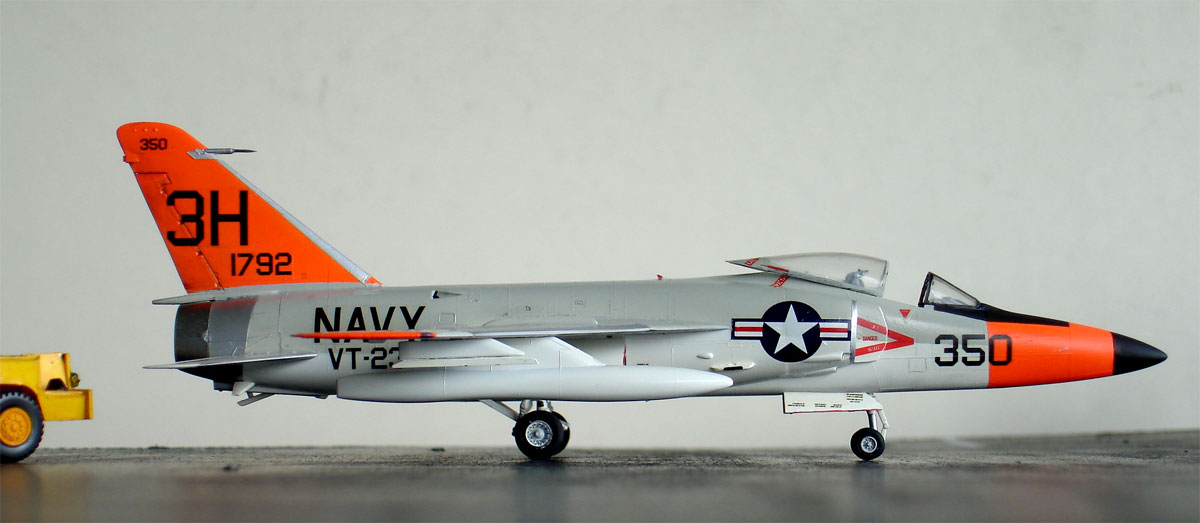
I opted to make the Tiger scheme of
US Navy squadron VT-23 as provided in the kit with high visibility orange
panels. The basic scheme is the USN Gull Grey FS16440 and white lower surfaces
FS16875 scheme.
First a matt white coat was sprayed,
the demarcation line and flying surfaces masked off with TAMIYA
masking tape and the gull grey sprayed on using acrylicGunze
Sanyo no.315 for the FS16440
Next followed the metallic leading edges of the wings and horizontal and vertical stabilizers. These were masked off and sprayed. (the tiny metallic intake lips were hand painted). The (still separate) jet exhaust D20 and aft section of the fuselage was sprayed metallic as well.
The orange panels were sprayed after masking the rest of the model surfaces, using Lifecolor LC23 acrylic. This should also be applied to the wingtips, which Hasegawa forgot to indicate in the instructions.
I replaced the flowvanes C3 and C4
with pieces of thin card and added these now. These were painted white.
The black nose and anti glare panel
was painted on as well with some details in areas.
Adding the decals is now easier to
do than later on to avoid damage. So the model was given a coat of Johnson
Future to get a good even gloss coat. The decals were applied
as provided in the kit for VT-23, except for the US Marking stars-and-bars
which are to bright blue. Replace these with markings from eg. Microscale
or Cutting Edge.
![]()

STEP3
Final assembly was now done.
In the cockpit the usual throttle
and some details from card were added. It was painted light grey with black
instrument details with a hand paint brush. A small gun sight was also
added. An the aft canopy cover area, some stretched sprue was added to
suggest some tubing.
The kit seat can be used as starting
point as pictures show it was a simple seat especially when the parapack
is not installed. Some added drybrushing also does the trick here in the
tiny cockpit.
 .
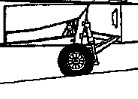
The main gear legs are difficult to align properly and I could not figure
out the exact correct position related to the holes where they are supposed
to be glued. I used some scrap plastic to set the legs at the correct position
in the main bay and to get a strong joint. Also, the doors C11 and C12
would not realy fit, I cut off their ends.
.
The main gear legs are difficult to align properly and I could not figure
out the exact correct position related to the holes where they are supposed
to be glued. I used some scrap plastic to set the legs at the correct position
in the main bay and to get a strong joint. Also, the doors C11 and C12
would not realy fit, I cut off their ends.
Next, some tubes and details were
added from stretched sprue in the main gear bays.
The gear doors edges were given the
red coloured "sealing rubbers" with a red TAMIYA
paint marker.
The arrestor hook on the F11 could
be extended/retracted as needed. I had to trim a bit the forward bit of
the hook D9 to get a good fit in the reces on part C15.
The AIM-9B Sidewinders in the kit are crude and in fact unusable, so I did not install them. Although the external fueltanks were rarely seen on operational planes, I added those on the model.
Some weathering was applied on the moving surfaces gaps with PROMODELLER Black wash, to suggest some oil streaks. The wingtip anti-collision lights were painted on and given a drop of Microscale Kristal Kleer. On the fuselage, a piece of transparant red plastic was set on for the light as well.
Some panellines (these were raised on the kit) were highlighted with some pencil stripes.
The overall model was finally given a overall semi matt coat with Johnson Future mixed with some drops of Tamiya Matting Agent. It now looks fine with an even shine.
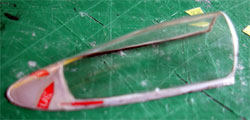
Finally, the outside canopy frame
was painted gull grey and the inside black, whereas the front windscreen
frame painted black with a paint brush, the fit is OK.
As a last finishing touch, a tiny pitot tube was added on the vertical fin through a piece of metal needle.
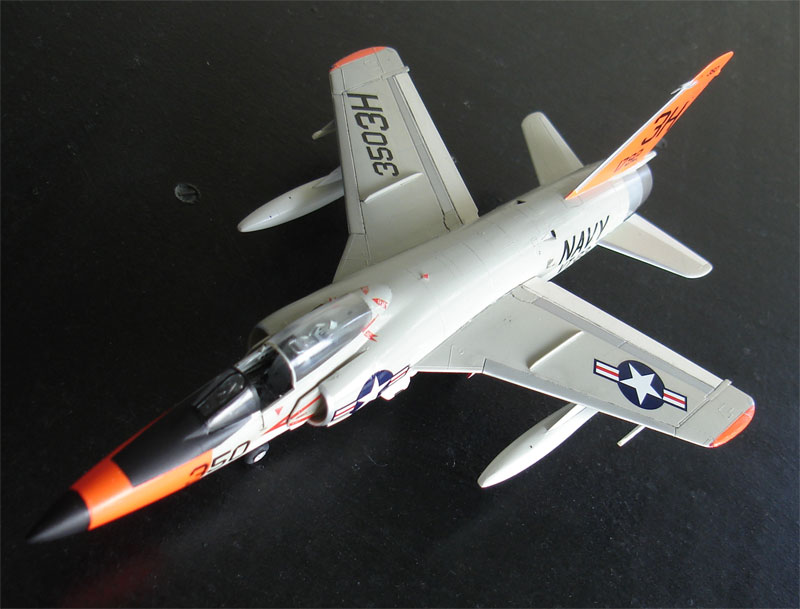
And there
she is... a Grumman Tiger.......

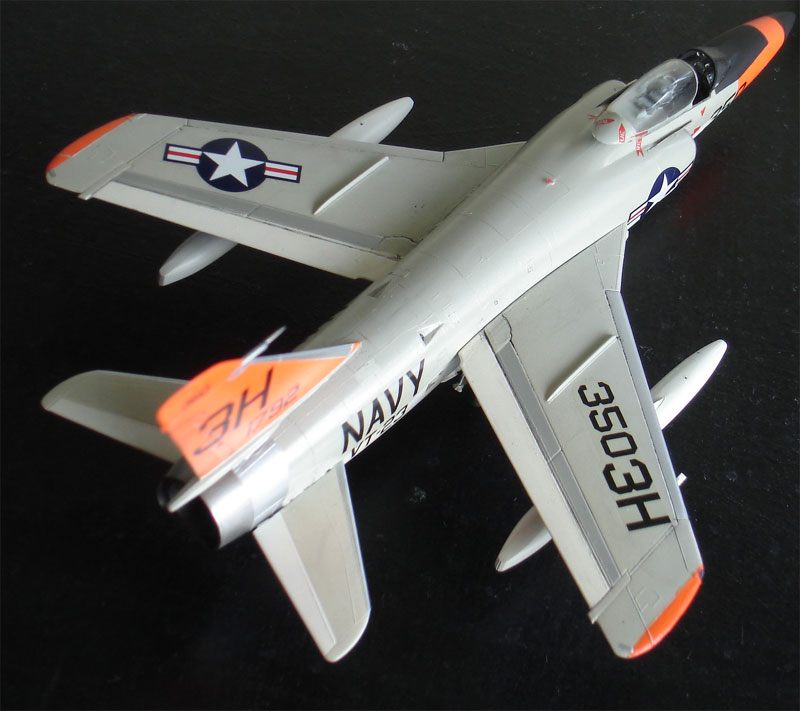
upper
view, note the subtle panel "pencil stripes" and tiny top anti-collision
light on the fuselage
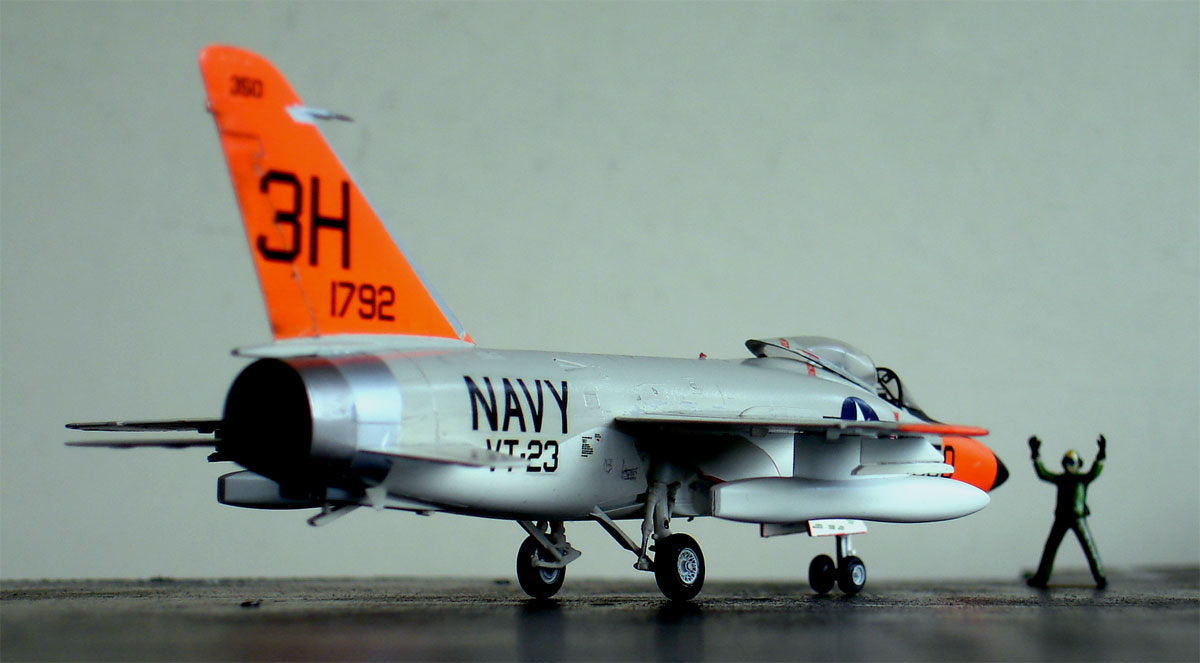
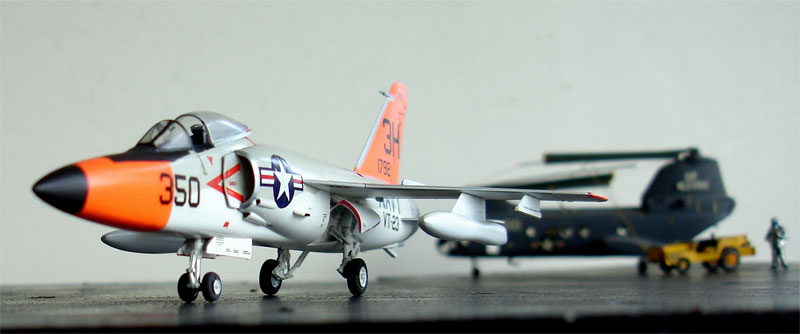
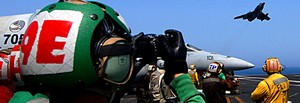
.. a view on
deck....
Books:
- F11 Tiger, Detail and Scale no.17,
Kinzey, TAB books
F11F, US Naval fighters, Steve Ginther
F11F-1 Tiger, Scale Aviation Modeller, November 2004 (with nice profiles)
Back to 1/72 Models.......
(c) Copyright "designer"/ All rights reserved. Your comments are welcomed by webmaster