[ Page 1 ]
1/72 scale Hasegawa F-106 Delta Dart of the USAF
to page 2...
I looked at my model stash and saw a whole pile of old Hasegawa kits of the F-102 Delta Dagger and the F-106 Delta Dart. These should be build and get a place in my model collection. It was decided to do a relatively simple "straight out of the box" built without too much effort.
But let's look briefly at their history.....
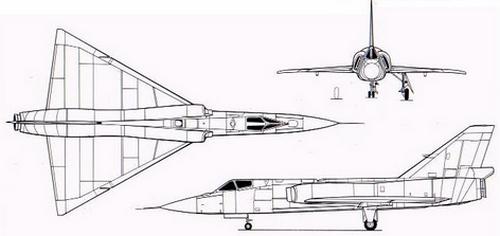
The Convair
F-106 Delta Dart was the primary all-weather interceptor aircraft for the
United
States Air Force from the 1960s through the 1980s. In its design, experience
of the Convair F-102 Delta Dagger was used, but the F-106 was a far more
advanced aircraft. To exceed Mach 2, the largely new F-106 featured a more
powerful Pratt & Whitney J-75-P-17 afterburning turbojet. The idea
was also that the F-106 was a specialized all-weather interceptor, using
only missiles to shoot down bombers, so no cannon was fitted. (later, the
USAF found out that the cannon gun was really required and fitted this
as standard on later types like the F-4 Phantom and the F-15 Eagle).
First flight
was in 1956 and it served until the 1980's and was operated in the Continental
United States. About 277 planes were built. The F-106B was a two-seat training
version with a longer canopy and tandem seating.
![]()
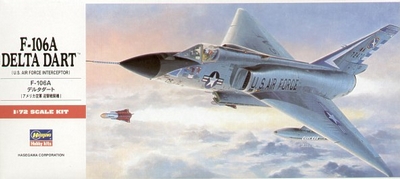
The Hasegawa 1/72 injection plastic moulded model is pretty basic but quite reasonable in shape and accuracy. It can be detailed as desired to get a nice model although it has raised panel lines, and only a few parts.
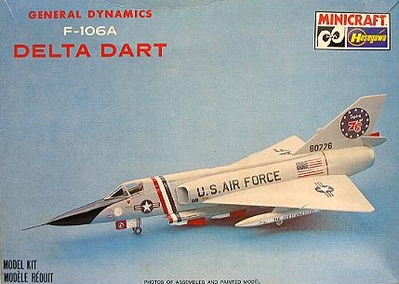
The kit was issued in many different boxes (coded JS-054 , E3, etc) and also under the US Minicraft label and with different box arts. In these re-issues even some parts were improved like the seat (still basic) and the main wheel doors with some more detail.
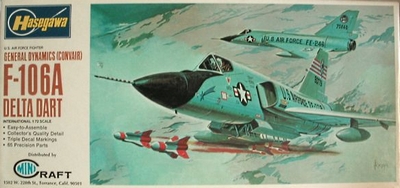
Issue no. JS054-180 with decals for
USAF 95th FIS 'Mr Bones' or 94th FIS 'Hat in the Ring' :

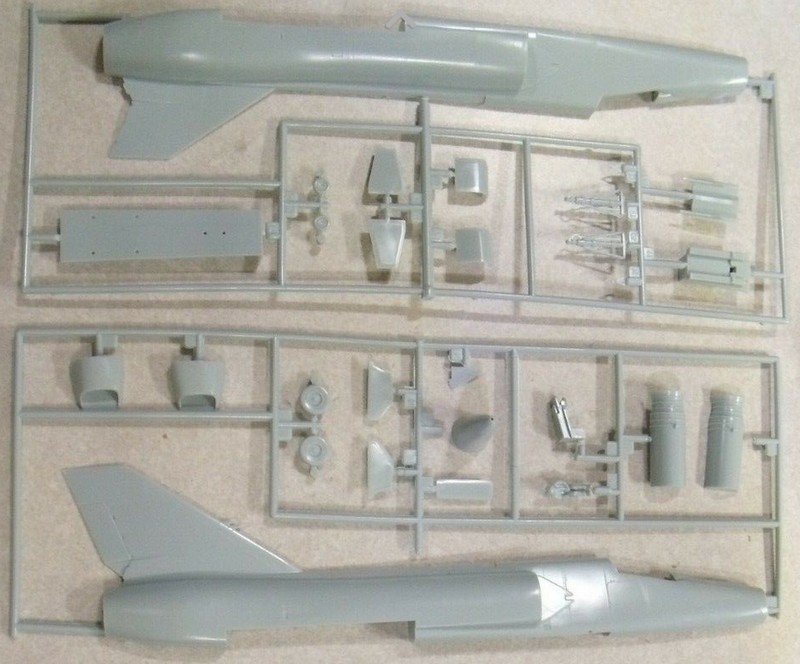
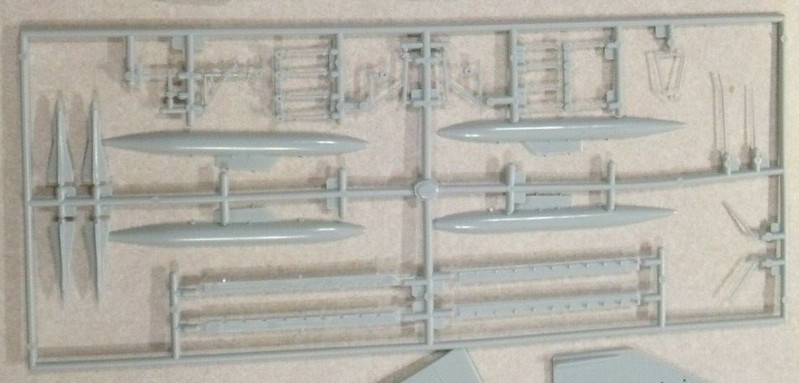
No real detail is present in the cockpit with only a very
basic floor and seat (missing a control column) and no real wheelbay details.
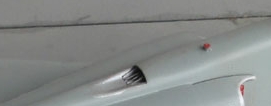
A missile bay is provided however, but it seems to be not deep enough.
The Falcon missiles are rather crude with no separate fins.
An issued kit was the colorful 'Spirit
of 76', kit of Minicraft:
The later style box is seen here:
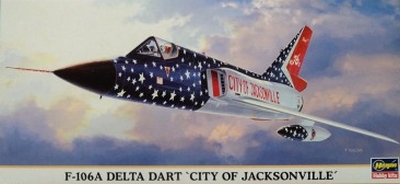
Another example was that Hasegawa
released the kit with ‘City of Jacksonville’ Bicentennial celebration aircraft
in 2001.
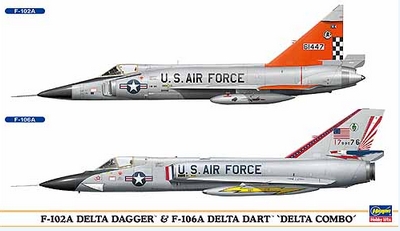
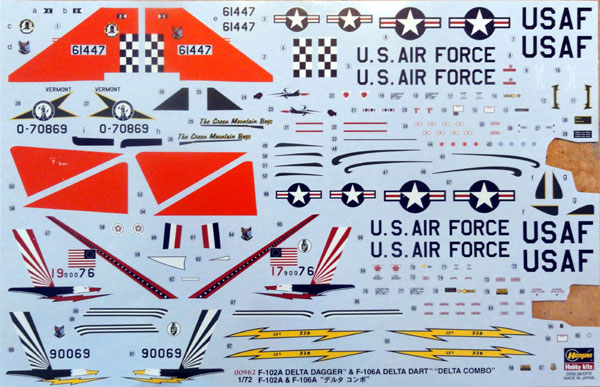
In 2011, a combo kit package was issued
that included also the F-102 Delta Dagger:
...and its decals...
The later issued kits had some re-worked smaller parts that were improved like the seat and wheel doors.
NOTE: MENG released a far better detailed kit of the F-106 in 1/72 in 2016. To be made in the future.
![]()
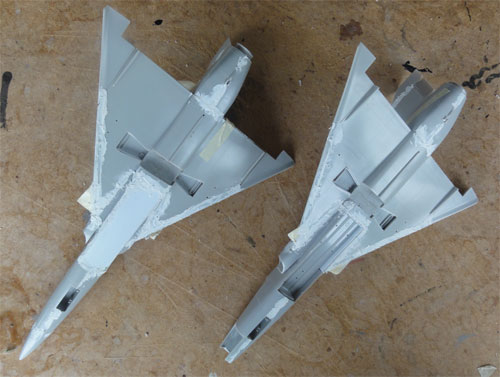
Series building
In my stash I had no less than 3
kits ( A F-106B trainer was already built
many years ago doing my own 1/72 conversion). Microscale
issued many decal sheets for several Delta Dart squadrons in the USAF with
also stencilling to further detail the model. I also had a couple of these.
So it was decided to do a relatively
quick build and set up a model "series building":
(A) early type F-106 Delta
Dart with canopy cross bar, spoke pattern wheel hub, early wing fuel tanks;
(B) medium type F-106 with
canopy cross bar but also later style wheels and supersonic tanks
(C) final type F-106 with new
style clear canopy, long supersonic tanks and retro fitted antenna's etc.
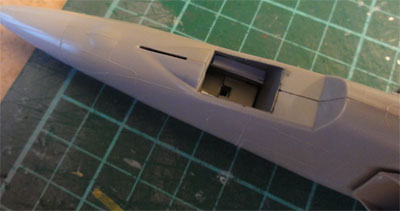
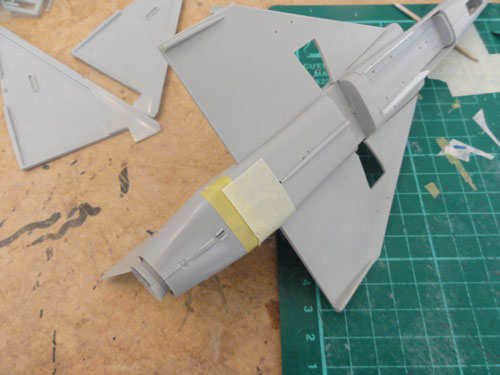
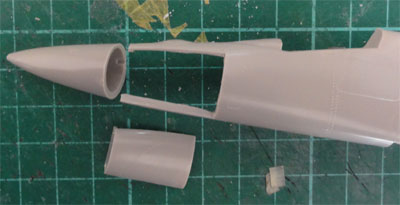
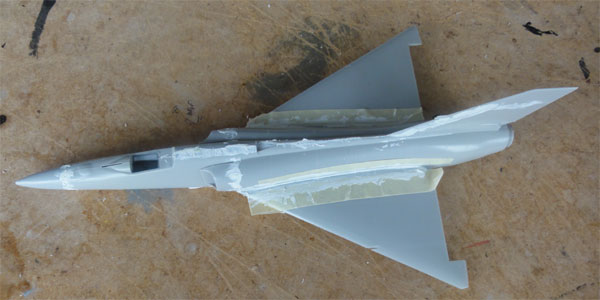
It was also decided to open up an avionics bay in the nose.
It was decided not to bother about
the raised panellines, these were retained as much as possible.
The cockpit tub was added and the fuselage assembled. In the tub, instrument side consoles from card were added.
The separate air intakes are unfortunately
not so deep so it was decided to add home made intake ground covers later
on. You can also open up the sidewall as seen here.... which I did on one
model.
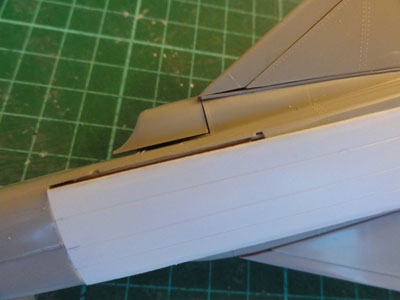
About 1967, an in-flight refueling
capability was retrofitted to all surviving F-106s, through a receptacle
in a dorsal position behind the pilot. The receptable in the kit fuselage
spine is not really well moulded. A slot was cut on each fuselage halve.
Some card and putty was used to get a smooth result. The small flow vanes
were inserted made from card. (note that on the F-106B the receptable is
a bit more protruding on the spine).
The prepared fuselage halves were
next joined with the cockpit tub, the tailpipe can be fitted later on.
(No nose weight is needed). Fit is not too bad.
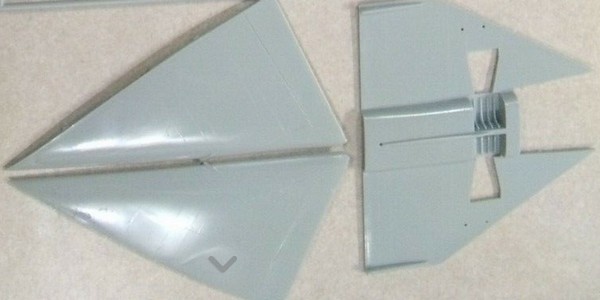
The wing trailing edges surfaces
were cut loose to set them at an angle later to add some interest to the
models. After 1957, the F-106 wing got a couple of slots sawed in at their
leading edges, removing the wing leading edge fences which were only present
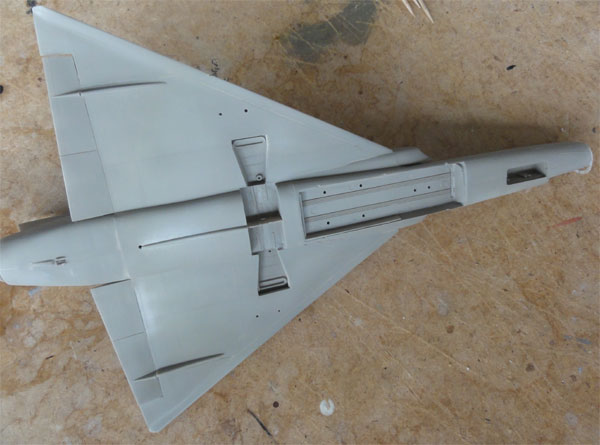
on the initial production planes. (so this was done for all three kist).
For kit (C), also an avionics bay
was cut open and the radar nose separated, only to add some additional
interest and details on one model.
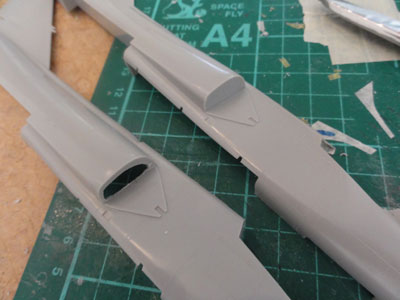
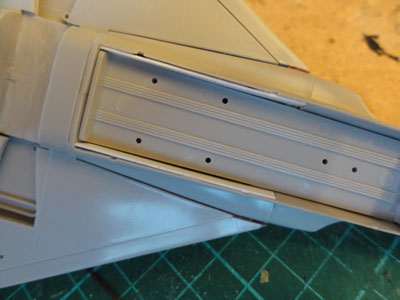
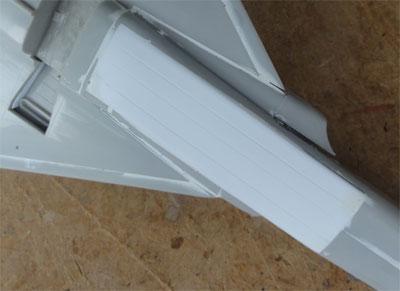
It was also decided to keep the large
missile bay open on one kit (C), on kits (A,B) they would be closed. The
kit bay is not very detailed but the four Falcon missile stations are interesting
and typical for the era with these kind of interceptors.
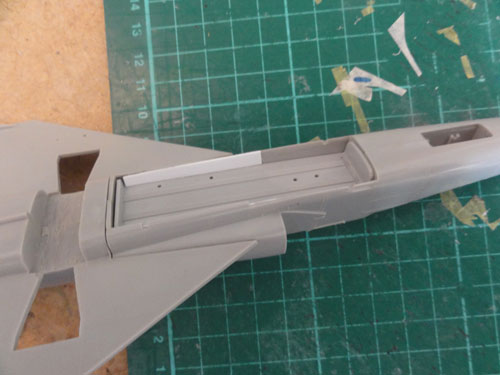
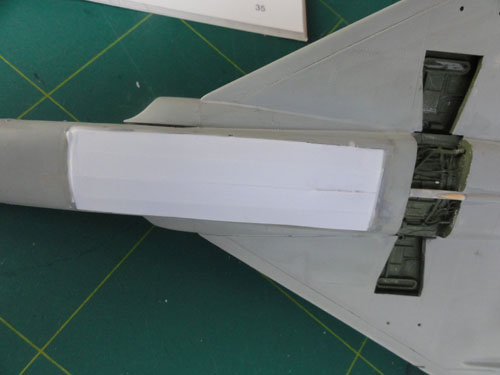
Some card inside was used to close
the gaps and used white glue to close the tinier gaps.
For the closed bay, I did not use
the four separate doors but used a single piece of plastic card made to
fit and tweaked into the opening; this will result in a better result and
less work. The doors were inscribed.
Filling was done next with putty requiring
long strokes of putty at the wing-fuselage joint and the lower wing edges
particularly.
Note the tape added to avoid damaging
the raised detail during sanding. When having the missile bay closed using
cart, extensive putty and sanding was needed as well.
Next, the trailing edge surfaces were
glued on each model and the gap slightly covered with white glue.
When dry, each model got an overall
light grey base coat was sprayed on with airbrush to check for any flaws.
As required, some new puttying and sanding was done.
![]()
Time for detailing.
Each cockpit got some detail from
sprue and a couple of instruments from spare decals on the added side consoles
made from cart. The cockpit was painted medium grey.
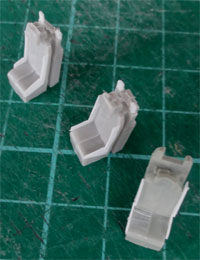
The kit seat is rather basic. The upper plastic of the seat was cut off and some bars added for the ejection rails. Some sidewall were added from very thin plastic sheet. The seat was painted medium grey and harnesses and parapack suggested with tape and painted dark grey with a red head rest.
On the floor a pilot control stick
was later to be added with on top a "V" shaped handle. One cockpit canopy
will remain closed on one model, the other ones will be set open.
The main wheelbays got some extra
details. Inside the wheelbays, some hydraulics were suggested from scratch
card, stretched sprue and rod. The wheelbays, inner doors and missile bay
were painted interior green with some black wash for depth. Interior green
came from White Ensign Models WEM ACUS09 enamel
paint for Fed.Std 24151.
 ..
..
With simple stretched sprue and rod
the gear doors got their retraction bars and so on. The kit wheels are
OK for the later style F-106. Wheel tyres were painted typre black with
aluminium wheelhubs.
For kit (A) of an early type F-106,
I got a pair of spoke type hub wheels from a 1/72 Hasegawa F-102 Delta
Dagger kit. These were initially also used on the real plane.
I also got F-102 wing tanks of 227
gallons from the F-102 kit as these were often seen also on early F-106A's
. The integral moulded F-102 pylons on the early tanks were reduced 5 mm
in length for the F-106 kit.
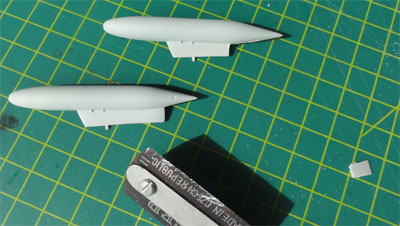
In the kit are correct larger 360
US-gallon capacity tanks used after about 1967, 50 percent larger than
the previous 227-gallon tanks.
For kit (C) an avionics bay was simply
made from card and bits and pieces from the scrap box. Note in the picture
below the typical windscreen split center panel. It was fitted on real
planes to avoid the pilot being blinded due to the flat sides on the windscreen.
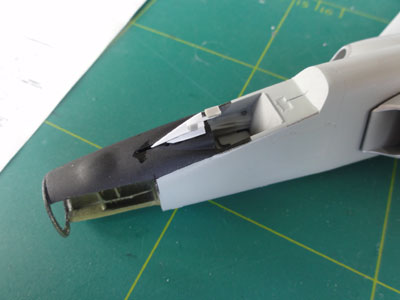
A radar disc was also found and using photos from Detail & Scale book detailed.
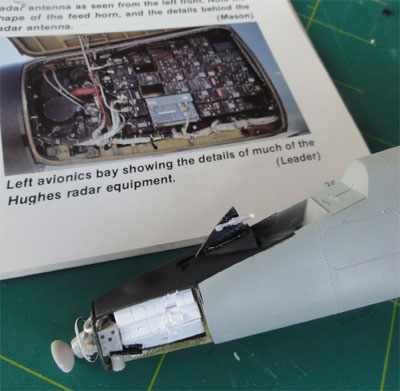
I did not find any photos on how
the radar nose is opened, probably it was completely removed when maintenance
was done.
Next will be the colouring and the finishing schemes.
On to next [ Page 2...]
this is really an incredibly good website about the F-106:
http://www.f-106deltadart.com
IPMS NL F-106 Walk Around
Books:
- F-106, Bunrin Do series no. 128,
November 1981
- F-106, In action series, Squadron
Signal
- F-106, in Detail & Scale no.
13, Bert Kinzey
 ...
...
Back to 1/72 Models.......

(c) Copyright Meindert "designer"/ All rights reserved. Your comments are welcomed by webmaster
Created this page Sept 14, 2011