Merlin / Cormorant
[ page 1 ]
Italeri models in 1/72 scale
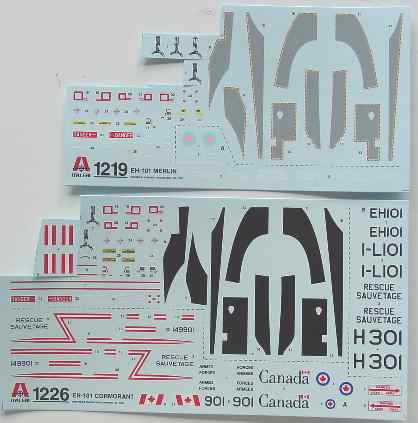
Two excellent kits of the EH-101 helicopter in 1/72 scale were released by Italeri; first in April 2002 of the EH-101 Merlin (kit no 1219) and at the end of 2002 of the Canadian version "Cormorant" (kit no 1226).
The EH-10 helicopter has had a long development (started in 1978 as type WG34) but due to many changes to the basic requirements the helicopter evolved into the EH-101. It grew in size and weights and several engines were analysed. Several variants are now being offered by the EH-101 consortium of Westland/ Agusta amongst others the Naval anti-submarine variant (Merlin for UK Royal Navy) and transport/SAR version. The first EH-101 became operational in 2000. It will be used by the Royal Navy, Army, Italia and also Canada.
The Canadian Armed Forces ordered several of the last type, called the Cormorant. The transport variant (such as the Cormorant) has a ramp door in the tail section as the most notable external difference and it is catered for in the kit.
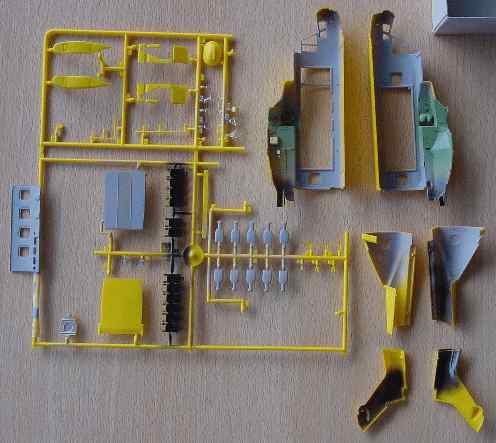
The Italeri EH-101 kits are excellent and the differences between the types are included through issuing two kits and several optional parts in them. The fit is very good, and also the delicate transparent parts fit well. About 100 parts in light grey plastic are in each kit and it has nice surface detailing typical for a modern helicopter.
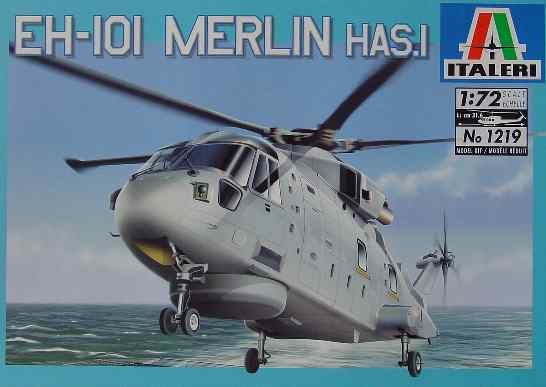
The kit no. 1219 of the Merlin HAS mk.1 has rou
- the radar fairing under the nose
- option to fold main rotor and tail rotor section and it looks OK good ASW interior
- kit decals for a single version ROYAL NAVY with good stenciling details
- it lacks parts for torpedo's and unit markings.
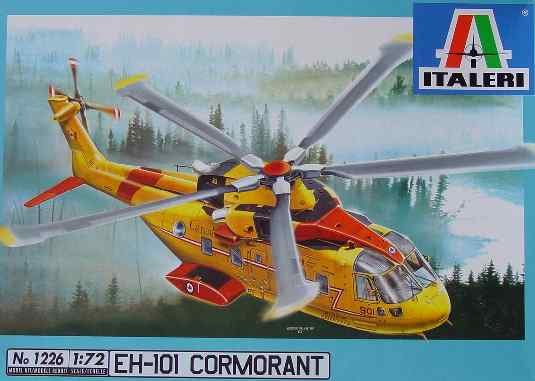
The kitno. 1226 Cormorant has parts in yellow plastic and:
- basic interior with some seats
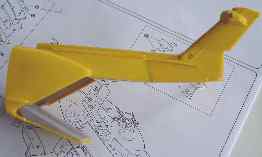
- different tail cone with ramp door (that can be displayed open)
- additional rotor blade fairings
- Canadian SAR markings for two versions including stencilling and striping.
Some parts are common to both kits but there also special parts within each kit.
Suggested
corrections to the Cormorant kit are according to pictures:
- 1 - the forward
right window is rectangular in the kit; it should be a bubble (such as
part 11d)
- 2- the
left bubble window directly aft of the cockpit is also missing, it should
be in the left emergency exit door; you will have to find another one (like
part 11 d)
- 3 - the main
undercarriage legs lack the double wheels! You will have to find
2x2 new (slightly) smaller wheels and adapt the legs.
- 4 - the "fairing"
on top of the rear exhaust pipe should not be there... simply sand off.
- 5 - the winch
(part 32a) seems to have another shape on the actual helicopters
 Cormorant
tail
Cormorant
tail
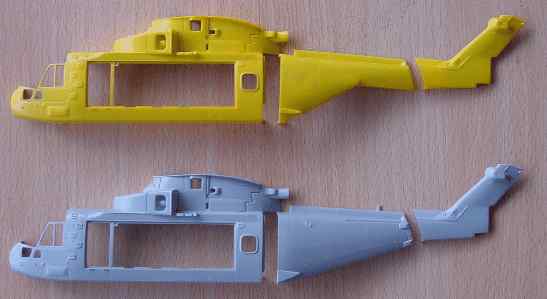
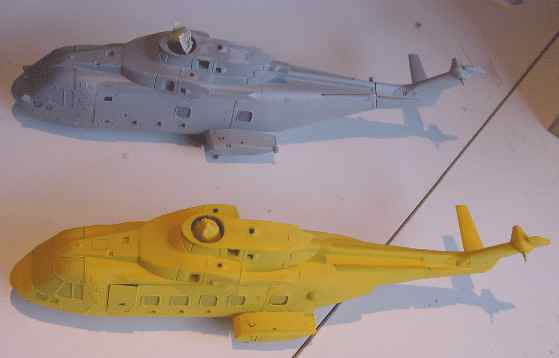
Upper parts:
Cormorant SAR/Transport variant
Lower parts:
Merlin NAVY ASW variant
Both kits will be made simultaneously. On the internet, pictures can be found of both types.
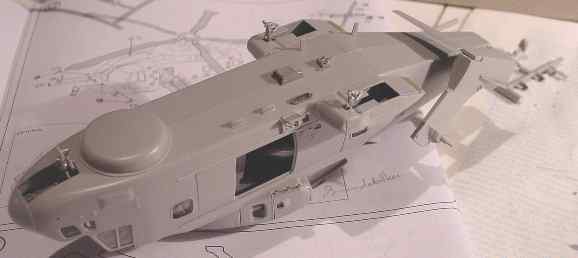
First, the smaller parts were given the basic paint colours (grey, black etc) with the airbrush. Basic assembly is straight forward and the fit is good.
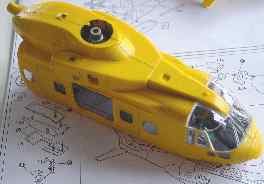
Also, a special tip: the larger fuselage parts (that are yellow parts of the Cormorant kit), were given a dark grey base inside colour to prevent "shining through" after the light yellow colour has been added later on.
The interior was slightly detailed as the doors can be set open. The cockpit area needs some more attention as it can be well seen through the large glass roofs. The seats were given some straps etc and the provided decals for the instrument were applied. In the Cormorant often also stretchers can be accommodated in the cabin with two swivel ling observer seats aft of the cockpit at the bubble windows.
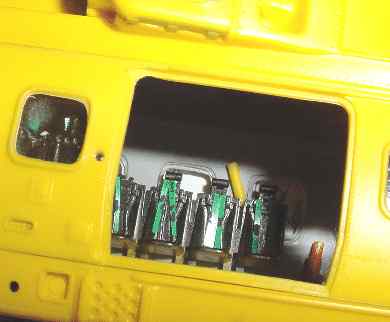
The cabine also has a roof and some
details in the engine compartment were added from the scrap box. The main
rotor was left of at this stage.
The forward windows on both sides
should be "bubbles".
The small gaps were filled with some
Tamiya putty and with glue in the very small seams.

The Cormorant
model seen above has the emergency hatch opened; I will close it again
and fit an extra bubble observer window (this is lacking from the kit)
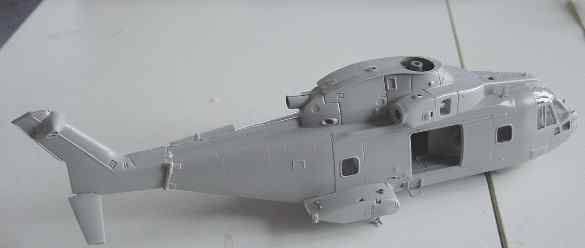
The largest fit problems are in the
sponson areas of the rear undercarriage legs, you will need to fill here.
Also, check the various antennas and ECM/RWR fairing. On the trees you
will find numerous parts for them and although not in the instructions,
there are actually there so check pictures of the real chopper.
Now the models await their first basic coats of paint: grey for the Navy Merlin and Yellow for the Canadian version. The light grey colour designation of the Merlin of the RN is not yet clear, but will probably be similar to that of the RN Seakings (medium sea grey?).
Later on, the other details will be
added such as the rotors and also the entry steps and access doors. Also,
for the Cormorant double main wheels will be fitted (which are lacking
from the kit)
Some additional pieces of sprue and
card can add realism, so....
On to next page [2]...
References:
- Air international vol 54/4 April 1998
- World Air Power, No.21
(c) Copyright "designer"/ All rights reserved. Your comments are welcomed by webmaster
Created this page January 5, 2003