Merlin / Cormorant
[ page 2 ]
Italeri models in 1/72 scale : kit review & modelling report
The models got their additional paint.
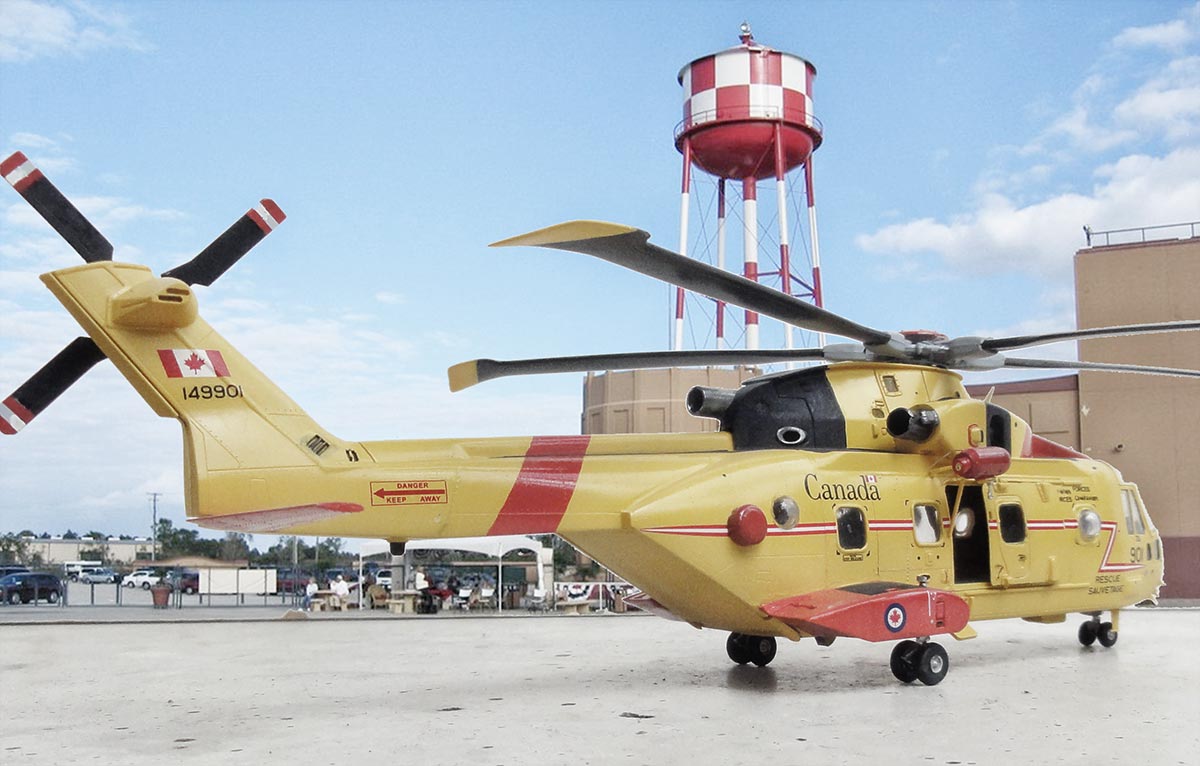
The Canadian Airmed forces aircraft apparently changed their own Canadian 502-1-GP-12c paints system from the 1983, transfering to (U.S) Federal Standard FS595 system and gradually painted when overhauled aircraft in the new colours.
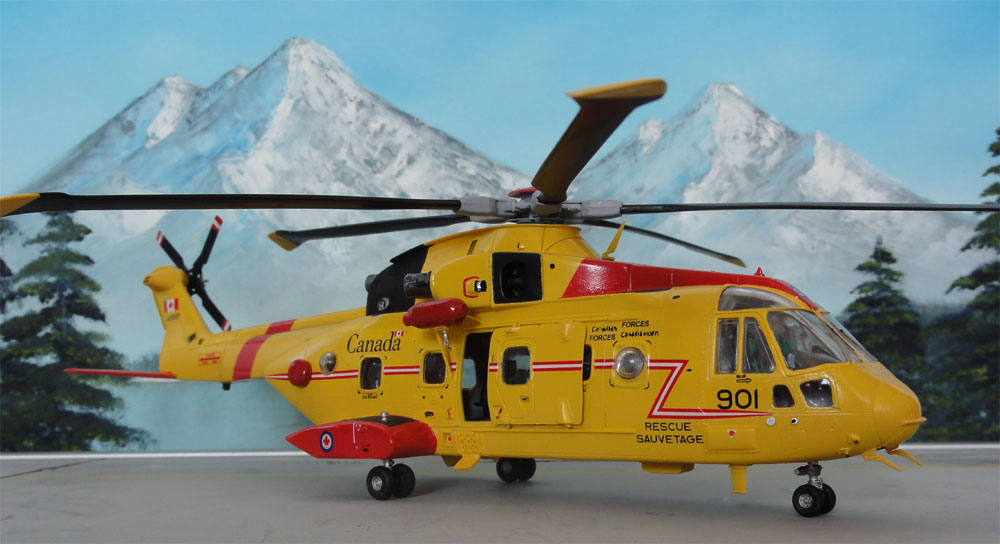
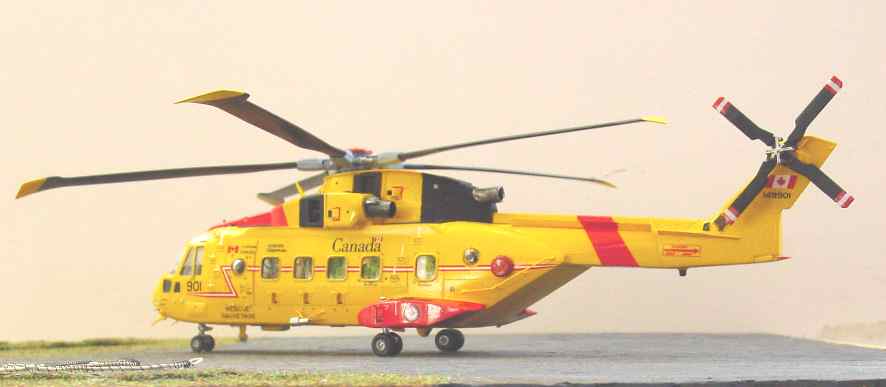
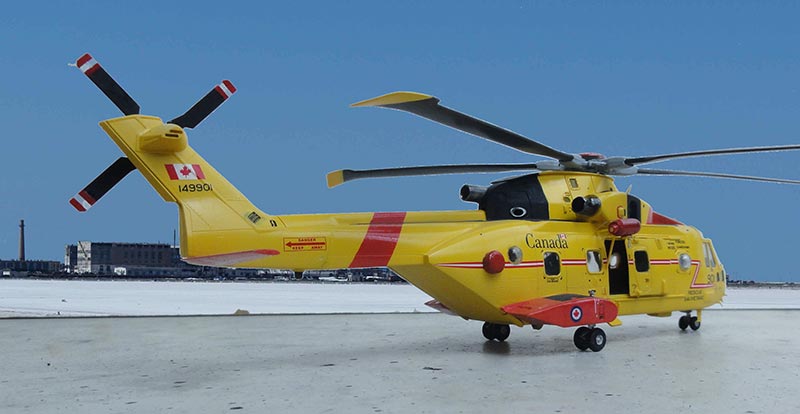
Rescue helicopters like the CH-113 Labrador had Identification Yellow FS13538 finish with Red FS11105 areas. I assumed that the Rescue Cormorant got these as well.
I forgot to write down which enamel colours I airbrushed at the time.
Quite some details were added as well, somewhat half way shown....
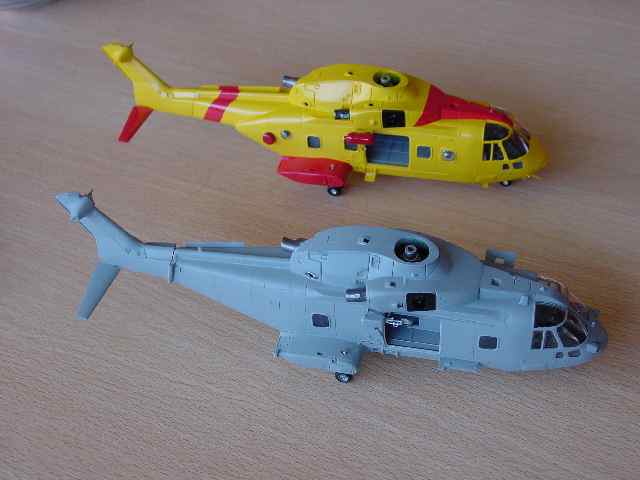
Also, the hoists have different shapes,
the one provided in the kit being used for the RN Merlin (lower kit), whereas...
- the Cormorant hoist (on top) was
carved from an old bomb and painted red.
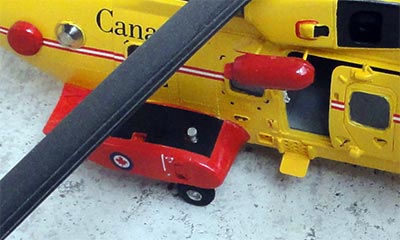
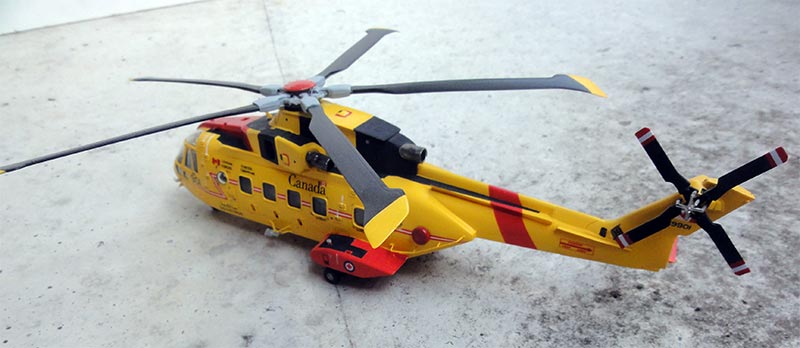
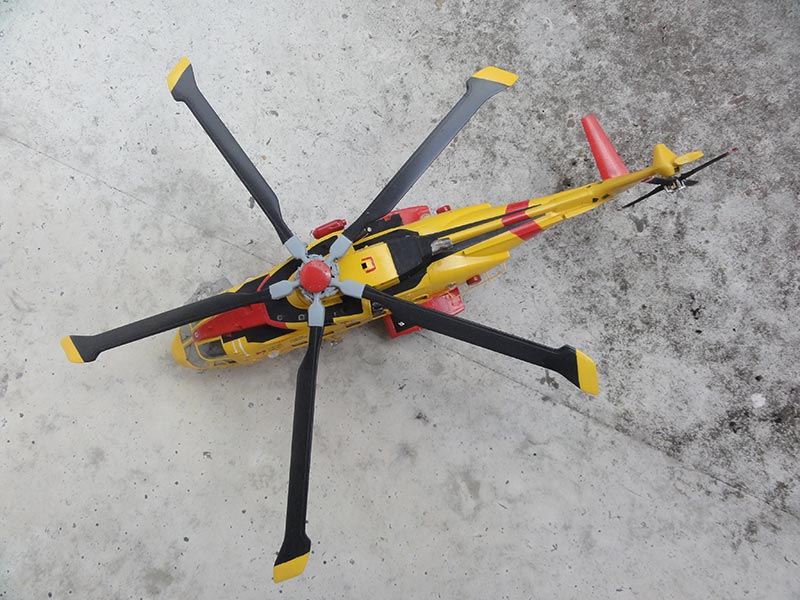
- the Cormorant was also given two
rounded "disk/pie" shapes at the rear fuselage, painted red.
[ NOTE: later on I was informed that these are "crash locator beacons" but only 1 is used on the Cormorant at the right/starboard side; the model still shows 2 at both sides ]
(Pre-)production and current helo's
show differences in areas, so study photos and choose a particular example
for your model.
Cormorant
Final
detailing tips:
- [A] changed hoist
- [B] do not forget to insert a large
window in the entry door part 40A for the Cormorant
as
indicated in the instructions and as provided in the kit
- different antennas were added and
not 14E and 17E parts
- parts for mirrors 3E/4E, tubes
9E/10E/11E and 20E were not used
- some extra details were added below
the fuselage, including some sort of hook wiring
- [C] wire deflector part 3C was
placed further aft on top of fuselage
- [D] a search light from some plastic
rod was added on the lower starboard side of the fuselage
- [E] locking mechanism on the emergency
door in part 5C is in a slightly different position, but was left as is.
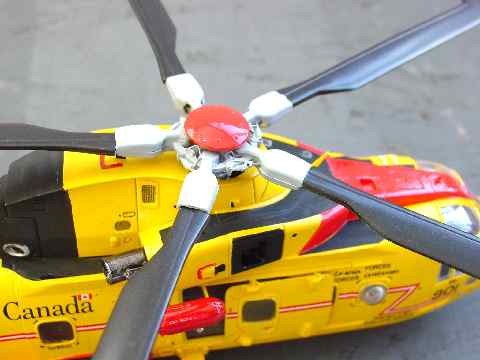
- [F] rotor head needs some careful
work in order to get a good fit. The pin on all parts 14C were slightly
reduced in size.
The Canadian
Cormorant in operational has slightly different markings
than as provided in the kit:
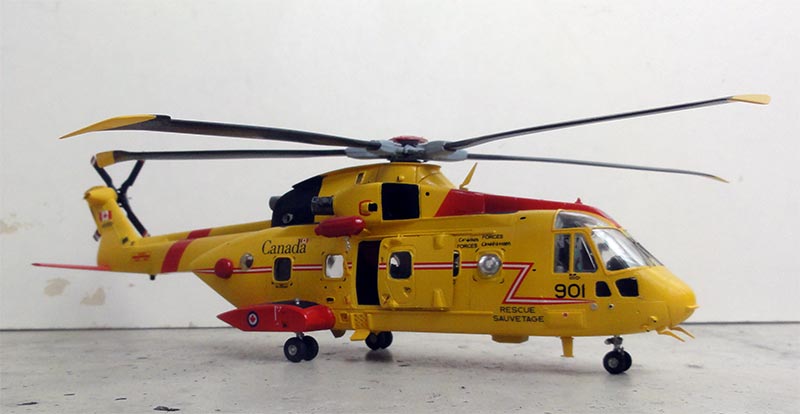
- [G] the red area on the forward
upper fuselage has a different outline than shown in the instructions
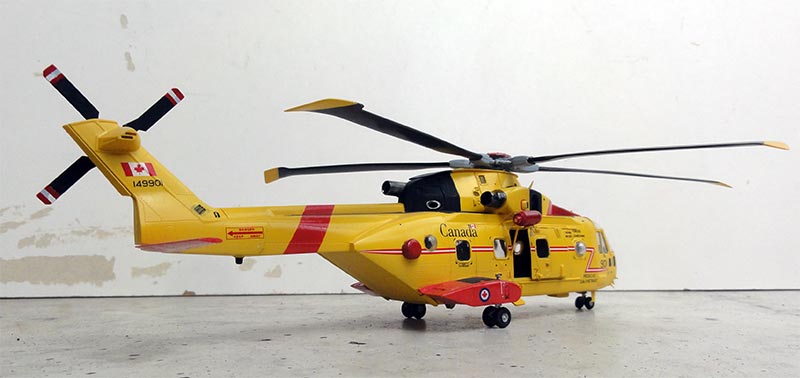
- [H] large black painted rear end
of rotor pylon
- [I] some red markings were added
at some small intakes
- [J] black painted area around left
intake under rotor head and extended black area on engine fairings
- [K] addition of a small exhaust
scoop at of left upper roof side
- [L] the walkway decal (no.12) on
the starboard sponson black area is slightly smaller and must be trimmed,
the right decal (13) is correct
- [M] The red/white striping decals
at the cabin should be positioned at the middle of the height of the large
cabin windows. These decals need some trimming as some extra windows are
there (for example on decals no. 10A)
- decals 5, 6, 18, 19, 24, 35,
were not used
- [N] the markings (1A) ARMED FORCES
and FORCES ARMEES should read Canadian Forces and Forces Canadiennes; these
were simulated with some black paint, also adding a small Canada flag
- some smaller decals are undersize
(4A) or oversize (7A, 8A) but this was left as is

Click
on photos to see view without Conversion details

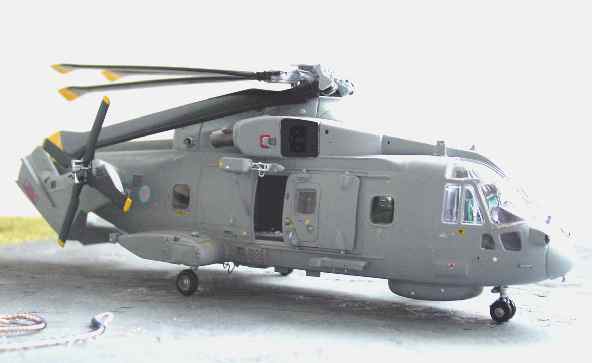
(Pre-)production and current helicopters show differences in the detailing with different windows in areas, black (with yellow or red tipped) or dark grey tail (yellow tip) tail rotors and differences in markings.
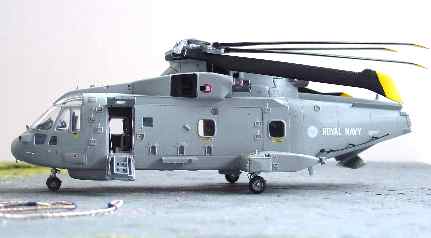

- [O] EH-101 Merlin entry door and
added details like rope. On the Cormorant, this is an emergency door.
- [B] the large window in the entry
door part 40A as indicated in the instructions and as provided in the kit
was added
- [P] next to the starboard entry
door behind the cockpit a small window was added.
- [Q] a small fairing was added at
starboard
- [J] black painted area around left
intake under rotor head
- [I] some red markings were added
at some small intakes
- [R] the "folding rotor head" looks
unconvincing to me, but having no pictures can do nothing yet...
Decals were adapted:
- [S] the keep clear tail rotor marking
on current EH-101 is same as for the Cormorant with a red box; this was
adapted form a spare one
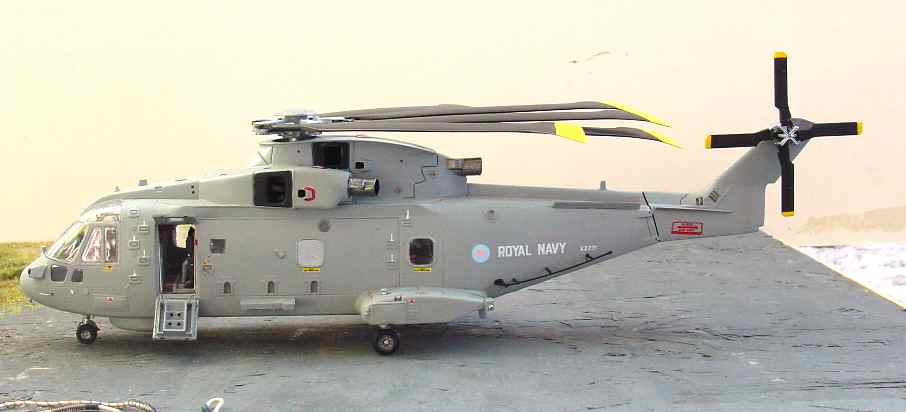
- [T] the white ROYAL NAVY markings
as provided and the reg.no are too large; replace with smaller ones from
the spare decal box
- [U] extra (torpedo) pylon from
a piece of cart on both sides
- [V] antenna added made from sprue
The grey walkways were added and used as provided in the kit; they were given a mat coating
Click on pictures to see view without
Conversion details

The RN MERLIN kit has the option to fold the tail and rotor, this being shown above...this is not correct, as the outer blades should also drop downwards... shown below...
The hinges of the two outer blades
were twisted with a plier and glued.
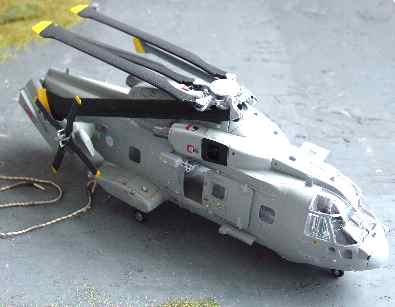
And here they are, two nice helicopter models with different attractive schemes... Thanks to Italeri!
Back to models.......
(c) Copyright "designer"/ All rights reserved. Your comments are welcomed by webmaster