Warner AEW of MLD
[ page 2 ]
TBM-3W Warner model kit in 1/32 scale (conversion)
Dutch Naval Air Arm (Marine Luchtvaart Dienst MLD)
...continueing from page 1....
First was now to do some “pre-painting” on the various interior parts.
NOTE: The colour
numbers I could not find on the instructions; these are GUNZE and should
be I think:
H1 black
H2 white
H3 red
H8 aluminium
H9 gold
H13 red ?
H27 Humbrol
63 (brown/yellow)
H33 black ?
H43 green about
Humbrol 116
H61 grey Humbrol
146
H78 mat oliver
drab
H304 olive
drab?
H340 green
about Humbrol 116
The interiors and some other parts were given the appropriate colours with an airbrush or paint brush and some other parts were pre-sprayed while still in their sprues.
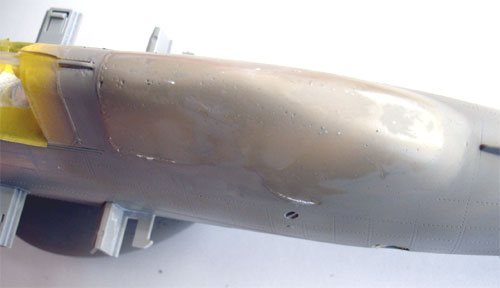
(22) Small panel
fit
Some small panels are not fitted,
such as part #F1. Fill the gap between the radar dome and the lower forward
fuselage
All gaps were filled and sanded when
dry. Fill again, sand and repeat as often as necessary.
(23) [T36] Cowling.
Note the supplied metal grills of
the kit are a nice touch. Some more plastic was added to suggest an intake.
Also, some cuts were made in the cowling "flaps" at the rear edge with
a razor saw.
The cowling for this variant has
a straight aft edge (this depends on the particular Avenger plane); add
some thin card to the kit part.
( Do not yet fit the cowling to the
fuselage ).
(24)[T51] Main
assembly
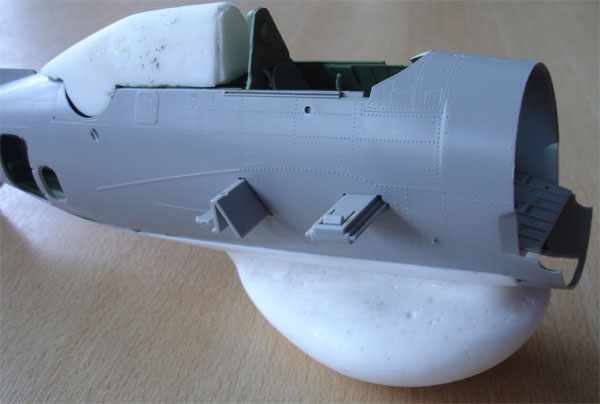
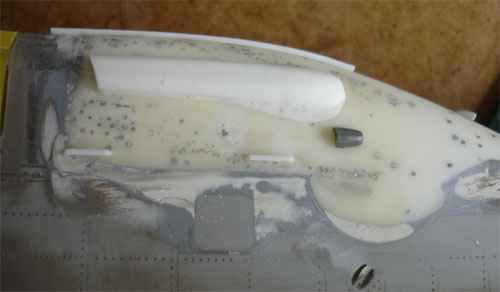
Now it is time to fit the rear resin
back.
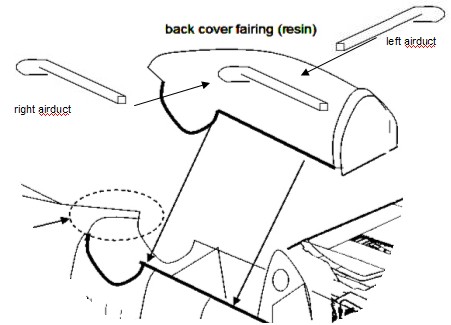
NOTE: Do not fit the resin airducts on the Warner back fairing yet before the fit is OK and smooth to prevent damage.
The back resin part was dry fitted.
Some removal of the area at the rear and sanding flat the round edges will
help here. When the fit is reasonable, fit with superglue. Filling the
gaps and sanding smooth is needed to get a flush result. I suggest to use
Scotch tape in the surrounding plastic areas to protect the surfaces from
too many scratches while sanding. The rear end particularly needs some
attention. Fill again, sand and repeat as often as necessary.
(25) Aft canopy
panel fitting
Fit canopy part K7.
Fill gap with resin rear back part.
Sand flush and paint rear window
portion of K7.

Fill and sand....
Fill and sand...
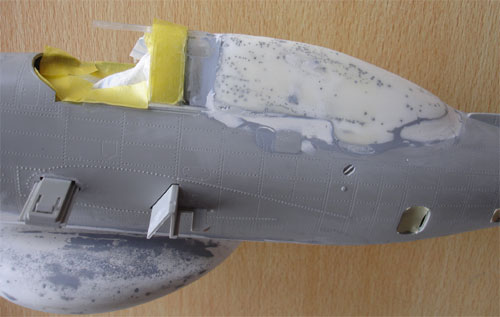
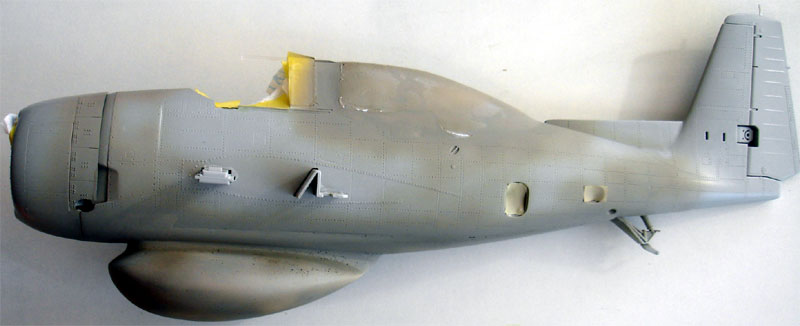
A first light grey coat revealed
that additional filling and... sanding was needed...
Fit the forward engine cowl and the
pilot instrument coverhood.
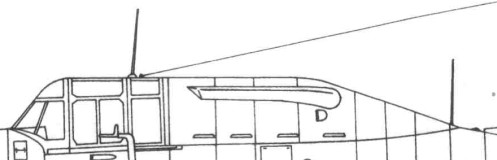
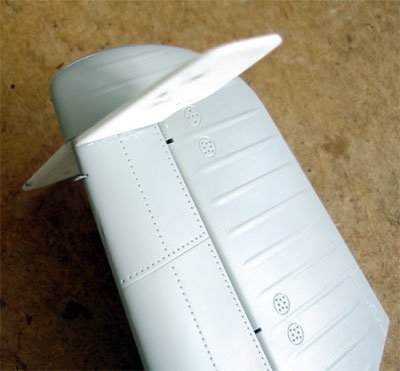
The back fairing seemed OK now, but
still some filling and sanding was needed.
Now the two resin airducts on the
right and left side were fitted. The gaps were filled with white glue or
you can use fine putty.
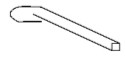
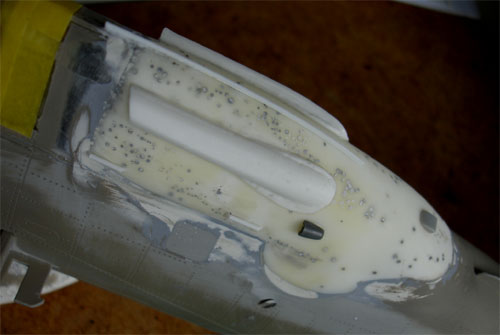
Note also the thin long strip on
top of the back fairing. Some small intake scoops were also, cut from some
spare bombs from the spares box.
The back area is now ready to get
a couple of coats of grey paint
.
(26-30)[ T37-T44
]
Now fit both wing halves. Some filling
at the wing roots may be needed.
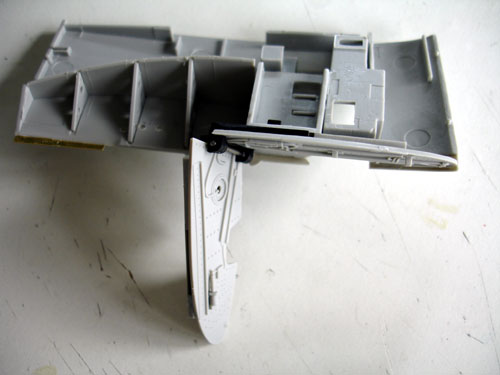
Assemble all as shown. The wing folding
assembly needs some time.
The wing fold mechanism is OK, and
the various parts sprayed white.
The trailing edge flaps would be kept movable; this required filling and sanding the ejector pin marks in their interiors.
The gunports were closed up with filler as these are not present on the TBM-3W Warner and the wing leading edges sanded in profile shape. It was decided to have the wings unfolded in normal horizontal flying position, so all was glued fixed in place. It was decided not to use the metal strips for the wing folding gaps. The parts for the folding mechanisms were used however for strength.
( Please note that the main wing halves are not to be fixed to the model before the complete fuselage ready with all gaps filled and sanded in shape of the radar fit, belly and rear upper fuselage back. )
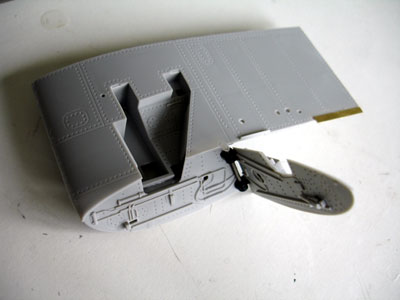
(30-33) [T47-T50]
Assemble the wings as shown and the
fit quite good. The flaps and ailerons were kept movable and are nice touches.
(Leave the engine and cowl for later).
![]()
(36-45) [T51
and next] Main assembly with wing halves, engine and cowling, smaller parts
Assembly some engine parts and fit
engine to bulkhead.
Fit winghalves, fill gaps as needed.
Assembly the gears and stabilizers as shown. To the gearlegs, some hydraulics' tubing was added made from thin metal wire. NOTE: The gear legs were NOT yet added to avoid damage.
Assemble the various smaller parts
like D41, F14, B4 and anti-collision lights.
Also fit the upper wing inspection
panels G16, G17
Fit some smaller airframe parts also at this stage.
(44) Tailfins
The Warner has four identical fins
fitted on the stabilizer, these are provided in resin. Fill any small gaps
in the fin parts.
The fins can be fitted making sure
they are symmetrical and at the exact spanwise position on the lower and
upper surfaces.
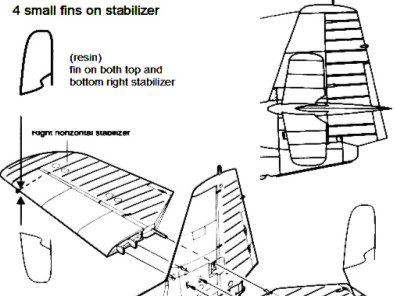
Some putty was needed to fill small holes and also to fit them onto the stabilizer without gaps.
 .
.
A peculiar Warner antenna should be fitted on on top of the vertical tail from sprue (leave for later).
(45-48)
Fit various smaller antenna's and
parts.
Fit any wire antenna's later on to
avoid damaging them now. Make these from fishing line.
That's it. Assembly is ready.
![]()
The interior areas were covered with
tape and the overall model was given a first light grey primer coat; this
was applied to check for any flaws in assembly at this stage (Humbrol 64
light grey).
Some areas,"pre-shaded" stripes of
mat black were applied with the airbrush. (You don't need to do this at
this stage however)
The clear areas were protected with
masking tape. The glazing required thus some masking.
Only now to start applying the rest
of the paint scheme.
On to next
[ Page 3... ]
Back to 1/32 scale Models.......

(c) Copyright Meindert "designer"/ All rights reserved. Your comments are welcomed by webmaster