[ page 2 ]

A-10 model in 1/32 scale , making the Trumpeter kit
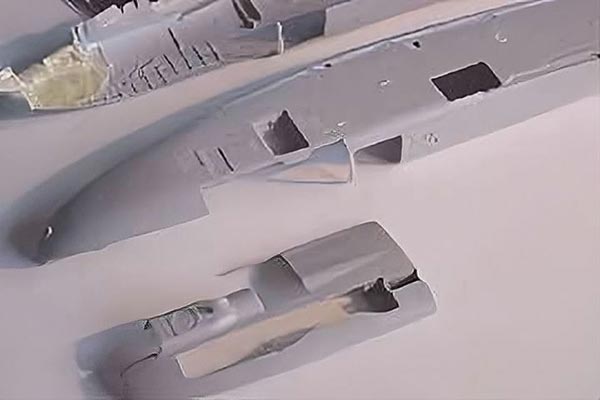
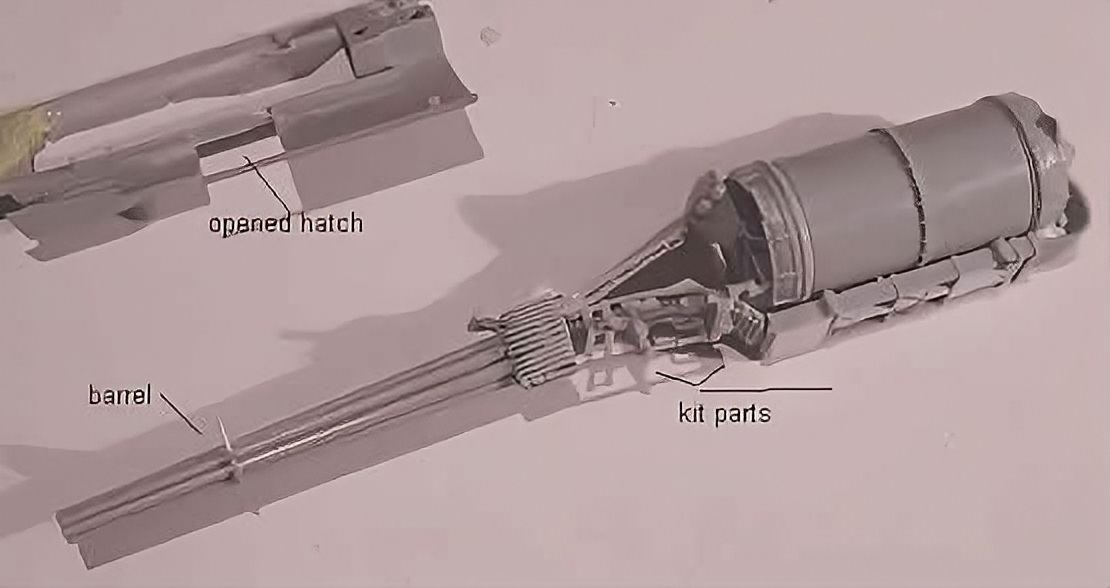
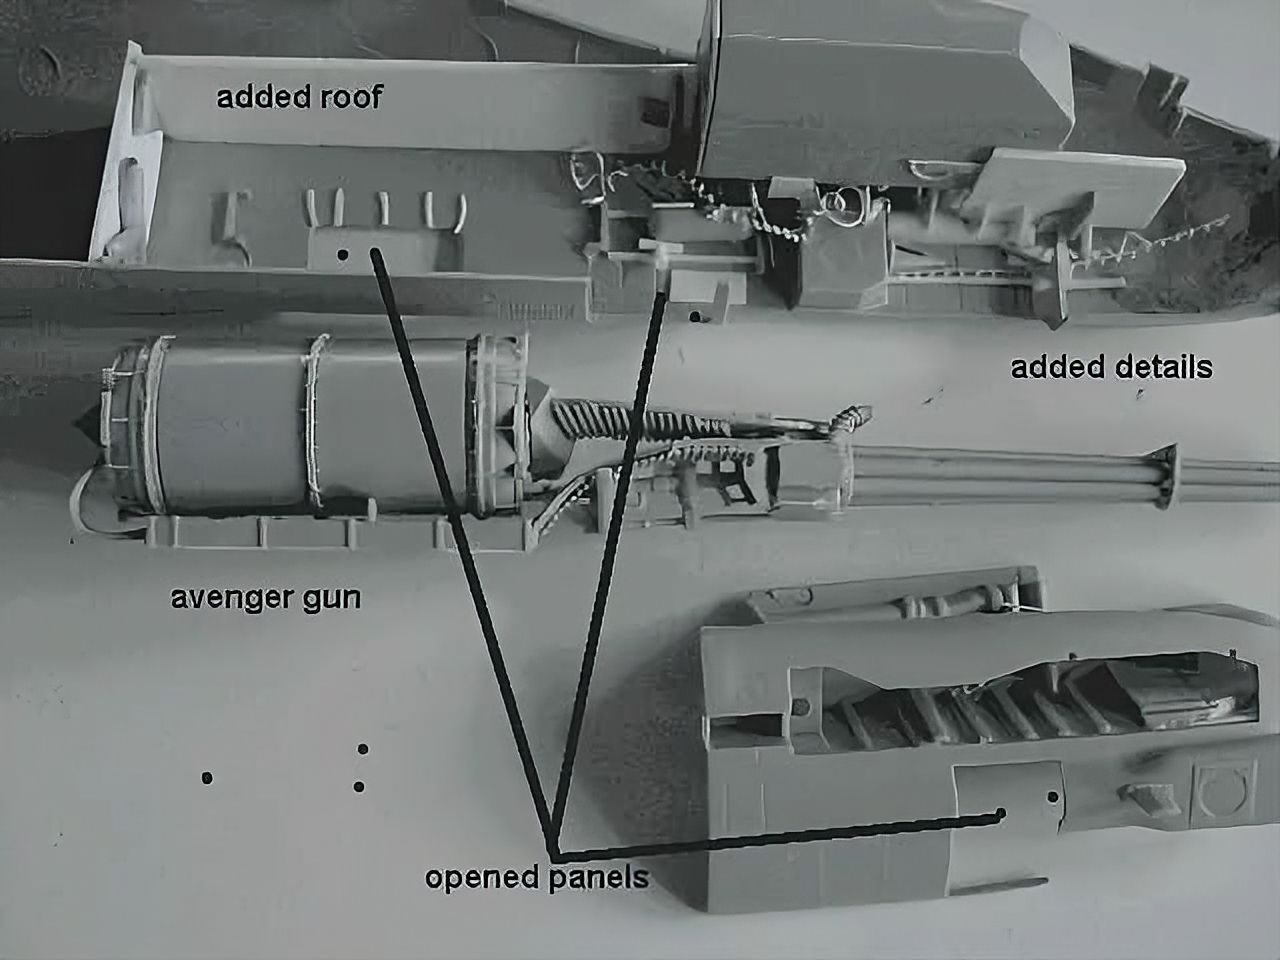
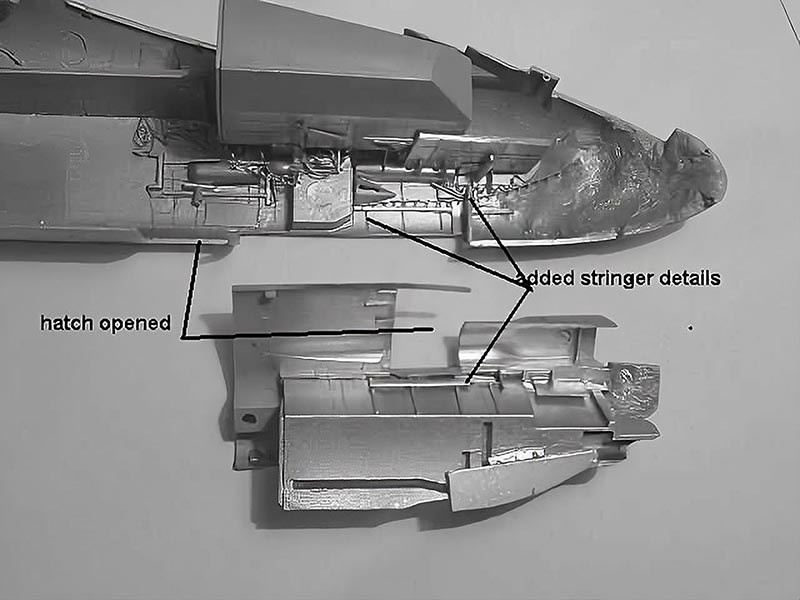
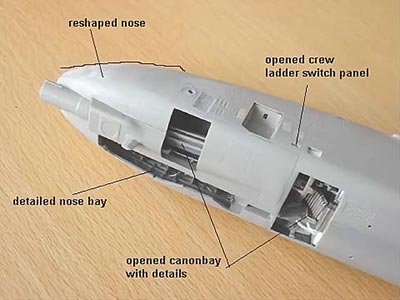
First steps were now taken to open up panels, hatches and intakes. The gun will be included in the model, and in order to see it, two lower hatches were cut open. Also, the pilot entry ladder actuator switch hatch was opened. Also, the numerous smaller intakes in sides of the forward fuselage were opened.
The forward nose will also be corrected.
The Avenger canon was simply assembled.....
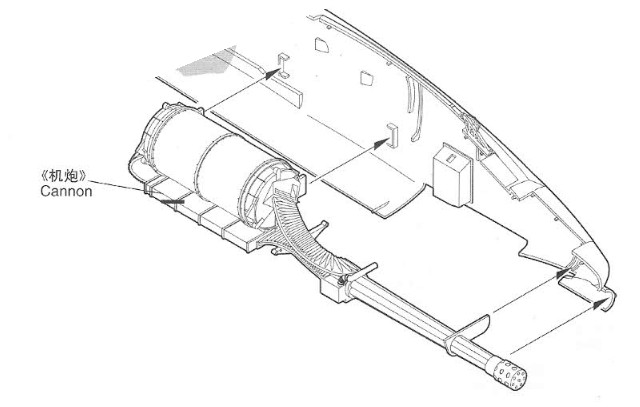
Only, the inner bulkheads and some extra wiring will be added later on.
I also decided to open up some lower gun panels to see the detail and to
add some interest to the model.
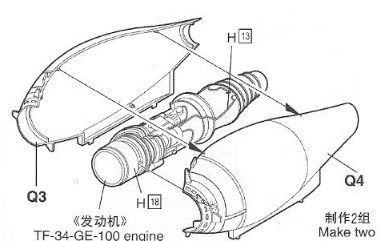
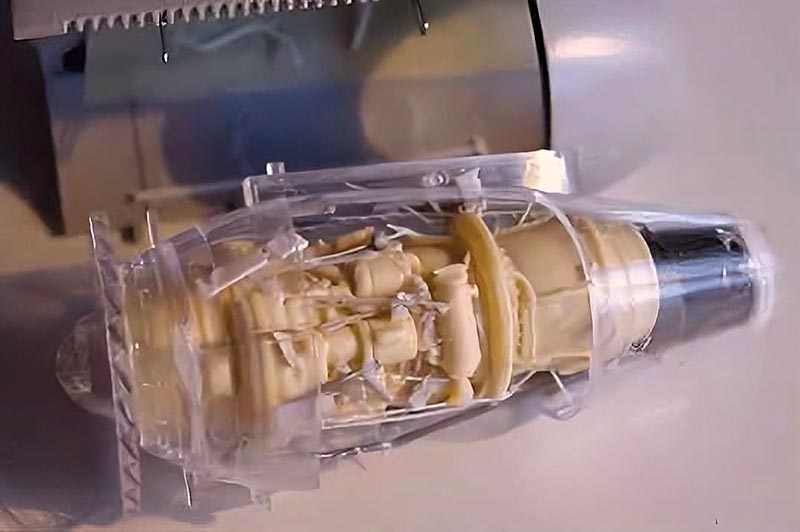
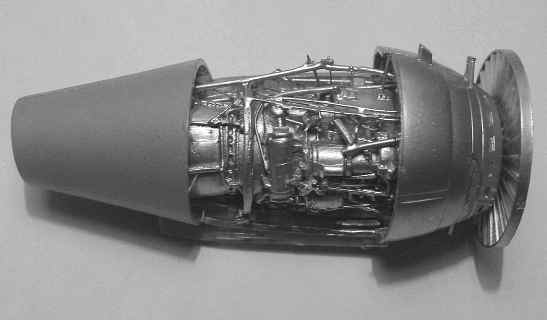
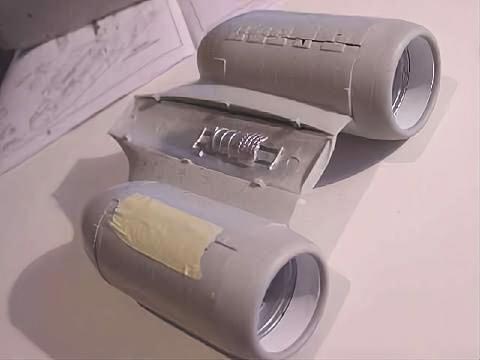
The left engine nacelle will be shown with an engine as provided and the hatch can be opened upwards if desired. The kit provides all required parts for the mechanism for both nacelles, partly from etched metal. The right nacelle will be assembled closed.
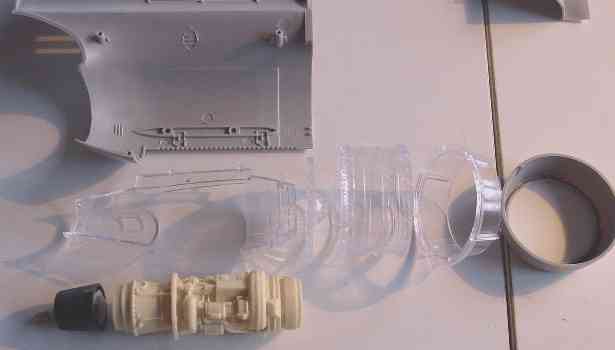
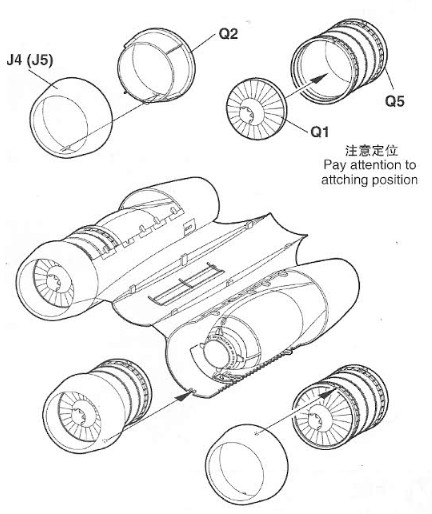
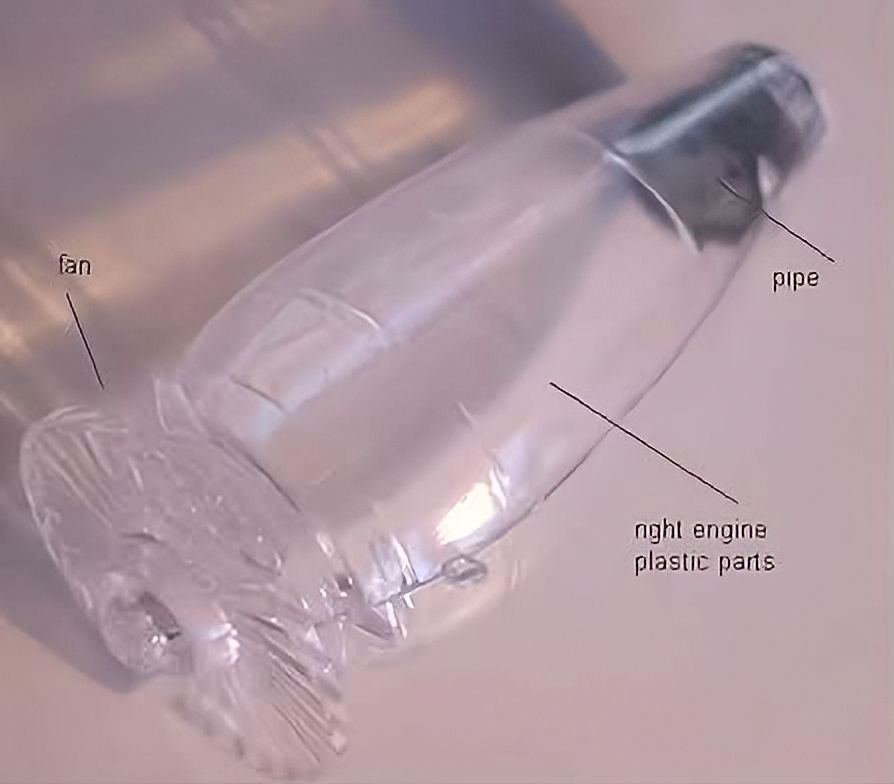
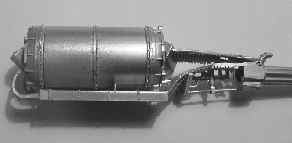
Into the engine support transparent parts (no Q3 and Q4), an opening was created in order to show the resin engine part. The rear section of the resin engine tailpipe was cut of as it is not open. Into the rear of the inner support parts, a tailpipe from the scrap box will be set. You will need to remove the rounded edges in the rear in order to get a smooth result.
The engine fan (part Q1) will be glued
at the forward end of the support parts (and NOT into the forward end of
part Q5). The engine fan must be set somewhat deeper. The engine was detailed
with some rods, sprue etc looking at pictures of the real thing.
[The bigger
pipes are still to be added]
Also, the inner nacelle was detailed
and the gap between parts J3 and J1 closed with some tape.
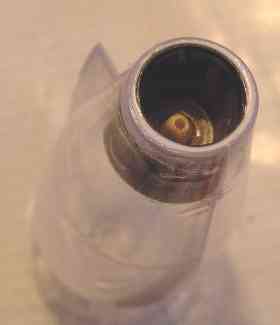
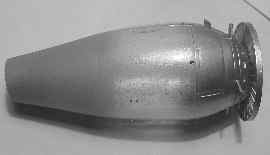
For the right nacelle, the parts
Q3, Q4 will also be used. The rear section edge was removed and also a
spare exhaust pipe added. Inside the pipes, a smaller engine fairing inside
the pipe with small opening was added.
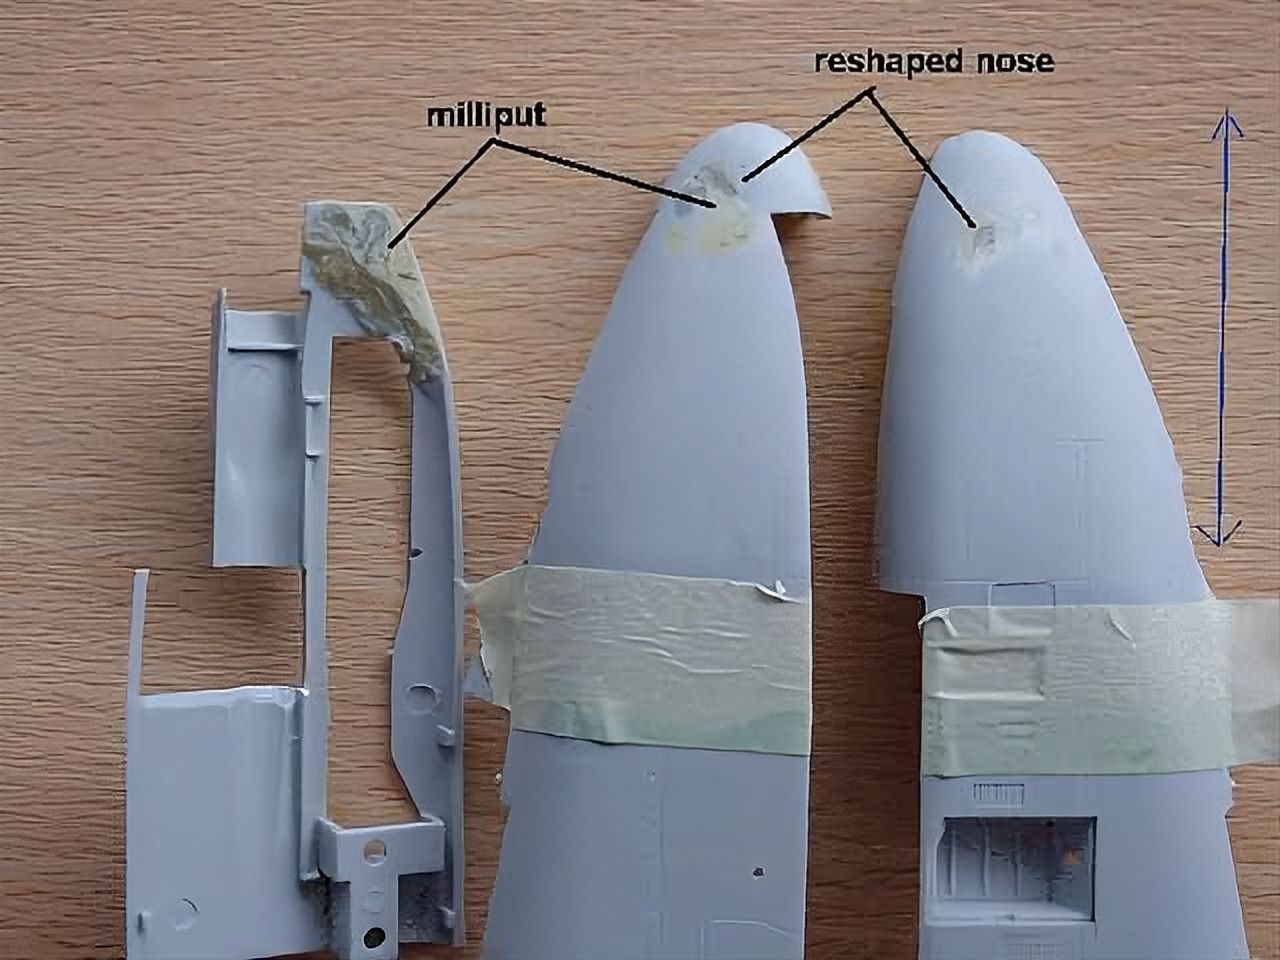
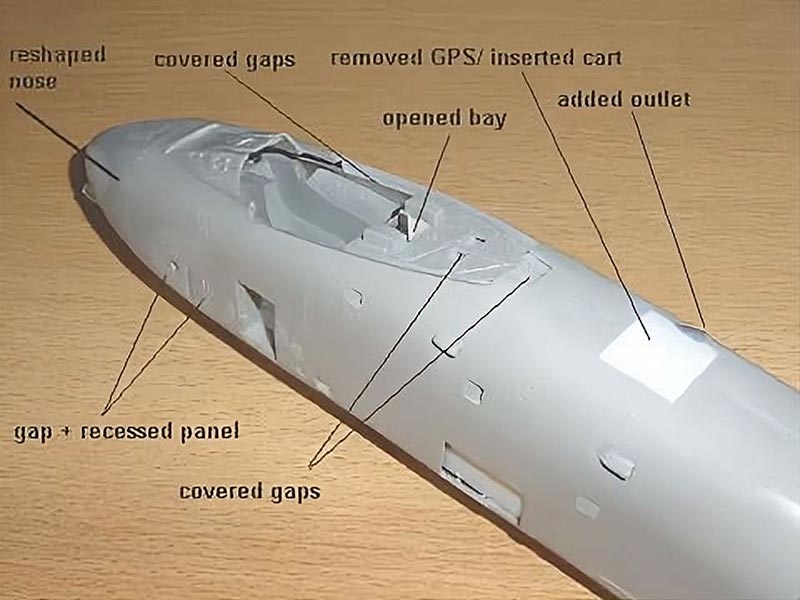
Correcting the nose shape
First, the fuselage nose parts were filed sharper and less rounded. The inner areas were filled with Milliput. Filing was done until the Milliput from the back came through, so about 2 mm plastic was removed in this area. Through this way, you get a better shape on the model as the real A-10 nose is less blunt.
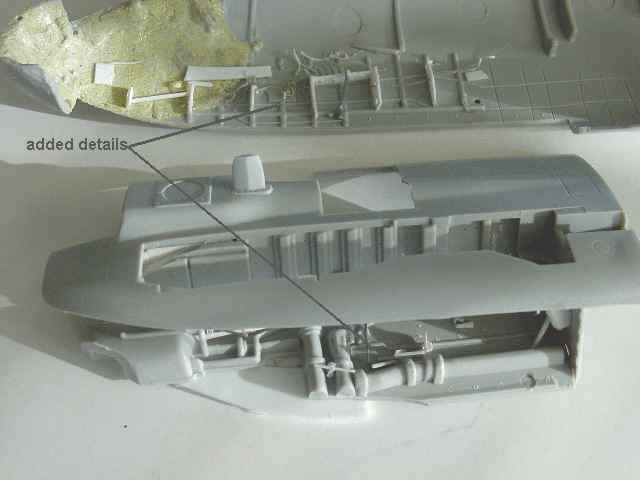
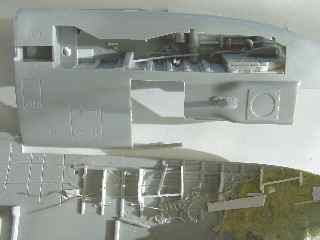
The model was further detailed in
the gun bay and nose bay areas with card, rod and sprue.
The model will be an early A-10 version,
so the LASTE items were removed with a knife. The RWR knobs were removed
from tail fins and end of fuselage and also the GPS receiver aft of the
cockpit was removed. The panel around it was cut out and the gap filled
with a piece of cart. .
and the parts were given a basic paint
coverage: metallic at the gunbay, light grey in nose bay areas
The detailed
engine, maintenance hatch to be opened so details were added (more to follow
later on, such as red colored piping)
 right
engine (will be set closed)
right
engine (will be set closed)
assembled gun,
not a lot can be seen later on as only a few hatches will be opened but
it is nice to know "it is there..."

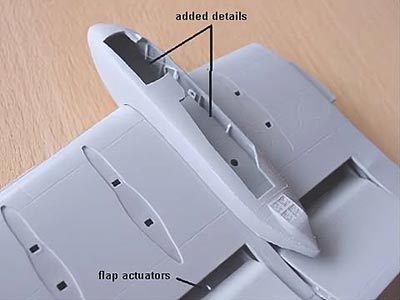
The main kit parts were now further assembled. The forward fuselage was reshaped in the nose area as described. The cockpit area shows some gaps, so these were closed with some card.
Behind the seat, a bay was made for the retraction canopy system. In the kit part the bay is not there, so open up and box in. The gaps between the cockpit tub and fuselage sides were filled with putty.
The reshaped fuselage nose was finally
sanded to remove all tiny ir-regularities. Some extra details were added
in the canon bay area, more to follow later on.
The engine
pods were now assembled after detailing the left engine (to
be displayed with an opened hatch). Otherwise, you can not reach all areas
to sand really in shape. It took quite some time here. Some filling was
needed and finally a re-scribing of the recessed panellines.
The wing main
undercarriage pods don't fit well, you need putty and some heavy
sanding in the areas in front of the wing; the bay itself needs some more
detailing with rod and sprue. The bay is not very cramped. The left bay
with the refelling panel has a very visible fuel pipeline in it. The flaps
were giving two actuators each made from a metal paper clip.
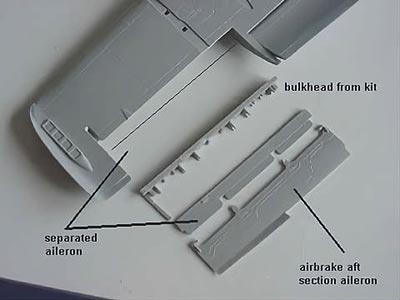
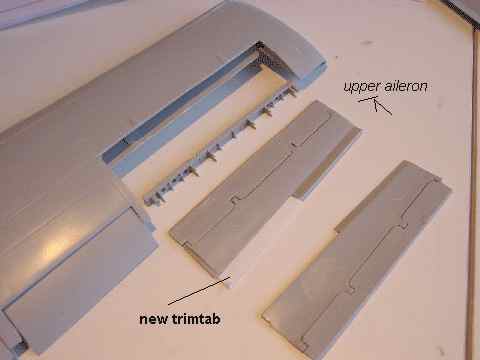
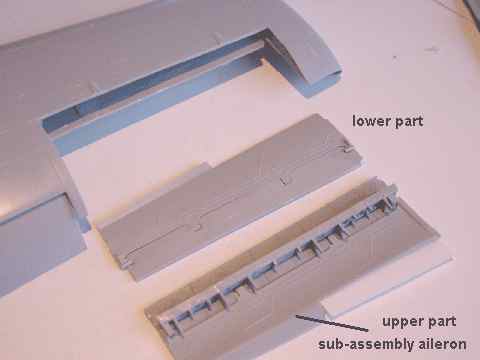
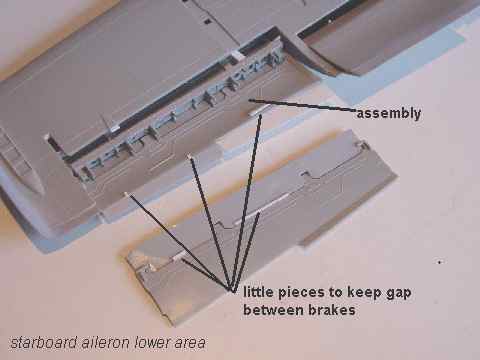
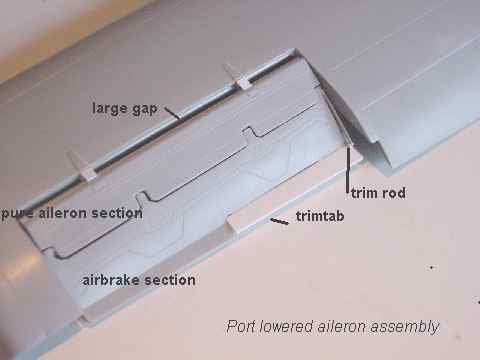
The wingtips need some modifications: the aileron should be a little bit more pronounced. The aileron was separated and the various parts detailed. The aileron/air brake is a special combination on the A-10. The chaff dispensers at the lower wing tips were retained.
The trim tab was made a separate new
part from thin cart with the trim rod added later on. The port aileron
will be set drooped slightly, the starboard one set slightly up. A spar
was added in the fixed portion of the wing and the balance rod in the outer
edge of the aileron was also cut out and angled.
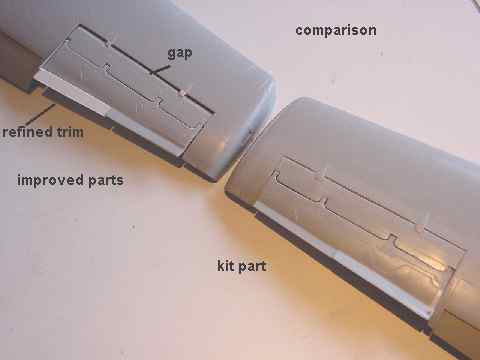
The pylon/combined actuator fairing
for the ailerons was also improved, making a gap a separating the rod.
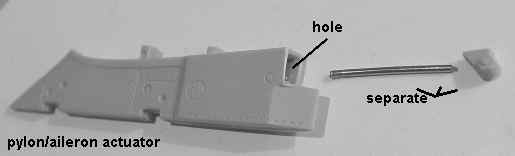
Also, the pylon attachments points/braces are supplied with the kit but not yet glued on. When setting the stores into their place, make sure they are in contact with the various stores. The wing pylon themselves are a bit rough but on the real plane also quite massive.
The whole wing assembly looks much better now.
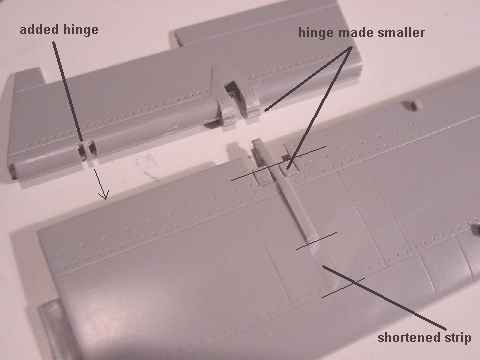
The elevators at the stabilizer need some corrections. A hinge is missing at the souther section, although hardly visible. It was added and the main hinge is too big represented in the kit.
Also the re-enforcements strips are too long; they were shortened and corrected at lower and upper sides of the elevator. It was corrected and made smaller; the still to be fitted trim tabs are OK.
To next [ Page 3....]
Back to 32 scale Models.......

(c) Copyright Meindert "designer"/ All rights reserved. Your comments are welcomed by webmaster
Created January 16, 2003