1/32 scale conversion
[ page 2 ]
Tornado ADV model in 1/32 scale
... continued from page 1 ....
page 2
page 3
page 4
page 5
Panavia Tornado ADV (Air Defense Variant) conversion
The Tornado ADV has a longer fuselage than the Tornado IDS / Gr.mk1, so a separate plug, a new radar nose, wing root gloves and the F.mk.3 jet pipe area extension are needed. Other details vary as well.
It was decided to cast a number of resin parts for use with the Revell Tornado gr.mk 1 or IDS kit. This is not easy. Cutting, trimming on both resin parts and kit parts is needed in addition to the usual filling and sanding work in conversions. The conversion was be done in a logical sequence using the Revell kit instructions.
What were my home made conversions parts?
- longer pointier radar ADV nose
- mid-fuselage extension plug
- jet pipe area fuselage extension
- new bottom panel forward fuselage
with missile recesses
- two small wing leading edge extensions
- longer tail fairing
and "nice to haves" as there are also
alternatives:
- two types of mid CRT screen layouts
(F3 trainer and F3) (alternative: buy resin cockpit sets)
- one pilot instrument panel (alternative:
buy resin cockpit sets)
- aft navigator panel (alternative:
buy resin cockpit sets)
- two detailed seat head rests (alternative:
buy resin after market seats)
- bulkheads (alternative: buy resin
cockpit sets)
- two outboard Sidewinder missile
pylons (alternative: do not fit)
- two chaff/flare dispensers aft
fuselage (not initially fitted on the F3)
- larger radar disk (only needed
for opened up radar nose)
For the F.mk2 (F2) the rear jet pipe area extension is not needed. Total weight of resin parts was 120 grammes.
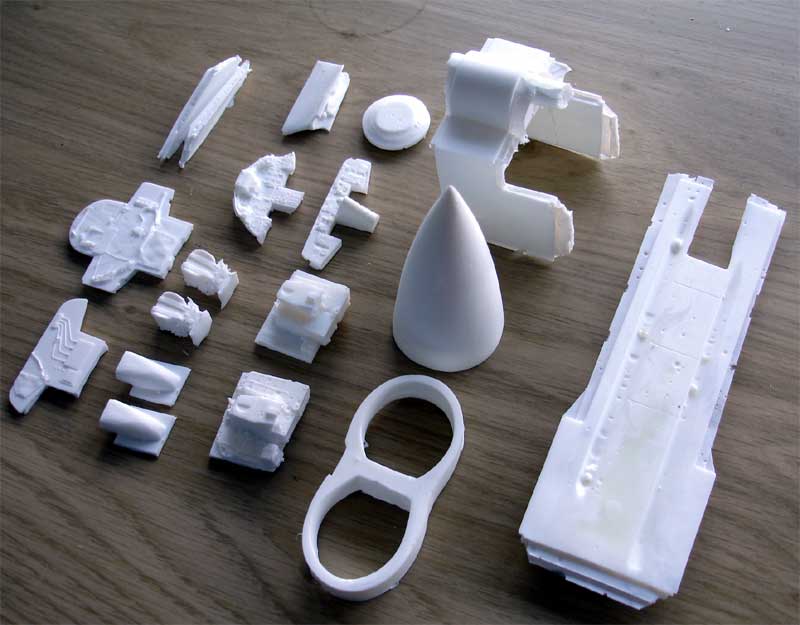

So some 20 parts in total.
I believe that many years later "HERITAGE" of the U.K issued a 1/32 scale conversion set.
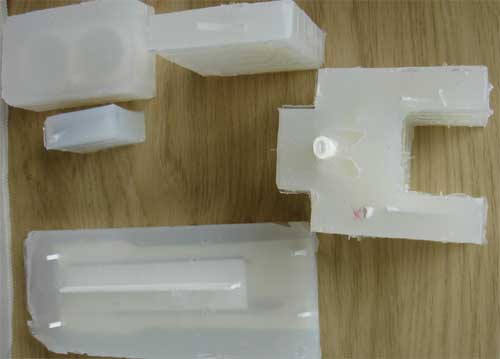
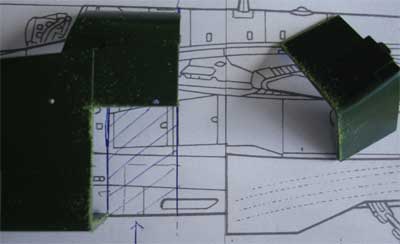
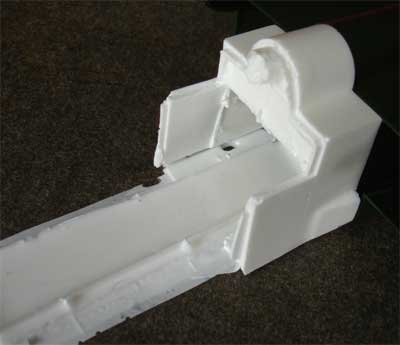
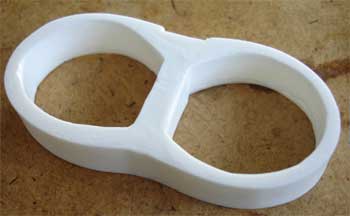
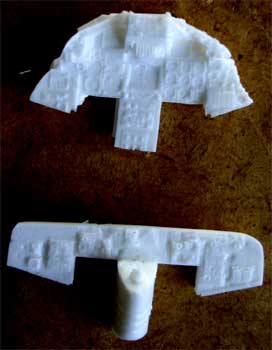
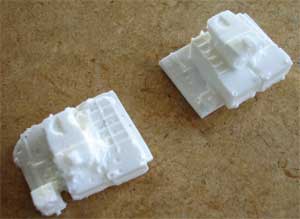
Some parts casted needed more work than others like filling gaps, sanding and merging it in the Revell kit components. Some cutting and trimming on both resin parts and kit parts is needed. Here some of the silicone rubber moulds can be seen:
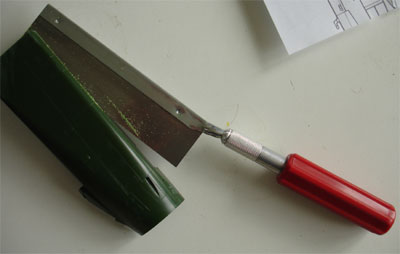
For resin glueing, Cyano Acrylate
Superglue and 5-minute Epoxy for large joins is used as is a fine modelling
razor saw. Putty/filler, superglue gell is also used to fill gaps and pin
holes. To fill tiny pin holes in the small resin parts, putty is also needed and to get a good result in the entire assembly
in fitting the resin to the plastic kit parts.


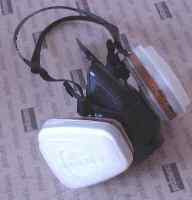
SAFETY
first:
when cutting and sanding resin parts, use hand nitrile gloves (not
silicon gloves!) to avoid skin irritation and allergy. Sand and saw
under water in a bowl and wear a face mask to avoid inhaling
resin dust.
PREPARATIONS
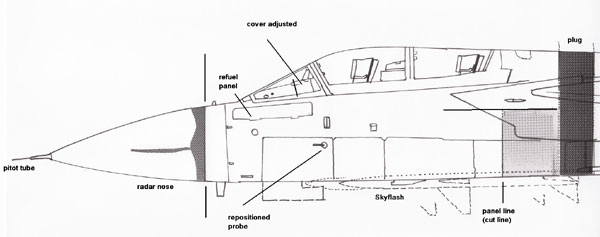
A. The forward
fuselage of the Tornado ADV has a refuelling probe is on the port side.
Inscribe the refuelling doors with a scriber, refer to drawing.
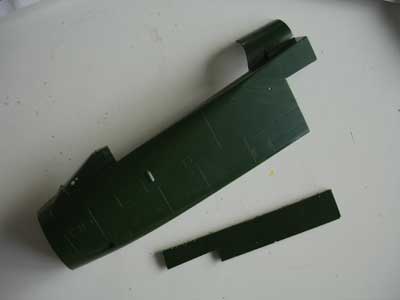
B. Remove the small inside stubs at the rear of the forward fuselage halves #18 + 18a to ease plug fitting later on.
C. In both fuselage halves #18 + 18a some plastic portions need to be removed. Use a razor saw to get straight cuts. Start sawing off the rear section of both halves #18+18a along the engraved kit vertical panelline and up to the two tiny holes. Than make a horizontal saw cut directly above the tiny intake locating holes. Cut on the outsides, so to have some margin left to sand for a perfect fit.
 .
.
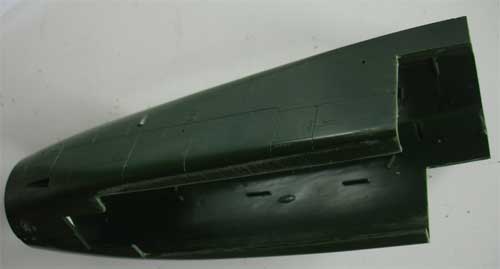
D. Tornado ADV variants have recesses for the two forward Skyflash missiles. A single bottom resin bottom panel for the forward fuselage is provided. It is moulded with quite some thickness to add strength and if the part is not perfectly flat, use hot water to get it flat.
Clean up missile recesses, but if you intend to fit Skyflash missiles only minor clean up is needed.
To fit resin bottom panel, remove of a large area on both lower fuselage halves. The cutting line from rear to front is indicated on both kit halves' bottom areas through a tiny panelline. The forward cutting line is aft of the forward nose bay gear well.
Note: the fitting
of the bottom resin panel is tricky and also moulding this resin part is
very difficult;
an alternative
is not to remove the lower fuselage section but to use a thick piece
of plastic cart (46 x 40 mm) to fit below the fuselage plug. Forget about
the missile recesses and put two sanded flat "missiles" in place (see missile
suggestions later).
The forward
gear bay # 17 should fit and the resin part has moulded strips to get a
stronger joint.
 .
.
.
E. The large resin mid-fuselage plug is a complex part but in the end you get a strong joint. Clean up carefully the connecting edges of the resin part. It will fit to a modified forward fuselage and on the aft fuselage parts #48+54. Don't bother to clean up the insides of the plug, nothing can be seen of it.
Glue together
the resin fuselage plug and the resin bottom part. Smoothen the glued edges.
Do not fit
it yet to the prepared kit fuselage!
F. The aft resin
jetpipe extension and resin fin base are needed only for the F.mk.3. Fit
as needed.
You may need
to fill up some gaps in the parts.
Starting the Build
KIT STEPS 1 & 2
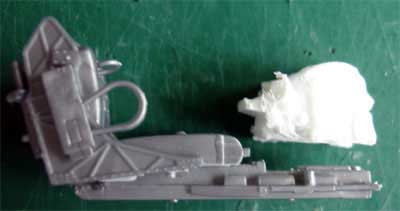
Assembled were the kit seats as per instructions.
However, the seat head rests #7 were replaced with finer
resin parts, do not use #5 in that case.
 .
.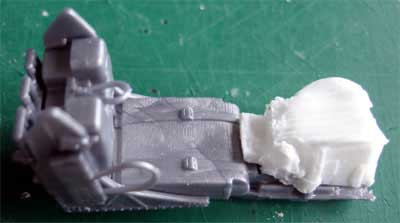
Detailed a bit further with straps and belts
as desired.
(NOTE: Full resin ejection seats can also be found on the market for the 1/32 Tornado).
KIT STEPS 4 - 5
The front ADV instrument panel is
only slightly different, but a resin replacement is provided. (you can
also use part #200 in the ECR kit). (The RAF kit 04705 does not have
part #200).
Remove a small portion of the instrument cover (where the HUD is) to fit the front resin panel. Fill any gaps with white glue.
 .
.
The rear instrument panel is quite different on the ADV, a resin part is provided. Two new resin bulkheads are also provided with some more details which may be used as replacements for parts #16 and 13.
NOTE: On a real Tornado, there is no actual "full" bulkhead between the two pilots, so you can also leave out this mid bulkhead and add various details from scratch.
The gaps between any sidewalls and bulkheads can be filled using white glue.
Use the foot controls #10 and control stick #12 as supplied in the kit. Cut off the small stick on kit part #15 and glue it on the pedestal of the rear resin part. (for a "twin stick" trainer, probably extra foot controls should be fitted in the rear cockpit; make from card).
Two aft CRT screen layouts are seen on the ADV. Two resin parts with the CRT's are provided, so decide which one you want to use. The most common one seen is symmetrical with two CRT's and it has two handling bars, add these from rod. The non-symmetrical one is for the ADV trainer 'twin stick" variant.
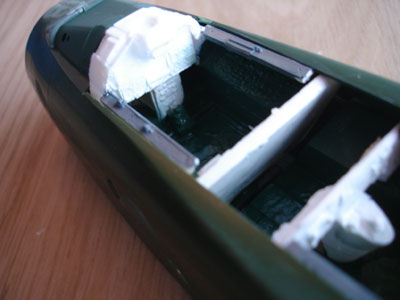
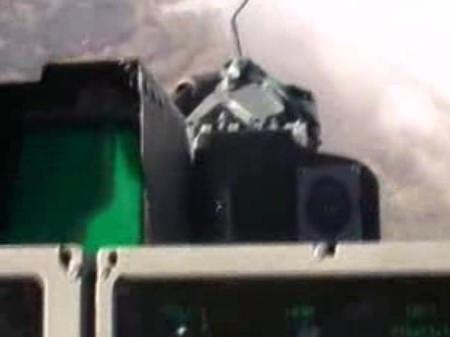
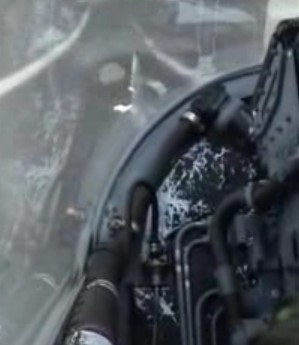
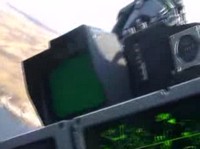
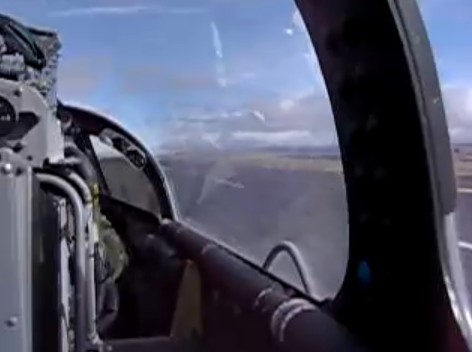
Some pictures of the real Tornado F3 rear cockpit area:
 ..
..
. small upper scope ...................... view looking aft the rear bulkhead
 ..
..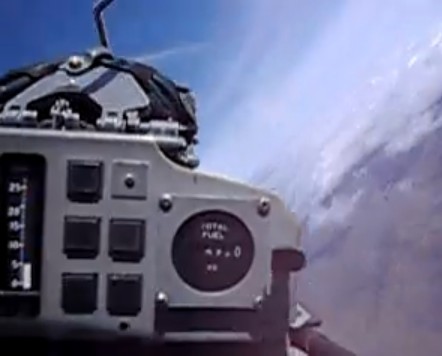
upper instruments with a small scope on the left
 ..
.. ..
..
here can be seen that the upper instruments are positioned more forward on top of the CRT screens
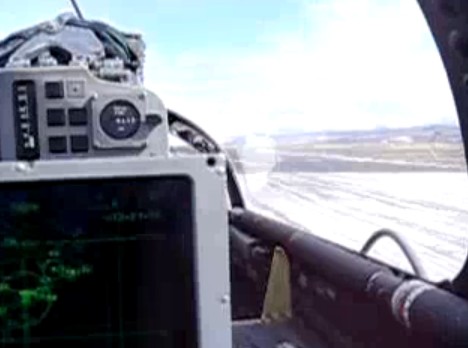
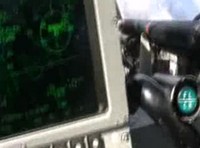
rear cockpit instruments, right CRT screen
.
 ..
..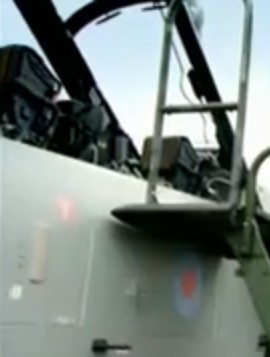
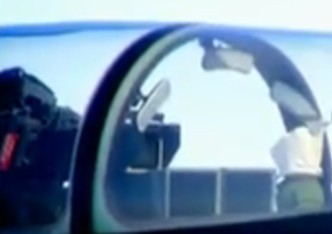
looking forward from rear seat to the right and ladder... note mirrors in canopy
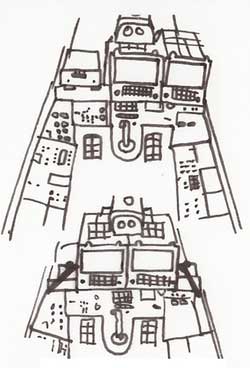
sketch with two alternatives for the rear CRT screen layouts
![]()
Fill tiny gaps in these parts with white glue. Note also that many electric wires run aft of the CRT's.
Do not fit the CRT's yet at this point but much later as one of the last finishing steps.
KIT STEP 6
Also put the ejection seats later
into your cockpit.
KIT STEP 7
Fit the gear well kit part #17 into
one of the lower inside fuselage halves and do not fix it to the cockpit
tub. (This will ease fitting the resin belly bottom later on).
KIT STEP 8
No need to drill open any holes on
the fuselage parts, the ADV has a quite different in-flight refuelling
installation. So do not use.
So regarding STEPS 57 - 59 (RAF kit
04705 steps 56-58):
Do not install the refuelling probe on
the ADV.
Some new panellines of the fuselage refuelling doors can be inscribed as seen on the drawing left of the windscreen (see preparation A).
KIT STEP 9
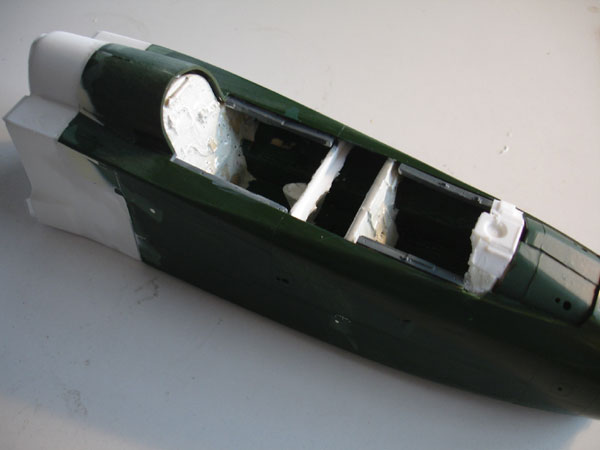
This step is a bit tricky as you
need to combine the resin bottom panel, the fuselage resin plug and the
cockpit assembly in the forward fuselage.
An alternative is not to remove the
lower fuselage section but to use a thick piece of plastic cart (46 x 40
mm) to fit below the fuselage plug. Forget about the missile recesses and
put two sanded flat "missiles" in place (see missile suggestions later).
NOTE: the rear Skyflash missiles on
a real Tornado are not recessed. They are attached straight on the rear
fuselage.
Next to these missiles, long
fairings can be seen. These can be made from plastic strip, plastic card
and rod sanded in shape
(they are too small to mould
in resin).
Do not bother with kit steps 10,11 and 13 at this stage. Do not trim the parts with your X-acto knife before you make sure parts needs trimming.
Start with taping together the prepared fuselage parts and resin parts with Scotch tape to check their fit. Snug in also the cockpit tub assembled. Make sure everythings fits but in any case some putty will be needed.
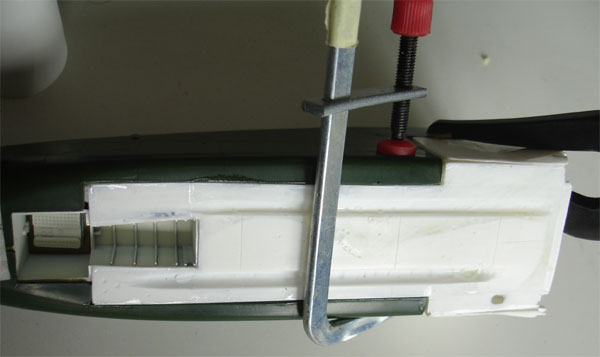
In the inner sides of the kit fuselage sections, you may need to reduce the thickness on the insides at the connecting edges to get a flush fit of the resin plug.
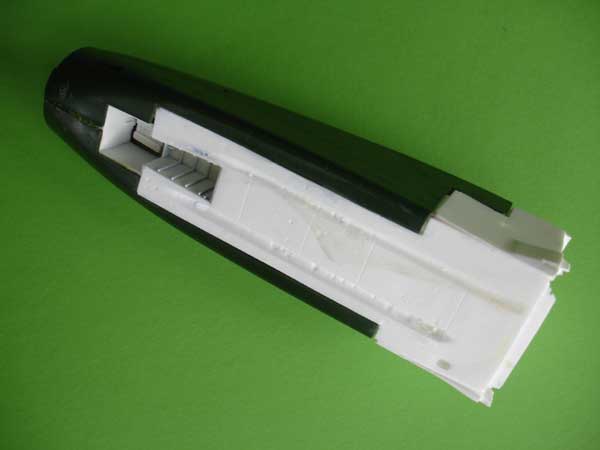
After the different parts dry fit, assemble the forward fuselage. Use plenty of tape and assemble in stages. It is recommended to let dry for 24 hours.
The canopy-fuselage sides were made a bit thicker with plastic rod (painted grey above).
After that, putty, strip and plastic card was used to close all gaps. All wat let to dry 24 hours and sanded flush before moving to next assembly stages. Rescribed than the panel lines.
As noted before:the fitting of the bottom resin panel was tricky and also moulding this resin part is tricky;
an alternative is not to remove the lower fuselage section but to use a thick piece of plastic cart (46 x 40 mm) to fit below the fuselage plug. Forget about the missile recesses and put two sanded flat "missiles" in place (see missile suggestions later).
To next [ Page 3 ....]
Back to 1/32 Models.......

(c) Copyright Meindert "designer"/ All rights reserved. Your comments are welcomed by webmaster
Created this page:
July 25, 2008