Royal Netherlands AF
[ page 1 ]
F-84 Thunderstreak and Thunderflash in 1/72 scale: : kit review & modelling report
Airfix and Italeri kits
page 2
During searching a particular kit in my kit stash, I tumbled over a cardboard box and after opening it, I found a bunch of very old Thunderstreak kits. One Airfix 1/72 kit was stripped of its paint years ago, another Airfix kit was there and also an Italeri RF-84F Thunderflash was in the box. At the bottom I found an old decal sheet of Modeldecal with those typical NATO camouflage schemes and Dutch Decals for Dutch demo teams. It was decided not to put the cardboard box back, but start modelling the 3 models!
But lets look briefly at the history.....
The Republic F-84 type jet family started with the Thunderjet which development was started during the second world war. As the phenomenon of compressibility at high speeds was not understood and certainly not how to deal with it, the Thunderjet had a straight wing. After the second world war, using German experimental data and seeing the German high speed aircraft designs, the swept wing was the solution and was introduced.
After the second world war, the Korean war showed that the F-84 Thunderjet was better used as a ground attack plane whereas the North American F-86 Sabre was the preferred jet fighter against the North Korean Mig-15. But still, there was clearly a need for a new fighter. So the USAF wanted a new capable aircraft and although the designation F-84 was still used, it became a new type with swept wings evolving into the F-84F Thunderstreak.
The first production
model was ready in 1952 after numerous problems during development, particularly
with the Wright engine. Over 2,500 Thunderstreaks were produced, many of
them being supplied to the NATO countries under the MDAP program because
of the Cold War. The aircraft was difficult to fly, USAF crews calling
it the "ground loving whore". For take-off JATO bottles could be used and
it was capable of a maximum speed of 1125 km/hour. The type was used
in various roles as fighter but also as bomber and it was a strong plane.
Also, the USAF Thunderbirds demonstration team used the type. But nevertheless,
these kind of jet operational usages came with a price and many planes
and pilots were lost in accidents.
![]() Dutch
F-86F Thunderstreak
Dutch
F-86F Thunderstreak
The Royal Netherlands
Air Force received 180 Thunderstreaks joining the also supplied Thunderjets
under MDAP. The first Dutch Thunderstreak arrived in November 1955 with
delivery continueing until June 1956. Various squadrons deployed the type.
It was also used by a couple of Dutch AF demonstration
teams, such as the "Dash Four" team in 1956, other teams were the "Red
Noses", the "Sandbag diamond" and the "Rascals". The Thunderstreak
was put out of Dutch service in 1970 and 75% of the planes were lost during
their operational career.
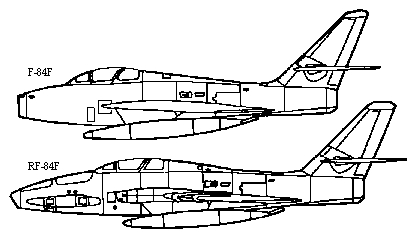
Also, there was a need for a reconnaissance aircraft and the RF-84F Thunderstreak was used for that as well. Requiring camera's in the nose, the so called Thunderflash got side air intakes. The rest of the airframe is pretty similar to the Thunderstreak and the first Flash flew in 1952. Over 700 Thunderflashes were build and also supplied to other NATO countries. The RNeth AF 306 squadron got 24 planes which were operated from 1955 to 1963.
![]()
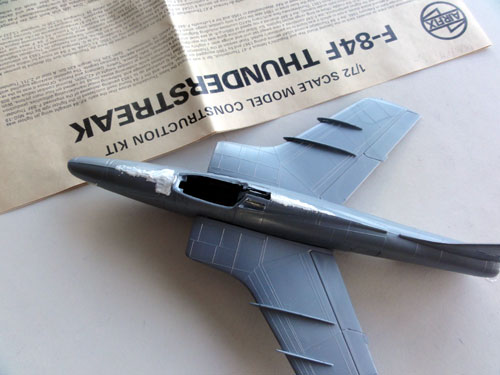
These kits are obviously old, but nonetheless it was decided to simply make these kits without too much effort and merely straight out of the box. This would give me a nice bunch of Thunders in the collection.
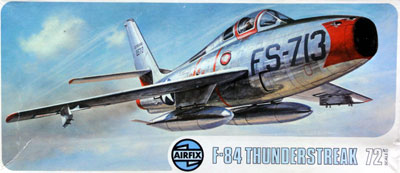
This is the box art of the Airfix kit.
Airfix also issued the F84-F Thunderstreak in newer boxes with new decals for the Diavoli Rossi team.
... and a snapshot of the Italeri
Thunderflash (kit no. 108).
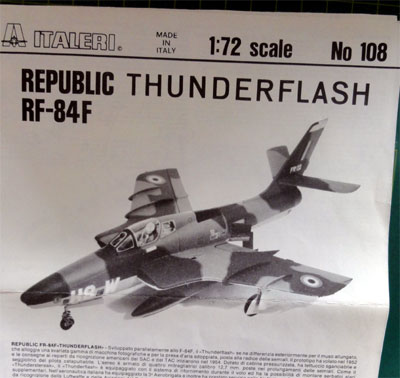
with old Carthograph
RF-84F decals
![]()
DOWNLOAD
INSTRUCTIONS (PDF)
Italeri-rf84-instructions.pdf
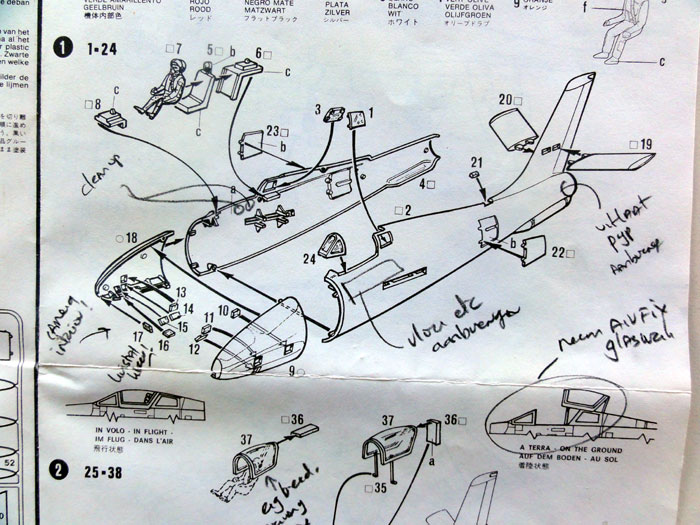
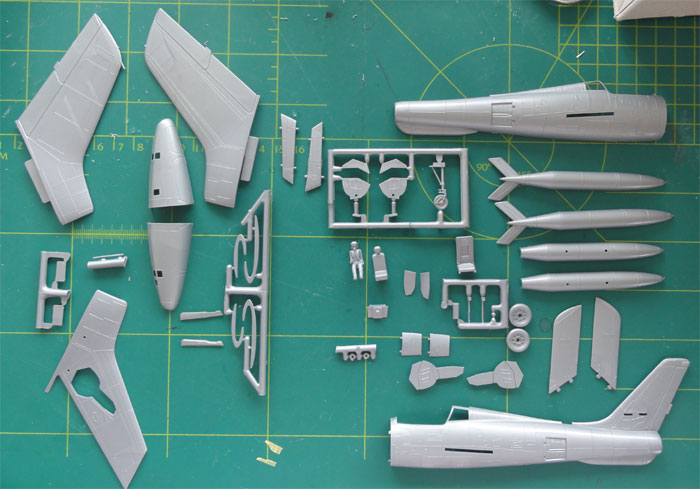
.... and the parts, note the separate
nose halves.
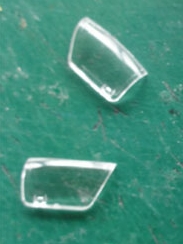
I looked at the three kits and found
that the Italeri kit has a very bare cockpit interior and the canopy and
windscreen
are 30% wider than the Airfix kit canopy!
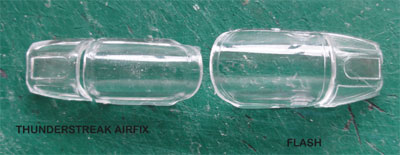
The Airfix parts seem to have the
most correct shape.
It was decided to do the following:
- transfer one Airfix interior to
the Italeri kit.
- use one Airfix canopy for the Italeri
kit.
- correct the Italeri kit fuselage
width at the canopy edges.
- simply cut the Italeri canopy in
half, reduce width and set this one as a bare shape on an Airfix kit. This
Airfix model will get a canvas cover over the cockpit.
Now, what
schemes to make?
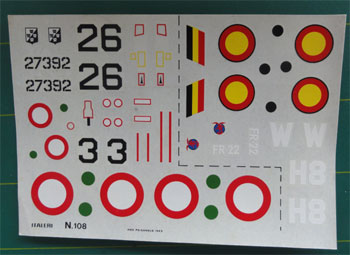
Looking at the various decalsheets
I opted for 3 Dutch AF schemes....
![]()
[1]- Italeri RF-84F Thunderflash
recce plane, camouflage scheme RNeth AF, "P-1" of no. 306 squadron using
a combination of Modeldecalset 29 for the stencilling and parts of Dutch
Decal sets
[2]- Airfix F-84F Thunderstreak, camouflage scheme RNeth AF, "P-306" of no.314 squadron, Eindhoven air base 1969 using Modeldecalset 29
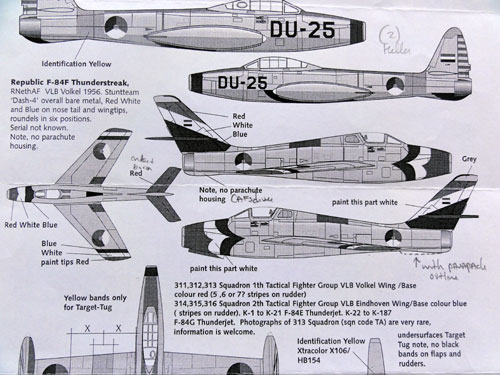
[3]- Airfix F-84F Thunderstreak, metal finish, Dash-4 demonstration team, no buzz no, Volkel AFB 1956, using Dutch decal set 72042
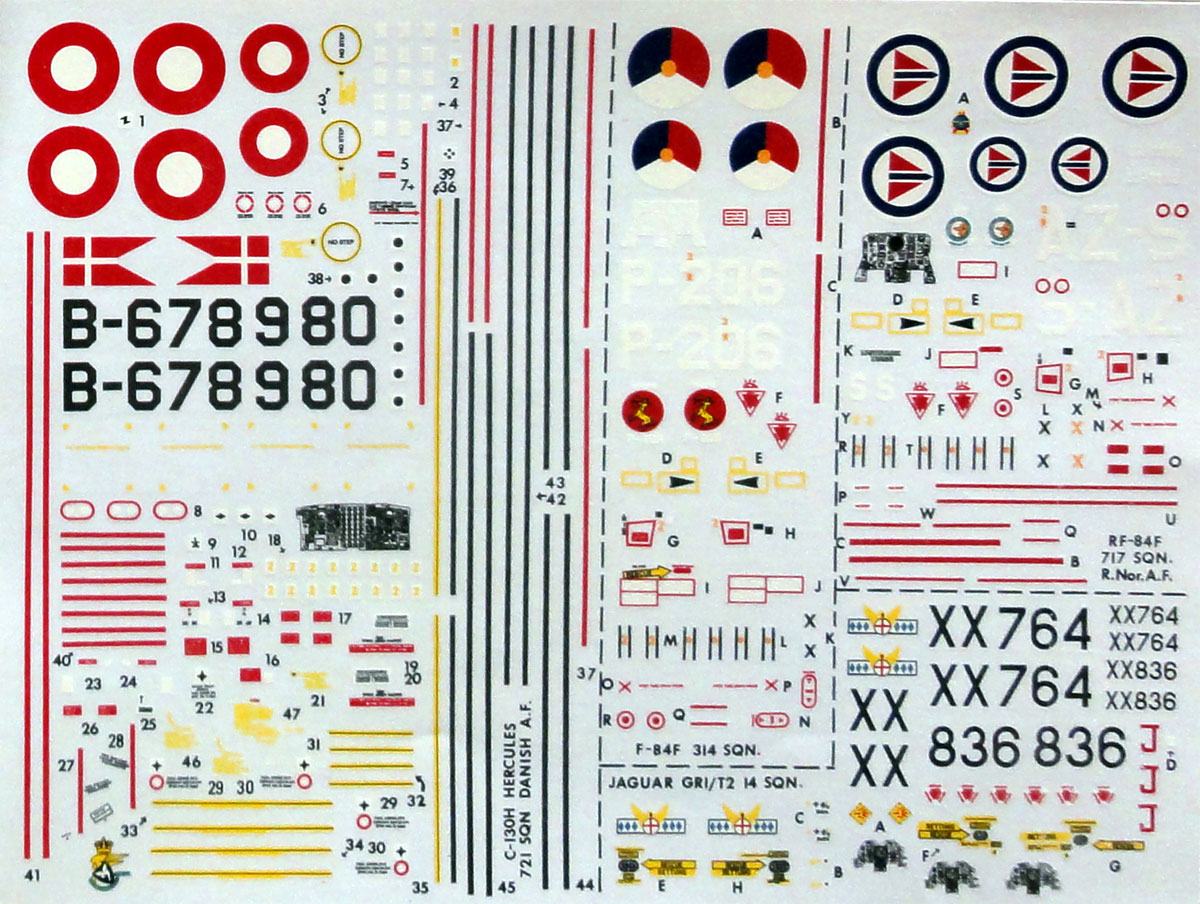
[ click to enlarge..]
Dutch Decal set 72042
Assemby
The Italeri model [1] was
started with first joining each nose of each aft fuselage halve to get
an absolute straight fuselage. The model is very basic indeed.
A piece of strip was set on inside
for strength as well.
 Also,
the The Thunderflash model thus got one Airfix cockpit interior. I suggested
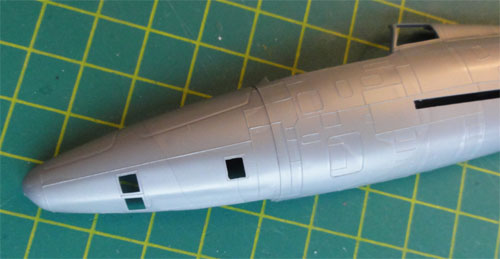
some camera's in the nose by putting in some sprue aft of the camera openings,
not a lot will be seen later.
Also,
the The Thunderflash model thus got one Airfix cockpit interior. I suggested
some camera's in the nose by putting in some sprue aft of the camera openings,
not a lot will be seen later.
There is also no tail exhaust pipe!
So one was obtained from the spares box using the Airfix parts as example.
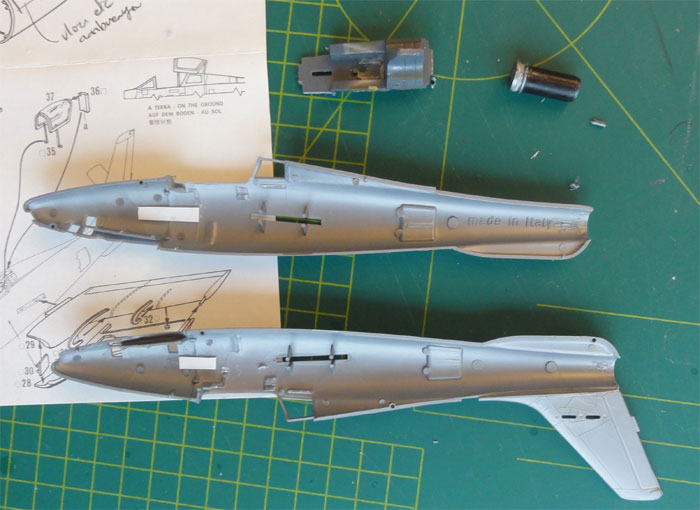
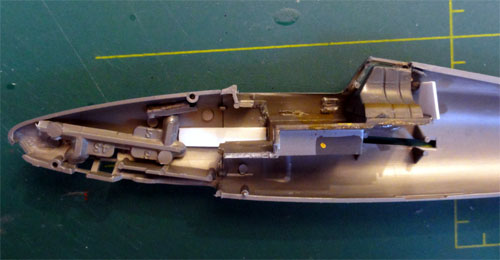
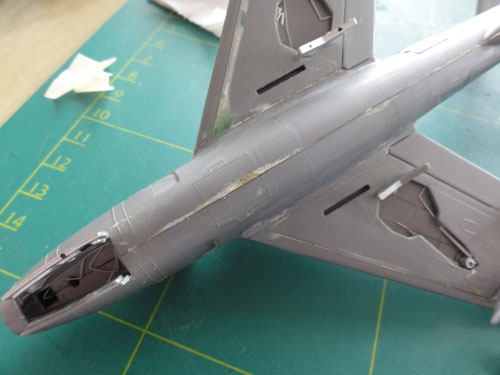
The Italeri fuselage was assembled. After fuselage completion, it
was time for adding the Italeri wing halves. There is no real intake tunnel,
so some bits of plastic card was used inside the air intake to get a better
result when looking inside. Some filler was also needed.
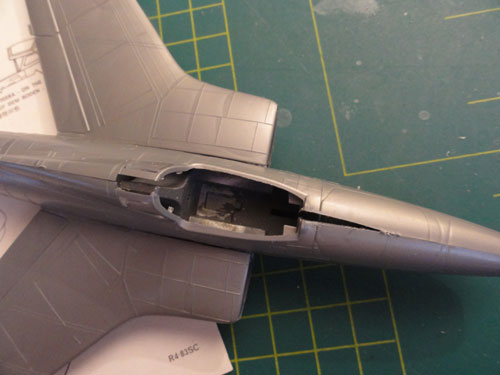
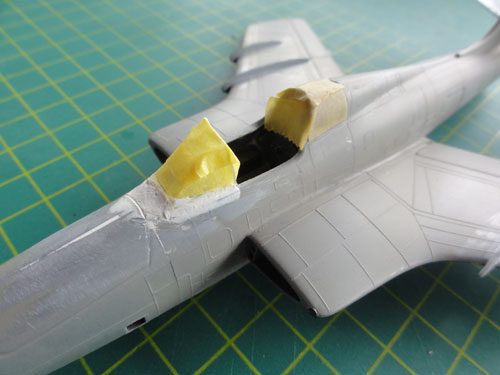
After drying, I removed a triangle
bit of plastic at the fuselage joints at the windscreen area. The resulting
gap enabled bending and joining the halves to get a less width canopy/cockpit
opening. With clamps, set aside for 24 hours to dry.
The to be used Airfix canopy of correct
width does not fit perfectly but it will be set open any way. But the overall
look is far better now for this area.
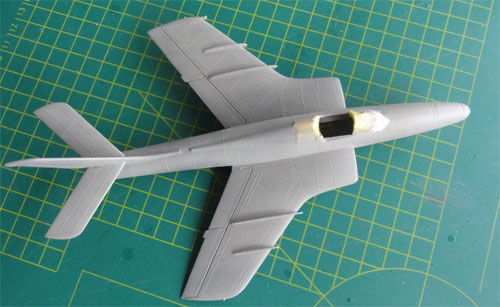
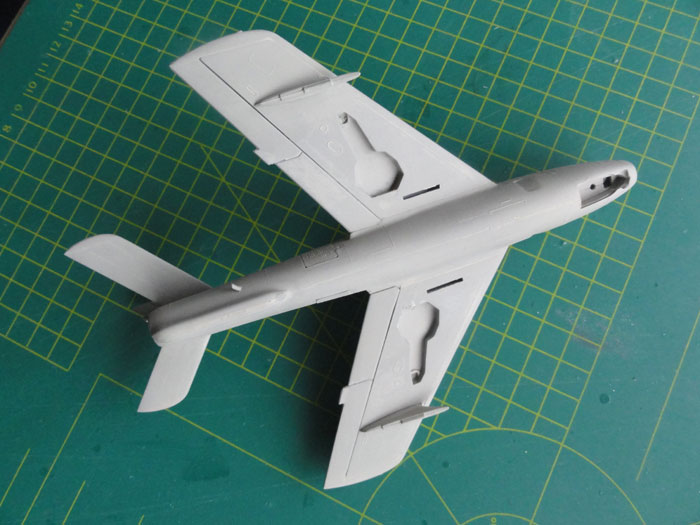
The rest of Italeri kit assembly was straight forward. The airbrakes were all set closed and some minor detail was added inside the undercarriage bays. The Airfix windscreen was added and the area filled with white Alasbastine car filler. The windscreen was masked with tape to protect it. After that, a grey base coat was set on the model with the airbrush to check for any flaws. Some more work was needed.
The four wing fences for the Thunderflash
were sanded thin and do not fit very well. The gaps between each fence
and the wing were filled with filler and sanded. The windscreen area and
the stabilizer-tail joints got some extra filler as well and sanded when
dry.
The 2 gun openings and 2 gun camera
windows were drilled open in the wing intake leading edges. The flap, rudder
and aileron edges were cut open with a razor saw, this improves the look
of these flying surfaces. The overall model is seen here.
![]()
Next I turned to models [2] and [3].
In the old Airfix kit, there are about 60 parts in light grey-metallic
plastic. Assembly was simply done, not even bothering to re-scribe the
raised panellines. For the scale, a simple light sanding would suffice
and the schemes to be used would attrack enough attention on their own.
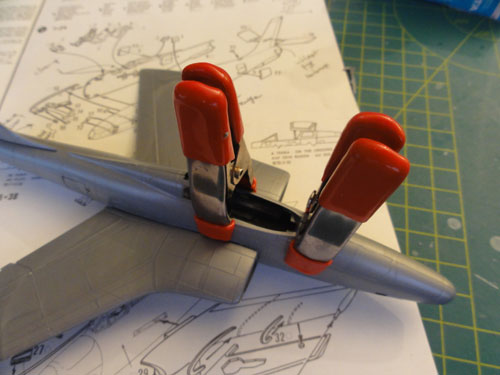
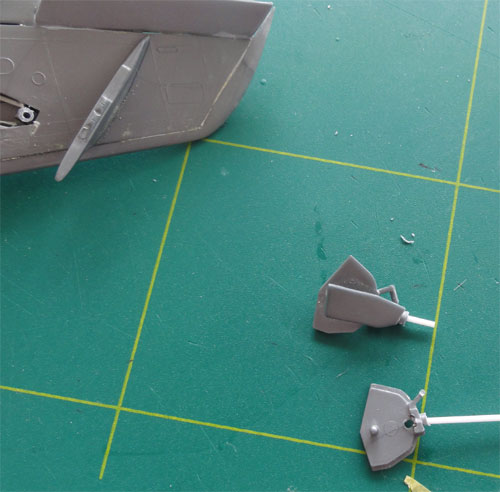
For model [3], the cockpit was assembled and painted medium grey. The undercarriage bays got minor details added with some strip and stretched sprue. The wheeldoors were sanded a bit thinner.
I found that the small windows #13 and #18 fit bad, so Micro Kristal Kleer is needed to close the gaps.
The flap, rudder and aileron edges
were cut open with a razor saw, this improves the look of these flying
surfaces.
For this model the ailerons were
also separated and repositioned just to add some interest to the model.

Some filler was needed at the wing-fuselage
joint, and the lower gaps at the wing panels. One of the gear legs
was broken, so I repaired it using plastic rod and a hand drill.
After using some filler in places,
drying and sanding a base light coat was airbrush to check for any flaws.
I forgot that the F-84F model [3] of Dash Four has no parachute pack under
the tailpipe, so the fairing was sanded to suggest a slimmer fairing with
no para pack.
![]()
Next, the other Airfix model [2]
was assembled in a similar fashion. Note that the cockpit interior, windscreen
and canopy was to be used for the Thunderflash model [1], so a very straight
forward assembly was now done.
(note that this is a very over
20 years old model of which the paint was stripped off with Caustic Soda.)
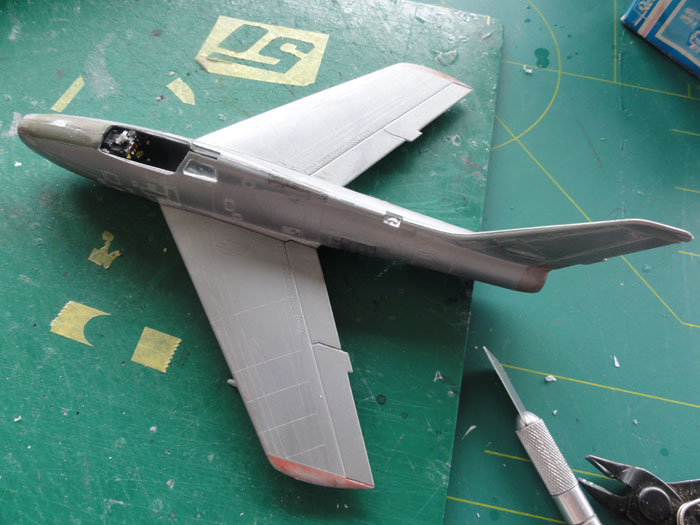
The Thunderflash too wide windscreen
and canopy was however used for this kit. These parts were simple cut in
halve, reduced in width and simply added on the Airfix kit model [2]. A
"canvas" will draped over the cockpit area when finishing this model.
 .
.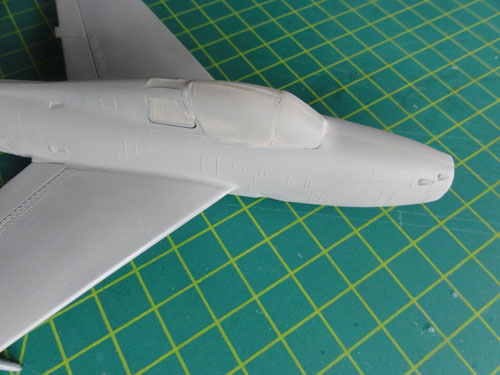
Filler was applied in various areas,
including the cockpit area and sanded when dry. The overall model got a
light grey base coat as well now.
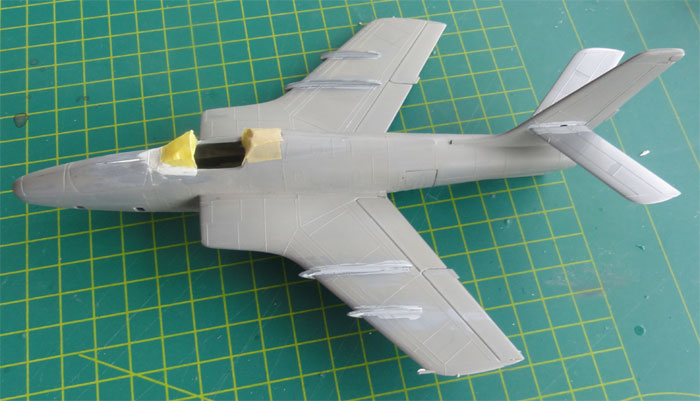
Now, all these models are ready for applying the colour schemes.
To next [
page
2... ]
References:
Books:
- Modelbouw in Plastic, H.G. Berfelo, IPMS Nederland, MIP magazine 2003-3 (in Dutch)
- Vliegend in Nederland deel 1, Thunderstreak. Flash aviation, 1986 (in Dutch)
- F-84 in Action, Squadron signal, USA, 1983
- Squadrons van de koninklijke luchtmacht, Helfferich, Wyt, 1994 (in Dutch)
- Thunderstreaks en Thunderflashes in Nederland, H.Groeneveld (in Dutch)
- F-84F Thunderstreak and RF-84F in dienst van de KLu, Dutch profile #20
------------
Internet:
- IPMS Nederland Streak in Dutch service info pages at NedMil website
- Aerobatic teams IPMS Nederland internet site
- www.thunderstreaks.com (website Frank Klaassen, Hans Engels, and Gijs Hiltermann)
Back to 1/72 Models

(c) Copyright Meindert "designer"/ All rights reserved. Your comments are welcomed by webmaster
Created August 12, 2011