& French SNCASE Aquilon
[ page 1 ]
Sea Venom model in 1/32 scale made and 1/32 SNCASE Aquilon conversion report
 .
.
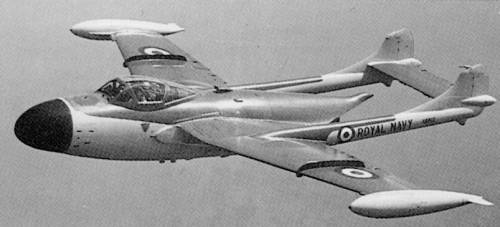
De Havilland Sea Venom
The Venom was developed from the De Havilland Vampire as the Royal Air Force needed a jet with some better performance. The Venom got a different thinner swept wing. Early Venoms had no ejection seat (it is unclear if they were retrofitted later). The first single seat Venom FB.1 flew September 1949. Night Fighters were also needed and a two seat fighter developed a different forward fuselage with big radar nose. The NF.2 prototype trials went well enough with first flight in August 1950. There were structural problems, these were tackled. The Royal Navy Fleet Air Arm also needed a Night Fighter to fly from their carriers. It lead to the development of the “navalized” NF.2. The first flew April 1951, designated "Sea Venom NF.20". It was generally similar to the NF.2, but with a strengthened construction and also an arrestor hook fitted in an “upper lip” at the aft fuselage. The first of 50 production Sea Venom FAW (Fighter All Weather) flew March 1953. It had the Ghost 103 engine, an AI.10 radar, and a clear-view canopy similar to that of the NF.2A. The FAW.20 entered service with the Fleet Air Arm in 1954.
Further improvements
are always needed and the next version, the FAW 21, first flew April 1954.
The tail plane extensions outboard of the tail fins were deleted and it got
a Ghost 104 engine, Westinghouse AI-21 radar, a modified canopy with a
bulged top to improve headroom, power boosted rudders and ailerons, non-skid
brakes, and inflatable seat packs to assist in underwater escapes.
Martin Baker
Mark 4A ejection seats were fitted from the 100th machine; it is unclear
if they were retrofitted to earlier production planes. Of the FAW
21 167 planes were built.
Next came in 1957 and 1958 the final Sea Venom variant, the “FAW 22". It was fitted with a Ghost 105 engine and an improved AI.22 radar. Also, many FAW 22s were adapted after delivery to carry DH Blue Jay (later Firestreak). Of the FAW 22, 39 planes were built.
The Royal Navy FAA obtained a total of 256 Sea Venoms of all types.

Also, the Royal
Australian Navy (RAN) was interested in the two seat Sea Venom. Several planes were
ordered as the FAW 53, being the Australian designation for the Sea Venom,
of which 39 built. The
Australina navy had the carriers HMAS
Sydney (formerly HMS Terrible) and HMAS Melbourne (formerly HMS
Majestic). Hawker Furies and Fireflies were operated from these and
later the Sea Venoms until 1970/ 1971 along with Gannets. 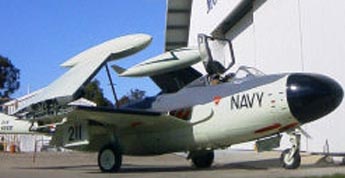 ..
..
![]()
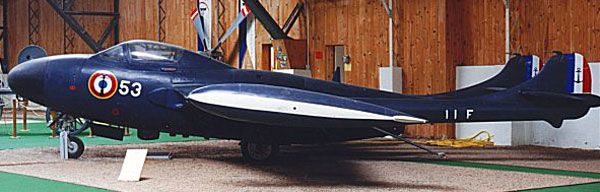
Aquilon
(premier jet
embarqué sur un porte-avions français)
After the Second
World War, the French Navy also worked on their naval power. So a
shipboard jet fighter was needed
and in January 1951 the Aeronavale selected the Sea Venom FAW.20
and arrangements were made for license manufacture by SNCASE
(later
Sud-Aviation). The French Sea Venom was given the name of "Aquilon ,
French
for “Sea Eagle".
page 1
page 2
page 3
page 4 (compl.)
ALSO SEE Conversion report on...
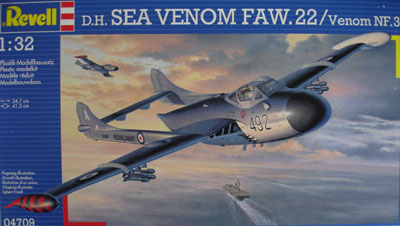
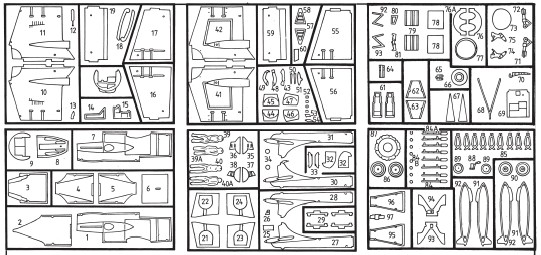
The Revell 1/32 Sea Venom kit #4709 is the same as the originally released Matchbox Lesney PK-506 kit issued 1980 (see info here...).
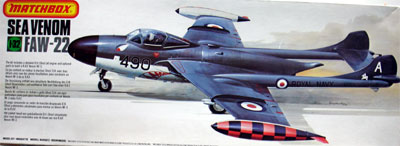
The 1/32 scale Matchbox Lesney kits
were known as being very good, with good accuracy and shape. I was told
that the dimensions of the kit (length and span) were pretty well ( within
a margin of a couple of millimetres) and I am not surprised as Matchbox
did make simple but accurate kits at the time. They had access to the real
thing.
OK, what is in the Revell released kit?
The instructions look like the original
Matchbox ones, but Revell has improved them in some areas.
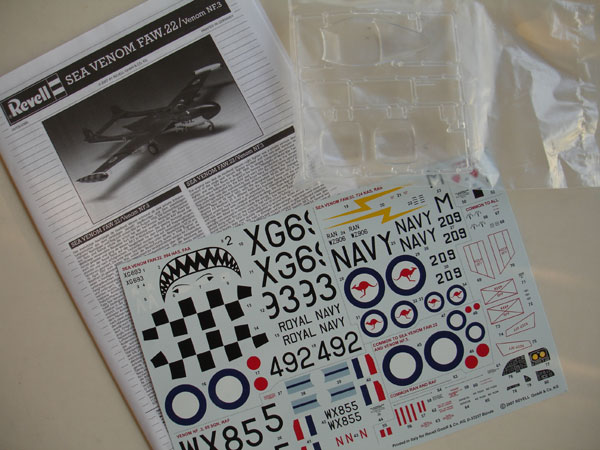
The kit has about 150 parts in white plastic. (The Matchbox kit's plastic has as some modellers may remember several colours, to help the younger modeller to get some colour on an unpainted model).
So, exactly the same parts and sprues
are found in the Revell kit, although Revell has cleaned up the mould of
the transparent parts to remove tiny scratches. Well done!
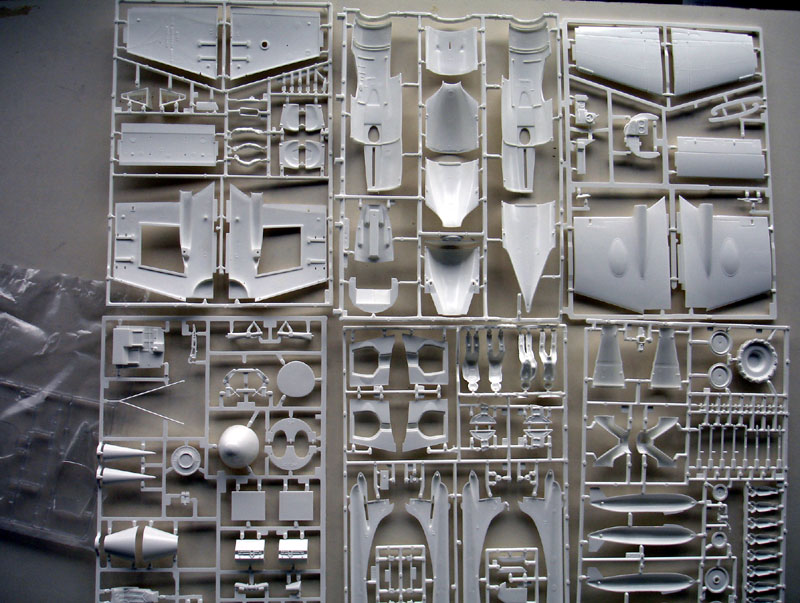
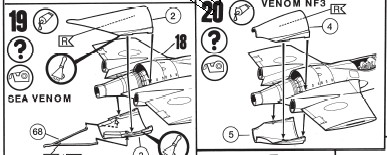
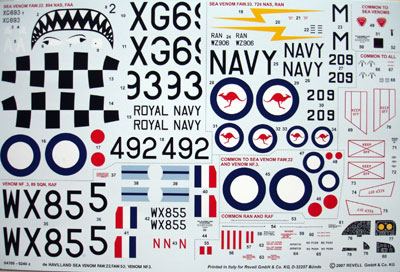
In the kit there are parts to create
some different variants: FAW 22 (FAA), FAW 53 (RAN), NF.3 (RAF).
![]()
You get some variations on parts like the different wheel bay shapes, a flat or bulged double canopy and different stores and decals. You also get parts for a miniature Ghost engine for which you can leave the top access panels open. The rear fuselage has two options as well.
The decals are of the usual very high
Revell
quality with versions for three planes:
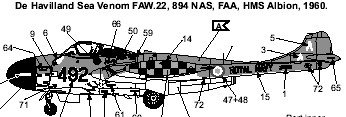
(1) Royal Navy 894 NAS (Albion 1960),
(2) Royal Air Force 89 squadron (1955),
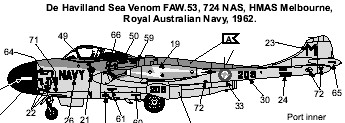
(3) Royal Australian Navy 724 NAS
op HMAS Melbourne (1962)
(The decals are not a complete copy
of the Matchbox ones).

![]()
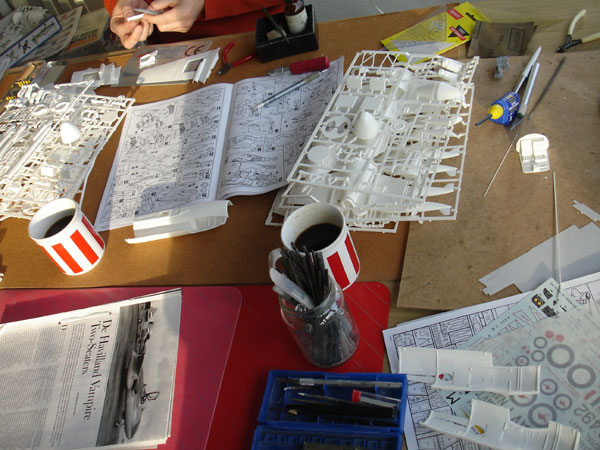
I purchased the Revell kit but in
the “stack” I found also an old Matchbox kit. I decided to make two models
simultaneously. Looking at possible markings and variants, I found out
from an old Air International magazine that
also the French navy used “all blue” Sea Venoms, called Aquilons (French
for "Sea Eagle"). Several variants were deployed and the Aquilons differ
in details from the British FAA Sea Venoms. It would be interesting to
make such a model and would not require a very big kit modification.
For the other kit, making a RAN Australian FAW 53 would be nice. I saw one at a museum in South Australia and this looked a nice scheme.
For this kit you are on your one regarding detailing as I could not find any add-on commercial sets from resin what so ever on the market.
Back to 1/32
model kit
Two kits will be made: Sea Venom and Aquilon.
First and discussed on these pages, a “standard dark sea grey and white” Royal Australian Navy Sea Venom FAW 53 in 1/32 will be made. A hatch would be opened in the nose to show some details inside. Otherwise, the model would be made with level unfolded wings but added details in the two seat cockpit.
So, before starting assembly, the opened up hatches were cut open in the main fuselage halves with a razor saw. Next, the major parts were separated from the sprues and re-scribed in some areas with an Olfa P-cutter. Please note that (Sea) Venoms had wooden fuselages that were covered with fabric.
The modelling report will indicate the step numbers as shown in the instructions; the order will be changed however to ease assembly.
![]()
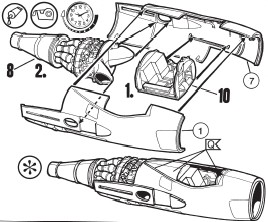
Steps 1 - 2
The intake ducts were simply assembled,
but not a lot will be seen later on.
Steps 3 - 8
The RAN Sea Venom model would not
display the engine, so it was not assembled for this model.
 .
.
Steps 9-10
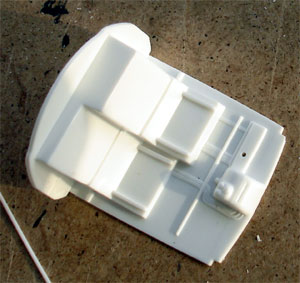
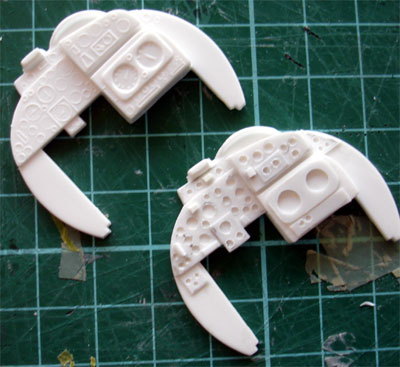
Next, the kit's interior was tackled;
it is basic but offers an excellent base for detailing which is well visible
under the large open canopy.
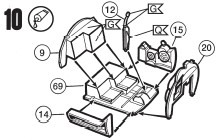 Sea Venom
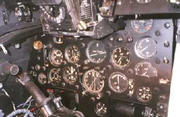
I searched on the Internet for photos of the cockpit.
Instrument panels were made from thin
card with the dials and clocks drilled open. (later on the decals for the clocks were set). The moulded trim wheel on the left
side console was cut off and replaced. Some details like the control stick
still to be fitted.

.
...
 ..
..
Cockpit details to be added were also some
stringers the side walls and rods and details from sprue en the spares
box.
Also added were an extended floor (not yet seen above), seat floor rails and foot controls for the pilot in the lefts seat. The right navigator/ radar operator seat on the Sea Venom was set a bit aft and lower and what was the area cramped!
![]()
Step 12
The basic fuselage was now assembled
as indicated in the instructions.
Steps 13-14
The 4 20mm Hispano canon nozzles were
drilled open in part #8 and plastic open tubes glued inside the part.
Also, the aft section of the nose wheel bay roof in part #8 was cut
out and some depth added with plastic card. I kept the attachment floor
section not to loose strength.
For the RAN Sea Venom model it was decided to open up the right hand hatch in the nose, to add some life to the model. The bay was detailed and a bulkhead added from card using the drawing from Air International. The nose radome was fitted.
Steps 19-20
The Sea Venom rear tail parts were set; (step 20 is not applicable)
Now, the entire fuselage and wing (root) sections were filled and sanded smooth. Do this BEFORE going further as you can now well handle the fuselage.
The area next to the jet pipe also
needs some filler and card. I made the gap around the tail pipe smaller
by making a small ceiling from thin card.

References
- De Havilland DH112 Venom and Sea
Venom, Warpaint serie, no 44
- Air International Vol.39, page
81 (with history and drawings)
- Aeroplane Monthly, 1978, page 300
Back to 1/32 models...

(c) Copyright Meindert "designer"/ All rights reserved. Your comments are welcomed by webmaster
Created this page January 21, 2008