De Havilland Sea Vixen
FAA models in 1/72 scale
page 1
page 2
In 1963 the improved FAW.2 variant came with bigger tail booms that extended forward of the wing leading edge (more room for ECM and fuel). Also, the frame in the middle of the pilot's canopy was removed. For the navigator, a fairing was added with a bulge and tinted window. On FAW.1s and early FAW.2s the hatch was flat with a small window .
The Sea Vixen was used in several conflicts by the FAA/ Royal Navy.
In 1972, the last Sea Vixen was put out of operational service, with some aircraft remaining being used for test purposes.
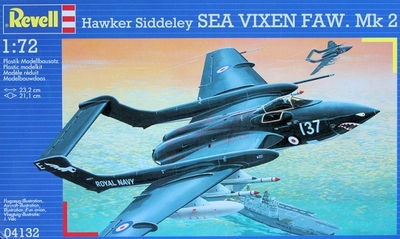
The Revell 1/72 model has been issued earlier by Frog, later the same mould by NOVO and also Revell re-issued the kit after cleaning up their moulds. Also the same moulds are from Ark models, Eastern Express, Modelcraft. Whatever manufacturer you select, being the same moulds, the kit is basic but can be made into a nice replica. Work is needed however not being a TamiGawa shake in box = ready kit.
(UPDATE: later on new mould kits were also released by CyberHobby and in 2008 by MPM/ Xtrakit; the Xtrakit is presented on page 2.....).
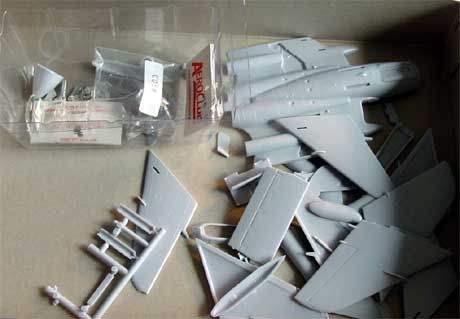
This kit is old with Frog characteristics with a rudimentary interior and some thick parts. But is aside from the expensive 1/72 High Planes kit and Magna Models resin kit, an acceptable Sea Vixen kit available.
The REVELL kit #04132 comes with very nice set of decals also. Otherwise, the Frog/Novo/Revell model has a number of options like 2 sets of outher wing sections (folded or non-folded) and the later retro fitted navigator fairing for the FAW.2 (not shown in the Revell instructions). The FAW.2 version was in fact the only real option of this kit so this was to be made as model (the High Planes kit has the option to make a FAW.1).
I also got some Aeroclub replacement parts for the interior and canopy.
 .
. 
Improvements the basic kit needs:
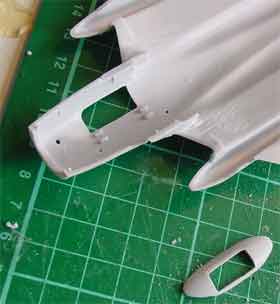
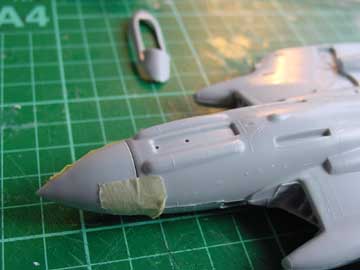
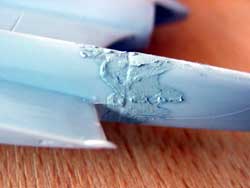
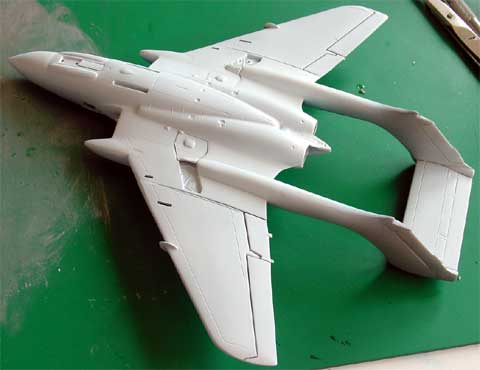
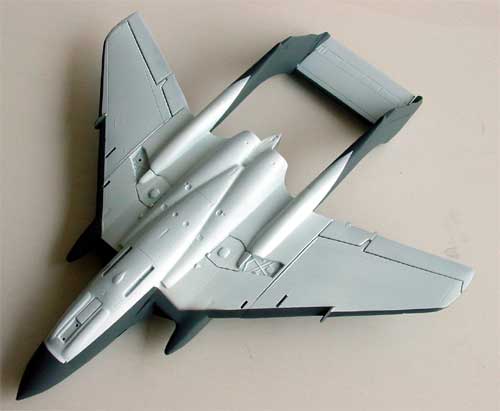
A/ the basic kit dimensions are unfortunately NOT OK, as there is a problem with the main fuselage. Looking at real pictures of the Sea Vixen and looking at the Warpaint book reference drawing, it seems indeed the main error is in the fuselage. It is in fact about 1 - 1,5 mm (1/14 inch) to deep and wide. As the span with wings is OK, correcting this is very difficult. I found a suggestion to improve the look of the kit by inserting a plug of 2 mm card between the nose cone and front fuselage.
 ...
... 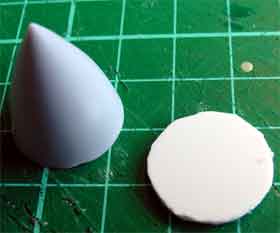
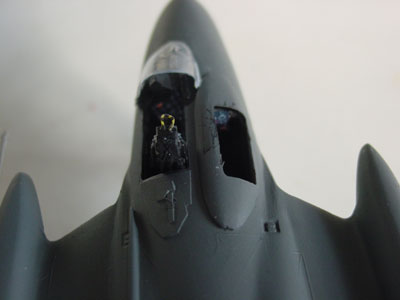
The nose without correction is seen above, and with the 2 mm plug below, improving the look of the model
With some sanding into a more tapered nose shape and reducing the lower forward fuselage fairings next to the nose wheel bay, the shape is vastly improved.
In other areas, the dimensions match with the Warpaint Reference drawing and their looks are OK to me.
B/ thin down the trailing edges of wings and stabilizers. Sand inside the surfaces of parts # 9 and # 11 to get the lower wings sections to meet the flaps.
C/ also sand down the integrally moulded rudders on parts #13 and 15 .
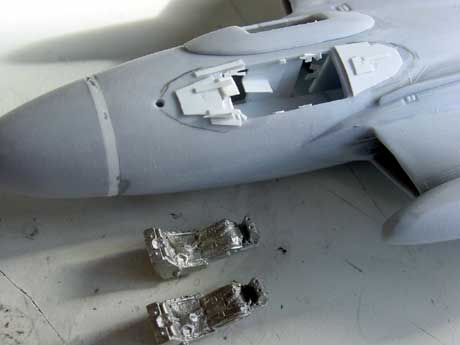
D/ a new interior with some card and strip. The floor of the pilot should be at where the upper and lower fuselage meets; the navigotor floor and seat is on the right side of the pilot and lower! The interior is typically of the period: crowded, small and dark!
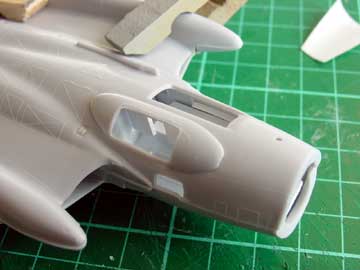
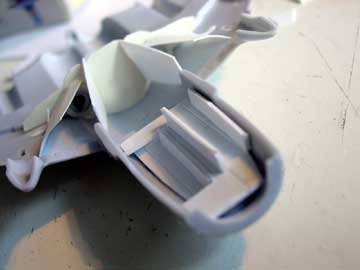
E/ the intakes were cut open; they need an interior. I made from thin plastic card an intake ducting, a bulkhead with 2 engine "compressor faces" from the scrap box and will add the intake guiding vanes later on
F/ decide if you want to open the "navigator coal hole". I think the later FAW.2 had a transparant hood cover, so carefully open up the hood in fairing part # 35.
G/ the fairing part #35 needs to be positioned 2 mm more fat than than suggested by the kits instructions.
H/ the right side fuselage window should be a bit longer ( 1,5 mm more longer).(part #5 not usable any more);
I/ add nose weight! Start with adding weight in the radar nose.
J/ the kit has raised panel lines; re-scribe the main ones and smoothen the overall surfaces of the kit. Especially at the top of the fuselage where the walkway markings are "raised lines", be carfeull to remove all of them; otherwise the decals will give troubles later on.
K/ the main undercarriage doors are often closed when on the ground, so there is no real need to deepen the wheel bays. The gear legs can be given some small extra detail with some sprue an rod.
L/ the main nose wheeldoor is also mainly closed so this needs no dept. So = OK
M/ make saw cuts of flaps, ailerons etc after glueing the flying surfaces to improve the look of the model.
N/ the horizontal stabilizer part 17 is OK, but reduce the left glue lip in size to fit.
O/ the underwing pylons are very close next to each other. Missiles and tanks don't fit...
kit review modelling report
kit review modelling report
kit review modelling report
kit review modelling report
kit review modelling report
kit review modelling report
kit review modelling report
kit review modelling report
kit review modelling report
kit review modelling report
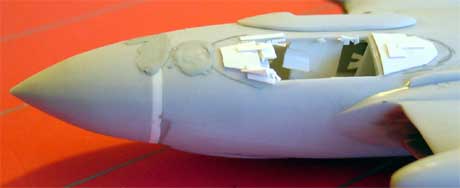
At the cockpit section with card some detailling was added. The Aeroclub canopy has the base moulded on, so the rather thick kit part # 35 is not needed.
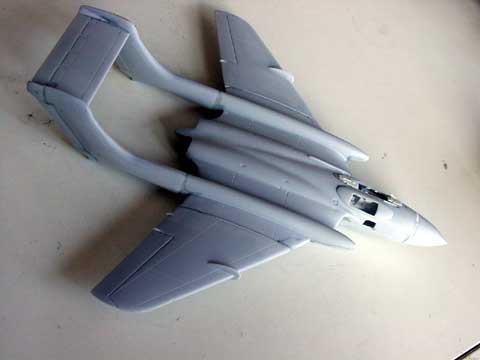
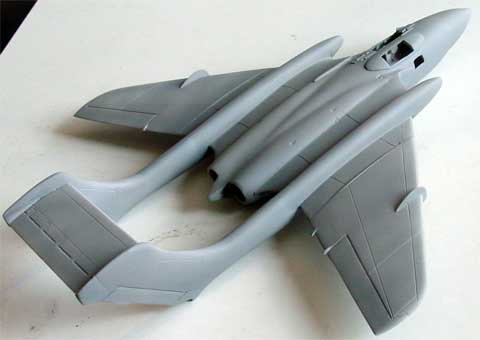
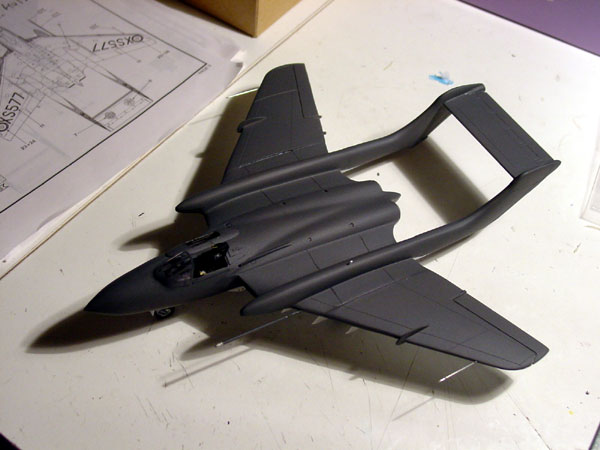
First sand the forward fuselage parts, add tailboom later on to enable better sanding.
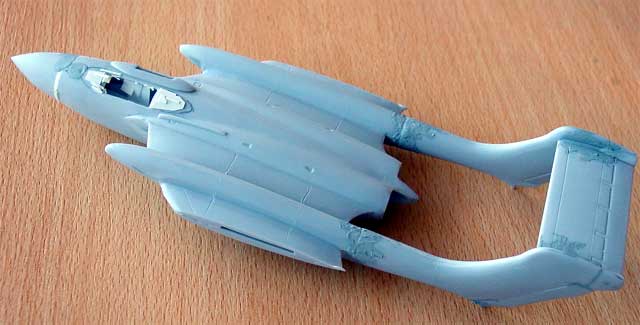
Tail booms fit requires lot of putty and sanding... Be patient here!
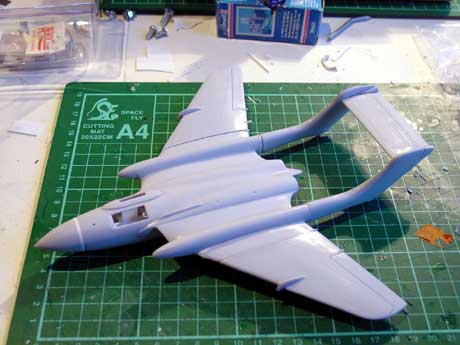
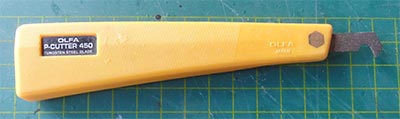
Next some panel lines were scribed in using an Olfa p-cutter.
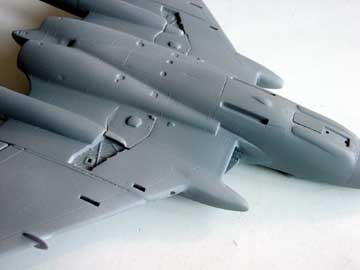
Some small corrections were made through some putty and sanding in areas. A new light grey coat was again applied in these areas. After a final check, the model was ready for....
PAINTING and FINISHING
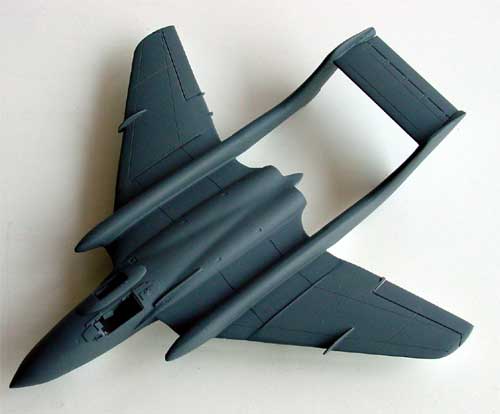
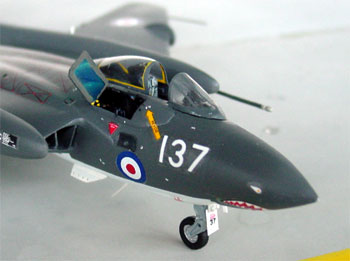
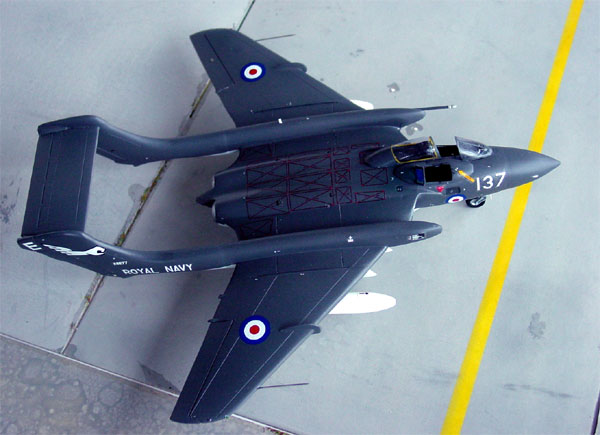
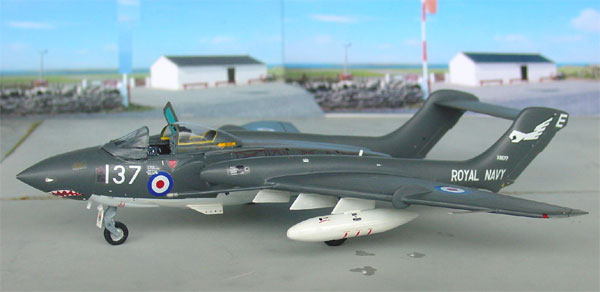
The model now got its finish of Extra Dark Sea Grey and White lower surfaces.
For the Extra Dark Sea Grey enamel paint Humbrol # 123 was the main colour, made a bit lighter by adding some 10% white. Other wise you get a very dark small model, the so called "scale effect". For the White, any brand can be used obviously.
First the white was applied to mainly the lower surfaces. Next, some considerable time was required for masking the model as the Extra Dark Sea Grey is also on the lower leading edges of the wing and stabilizer. And off course, the Sea Vixen is a complicated aircraft with the tail booms.
The model now got a gloss coat of Johnson Klear (or known as Johnson Future in the USA). The gloss coat will help with decals application to prevent trapping of air bubbles called "silvering" .
The landing gear was added to the model. The model should be lightly tilted aft, so the nose leg seems a bit too long. Otherwise, no problems were found here.
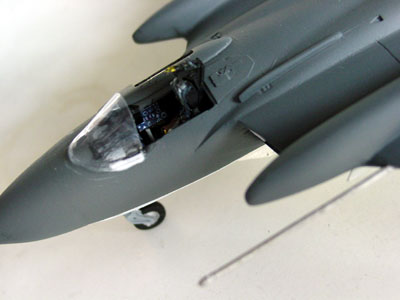
The cockpit needed some extra work.
The fit of the Aeroclub vacuform canopy required carefull trimming and
cutting. In order to fit the forward windshield, some work was especially
needed. Also, a canopy sliding rail was added from plastic strip (not yet
seen in the pictures).
... but can be seen when carefully
looking at the picture below....
The canopy end result is not perfect but not too bad either. The canopy got a very thin yellow edge painted on with a very fine brush.
The metal Aeroclub ejection seat only
needed some paint work.
![]()
The model is now ready to receive
its decals. First, several coats of gloss Johnson Future were applied with a wide paint brush. 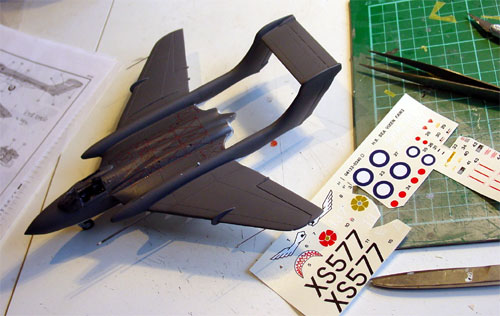
The decals supplied in the Revell
kit are much more detailed than in the older FROG offering or even Modeldecal
sets. The Revell decals are very fine with particularly the red crossed
walkways. The walkway markings on top of the fuselage are asking for the
disturbing "silvering effect". In order to prevent air bubbles to be trapped
during decalling, with a sharp scalpel cuts were made in the decal while
still on paper. After that, each individual decal was applied.
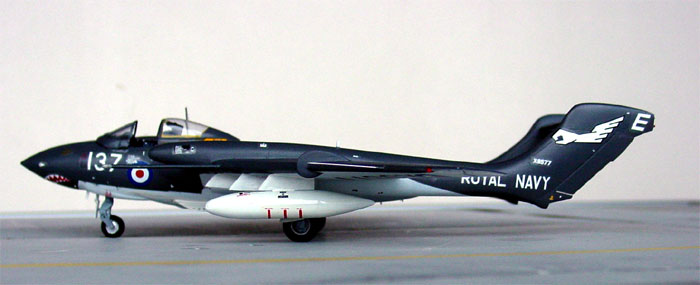
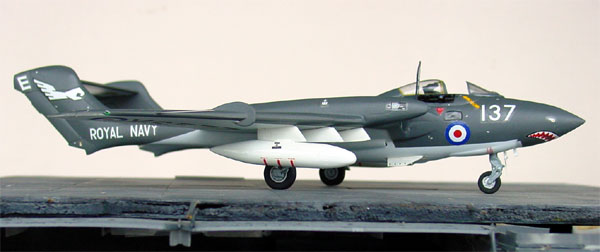
The scheme of FAA Royal Navy
no.899 Squadron was selected.
Unfortunately, the Revell UK roundels have a
too dark blue colour.
I replaced them with D-type roundels from Xtradecal set X041-72. Later on I discovered that these Xtradecals are quite thick and decal solvents only seem to
matters worse. If you can, use another brand for the roundel decals.
> Finally, a hatch was made for the
navigator "coal hole" from clear acetate sheet and painted transparant
blue with grey edges.
> Pitot tubes were set on the leading
edges from metal needles.
> Anti-collison lights were added
to the wing tips. Small notches were cut out for that purpose, filled with
Micro Kristal Kleer and painted with transparant Tamiya paint.
Check out the Xtrakit/ MPM Sea Vixen FAW.1 in 1/72 here......
Back to FAA models
- Warpaint no 11 - Sea Vixen, Alan Hall
- Scale aircraft modelling vol 14/1
Oct 1991 ; Vol 16/8 June 1994 ; Vol 18/8 Oct 1996
- Air International April 1991 (with
cutaway and history)
- Web: http://www.thunder-and-lightnings.co.uk/seavixen/index.html

(c) Copyright Meindert "designer"/ All rights reserved. Your comments are welcomed by webmaster
Created this page
March 5, 2005