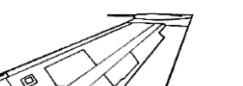
Saab Draken model in 1/72 scale
 .
.Back in 1950, the Swedish Air Force set out a specification for a new jet fighter with a top speed of Mach 1.8. Saab from Sweden came with a proposal with Project (R)1200 and later the Model 35. The design had a double delta layout as it was thought that high speed performance combine with a relatively good field take-off and landing performance would be a good compromise. It would also have to be relatively cheap to operate by "neutral" Sweden and have sufficient range, not an easy task for the time with high fuel burning jet engines. The aerodynamic design was troublesome as the high speed Mach aerodynamics were new for the time and it was decided to also make a small design test plane, the Sqaab. This was a 70% scale testbed. This resulted in 1952 with a further project go ahead that eventually led to the Saab J-35 being referred to as the Draken (Dragon in Swedish).
 Several
variants would appear such as the first J-35A from 1960 and the fully operational
interceptor J-35B. More powerfull engine variants of the Svenska flugmotor
RM6, which was based on the Rolls Royce Avon engine, appeared as well.
A trainer version was the Sk-35C and later the Sk-35XD. The J-35D had redesigned
intakes and better systems and became in 1963 operational. The J-35E was
known as the S-35E as it was a reconnaisance version with change nose and
camera's in the wing. The J-35F was a much improved interceptor with newer
systems, better visibility canopy and better RM6C engine with new afterburner.
The port wing canon was deleted and it could carry RB27 semi-active radar
missiles and AIM-4/26 Falcon missiles. The J-35F-2 also later got an infrared
sensor pod below the radar nose (later retrofitted to all J-35F planes).
It became operational in 1965 and was the backbone of the home Swedish
Air Force.
Several
variants would appear such as the first J-35A from 1960 and the fully operational
interceptor J-35B. More powerfull engine variants of the Svenska flugmotor
RM6, which was based on the Rolls Royce Avon engine, appeared as well.
A trainer version was the Sk-35C and later the Sk-35XD. The J-35D had redesigned
intakes and better systems and became in 1963 operational. The J-35E was
known as the S-35E as it was a reconnaisance version with change nose and
camera's in the wing. The J-35F was a much improved interceptor with newer
systems, better visibility canopy and better RM6C engine with new afterburner.
The port wing canon was deleted and it could carry RB27 semi-active radar
missiles and AIM-4/26 Falcon missiles. The J-35F-2 also later got an infrared
sensor pod below the radar nose (later retrofitted to all J-35F planes).
It became operational in 1965 and was the backbone of the home Swedish
Air Force.
Several export variants also appeared, the Draken being exported to Denmark, Austria (J-35O) and Finland.
The J-35J
is
a further improved J-35F having upgrades to systems, strengthened wing
able to carry additional armament pylons and became available around 1985.
It also could carry the AIM9 Sidewinder missile. About 66 planes were upgraded
until eventually replaced by the Saab Jakt Viggen and Saab Gripen
types.

See also the
references..
In 1/72 scale, several models of the Saab Draken appeared:
Airfix: kit 2039 of late J-35F; old kit but reasonable; IR sensor too small; fueltanks 4 mm too short in length; simple cockpit, thick pitot; has missiles.
Revell: old kit H189 with Acro Delta team and H4381; old kit with many faults;
Revell: new kit , similar to Hasegawa, so OK.
Heller: kit 255 also has parts to make a two seater and recon version; wrong shaped fueltanks, canopies too high; Twoseater only correct for Danish aircraft; recon version should have 2 camera windows each side for Danish version;

Hasegawa
came
with a very good kit and is the best Draken kit in this scale, with
several kit variants being issued:
J-35O, kitno BP2 for Austria; (also
in a box no.386 with "farewell special" decals with black livery; it lacks
RWR antennas on the tail and around the exhaust, and IPMS
Austria has a fuselage resin kit )
J-35F, kitno BP1 for Sweden; (also
with a Red Livery as kit BP101).
J-35J, kitno BP3 being this kit of
this modelling Report.
( Revell also boxed the later Hasegawa
kit later on, make sure not to buy the old Revell offering ).
![]()
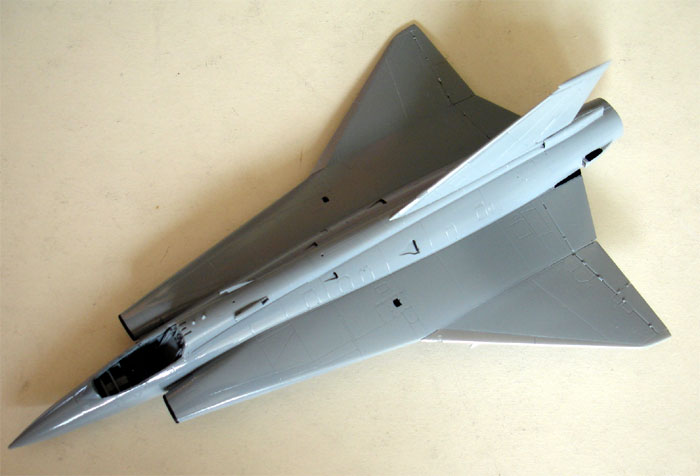
For this
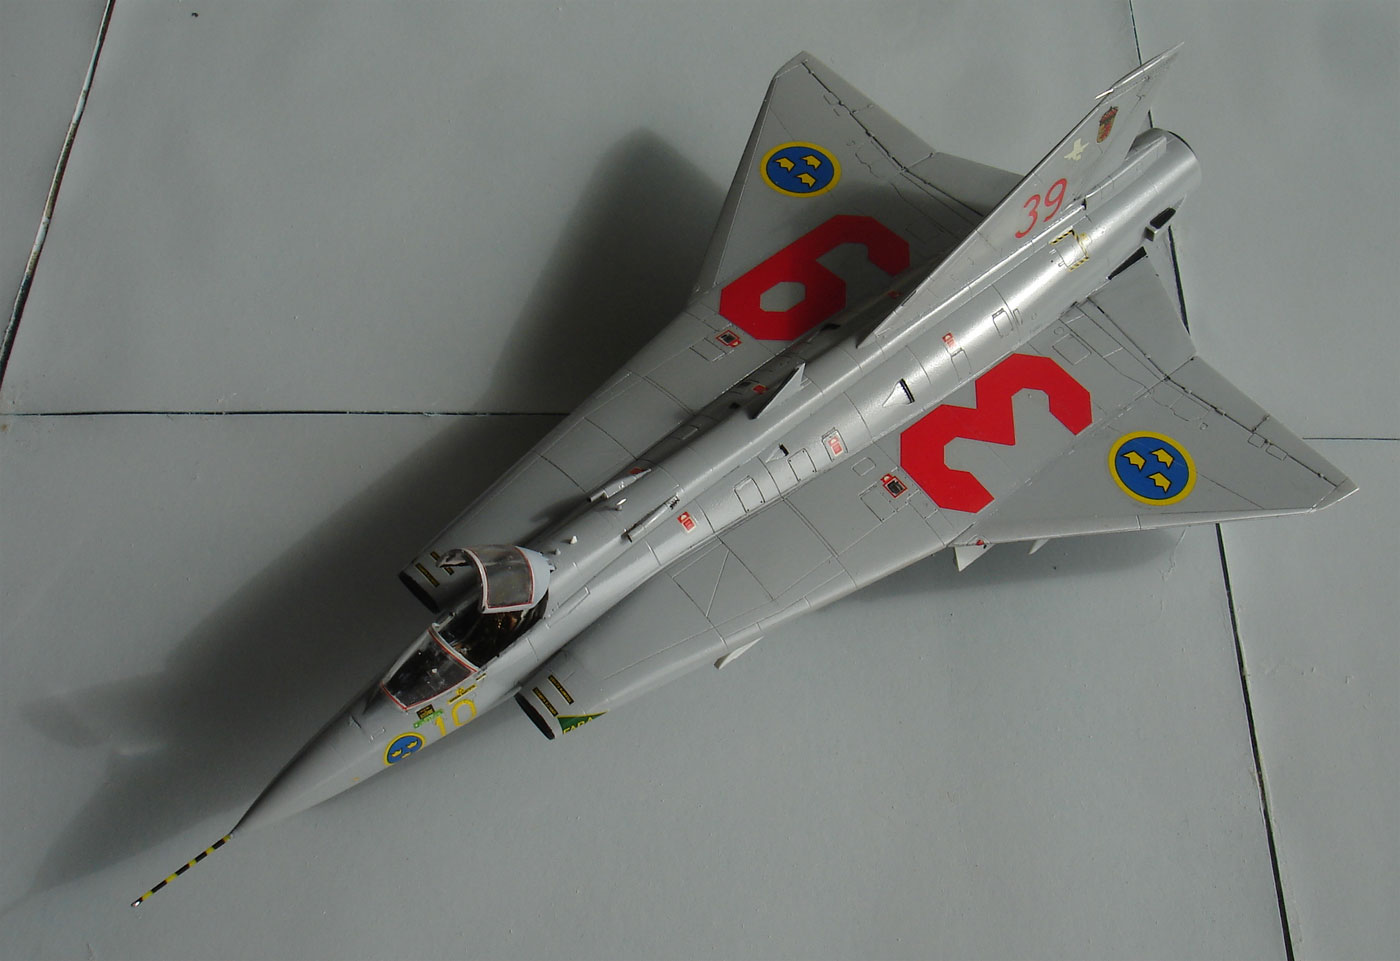
model, the Saab Draken J-35J of kit BP3 was to be build.

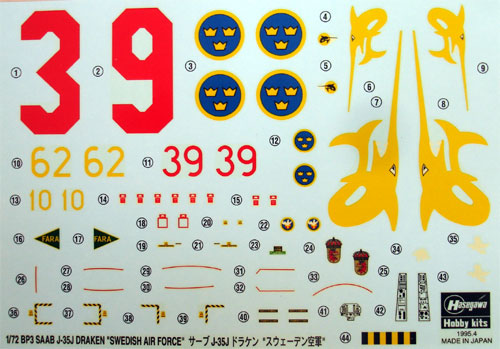
This kit has 2 decal options:
(1) Division 3/F10 with conventional
camo scheme and yellow swordfish marking (seen on box top)
(2) Air Defense Grey version of Division
2 / F10 unit with red/dayglow numbers
Notes on the J-35J kit (no. BP3):
- It has finely recessed panellines albeit no armament. This is really missing as you are left with empty pylons and only a couple of fuel tanks.
- The dimensions are OK.
- Only the small pitot vtube on the top of the fin is missing.
- The J-35J has the port canon deleted (fairing provided in the kit as part C2)
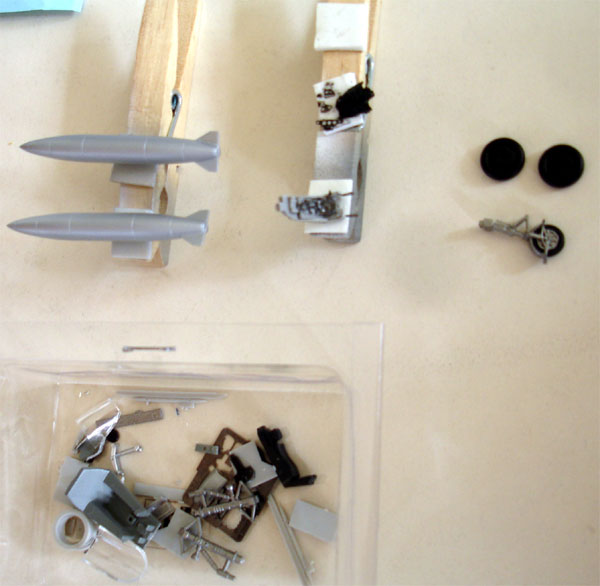
I started with spraying some parts while still on their sprues, eg. various coats of white on the doors, gear legs and wheels. Also, some parts were sprayed metallic. After drying, moved on to assembly....
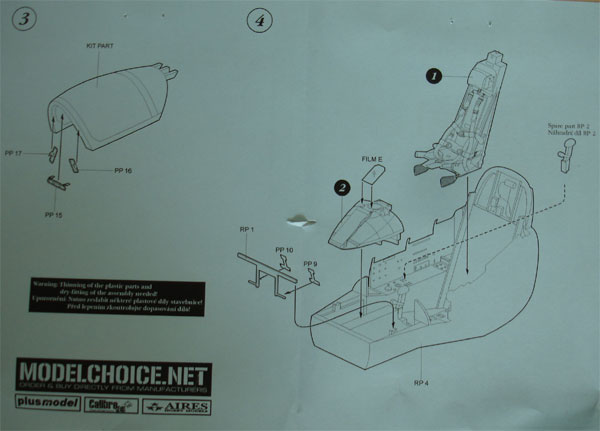
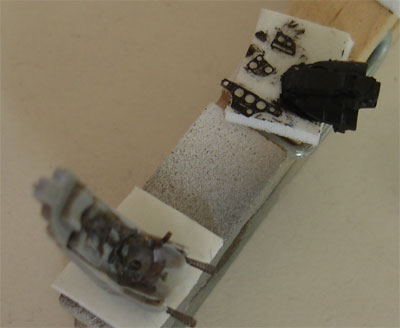
STEP 1
I decided to use an Aires
Cockpit Upgrade resin set no. 7202.
It has a nice seat and a nice cockpit
tub with detailing. You also get etched metal parts for seat harness and
instrument panel.
This all replaced the kit's cockpit
parts.
.
 .
.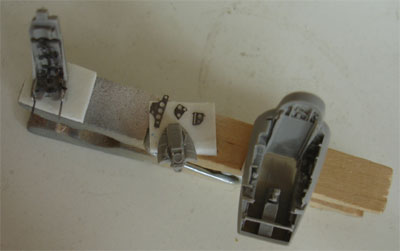
STEP 2
I removed from the spine part A2
the bulkhead area as this is in the Aires tub integrally moulded.
STEP 3
I added a simple bulkhead in the
mid fuselage from card to prevent seeing through the fuselage. The fuselage
interior was painted black.
Open the holes in the lower fuselage
for the pylons as desired.
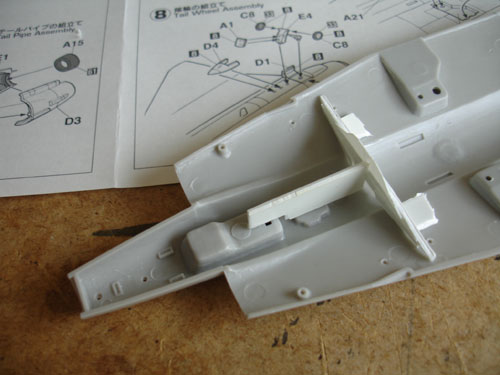
STEP 4
Assemble the afterburner section
as shown. It needs some filler.
From step 8, add the small fairing
D4 below the aft fuselage.
From step 11, add the tiny port fairing
part C2 (one side only!)
I also made very small notches open
on the wing leading edge at the Delta root for the two small anti-collision
lights.
STEP 9
Assemble fueltanks and the Sidewinder
pylons are OK.
Now before adding
detail parts, use limited amounts of putty/ filler. Especially on the nose
fuselage sides and aft tail cone filler is needed. Sand and check for gaps.
Add a coat of light grey primer.
![]()
COLOUR SCHEME
Some general colour observations:
- cockpit interior : mid grey with
medium green panels
- grey seat with khaki seat cushion
early seat 73SE-F and late J-35J
cockpit
 .
.
- striped dark blue and green camouflage
sports KFF 438 (about FS 35042) and KATF 325 (about FS 34086).
- sometimes also a pattern is seen
with also Blue grey KFF 058 (about FS 36152) (about Humbrol 87).
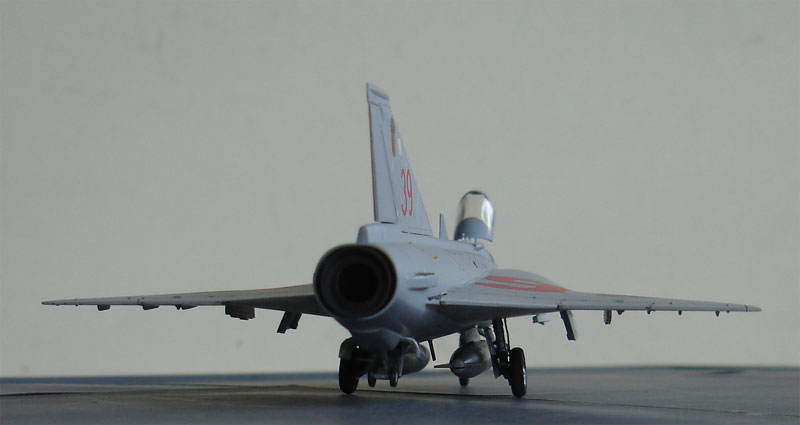
- the overall later Air Defense scheme
has two greys: upper FS36230 (Humbrol 128) and lower FS36495 (Humbrol 147).
- the belly of fuselage and leading
edges on outside wings and fin are often left natural metal.
- gear details, inside wells and
doors: natural metal (including the unique small wheels below aft fuselage)
So, now apply first the desired paint
scheme with an airbrush.
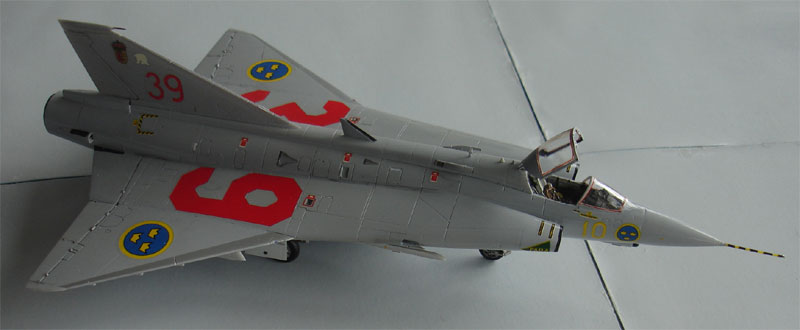
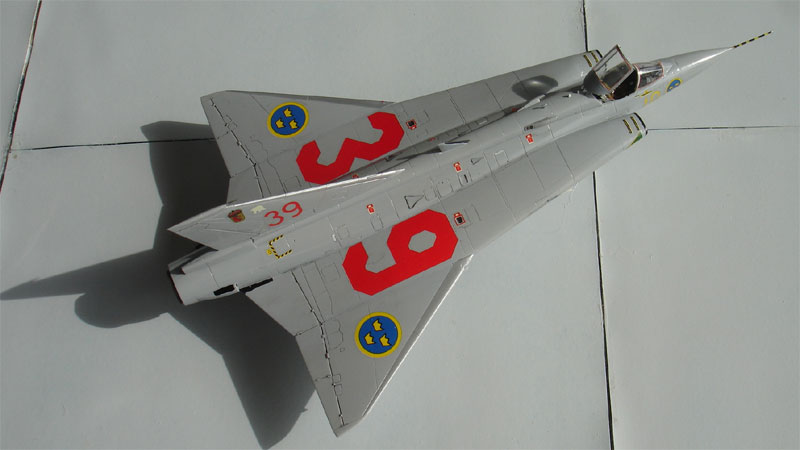
I picked scheme 2 of the kit for
an Air Defense Grey version of Division 2 / F10 unit of the Swedish
Air Force with the attractive large red numbers. It flew with the type
up to 1998.
I used Gunze
Sanyo 338 for the lower FS36495 and Humbrol 128 (or Gunze 307)
for the upper FS 36320.
- The fuselage belly and metal leading edges were masked off and sprayed metal
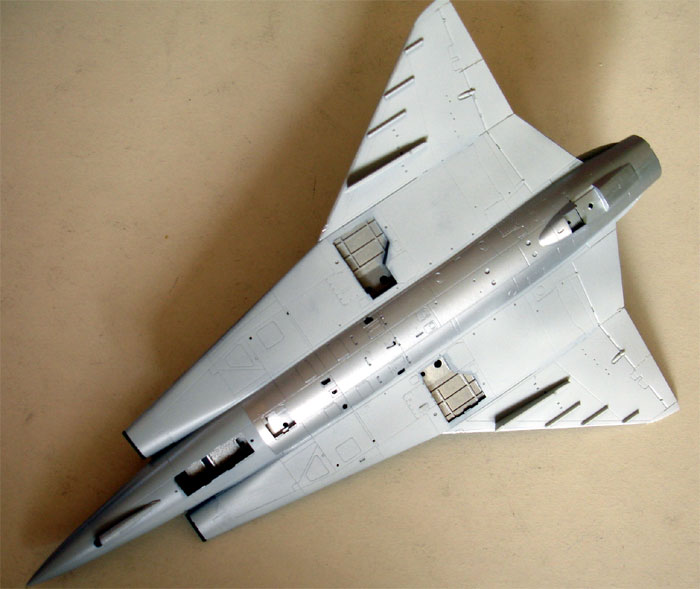
- Also spray the pylons and gear doors but do not fit yet to the model
- The intake lips were painted black.
- The small intakes on the airframe were given small black outlines and "gaps"to suggest these being open.
Next, apply the excellent Hasegawa kit decals as provided.
After the decals dried for 24 hours, I added some very limited wash in the recessed panellines. Usually I use the black wash from PROMODELLER
STEPs 5, 6, 7, 8, 10
Paint the small parts such as antenna's,
the wheels, gearlegs and tyres as needed.
Assemble as shown on the model.
STEP 11
- Carefully paint the canopy and add the nice tiny red edge decals. I added also the Aires mirror parts.
- Fit the windscreen on the model, this needs no filler at all.
- For the pitot tube I used a yellow piece of stretched sprue and added the black stripes with a marker pen (not using decal #44) .
FINISHING:
- On the undercarriage legs: add some tiny brake wires.
- Add a small pitot tube on the top fin leading edge. I used a piece of metal needle.
- a very small gunsight / HUD was cut from thin clear film and added on the top instrument coaming.
- paint the port anti-collision light red and starboard green light and fill notches with MicroScale Kristal Kleer
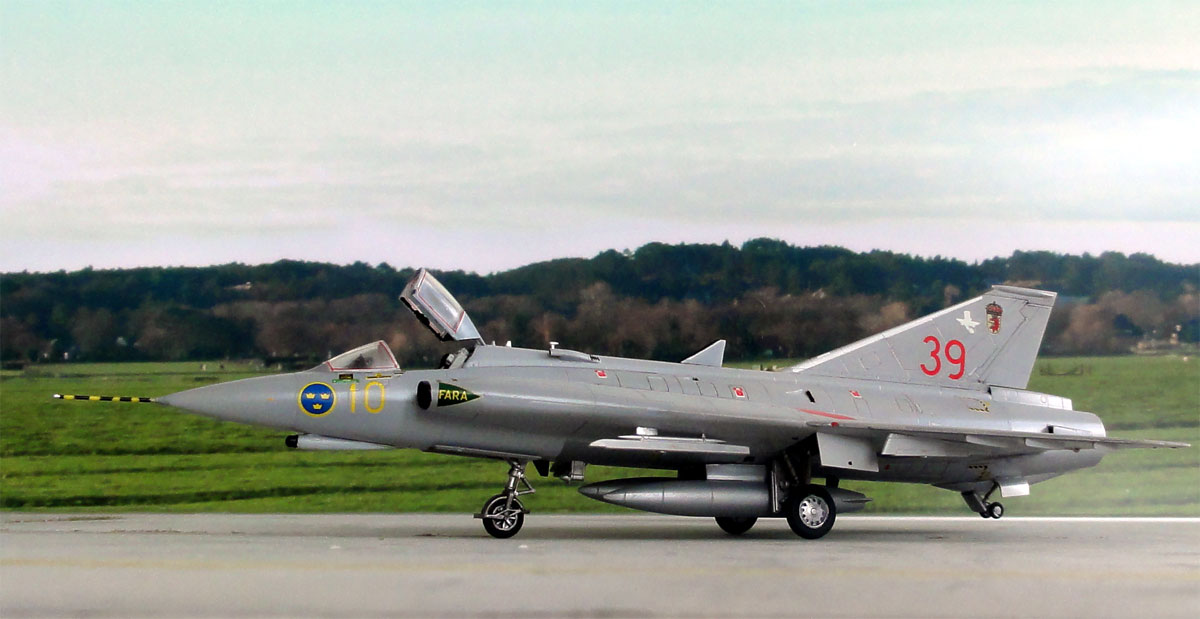
Now the model
is ready! It looks very nice but I miss those typical Swedish missiles
like the RB27....
![]()

[area: 450,000 sq.km | capital: Stockholm | population: 10,3 million | GDP per capita USD 51,000 nominal ]
The Swedish
air force ("Flygvapnet") was established mid 1926. Types were Nieuports,
Farmans and a mix of others including Swedish Thulin and purchased Fokkers
and Heinkels. Sweden managed to stay out of many wars including the Second
World War. The Cold War emerged in 1946 and while Sweden kept the neutral
position, it understood it needed to keep modern armed forces. Jet aircraft
were taken into development by the SAAB company like the J21 and the successfull
J29 Tunnan. The forces
were dispersed at various locations including shelters inside mountains
with in 1960 over 1,000 combat capable aircraft being a relatively large
force considering the number of inhabitants. Several incidents occurred
especially with intruding MiG aircraft over the Baltic Sea. During the
Cold War modern aircraft were over 700 Saab Draken aircraft in various
versions over the years: about 90 J35A from 1960, later 70 J35B, about
25 Sk35C, 120 J35D, 59 S35E and from 1969 nearly 300 J35F/J used until
the 1990s. From 1971 the Saab Viggen took over many roles of the Draken.
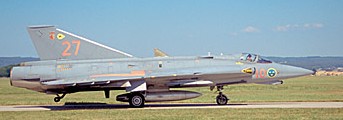
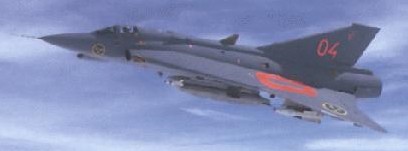
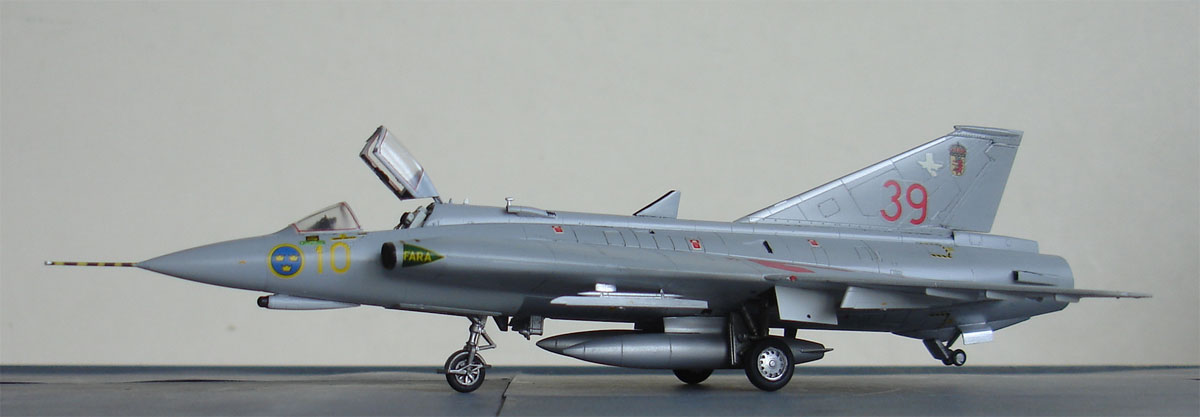
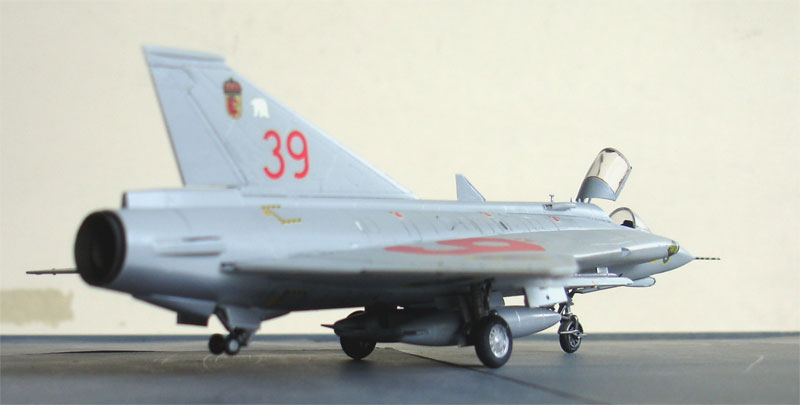
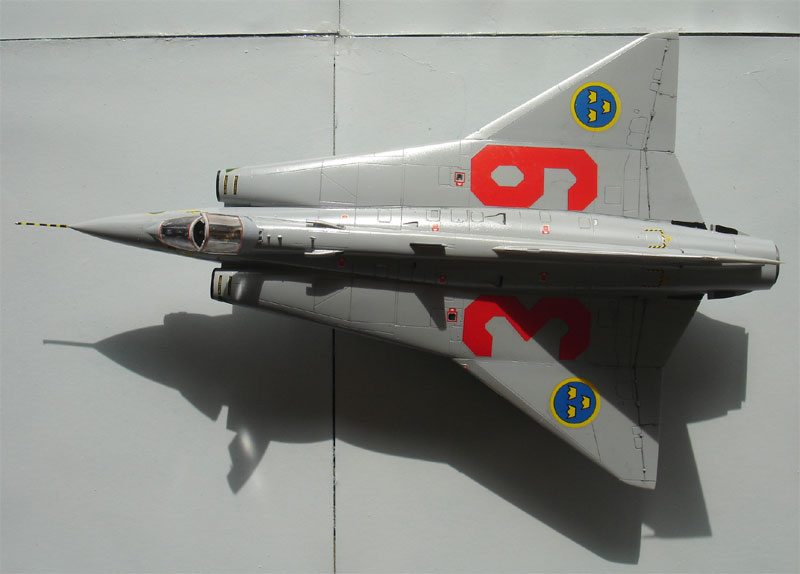
Saab J-35J
Draken
.
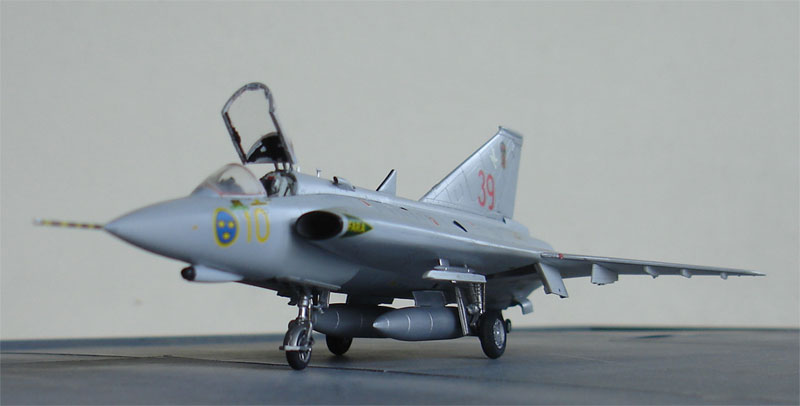
note the two fueltanks below
the belly and the Sidewinder pylons
.
[ click
on pictures for a larger view ]
. the red numbers can be clearly
seen here.
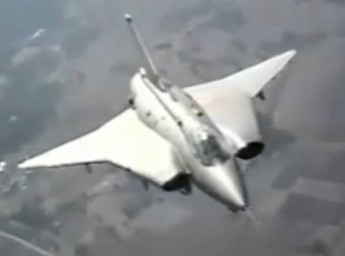
Check out the Draken successor, the
Gripen
here...
![]()

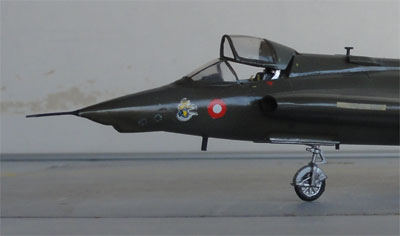
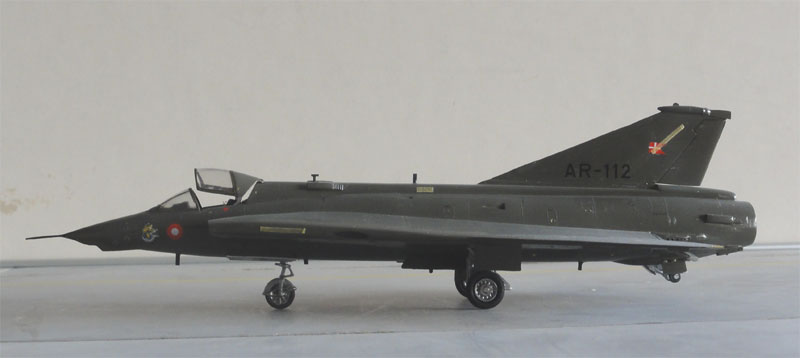
Decades ago I made the Heller Draken kit. This kit #255 also has parts to make a two seater and recon version; it seems that it has wrongly shaped fueltanks and the canopies are too high. If you want a twoseater, what is supplied is only correct for Danish aircraft; the recon version should have 2 camera windows each side for Danish version;
I made the model as a Danish S35XD, the reconnaissance version. The camera nose was used and a few extra camera holes made. Also the Danish version retained 2 canon in the wing. I added an arrestor hook and the low visibility lighting strips.
The rest of the model was made rather straight out of the box. The overall colour is British Standard BS 381C "Olive drab 298" for which Enamel Xtracolor X112 can be used. The airbrush was used. Some fading was done by added light grey paint in the olive drab base colour and airbrushing some panels in this lighter colour.
Decals and Danish roundels came from the spares box.
That completed a nice Danish Saab
S35XD Draken.
For info about the Danish Air Force, check out the F-16 page here...


Books:
1. Saab Draken, World Air Power,
Volume 17 / summer 1994
2. Saab Draken, IPMS Nederland, Modelbouw
in Plastic, 1996 / 3 [Link
to Dutch IPMS article]
3. Air Power Int. no 14/Oktober 95:
about Swedish Drakens.
4. Saab Draken, Bowidfeldt (1995),
Air Historic Research
5. Aerofax Minigraph 12, Saab J35
Draken door Dorr, Miller en Francillon
6. Flygplansritningar 2 en 4 (1984),
Bjorn Karlstrom. (drawings, Swedish text)
7. Scale Aircraft Modeling,
Vol 7/no 9/june 1985
Internet:
http://www.scramble.nl/draken.htm
http://www.ipms.nl/artikelen/specials/saab-draken-special.html
(c) Copyright "designer"/ All rights reserved. Your comments are welcomed by webmaster
Updated 10 July 2015