"B one"
[ page 3 ]

Revell Rockwell B-1B model in 1/72 scale
page 1
page 2
.... continued from page 2...
Colours
So it was time for the colour scheme. Well, most operational Bones have a dark grey colour Fed.Std FS36118, with the nose FS36081. Some B-1B aircraft had a camouflage pattern of FS36081 gray with green FS14086.
In the box are excellent decals of the usual good Revell quality with detailed stencillings with various choices and options for 3 USAF squadrons. There are even some minor variations, still a few options indicated with a letter "A".
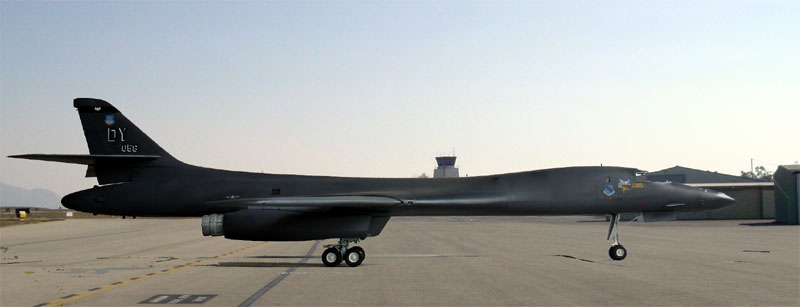
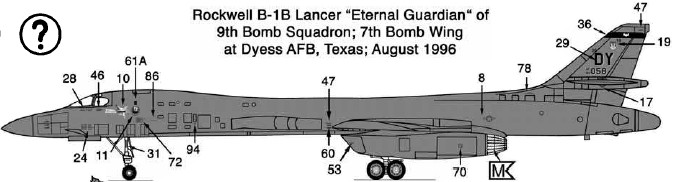
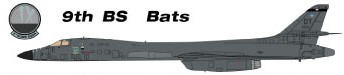
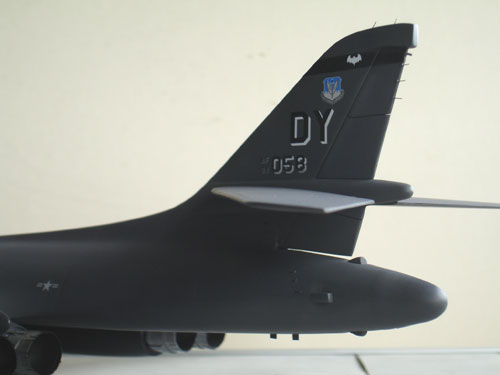
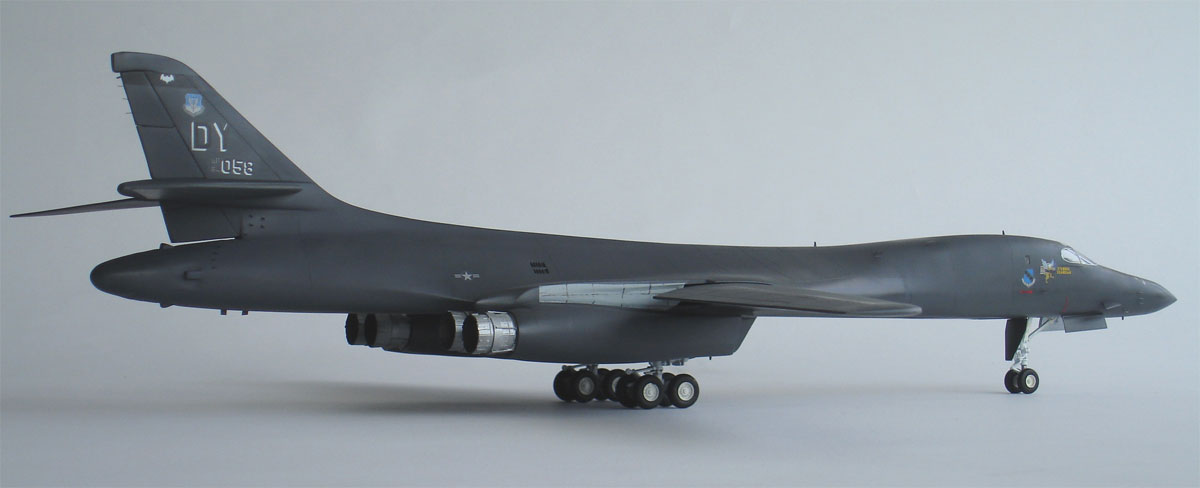
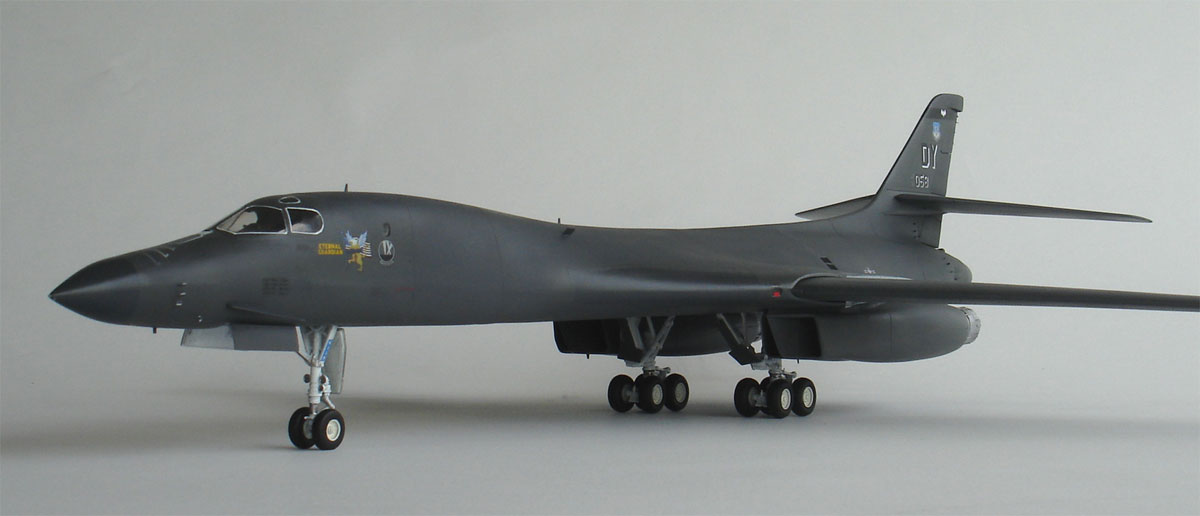
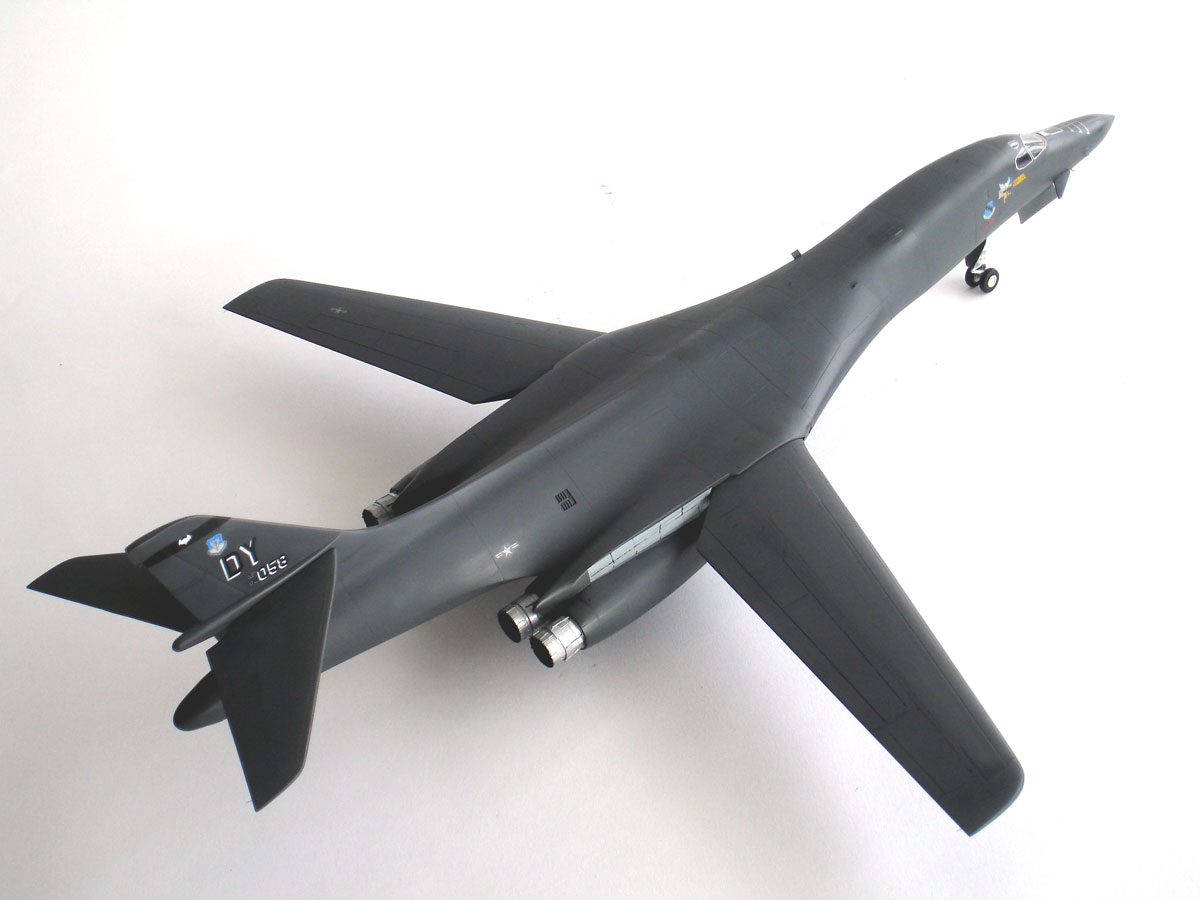
I picked a scheme from the kit for an overall gray Bone of the USAF 9th bomb squadron which flew around 1996 from Dyess AFB in Texas, USA. But there are also numerous commercial decals for sale from Superscale/ Miroscale, Cutting Edge, Two Bobs and Fox One.
Nowadays I try as much as possible to use acryllic paint. It is less harmful to your health than enamels.
I used here:
For gray FS36118: Revell Aqua acrylics "panzergrey" no 78. You can also for example use Lifecolor UA022 or Gunze Sangyo / Mr.Hobby H305.
On photos "patches" with various grey hues are seen on the Bones. This can be achieved by adding some white to the paint and black during spraying. Some lines are sharp, you can achieve this with a mask of paper or tape. Do not "black out" the panellines, this is never seen on the bones.
The Revell acryllic paints are in their blue container very thick. I thinned it in a ratio 40% paint, 40% water and 20% car window clean fluid. You can also use the Revell aqua off course.
The cockpit area was masked.
Paint was applied with the airbrush.
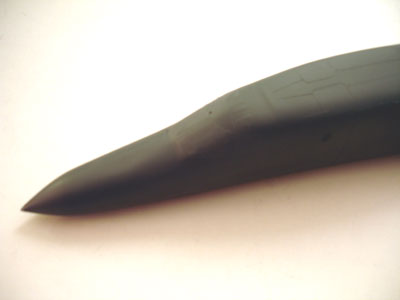
The nose has a slightly different grey FS36081, so I used Lifecolor UA030 acrylic paint that I had. After masking the nose, this was airbrushed on.
The wheelbays, insides of doors and any other internal open bays (such as the bomb bay) are plain white. I applied the white paint with a paint brush in several coats.
The engine exhaust were painted metallic/ silver.
Decals
It is now time for the decals. Remember first to cover the whole model with a shiny layer of varnish, for example with Johnson Future/ Pledge acrylic to prevent decal "silvering". When applying each decal also use ample Future at the backing side of the decal, dragging a decal through a "bath of Future".

Each decal was cut out, dipped in water and applied.
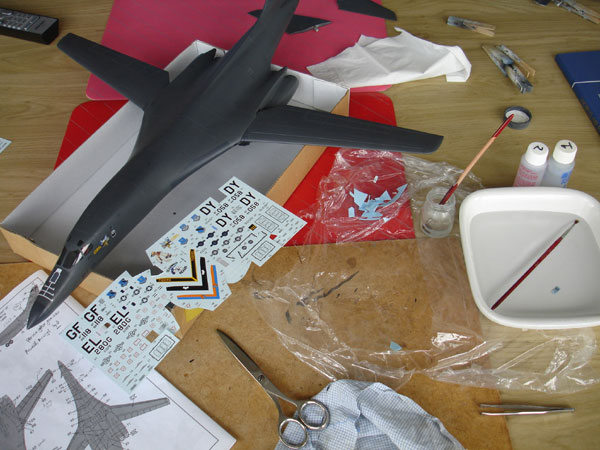
Decalling is quite some work as Revell gives you plenty of stencilling as on real Bones. The wing walk lines also need care and you get different styles of stencils. But it is rewarding.
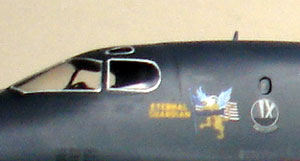
The seal behind the wings are a bit crude in the model. I simply used a decal here. I painted a piece of decal light grey, cut it out and applied it to the model. Some fine lines were pencilled on the decals to suggest the rubber seal gaps. Also note the scratch made exhaust pipes "without Turkey feathers".

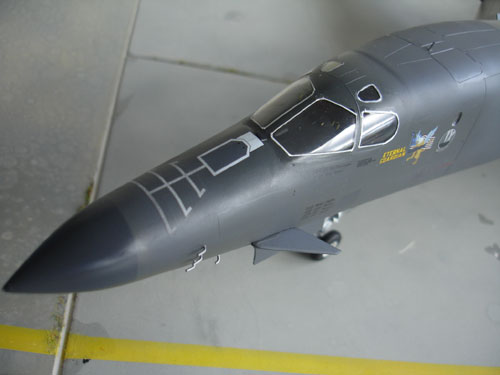
Very noticeably, a very thin white outline around the edges of the cockpit windows can be seen on Bones. I made these from very thin cut out white decals from the spare decals box. It is quite some work but very wortwhile to do.
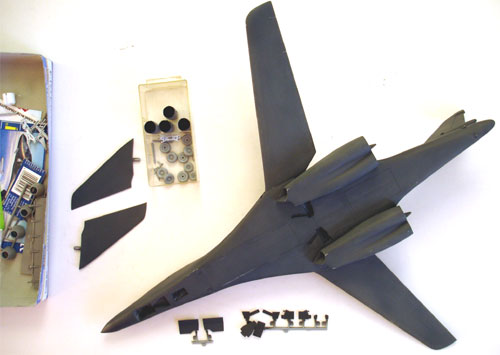
The model was decalled and ready, so now time for final assembly.
Gears and finishing up
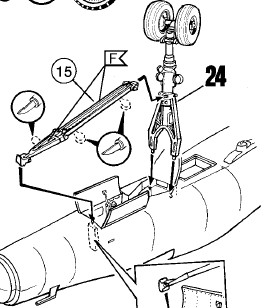
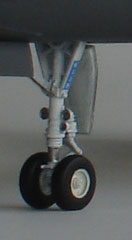
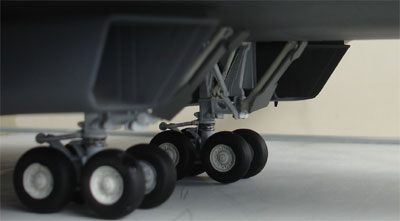
The nose gear is slightly different on operational Bones as the parts in the Revell kit. The support and retracting strut #15 should have a" tripod" at the front end. Make this from rod.
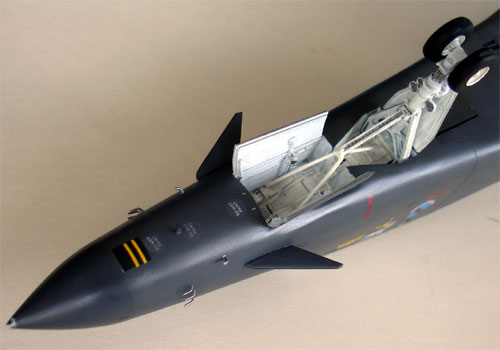
The nose lights got small silver disks cut out from metal foil as well as the oleo.
 ..
..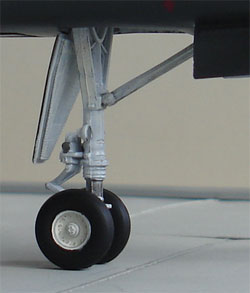
(some pictures of the finished nose gear)
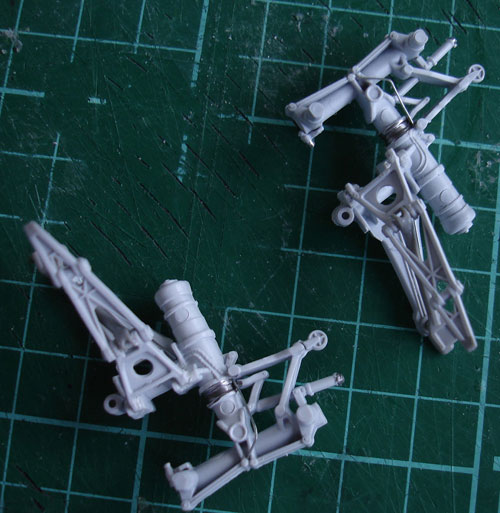
Some detalling can be done with hydraulic lines on the gear legs and inside the bays. Most of large gear doors are closed when a Bone sits on the ground.
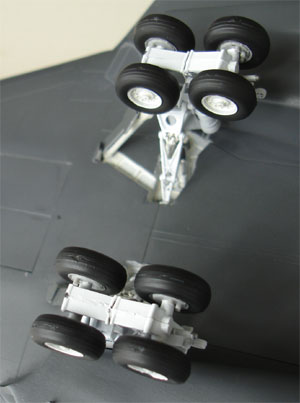
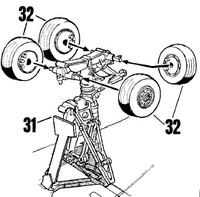
The undercarriage parts are OK and well detailed. Aligning all the wheels to touch the ground is difficult but can be done. Take care when doing this and use slow drying glue that enables you to adjust the gear. Set the model on a flat surface and adjust as needed. When the wheels do not evenly touch the ground, it will spoil how the model looks.
New fine pitot tubes were added in the nose area and some tiny blade antennes on the fuselage. Also, some small static dischargers wires were added on the trailing edges of fin and wing tips.
The stabilizers were fitted.
Finally… a protective matt coat was added to the model through a mix of Johnson Future/ Pledge mixed with 15% Tamiya Flat Base X21 acrylic.
That's it.
With some conversion work, the Revell kit can be made into a good model. It remains the best option in this scale (the old Airfix kit is much more incorrect in outline and shape and better avoided) .

A good view with the small pitot tubes...
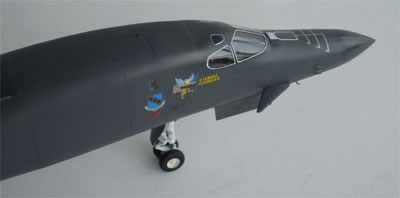
... nose area, note white window seals
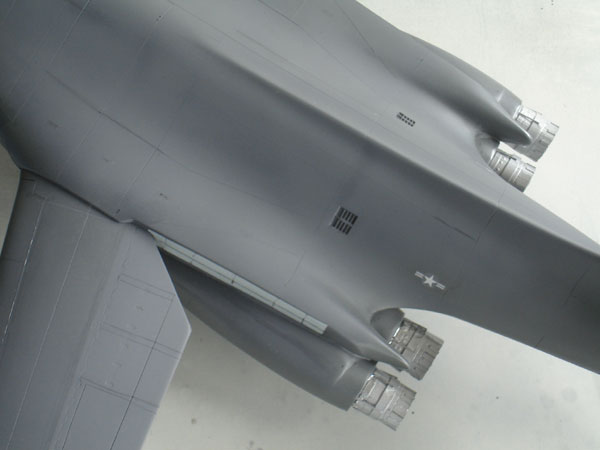
Some subtle patch paint work can be seen here.
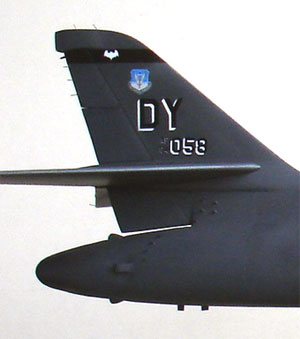
Bone of the USAF 9th bomb squadron which flew around 1996 from Dyess AFB in Texas, USA
Side views:

Upper view:
The 1/72 Bone in the collection is a lot smaller than his Russian counterpart, the Tupolev Tu-160 Black Jack. But still… where do I put them?
NOTE: a Dutch version of this modelling report was published in the Dutch IPMS magazine MIP "Modelbouw in Plastic" 1/2009
Back to 1/72 models...

(c) Copyright Meindert "designer"/ All rights reserved. Your comments are welcomed by webmaster
Created this page November 6, 2008