Avenger MLD
[ page 1 ]
Trumpeter TBM-3S2 Avenger model kit in 1/32 scale (conversion) by Meindert de Vreeze.
Dutch Naval Air Arm (Marine Luchtvaart Dienst MLD)
Page 1
Page 2
Page 3
Page 4
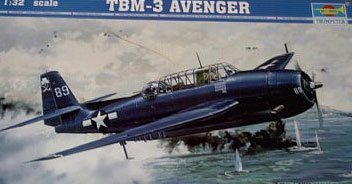
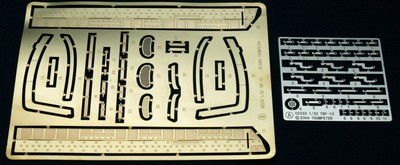
The Trumpeter 1/32 kit #02234 of the Grumman Avenger TBM-3 is a very good kit and comes with an impressive number of parts in no less than 16 sprues including some photo etched parts.

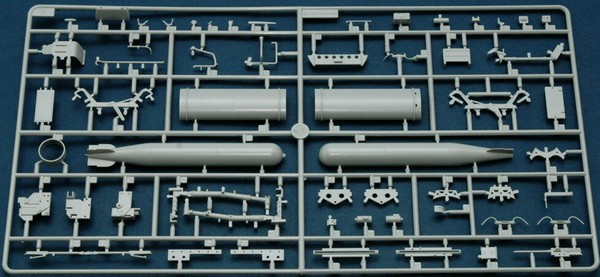
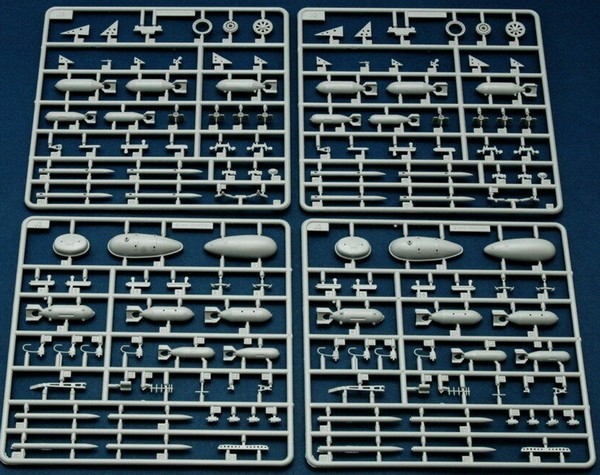
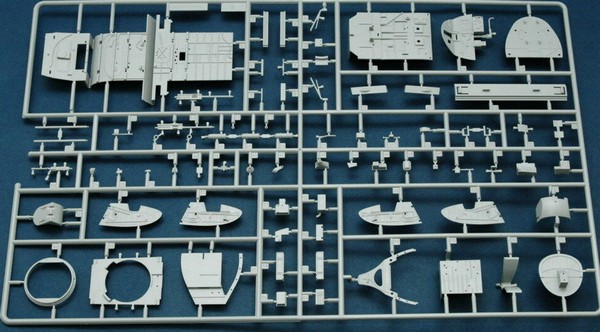
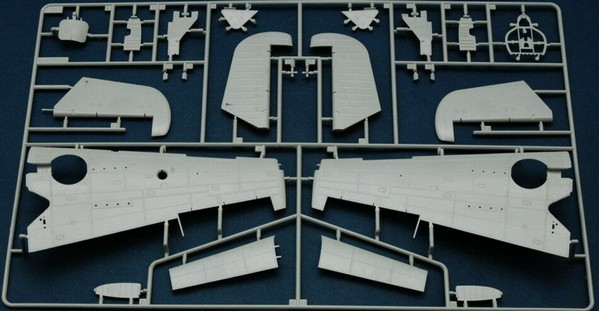
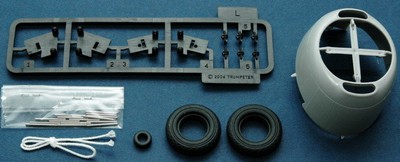
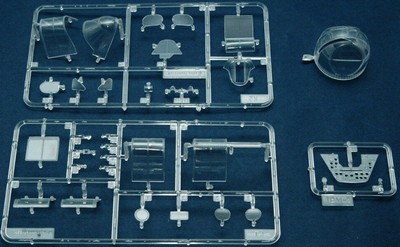
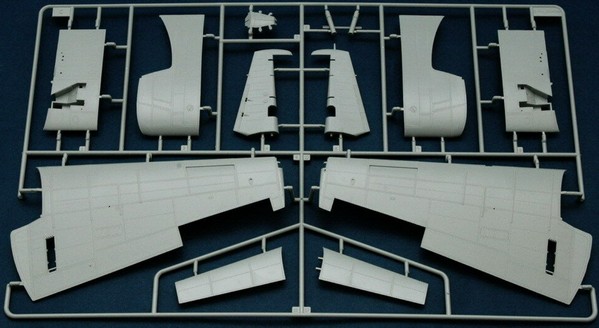
The lower fuselage bay can be displayed open and stores are provided like a fuel tank, torpedo or 500 lb bombs. The wings can be folded and the visible details are all there. Moving surfaces are also provided including trailing edge flaps fine with metal hinges and shafts. Rubber tyres and a tiny photo negative instrument panel is also in the kit. The instructions are very large with 28 pages and 61 construction steps and comes with a colour profile for the scheme.
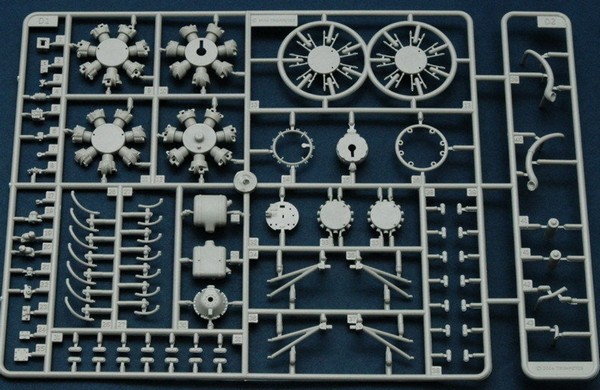
During assembly, you create various sub-assemblies such as an impressive engine, interiors and the gun turret. It all adds up to a very nice representation of the Avenger.
Thankfully, most parts
have a pretty
good fit and this should not stop any modeller on making this nice
Avenger
in this large scale!
NOTE: The colour
numbers I could not find on the instructions; these are
GUNZE SANGYO mr.Hobby and
should be I think:
H1 blackLet’s look first briefly at the type’s history.
H2 white
H3 red
H8 aluminium
H9 gold
H13 red ?
H27 Humbrol 63 (brown/yellow)
H33 black ?
H43 green about Humbrol 116
H61 grey Humbrol 146
H78 mat oliver drab
H304 olive drab?
H340 green about Humbrol 116
![]()
The
Grumman’s
TBF Avenger was one of the most successful naval aircraft of the second
world war and was also deployed by various air arms after the war.
First
flown in 1941, various versions were produced. All the versions have
their
own typical characteristics and external differences. Almost 10,000
planes
were eventually built.
![]()
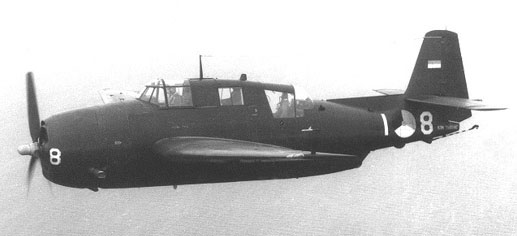
I
was interested
in a model of he Dutch Fleet Air Arm (MLD: Marine Luchtvaart Dienst) as
they also used the Avenger after the war in various roles.
They had Warner AEW aircraft with a large radar dome (see here for a Warner 1/32 modelling Report).
Another
variant
was the TBM-3S2. Of the TBM-3S2
variant, 34 planes were delivered to the MLD under Military assistance
program from January 1954 to May 1955 and these were ex-planes from the
US Navy. Serialled 1-1 to 1-34 (later 020 to 042), they were used as
submarine
'killer'. Some were deployed from the Dutch navy aircraft carrier
“Karel
Doorman”.
Also
25 TBM-3W2
planes delivered in the 1953 also coming from the US Navy. Serialled
16-101
to 16-124 (later 045 to 064), these were used as submarine 'hunter'.
Another
20
TBM-3E and -3E2 planes were delivered January to March 1958, coming
from
the Royal Navy. Serialled 21-20 to 21-39 (eleven became 065 to 075 in
1959),
these planes were used for patrol.
Some
Avengers
were later converted to target tugs and the last Avenger was used in
the
MLD mid 1961.
![]()
I
wanted to
build a TBM-3S2
"Killer" of the MLD and this modelling report will show how to model a
TBM-3S2 from the MLD. It operated in pairs, with the Hunter (with a
radar)
and Killer.
What
conversion
work is necessary and what is the most logical sequence to
follow?
The TBM3-3S2 has a couple of
specific
characteristics:
[A] internally, there
is a provision
for an observer and a radar equipment operator as no gunner is
present;
[B] a large curved observer
window
is fitted and many windows faired over.
[C] it has no gun turret, and no
gun armament is present in the wings or lower fuselage belly;
[D] at the fuselage belly, no
gun
is present and a closed fairing;
[E] as on all TBM-3 types, an
oil
cooler opening is present in the engine cowl and the cooling flaps have
a straight edge;
[F] the arrestor hook is
external;
this modification was done to prevent corrosion problems;
[G] there are several changes in
antennas including the wire antennas;
[H] a search light pod was
usually
fitted under the wing;
[I] usual armament were 4 depth
bombs
and below the wings sonar boys could be carried. The sonar required a
deployable
wire antenna;
[J] some special small antenna's
and fairings are present.
![]()
Starting
the
Avenger kit build.
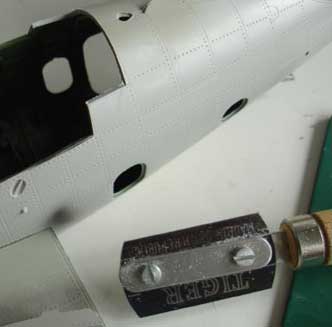
The modifications' major work on this -3S2 conversion is the large observer bubble window. This first required the cut-out of a part of the plastic walls at both fuselage halves. This would need to be followed by modeling the observer clear bubble window of exactly the right dimensions. All the other conversion work is relatively easy.
As I had experience with moulding clear parts, it looks feasible.
I began by marking the
cut- lines
with a marker in the fuselage, making a cut slightly lower than the
edge
of the observer window. A TIGER razor saw was used here.
Next step was continueing with the model as usual with all models.
First was to do some “pre-painting” on the various parts. Some smaller sub-assemblies were made like the undercarriage legs. These were given the appropriate colours with an airbrush or paint brush and some other parts were pre-sprayed while still in their sprues.
Following the Trumpeter
instructions
in fact result in quite some sub-assemblies.
Let
us see
how it' the model construction is done....
![]()
[
Steps 1 to
4 ]
The suggested build sequence
starts
with the forward fuselage.
The inner details aft of the
firewall
bulkhead can hardly be seen and it was decided to skip step 1 parts.
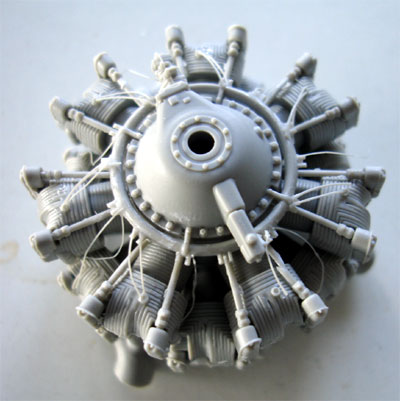
The Wright Cyclone R-2600 engine
is accurately portrayed and assembled. Some details were added like
electrical
lines from stretched sprue. I had the impression that there are too
many
parts D27 and how the piping runs is a bit tricky. You won't see a lot
of the engine in the dark cwling.
The engine was later on
sprayed black
with dark metallic cylinder heads.
In step 4, the engine was NOT
yet
fitted on the bulkhead but set aside.
Next step was to start working on the interior.
[
Steps 5 -
9 ]
This deals with the instrument
panel
and cockpit interiors and was simply assembled. The model is well
detailed.
No particular info was found on
how
the TBM-3S2 interior should exactly look like, so it may not be
completely
accurate for this model. But who will know?
[
Step 10 ]
The engine was as noted NOT yet
fitted
to the bulkhead.
[
Steps 11 -
13 ]
These interior details were
assembled.
Very nice indeed.
On the fuselage
sidewalls, some plastic
strip was added to suggest stringers. Please note that as most of the
greenhouse
is faired over/closed, there no detailing is needed. To the rear of the
boxes (such as on part #A8 ), some wiring was suggested with
sprue.
[
Steps 14
- 16 ]
The bomb bay was also assembled
as
in the kit and sprayed interior green.
(HUMBROL
Authentic
HD5 enamel paint, or green Xtracolor X117 or Humbrol 151 enamel can be
used. )
[
Steps 17
- 22 ]
It was decided not to fit the
fueltank,
bombs nor torpedo inside the bay (yet).
[
Steps 23 -
24 ]
This deals with the general
floor
assembly and seat. The seat will be used for the "observer" on this
conversion.
The seats were painted
interior green
with dark brown cushions and with seat belts made from tape and the
kit's
etched parts.
(NOTE: there are 3 crew members
in
the TBM-3S2).
[
Steps
25 - 27 ]
The TBM-3S2 did not
have
the gun turret [C], so these assemblies can be skipped and parts
referred
to the spares box. The turret is a model in itself by the way!
[
Step 28 ]
The tail leg was assembled, but
without
the wheel tire and part #G41 not yet fitted. The gun is not
needed on the TBM-3S2 .
[
Step 29 ]
The arrestor hook on the TBM-3S2
is externally fitted, so here do not
fit
it. [modification F]
[
Step 30 ]
The interior parts were fitted.
You
get a good wing spar to add strength to the overall assembly.
[
Steps 31 +
32 ]
Assemble the bay doors; it was
decided
to set the doors in the open position. The doors internal
surfaces
were sprayed interior green.
[
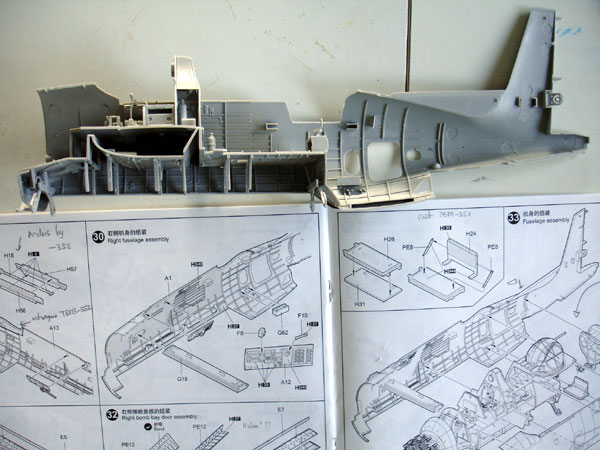
Step 33 ]
This is the major fuselage
assembly.
Note the modification needed for the TBM-3S2 as noted
before.
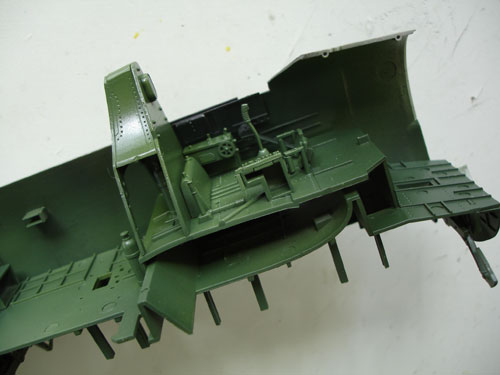
The bench (parts #H24,
26, 31) was
not used, instead some extra details added in the interior.
Add a
scope and some "boxes" to cope for the extra equipment in the TBM-3S2
for
the operator and the observer. An extra operator seat was made from
some
plastic.
Paint the extra parts
added.
The rudder was assembled as
shown.
Remove the "antenna" on its top.
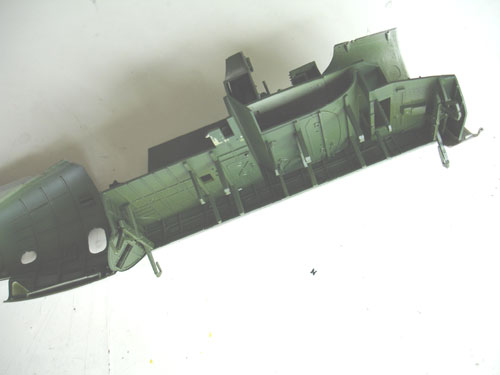
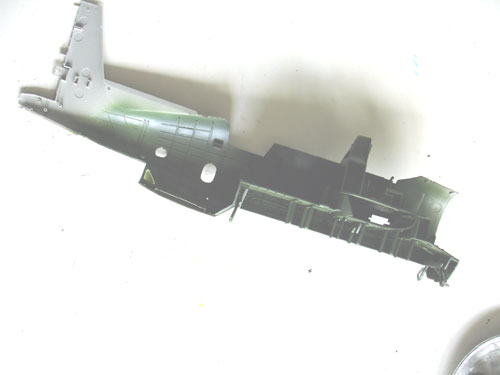
Before joining the fuselage halves, the various boxes were painted black. As noted, the turret is not fitted. It was decided to keep the rear door (part #B1) half open. This will enable a look inside, seeing the interior details.
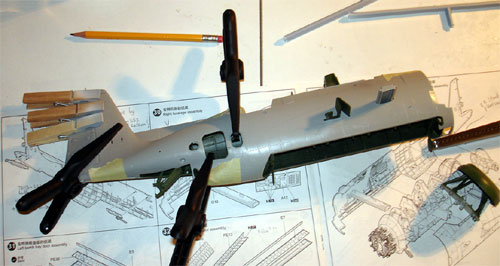
After paint drying for 24 hours, squeeze all parts together and assemble the fuselage. Use tape and allow enough drying time. A little bit of filler and sanding may be needed at the centre edges. The spar can also be seen here, very good to fit the wing later on.
For the TBM-3S2:
-
the transparant parts #K20
&
K21 (in step 34 & 35) should be overpainted/ faired over. Same
applies
for the belly window part #K15 in step 34.
a small fairing was added at the rear right fuselage side aft of the entry door.
at the left side, a small "round" fairing was added. Parts found in the spares biox were used.
Leave the bomb bay doors for later assembly. Part #H9 fit is not clear and was not fitted.
[Step
36]
Cowling. Note the supplied metal
grills of the kit are a nice touch. I added some more plastic to
suggest
an intake. Also, make some cuts in the cowling "flaps" at the rear edge
with a razor saw.
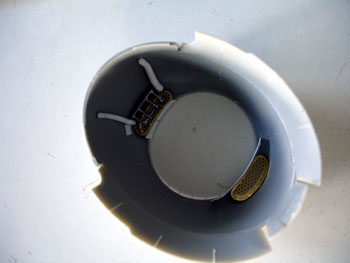
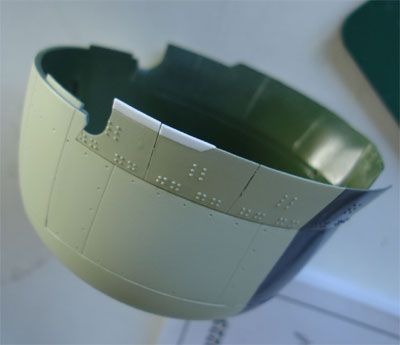
The cowling for this
variant has a
straight aft edge; add some thin card to the kit part.
(note: picture of a painted
cowling,
I found out later on...).
To next
[ Page 2 ] ...
Check out also:
References
-
85
jaar Marineluchtvaartdienst
in beeld, P. Korbee, 2002
Very nice book in Dutch ;
70 jaar Marineluchtvaartdienst, Nico Geldhof, Uitg Eisma, 1987; Very nice book in Dutch;
IPMS The Netherlands, Avenger info pages: NedMil website
Back to 1/32 scale Models.......

(c) Copyright Meindert "designer"/ All rights reserved. Your comments are welcomed by webmaster