Avenger MLD
[ page 3 ]
Avenger TBM-3W Warner AEW model kit in 1/32 scale, (Marine Luchtvaart Dienst MLD)
Page 1
Page 2
...Continueing from page 2...
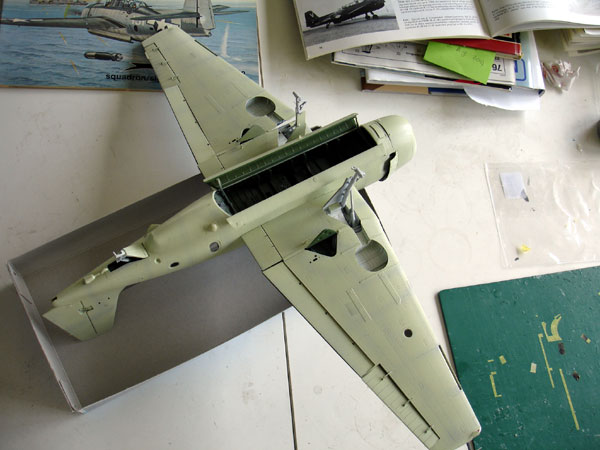
Painting
The MLD TBM-3S2 planes had either
a dark sea blue (first scheme) or a dark sea grey upper surfaces and sky
lower surfaces (later scheme). The BSC Sky and Extra Dark Sea Grey scheme
was picted.
There were also two types of schemes
regarding the numbering and insignia roundels, these being either small
or large. The scheme with the small roundels in six positions was opted
for and with the small numbers and a small KON.MARINE text at the fuselage
tail end.
The planes also had a medium blue propeller hub with light grey blades and yellow bladetips.
The colours were applied with the
Badger
airbrush.
For the Sky
HUMBROL
90 enamel was airbrushed
For the Extra
Dark Sea Grey XTRACOLOR X5
First apply the lighter Sky, mask with Tamiya tape and then the darker Sea grey.
After putting on these colours, several "stripes" of mat black were again free hand applied at some areas, especially at the panel lines. Again, the Sly and grey colours were applied and you get a fading effect.
Also, some panels were separately
sprayed by added in some white in the colour and spraying it with some
dedicated masking at the panel.
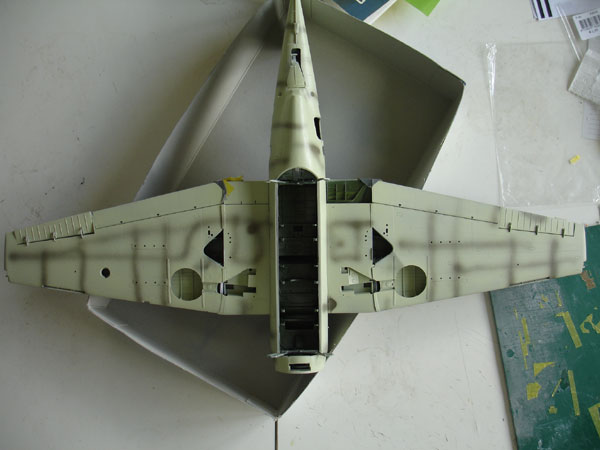
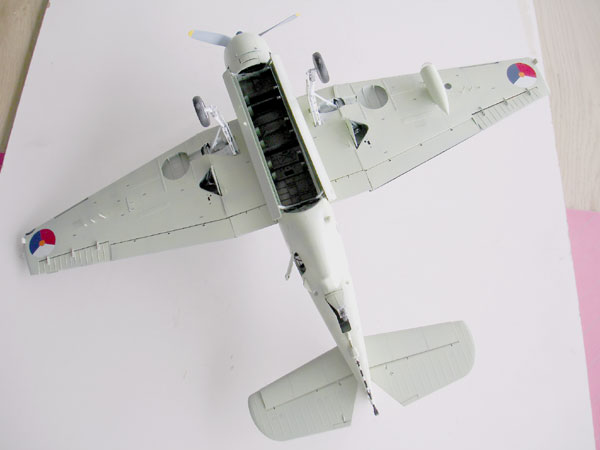
The wheelbays and wing fold ribs
were sprayed white, but the bomb bay and some internal bays were kept interior
green.
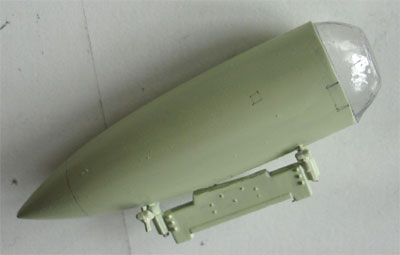
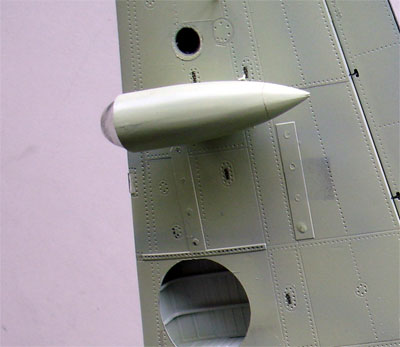
![]()
This variant
is often seen with a search light pod. This was made from a spare fuel
tank from the spares box. The transparant cover was "heat plugged" with
clear plastic. I used an old ballpoint shape for the shaped curve. The
pylon was made from a spare kit part.
Note the closed gaps (using white
glue) for the kit armament not fitted
The decals came from a variety of
sources, such as Dutch Decal, the spares box
and the Dutch IPMS. The roundels are quite
big. Note that particular Dutch Avengers had different sized and schemes
depending on the time period. You can see Avengers with large KON.MARINE
texts, but also small texts as on the model below the stabilizer.
![]()
The Dutch roundels on this scheme
should be 1/32 about 30 mm at the upper and lower wing tips (4 positions)
and 15 mm at the two fuselage positions.

The MLD squadron VSQ 2 has the squadron marking on the left side in front of the wind screen (not sure if it is fitted on both fuselage sides...). This emblem was scanned from a book, and reduced in size to 1/32 scale with the computer graphics program. It was printed on a clear and a white Bare Metal foil decals sheet. Varnished with MicroScale Decal coat, cutt in two and applied.
![]() VSQ
2
VSQ
2
Before application of the decals, put on a gloss varnish (Johnson Future) to avoid "silvering".

After the decals were applied, the overall model was finished. The gear, stabilizers and other details already prepared were added.
![]()
Final touches
are:
- the antenna wires (made from thin
fishing line); note that they run differently on the TBM-32S from the leading
edge of the vertical tail to the antenna mast; check always pictures on
the Avenger you are building; (use superglue to fix the wires).
- the lower wire antenna's on the
bay doors;
- the blade antenna's on the wing
tip, made from thin card. I was not sure as there exact location, so some
estimation was needed looking at vague pictures...;
- adding the search light pod;
- add a venturi tube in front of
the wind screen made from some plastic rod;
- add an extra vertical tri-angular
antenna on top of the canopy framing;
The wing ends were kept movable on this model to save cabinet space while in house on dispaly. I used two metal wires to tight the wing halves to the stabilizer tips when folded. The wing can thus also be shown on horizontal position !
And finally....
Aft of the engine exhaust pipes,
some black mat paint to suggest smoke was dry-brushed onto the model.
There are also black walkways at
the fuselage-wing joint area and also at the upper bay doors you have a
triangled "black" walkway. I used decals for the walkways and made them
"mat" with dull varnish.
Add some "no steps" and white markings
here on the walkways.
When dry, clean up all residue from the decal solvents and remove any dust. Spray the overall model with a coat of Johnson Future mixed with about 15% Tamiya matting agent to get a very nice overall semi-gloss sheen on the model. It will also protect the model decals.
Go to next
[ Page 4.... ]
Back to 1/32 scale Models.......

(c) Copyright Meindert "designer"/ All rights reserved. Your comments are welcomed by webmaster