(Sea Venom conversion)
[ page 3 ]
Aquilon model in 1/32 scale
... continued from page 2...
page 2
page 3
page 4
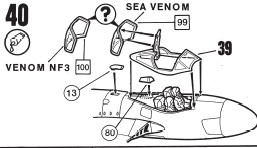
Step 39
In the kits, not only the canopy
and glass section, but also the cockpit ridge are provided as transparent
parts strangely enough. The ridge/ lower section part #98 does not fit
very well. It was decided to fit it now.
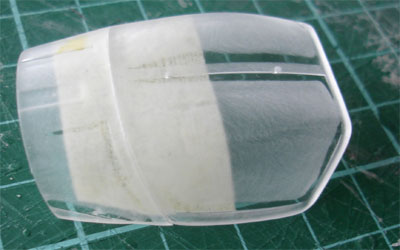
But first: the inner windshield surfaces of part #98 were masked off with Tamiya tape, as well as the outer surfaces to protect the glass. This would be required as the cockpit still needs painting as well. The tape can be removed later on.
For later Aquilon
variants,
some
modification was necessary to the canopy. These Aquilons had rear sliding
canopies, not upward tilting as on normal (Sea) Venoms.
The Aquilon
203 sliding canopy is also longer and has a covered rear
fairing.
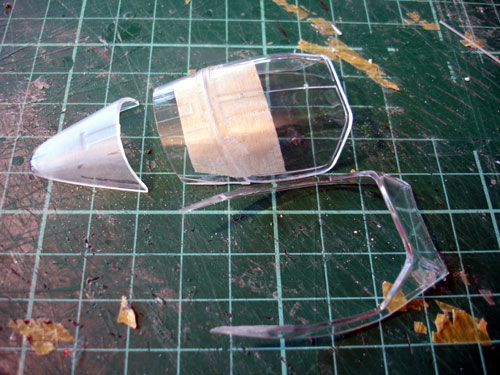
The aft section of the lower ridge
#98 was sawed off; this was glued to the forward canopy part #99. Next,
the whole set was sanded flat as it would be used as a master to re-shape
a new scratch made Aquilon canopy.
For making the canopy, I used my
vacuum box. It is an air sealed box with a grid on top and an opening for
a vacuum cleaner hose on the side. You fix the master with double sided
tape on the open grid, also making the opening on top with Scotch tape
smaller and use this to vacuum shape a heated part.
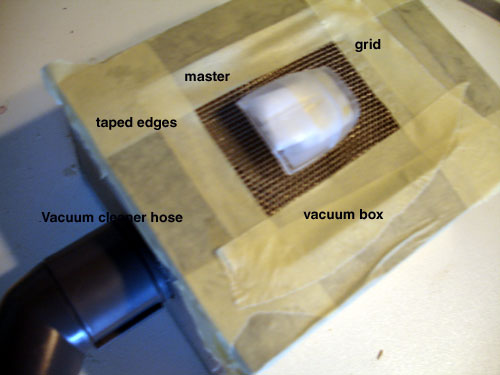
A sheet of acetate plastic was heated
in this case for the canopy to 170 degrees Celsius for 10 minutes. The
vacuum cleaner was turned on and the box set with the master ready to put
on the heated acetate sheet; speed is needed here. The air pulls the sheet
over the master mould and here you get your canopy! I needed a couple of
tries to get a clear canopy.
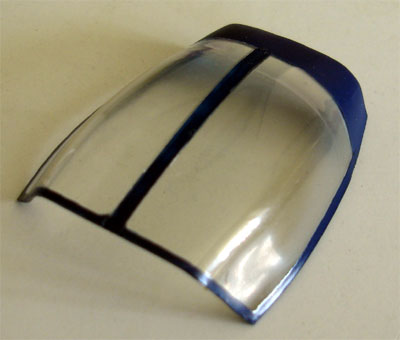
Aquilon canopy
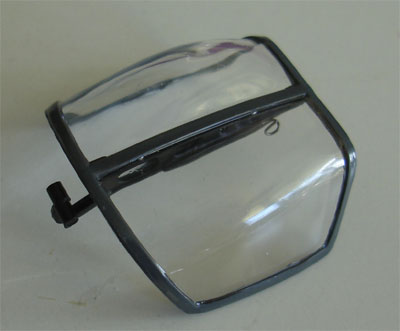
... and
Sea Venom canopy for comparison.
The canopy was trimmed to correct
size and finished as a normal canopy, painting the edges, adding internal
details from plastic strip etc.
Step 40
The remaining section of the forward
ridge was glued on the fuselage. Filler was applied between the ridge and
the fuselage as the fit is not perfect.
Next, careful sanding was done for both models. With plastic strip, sprue and card details were added.
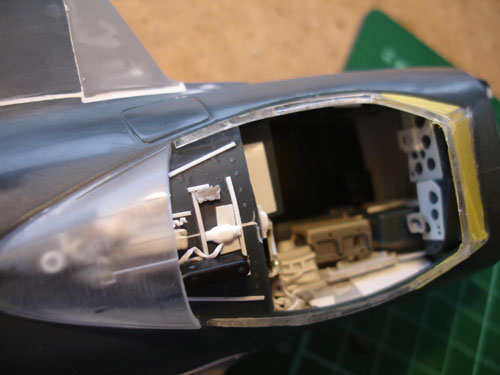
Masking took
considerable time in the cockpit area. I put on Tamiya masking tape in
the insides and outsides of the windshields. This is really required to
protect your clear windshields.
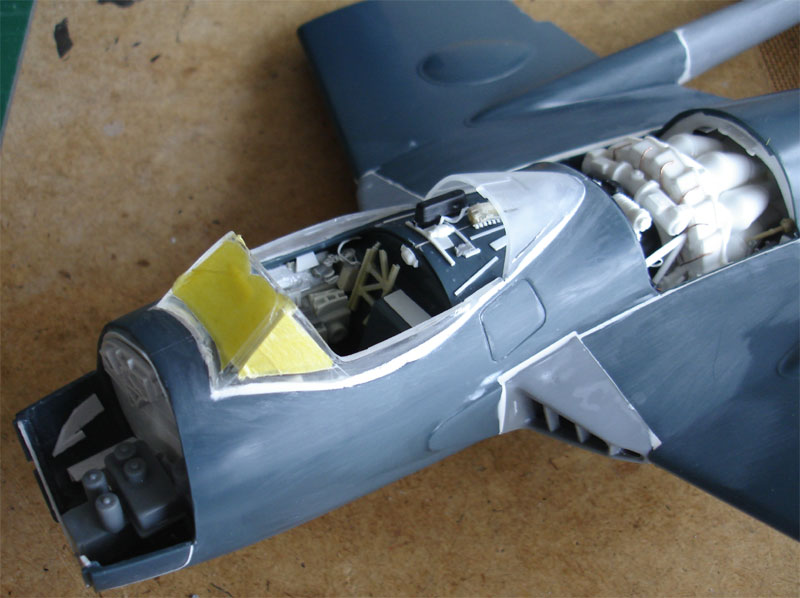
The small intake scope #13 was not
yet fitted.

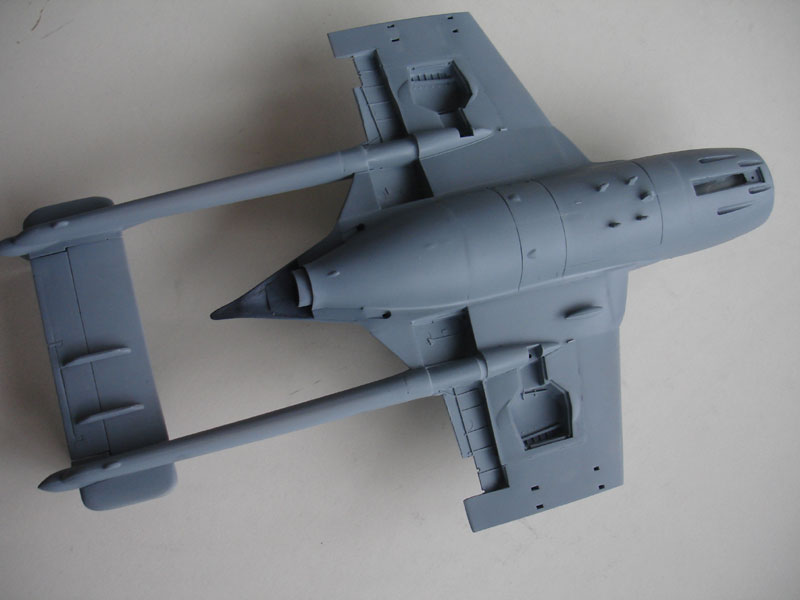
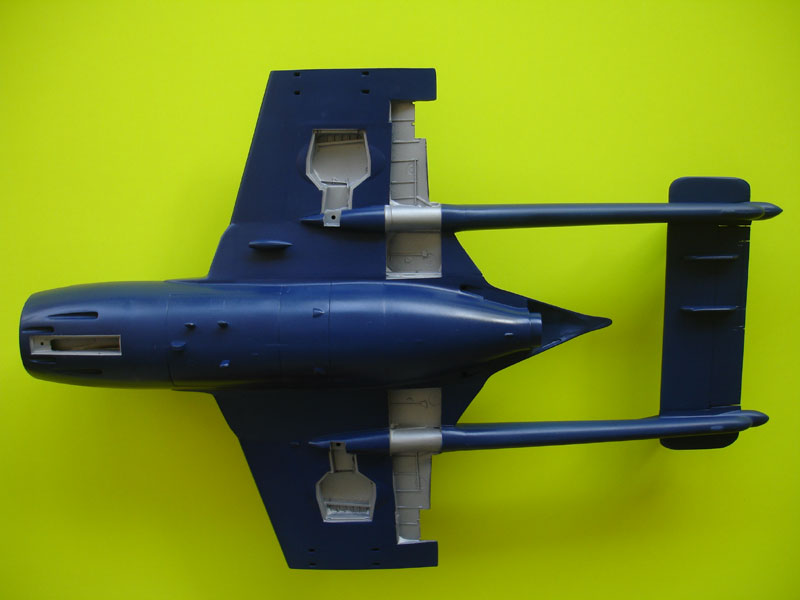
Steps 28-33
The wing tip tanks were assembled,
needing minor sanding and filling. The tanks are not yet fitted as they
will be fitted after painting the model.
The too thick wing fences were sanded thinner on a flat surface and put on the wings. For the Aquilon, the outboard wing sections were kept separate as these would be set in a folded up position.
This all completed the main assemblies.
![]()
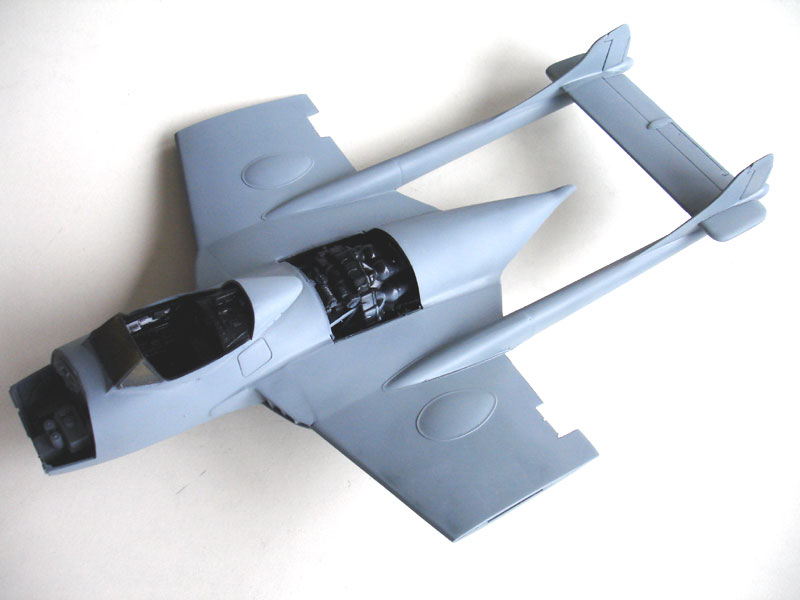
The model was given a light
grey base coat using the airbrush to check for any flaws. These were corrected
with filler and sanding everything smooth and "invisible".
The cockpit areas were sprayed black.
Aquilon model views, with light grey primer
The Aquilon was now ready for a final colour paint coat applied with the Badger 150 airbrush. Some masking was also necessary in due course.
For the French
Aquilon
it was very difficult to establish the overall colour. Some sources suggested
French midnight blue... what ever that colour is? Information
was obtained from IPMS France, La VdM No.11 publication. Also, sources
indicated that the standard colour for French navy aircraft in that period
was "bleu marine brilliant" (gloss sea blue). The US equivalent was FS25042.
But considerable variations in colours were seen, some planes coming from
the US, others from Britain and the French planes. The Aquilon was no exception
as can be seen on the rare colour pictures, its colour was quite different.
![]() Merci Mr. A. Dulieu / IPMS France for the information!
Merci Mr. A. Dulieu / IPMS France for the information!
I looked at several Aquilon colour
pictures and choose to use enamel Revell SM350 blue.
Applying the
blue coat particularly onto the Aquilon took a couple of coats.

The gear bays
got a coat of aluminium / metal.
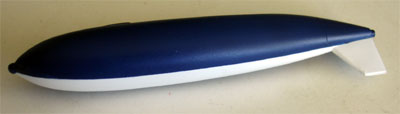
The Aquilon
tanks needed a tricky white line, this was accomplished with Tamiya masking
tape and airbrushing the tanks.

.
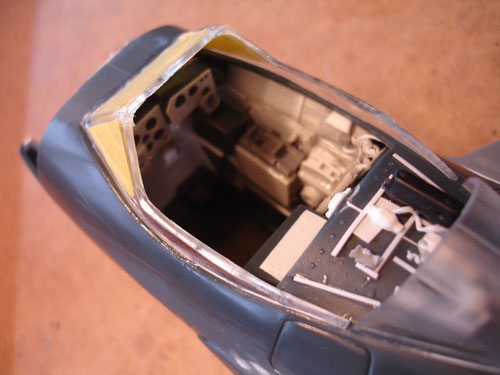
Here a detail can be seen on the
Aquilon flap area and main gear bay area. These were detailed with strip
and card.
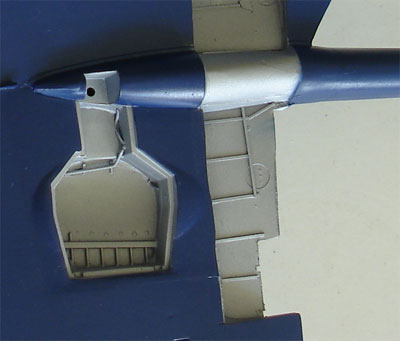
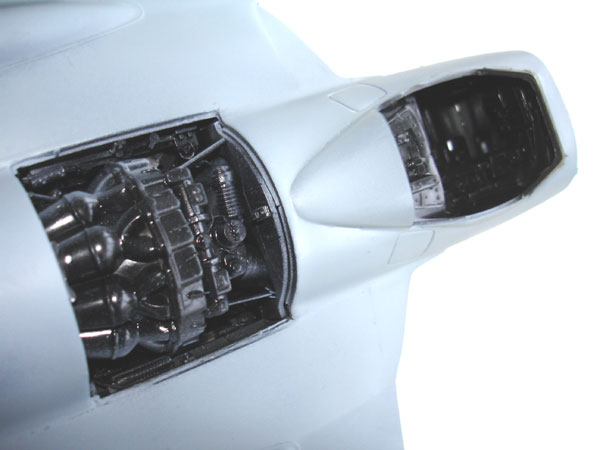
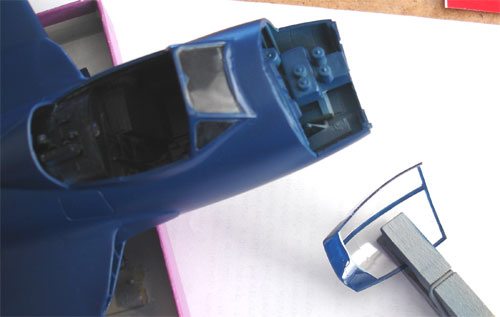
View on the Aquilon nose area, details
in the cockpit and avionics bay still to be added.
The Aquilon jets were not much
weathered as they were well maintained for carrier operations.
to next [
Page 4 ......]
Back to 1/32 models...

(c) Copyright Meindert "designer"/ All rights reserved. Your comments are welcomed by webmaster
Created this page
February 16, 2008;