[ resin parts page ]
Conversion parts for the Lynx model in 1/32 scale of Revell (Mk.88A , kit ref no 04652)
SORRY ... SOLD OUT !!!
The home made conversion set has 4 resin parts. Fitting these will require some minor work to the Revell 1/32 Lynx kit. Some brief instructions will be included with each set, but are in fact also seen below here....
Included are.....
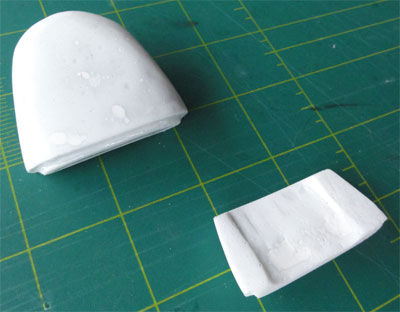
2 parts for the conventional SH-14
/ HAS 2 / HAS 3 nose:
and 2 parts for the old style stubwings (without ECM):
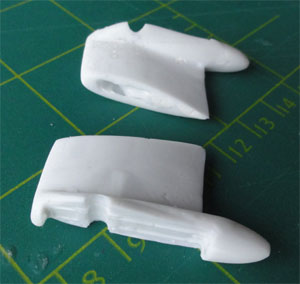
(Revell kit gear
parts can be inserted).
NOTE: no external surface detail such as panellines are moulded as these differ per Lynx variant. Re-scribing and adding these yourself as desired is more flexible. Also, the smaller air holes need some filling, but nothing unusual for the modeller. Use your favorite filler brand here.
![]()
COSTS AND
POSTAGE
The set with 4 resin parts costs:
20,- EURO INCLUDING POSTAGE FOR EUROPEAN COUNTRIES
23,- EURO INCLUDING POSTAGE FOR REST OF THE WORLD
PAYMENT is only possible through PayPal,
sorry for that. It is not difficult though.
![]()
![]()
Interested
in ordering?
1/ First send me an email with your
name and complete address to:

2/ I will check availability of the
set and mail back PayPal payment instructions
3/ Please pay only after getting my mail instructions !
4/ When payment has been received, set will be shipped within few days (without insurance to keep costs down) to your desired address.
That's it!
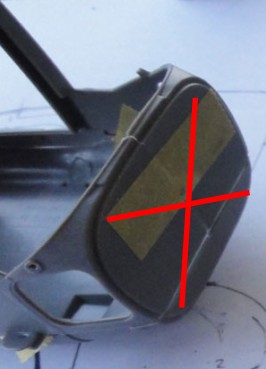
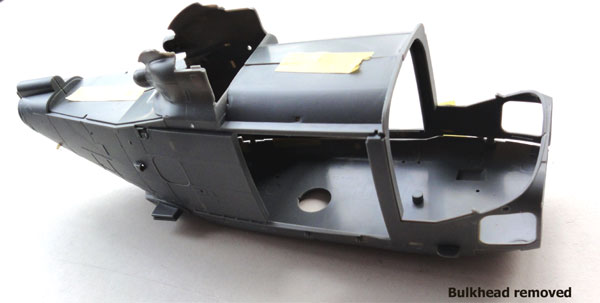
FITTING THE NOSE:
First, remove the kit nose-bulkhead
areas with a razorsaw.
Join the lower and upper resin nose parts. Fill the gaps, and rescribe any panellines, raised rivet detail etcetera as desired depending on the Lynx version to be modelled. (do not set any additional antennas at this early stage).
The new nose should be fitted to the kit later as desired after completing any other work like the kit interior etc.
Fill any gaps , between the new nose and the kit fuselage with filler and sand smooth after drying.
FITTING THE STUBWINGS:
For the stubwings, first fill any
tiny air holes and rescribe any surface detail as desired.
( For a SH-14D, a small tiny Radar Waring Receiver antenna is fitted. Cut of 3 millimeter of the aft fairing and put a small circular piece of card. See building report on other pages as wel.... )
For fitting the stubwings to the model,
you may need to remove part of the kit mating lip for each resin stub wing
to fit:
![]()

(c) Copyright Meindert "designer"/ All rights reserved. Your comments are welcomed by webmaster
Created this page November 1, 2012