Azur / Special Hobby


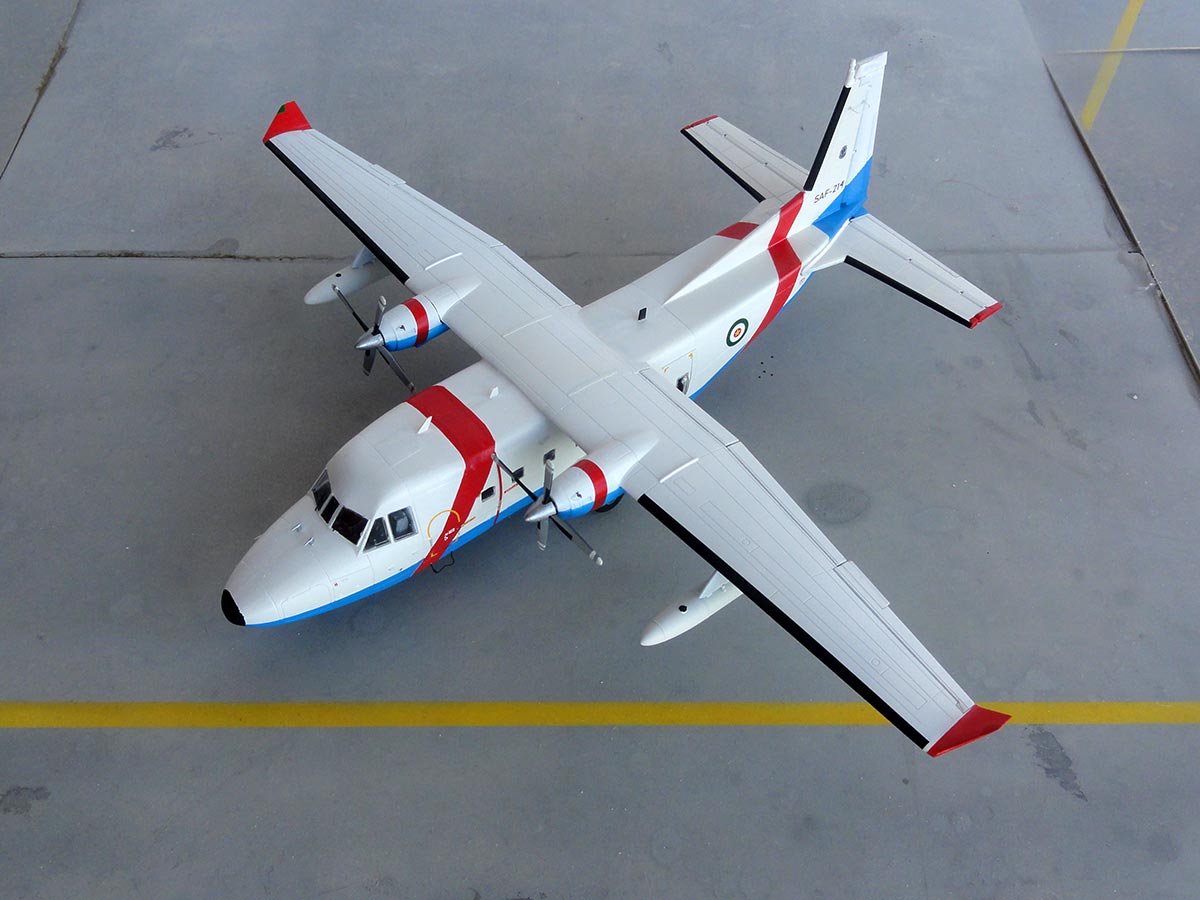
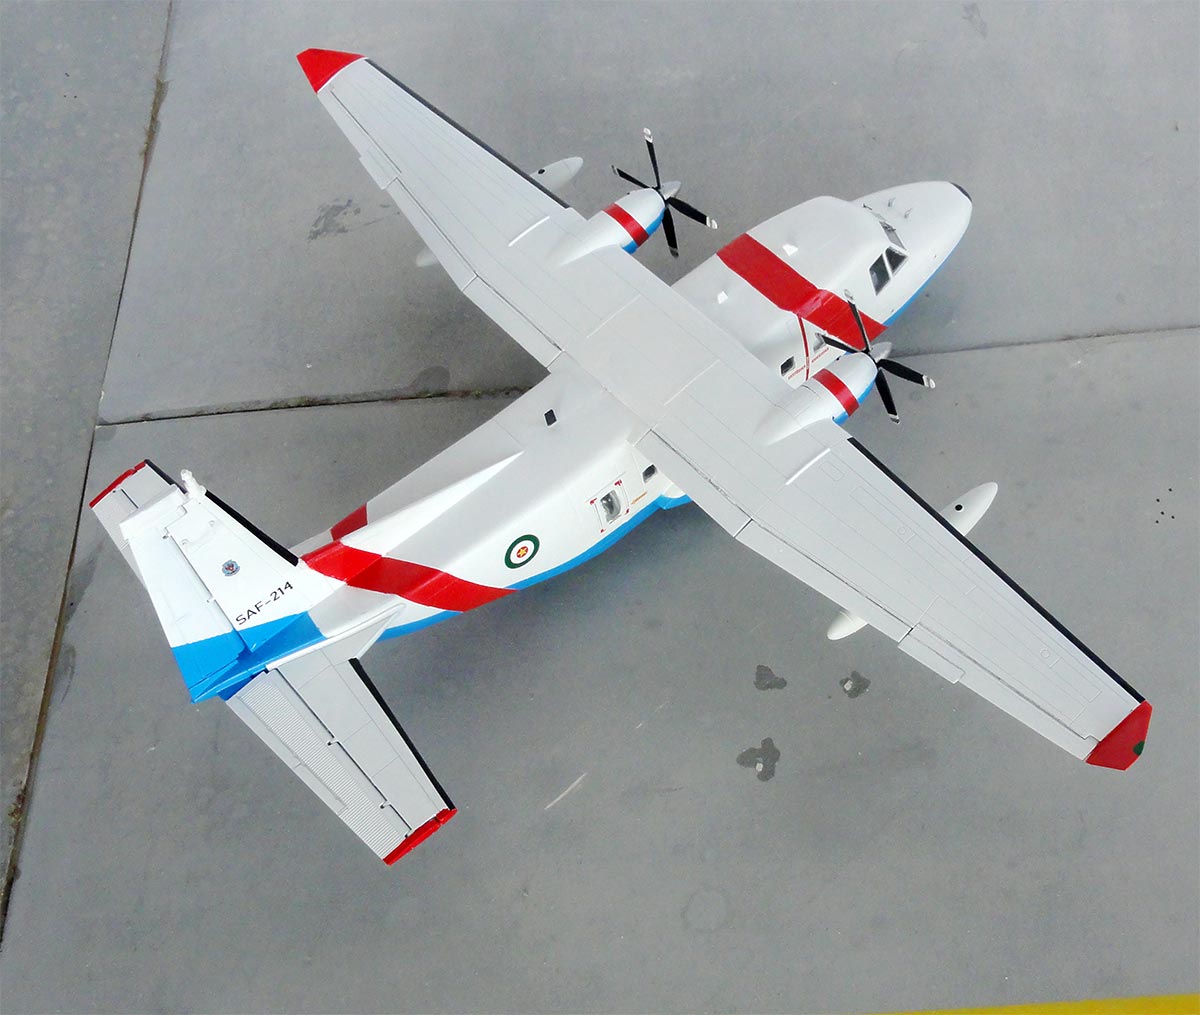
CASA C-212 model in 1/72 scale

photo made at Le Bourget
CASA ("Construcciones Aeronáuticas SA") in Spain developed end 1960s, beginning 1970s a twin engined transport aircraft capable for various roles. First flight was March 1971. Various versions were developed with different engines and also long nosed fuselage and including maritime patrol. It has rear ramp for loading. The series 400 was introduced in 1997 got a glass cockpit and more powerful engines. Some 480 aircraft were manufactured until 2013 and its flies with dozens of air forces and civil operators. The aircraft was also license built in Indonesia at IPTN/ Nurtanio.
Special Hobby released a number of fine 1/72 models of the CASA C-212 in 2017 after previously there were vacuform and resin C-212 models.
It was nice to have for the "World Air Forces in Plastic" series a Suriname air force aircraft. They had 1 transport aircraft and 1 colorful maritime patrol aircraft (MPA). It seemed nice to make the latter and a better choice than is to use the AZUR kit FR0040.

This is in fact based on the same Special Hobby mould but with some necessary parts for the desired maritime patrol version. For example, the part of the Bendix radar is included with the kit, it can be made with the longer nose and another horizontal kinked stabilizer.
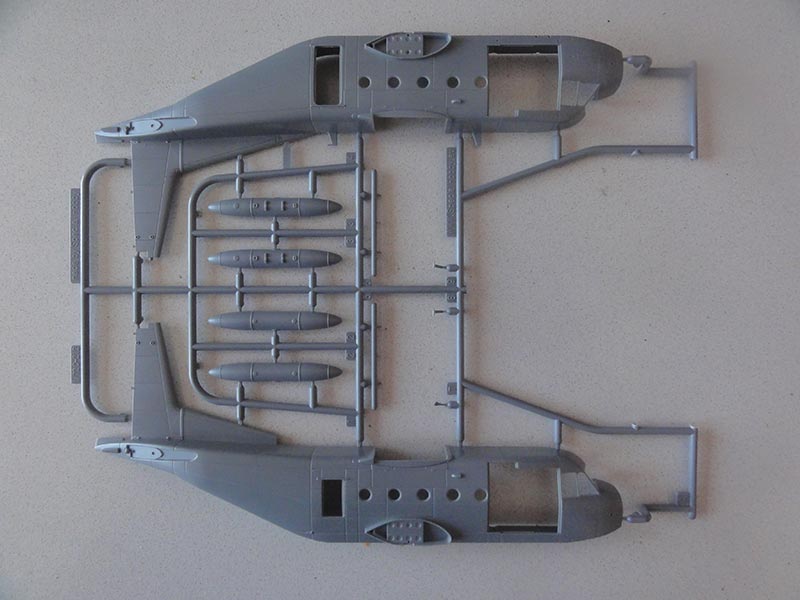
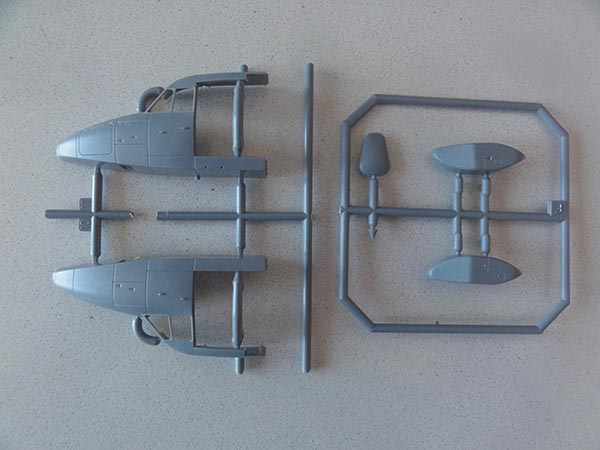
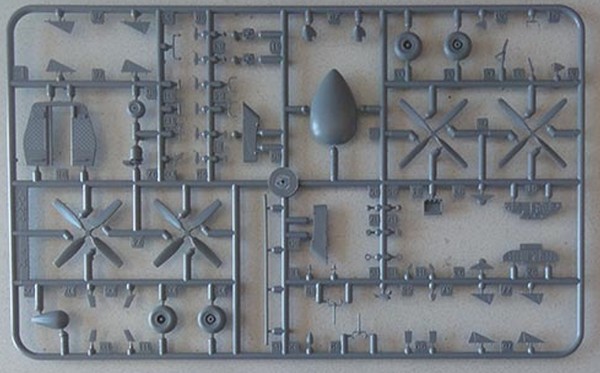
The kit's instructions needs to be studied carefully as there are countless optional parts for different versions, including those for a Surinamese MPA model like Bendix RDR-1500 radar and underwing fuel tanks.
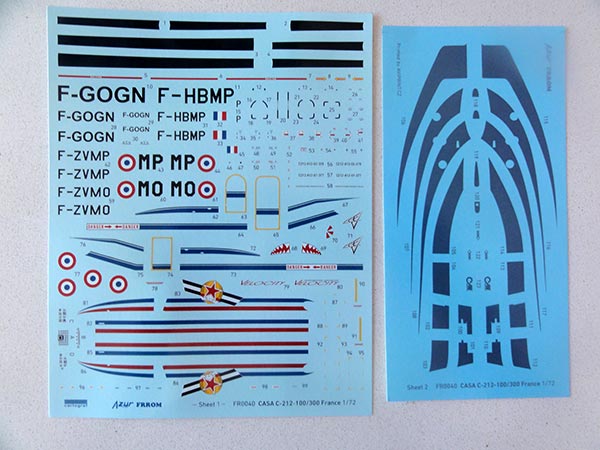
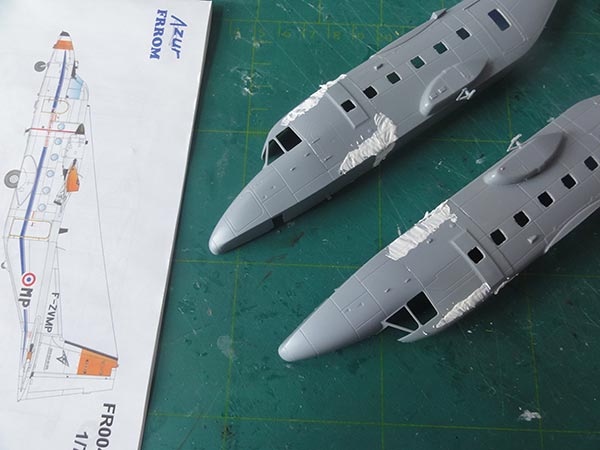
The decals of the AZUR FR0040 are for:
[A] France registration F-ZVMP of the flight test centre at Istres 2015;
[B] France registration F-GOGN as used in a film with "Soviet marlkings";
[C] France F-HBMP in grey scheme of CAE, 20902014;
[D] France F-ZVMO of the flight test centre at Istres 2015;
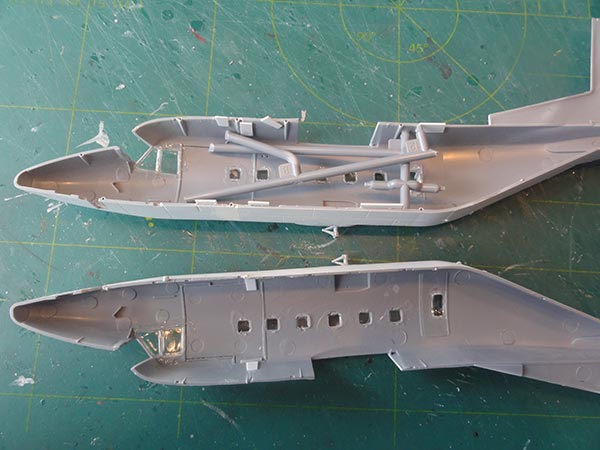
The model has a neat cockpit interior but otherwise no cabin interior. However, because of the small windows, that is not a problem as a lot is not seen anyway.
Building the model as Surinam MPA
Steps followed will be described, mostly those for Camo A/C/D for building a C-212-400 MPA.
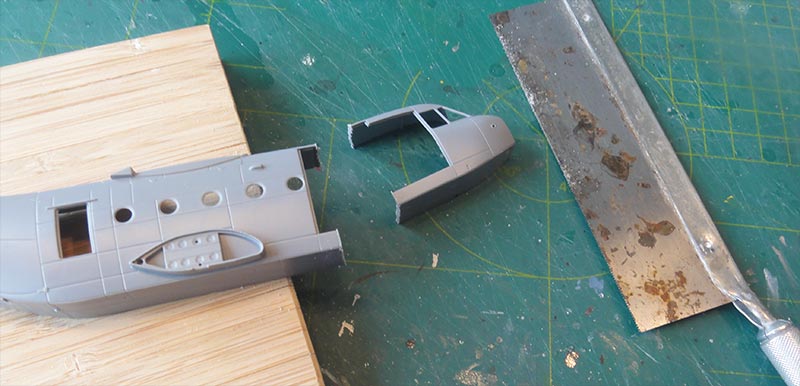
STEP 1
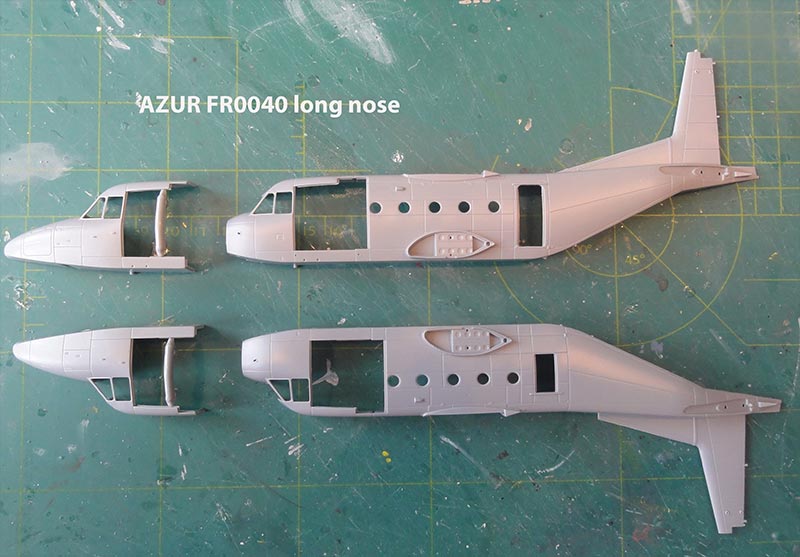
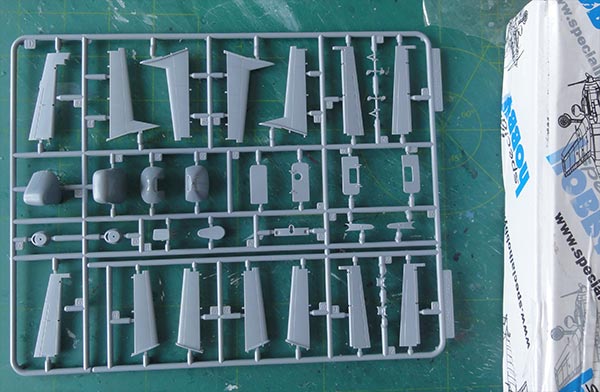
The long nose requires that the short nose must bu separated with a razor saw and than be replaced with the separate longer nose parts that are in the kit.
STEPs 2- 3
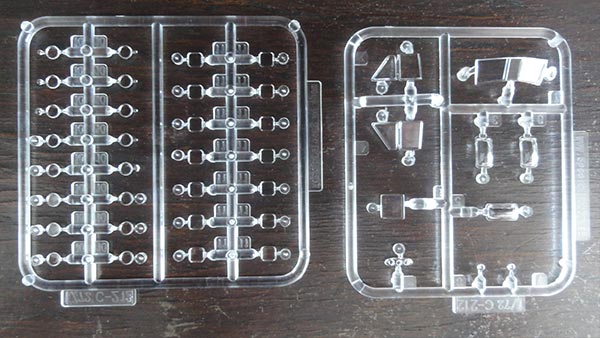
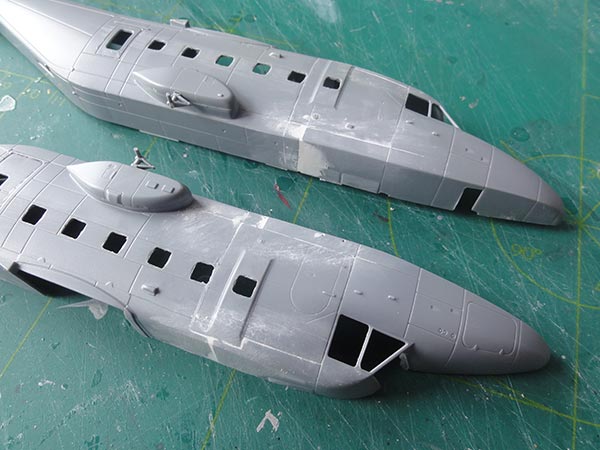
The windows should be shaped for the MPA more rectangular, but the good news is that Special Hobby has moulded the fuselage insides with thinner plastic and the rectangular window parts are included in this kit! Shaping the windows is a precision job using a small metal file.
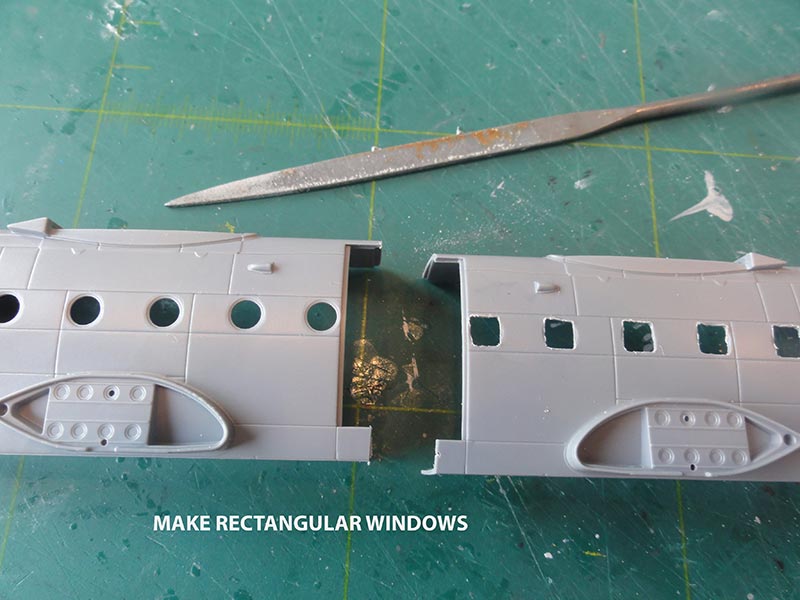
After using the razor saw, join the nose with rear fuselage on one side first: it is a good idea to assemble one half of the fuselage on a board to make sure that the fuselage becomes straight.

Let dry. Now some sanding and putty was needed. (later on... aligning the other fuselage parts against the already joined half will be done).
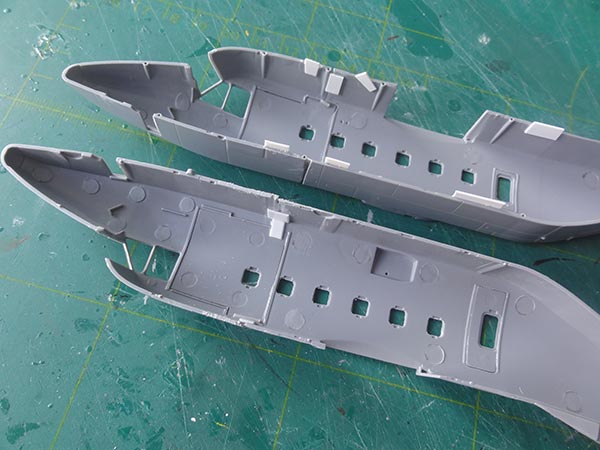
STEPs 4-6
Make the cockpit interior. Door section #34 also needs a rectangular window opening. Do not yet fit the cabin windows... as I always have some trouble with windows that need to be placed from the cabin inside as it needs careful masking later on. That is why I airbrush the windows areas of each fuselage half and also the windshield opening in advance in the final color before the fuselage is assembled. In this case, that's white. That saves a difficult masking work later on.
Use rear doors #59 with bubble windows supplied in the kit.
STEP 13
It was somewhat unclear which undercarriage fairings should be used, I chose #122 and #123. This also means that the main undercarriage legs must already be installed.
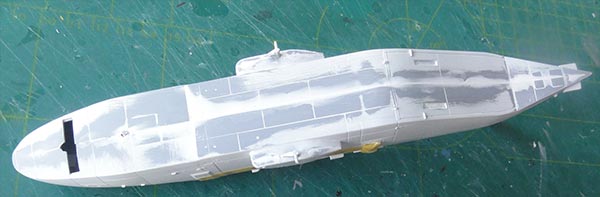
The fuselage seams were reinforced with pieces of plastic card that were set to the inside. The fuselage parts were glued against the already assembled fuselage half.
Some putty and sanding remains necessary.
The areas around any fuselage windows were now airbrushed to avoid complex masking. Areas were first airbrushed in a mat white base coat (airbrushing Revell Aqua 05 white acrylic). Than followed Gunze Sangyo H1 gloss white over the base coat.
Now the rectangular cabin windows #11 were installed, these are in the kit! Also add cockpit side windows #CP2, 4. Avoid glue spills. Protect the windows when dried with tape.
Inside the fuselage some sprues were set to suggest when looking through windows an interior.
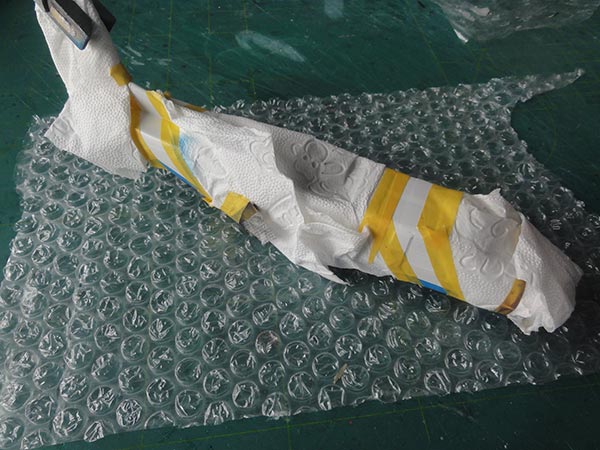
The fuselage halves were closed, clamps were needed.
There are always remaining ridges, so some putty is needed and sanding. But not any way near windows.
STEPs 17-20
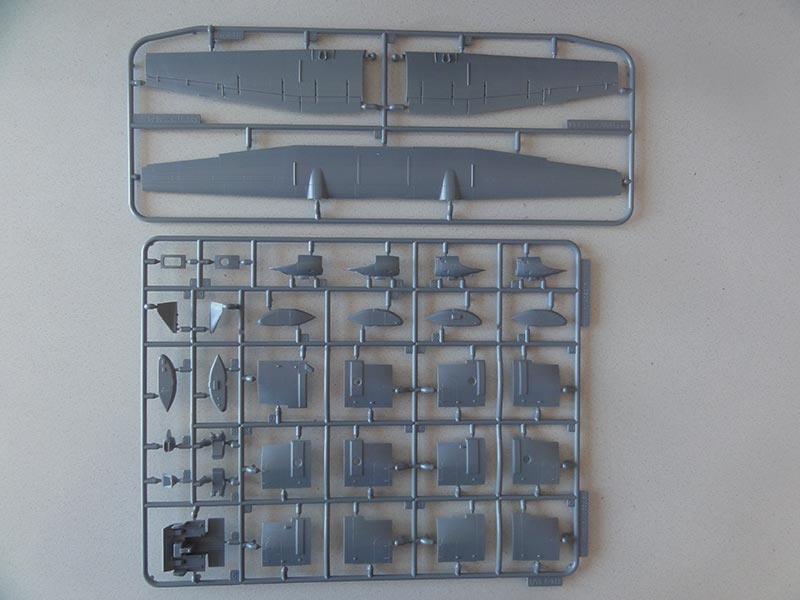
The large wing was built with the engine nacelles. The flap hinges are somewhat incorrectly indicated, #76 must be #77 and vice versa. Some putty was needed at the nacelles.

The curved wingtips #19, #20 can also be found in the kit. The wing aileron trailing edge extensions were kept.
STEPs 11-12
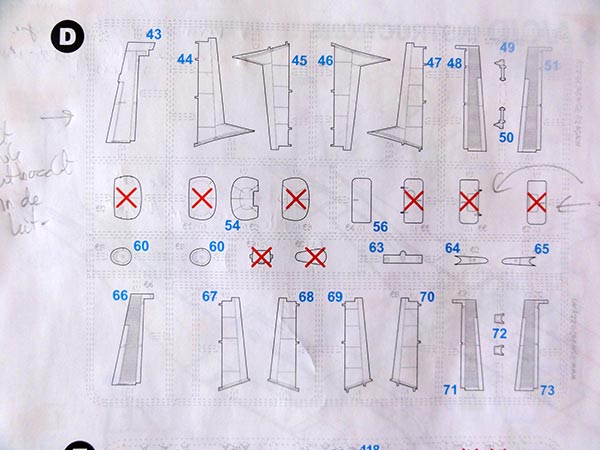
The correct MPA horizontal stabilizers are parts #44-47 and #48, #51. These were airbrushed white but NOT yet installed for easier masking.
STEP 14
The rudder top should not be shortened, simply retain the rudder part #43.
The fuselage and the wing were not yet joined for easier airbrushing at this stage.
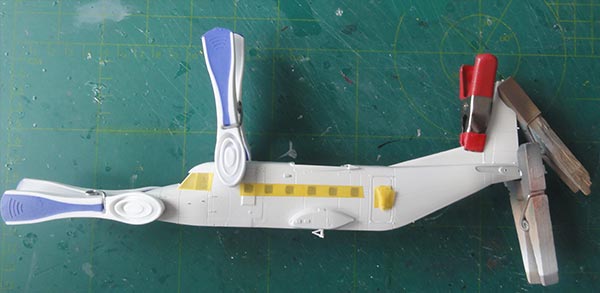
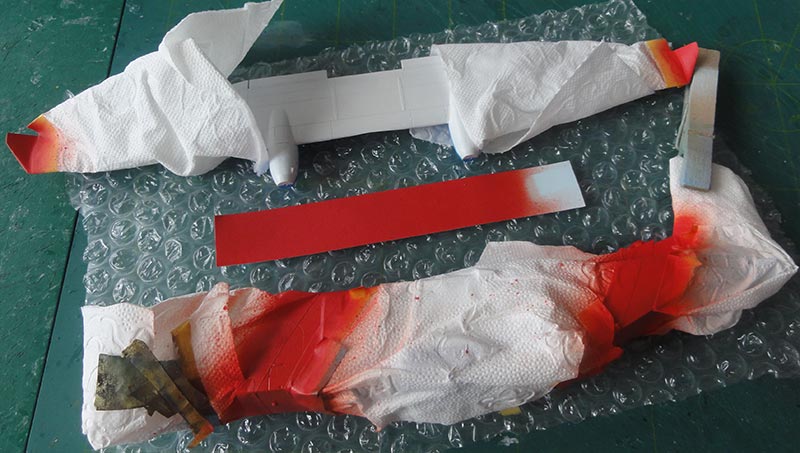
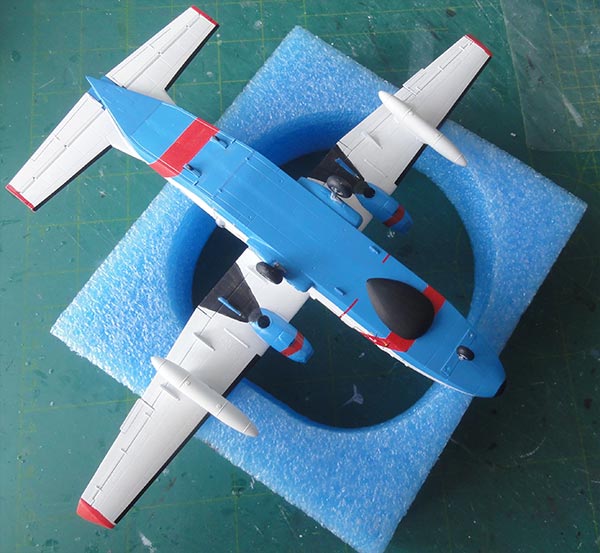
The Surinam MP aircraft colours are white, blue lower surfaces and bright red bands. In the kit luckily the black de-incing boots on flying surfaces are provided as decals! This saves again a lot of masking work.
All remaining sections were airbrushed in a mat white base coat (airbrushing Revell Aqua 05 acrylic). Than followed Gunze Sangyo H1 gloss white over the base coat. Note that the cabin window areas were already airbrushed earlier.
Masking was done at the fuselage and than the blue lower fuselage airbrushed for which Gunze Sangyo H25 blue acrylic paint seems a good choice.

Tip: also airbrush a spare small decal sheet in the colour for later correction work.

The bright red bands around the fuselage, tail and wingtips were masked (but not the nacelle bands). The tips of stabilizers would also get red paint.
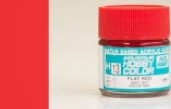
For the bright red I used thinned Gunze Sangyo H13 red with some H24 orange mixed in.
Also airbrush a piece of decal in that color for the nacelle bands and later repair work.
After you have removed the masking tapes, you will always see some irregularities. First, corrections of overspray can be done with a cotton swab and some thinner. The edges themselves if necessary can be made very nicely with small cut sections of the decal that were previously also airbrushed in the colours.
The cockpit window #CP1 was installed and fits OK.
As far as markings of the Surinam MPA are concerned, I have spent a long time searching for photos, especially for photos from above and from below but have not been able to find them. I got the impression that there are no further markings on the wing. On the MPA rear fuselage I saw 2 roundels and the small black registrations on the tail. Also a kind of emblem on the tail was seen though it was not clear exactly what it looked like. These Surinam markings were designed and laser printed in colour on decal sheet.
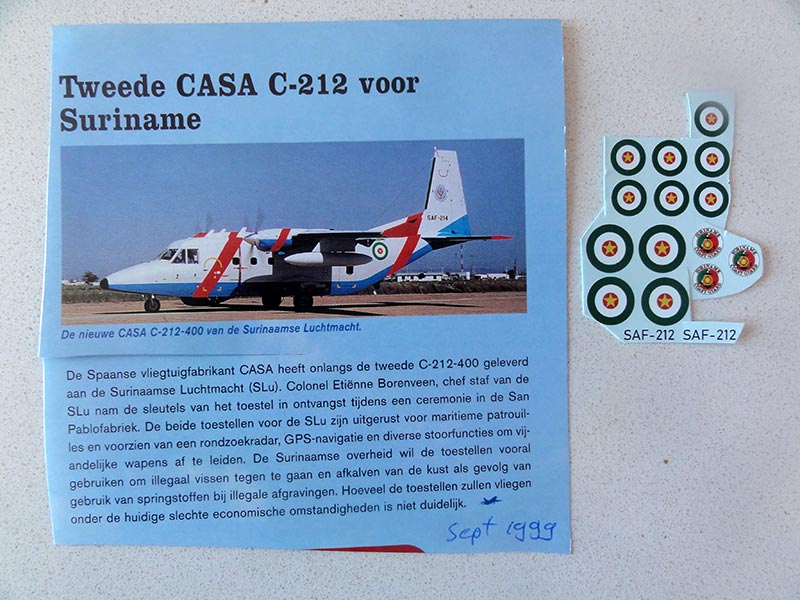
You see printed SAF-212 but SAF-214 should it be for the MPA on the vertical tail. The "2" was replaced by a "4" from the spares box. The emblem on hind sight was not seen, so not used.
Decalling was done at this stage as it is easier to do now and the wing and stabilizers can be installed later on. Some kit decals like stencilling as well as the red prop stripes were used. A few markings were found in the spares box such as the warning panels. Door markings were set and note that door markings on the left fuselage are yellow but those on the right side red!
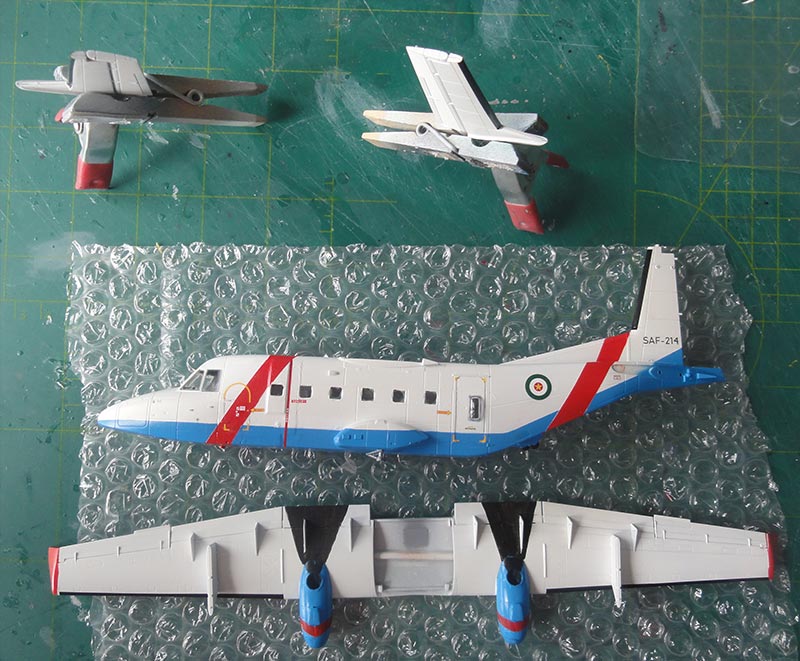
Also note the painted black "smoke" areas aft of the nacelles.
Final bits were now installed. The lower nose gear part #63 was installed after some nose weight had been set. The undercarriage was easily installed. The Bendix radar #86 is also provided in the kit and, after it was painted black, set under the forward fuselage.
STEP 21
Finally, many antennas, pitot tubes and a bit were placed on top of the tail. The small etched metal fret in this Azur kit also has some nice wind screen wipers. (the parts #PP6,8,10 were not used).
STEP 15-16
The propellers with the rounded tips are appropriate for the Surinam MPA aircraft. These are medium grey at their fronts and black at the rear with white-grey-white tips. Propellers were fixed with white glue at their nacelles.
A few underwing tanks were also set on pylons below the wing, these parts are in the kit.
A final airbrushed thin coat of gloss Johnson Future/ Pledge varnish completed the model.
Surinam
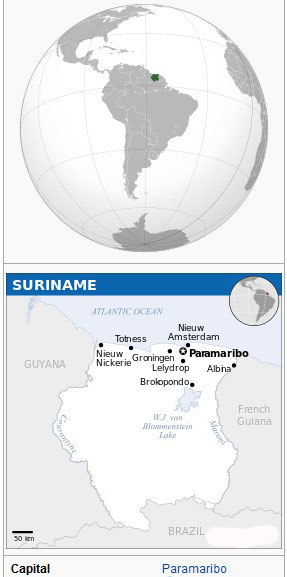


[ area: 163,800 km2 | population: 575,000 | capital: Paramaribo | GDP 6,500 US per capita nominal ]
Suriname is located in the north of South America and is bordered to the east by French Guiana, to the south by Brazil, and to the west by (former British) Guiana.
In 1999, a CASA C-212-400 Aviocar maritime patrol aircraft (SAF-214) was purchased as well as a CASA C-212 transport aircraft (SAF-212). In 2009 there were plans to purchase Indian Druv helicopters, but it never came to that. The CASAs were almost never flown, in fact they were grounded for almost 10 years and were finally sold in 2012.
For more information about this Suriname air force, look at the Alouette page here...
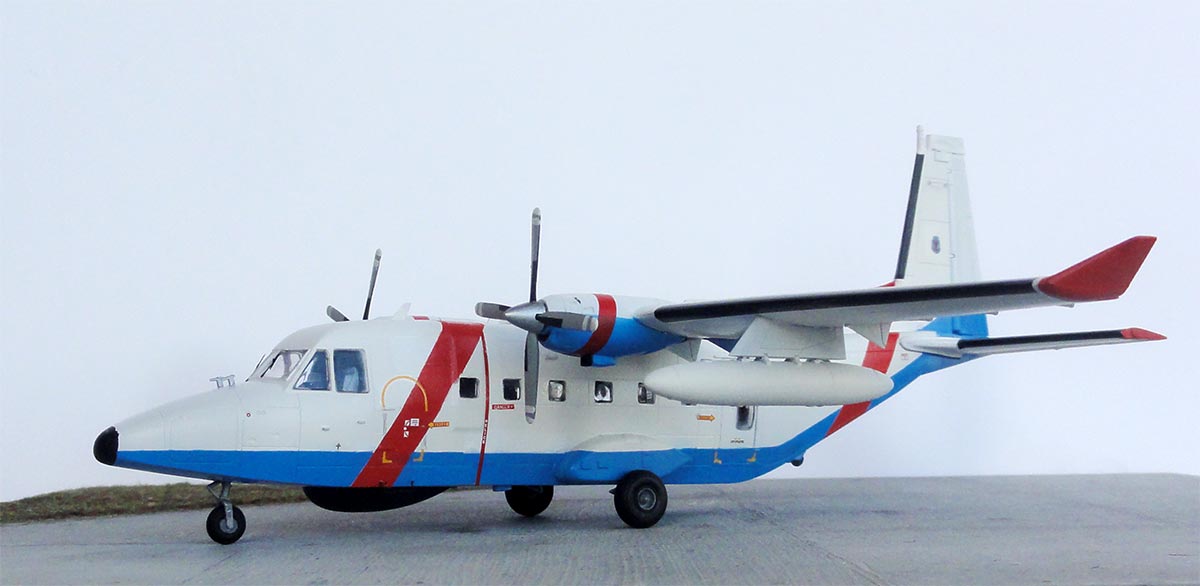
C-212-400 Aviocar maritime patrol aircraft, serialno. 467 coded SAF-214

- none! Read my article in the IPMS NL magazine MIP 2022-1 (in Dutch)

(c) Copyright "designer"/ All rights reserved. Your comments are welcomed by webmaster
Created this page
March 12, 2021