Amodel


EMBRAER EMB-110 Bandeirante model in 1/72 scale
P-95 page
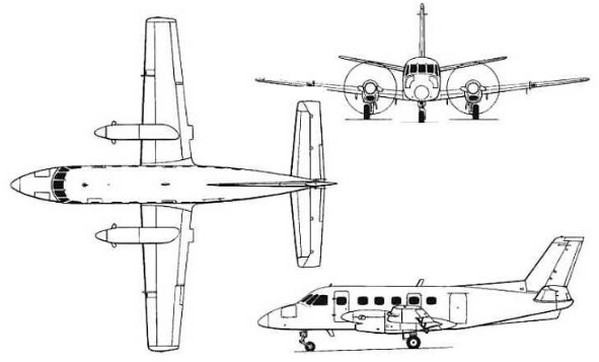
In the sixties, Brazil began developing its aviation industry. The EMBRAER factory developed a light transport aircraft designed by the Frenchman Max Holste. The prototype first flew in October 1968. It was decided to incorporate a slightly larger cabin and some refinements by the Brazilian chief designer Ozires Silva. This became the EMB-110 Bandeirante, meaning "pioneer". Production started in 1973.
Quite some variants were developed over the years. Early aircraft like the EMB-110 and EMB-110C had a flat horizontal stabilizer and no ventral fin. The EMB-110K1, P, P1 had a longer fuselage with cargo door at port and got a ventral fin. The EMB-110P1A/ P2A had stabilizers with 10 degree dihedral for added stability. Variants for military transport use were designated C-95 in Brasil.
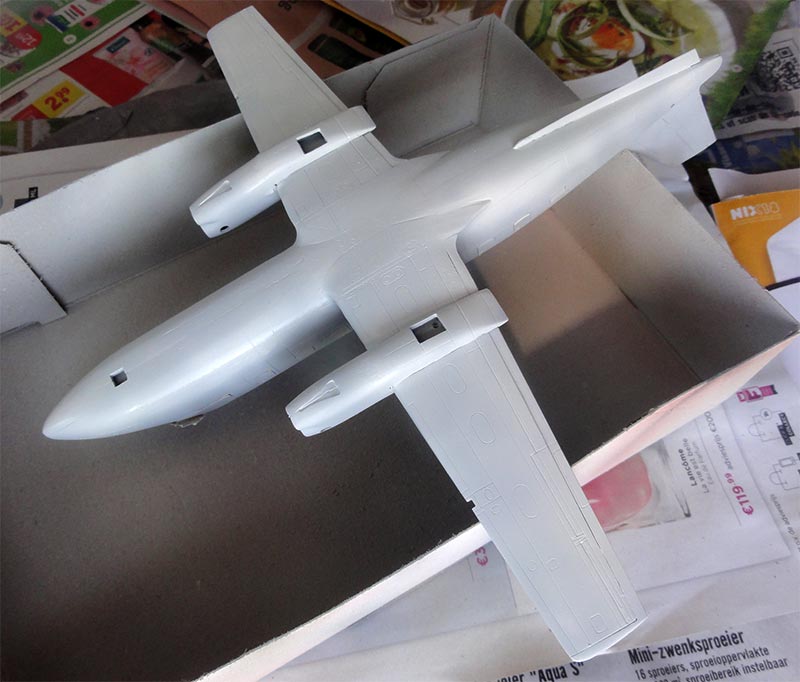
The EMB-111 was a patrol aircraft with military designation P-95 based on the early EMB-110 the short fuselage and horizontal stabilizers. Sometimes called bandeirulha, it got wing tip tanks and for the patrol role various systems and radar nose with AN/APS-128 search radar. Pylons with armament can be carried with unguided HVAR rockets or depth charges. It is fitted with a powerful search light. Some 12 P-95 aircraft were delivered to the Brasil Air Force (FAB). The P-95B is an upgraded P-95 with the stabilizers having a 10 degree dihedral. The P-95BM has a modernized cockpit and systems and often fitted with FLIR turret and EC
Of the Bandeirante family over 500 aircraft were built by EMBRAER.
..At 1/72 scale, there was no injection moulded kit of the Bandeirante though there was a rare resin kit from Liberty in Brazil. Fortunately, Amodel has released a 1/72 model kit of good short-run quality in 2024. Several 1/72 kits variants were released by Amodel and their sister brand SOVA-M with some different parts related to the specific EMB-110/ EMB-111 version.
Amodel kit #72395 is for a EMB-110P1. The EMB-110P1 was a cargo/passenger
variant based on the K1 with a 0,85 stretched fuselage to accommodate 18
passengers and fitted with PT6A-34 engines. It had a ventral fin and horizontal stabilizers.
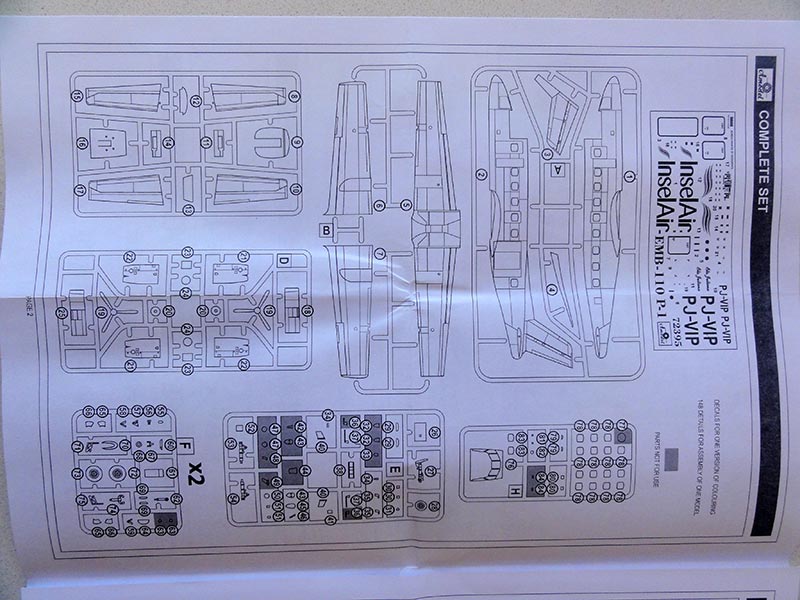
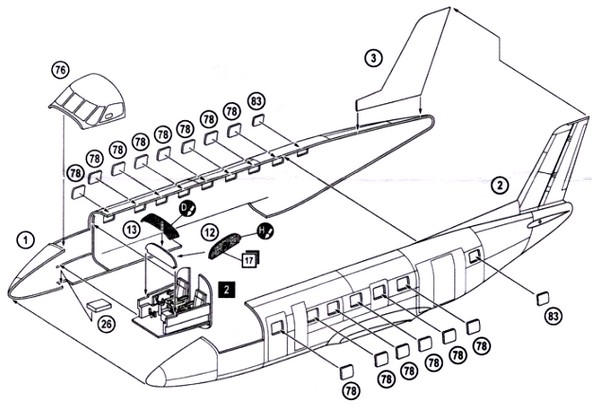
There are 7 sprues in
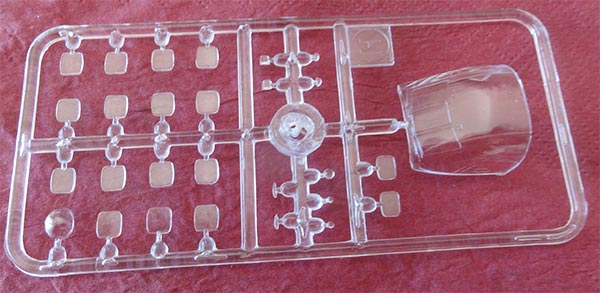
light grey soft plastic and 1 transparent sprue, totaling around 148 parts.
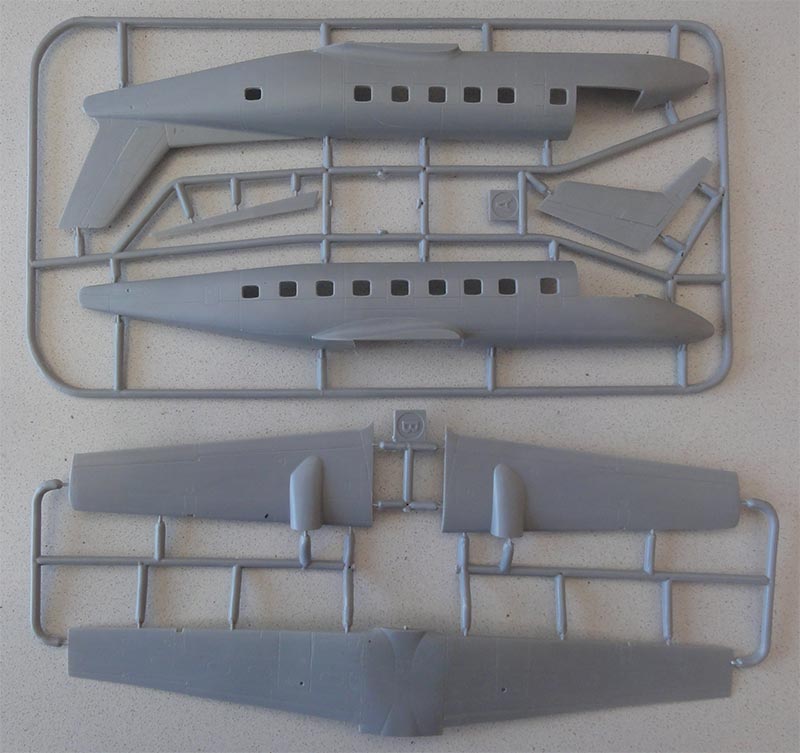
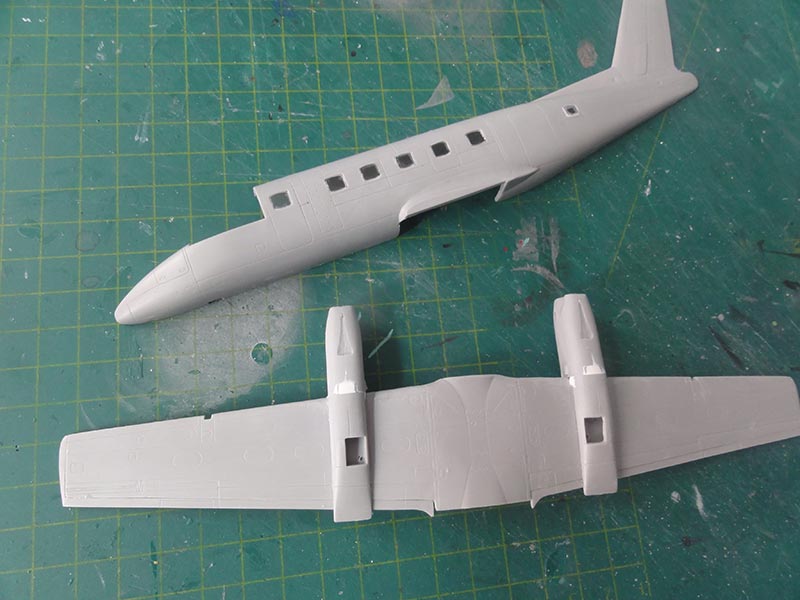
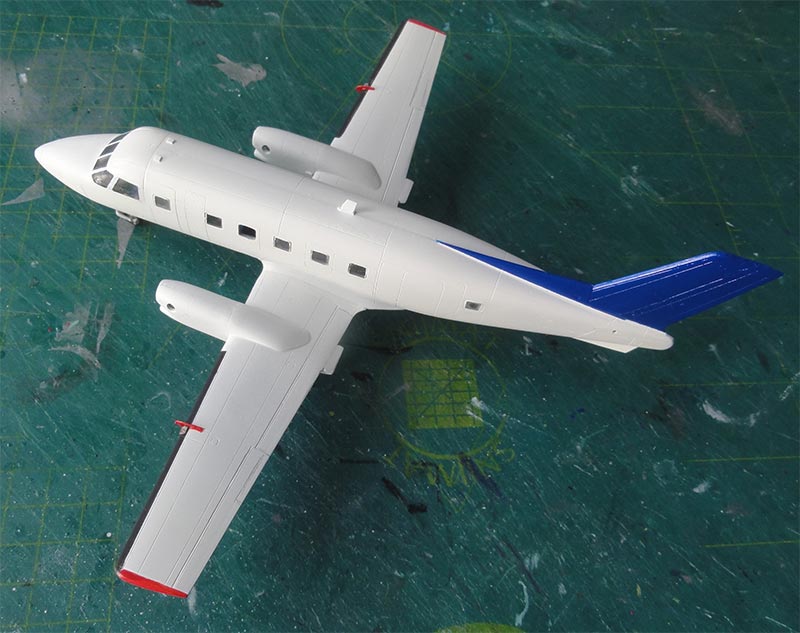
The lower wing is one part, ensuring a strong wing assembly with correct dihedral.

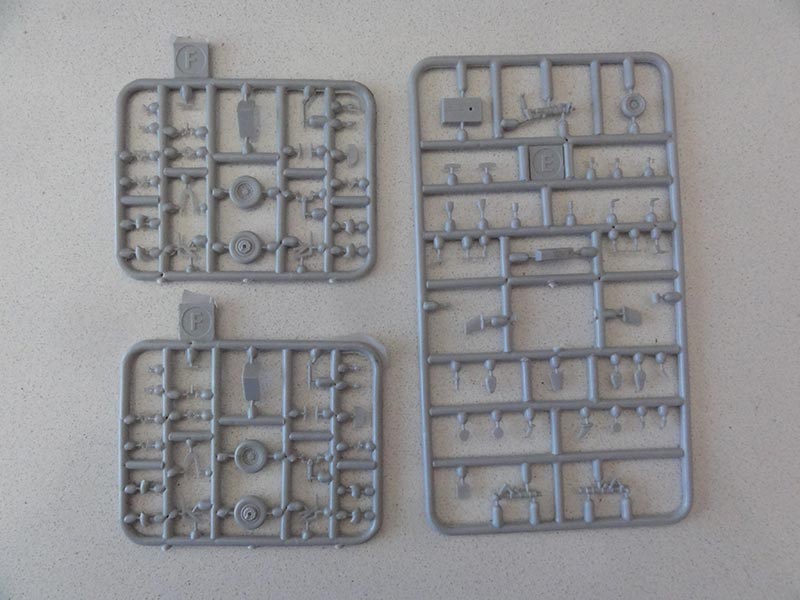
Some parts are not used, these are for other kit releases such as #72051 for the P-75 Bandeirulha military version under the brand name SOVA-M. (this kit will be made in the future). Other kits are also coming.
No masking set or etched frets are provided.
In the box you will find parts with neat recessed panel lines, but you could deepen/ inscribe the gaps of the control surfaces as this aircraft was of simple construction. The transparant landing lights in the wing leading edge are nicely provided.
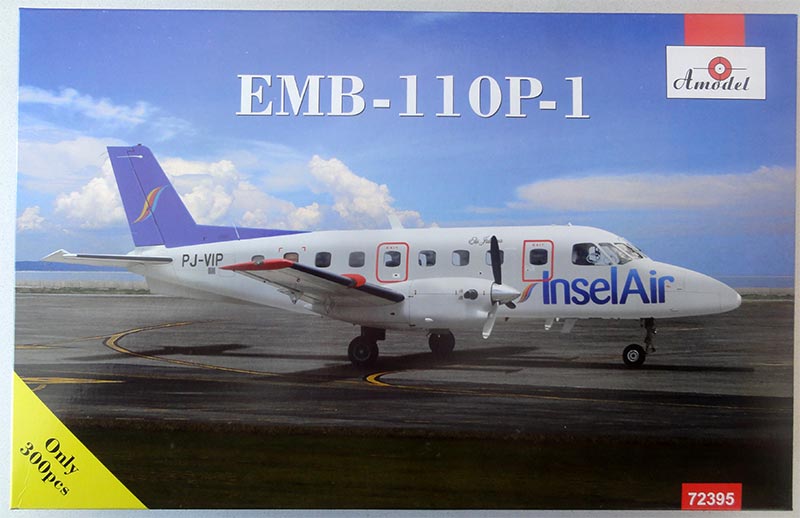
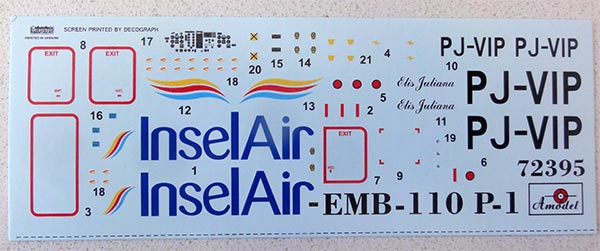
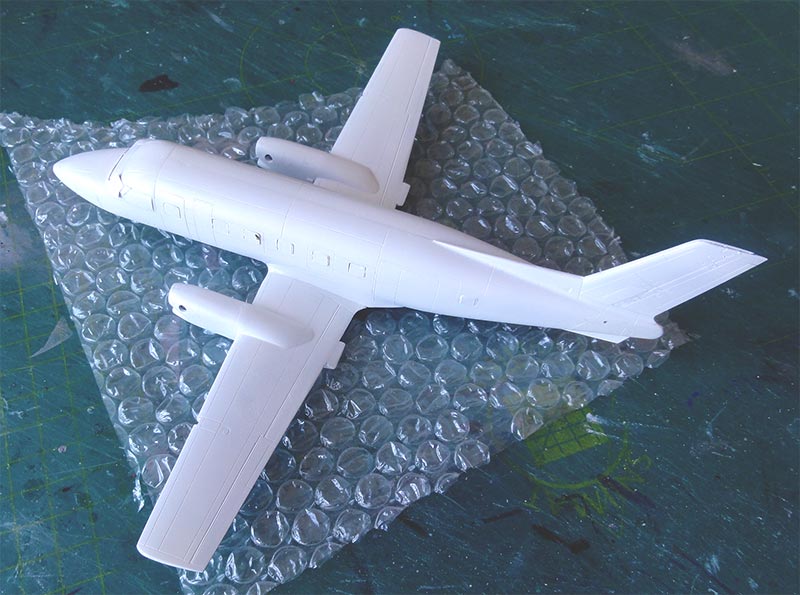
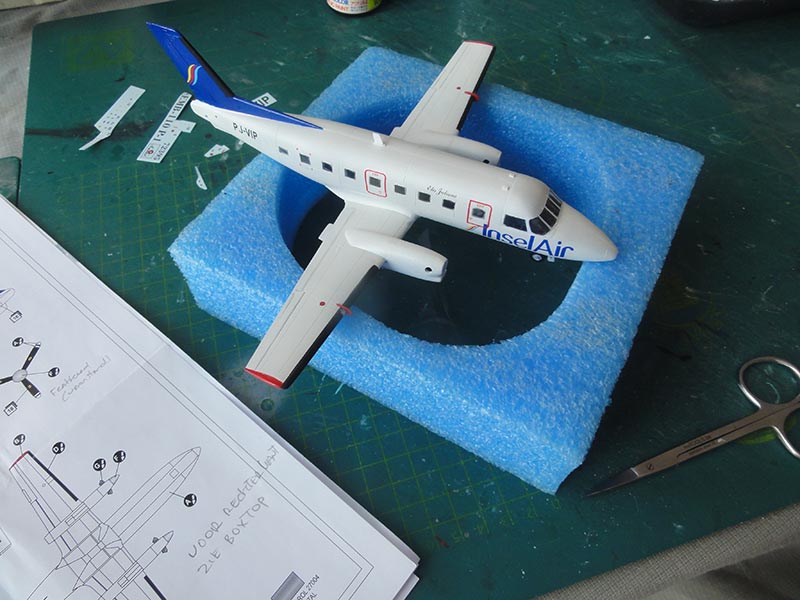
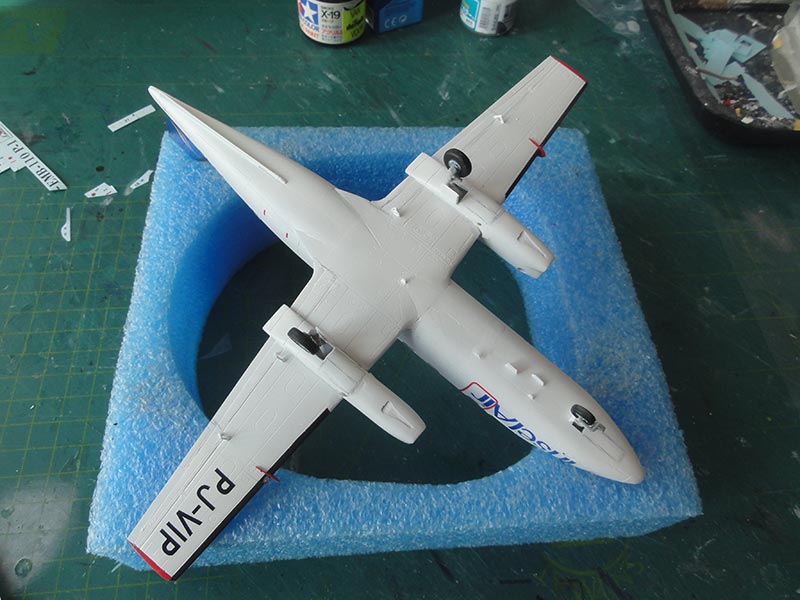
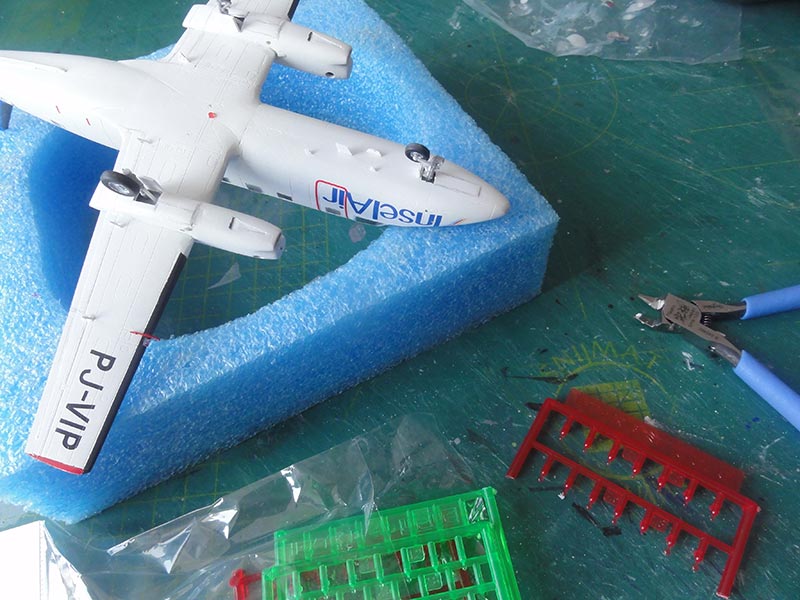
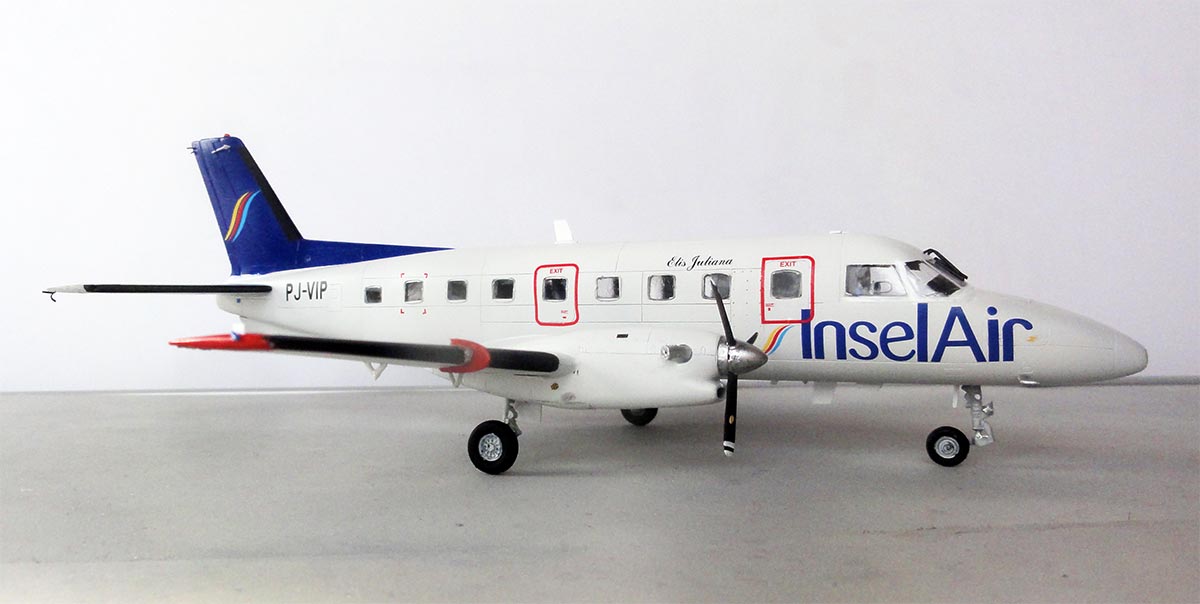
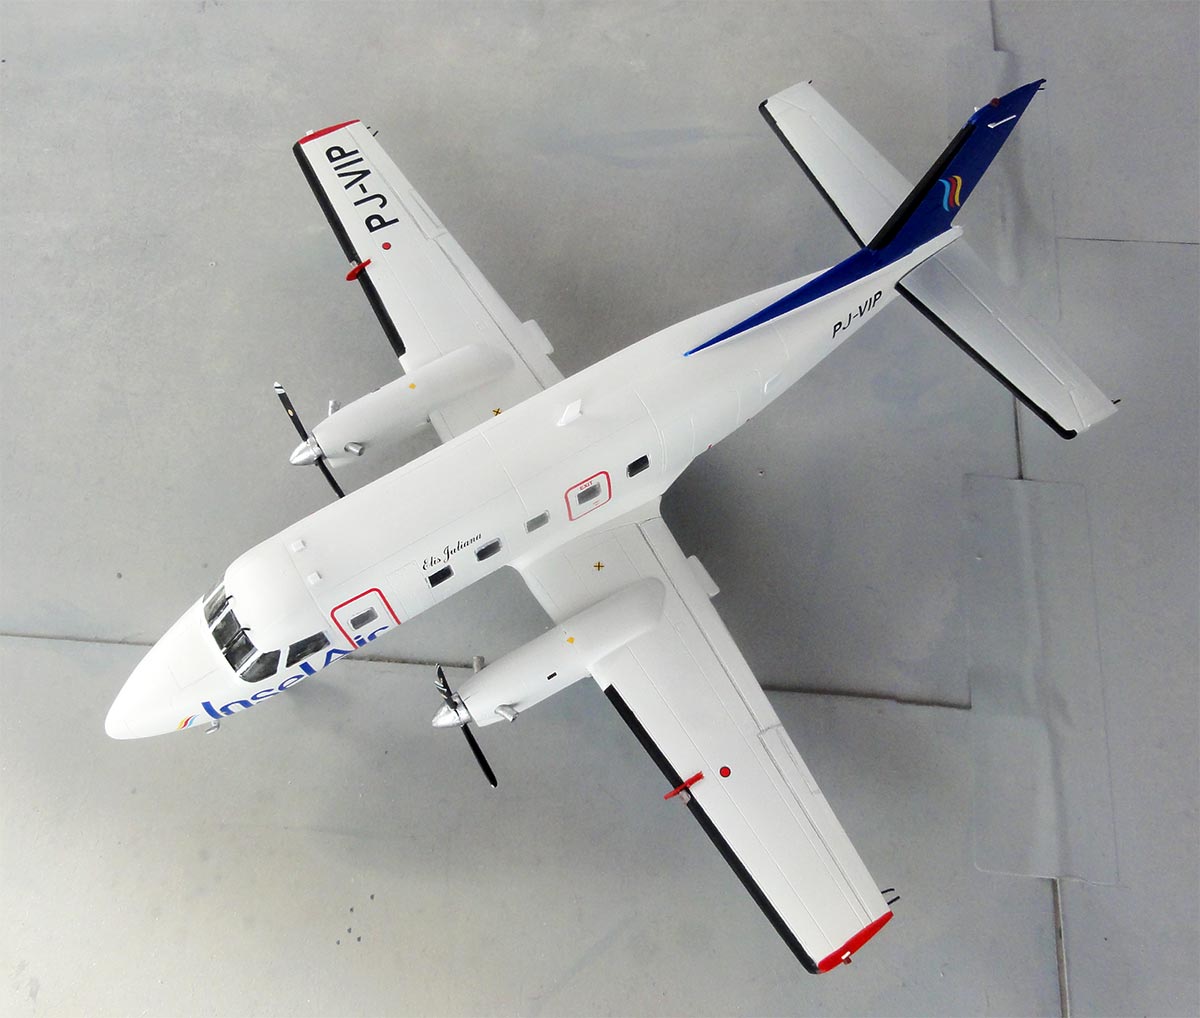
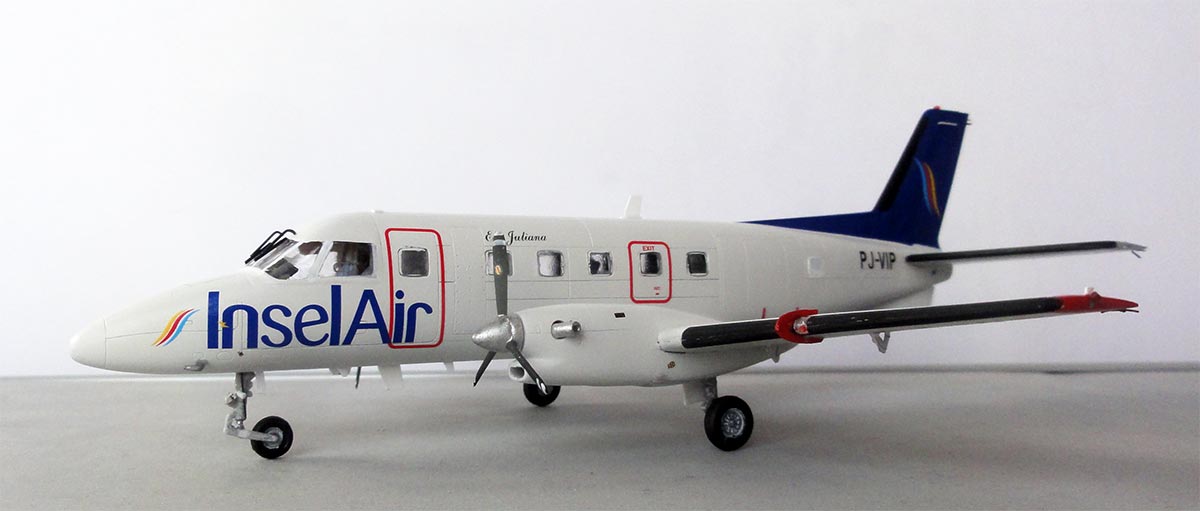
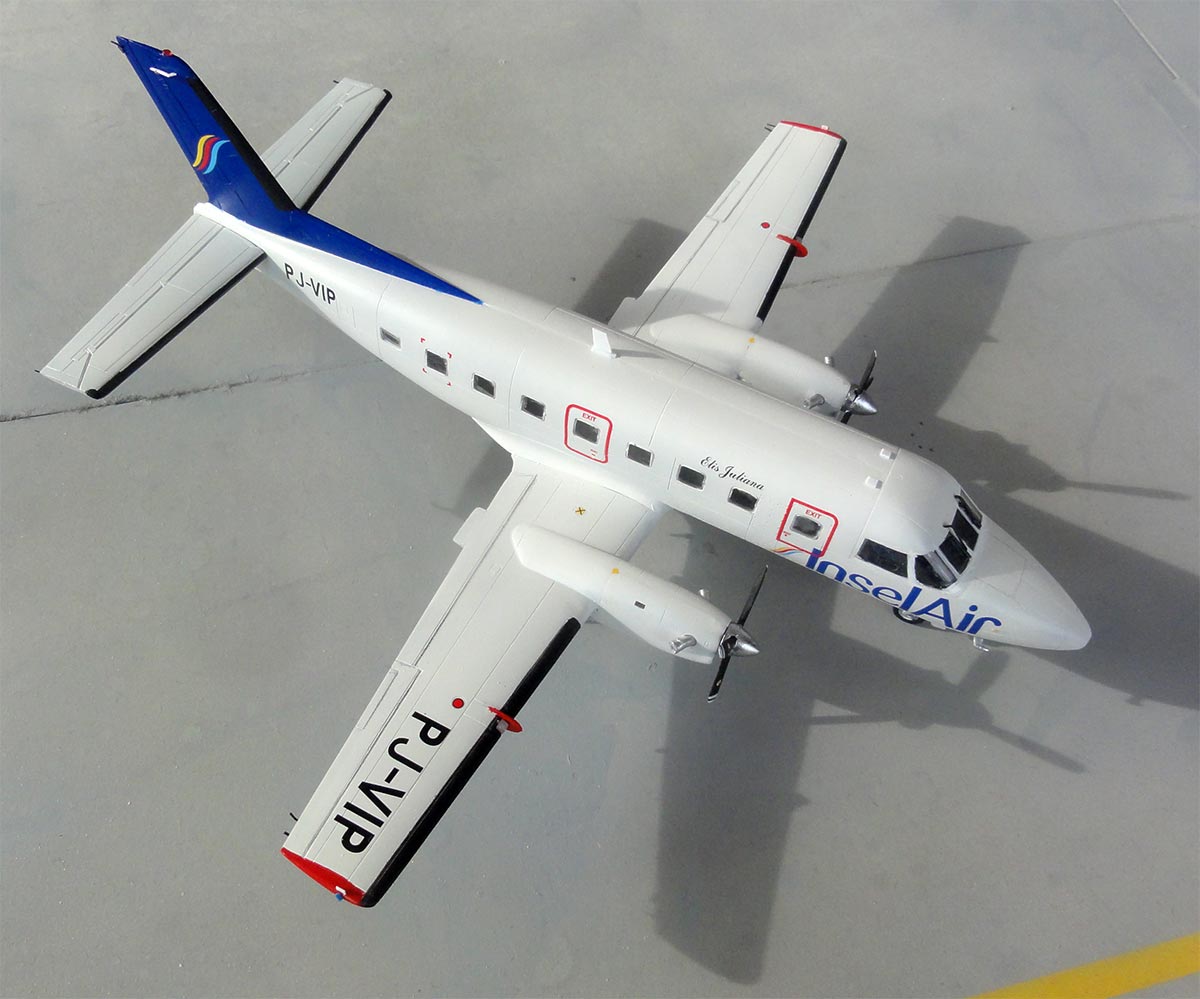
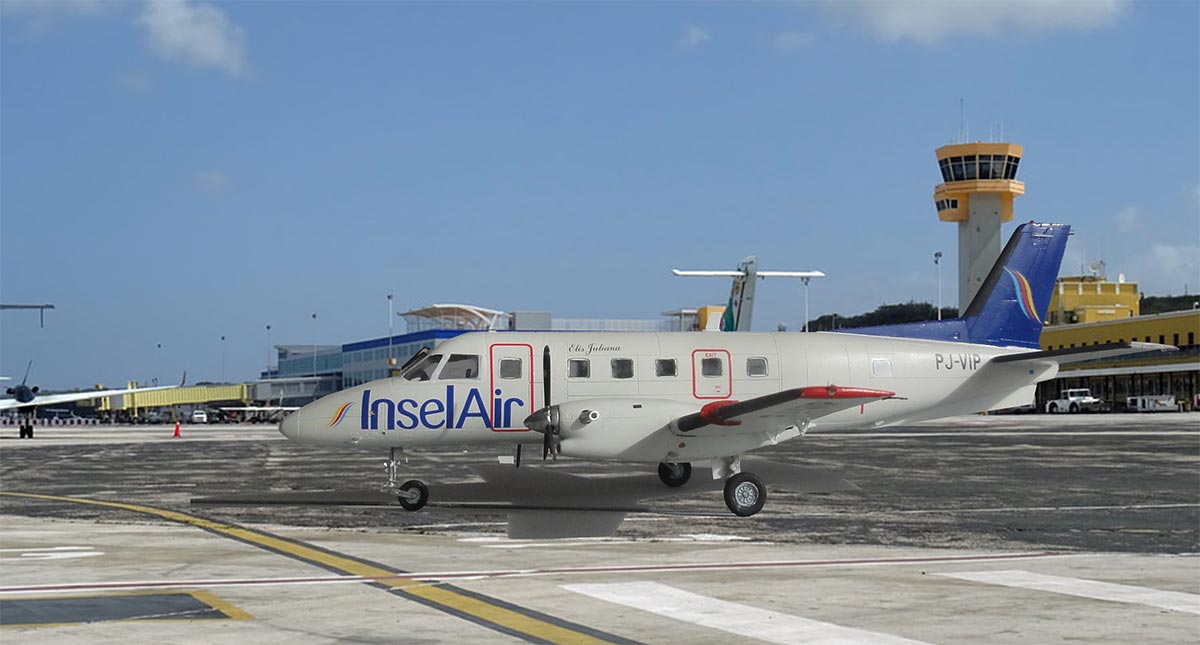
This Amodel kit #72395 includes decals for only one civilian aircraft, but it's a nice one for me: from Insel Air PJ-VIP EMB-110P-1 as it flew around Curaçao from August 2006. It bears the name Elis Juliana, after a well-known Antillean poet and historian. The aircraft is all white with a blue tail. (It flew in two liveries but decals are for the later livery).
The decals are excellent and you also get the smaller markings.
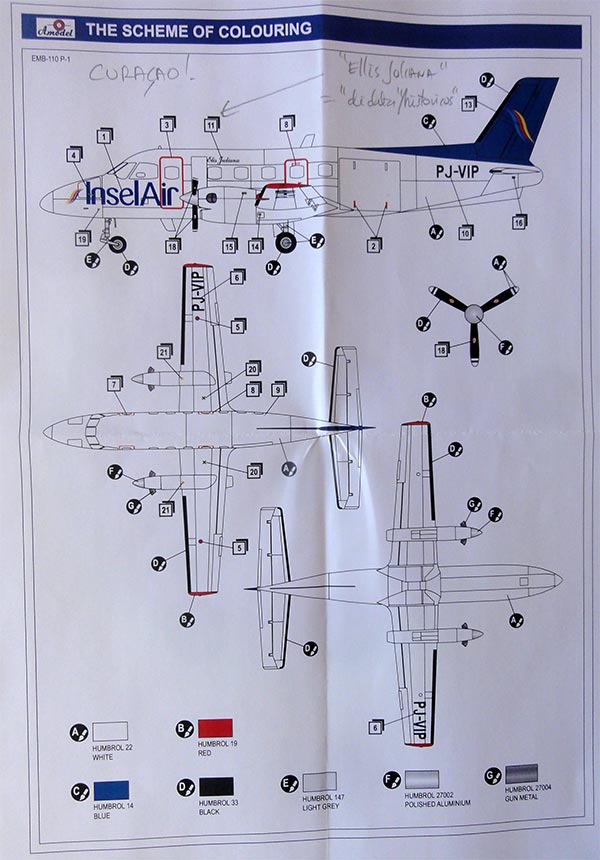
The instructions are in black and white with a separate coloured sheet for the port paint scheme. But no drawing is provided of the starboard side, this can be seen at the box top.
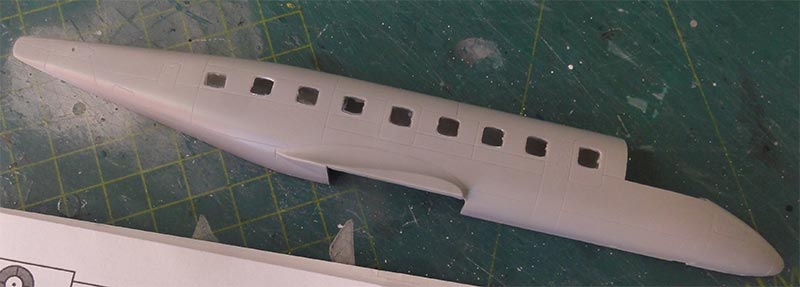
The instructions are clear with 11 steps but the some smaller parts are better installed at later stages to avoid damage and for easier painting. It is not shown that nose weight should be added to avoid tail sitting. A small error is that it is not indicated in the instructions that the rear port cabin window aft of the freight door is not there on the Insel aircraft and should be filled. The fuselage appears to be OK for stretched variants like the P1 with the large cargo door.
There are details in the cockpit, but there is no cabin interior included. As the cabin doors are moulded closed, this is OK. Tip: check out if the rear cabin window is applicable for your desired scheme.
Applying the window parts is a bit of a challenge as they need to be precisely glued into the openings. Cleverly done is that the cockpit glazing is one part, allowing for easy filling, sanding, and masking.
The engine nacelles are OK with a neat undercarriage with the larger gear doors closed. Correct antennas are located
under the fuselage. The propellers are also neat in a feathered pose.
There are aftermarket 1/72 decal sets available for other
civilian Bandeirantes, for example from OldModels decals, and undoubtedly more
will follow.
This short-run model requires a bit more work, such as cleaning up mold lines and attachment points. Remove any smaller parts with a sharp cutter. But you'll end up with a very nice 1/72 model of this Bandeirante.
Start with instructions' step 3 the cabin windows; these are to be installed from the outsides'. This is better done BEFORE the fuselage halves are joined which is much easier to do. It allows alignment and you will loose windows dropping inside otherwise. The individual windows fit surprisingly good. Ensure a fit slightly raised fit to allow a good sanding and polishing job to be done. Use thin plastic cement fluid.

I discovered too late that on the Insel air aircraft the rear port window aft of the cargo door is not there. I overpainted it later on but better close/ fill this one now.
Let dry for an hour. Now sand the window rows flat. Yes, that is wet sand with fine grade sanding paper! Next polish the windows and do it now. This will enable removal of any polish paste from both insides and outsides. These are the first assembly tasks.
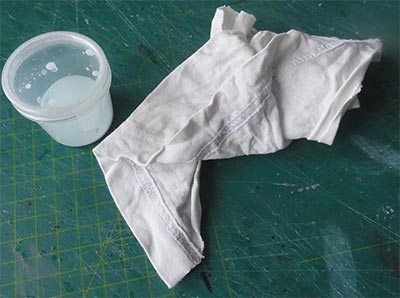
When the windows are flush and look clear, do a really good clean up. NOTE: a perfect result is difficult to achieve but seems to be the best approach for this short run kit.
The fuselage assembly is than next.
The kit cockpit parts look OK and were assembled. I added a few pilot seat belts and you get a decal for the instrument panel (which I forgot...). A rear cabin wall was also set from plastic card.
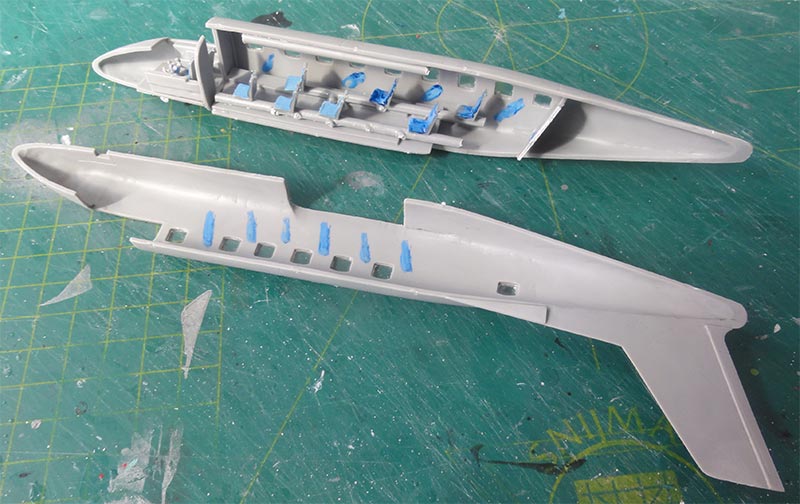
There is no cabin interior but I had some spare parts for seats in the spares box. Seat upholstery was painted blue. The seats were set, to find out later that nothing is seen... So thus not really needed.
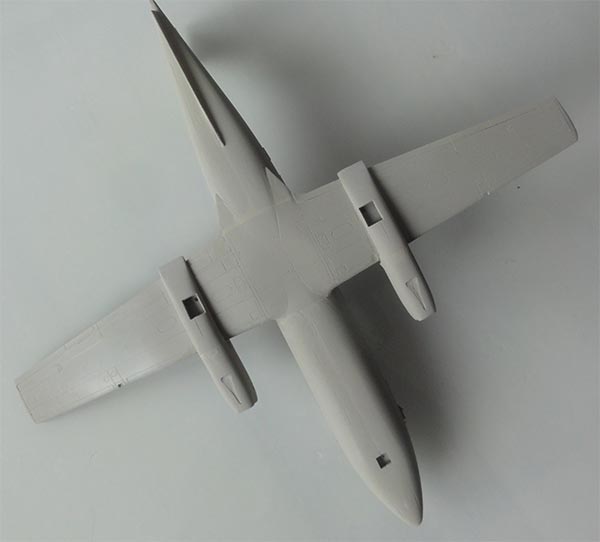
Finish the main wing BEFORE joining the wing with the fuselage.
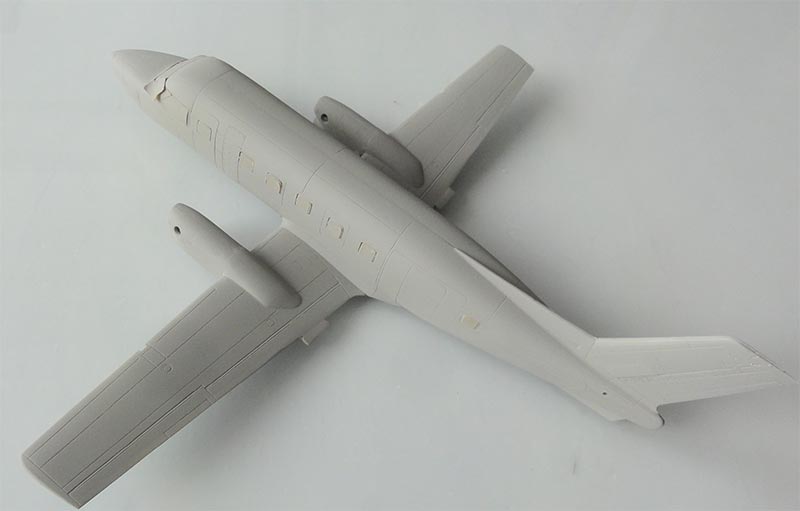
The wing parts and engine nacelles were assembled. Fill and sand. The needs consirable sanding and putty and again sanding. I inscribed the flap hinge lines a bit deeper. There are recesses for landing lights in the wing leading edge and the tiny wing fences, very nicely done in this kit. But set these later on.
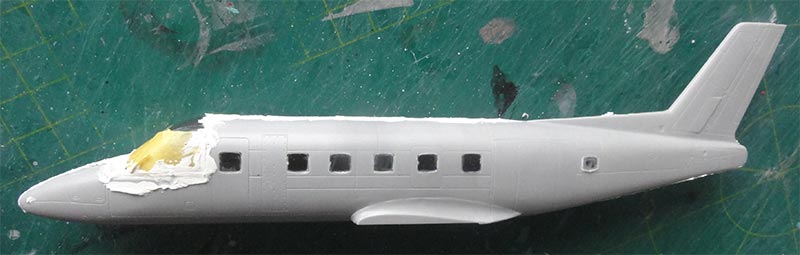
The fuselage halves were joined after nose weight was added. Puttying and sanding the joints is needed as the fuselage spine should be very smooth! Redo puttying if needed and sand again.
The cockpit glazing #76 was now installed and blended in with putty. It fits OK. Protect the clear areas before sanding. Ensure no dust and dirt will get inside the fuselage and cockpit!
The 2 large sub-assemblies fuselage and wing were joined. Some putty and sanding was needed at the wing-fuselage joints. Rescribe some panels at the fuselage spine. Install the ventral fin that was also fitted on the EMB-110P-1 (not on all variants).
The smaller parts will be set at a later stage.
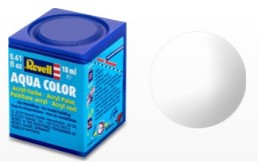
Now a base grey primer is airbrushed after all clear windows had been masked with tape. You get no masking set in this kit but it is not that difficult to do.

The model got than the base grey airbrushed with Revell Aqua 75 steingrau acrylic. Any flaws were again sanded and puttied.

All looked fine.
I liked the Dutch Antilles Insel Air scheme as per kit and shown on box top and on a nice colour paper sheet.
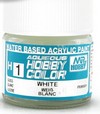
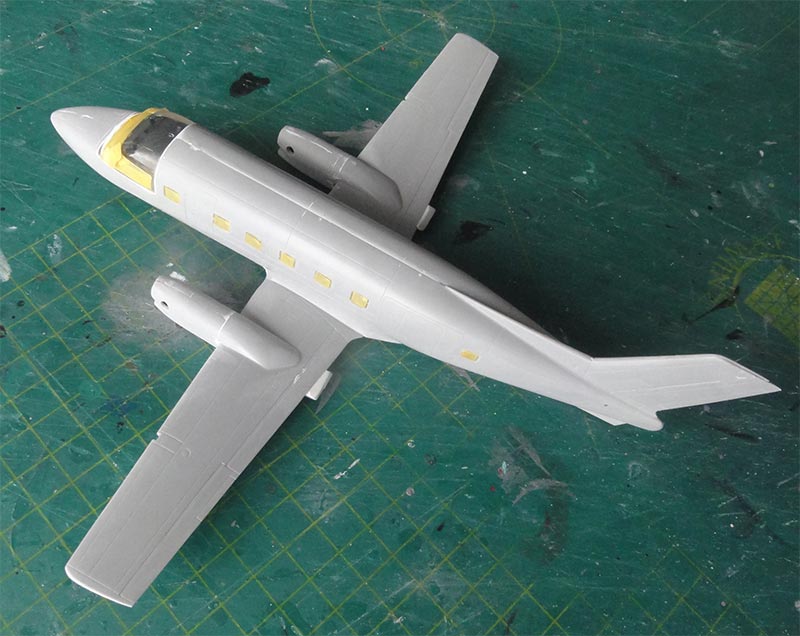
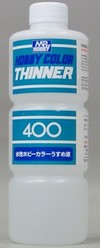
This overall Insel Air scheme is gloss white and it is a good practice to airbrush first a mat white coat. Airbrushed were a few layers of thinned Revell Aqua 05 weiss acrylic. Than followed a few gloss white coats with Gunze Sangyo Mr.Hobby H1 white acrylic thinned with 80% Gunze acrylic thinner and 20% Gunze levelling thinner.

A final good effect is obtained with a final thin coat than with Tamiya White X-2 thinned with Tamiya thinner X-20A.
I polished a bit the gloss white surfaces with a polishing block and cloth BUT ENSURED not to do this at the window rows.
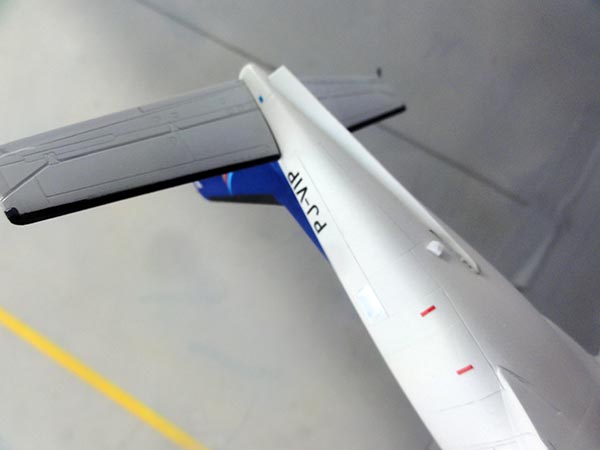
The tail area was masked and airbrushed Insel Air blue for which I used Gunze Sangyo Mr.Hobby H15 gloss blue acrylic.
Next, the leading edges of the outboard wing sections were masked off and airbrushed matt black. (The inboard nacelles edges are not black). Also the edges of horizontal stabilizer and vertical tail.
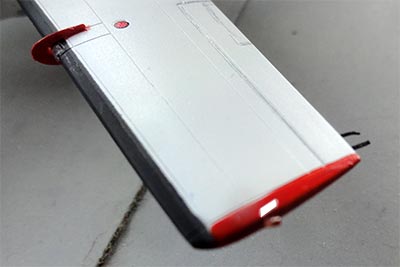
The 2 wing leading edge lights were installed, it needed some sanding of the recess. Ensure not to loose the tiny parts to the carpet monster! On the insides of the lights are the wing fences #70, some white glue closed any gaps here. On the later Insel Air paint scheme as per kit these are red. The wing tips were hand painted gloss red as well.
The window masks were removed. Any small irregular white spils on the window edges can be removed with a tooth pick dipped in window cleaner fluid or Blue Wonder.

All looked OK now. (Note I still have to close the rear window).
All decals were now set and these are fine as per kit.
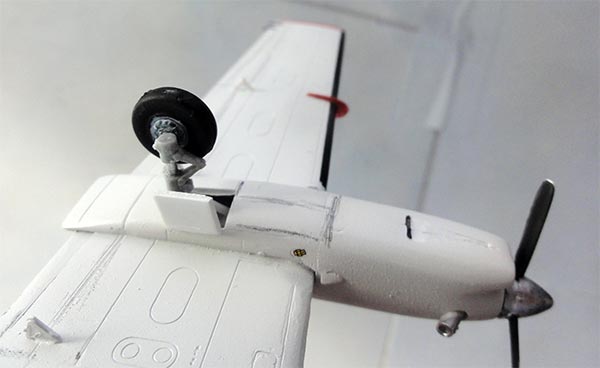
When decalling was done, the landing gear was set. I added a hydraulic wire from black stretched sprue at each gear leg. Than the smaller bits like pitots and antennas were installed. I replaced some blade antennas with thin white plastic card that were painted. The flap hinge parts were also set and painted white.

The closed landing gear door outlines were suggested with pencil lines.
The stabilizers for this variant EMB-110P-1 are to be set horizontal. These were installed after the rear locator holes were drilled open.
Set were next the tiny coloured anti-colision lights; there are clear kit parts but I used coloured aftermarket bits.
The engine exhaust pipe parts are a bit rough in the kit and were replaced by bended plastic pipes from the spares box. These were painted dark aluminium.
A small air scope #41 was set next to the ventral tail fin. The last rear port cabin window was overpainted white as on the Insel Air aircraft this is not fitted.
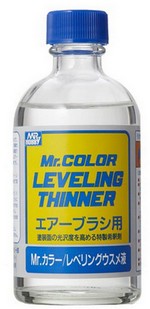
The model was not weathered, this is a well maintained commuter. Only the recessed flap lines got a darker pencil stripe. A final airbrushed acrylic coat of Johnson Future / Pledge thinned with 10% Gunze Sangyo Mr.Color Leveling Thinner protected the decals and gave a nice gloss sheen.

The propeller blades are set as per kit and they are in a nice feathered pose as usually seen on parked Bandeirantes. The blades were painted tyre black and I think the white-black-white propeller stripes are only at the frontal prop tips. The spinners having a chrome color were painted Valejo metal chrome 77.707.
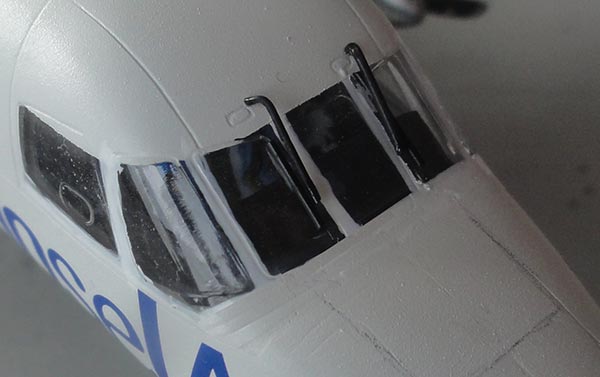
Two window wipers were made from black stretched sprue and fixed with white glue besides the front cockpit window frames.
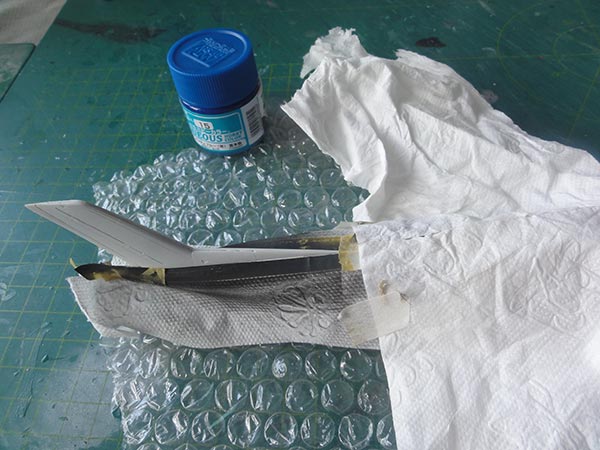
At aileron ends, stabilizer and tail rudder top 5 pairs of static dischargers were set made from EZ line (or use thin black stretched sprue).

At each wing tip a very tiny anti-blinding plate was set from thin card.
That completed this nice model.
Kit dimensions are length 212 mm (real EMB-110P1 15,10 m so in 1/72 210 mm); wing span 214 mm (real 15,33 m so in 1/72 213 mm) so the model dimensions are OK.
... situated at Insel Air home base Hato, Curaçao Airport, Dutch Caribbean....
A few more 1/72 Bandeirante kits are in the stack, to be made in the future.
But meanwhile check out the P-95 patrol version....
- Air International magazine, Key publ: Vol 19/page 201; Vol 23/page 120; - Aviacao militar Brasileira 1916-1984, Netto publ. (in Portuguese)
Internet:
- WikiPedia

(c) Copyright Meindert "designer"/ All rights reserved. Your comments are welcomed by webmaster
Created this page
Sept 4, 2024