Avenger MLD
[ page 2 ]
Trumpeter TBM3W Warner variant of Avenger model kit in 1/32 scale (conversion)
Dutch Naval Air Arm (Marine Luchtvaart Dienst MLD)
....Continueing from page 1....
[ Steps 37-44
]
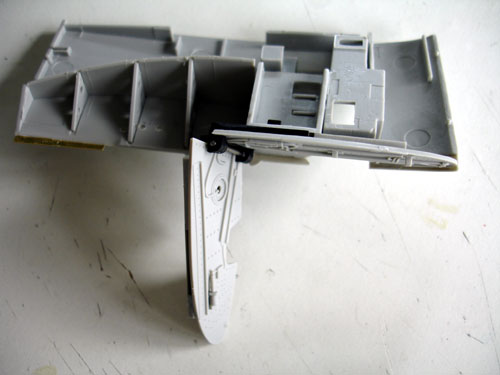
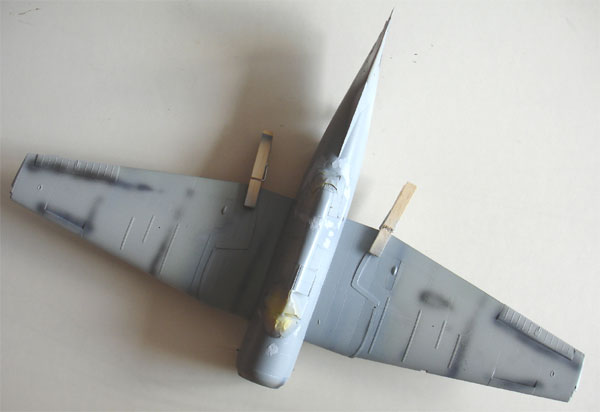
Assemble all as shown. The wing folding
assembly needs some time.
The wing fold mechanism is OK, and
the various parts sprayed white. It was elected to keep the wings foldable
as this would save cabinet space when the model is finished. The trailing
edge flaps would be kept movable; this required filling and sanding the
ejector pin marks in their interiors.
[ Skip steps
45 & 46]
no guns on this variant.
[ Step 47-51]
Attaching the wings is very easy
and the fit quite good. The flaps and ailerons were kept movable and are
nice touches. (Leave the engine and cowl for later).
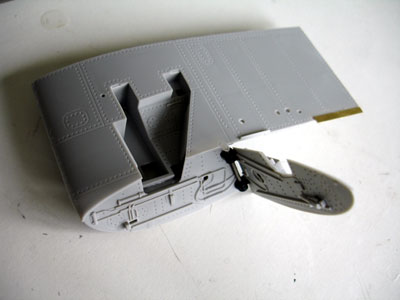
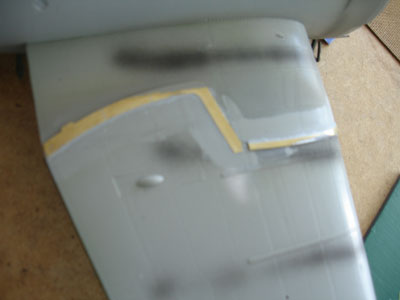
The metal edges were blended in with
the main wing with putty. The wing ends were kept movable and also the
flaps were not fixed.
[ Steps 53 -
56 ]
Assembly the gears and stabilizers
as shown. To the gearlegs, some hydraulics' tubing was added made from
thin metal wire.
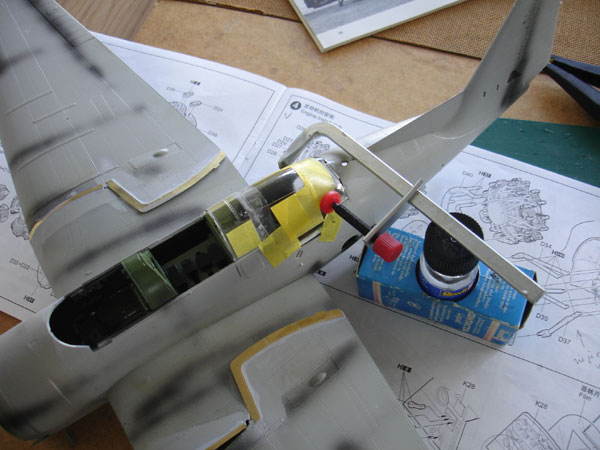
Before going to the next Step 57...
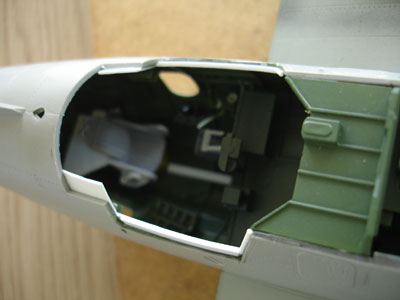
The interior areas were covered with
tape and the overall model was given a first light grey primer coat; this
was applied to check for any flaws in assembly at this stage (Humbrol 64
light grey).
Some areas,"pre-shaded" stripes of
mat black were applied with the airbrush. (You don't need to do this at
this stage however)
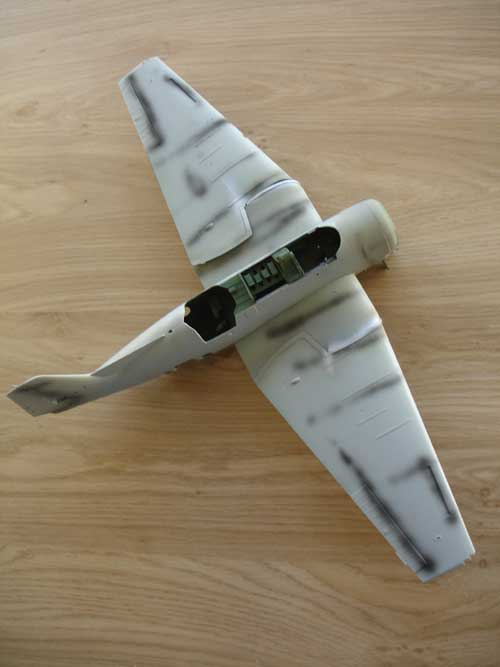
The gear legs were NOT yet added.
![]()
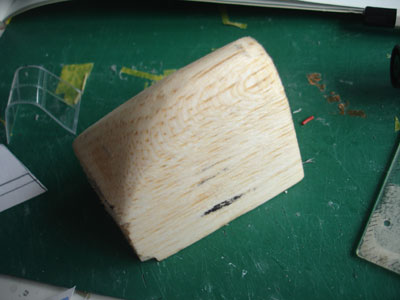
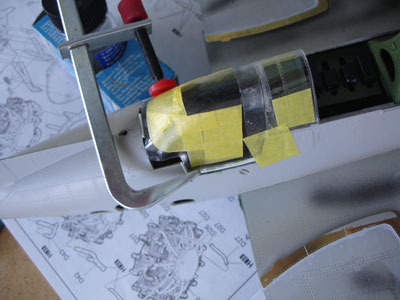
It was now time tor the TBM-3S2 observer
window modification. You need to make a window yourself. This was done
with the "plug method", creating a master from balsa wood first.
The observer window shape was derived
from pictures and the cross sectional shape of the rear upper window.
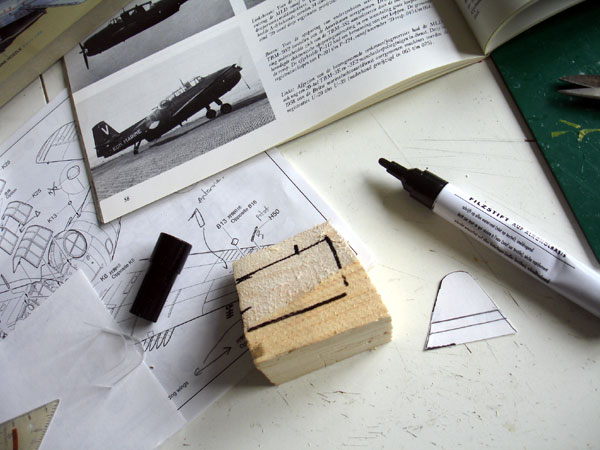
Ensure the shape and especially the
width is OK in order to get a good fit to the cut-out area on the rear
upper fuselage of the kit later on.
A sheet of clear acetate plastic
was heated up to 170 degrees Celsius and with the help a homemade vacuform
wooden box, the clear plastic was vacu plugged over the mould also using
a household vacuum cleaner.
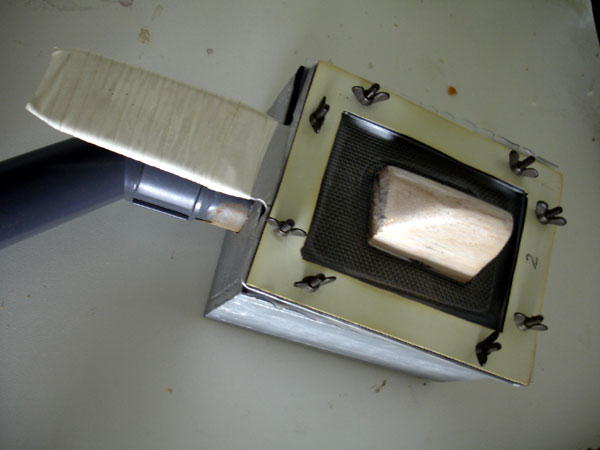
After a couple of tries, a clear
observer window was achieved.
Trimming and cutting the moulded shape of clear plastic was next.
The home made rear observer window
was now to be fitted to the fuselage. Strips were set along the gap edges
to get a strong joint between solid plastic and the clear vacu part.
The clear areas were protected with
masking tape. The glazing required quite some masking. Note the this Avenger
-3S2 has a different glazing lay-out than most Avenger versions.
All edges were carefully glued and
"sealed" with "liquid glue"; this is the ordinary plastic glue with some
small pieces of sprue dissolved in it. It gets you strong joints and ensures
no fluid can get inside the glazing of the fuselage if you carefully close
all gaps with it; note that you will not be able to do any clean-up later
on inside....
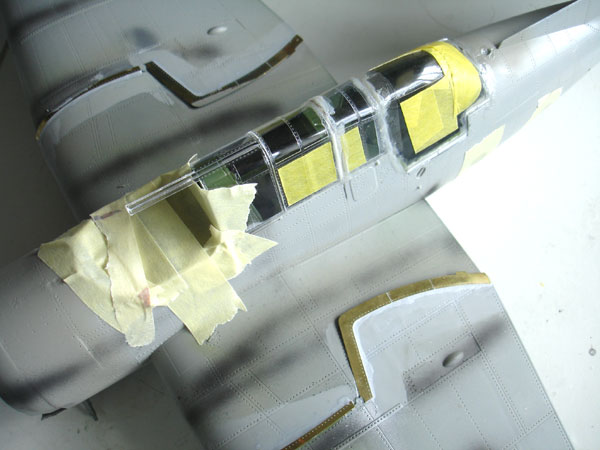
Next putty was applied also
over the liquid glue and all edges were treated and sanded smooth.
[ Step 58 ]
Continue assembly, but most parts
here are not needed: the rockets, bombs and tanks are not fitted to the
TBM-3S2. Also, the antennas J16 + J41 are not needed.
At the tail area, a small fairing
was obtained from the spares box for the external tail hook. The ridge
seen below is to be cut off...
Note that the lower window was already
filled up with card and and faired in with putty.
[ Steps 59 +
60 ]
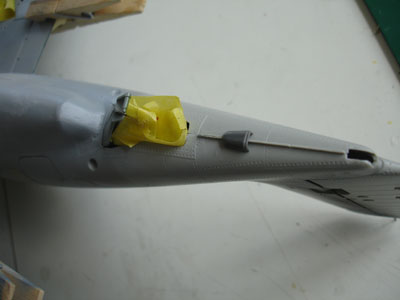
The glazing areas are quite OK now,
but carefully assemble the forward parts with the windshield.
The vertical mid-frame on clear side panel part #K6 should not be there for a TBM-3S2. Sand away using fine grid and polish with Tamiya rubbing compound until clear.
The wing tips lights are nice touches
to the model.
The cowling, engine an d propeller
were fitted. Note that there should be indeed an edge at the top of the
cowling where it meets the fuselage.
The parts #K13 and D6 are not needed, part #G36 is at a slightly different position. The pitot #H50 at the wing tip is very breakable! Leave until later.
We are almost there! Only now to start applying the rest of the paint scheme.
On to next
[
Page 3 ...]
Back to 1/32 scale Models.......

(c) Copyright Meindert "designer"/ All rights reserved. Your comments are welcomed by webmaster