[ page 2 ]
Douglas A-4 Skyhawk in 1/32 scale
page 2
page 3
... continued from page 1...

... and seen here in the tail…
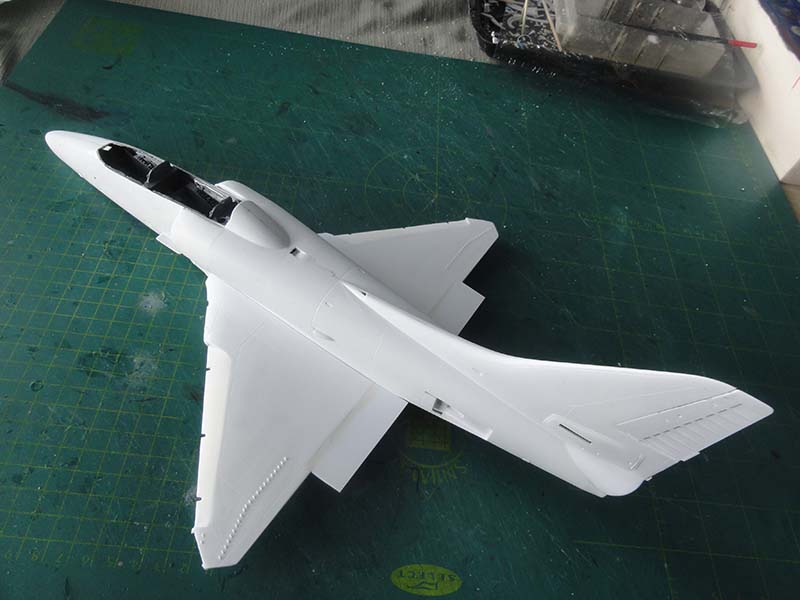
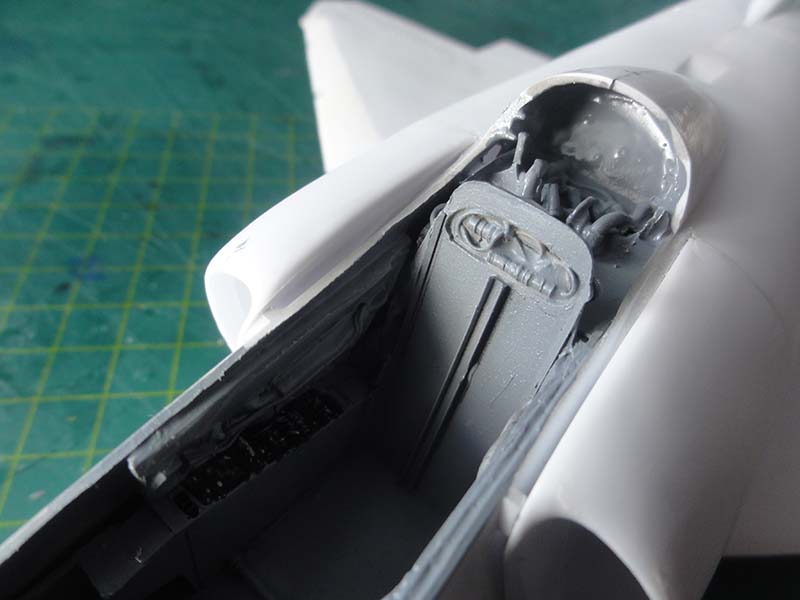
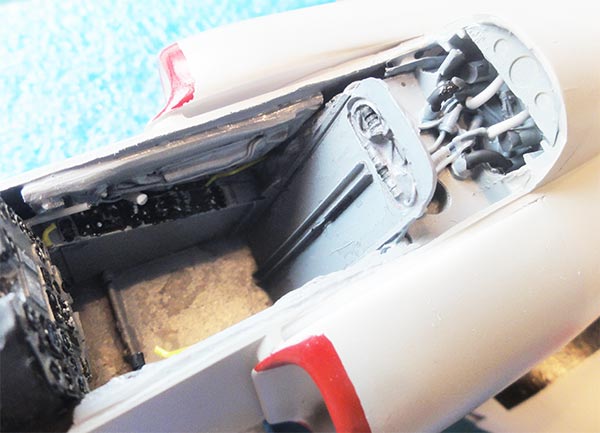
The fuselage interior is now ready for closure.
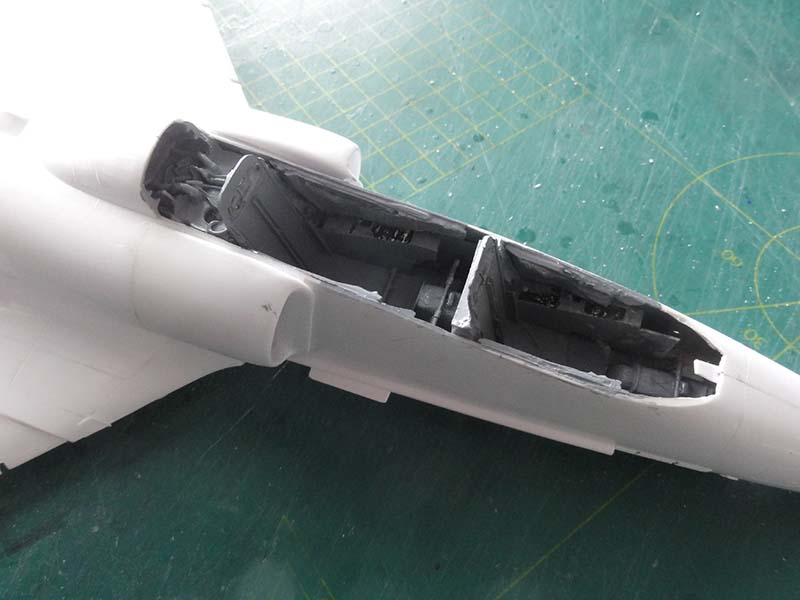
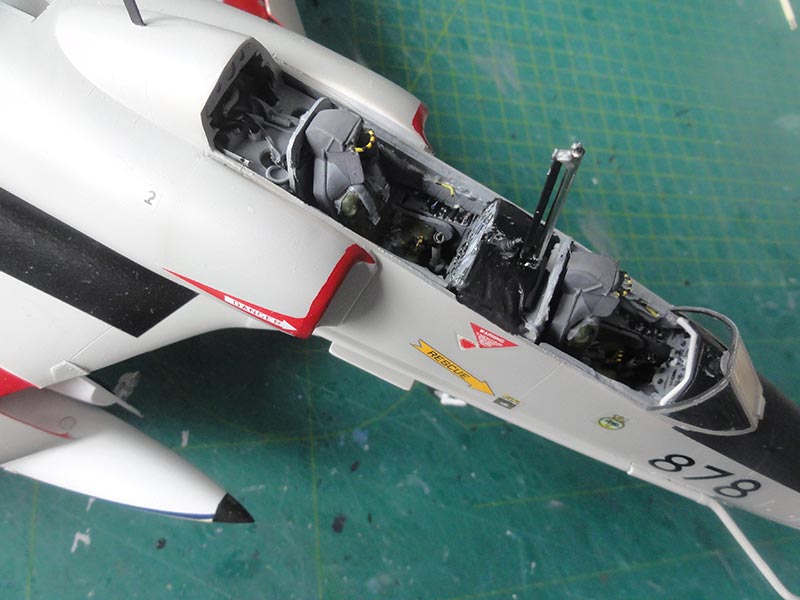
At this stage the AVIONIX cockpit tub was set with superglue as well as the sidewalls. A few slices had to be removed of the resin side walls in order to fit.
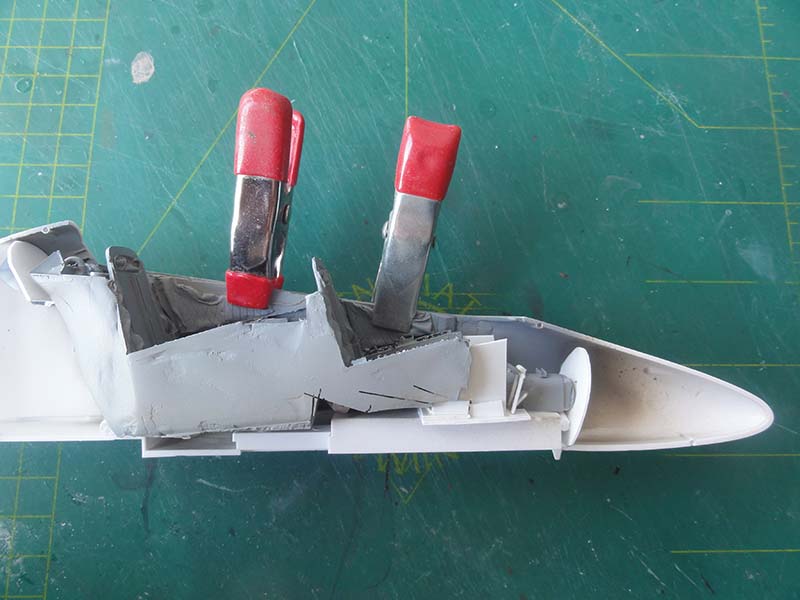
A few side walls from card were set as well as the resin bits had been damaged earlier.
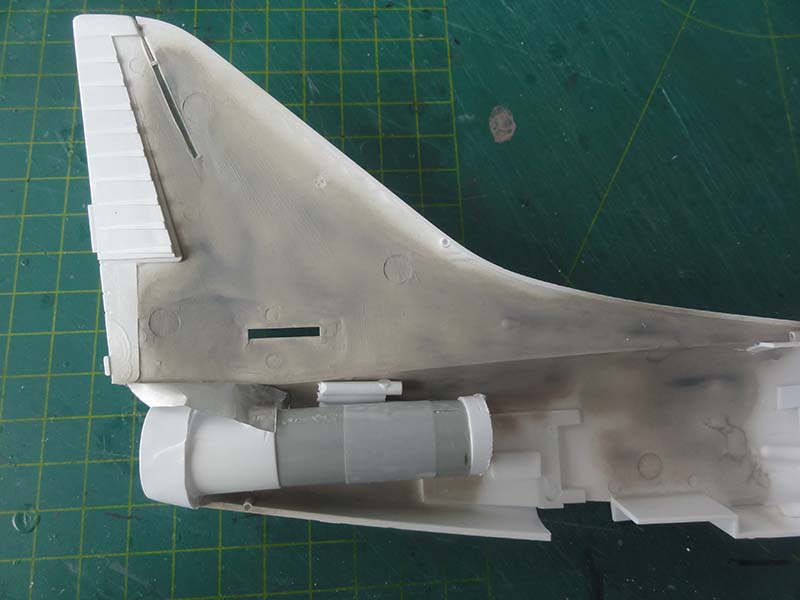
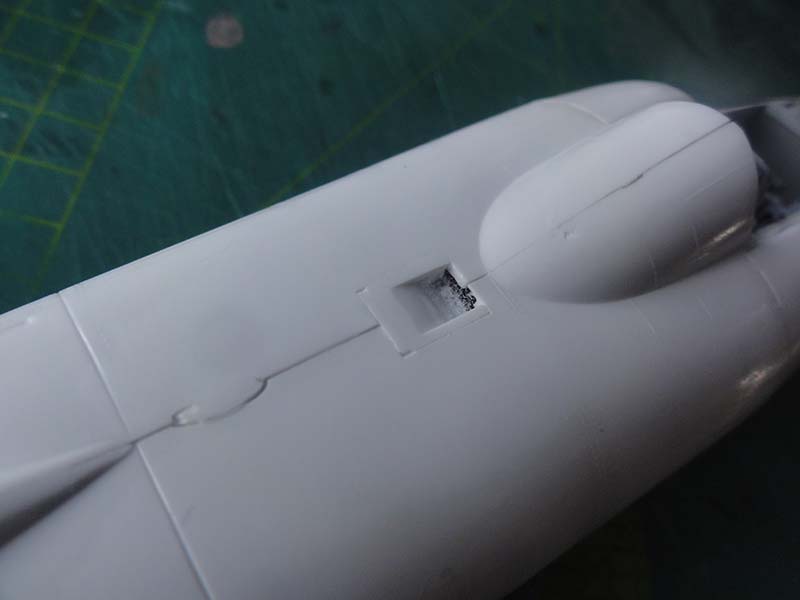
The cooling duct #C24 at the spine was opened up and set.
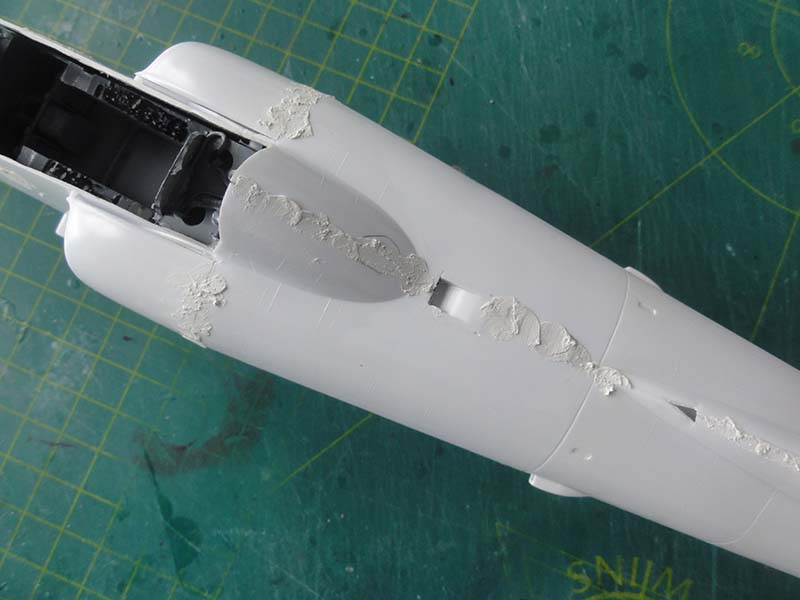
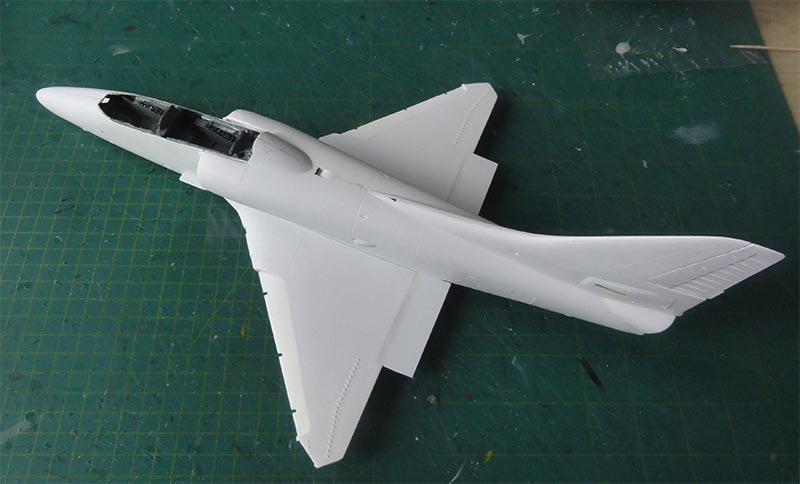
As very important moment…. Closing up the fuselage….
The intakes were installed, some joints puttied and sanded. Sanding as also needed at the lower fuselage. On the cockpit sides and intakes some “shrinkage” was filled and some sanding done.
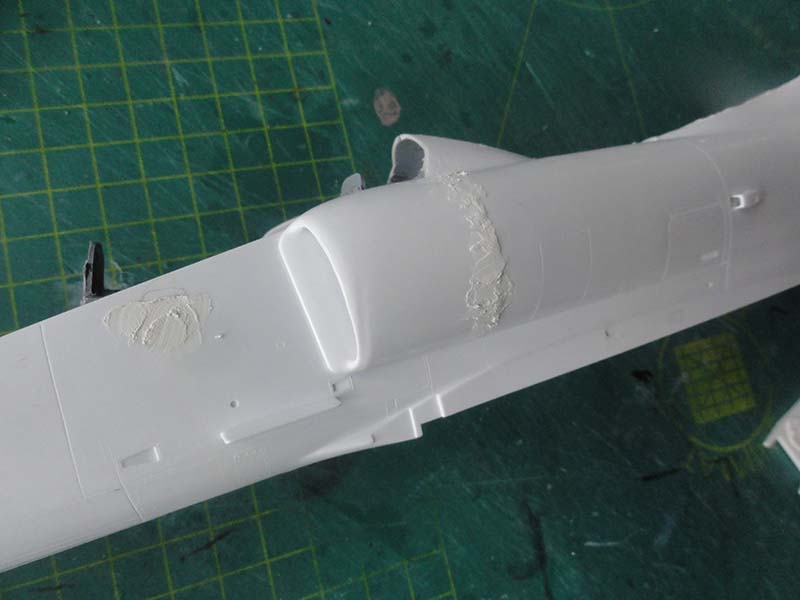
The air brakes are separate parts and will probably be set closed. They fit O.K. The spine needed however some extra putty and sanding.
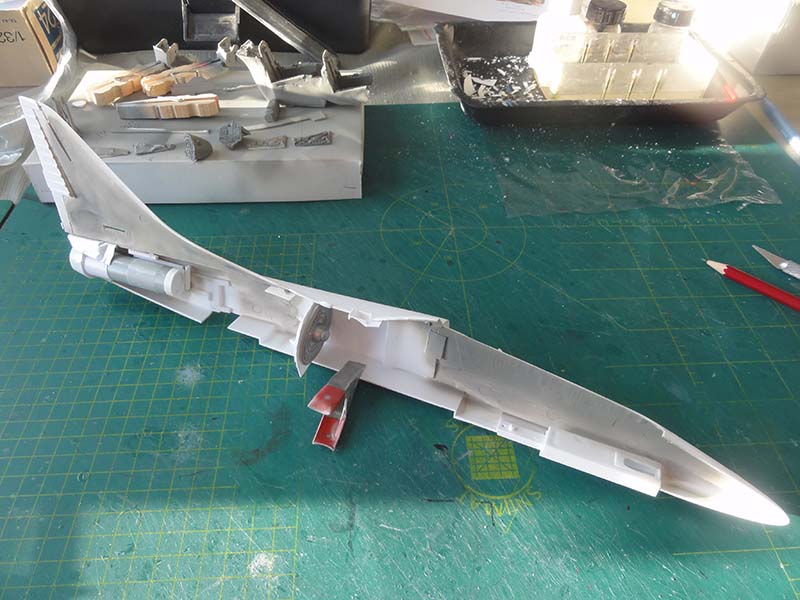
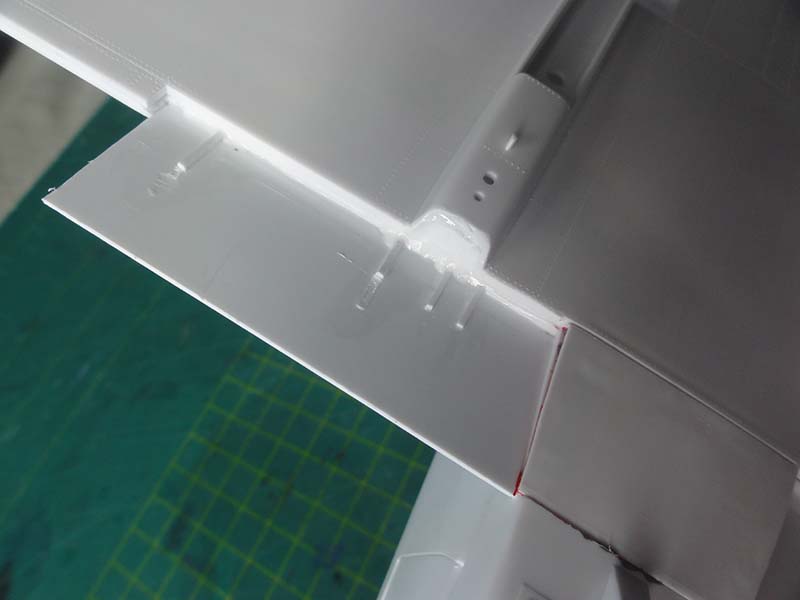
The wing-fuselage junction as per kit is quite good, the small gaps can be closed with white glue.
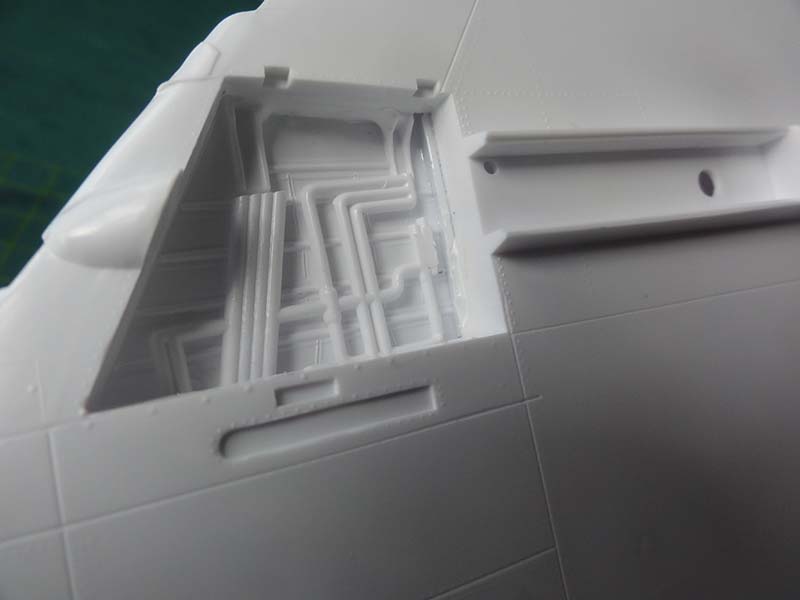
The optional rear engine bay hatch can be posed open later on if desired. To have this option, I detailed a bit the empty bay in the kit with some spare parts suggesting a lower view on the engine.
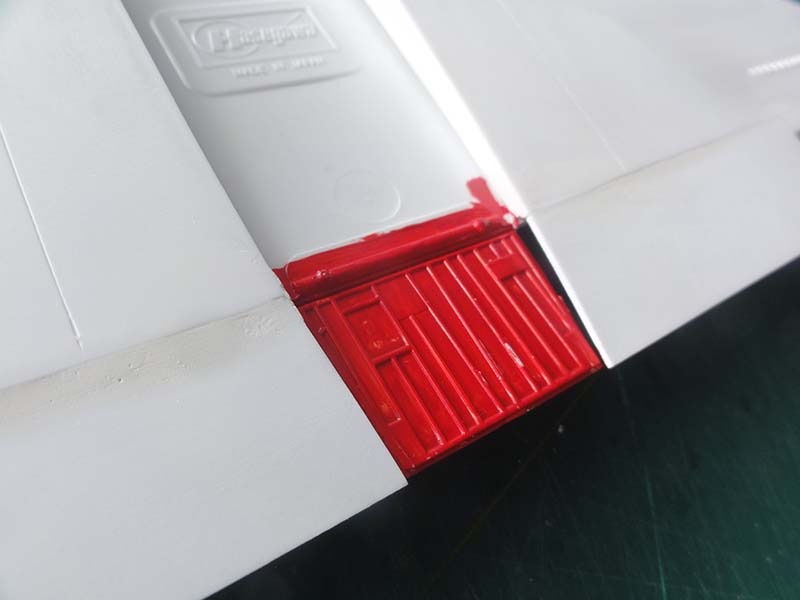
The hatch was painted red and also the added detail.
The wing was joined with the fuselage but the engine hatch was not glued!
The split flap is seen here with white glue used to close gaps:
As noted, the rough moulded tubing in the gear bays were cut out and these were set with glue deeper. Some more details will be added at a later stage.
The gaps in the bays were closed with card and white glue, creating the bay enclosures. Detailing to follow later on.
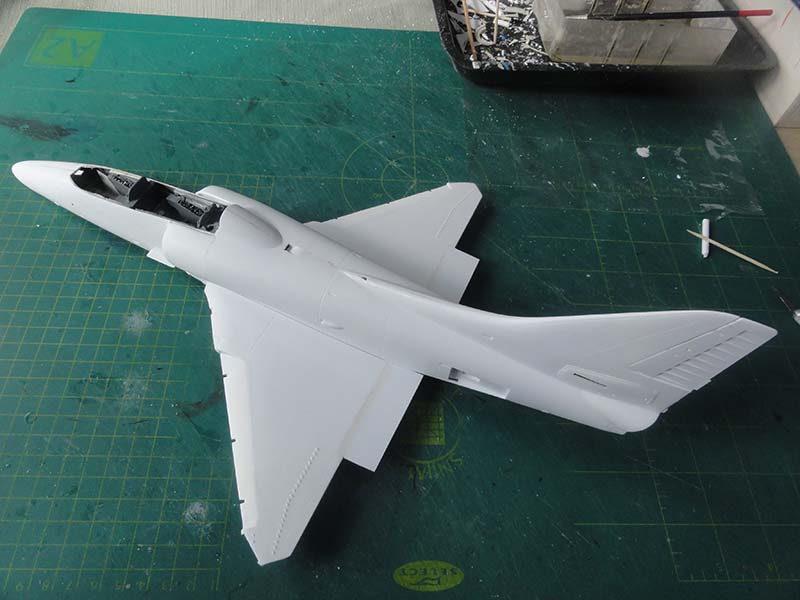
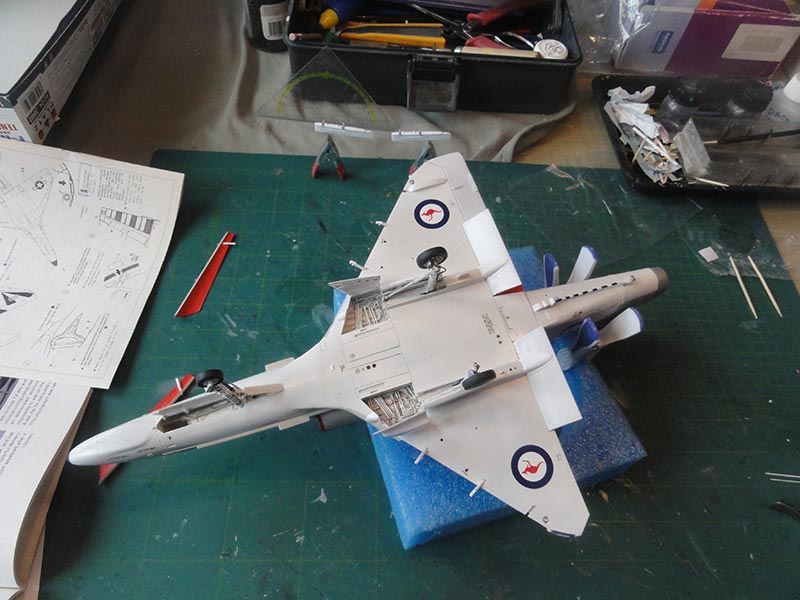
Overall assembly done...
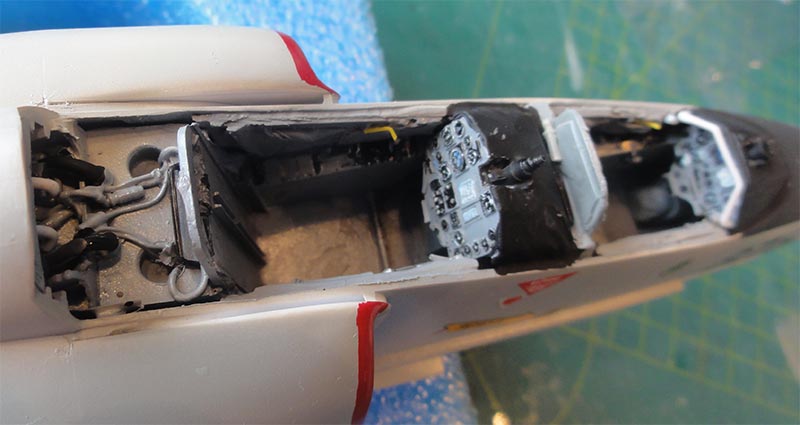
At the rear of the cockpit tub, a small inside bulkhead had been set and the gaps were closed with white glue. Same was done with the small gaps at the resin side walls and cockpit openings.

The model got now a first base grey coat with Revell 75 steingrau with the airbrush. Some tiny spots needed a bit more putty and sanding.
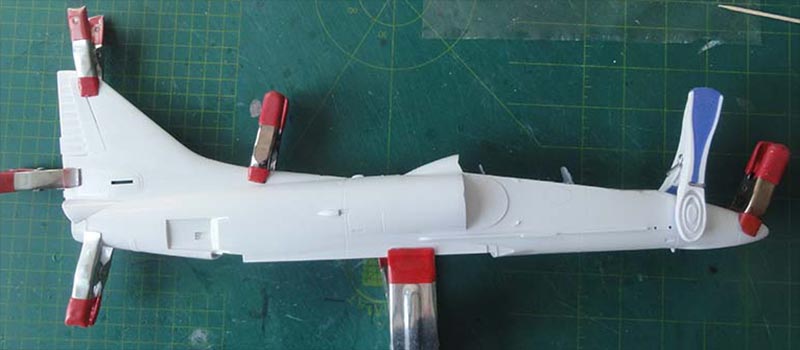
The lower surfaces and the tail areas were airbrushed white as the Australian Navy (RAN) TA-4G has a gull grey and white scheme. The separate ailerons and flaps were also airbrushed white.
For the white I really like the Gunze Sangyo acrylic paint H1 which gives a very fine finish when thinned with the Gunze acrylic thinner.
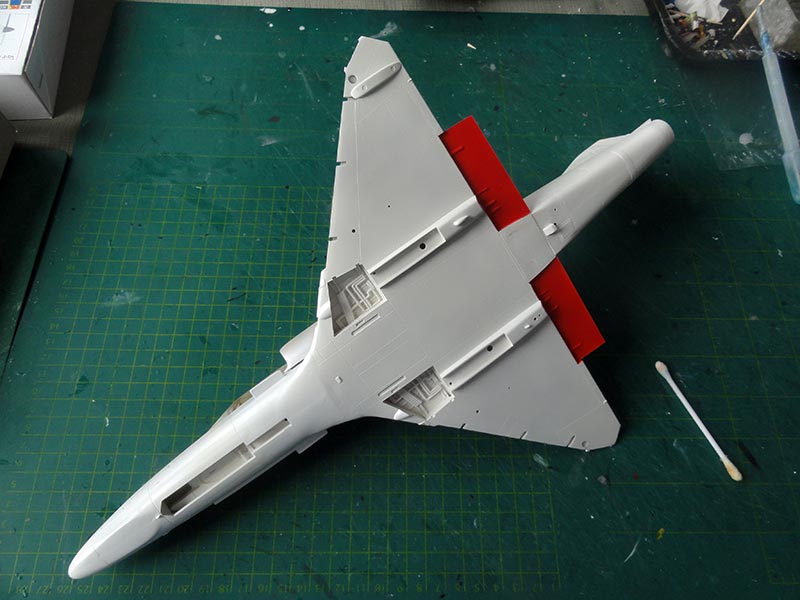
After the white had dried, masking was done and the insides of the flaps and fuselage recess were airbrushed bright red. The white tail with rudder would get the special coloured panels and was also masked.
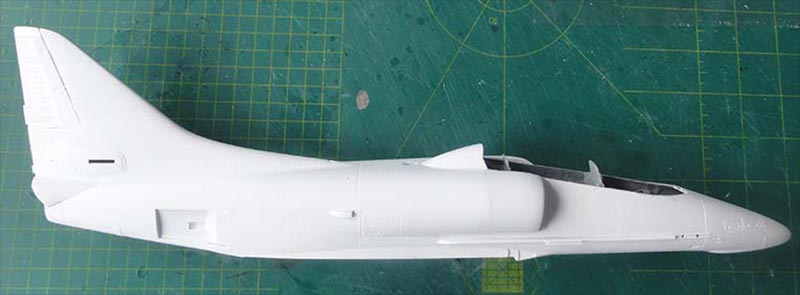
The lower areas were masked and the upper gull grey FS36440 airbrushed with Gunze Sangyo H325 acrylic paint. The canopy and windscreen were masked of and carefully airbrushed as well.
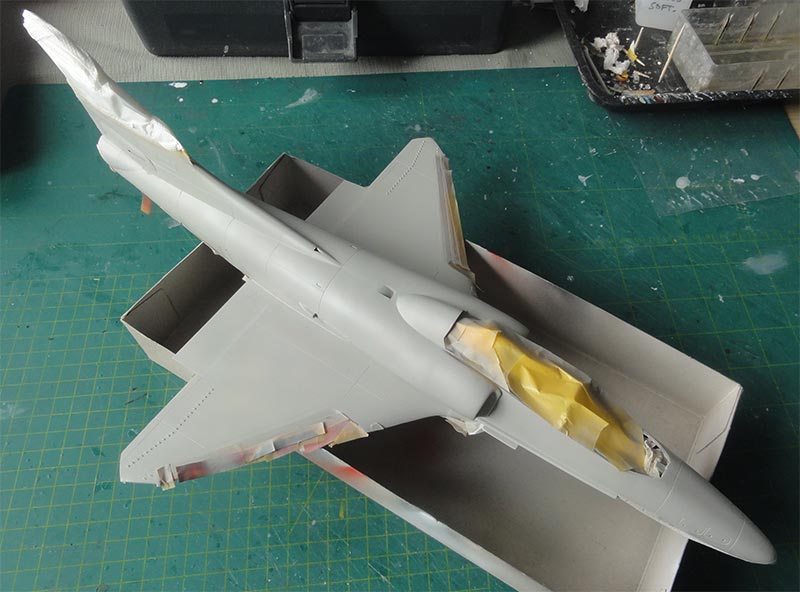
And the slat insides were after masking airbrushed red after masking done.
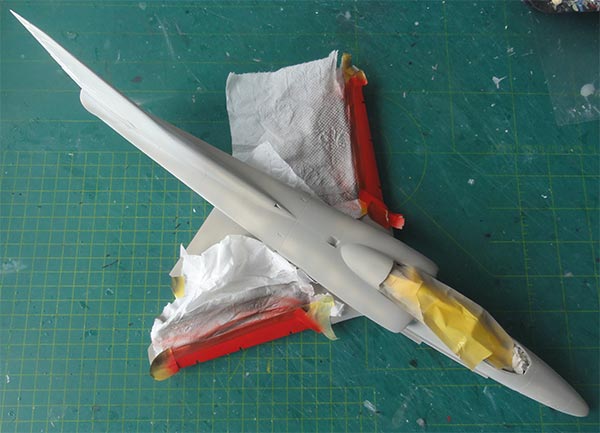
The result is seen here (the tail colours were still to be added).

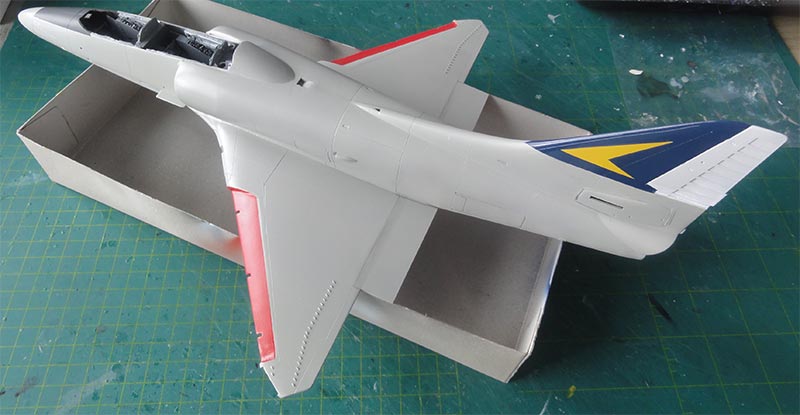
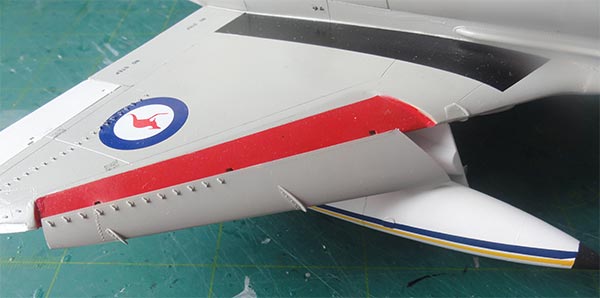
The tail colours were airbrushed after masking with fine tape after looking at photos.

I used for the Oxford blue (about FS 15058) Gunze Sangyo H328 acrylic paint and for the yellow Gunze H413 (approx RLM04).
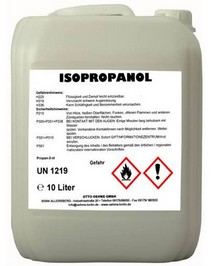
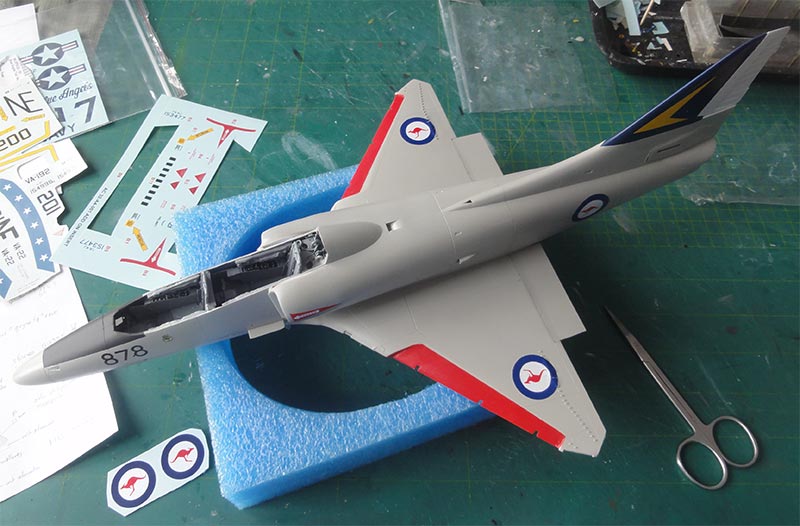
The model had received now the main colours and a few gloss varnish coats were airbrushed with thinned Johnson Future/ Pledge. This gives a good undercoat for the decals to avoid “silvering”, that is the disturbing effect of air bubbles below a decal that spoils the appearance. The thin ratio is about 3 varnish : 1 thinner, which is a mix of Isopropyl Alcohol (IPA) and distilled water.
The markings of this particular TA-4G from VC-724 were not aftermarket but gathered from other kits and spares.
Decalling was done. A large Xtradecal sheet X72260 provided 4 big roundels of about 23 mm diameter but I needed 6. I was lucky to find 2 more on in the Revell (Italeri mould) Mirage III kit #03919 (though 1 mm larger) which were set on the lower wing. x
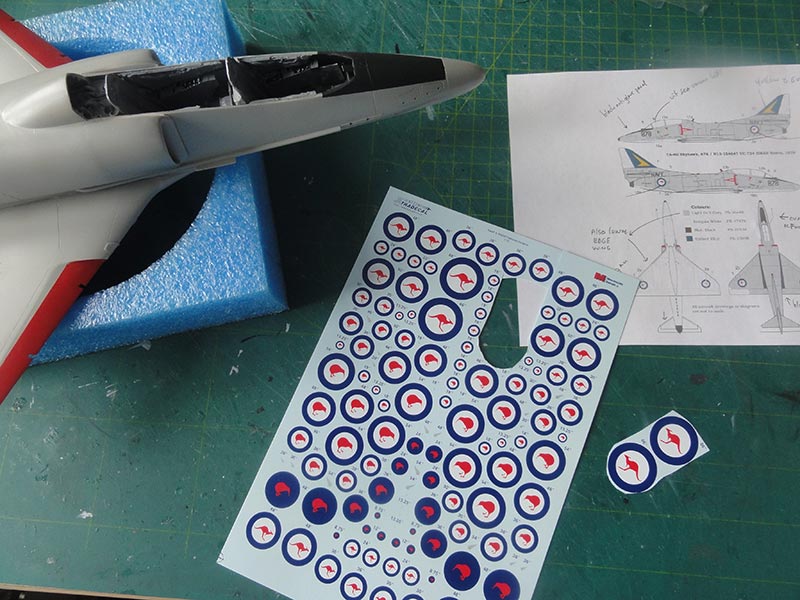
The NAVY titles came from the Hasegawa kit decals. The smaller RAN airframe stencilling markings were not very clear to me, I simply assumed these not to be that different than US Skyhawks. The RESCUE arrows though have a different shape and were found in the spares box and spare Microscale A-4 sheets.
A pair of RAN squadron badges were found on a 1/32 Revell Sea Venom decalsheet that looked quite like those seen on the TA-4 of VC-724. The large aircraft codes (“808 “picked) seem to have the “British” style and were also found on that Sea Venom sheet. The small a/c Bur.no N13-15474 were composed of various smaller number decals from an XTRADECAL numbers sheet.
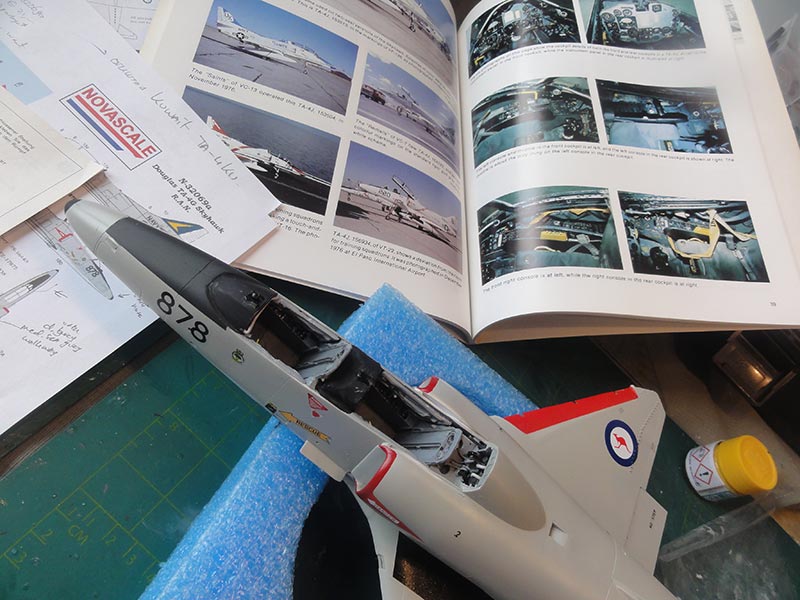
When decals had been applied, it was time to proceed completing the cockpits. Various details were added to the used AVIONIX cockpit set like throttles, various handles etc. I used the Detail and Scale Vol.32 A-4 Skyhawk book which shows nice details. In front of the forward instrument coaming I saw a sort of grey pipe, may be for demisting? This was added from scrap. Aft of the rear seat some extra’s were added as well.
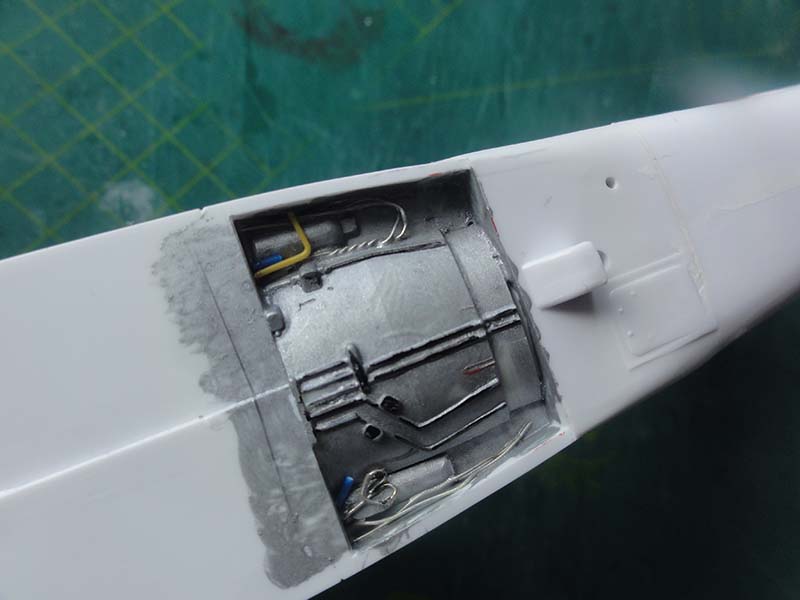
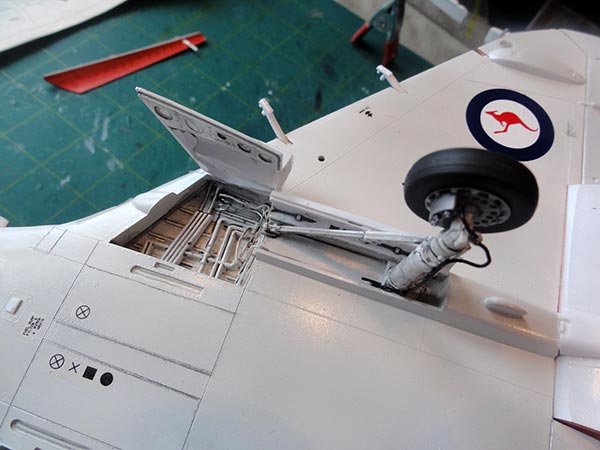
Undercarriages as per kit are fine and strong enough. I needed however to scrape off the raised mould ridges on the legs. The tail hook was painted with with metal bits and got black stripes.
The long nose gear leg has the steering rod as well and this is in the Hasegawa kit part #D6. I replaced it with a long metal wire though to have a metal shiny effect. After the gear had been set in place, the gear bays got more details made with wires and stretched sprue for the many hydraulic pipes seen in a real A-4 bay.
TIP: I used the IPMS The Netherlands A-4 Walk Arounds that my over 40 years’ modelling friend Cees Hendriks made looking for the details.
On the gear legs also but just a few hydraulic wires were added. A dark wash was added when all was painted mainly white. On the gear door with the landing light, an electric wire was added as well.
![main gear]](a-4-32-232.jpg)
Next, it was time for adding the wing leading edge slats. These drop by gravity on parked aircraft. I had quite some work here. The slat rails in the kit look good but I think they are 2 mm too long. So these were shortened and getting a parallel symmetric instalment takes time.
The wing tip lights are in the kit. The forward portion is clear, the rear red on left wing tip or blue on right wing tip. I painted a small section in gull grey to suggest 2 separate lights. It seems there is also a small tail light (kit clear part #F7); though I could not see it clearly on photos, I assumed it is also there on a RAN A-4. On top of the fuselage spine, a clear red anti-collision light was set that I had in the spares box.
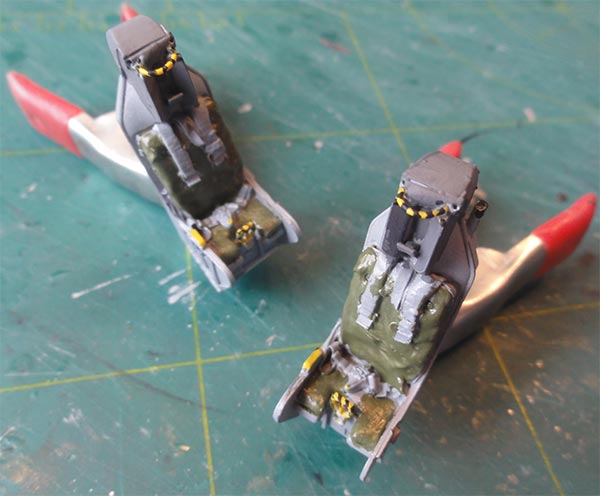
The AVIONIX seats were used and were painted and detailed. Many sources quote seats to be mainly black but I saw on photos mainly dark grey with various colours for the packs etc. Some metal wire was added to suggested buckles and the small pull handle on top and lower ones were made from yellow stretched sprue with black stripes added with a tooth pick.
The big canopy in the Hasegawa kit is fine and you get some internal detail. The big canopy will be set open and will fit in a notch in the back. So I added more details as on photos very prominent the locks are seen at the canopy sills. All these were copied using as pattern an etched metal set included in a nowadays very rare 1/32 Hasegawa OA-4M kit that I still have.
The canopy locks were made similar to the etched set patterns from old photo negative strips, cut to size.
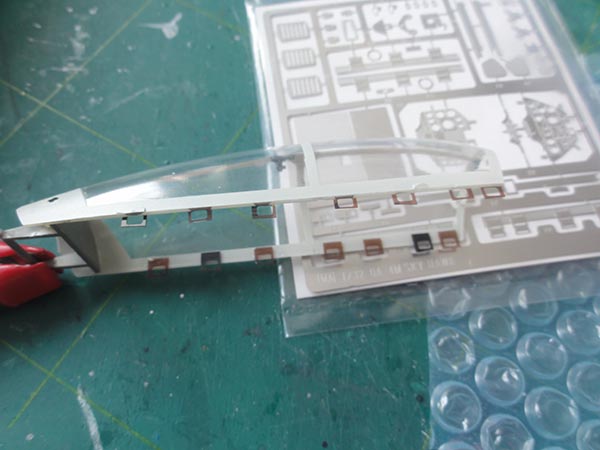
The 2x2 rear view mirrors came from an old REHEAT mirror set. The interior colours in the canopy show black frames, these were suggested with a combination of black decal stripes and painted.
The kit extension rod #A6 was replaced partly with a metal spoke to get a shiny effect and suggest the hydraulic rod of the actuator. The metal bit should be at the front.
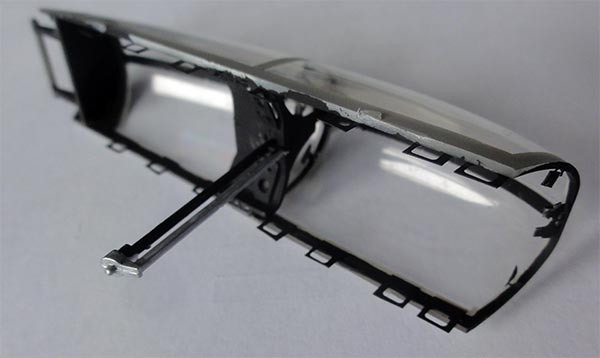
(on retrospect... the locks are a bit oversized but it was decided to retain them as the photo negatives are that size).
Later on, I decided to set the extension rod fixed not with the canopy but with the coaming to avoid breaking it.
The seats were set in place.
Back to 1/32 Models

(c) Copyright Meindert "designer"/ All rights reserved. Your comments are welcomed by webmaster
Created this page
August 16, 2021