conversion
[ Page 1 ]
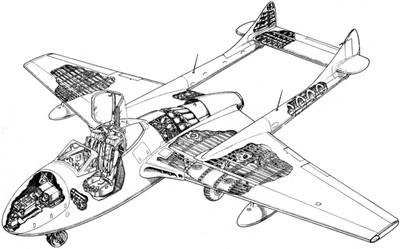
1/32 scale De Havilland Vampire trainer conversion
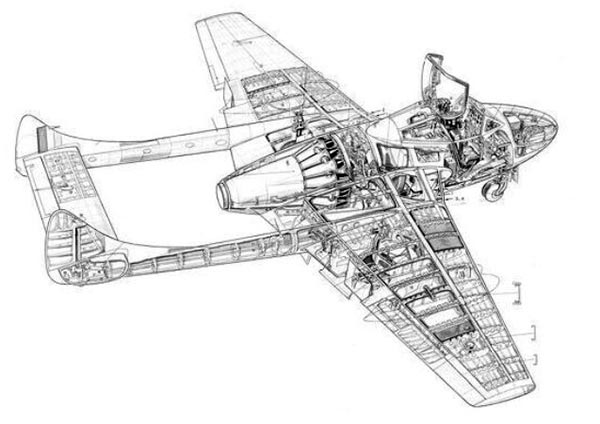
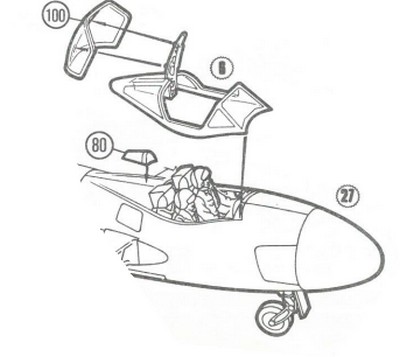
(old cut away drawing courtesy Flight magazine of Vampire T two seater)
Two seated Vampire versions were also developed and manufactured and these had the Goblin 3 engine. It started with the NF "Night Fighters" and the two seaters had a different fuselage and twin cockpit with a pilot and radar operator/ navigator in a "staggered" seating arrangement.
There was also a need for jet trainers so of the Vampire T.11 was development. It was different than the twin seated Night Fighter with different canopy, tails and a nose with and up hinged nose cap. For better instruction capability, it got "side-by-side seating" and was rather cramped. Initially, the T.11 did not have ejection seats, but later models got ejection seats. The wing was similar as to the Vampire FB.5 and it had the same overall wing span. Lower nose armament was also similar though many trainers flew with only 2 guns installed internally but in case of crisis, 4 guns could be fitted. Weapon trainers were based on the T.11 like the T.55 and T.33/ T.35A. Many Vampire trainers were exported as well and used by air forces that also used the single seat Vampire.
See for more history information the 1/72 Vampire pages here...
I would like to have a 1/32 scale Vampire trainer T.11. But in 1/32 scale there is no Vampire two seater trainer model kit. But could it be done with combining a ....
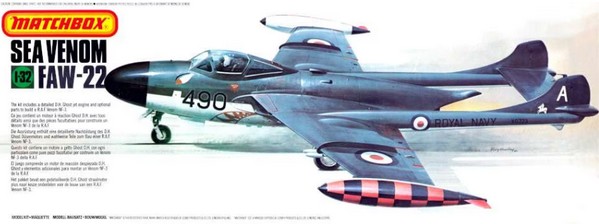
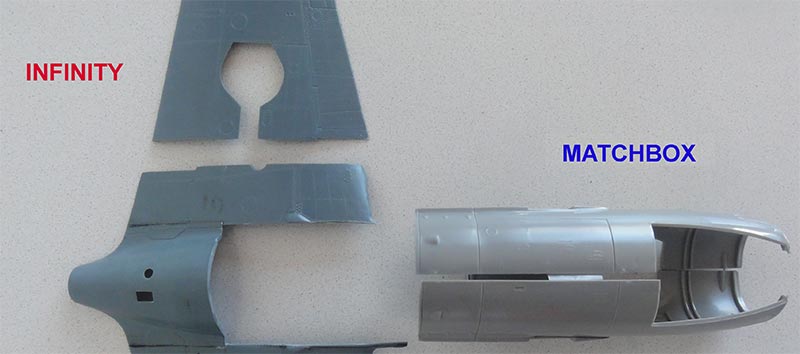
.... 1/32 Sea Venom kit from Matchbox (also released by Revell)
+
... and the Infinity Models single seat Vampire kit as described on this page... ?

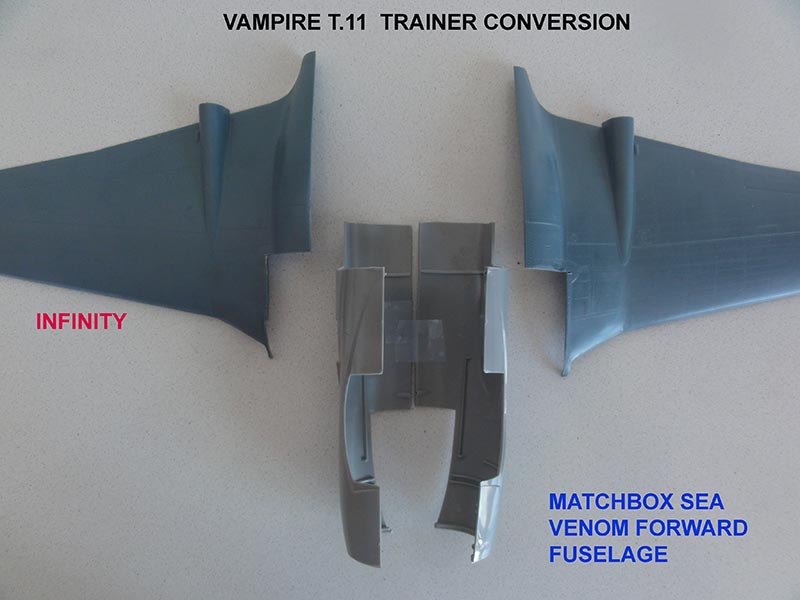
Cross kitting both kits could give the main parts needed for a twin seated Vampire:
- two seater fuselage from the Sea Venom kit but with significantly changed nose with no radar;
- Sea Venom two seater canopy;
- wing from the single seat Infinity Vampire kit with clipped wing tips;
- adapted tail booms and fins;
- changed details like in the cockpit and different seats and layout.
The accuracy of the 1/32 Infinity Vampire FB.5 wing planform checked as noted on the page 1 is good and the T.11 had the same wing. Though the Goblin 3 engine used in the Vampire twin seater had a larger diameter than the Goblin 2, the overall wing span of the T.11 was the same as the FB.5. So I concluded that the mid-fuselage diameter would largely be similar as well.
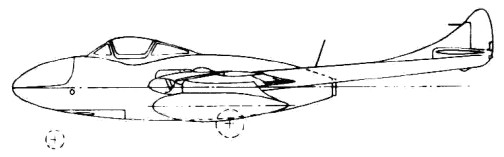
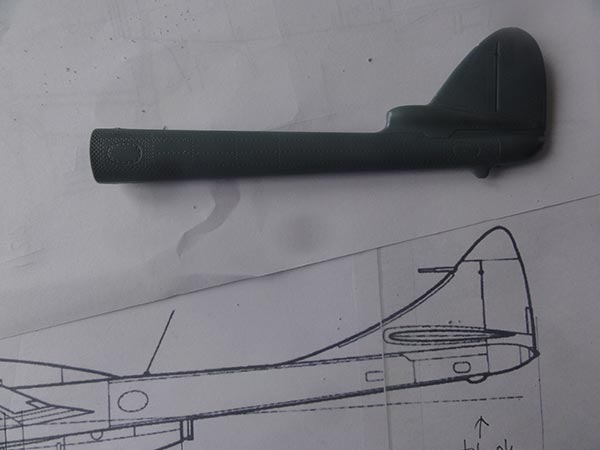
Than the shape of the Matchbox Sea Venom fuselage was checked with photos and a drawing. Some scaled up drawings to 1/32 showed that the Vampire trainer nose in front of the wind screen looked different as to the Sea Venom with its radar nose.

The Sea Venom had a big radar nose and a total length of 36 ft 7 inch (11,15 m).
The Vampire T.11 trainer has a total length of 34 ft 6 3/4 inch (about 10,53 m). I looked at various references. Length differences are not necessarily all in the nose but may also be due to other Sea Venom tail booms, fuselage rear lengths etc.
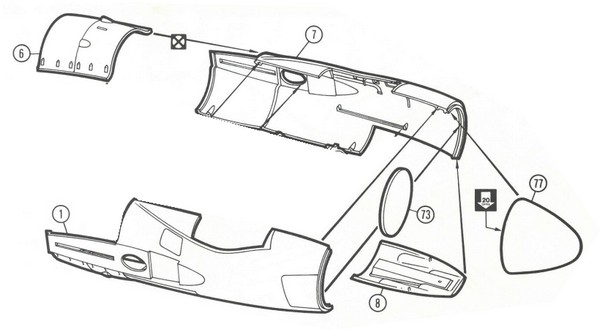
The Vampire T.11 trainer nose had no radar and a quite different shape. It had an upward opening nose cap/ hood in front of bulkhead no.1 and could accommodate a G.45 camera, VHF radios, oxygin bottles, glycol container and batteries.
The shape of the Matchbox Sea Venom kit forward radar nose shape is "fat amidst the nose". But where was the length difference?
![airfix t11]](airfix-vampire-t11-a02058A-1.jpg)
The 1/72 Airfix T.11 kit was analysed, see page 1.
Some measurements were done scaling up with a 72/32 = 2,25 factor.
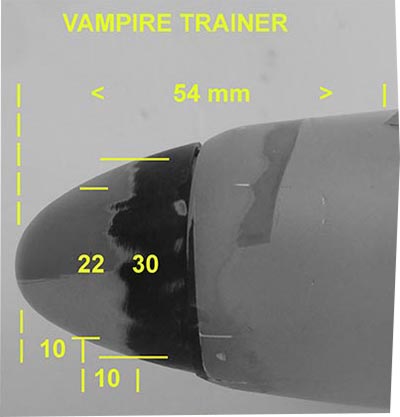
The length was measured of nose tip to forward wind screen edge:
Airfix kit 48 mm and Matchbox nose 54 mm so here is quite a difference. 6 mm in 1/32 scale is approx 19 cm on a real Vampire.
The overall length difference quoted between Sea Venom and Vampire T.11 is 1115 - 1053 = 62 cm so this means that some 43 cm length difference is elsewhere for the Sea Venom, for example in the mid-fuselage and tails.
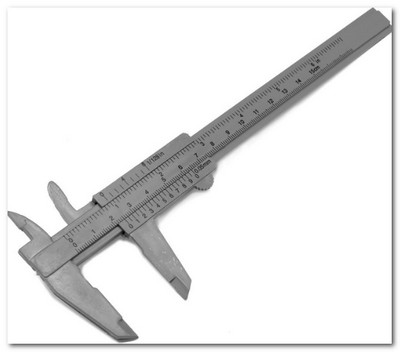
Than cross sections were checked:
At 10 mm from nose tip: cross section height Airfix 22 mm and width 24 mm; Matchbox nose 22,2 and 24 mm respectively so quite good.
At 20 mm from nose tip: cross section height Airfix 30 mm and width 29 mm; Matchbox nose 30 mm and 30 mm so again quite good.
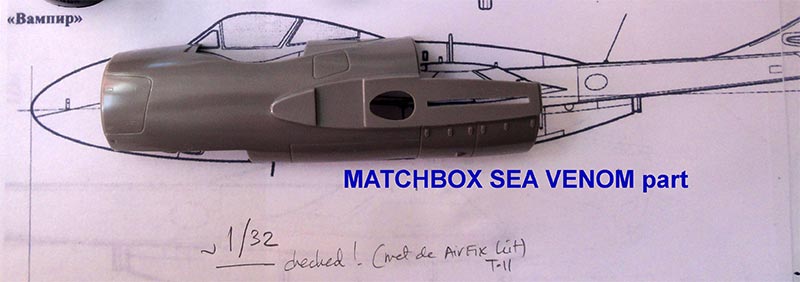
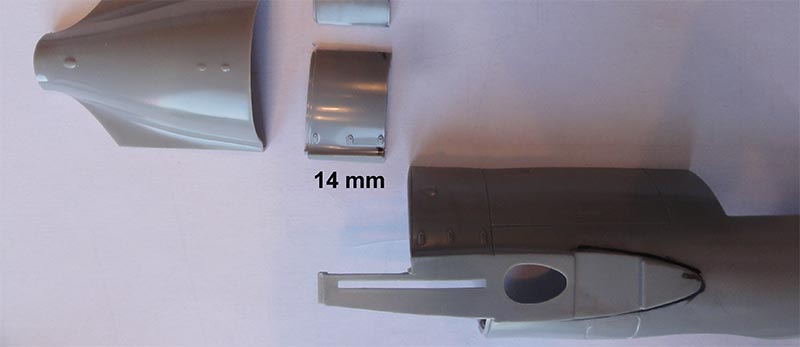
It was concluded that the first 25 mm shape of the forward nose part #77 of the Matchbox Sea Venom is quite similar to the Vampire trainer nose shape. A nose section slice of 6 mm length in 1/32 scale should be removed between "somewhere amidst" the nose in front of the Matchbox kit wind screen.
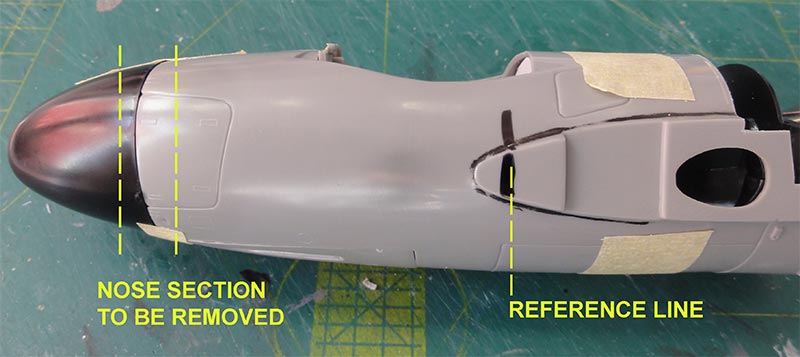
It was decided to do the correction at the kit nose joint: from the rear of the nose part #77 some 5 mm will be removed and 1 mm will be sanded off from the nose shells #1 and #7 near the bulkhead #73. The lower gun nozzle positions looked good enough.
Because of the shortened forward fuselage there will than obviously be a "circular step". More about this later on.
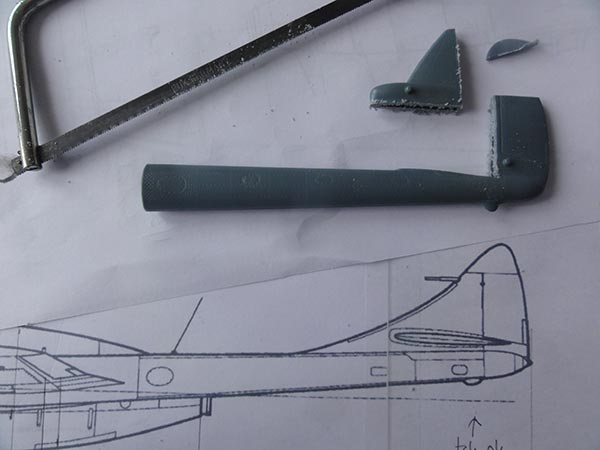
The Vampire trainer tails are quite different though as compared to the standard Vampire. Here a 1/32 drawing is seen with the Infinity Vampire tail boom. The Vampire trainer also has stabilizer extensions and an additional curved fin area for better sideslip control. But conversion with putty and card can be done to be discussed later.
OK, let's start with major surgery...
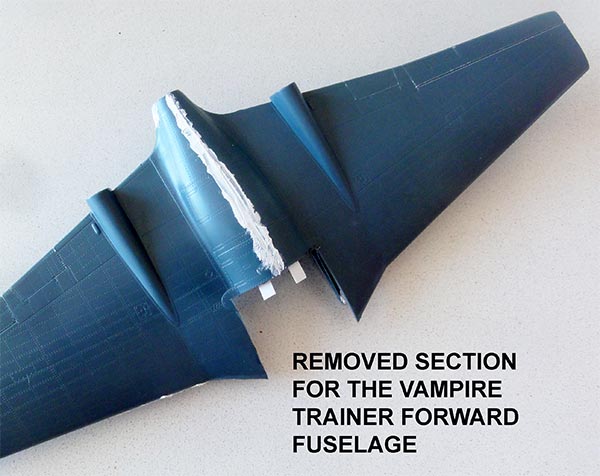
A razor saw and Tiger saw were used.
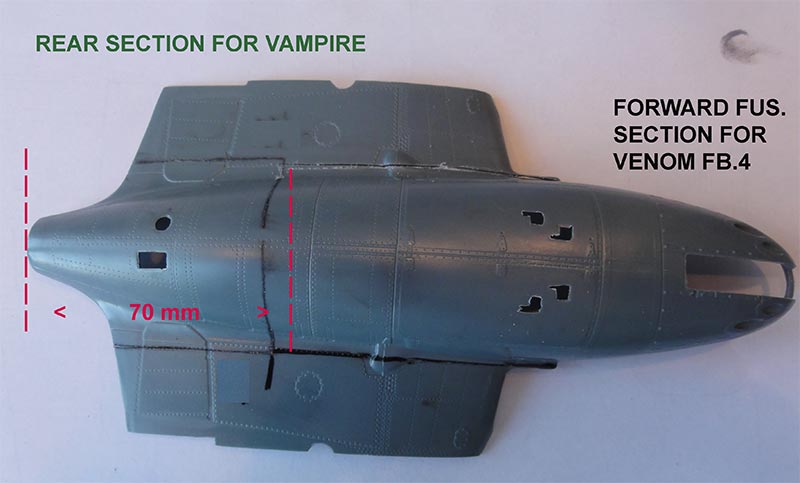
A section was removed from the Matchbox Sea Venom mid-fuselage halves parts #1 and #7.
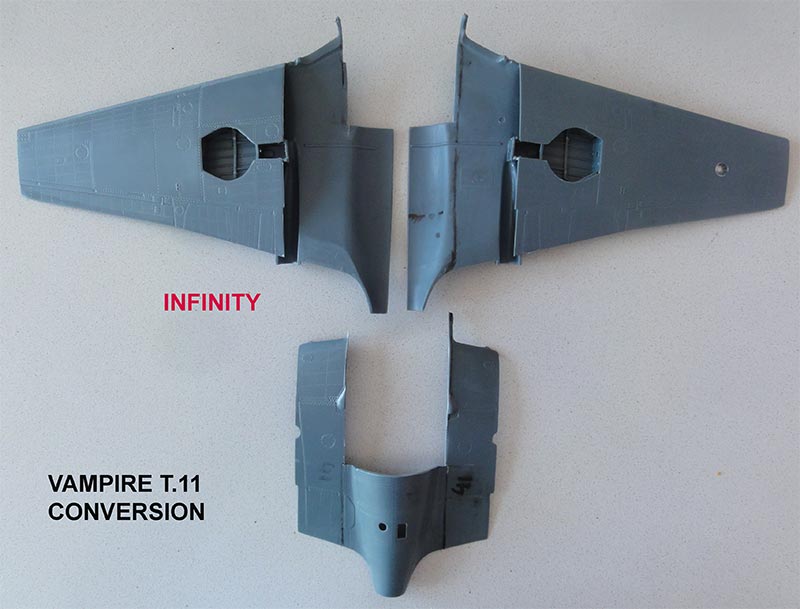
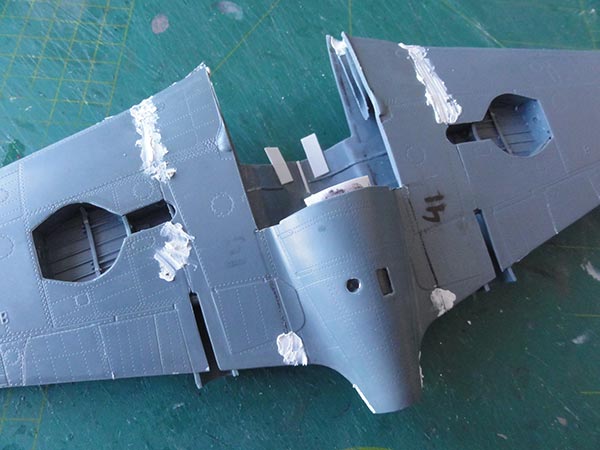
The needed 1/32 Vampire trainer wing from the Infinity kit is needed and is accurate as discussed here. Note that the T.11 had the same clipped wing as the Vampire FB.5. In order to install the wing, surgery is first needed on 2 main Infinity Vampire parts.
(NOTE: the separated remaining Infinity nose is to be used for a Venom FB.4 single seat jet conversion I will also do).
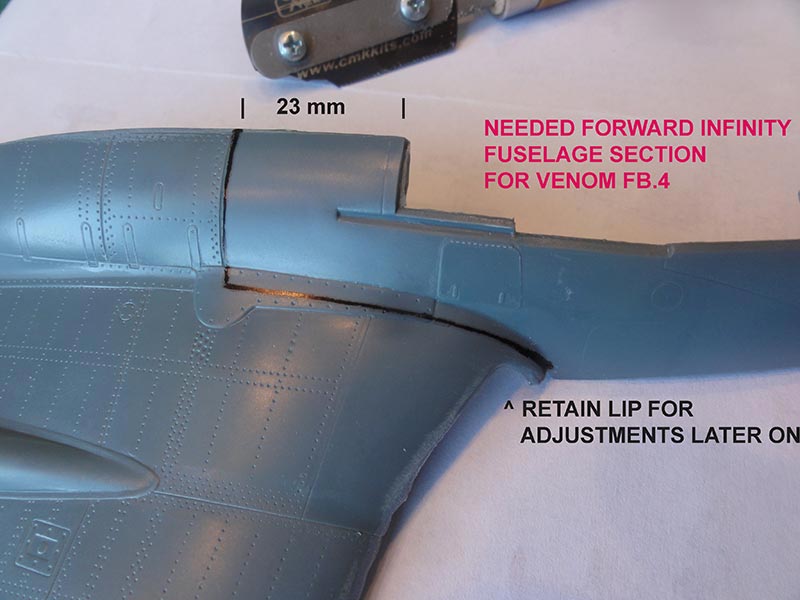
The locations of the cuts made are seen in the photo. Try to retain each intake lip.
The rear fuselage was to be used for the Vampire T.11 trainer as was the lower Infinity rear fuselage...
... and after sawing....
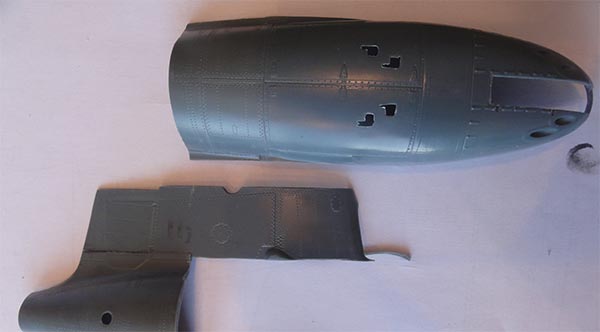
The main parts are seen here...
WING
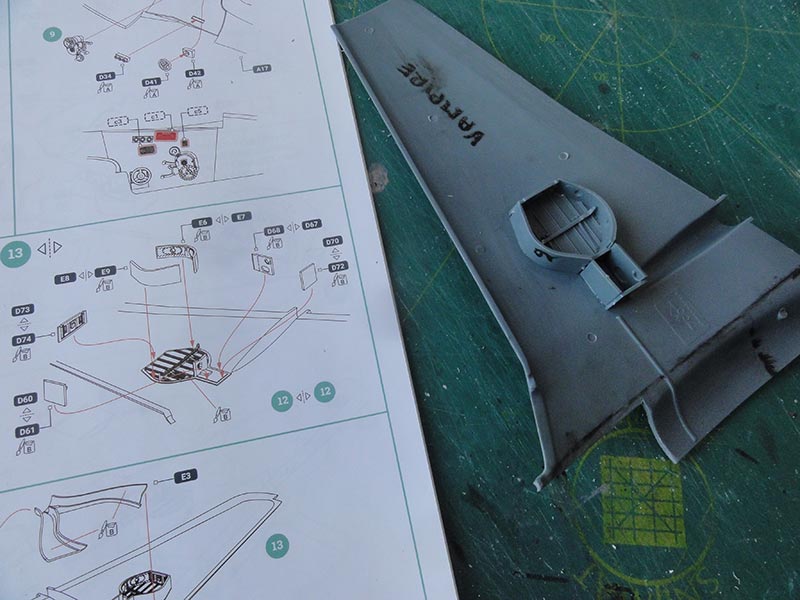
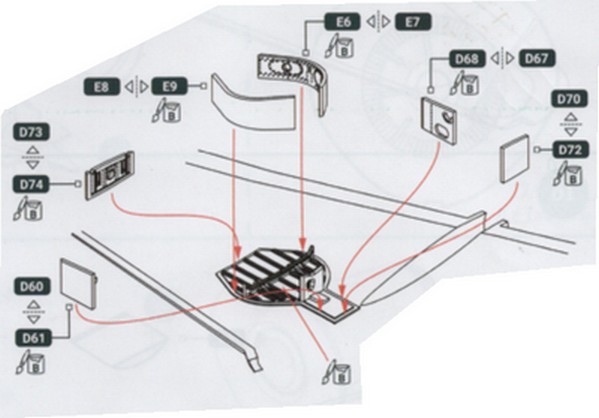
The prepared Vampire wing with the Infinity parts was assembled and got the gear bay walls and structure as seen in STEPs 12, 13. Also the wing should get the "clipped" wing tips as indicated in the kit instructions STEP 41. Use a razor saw. (NOTE: on hind sight it is better to do this clipping after the wing had been assembled after STEP 22). More details of the general assembly is discussed on the 1/32 Infinity Vampire FB.5 page here...
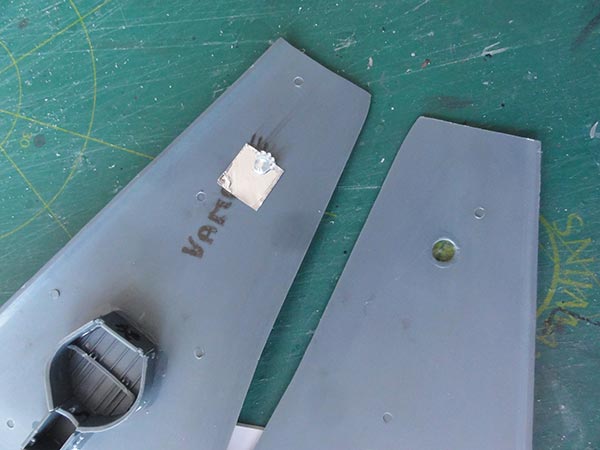
Inside at the lower wing light opening, a piece of aluminium foil was sticked to suggest the light. Or use a part #A7 which is not seen in the instructions but may be the light reflector.
Join the Infinity kit wing halves. Clamps were needed and note the retained upper mid-fuselage section.
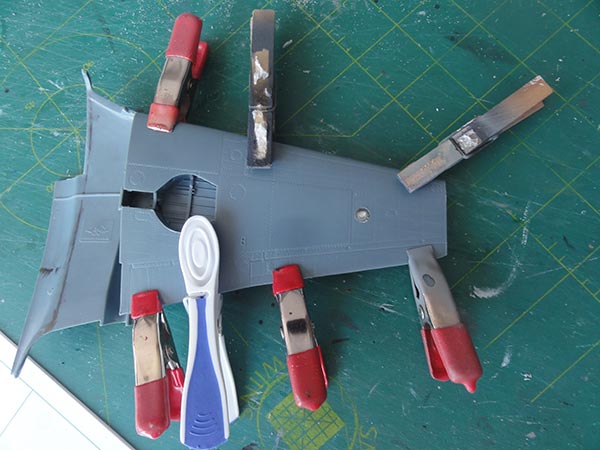
Matchbox Sea Venom engine parts were not used as seen in their instruction STEPs 1-5.
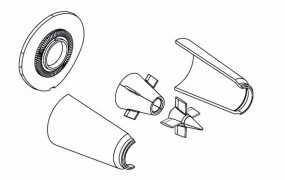
Install the Infinity Vampire kit jet pipe of STEPs 20 and 21 but first I did install the transparant parts #C12, C13 though not sure if these are seen on Vampire trainers. (they can be puttied/ painted later if needed).
I only used the forward sections of the air flow duct. The remainder is not seen inside the fuselage any way. These air duct fronts were set with clamps on the wing intake edges and allowed to dry.
NOTE: the intakes' vanes #D8, D9 as seen in STEP 15 were NOT yet set as a lot of putty and sanding is needed first at the intakes and fuselage. This is one of the weaker issues of this kit.
Further assembly was done...
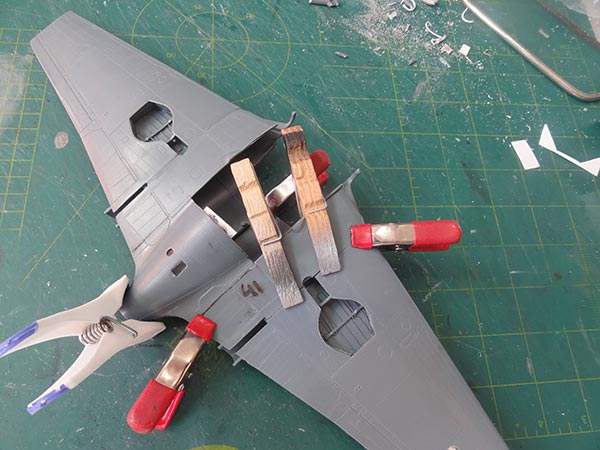
The prepared Infinity kit sections of wing and central rear fuselage were joined and puttied... NOTE: the kit bulkhead #E5 was not used but it can be used for extra strength... Make sure to have a wing without anhedral/ dihedral so "horizontal".
The Vampire trainer has clipped wing tips, so remove the tips with a razor saw as seen in the Infinity kit instructions.
A few strips were set to get stronger joints.
FUSELAGE
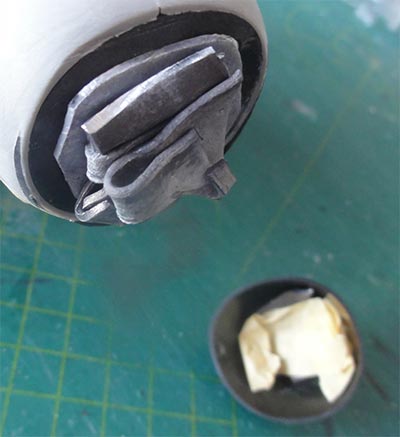
The cockpit interior parts of the 1/32 Matchbox Sea Venom (see instructions STEP 9) were discarded, the Vampire trainer has a quite different cockpit layout and interior. To have a cockpit base, pieces of plastic card were used for the cockpit floor and bulkheads made. Detailling wil be done at a much later stage.
The kit gun nozzles were drilled open in part #8 and a nose wheel bay opened up to make the gear well deeper. An opening was made in the floor for a retracted nose gear wheel housing.
A small bit from the air flow tunnel from the Matchbox Sea Venom STEP 7 was set as well inside the fuselage als was the new card cockpit floor and rear bulkhead.
Dry fitted in place. Yes... there are gaps!
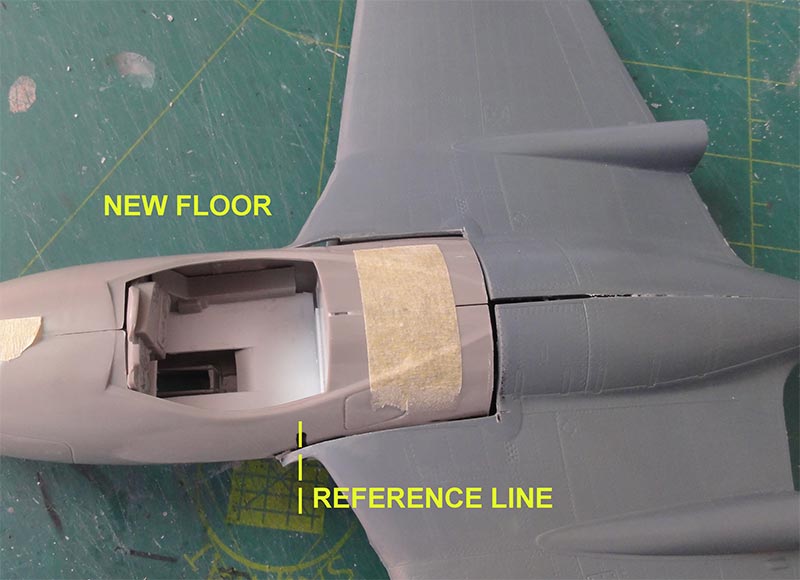
NOTE: the Vampire trainer front nose conversion is still to be done.
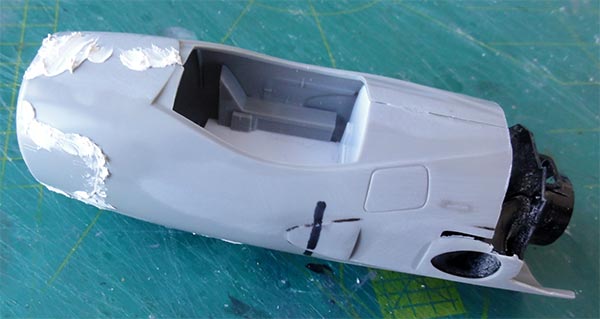
The forward fuselage was now set and aligned. It is not easy but can be done.
... and the lower fuselage....
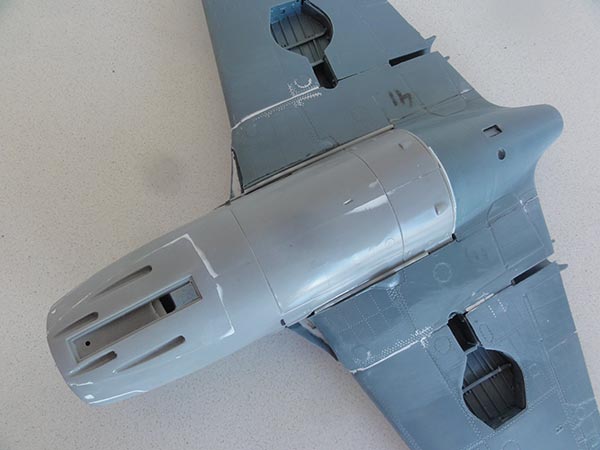
Yes... gaps! Plastic strips, rods, glue and a lot of putty was needed to close up all gaps.
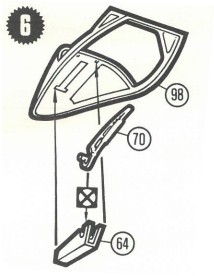
Note that the transparant cockpit fairing #98 and integral wind screen were not installed yet to avoid sanding damage at this stage.
Lots of wet sanding was needed using sanding blocks. Several new passes with puttying were needed.
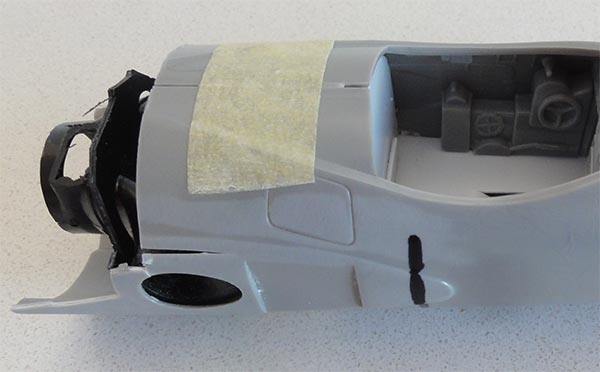
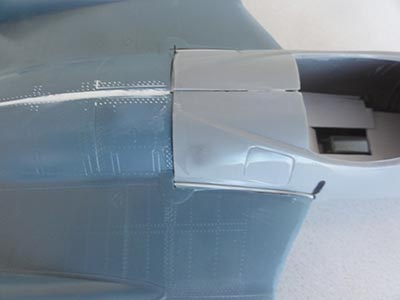
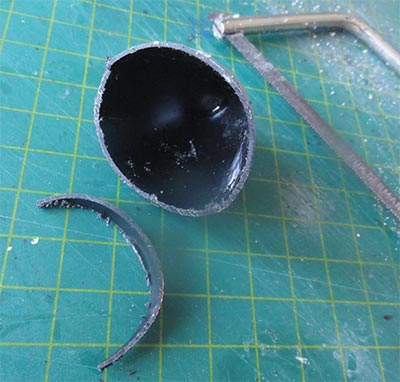
NOSE
Now the Vampire trainer front nose was changed in shape. Measurements were presented earlier above.
From the rear of the Matchbox/Revell nose part #77 some 5 mm was removed and 1 mm will be sanded off from the nose shells #1 and #7 near the bulkhead #73.
 ..
.. 
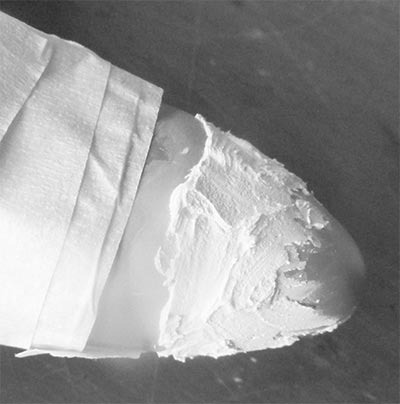
Vampire trainer nose shape measurements after the cuts were made.
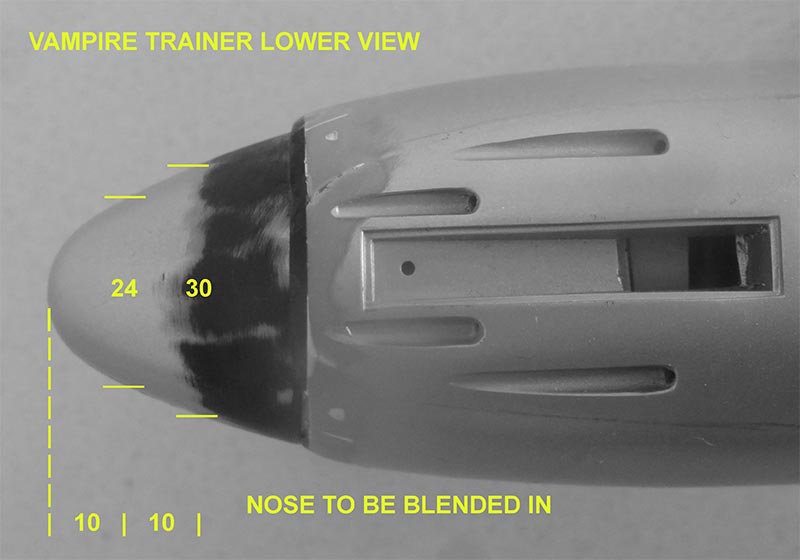
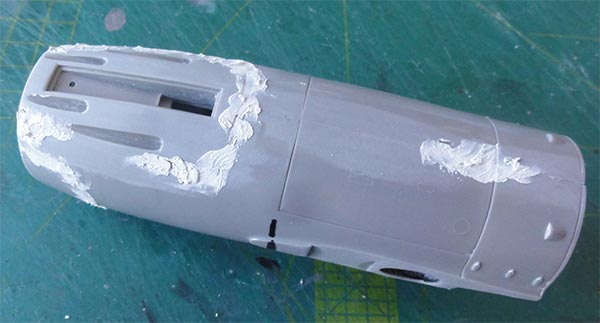
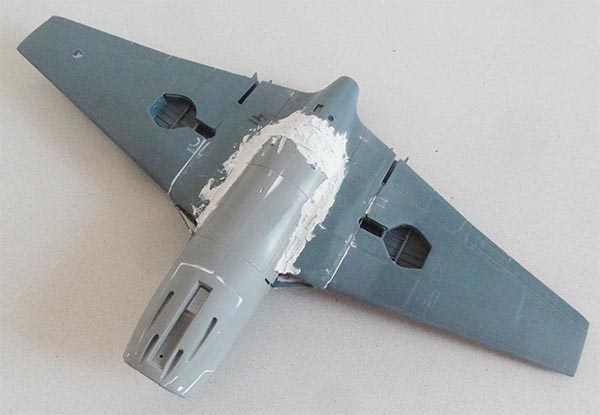
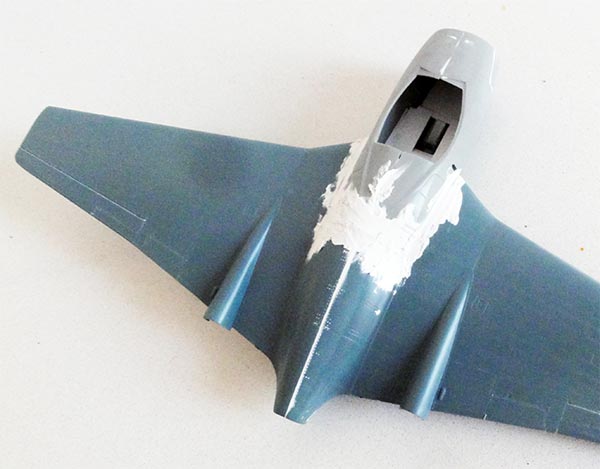
The nose now needs to be blended in; the circular "step" was filled and sanded in shape to get streamlined contours ... and do not forget to put a lot of ballast weight in the nose to avoid a "tail sitter". I used bended lead though not sure it will be enough.
..
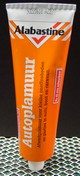
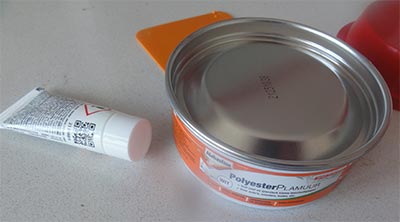
To blend in the "step" and have a streamlined shape, two component polyester filler was applied of Alabastine. This is less vulnerable to shrinkage though harder to sand.
 ..
..
Sand, sand...
 ..
..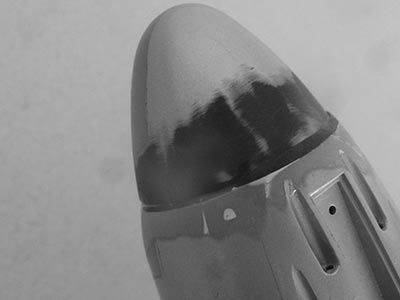
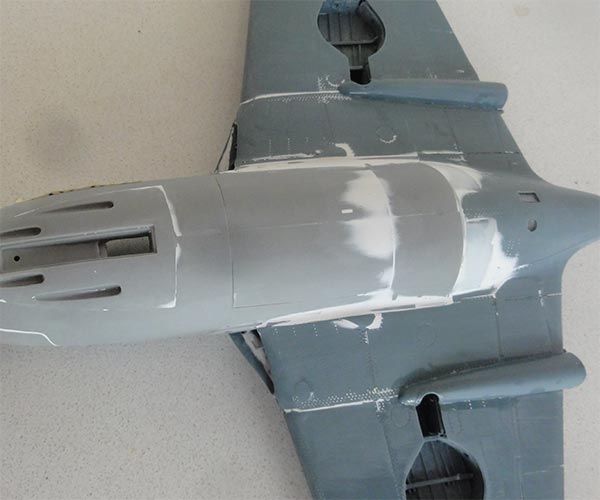
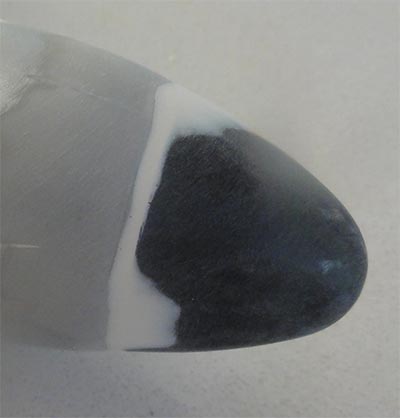
Some more filler and sanding still needed. Note that I did not change the lower gun panels.

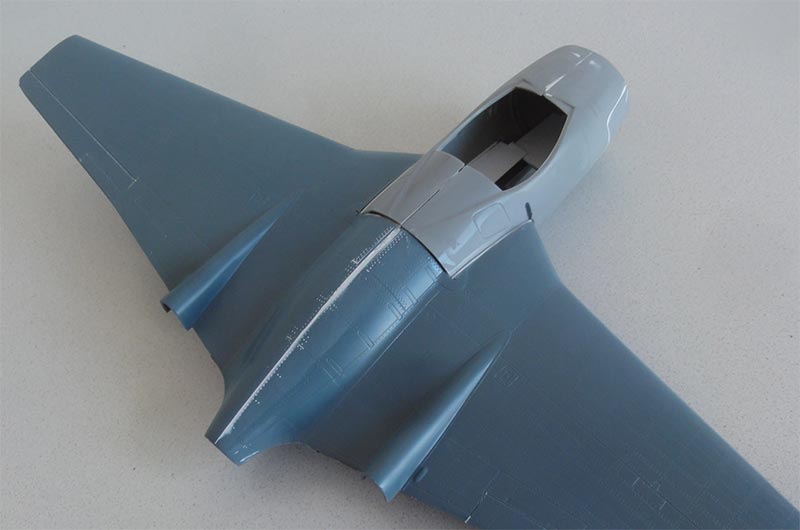
A base grey coat was now applied on the main assemblies to check for any flaws by airbrushing my favourite Revell Aqua 75 steingrau. Repairs with putty and sanding was done when necessary.
![]()
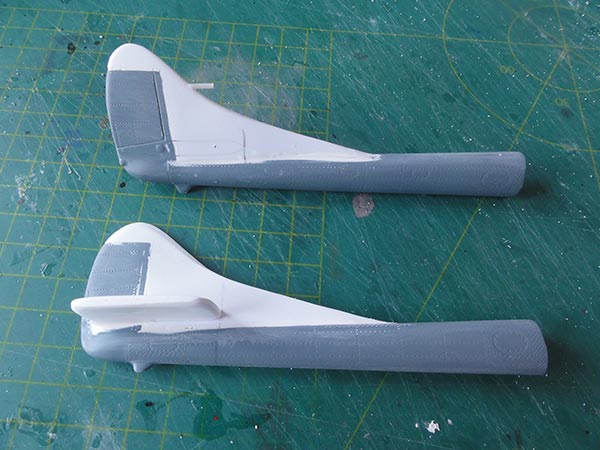
The Vampire two seat trainer has a different tail fin layout but the Infinity Vampire kit parts can be used including the tail booms. But there are additional vertical tail fillets to have better sideslip flying characteristics caused by the fatter two seater nose. I had enlarged drawings to 1/32 scale as a pattern. Cuts were made in the Infinity booms and from sections of plastic card new additional fillets made.
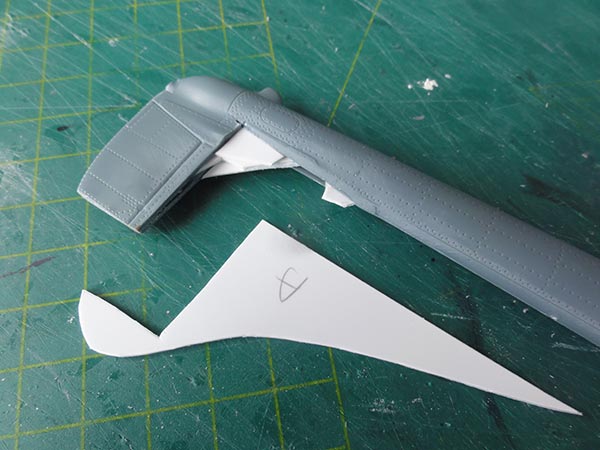
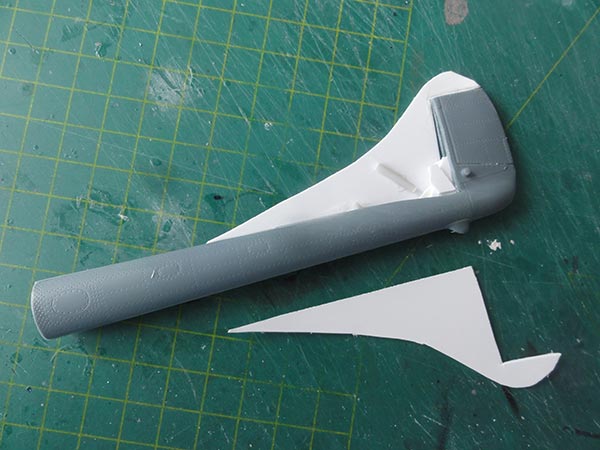
The fillets are a bit curved, accomplished by using strips inside, 2 pieces of curved card, putty and sanding the leading edges.
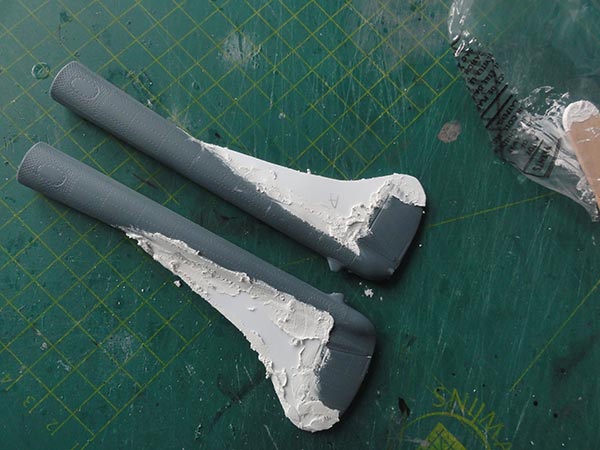
There are also stabilizer extensions, these have the same chord as the mid stabilizer. All made from card and considerable amounts of putty were needed.
A base grey coat was now airbrushed to check for any flaws.
The horizontal stabilizer parts #A9+B7 as per Infinity kit can be used but I ensured strong joints with a metal rod and pins.
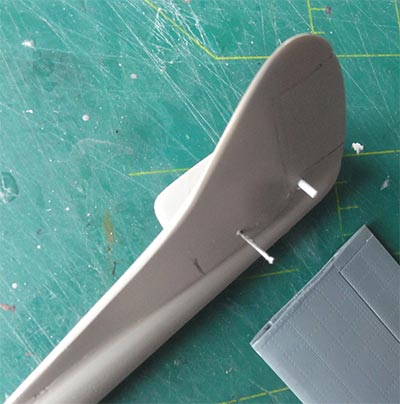
JOINING
The tail booms with tail fins and stabilizer were joined with the wing and fuselage assembly. Alignment is crucial and all was done on a thick flat wooden base.
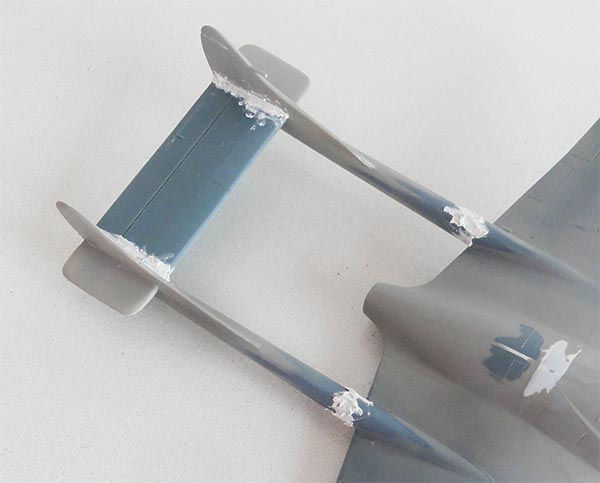
The installment of the tail booms at the mating wing joints needed some trimming of Infinity parts #A15 and again putty and sanding was needed.
For now, the main assembly for the Vampire two seater/ trainer has been done.
Go to next [ Page 2... ]
Back to 1/32 Models.......

(c) Copyright Meindert "designer"/ All rights reserved. Your comments are welcomed by webmaster
Created this page
November 23, 2022