"Sea Flanker"
[Page 1]
[ Page 1 ]
[ Page 2 ]
[ Page 3 ]
(conversion based on the Trumpeter kit)
The
Sukhoi Su-27 series air superiority fighter aircraft from Russia are
very capable and high performance aircraft. Known in the West as the
"Flanker", it made a large impression on various air shows in the
Western world back in the nineties demonstrating the "Cobra
manoeuvre" which Western fighter aircraft were incapable of executing.
Designed
by the Sukhoi Design Bureau (OKB), it is a huge aircraft forming the
air defense backbone of todays Russian Air Force. The T-10 prototype
flew mid 1977. The first operational Flanker was the Su-27
with also the Su-27UB two-seat trainer.
Even naval versions were developed, designated Su-27K and called "Sea Flanker"; later, it was also referred to as the Su-33.
The Sukhoi Flanker was produced first in license in China by Shenyang as the J-11 and later the Chinese "copied Su-33" as Shenyang J-15...)
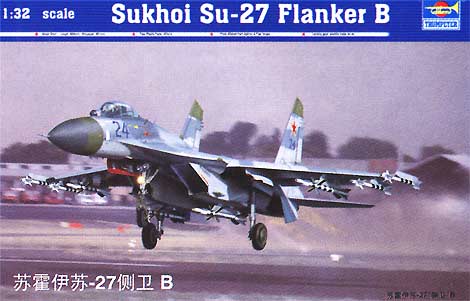
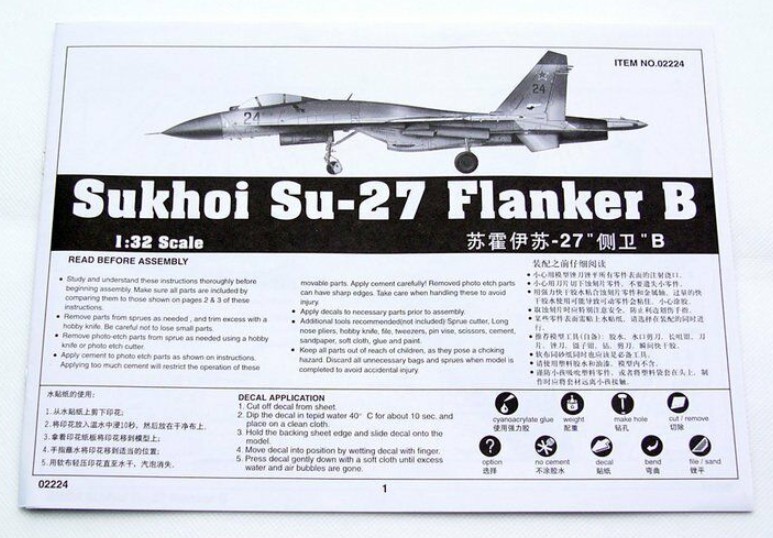
The Trumpeter
kit (# 2224) is for a Su-27 "Flanker B".
The kit's plastic is in light grey
and comes in a very large box with lots and lots of parts.
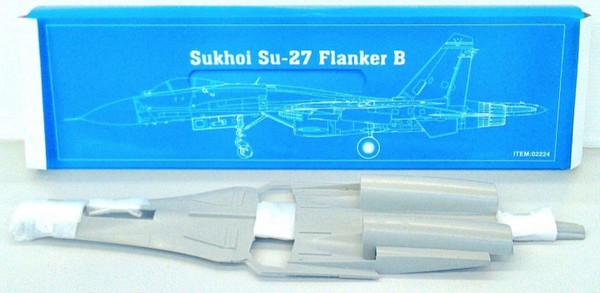
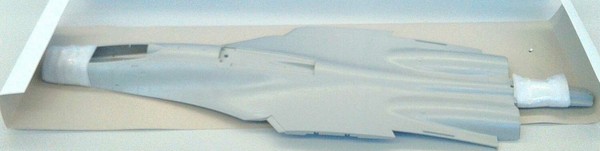
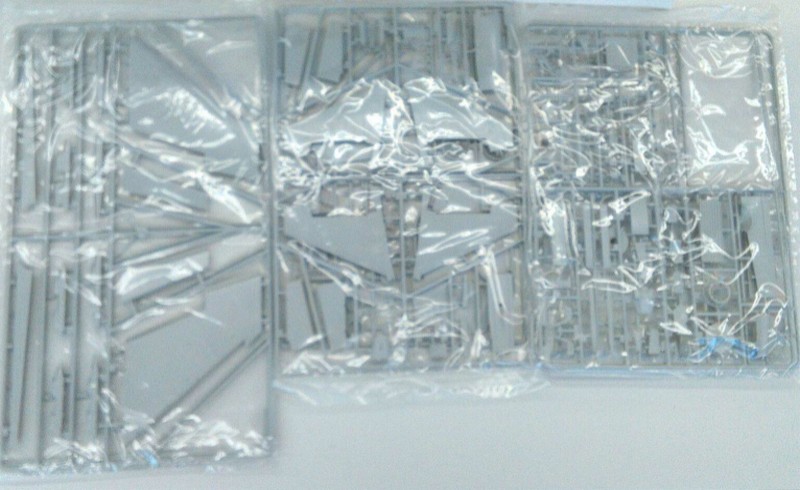
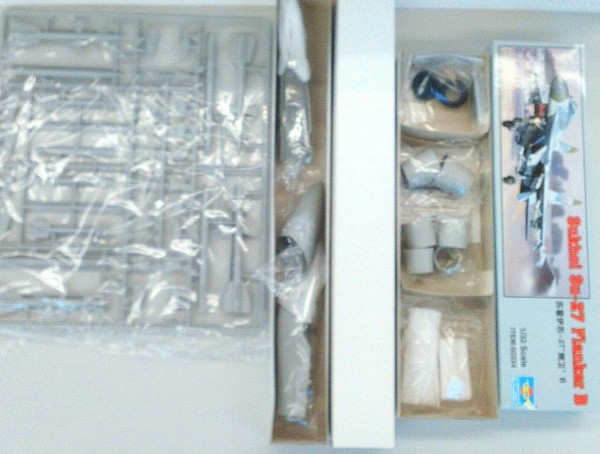
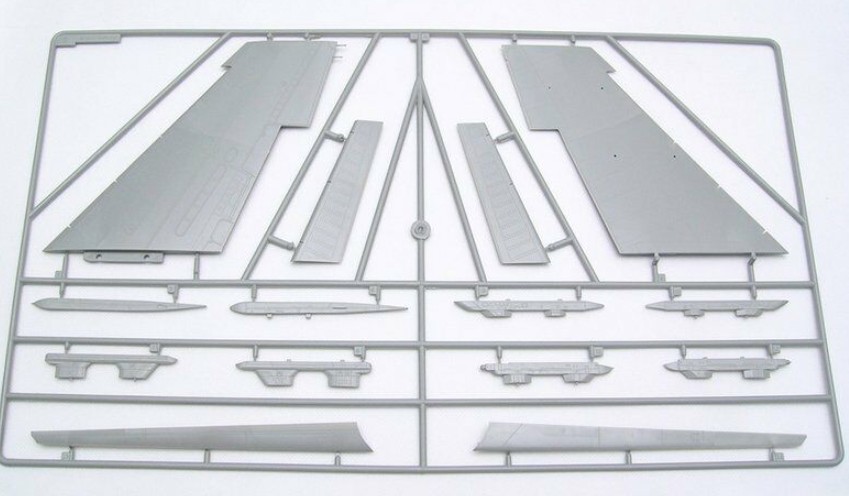
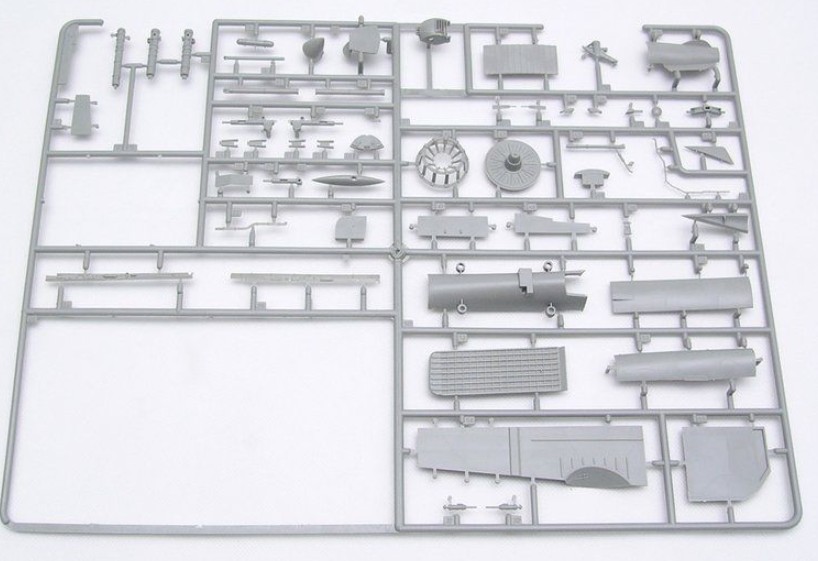
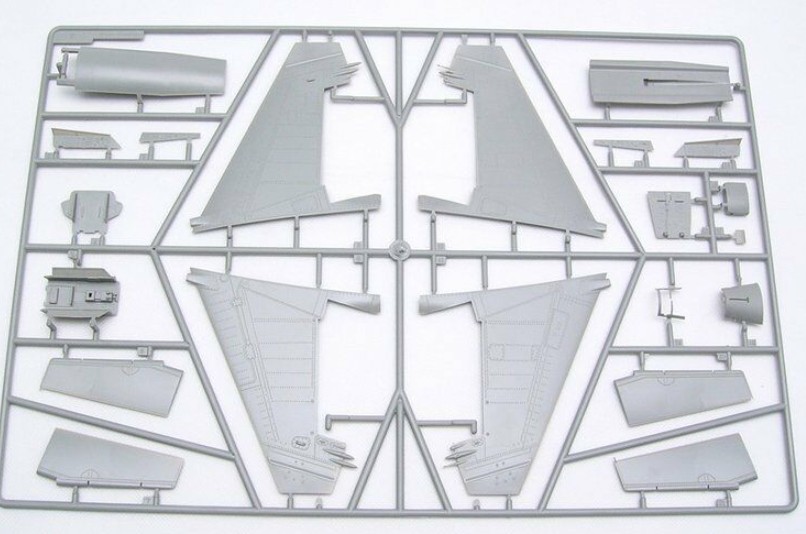
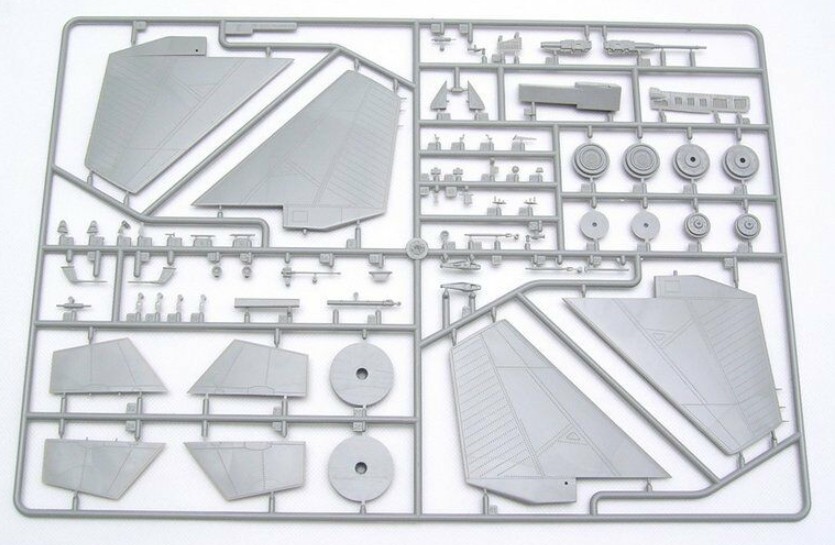
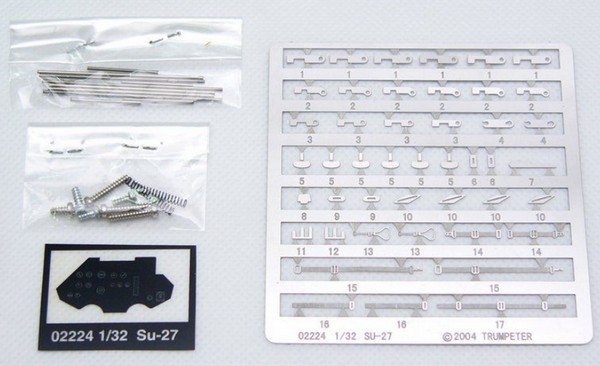
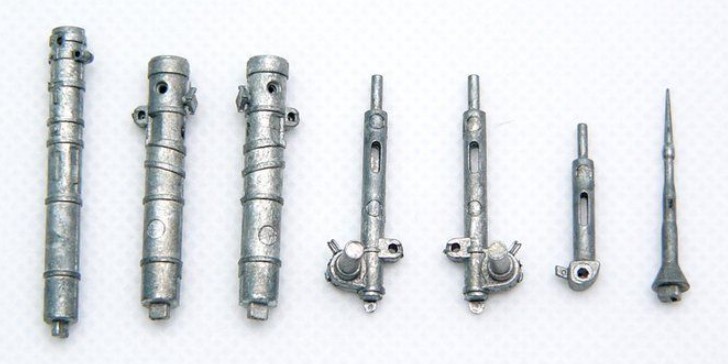
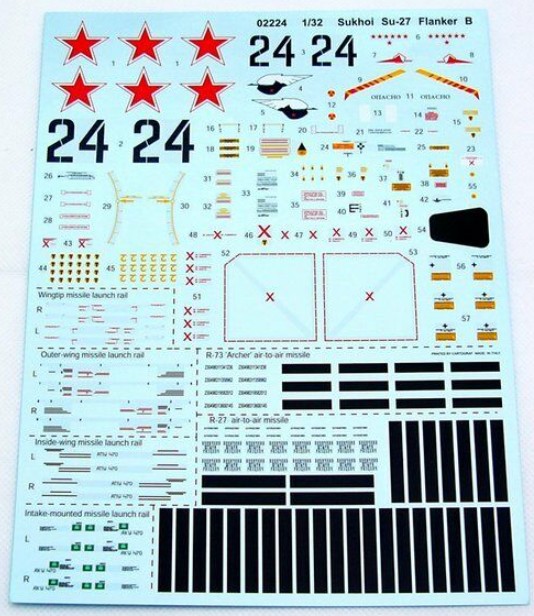
Also a metal landing gear, photo-etched parts and other small parts are provided. The wing has separate slats and flaps. Decals are for a Russian plane - Blue 24 from the 582nd Fighter Regiment, 4th Air Army as based at Chojna, Poland around 1992.
Overall the kit is quite good. However, some areas may be improved in shape, and that wil be in this build done along with some conversion work and in addition using some commercial accessoires sets.
The basic Trumpeter kit may be improved in these main areas:
Regarding the shape of the model:
-A1- Nose shape: this should be a little bit more massive, a bit longer an a bit more tilted down; you can use the Zactoman (website: ZACTO MODELS) nose as I did ;
-A2- Canopy: unfortunately the hinged canopy and its windshield is not very well shaped; it is to flat and the curve in side-profile is not accurate; An very good solution to that is to order and use the Zactoman canopy set as I did ;
-A3- Intakes: the kit intakes are too small in forward view and they are too bulged at the lower section in side profile ; you can use the Zactoman intakes but I decided not to use it and correct these intakes myself with some relatively easy work (see notes later on);
Regarding detailing, improvement
on a Trumpeter Flanker model is recommended on..:
- adding more details in the cockpit;
you may use the Aires detail set as I did;
- add more details in gear bays
- correct the outside surface details
of the exhaust pipes;
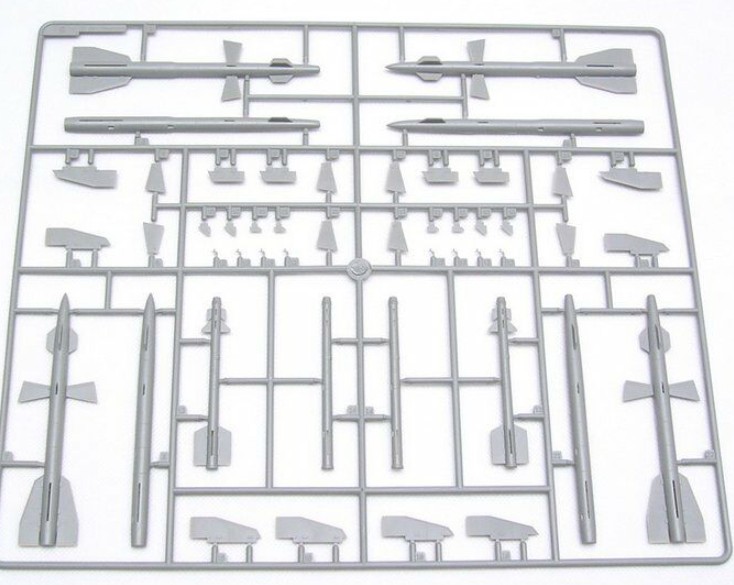
- choose the "stores" that are accurate
if they are to be used
- correct some minor details
(see later on in this modelling report
on more explanations)
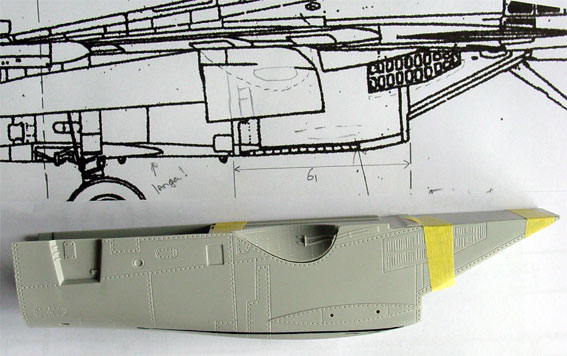
The Sukhoi SU-27K (later designated also SU-33) is a naval variant flown from the Soviet (now Russia) carrier Admiral Kutznetsov. This ship is fitted with a special launch ramp similar to the British SkyJump; this ramp gives the plane a higher angle-of-attack, improving lift at the end of the ramp before the plane gets into the air. Also, the airframe itself got various modifications for this role.
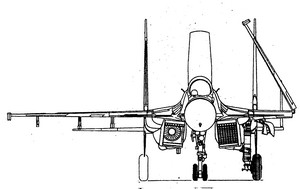
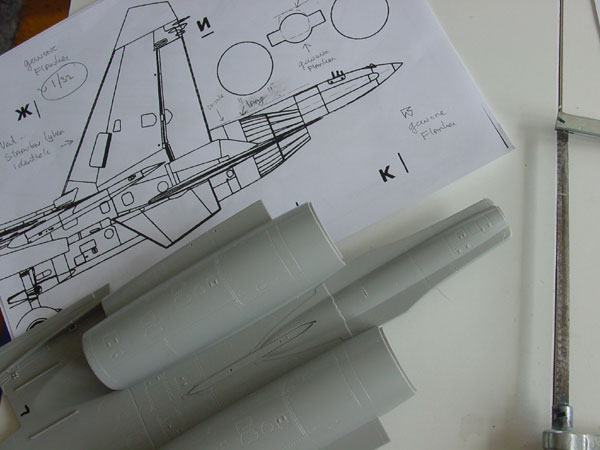
In order to get an idea on the required modifications I used very good drawings from the website
http://www.airwar.ru/firm/alfavit/srus.html
Many different
drawings can be found, also for several of the "land based" Flanker types.
I strongly recommend you take a look if are modelling any Flanker kit.
The drawings
were enlarged to 1/32 scale, checking the sizes using real aircraft measurements.
For example note that the wingspan is similar for many Flanker variants.
NOTE: some sources indicate that the Su-27K vertical tails were also changed, having less height; however, no real evidence was found looking at pictures and scale drawings. I suspect this was only the case on the naval Flanker prototypes.
Also on the Internet, quite some useful pictures were found, also from details.
The Sea Flanker
main
modifications compared to a "land" Flanker B SU-27 are:
- S1- a larger
main wing chord and thus larger wing area
- S2- wing
fitted with slotted rear flaps
- S3- larger
wing got ailerons
- S4- hinged
outboard wings surfaces
- S5- flat
and shorter rear tail cone with arrestor hook
- S6- canards
in front of the wing with LEX (leading edge extensions)
- S7- hinged
rear horizontal stabilizers (unique!)
- S8- slightly
different "thicker" main gear and twin wheeled nose gear
- S9- off-set
IRTS sensor in front of the windshield
- S10- tanking
boom on left side in front of cockpit
- S11- different
weapons and different pylons
- S12- smaller
differences like the vertical tail antennas, longer maingear-strut fairings
etc
These differences
will take considerable work to actually carry out this conversion to the
Naval Sea Flanker Su-27K / Su-33 , but I decided to give it a try. So these
items will be taken into account when modelling this 1/32 scale Sea Flanker
model.
OK, now back to the kit....
I will go through this build in the
step-by-step approach that I used for the "Sea Flanker SU-27K or SU-33"
. Note however that you may find some useful guidance on how
to build your "normal Flanker B" also as the Trumpeter kit has some inaccuracies
that you may improve as noted above.
Trumpeters' kit has their usual approach for the instruments, which are provided on a clear film to be sandwiched between a front panel and a flat part. Although quite OK, it was decided to go for somewhat more detail and accuracy.
Aires set Number
3026 for Su-27 Flanker B Cockpit was purchased
and has very fine resin parts with lots of details; you also get
some etched metal. 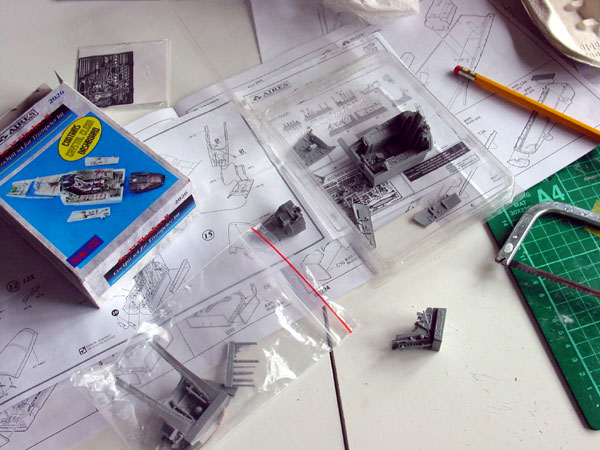
Looking at
pictures of the real cockpit, it is quite accurate for a Flanker. 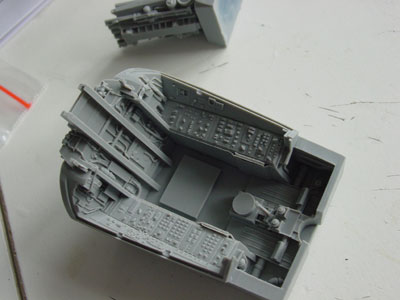
You get first
the instruments and they are quite fine, although the supplied micro acetate
film really needs a piece of white plastic sheet at the back which was
added.
A nice throttle
is also provided as is a instrument coaming with the Heads Up display.
WARNING: when working with resin, take safety precautions for your health. When doing any cutting and sawing, use plenty of water to prevent dust coming into the air you breath!
The interior of the canopy is also supplied by Aires. (I however used the Zactoman set instead as it has a little more detail. I think that if you only have the Aires parts, use them as they are quite good also) .
I checked photos and saw that for a Su-27K / Su-33 Sea Flanker, the cockpit looks very
identical
to the cockpit of the Su-27 Flanker B, so the Aires set can and is used.
Only a small black switch panel on
the lower right side on the instrument panel seems to be installed extra
on the SU-33
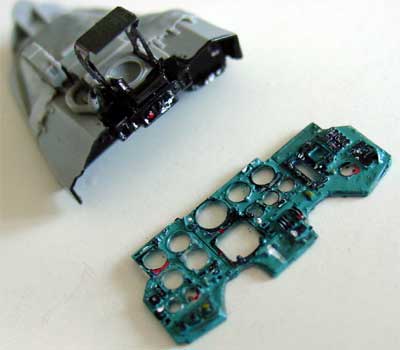
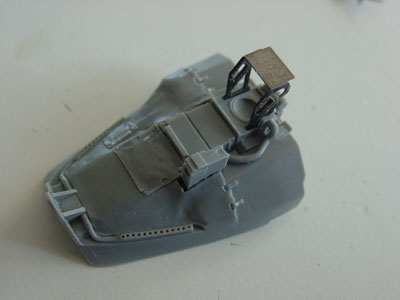
(The instrument cover; later on I
discovered that the HUD was a big to high)
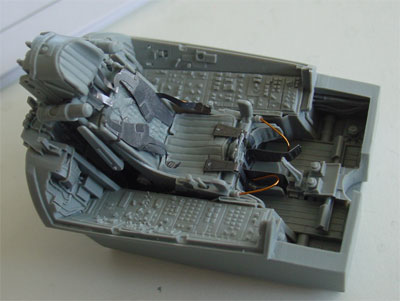
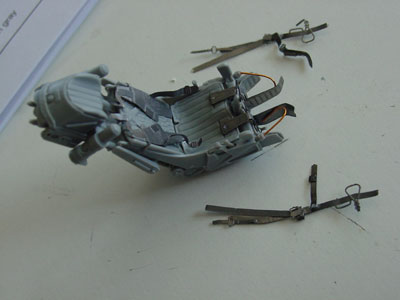
Also, the
Aires
set
has a very good Zvezda K-36M ejection seat with lots of separate resin
parts. The supplied metal etching for the harness is a bit complex
and the instructions not always completely clear; look at pictures of a
real bang seat to get an idea on how it all comes together.
The provided
cockpit side walls are also OK in the Aires set, but I had to remove on
their rear backing surfaces some material in order to get them to fit on
the kit's surfaces.
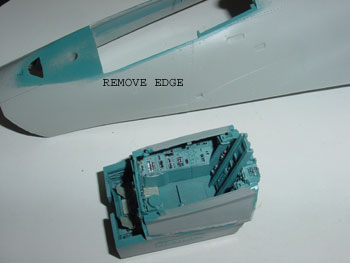
You need also
to remove the edges at the top cockpit sides at the upper fuselage part,
and this has been indicated by the Aires instructions.
The Aires rear
backing plate replaces the kit part #F15 also.
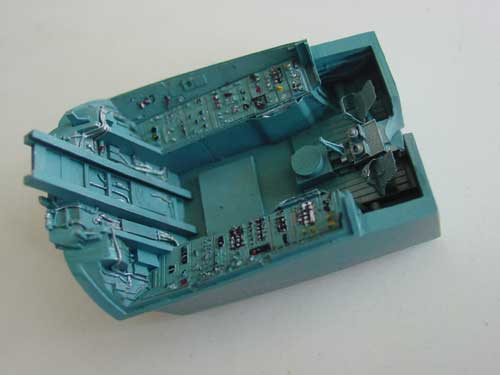
Generally I
used Xtracolor #X603 enamel paint with
some added white for the cockpit interior.
![]()
First some rough work will be done on major parts as this will not damage the model at this stage:
- Regarding A1 (Nose shape): if you use the Zactoman nose: adapt the facing front sections at the front of the main upper and lower fuselage part to meet the Zactoman nose cone.
- Regarding A2 (canopy shape): if
you use the Zactoman canopy set:
remove
the raised bump / section in front of the wind screen on the kit.
The Zactoman
canopy
set details with the extra's were used as provided even if you have the
Aires
set. Please note that the SU-33 has an offset IRTS and the windshield transparent area is a bit "longer"; Also you can
not use the Zactoman
IRTS part;
Important: because of this, the Zactoman vacu windshield front section is clear as it is not covered. By cutting a little bit forward and NOT at the moulded in windshield line of the Zactoman canopy, a longer satisfactory Su-33 windshield can be made.

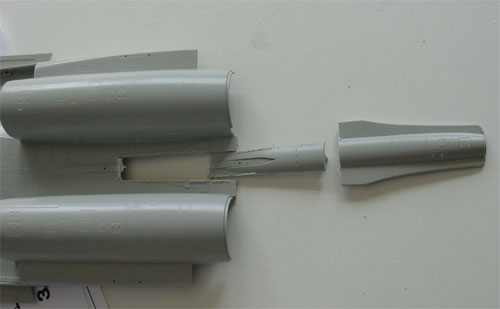
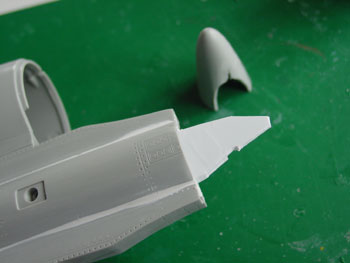
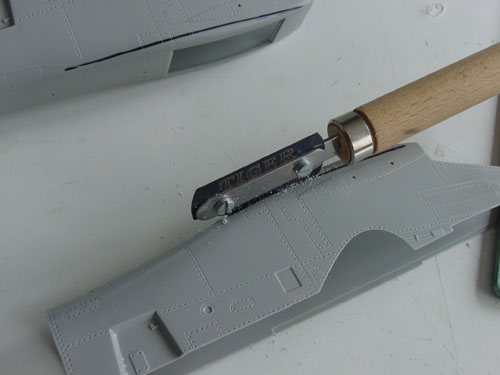
- Tail cone of the Sea Flanker is different;
it has a slightly higher (about 2 mm) side-profile and shorter tail cone,
which is also flat on the lower side to accommodate the arrestor hook.
original
kit section of the tail cone with a drawing of the normal Flanker B
First, make 2 saw cuts at the rear
tail cone in the upper fuselage part.
Bend the tail cone upwards and glue
in place.
Next, remove the lower curved tail
cone section at the lower fuselage part. Make a flat piece of card.
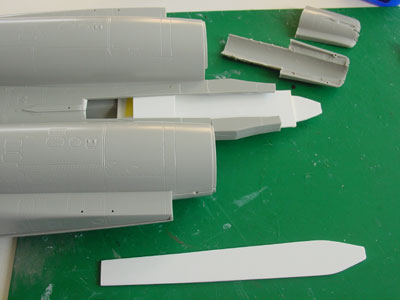
Cutt off the rear tail cone sections;
You may need to find some sort of cone shape in your spare box, or use
MillyPut to make a shape. I used the front end nose of a spare Trumpeter
F-105 main center fuselage fuel tank to replace the rear tail cone end;
this was filed flat and filled with putty.
The arrestor hook and fairing will
be added later, made from rod and some card.
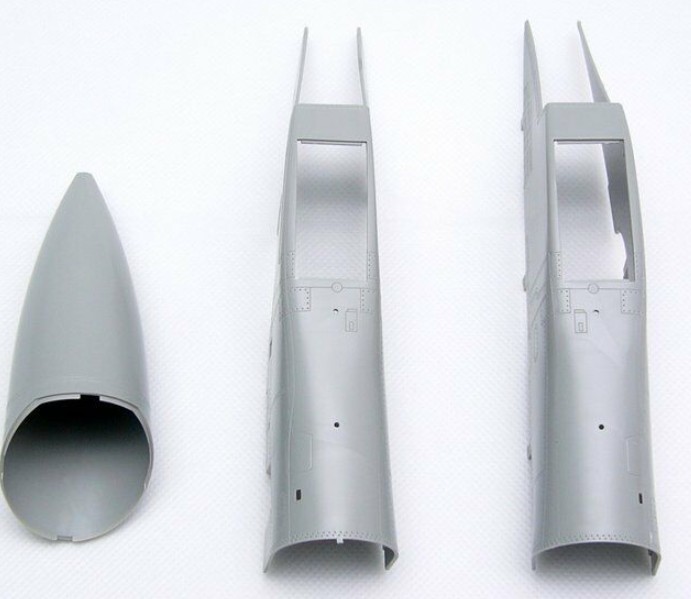
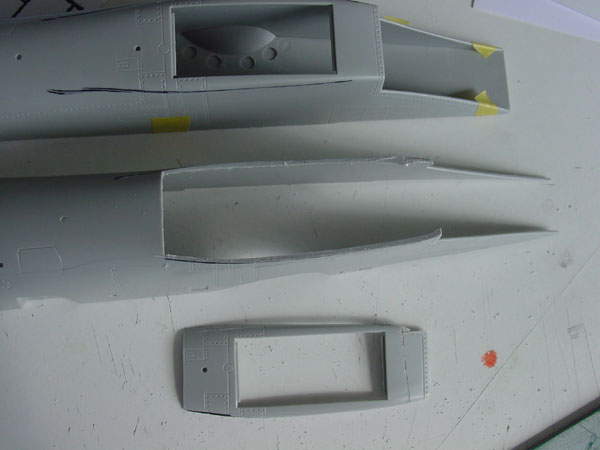
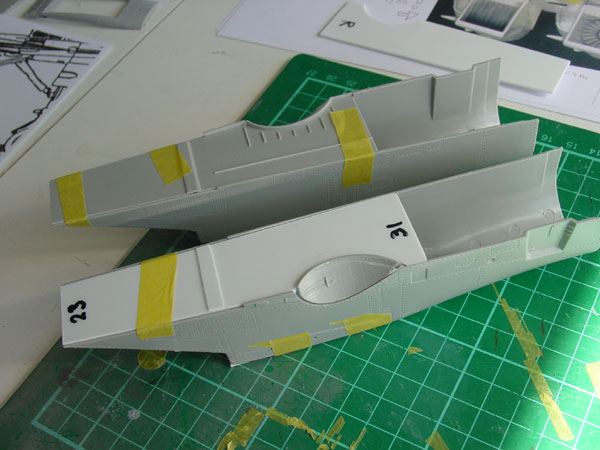
Trumpeter steps 13/14 (Intakes) [applicable for all Flanker models]
- Regarding A3 (Intakes): First tackle these steps for the intakes to get this sorted out now. The Trumpeter intakes are to small in front view at the front and too bulged in side profile.
Note the drawn black line on the kit part at the lower section of the picture as how it should be.
It was decided to correct this shape with some card. (Alternative is to buy the Zactoman intake set, which is a bit expensive; also for the Naval Sea Flanker the main gear-strut fairings are different).
The good news: you can improve the intakes yourself! I will show you how.
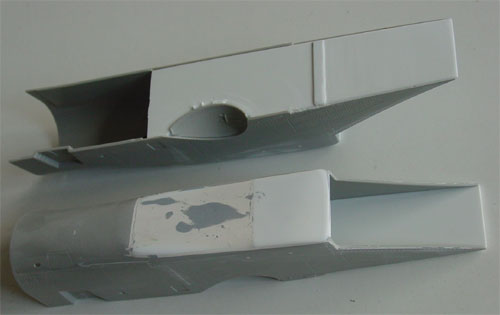
The pictures give you an idea, but
the whole mod makes the intakes 3 mm wider and flatter.
Left can be
seen a modified intake, on the right the Trumpeter intake
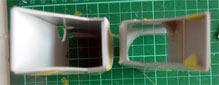
 Lower
bottom intake sections
Lower
bottom intake sections
In each part # C26 and D52 make two
saw cuts with a razor saw about 71 mm long. A piece of card will be set
in here to make the intakes flatter and wider.
The parts #C28 and D13 were not used;
I simple cut out 2 very thin rectangular pieces of card and inscribed the
louvre doors.
The engine compressor fans #E26 were simply used.
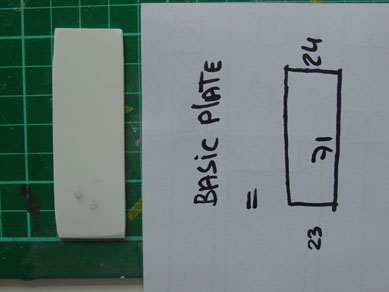
The parts C54 and D24 you replace
by two pieces of flat card, the same length but 23 mm wide in front and
31 mm at the rear; 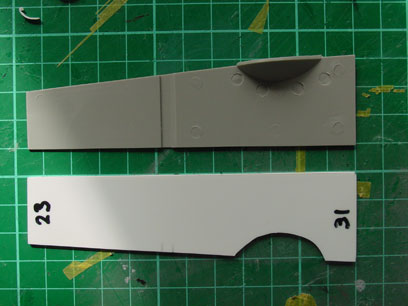 Upper intake "ceiling"
Make a round gap in each to accept the cut out main gear wheel well curvatures.
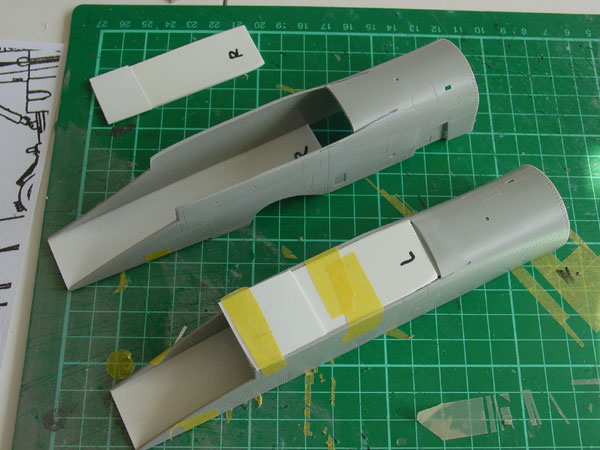
Finally, fill with putty the edges
and sand smooth. The front intake "lip" should be sanded a bit round, to
get a very gentle up - curve.
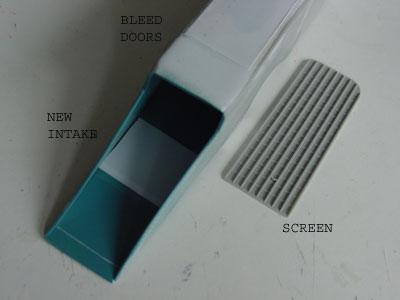
Almost the
basic shape is OK; note that the "louvre bleed doors" are not yet added
Finally, the lower external louvres
/ doors were suggested with a piece of thin card with the door edges scribed
in.

The intake screens drop down inside
and on to the intake floors when the engines are not running, so I simply
decided to reverse the Trumpeter parts #C52 and D22 and set them on the
newly shaped lower intake surfaces. (I assumed here that these movable
screens are also installed on Sea Flankers)
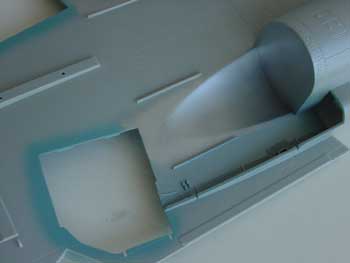
At the intake ceiling, a small thin
piece of card was also added; air vents were punctured in with a sharp metal
pin.
The inside of the intakes also got a piece of flat thin card to improve the smoothness of the intake in front of the cut out gear well curvatures. Also were added some pitot tubes inside the intakes from stretched sprue as seen in the intakes of the real Flanker.
The end-result are two very nice accurate
intakes.
![]()
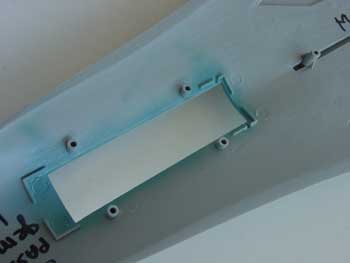
The main gear bays are OK as provided in the Trumpeter kit, but some extra detailing is worthwhile with some extra pressure piping made from stretched sprue and rod.
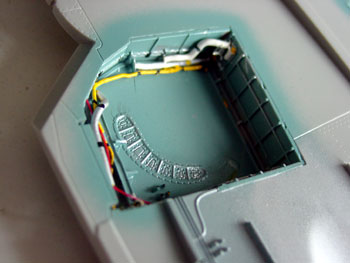
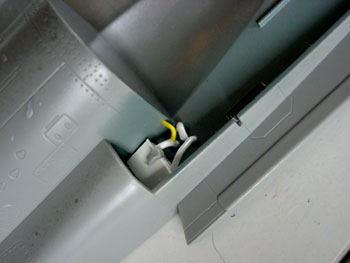
At the rear of the main bay near the leg frame, some extra detailing as also added.
Later it turned out looking at very
rare colour pictures that large portions of the gear bays are red on naval
Sea Flanker:
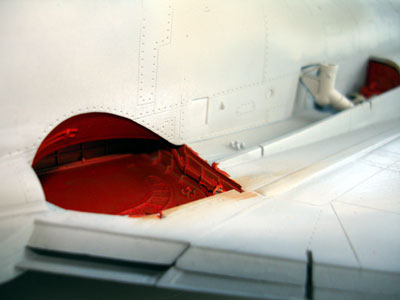
The details
are to be painted white, yellow and aluminium.
Trumpeter step
6:
Assemble as
shown, using the Aires cockpit if you have it.
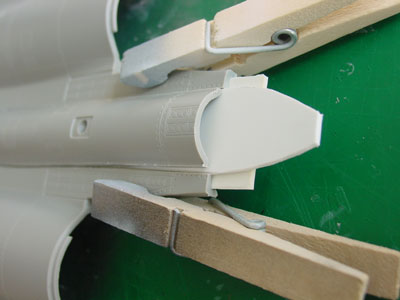
The nose bay was also detailed with some boxes and tubing from card. Strangely, this bay remains grey on the Naval Flankers.
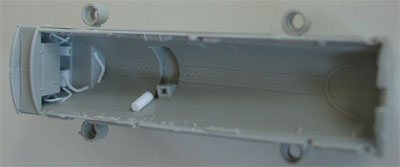
I had to remove about 3 mm of the
top-section of the front bay on parts #C10+C50 with a razor saw in order
to get the Aires cockpit to fit.
- remove a section on both lower and upper fuselages in order to adjust for the LEX/Canard area in front of the slats; use a razor saw. (see page 2 for where to cut).
After spraying the canon bay in a mix of Xtracolor #X396 and aluminium, the canon was assembled straight from the parts supplied [Trumpeter step 2]. The panels will set closed on anyway and hardly anything can be seen.
Next, the intakes were glued onto
the lower fuselage part. It was a bit bended, so clamps were used to get
a good fit. Let dry over night.
On to next [ Page 2 ... ]

(c) Copyright Meindert "designer"/ All rights reserved. Your comments are welcomed by webmaster
Created April 27, 2006