[ page 3 ]
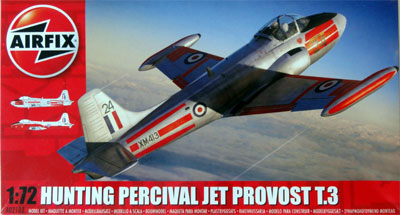
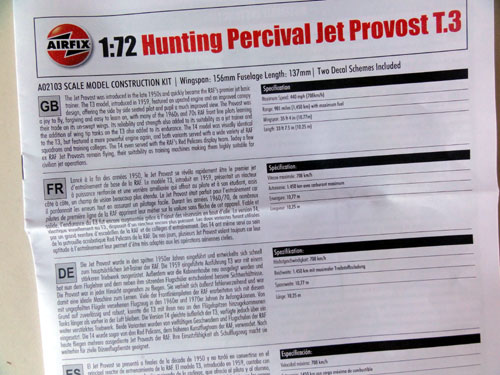
1/72 scale kits of Jet Provost and Strikemaster family modelling the NEW AIRFIX KIT
... continued from page 2...
 ..
.. page 2
page 3
page 4
page 5
page 6
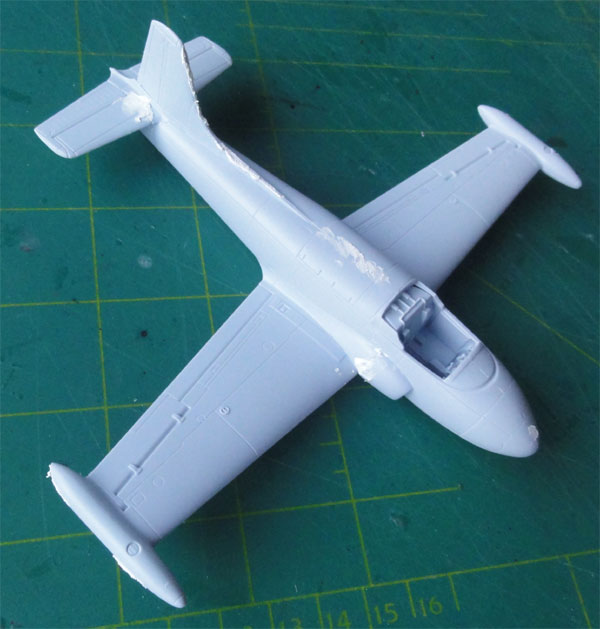
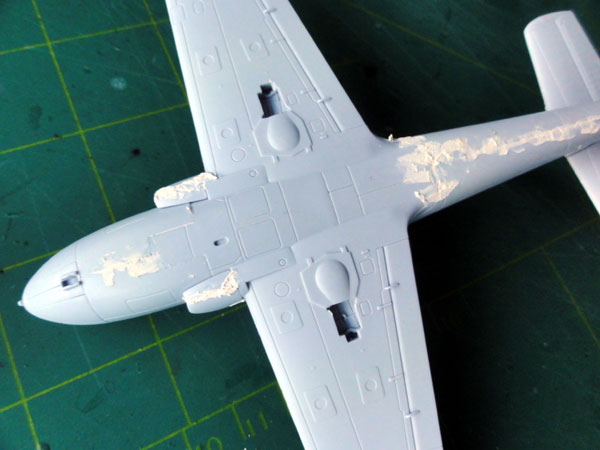
The kit has very light blue plastic with fine engraved panel lines. Some panels are raised and overall surface details looks good. Instructions show in colour the various assemblies. The colours for the details are indicated only with numbers by Airfix in the instructions but no colours described. This is a bit unclear. Colour "85" seems to be semi-gloss black, "33" is black, "56" is aluminium, "11" is Silver.
For the smaller markings a separate
paper sheet shows their locations.
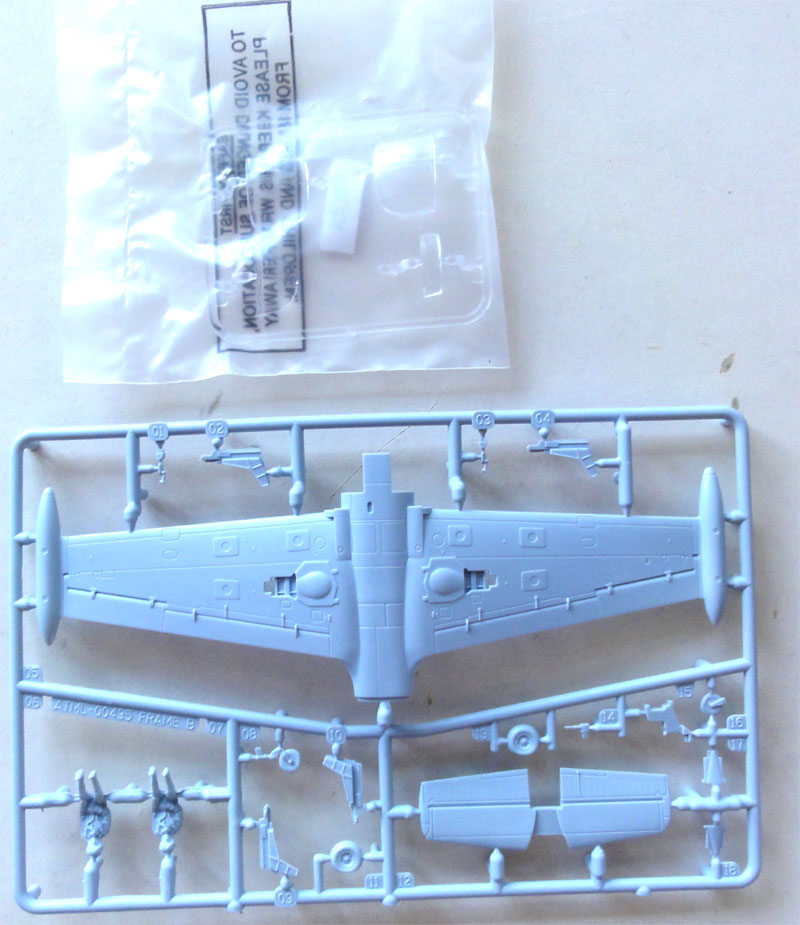
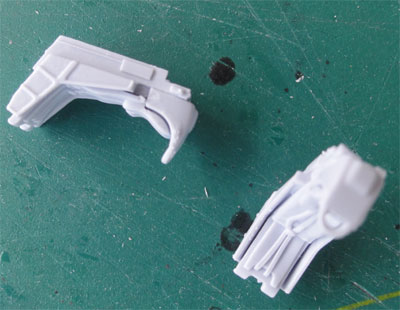
About 40 parts are in the kit including
a transparant sprue with two canopy sliding hoods: one #D02 for the closed
setting and another one #D04 for a aft slided open setting. The different
hood seems a bit wider to avoid interference with aft small transparant
section #D03. Nice that Airfix thought about it. The hoods look great
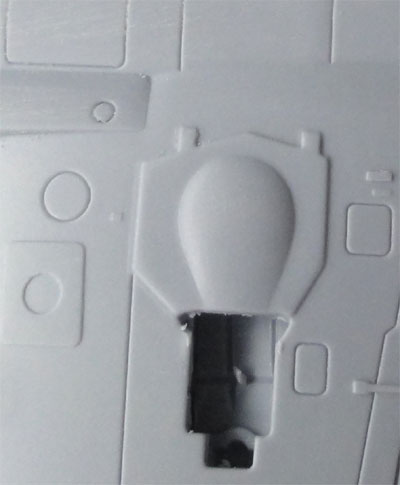
(NOTE: I later found out that the central hood frame is not on the outside in the glass but runs below the glass).

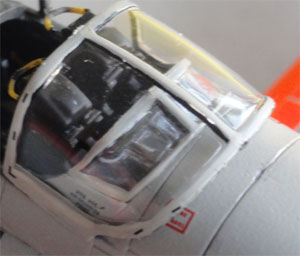
The cockpit is small but has good
detail. A central console, control sticks and detailed sidewalls. The deeply
positioned main instrument panel has a decal for the instruments, good
enough. The ejection seats look good with a separate parts for the harness
that has raised strap detail. There is an option to install two pilots
(supplied in the kit) in which case the harness part is left out. I will
replace the seat firing handles with thin yellow coloured sprue.
The landing gear is small and on this kit can be set lowered or closed with a few extra doors provided. The inner gear doors are moulded closed which is correct for also a parked Jet Provost. But the main gear bays are undeep. The low pressure tyres have flattened areas which I think are a bit overdone but I used these nevertheless. Each main gear leg and outside door is one part but looks fine.
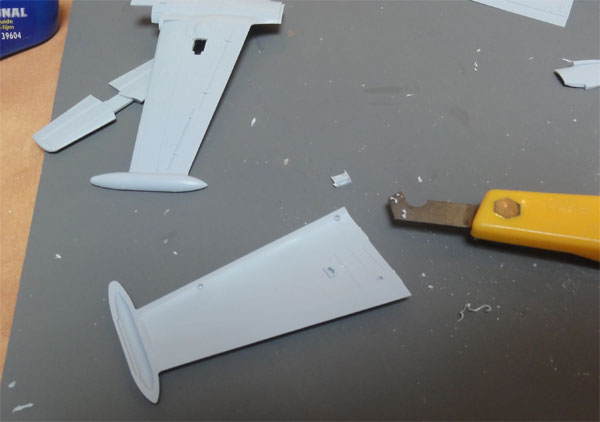
The 3 tiny trim tab control rods (left side rudder, upper left side elevator, lower right elevator) are moulded on the parts. I elected to shave them off and add later on tiny rods from thin wire.
There is strangely no exhaust pipe in the kit.
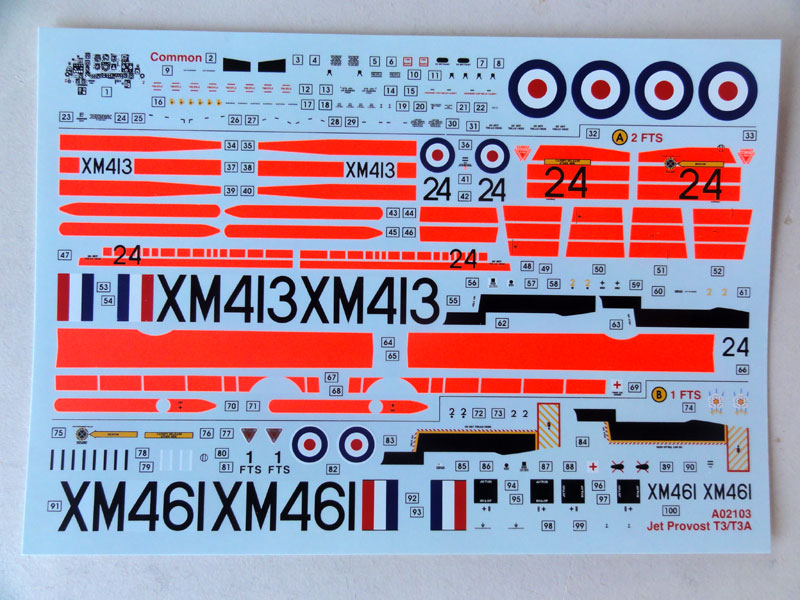
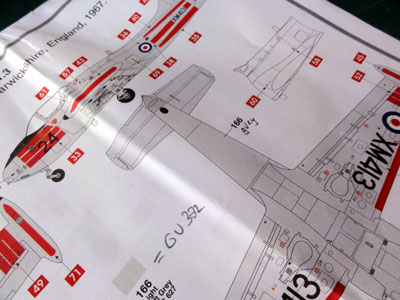
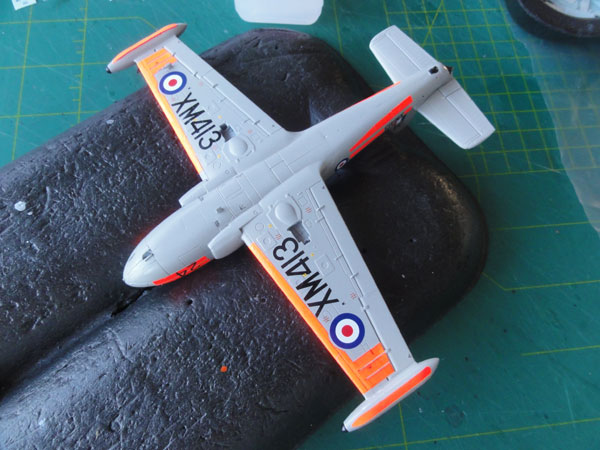
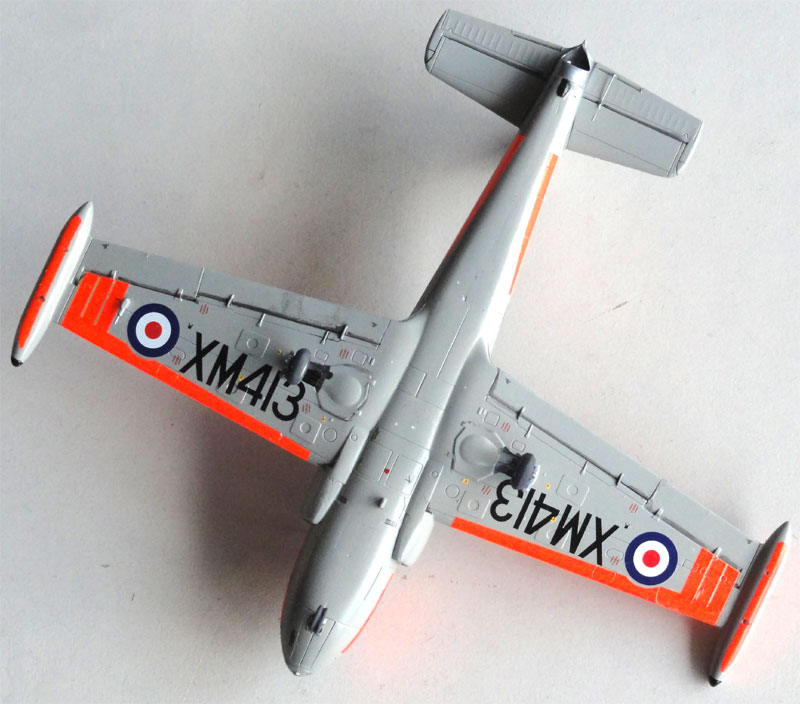
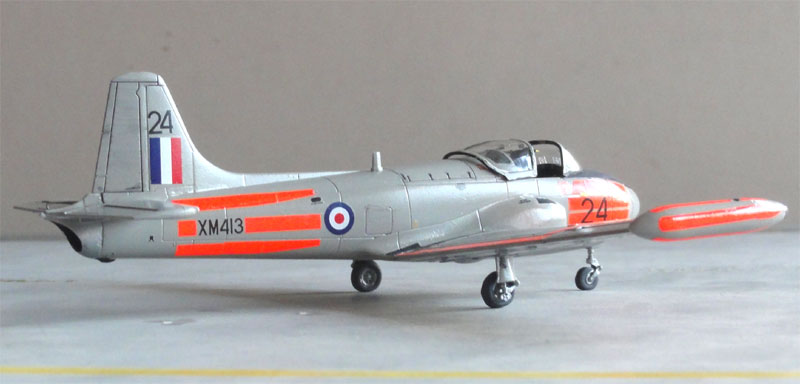
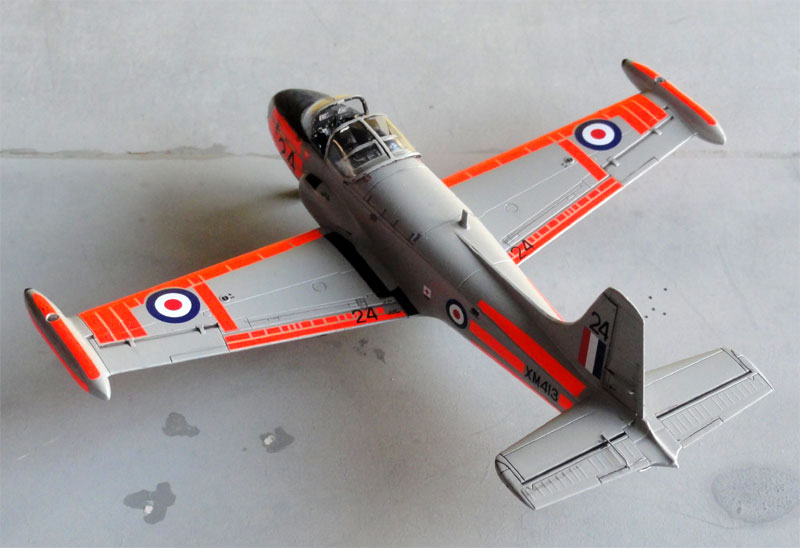
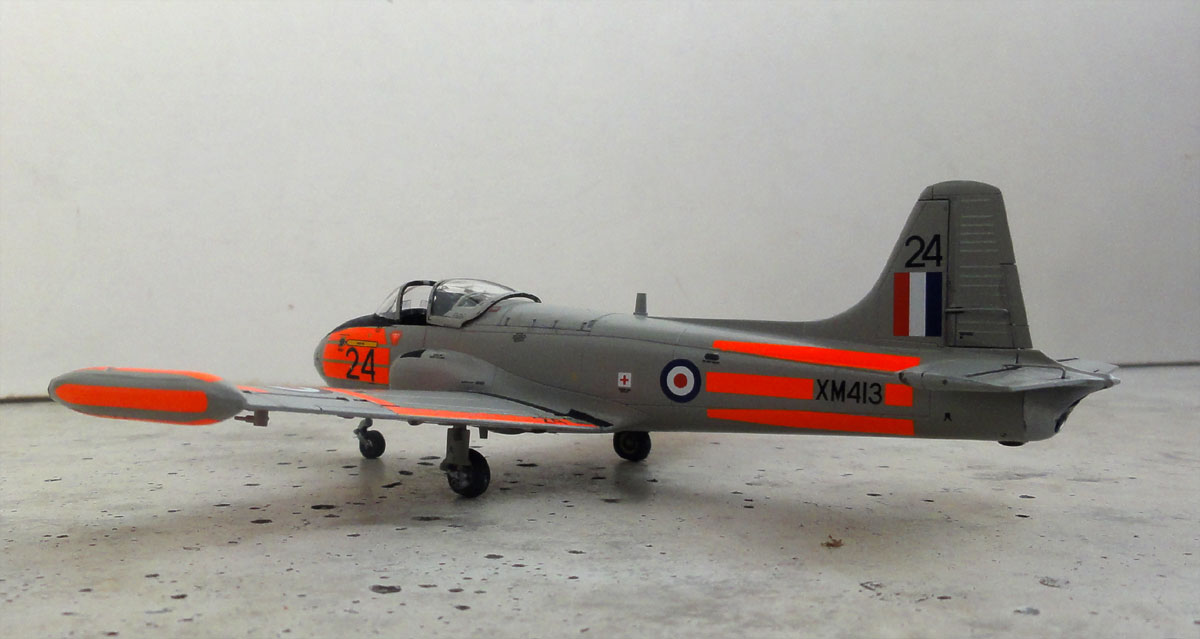
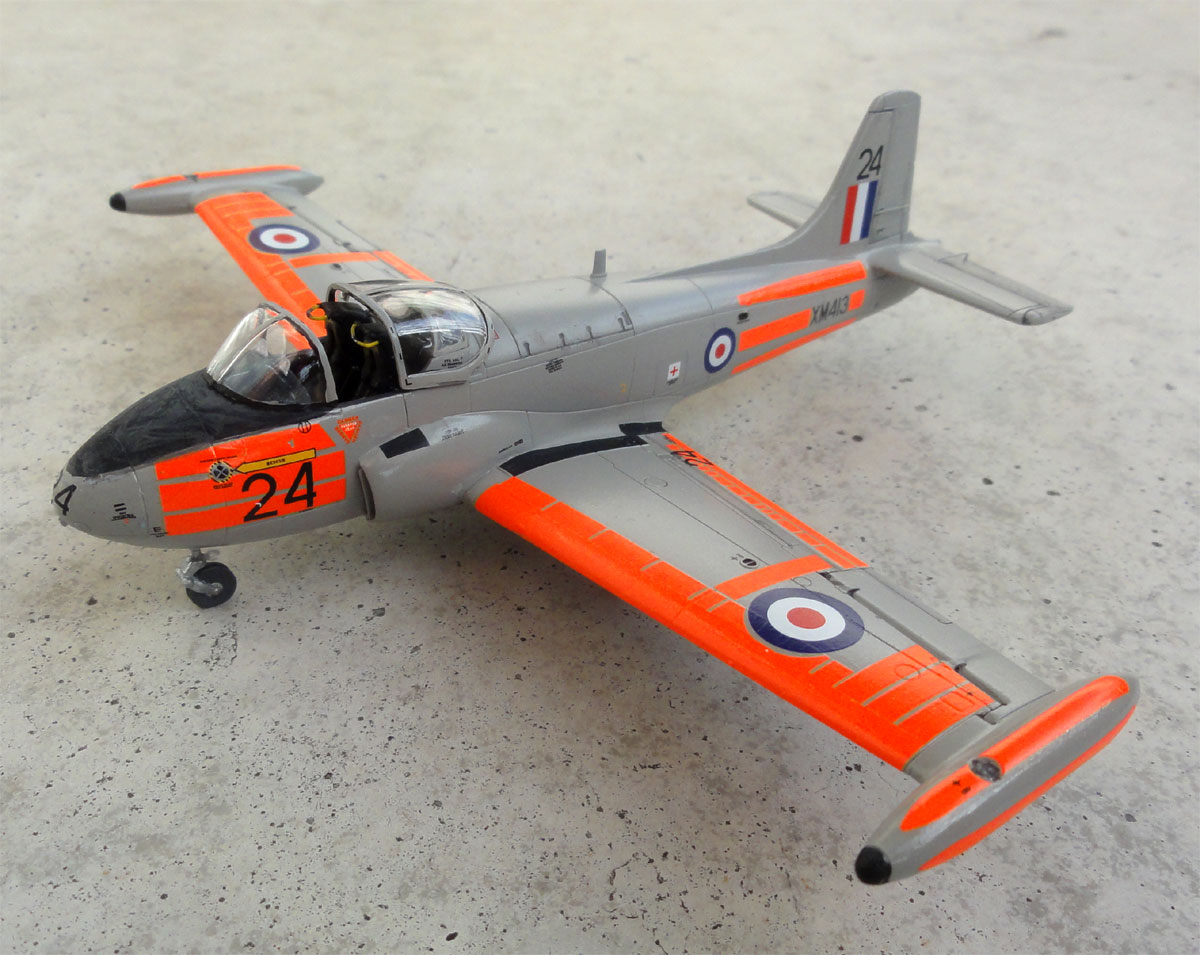
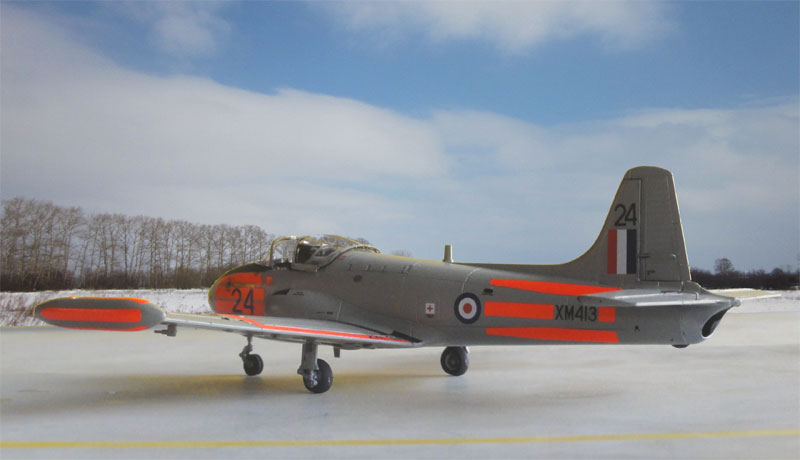
Two paint schemes and decal options
are in the kit:
(1) Jet Provost T3 of RAF no.1 flying
school at Linton-on-House, 1984 in a grey/red scheme;
(2) Jet Provost T3 of RAF no.2 flying
school at Gaydon, year 1967 in a light grey and high visibility bright
orange scheme. The decals are spectacular as Airfix provides these bright
stripings. More about the decals later on...
It was decided to make this second
scheme as in the kit and do a rather straight forward build.
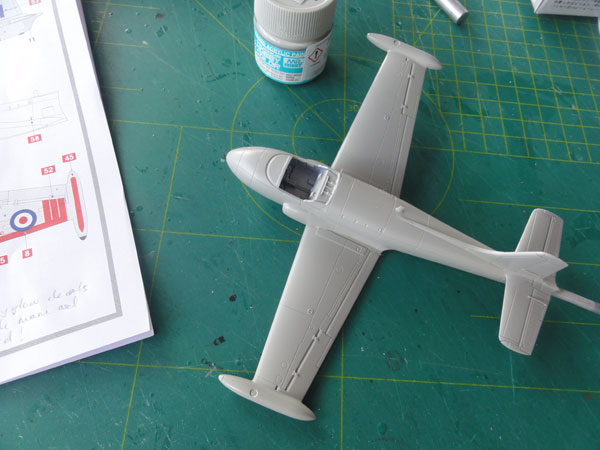
The new Airfix kit assembly is rather simple and there are not a lot of parts. The main lower wing is a single part which is good as it ensures correct wing dihedral. But before starting assembly, I removed the moulded inner gear bay floors and made the moulded closed inner doors thinner on their insides of the lower wing #B05. In the upper wing halves, at the gear bay roof some lines were inscribed to suggest detail.
 .
.
The fuselage was assembled first. The nose needs a lot of weight to prevent tail sitting. Ensure you put enough here!
Next, inside the fuselage I blanked off the deep exhaust area and painted it black inside.
The lower wing was set in place (after
the bays were deepened, see above). Next the upper wing halves were fitted.
But the upper wing-fuselage joints need no filler so nicely the raised
detail is kept.

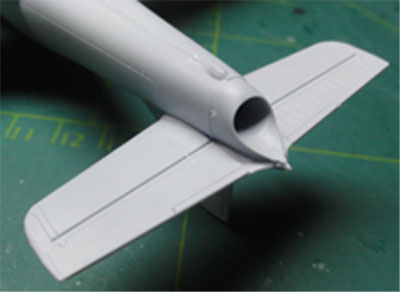
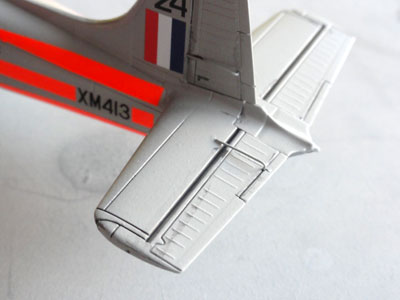
The single piece horizontal tail plane
#B12 needs some carefull alignment, I had to remove a slice of plastic
in the slot to get a perfect horizontal fit. Some filler was needed as
well at the tailplane joints and at the exhaust section #A14 when installed.
Also some filler was strangely needed on the vertical tail leading edge
and fillet but may be I should have sanded it smoother inside.
 .
.
 ..
..
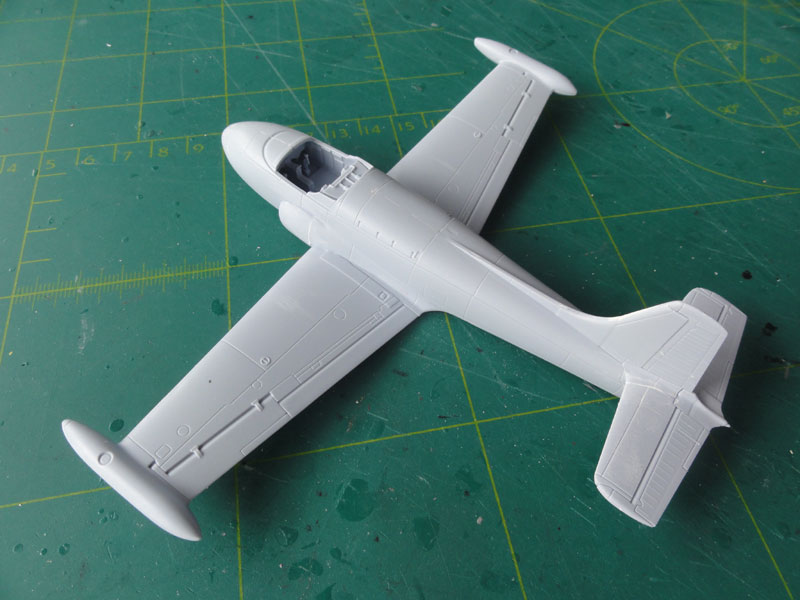
That about completed the basic airframe
in only 2 hours. I finally needed a bit filler / putty on the air intakes,
and the lower wing-fuselage joints in the fuselage belly. After drying,
the areas were sanded and a grey base coat was airbrushed using Revell
"75" Stein grau acrylic.
Here the trim tab control rods are
seen removed.
Next, I applied the 3 tiny trim tab
control rods made from thin metal wire: left side rudder, upper left side
elevator, lower right elevator.
The picked RAF no. 2 flying school
scheme is very nice. This required the model to get an overall BSC381C
Light aircraft grey 627 coat. I airbrushed Gunze Sangyo #332 acrylic
which is the correct colour.
The anti-glare panel in front of
the cockpit has than painted matt black as well as the small tail bumper
and the wing tip fuel tank tips. The cockpit tub and interior was now also
painted; the cockpit interior is rather dark, being semi-gloss black. I
used a mix of dark grey and black with some dry brushing.
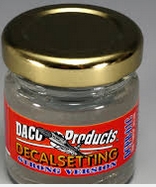
To ensure a good decal application, first the model got a few airbrushed layers with American Johnson FUTURE varnish (with the usual technique).
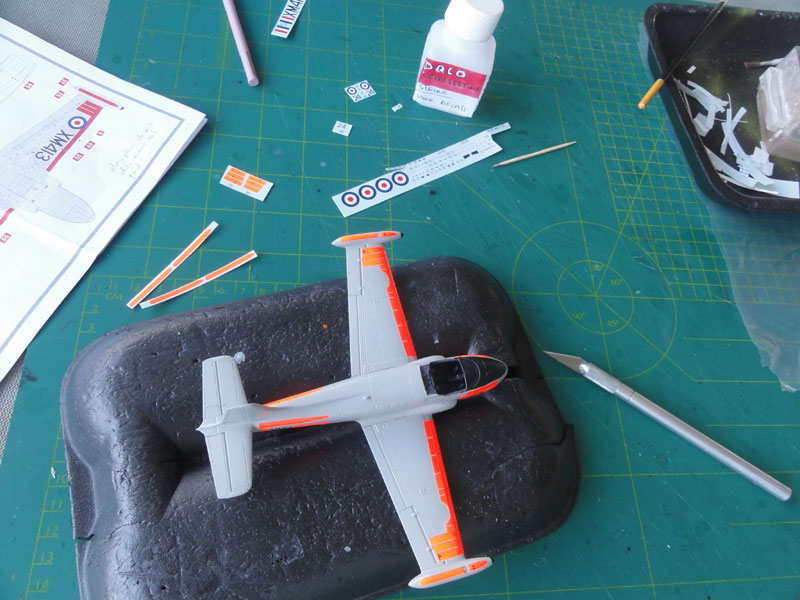
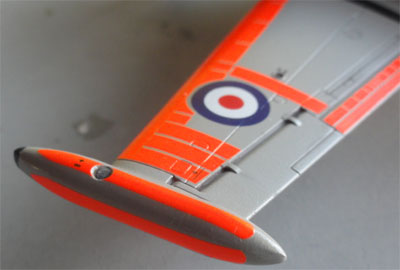
Next came the big challenge to apply
the bright orange/red decals for the colour striping. The Airfix decals
look great but the striping decals are rather thick but this was necessary
to get a good opaque orange/red covering. But this means these decals
are vulnerable and thick and sturdy.
I used this technique to get them on to this model:
I started with the upper wing leading edge decals #64 and #65. These are mose "critical'. These decals should be "folded around the wing leading edge", a daring exercise!
I first brushed a coat of FUTURE varnish on the upper and lower wing leading edge (thus not the entire wing!). This coat was left to dry for say 2 minutes.
The first bright decal was set in
water and when loose than sliced CAREFULLY on the upper leading edge. The
FUTURE below is now a bit sticky and helps to fix the decal on top and
keep it in place. (It protrudes as the lower section is not yet fixed).
On the still protruding area of this
bright decal, some DACO Decal Softener was set with a brush on top. It
will stay there and I waited 2 minutes for the decal to soften; this will
help to "bend it around the leading edge".....
With the finger the decals was bended starting from the inside to stick on the lower leading area; this areas already had gotten a FUTURE sticky coat so the decal indeed sticked. Ensure the decal does not stick to your finger but to the model....
NOTE THAT THE DECAL TENDS TO BREAK UP IN SOME SPOTS. But I managed to get it done. With the brush stick, the decal was rubbed flat and kept to dry.
The other side of the wing leading edge was done in a similar way. When this was done, the difficult parts have been done. No fears for the rest of the model!
The large nose decals #32, 33 were
"cut in" to pursuade them to fit better.

All the other bright decals can be
applied without a problem, but be carefull as they are very vulnerable.
Some additional decals are for example also on the upper wing forward section
but these are simple to apply.
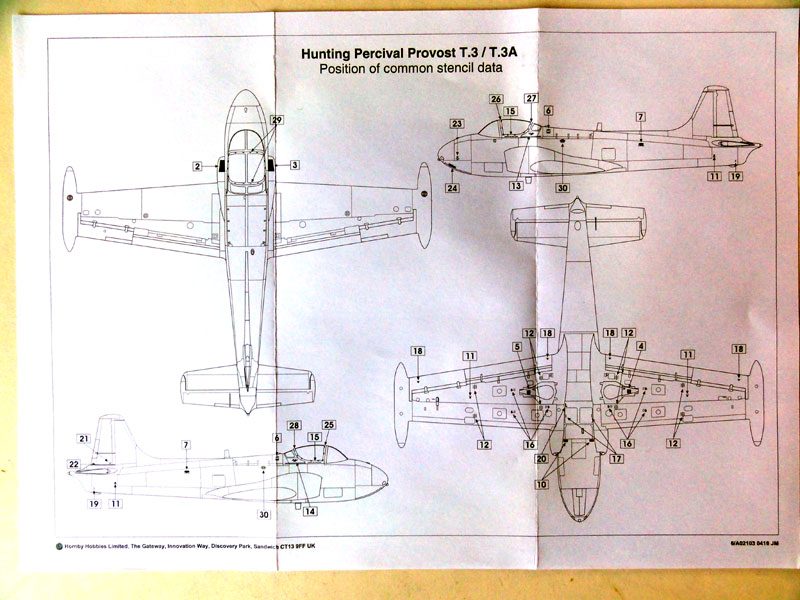
Finally, the stencilling was applied.
Airfix provides a separate paper to show their positions. I believe there
is an error here: decals #6 behind the cockpit should be #10, the rectangular
marking.
The overall decalling was the biggest challenge and took me 3 hours.
After the decals dried, the model
got a final coat of Johnson Clear/ Pledge using the usual
technique. Simple hold a piece of paper in front of the mat black anti-glare
area when airbrushing the clear coat.
Final completion could now be done.
The semi-black seats as per kit were installed after their harnesses where
painted medium brown with also a bit of wash. The ejection handles on top
were replaced and made from yellow stretched sprue with a few black stripes.
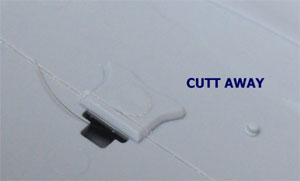
The wind screen, hood and rear glass section frames were hand painted BSC 627. The glass work fits well and was fixed in place with some white glue. Inside the hood leading edge, I installed 2 very small rear viewing mirrors made from thin foil.
NOTE: I later found out that the raised central hood frame is not on the outside in the glass but runs below the glass. Removing the moulded central frame can be done wat carefull sanding followed by polishing. Finally paint the central frame INSIDE with a paint brush. (this will be done on future Airfix T3 models made).
 ..
.. 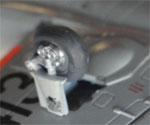
The landing gears were installed.
The tyres were painted very dark grey. I also painted the wheel hubs aluminium
though Airfix indicates black. The deepened gear bays as well as the legs
were painted also aluminium.
At the nose I added a few silver spots with a tooth pick for the the landing lights. I had some difficulty to see where the anti-collision lights were situated on the real Jet Provost. There is one at the rear fuselage end but I was unsure about the wing tip lights. None were found on photos. The wing tip fuel tank tips are black and I think these tanks contain no lights themselves. So unclear here.
The 2 small antennas on top and on
the belly colours vary a bit between real aircraft. I kept them grey as
per instructions, b/w photos only being available.
Finally some wash was applied at
the recesses of the ailerons, elevator and flaps. A very thinned black
wash was applied with a tiny brush and excess paint swiped off.
Some
... and the trim tab control rods
added
That completed the model in just an
overall 10 hours. The model looks even greater than anticipated and was
a pleasure to build.
NOTE: I routinely installed 2 gun sights on the top instrument coaming, but this was wrong. This is not a Strikemaster but the Jet Provost that was an unarmed trainer. (I removed them but in some model photos still seen installed).


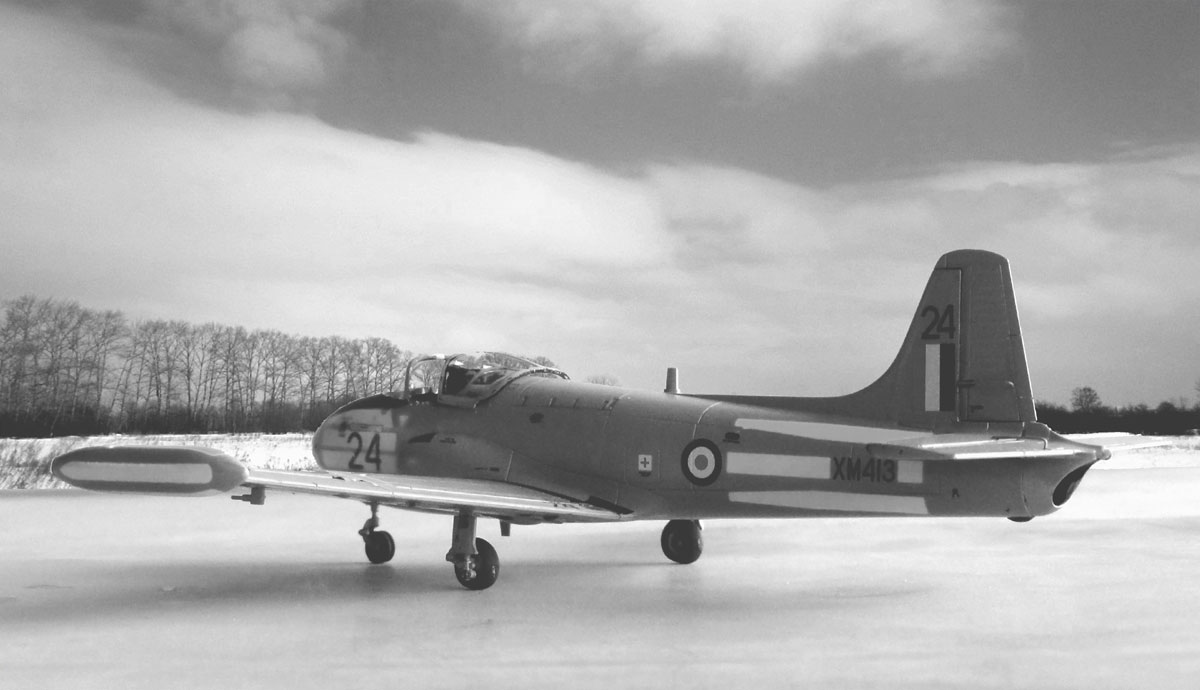
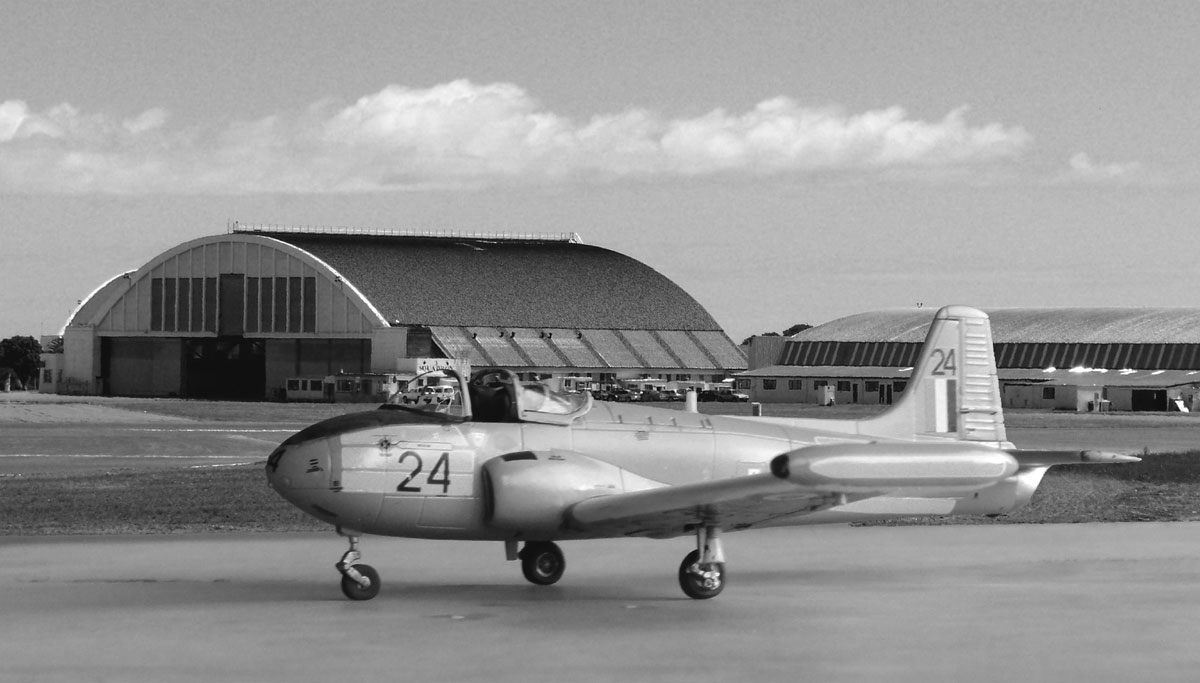
Some "sceneries..."
On a visit to RAF Woodford...

and some other "sceneries"...

On to next
[ page ... ]
Back to 1/72 Models.......
(c) Copyright Meindert "designer"/ All rights reserved. Your comments are welcomed by webmaster
Created this page
October 1, 2016