
Avro Shackleton models in 1/72 scale
.....continued from page 4...
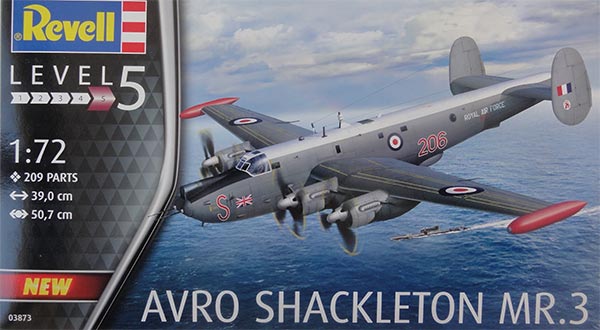
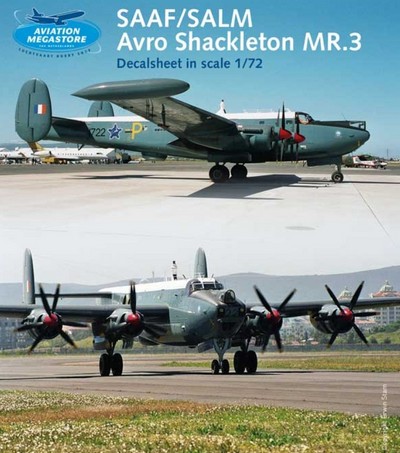
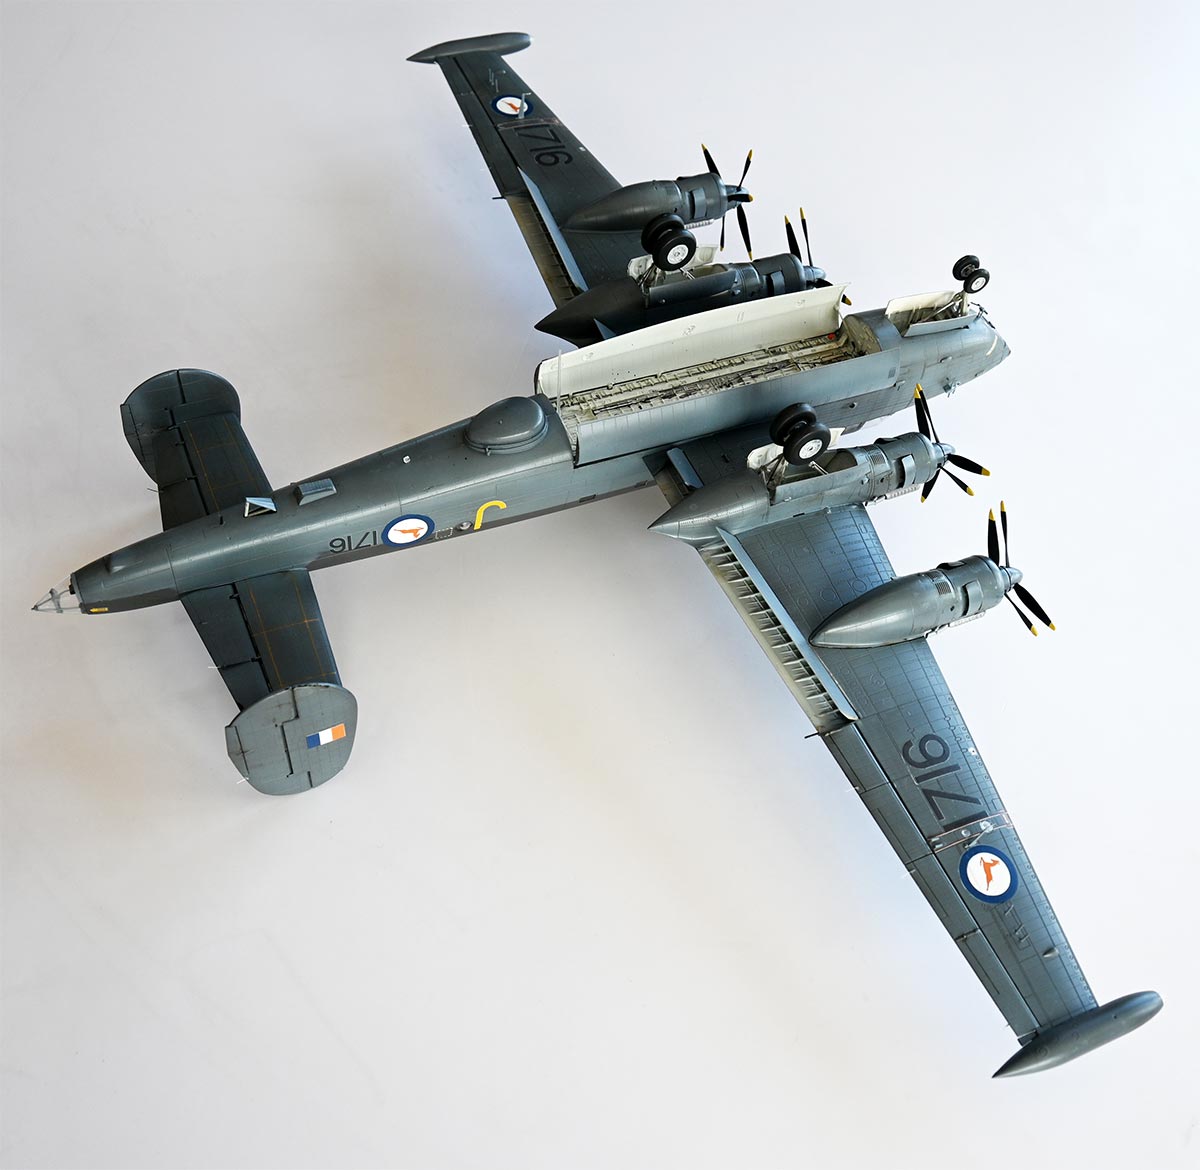
This Revell Shackleton MR3 kit #03873 will be built in an early South Africa Air Force (SAAF) scheme. Or in Afrikaans: "Suid-Afrikaanse Lugmag" (SALM).
The SAAF got the first MR3 end 1957 with deliveries starting of 8 aircraft. They had upon delivery paint scheme with the "springbok" roundels but soon these were replaced with the "castle" roundels. These aircraft got a in the mid 1960s a Phase II upgrade in the U.K. but never got the Viper jets fitted. Than came the arms embargo. The remaining Shackletons a new paint scheme and other roundels. The SAAF Shackletons were used until 1984 when they became unserviceable due to fatigue and lack of parts.
I wanted to make an early MR3 with the early springbok roundels as seen on the Shackleton MR3 numbered "1716" coded "J" as on delivery in 1957. This aircraft has a special history, more about that later on...
But colour information in various books and decal instructions were unclear. So I posted a message on the Britmodeller Forum.
James "71chally" provided the following information:
"The initial SAAF colour scheme was dark sea grey upper surfaces over PRU blue fuselage sides/underside, wing and tailplane undersides, and vertical surfaces. In the very early 1960s the fuselage gained a white top and this created a 'stripe' of the dark sea grey left at fuselage window level, this was short lived before it was painted over in PRU by the late 1960s. Final SAAF scheme was the white over PRU blue fuselage, and dark sea grey upper wing and tailplane surfaces. The colour variation between the DSG and PRU can be very difficult to detect in photos, when the machines were fresh the gloss finish hides the effect quite well, and when they were knackered and faded it is even harder to detect! You can normally just about make out the demarcation half way down the tip tanks, and on the upper engine nacelles".Thank you James and looking at photos confirmed the scheme. I also found that the early Shackletons did obviously not have the later electronic equipment situated on the fuselage spine.

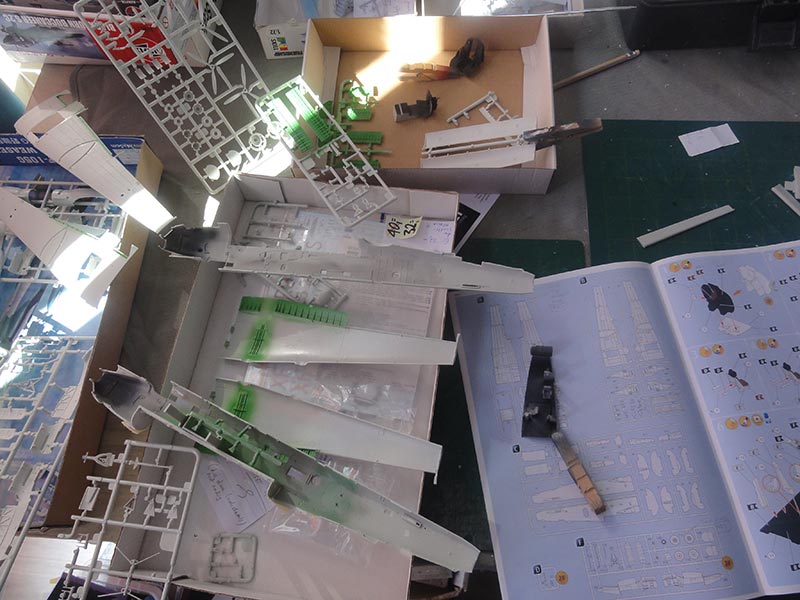
The Revell MR3 kit is very nice but can be fine tuned on some aspects. This will be shown in the followoing STEP by STEP sequence following the Revell instructions.
First: there is a bit plastic shrinkage in my kit, notably on the upper wing parts. Fill and sand flat.
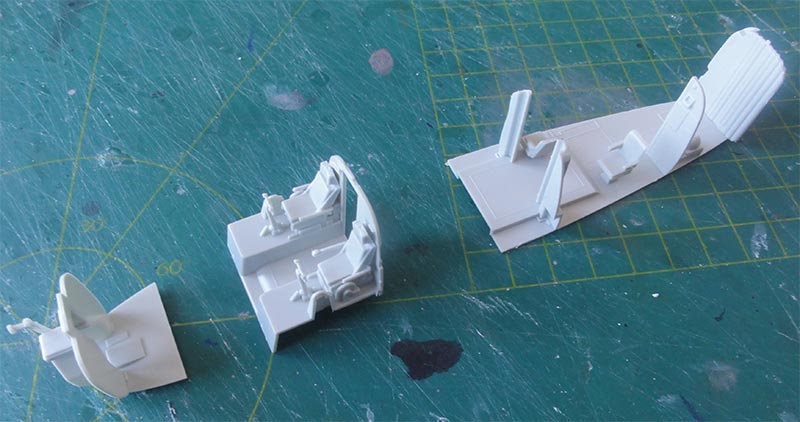
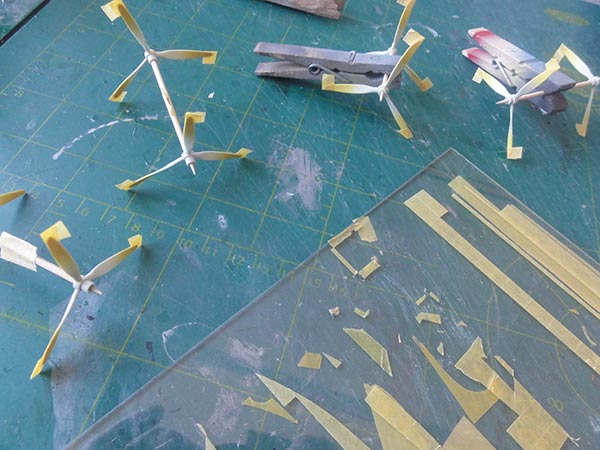
STEPs 1 - 7 and 9 deal with the fine interior provided in the kit. I simply followed the instructions. Not a lot will be seen of the rear fuselage cabin details through the windows. Also, I decided to set the door #A29 closed. I only added a few seat straps on the many seats made from tape.

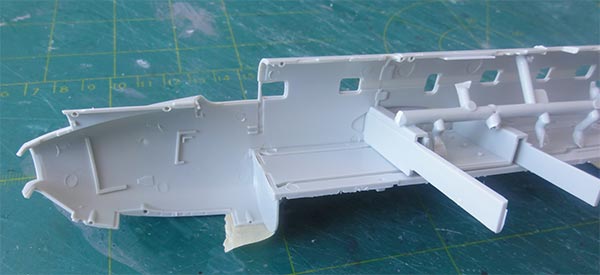
STEP 8 shows a very welcome spar assembly that really helps to get strong wing-fuselage joints. The fit is very good.
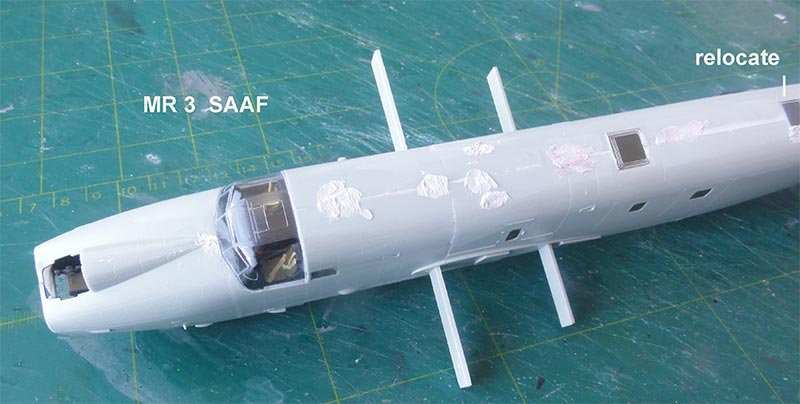
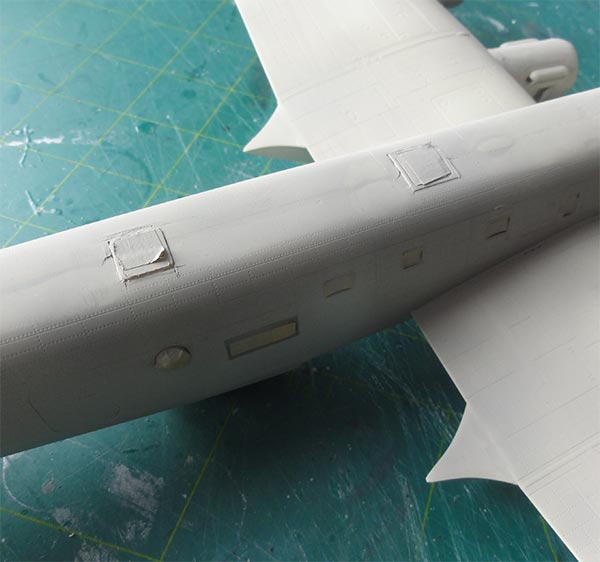
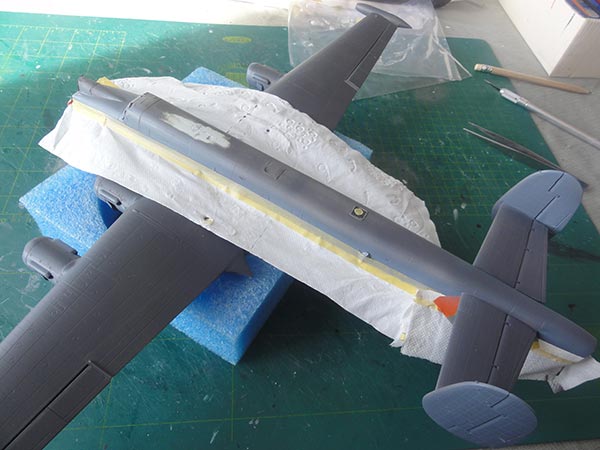
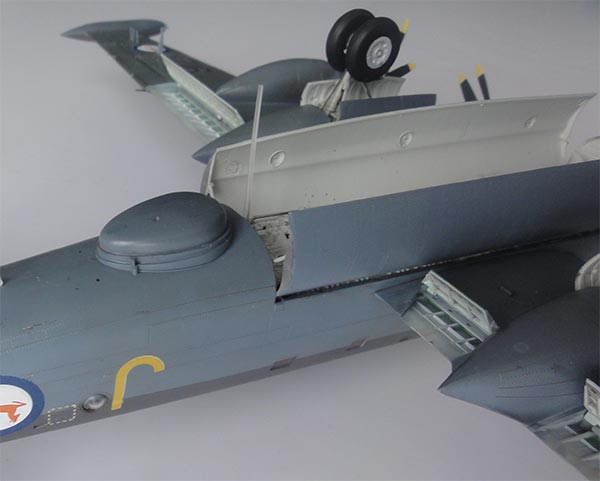
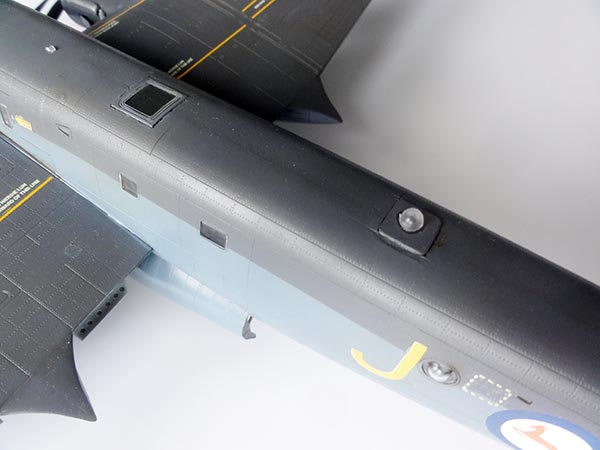
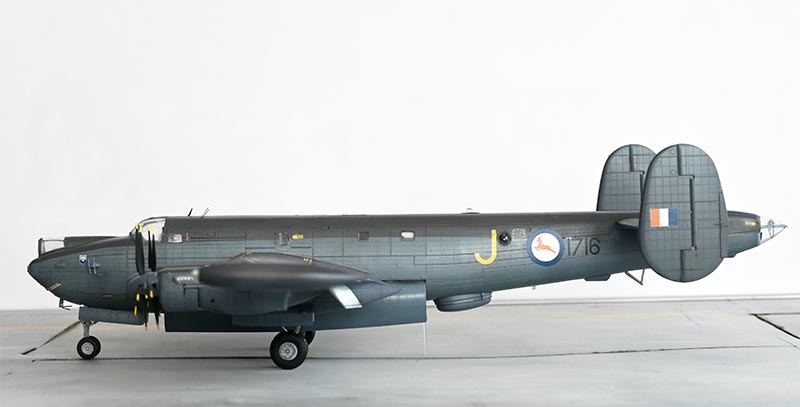
STEP 10: on all SAAF Shackletons the astrodome (Revell part #O45) is relocated on the aft fuselage spine in the rear ditching exit panel (which should be solid) which was itself offset to starboard. It is about at the location of the Revell window part #M47 and can be glued on top. This window #M47 should also be shifted off set about 2 mm more to the right, which is easily done with the astrodome to be installed later on top.
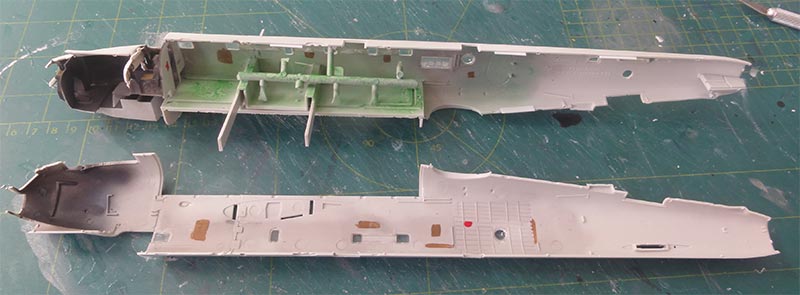
I painted the interior fuselage as indicated in the instructions, with mostly light grey. The instrument decal is too light grey, it should be dark grey with black instruments, but it will be invisible and was set. On the seat, a few straps were added from light brown tape slices.
The forward fuselage nose halves should be mated with the rear fuselage, this is not a problem with just a bit sanding.
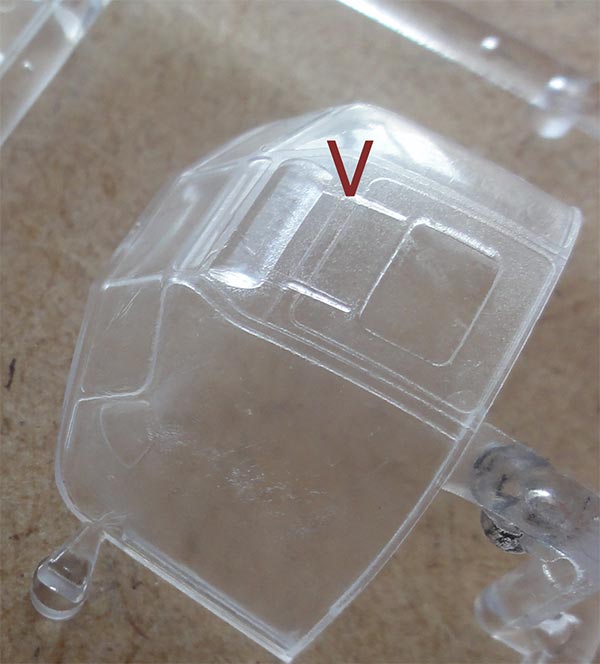
STEP 12: I could not clearly see how the circular opening in the rear fuselage will be closed. It is not shown in the instructions but there is an opening. I closed it up.
STEPs 13-18: done as per instructions. Adding a lot of nose weight to avoid tail sitting later proved invain... I needed a clear rod.
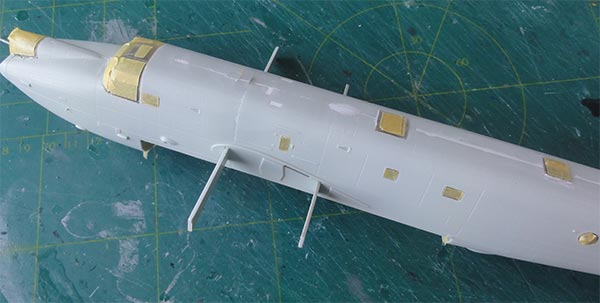
STEP 19: for an early SAAF Shackleton as it was delivered, the many recesses for the spine antennas were closed/ filled and sanded flush like recesses for not needed parts #B136, #B137, #B138-I-II , E139 shown in STEP 72 and the forward circular opening of the (relocated) astrodome was closed/ filled with putty.
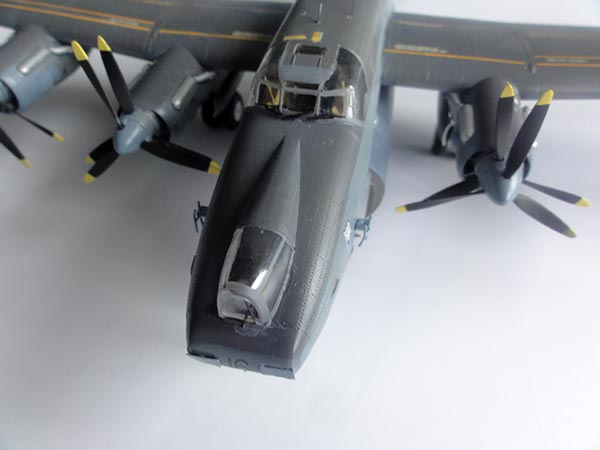
The large cockpit window needs removal of the ridge on top as indicated by Revell. It can be installed or at a later stage. Note the large escape hatch in the cockpit roof and the small side ventilation windows.
Now at this stage, it is recommended to fill with putty the various recesses and after drying sand the fuselage spine.
STEPs 20-33 were done as per instructions and deal with tailplanes etc.
STEPs 34-38 deals with the wing and was done as per instructions; install for the SAAF Shackleton the engine nacelles without the "Viper", so parts as indicated in Revell instructions STEPs 39 and 40. For the early SAAF MR3 the antennas were cut off from parts #K80 and #K90.
STEPs 39-40 has the option for closed or open engine cowl flaps. I set them open.
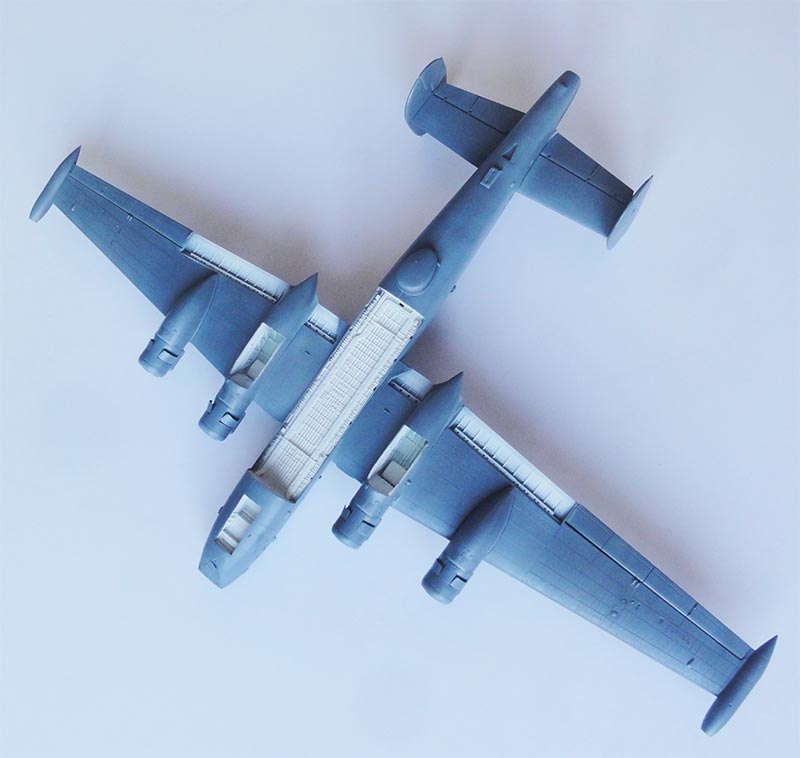
STEPs 43-44 deal with the main gear bays and nacelles and the kit parts look fine. The gear bay interiors are "dirty" white inside but between the structural panels often interior green is stiil seen. I painted all white but the tanks #F116 bright green.
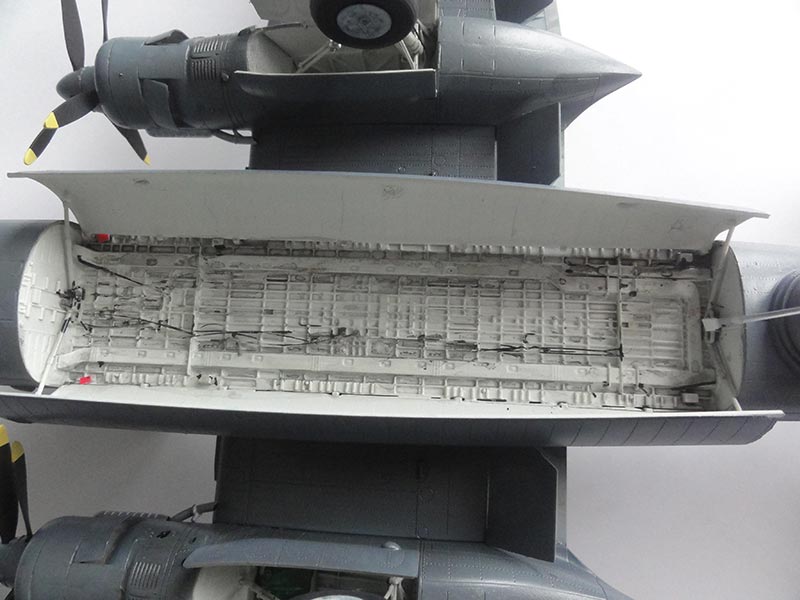
If you want the big bomb bay doors closed, set these at this stage; it may need some trimming, putty and sanding. See STEP 59. I will set them opened up and the bay and door interiors are white.
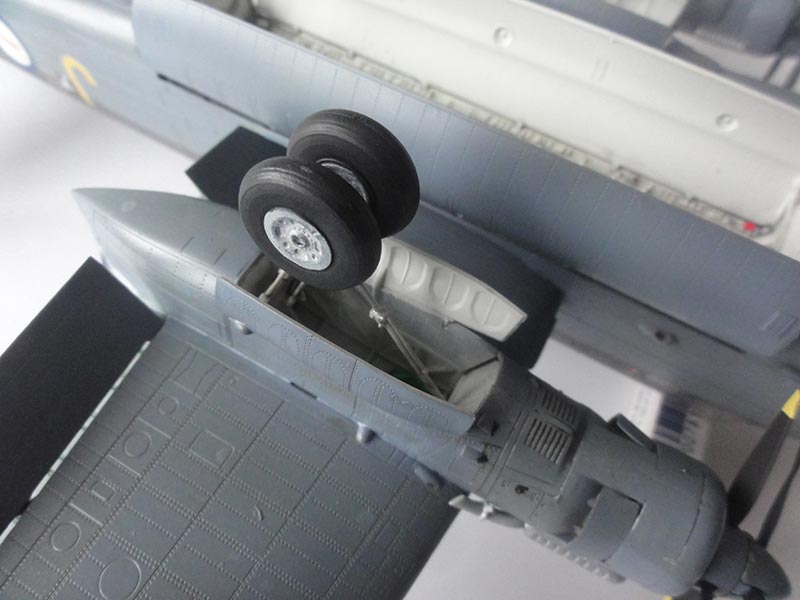
STEPs 45-54 deals with the landing gear. Install the gears after major sanding and model painting. The gears with wheels themselves are fine in the kit.
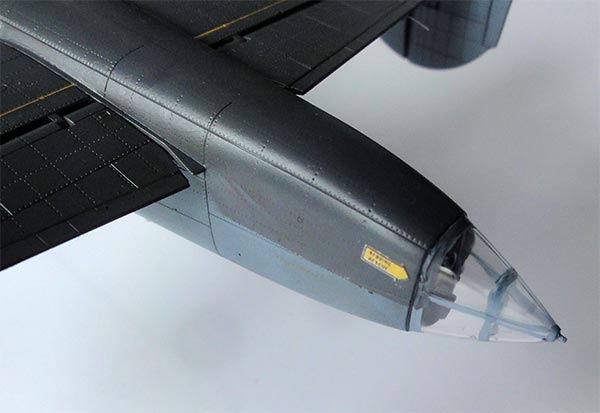
STEP 55 shows the forward nose fairing; guns were not always carried on SAAF Shackletons, an early photo shows them not installed. The clear observer dome part #M44 can also be set at a later stage.
STEP 56 shows the dome in retracted position as set as per instructions.
STEPs 57-58 done as shown but the clear parts can be set at a later stage.
STEP 60: the antennas #I140 shown were not used for the early SAAF Shackleton.
STEPs 61-62: the engine exhaust pipes will be installed at a much later stage after the paint scheme has been airbrushed. Same with the trailing edge flaps; their interiors are white.
STEP 63: do this later; the clear part #M48 as well as the antennas can be set at a later stage.
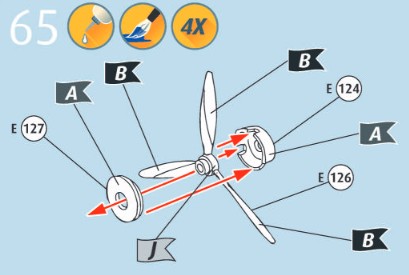
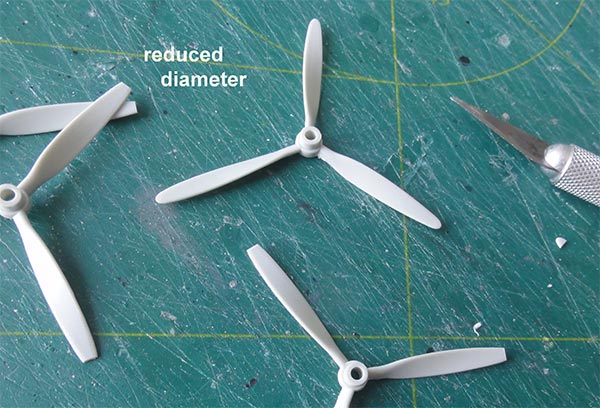
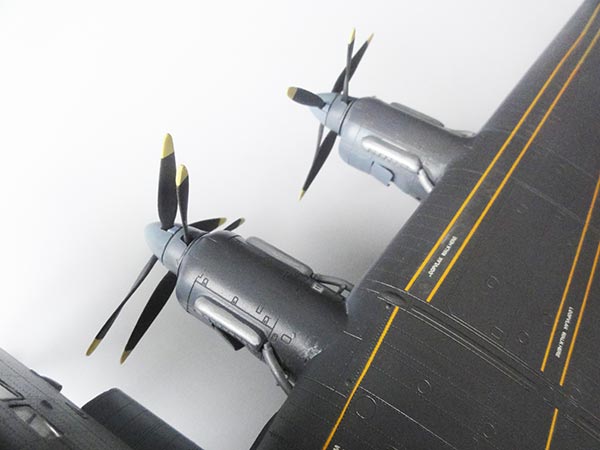
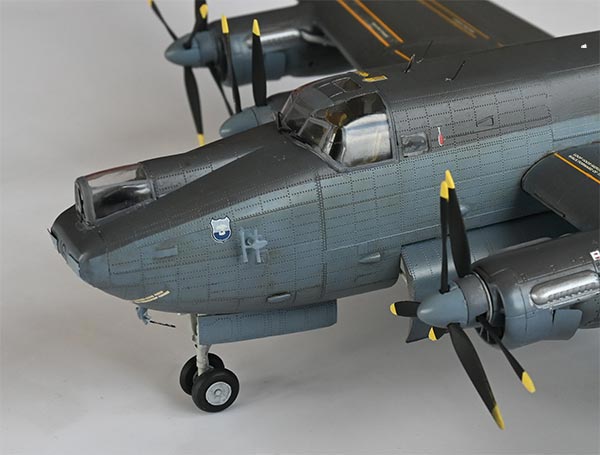
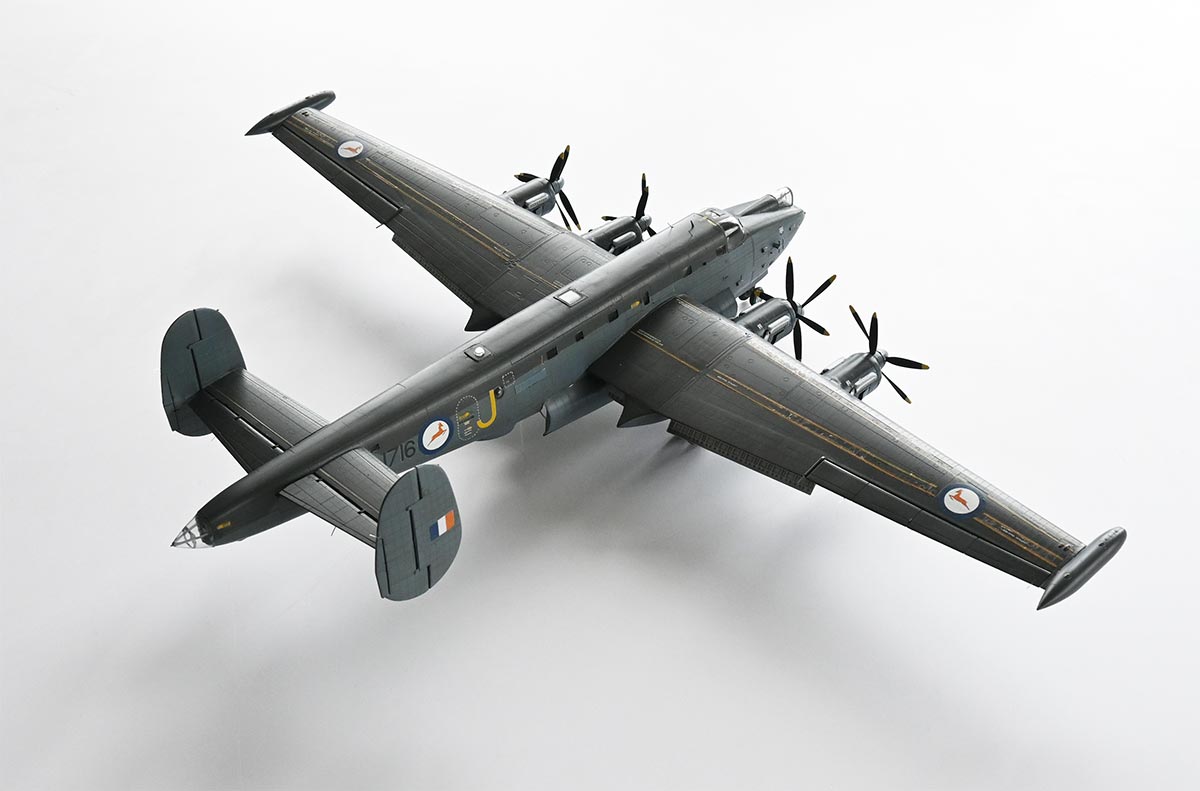
STEPs 64-69: the 4 rear propellers #E126 of the counter-rotating pairs should have a 2 mm smaller diameter, so I cut off 1 mm from each blade of the rear prop and sanded the tips again in curved shape. The forward propellers look OK and the props will be installed later as they are very vulnerable. The props are black with yellow warning tips.
STEPs 70-72 : skipped for an early SAAF Shackleton; the various recesses had been closed up earlier.

The various windows were masked with tape.

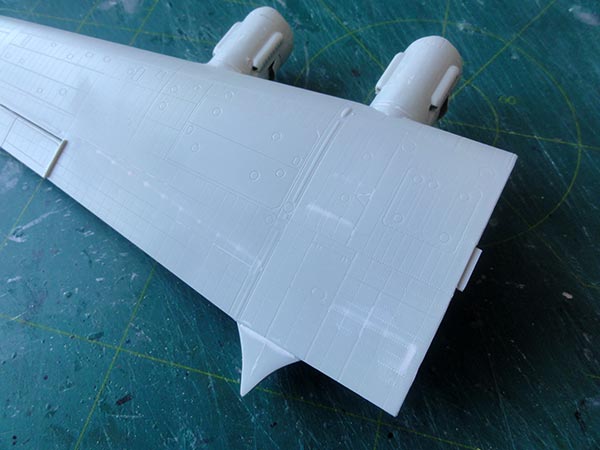
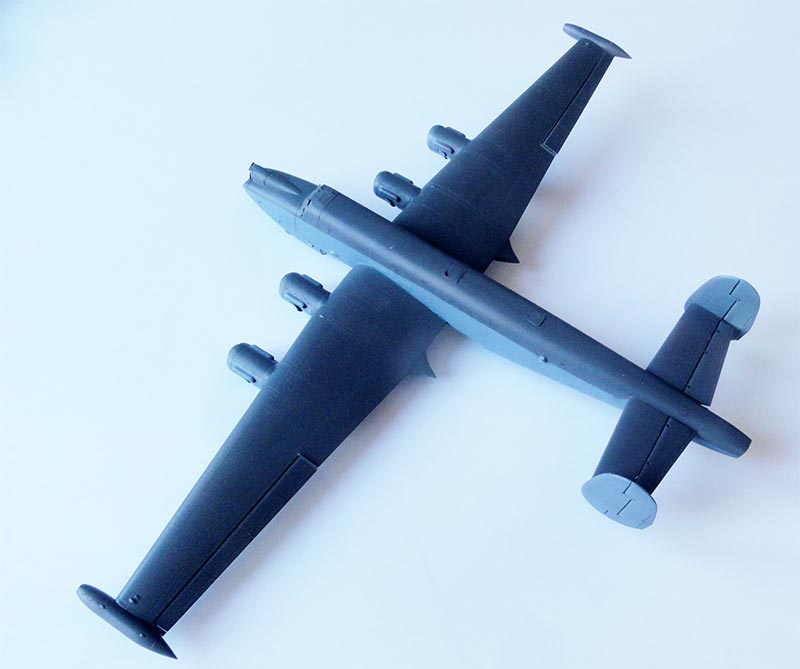
A base grey primer was airbrushed using my favourite Revell Aqua 75 steingrau primer. This will reveal any flaws and small gaps and shrinkage. All needs to filled with putty and sanding again when dried.
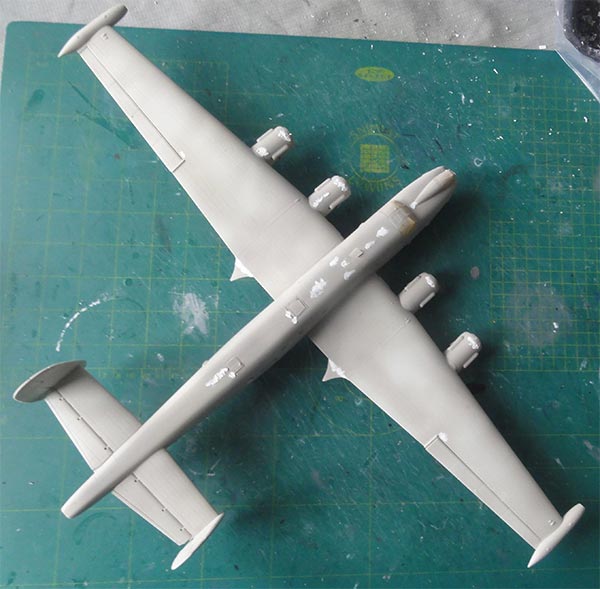
The surfaces look good now.
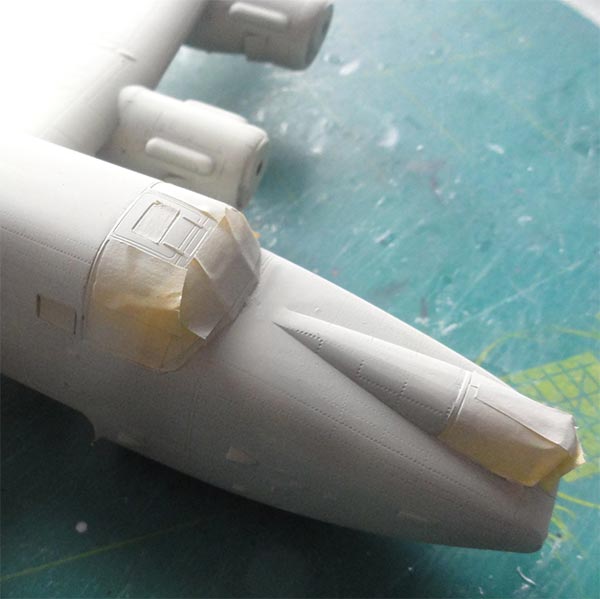
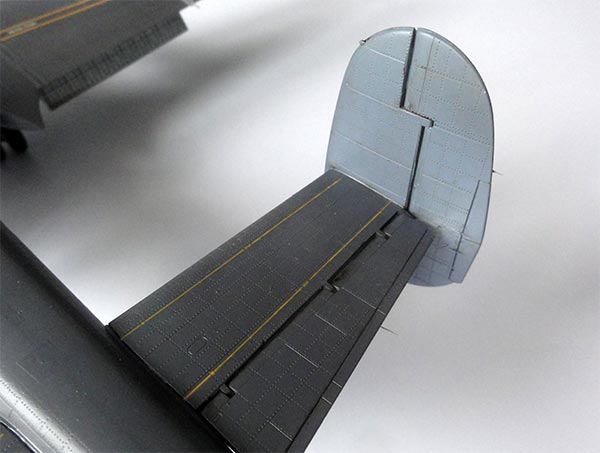
Here the repositioned rear window is seen, it will get the relocated astrodome later.
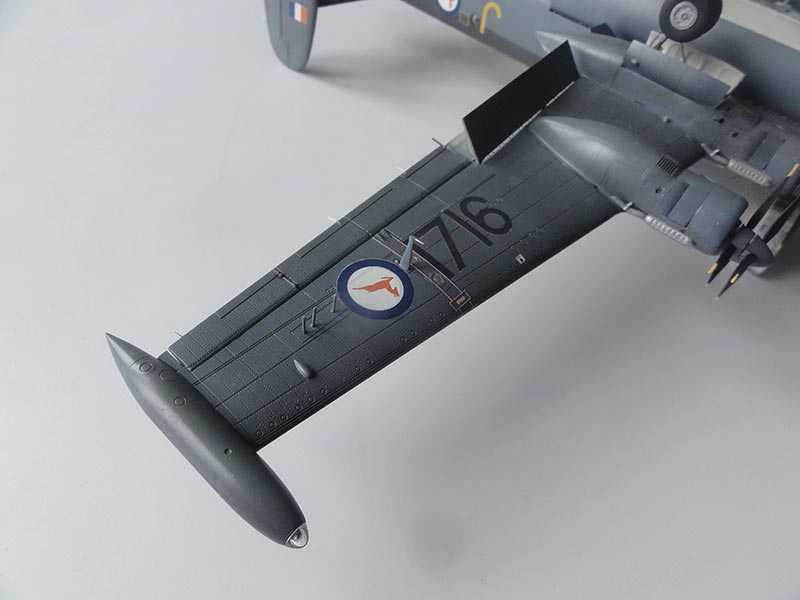
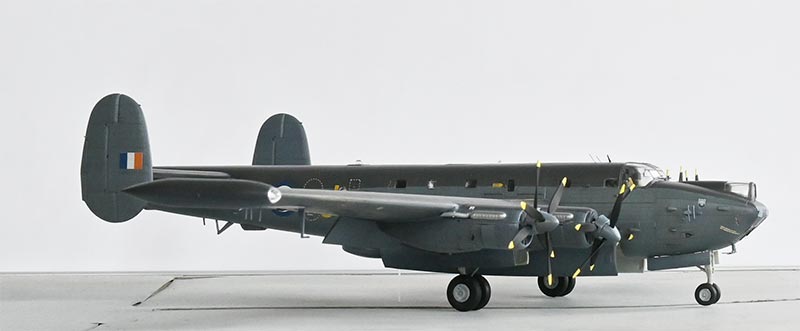
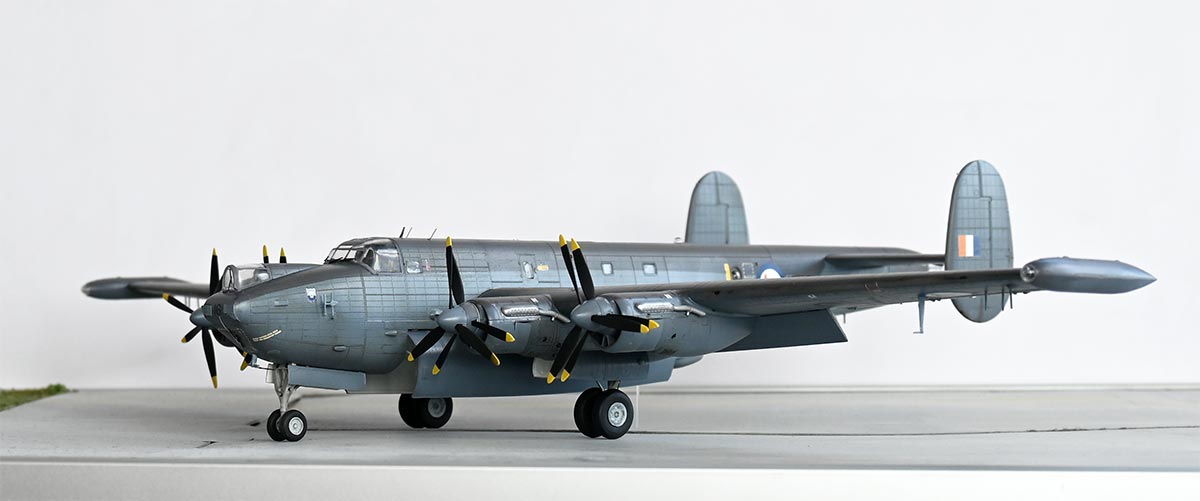
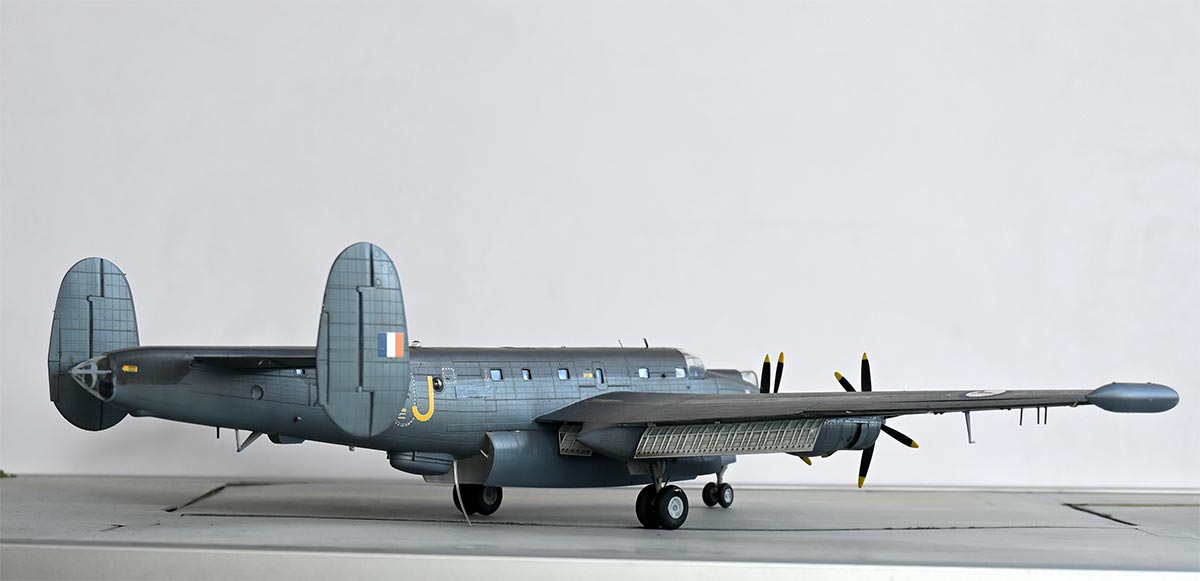
The model now got the base SAAF colours for the early MR3 Shackleton scheme. As noted earlier, the colour scheme was dark sea grey upper surfaces over PRU blue fuselage sides/underside, wing and tailplane undersides, and PRU blue vertical surfaces.
For the dark sea grey BSC638 Gunze Sangyo Mr Hobby H331 acrylic was airbrushed, thinned 50% with the Mr Hobby thinner.
For the PRU blue a mix was made of 50% Gunze H56 intermediate blue + 50% Gunze H25 sky blue. Make a lot of this mix as all undersurfaces and stabilizers need this. This mix was thinned and airbrushed after masking the grey surfaces.
The fuselage spine needed sanding and another dark sea grey coat as it "had gotten a fingerprint...".
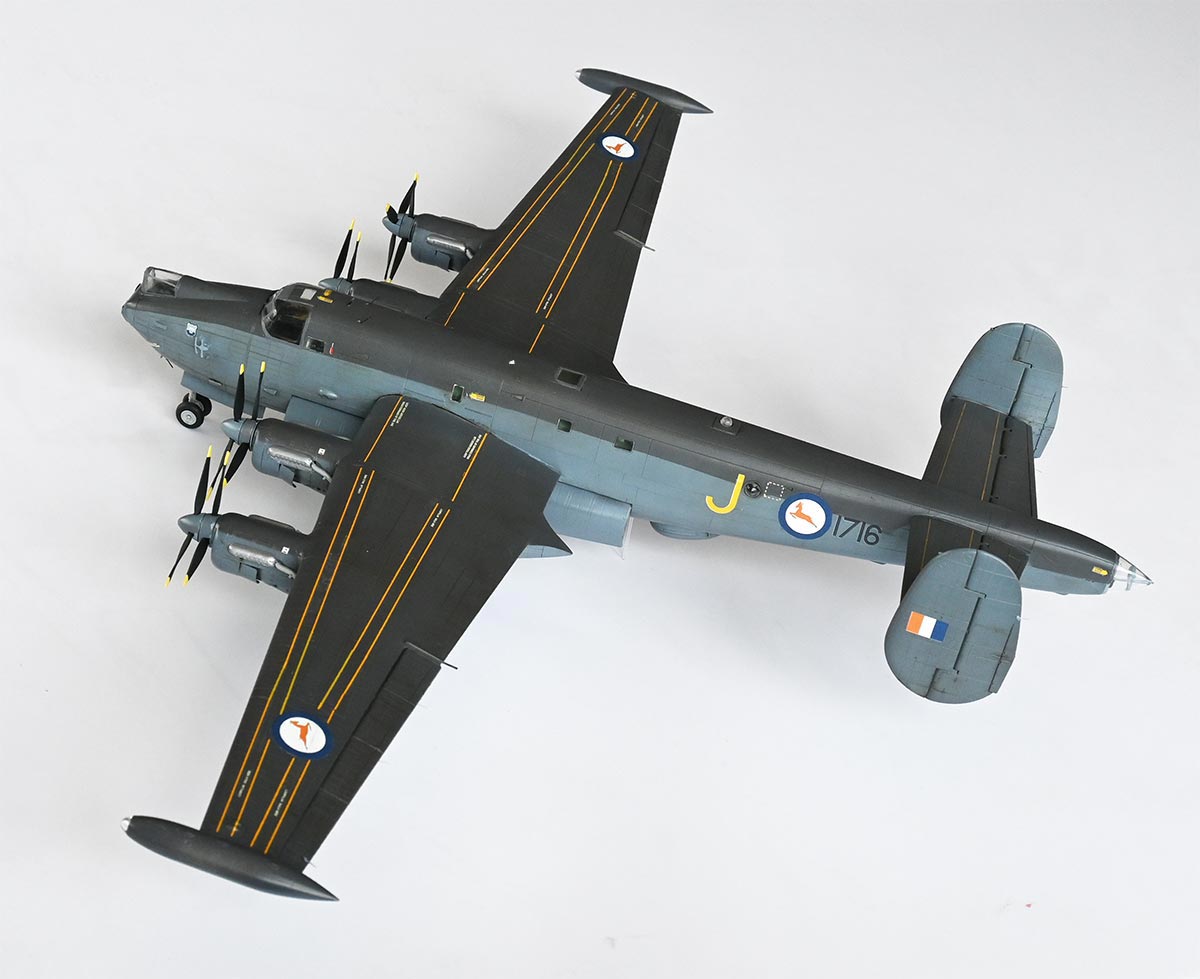
The lower surfaces are seen here with white flap recesses and gear bays.

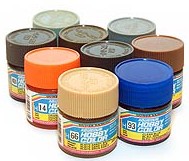
After drying, losely dark engine grease artist oil paint of Abteilung 502 was applied particularly on the upper surfaces and after 30 minutes drying wiped off with a old T-shirt. Very subtle the rivets and panel recesses remain visible. The oil wash takes a few days to dry completely so set the model aside.
The decals for the scheme could now be applied as the surfaces are "glossy".
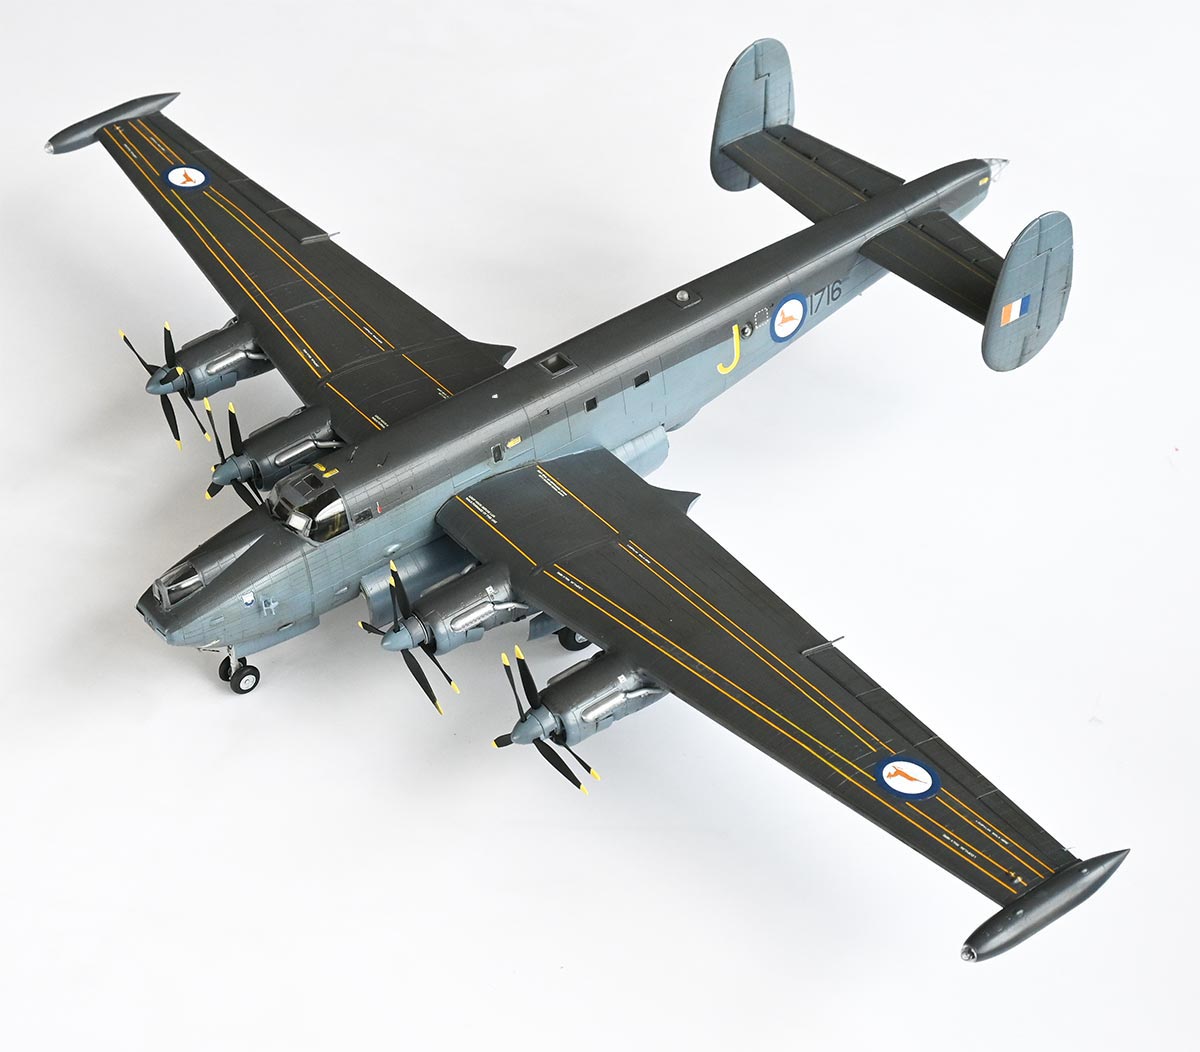
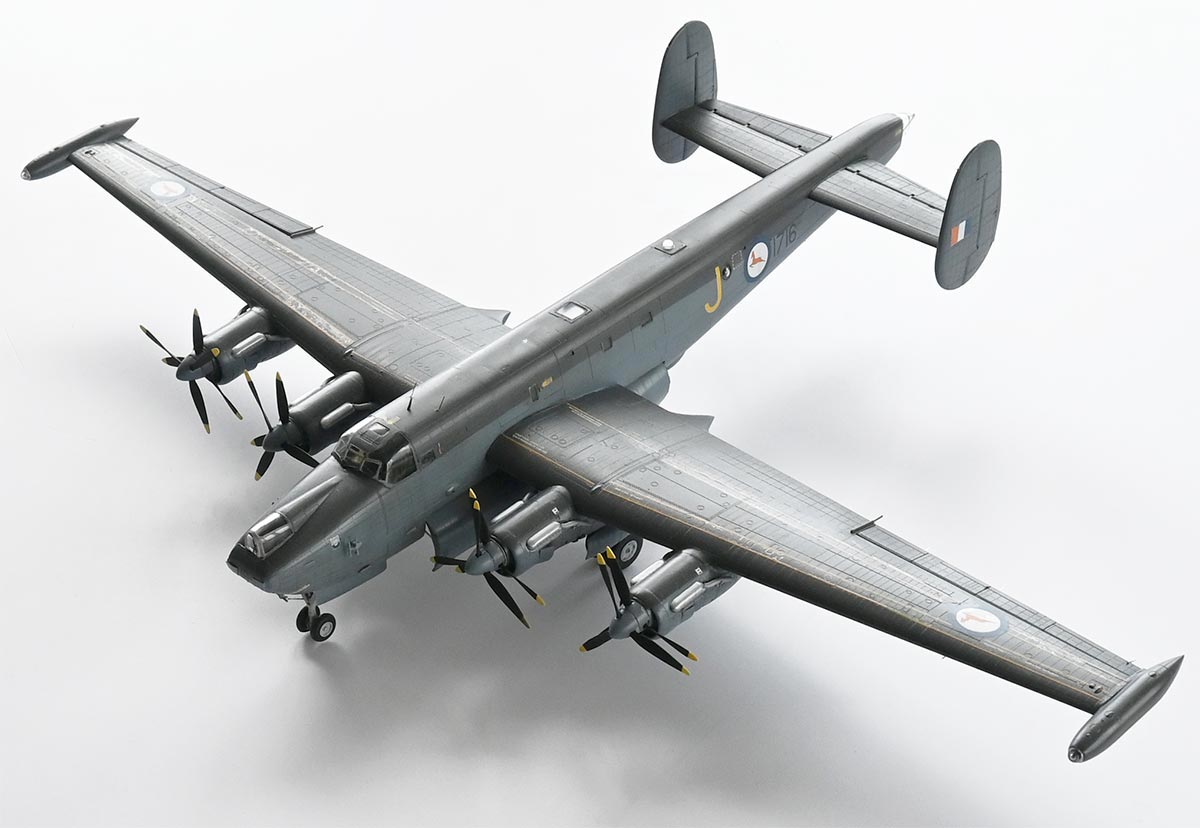
As noted, the early SAAF Shackleton MR3 numbered "1716" coded "J" as flown by SAAF no.35 squadron was modelled. This aircraft has a special history, more about that later on..
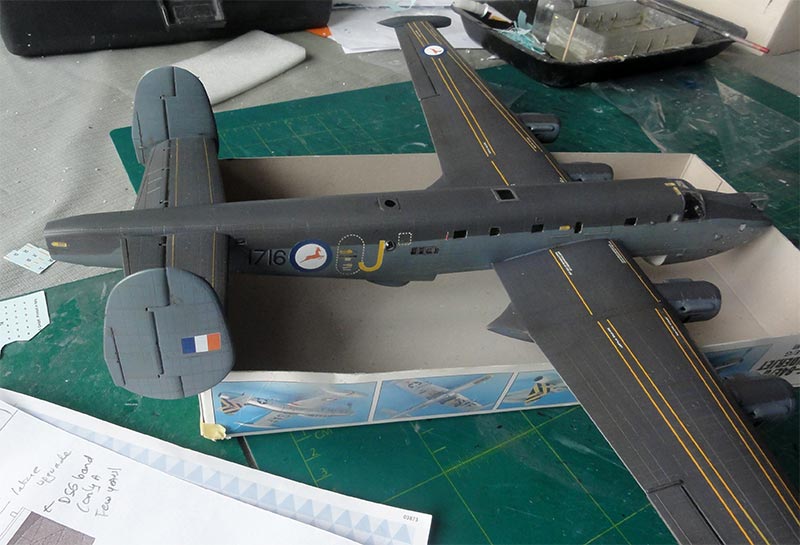
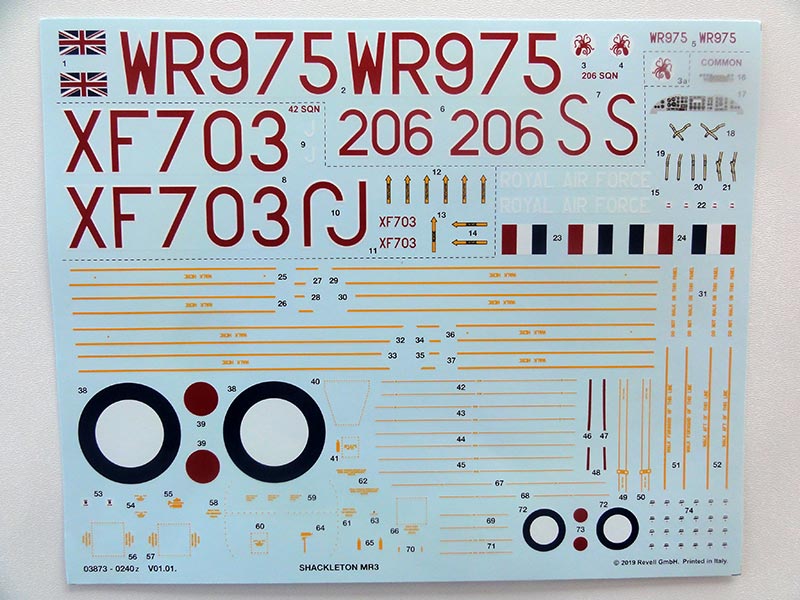
"Kits at War" decals set K7/5 was used; this set from Dutch Decals was developed by Luuk Boerman of DD with E. Stam and was originally for the old 1/72 Frog Shackleton kit. The decal sheet was reprinted in 2010 after the excellent Revell kit was released.

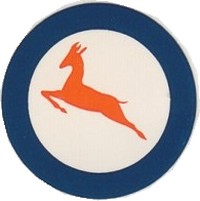
The early "springbok" roundels' shape in the decals (seen at right) looked not 100% accurate but were acceptable and used. (May be I will draw new decals in the future).
Please note though that the colours are mixed up in the decal instructions; the side and lower surfaces are PRU as noted above.
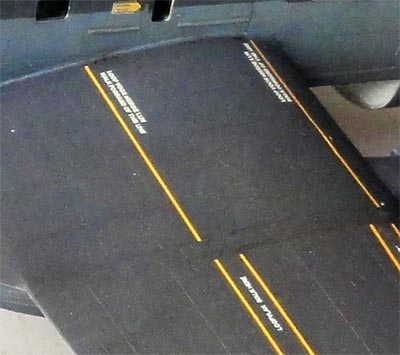
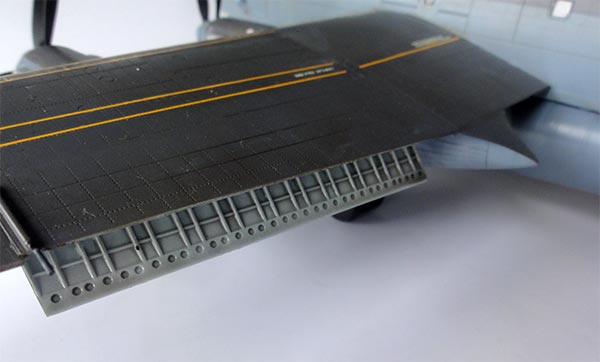
The SAAF Shackletons have also Suid-Afrikaanse stencilling like "LOOPVLAK" for walk way; these are all nicely provided in the sheet. Setting the walkway lines takes a lot of time.
Decalling took quite some time. Some smaller Revell decals were also set for the early made MR3; do not use the propeller decals #74 and not the obvious English stencillig etc.
After decalling, the remainder parts were handled. The rear clear dome was installed.
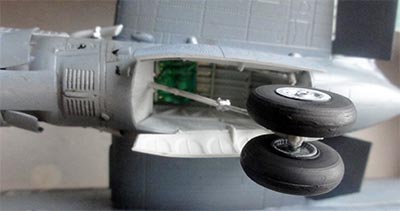
The landing gears of the kit are excellent and installed. On the nose gear no hydraulics are seen. I only added some "plumbing" inside the gear bays. The kit gear doors are also very good.

The flaps were installed, they are "dirty" white inside.
The model is a "tail sitter", Revell wants you to install weights even in the front engine nacelles. This will make the model very heavy and the gears vulnerable. So I installed a clear plastic rod "pogo stick" at the rear of the bay made from transparant stretched sprue to hold the nose wheels on the ground....
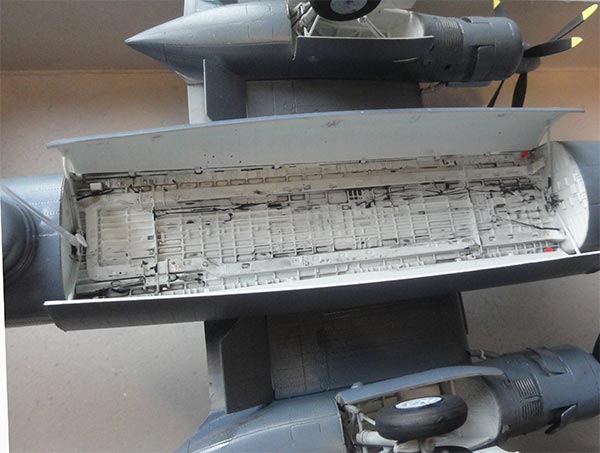
It was opted to set the large bomb bay doors open. In the real bay a lot of details are seen on the "ceiling", too much to all add in 1/72; I suggested these a bit with stretched sprue and a wash.
The final external details were added. Below the rear fuselage the tail bumper was set extended and an extra small tiny pipe added aft of it. The exhaust pipes were installed and the adjacent small nacelle exhaust panels painted silver.
STEP 70
Below the wing, the pair of pitots #E130 and smaller antennas #K80 and #K90 were re-installed.
The pairs of landing lights next to the lower wing pitots were painted silver. On the forward fuselage spine and aft of the lower radar dome, white flashing lights were probably fitted as suggested on the Britmodeller forum; these were made with clear stretched sprue bits. It seems no other anti-collision lights were fitted.
The nose antenna #B132 was refined and the antennas #D131 installed as well.

On the forward window a wind screen wiper was added made from black stretched sprue and and presumably another 3 at the cockpit front windows. At the lower crew window/ emergency hatch #M48 also a wiper was set. There are small side ventilation panels at the cockpit side glazing, this is nicely moulded in the Revell cockpit window part. The clear rear fuselage cone was installed and its frames painted with a fine brush.
A pair of tiny wire antennas were set on the fuselage roof top as was a blade antenna. I could not see long wire antennas on the early SAAF MR3 so these were not installed. But they are difficult to spot on old photos so I may be wrong here.
The counter-rotating propellers are next...
The rear of the double counter-rotating propellers had been reduced in diameter as described earlier. The yellow tips were airbrushed and after masking the propeller blades airbrushed black. When dried, the prop pairs were set and fixed with white glue.
The model finally got a semi-gloss varnish airbrushed with a mix of Johnson Future/ Pledge acrylic varnish with a few drops of Tamiya Flat Base X-21 mixed in. Mask obviously off any windows while airbrushing.
Finally some "static dischargers" were added from EZ line on the trailing edges of rudders, elevators and wing ailerons.
That completed a nice early SAAF Shackleton MR3 in the World Air Forces collection.
South Africa
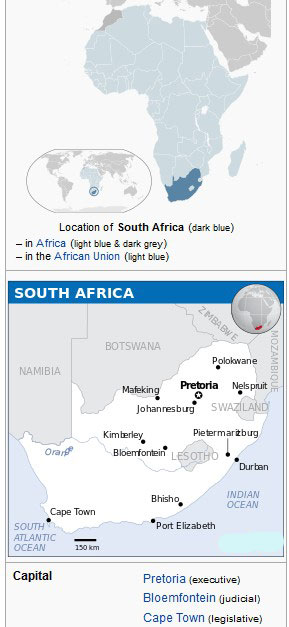


[area: 1,221,000 sq.km | population: 30 million in 1980, 60 million in 2021 | capital: Pretoria | GDP 6,500 USD per capita nominal]
The deliveries of the 8 Shackletons for the Suid-Afrikaanse Lugmag / South Africa Air Force started in 1957. They had the springbok roundels; these were only briefly carried, soon the castles markings were painted. SAAF aircraft later got a Phase III upgrade with electronic systems (but without the Viper jets). An arms embargo was set by the British Labour Government in 1965 so keeping the aircraft flying took at lot of effort. But the SAAF Shackletons soldiered on. Later Shackletons such as Pelican 16 coded "1716" got a new wing spar between March 1973 until April 1976 as well as a few other Shackletons. The SAAF Shackletons flew until November 1984.
For more information about the SAAF, look at my Mirage page here...
In the first early outfit and scheme
... in a scenery..
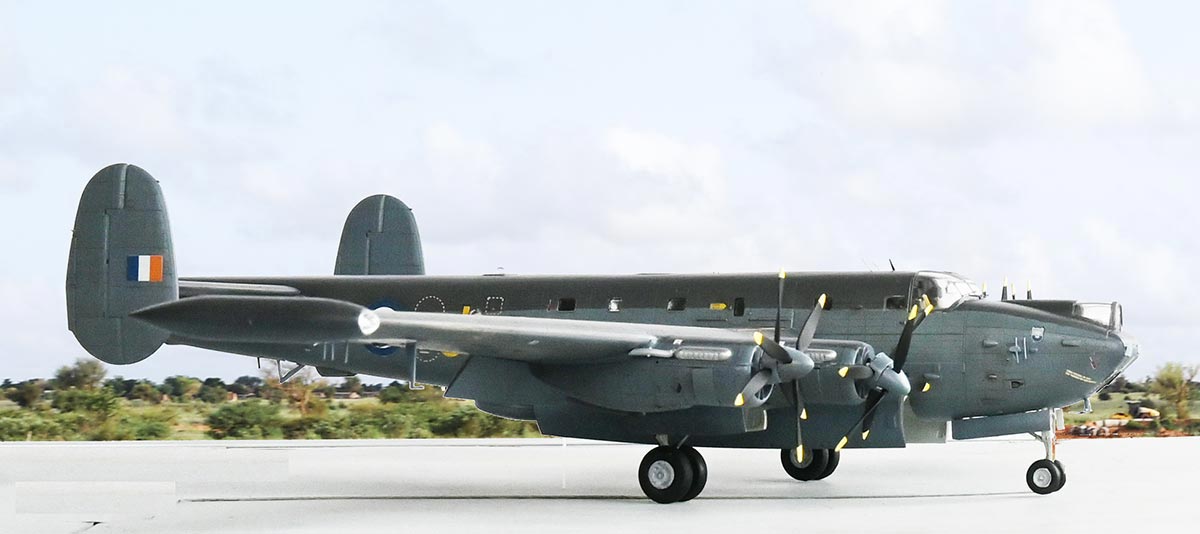
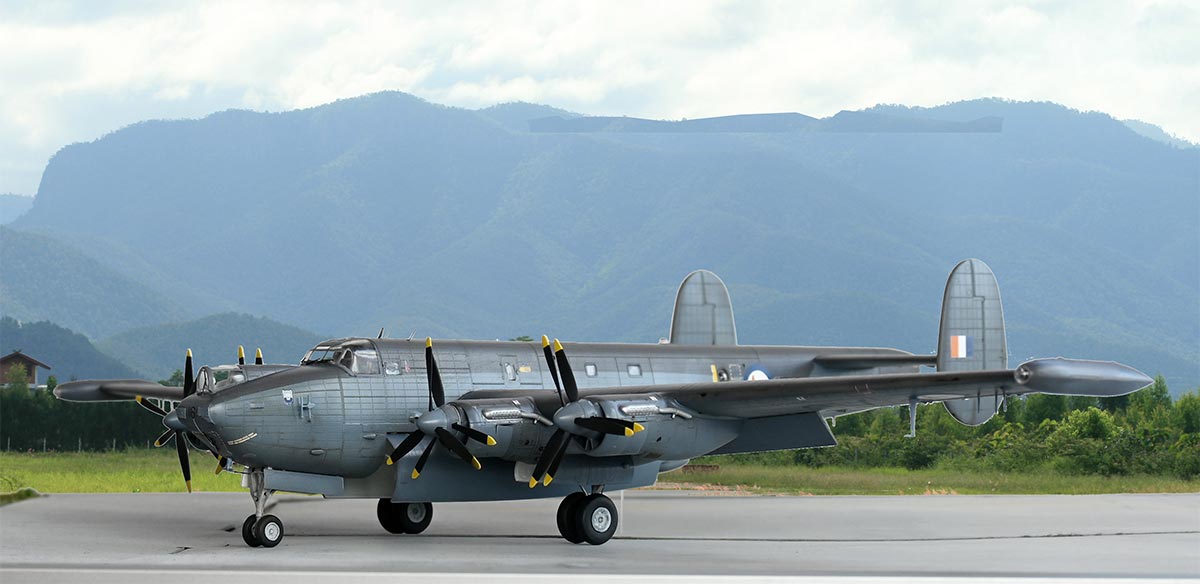
Shackleton MR3 numbered "1716" coded "J" with nick name Pelican 16 flown by SAAF no.35 squadron in first 1957 scheme.
This aircraft was later upgraded as other SAAF Shackletons to Phase III standard and also got new wing spars in the mid 1970s. The paint scheme had changed and the fuselage had a white sun roof. (This configuration is as provided in the Revell kit).
After being put out of SAAF service, this same aircraft was maintained by a museum and kept in flying condition. Known as Pelican 16 it was invited to go to the U.K. for the 1994 air show season. The flight would go from Cape Town along the African west coast and than crossing the West Sahara to the U.K. with a few stops. Flying to Abidjan, an emergency engine shut down was needed before it landed. Checks were done and all engines were up and running again. For the crossing of the West Sahara Pelican 16 took off from Abidjan on July 12, 1994. During the crossing flight at night problems arose and there was an engine failure and fire between at another engine prop with eventually 2 windmilling props at the same right side. It was unflyable so it was decided that Pelican 16 had to do an emergency crash landing on the desert ground with no ground visibility in the night of July 13, 1994. Radio emergency signals were sent out. Crash landing was possible at about 100 knots but there was no visible ground in the darkness. It was a miracle crash landing and the crew of 19 had a only few enjuries and survived. They were soon discovered by a French Atlantic and rescued. The Polisario Liberation Movement took over at the ground but eventually the crew were brought by an Algerian C-130 to Algiers and than back home.
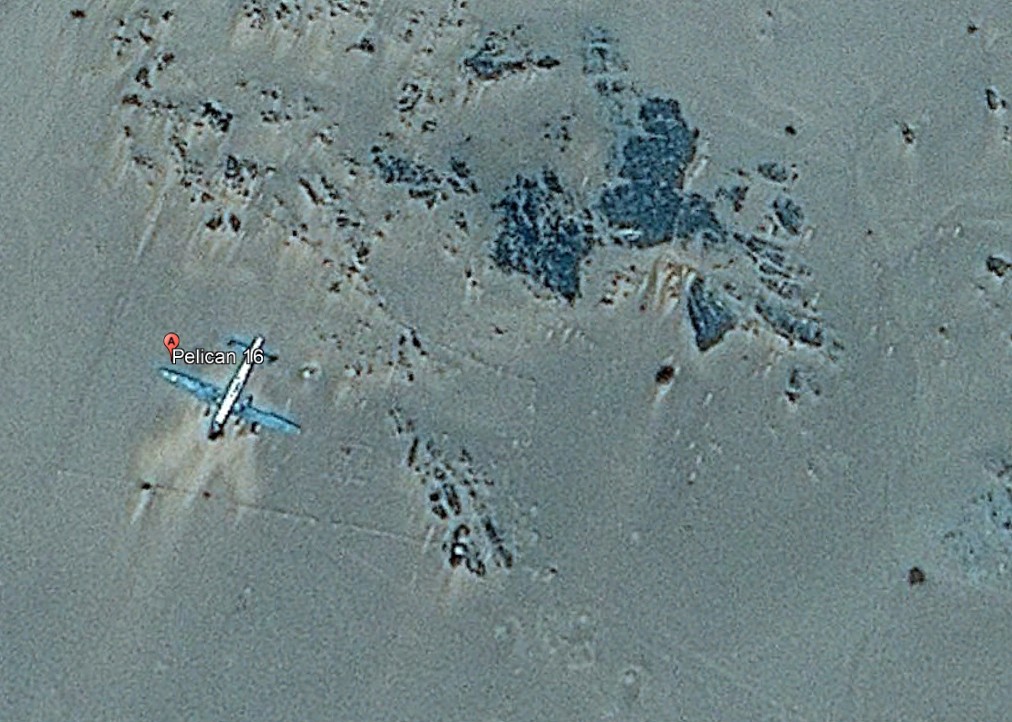
The crash landing location in the West Sahara is near Fderik in Mauretania and Pelican 16 still lies in the Sahara desert:
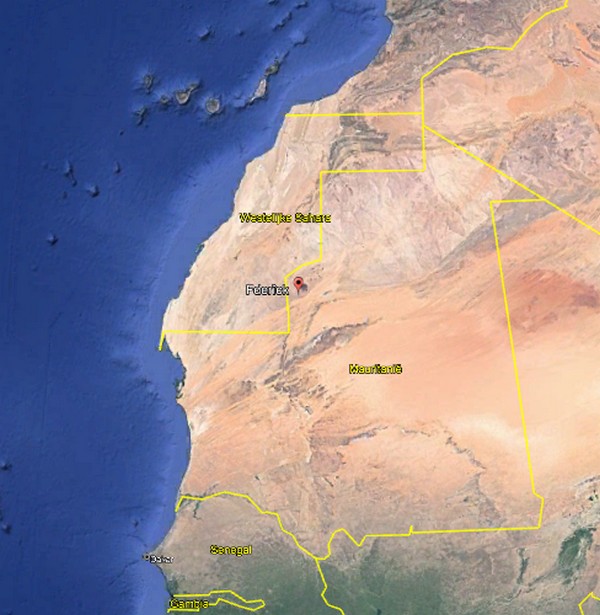
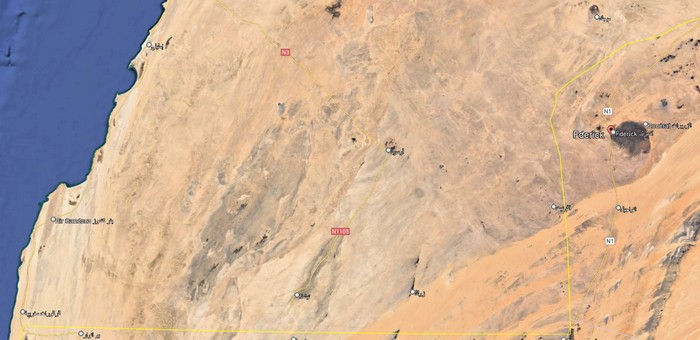
Google Earth views at about 22deg37'51.02" / 13deg14'.12.10"
External links:
YouTube link to the Pelican 16 crash documentary (2 parts)
YouTube link to an old patrol film SAAF Shackleton
Back to 1/72 prop models
(c) Copyright Meindert "designer"/ All rights reserved/ Amsterdam The Netherlands. Your comments are welcomed by webmaster
Published this page
July 12, 2023