

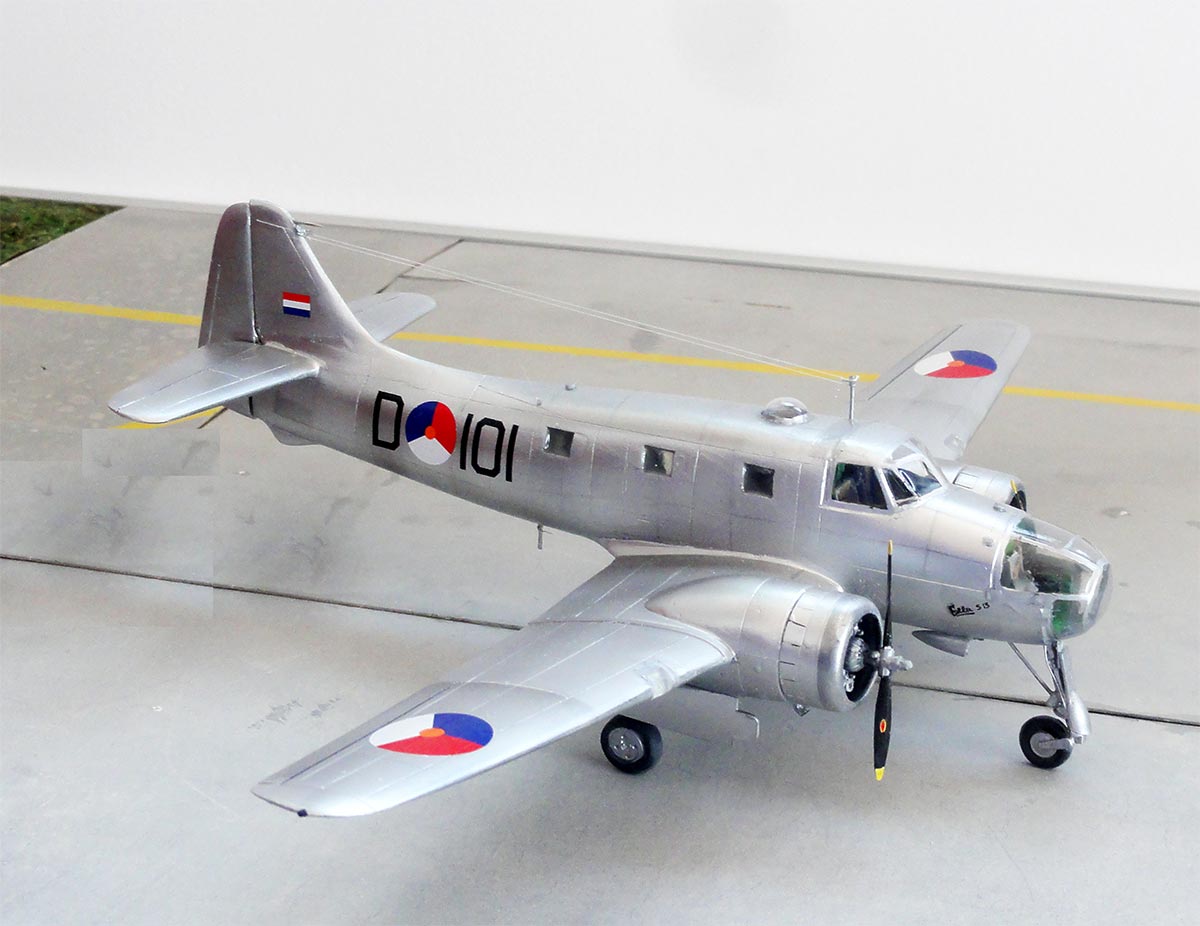
Fokker S-13 model in 1/72 scale
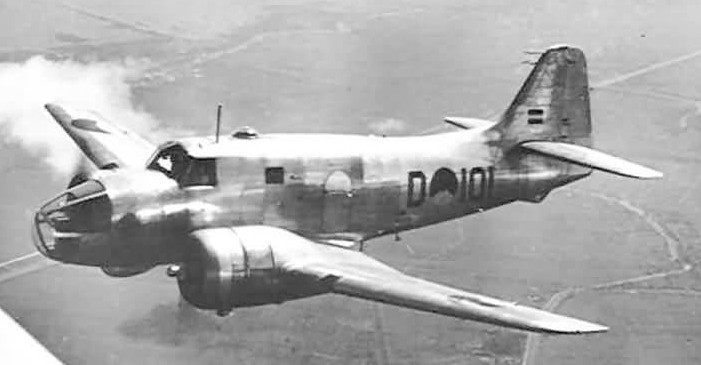
photo: Dutch ministry of Defense
INTRODUCTION
The S-13 “Universal Trainer” was developed as a multi-engine trainer by Fokker after the Second World War. This project was also envisaged to rebuild the Fokker aircraft factory after 1945 and was supported by the Netherlands Institute for Aircraft Development (NIV) of the Dutch Government. The initial Fokker design no.236 was for a training aircraft to replace the Oxford and Anson used with the Royal Netherlands Air Force immediately after the war. Furthermore, Fokker hoped to sell at least 100 aircraft for export. The design was therefore adapted so that it could somewhat meet English requirements, and therefore became now some 1000 kg heavier and needed now not 450 shp but 600 shp engines. Fokker called it the "Universal Trainer" i.e. multi-purpose trainer although that name was rarely used in practice.
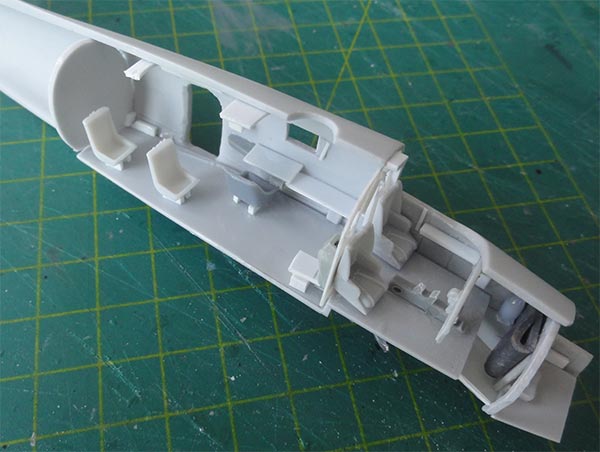
The construction was in light metal with 2 detachable outer wing parts. The control surfaces such as ailerons, elevators and rudder were made of light metal covered with linen. In the fuselage there was a front section with transparent nose, the pilot section with bulkhead and door to the cabin, where the training stations for five students would be located. In the back there was a compartment for equipment.
In mid-1948, however, the air force staff was already considerably less interested in this type and in August 1949 it became really clear that they were not going to order any S-13 trainers for the Royal Netherlands Air Force.
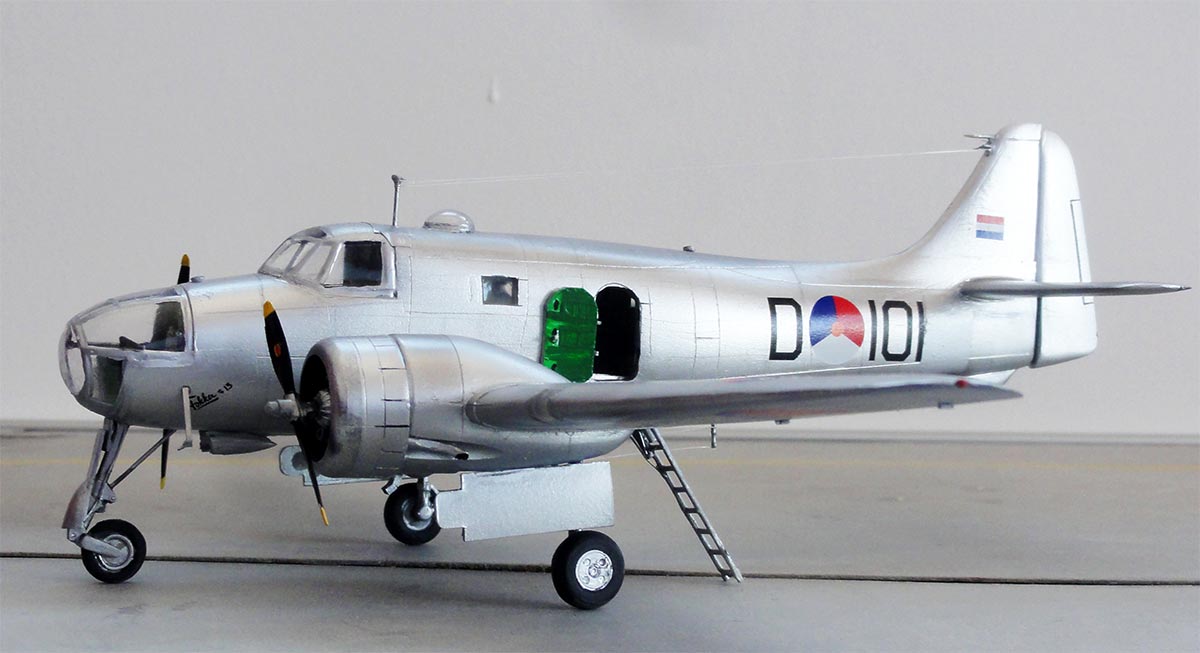
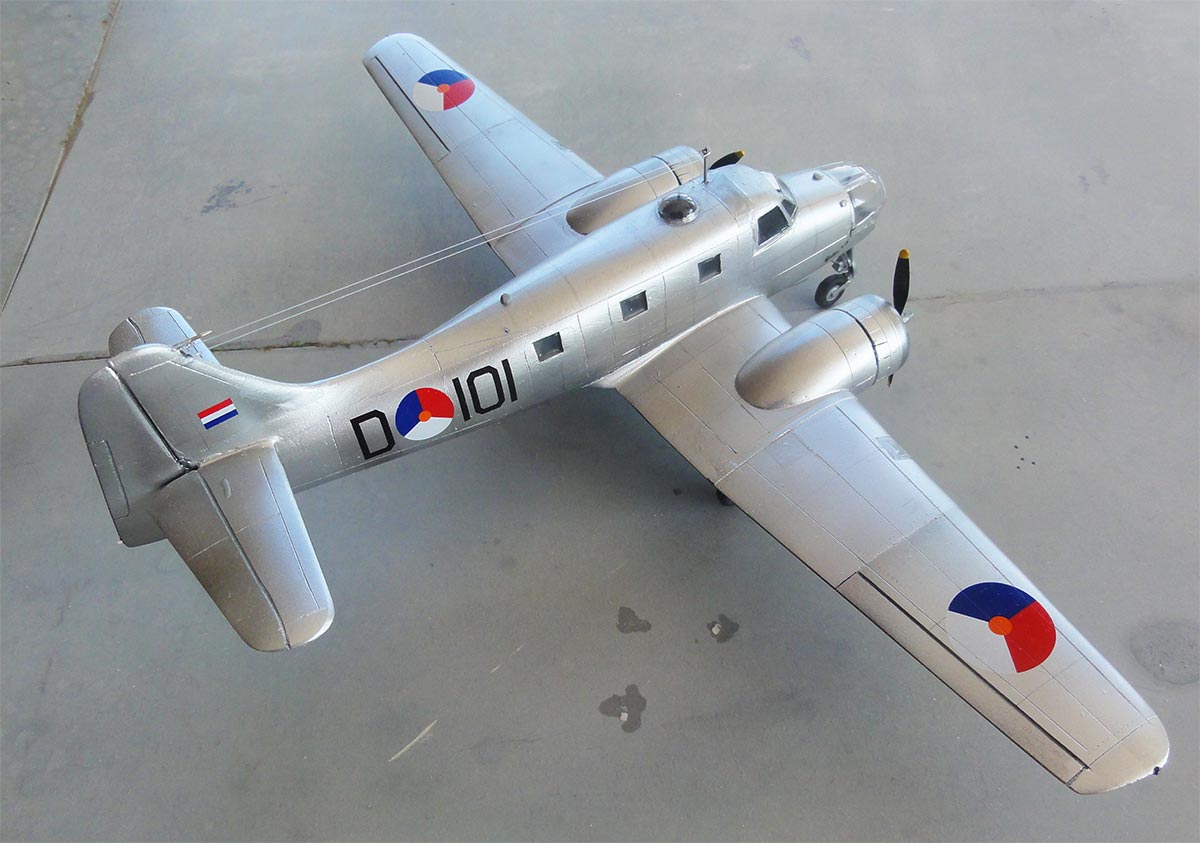
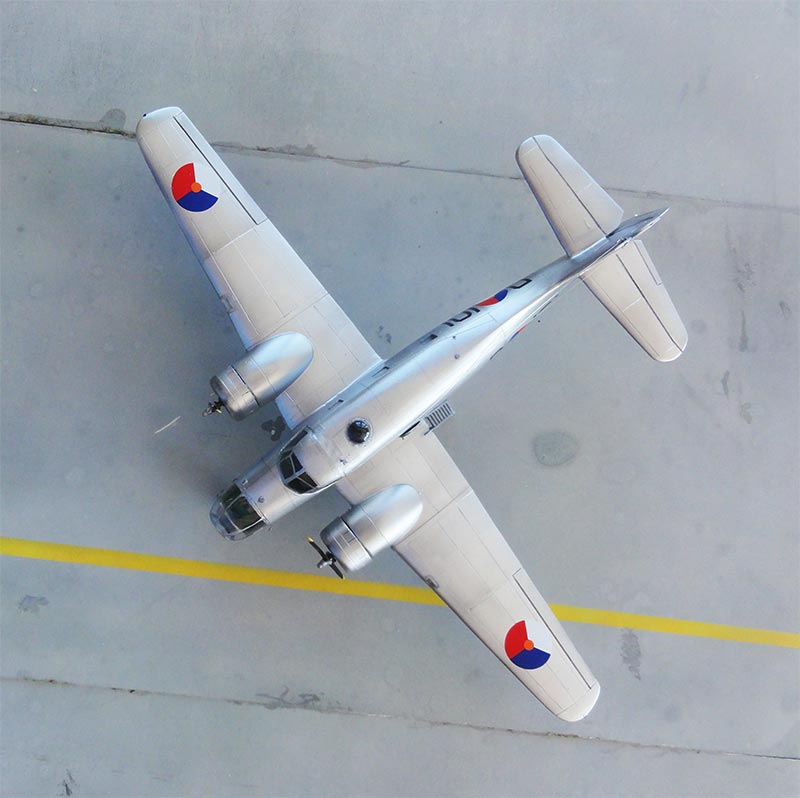
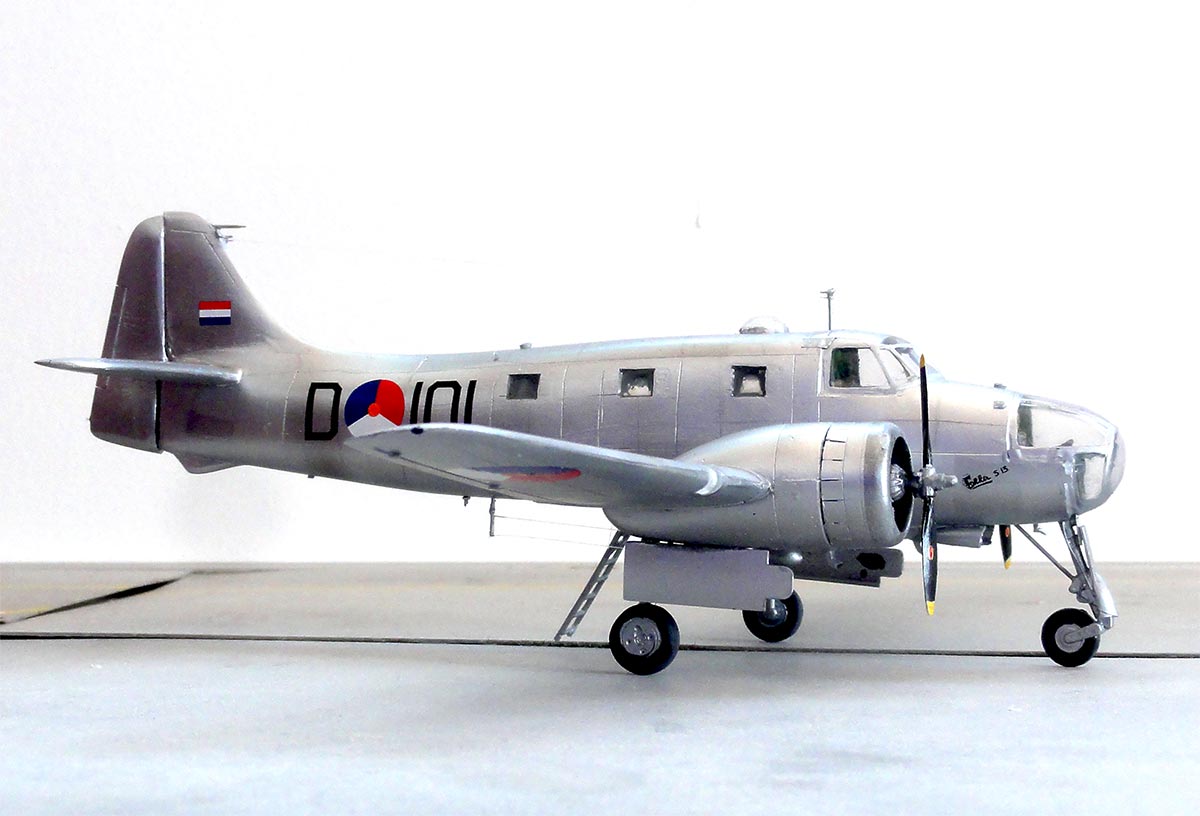
The S-13 with registration PH-NDW and property of the NIV made its maiden flight on March 11, 1950. It turned out to be a good plane to fly. This S-13, still owned by the NIV, also flew in a "fake" Royal Netherlands Air Force scheme as D-101 but was never used by the air force. No matter what the Fokker Sales people tried, no order was obtained. The aircraft was then given the new PH-NEI registration and a different attractive colour scheme in June, 1951. In 1954, the Dutch aircraft operator Schreiner rented it from the NIV for target towing flights. In 1957, the aircraft was formally given to Fokker transferred but scrapped from the register on June 10, 1960. It went to the college collection of the Delft Technical University Department of Aircraft Engineering. Currently parts of this only S-13 can be found in museums, the cockpit section was on display in the airport museum on Texel (but now is moved to an unknown location).
(see references).
(My first impression of me of the kit was published in May 2021 on the WWW.IPMS.NL website; presented here is the modelling report in English).
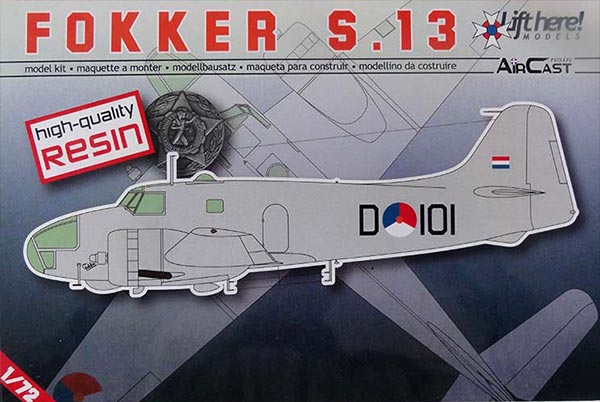
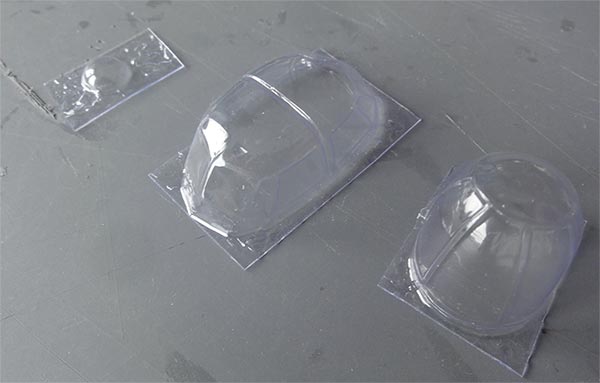
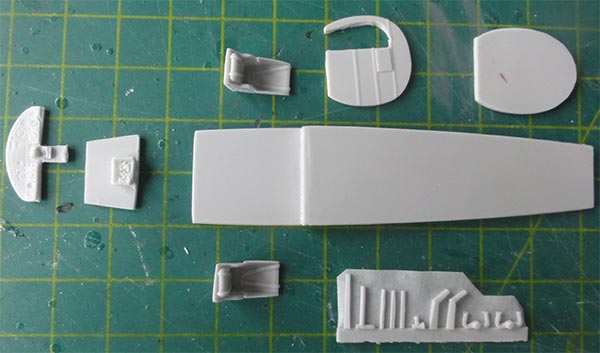
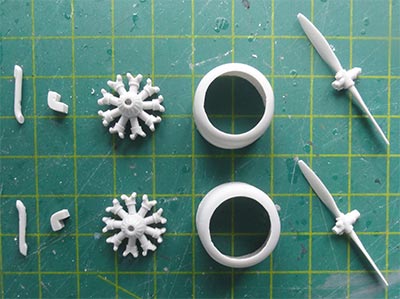
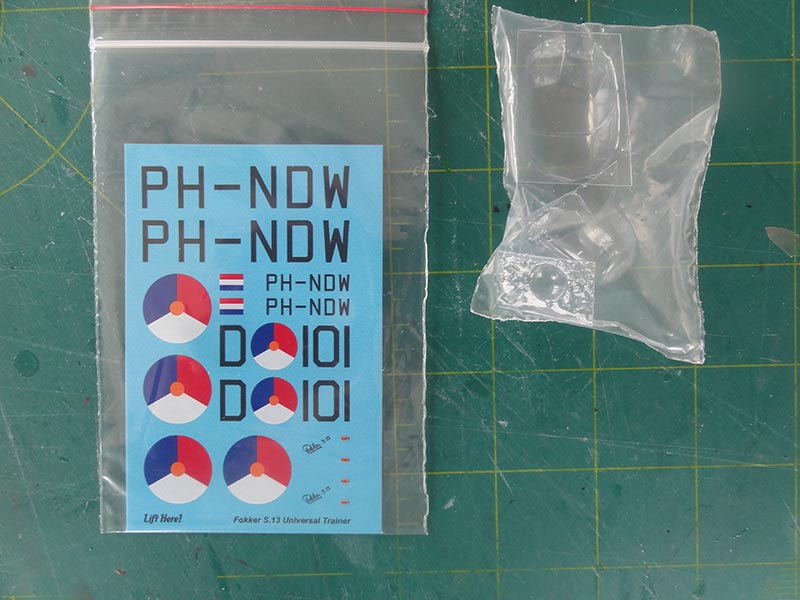
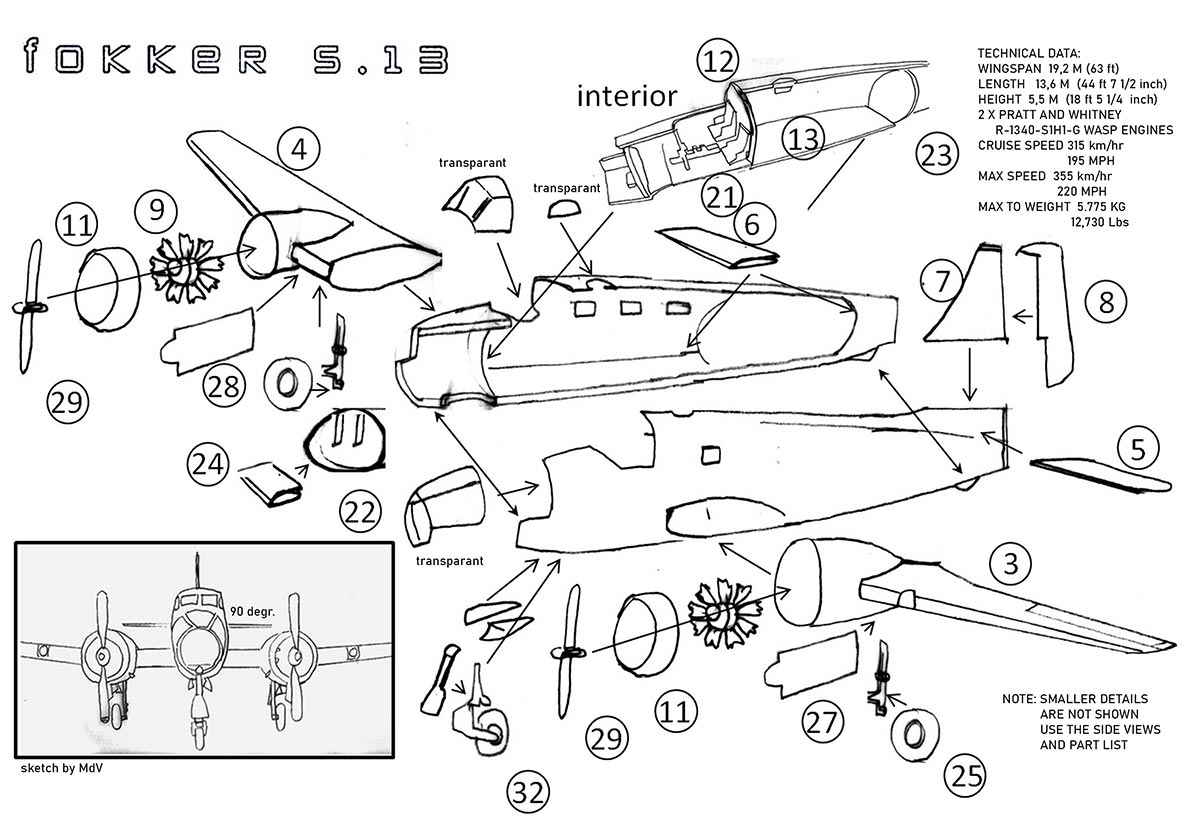
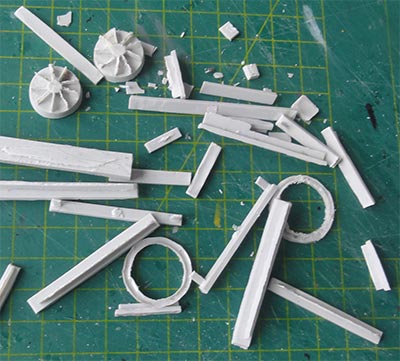
The 1/72 model is the only one and is from Lifthere Models. It looks good as the real Fokker S-13 and measures up to scale. The model has resin parts and consists of two body halves, two wing halves, separate tail surfaces, two engine nacelles, two Wasp radial engines, and of course several smaller parts. Vacuform transparencies are clear but pretty thin. You get a spare of each as well.
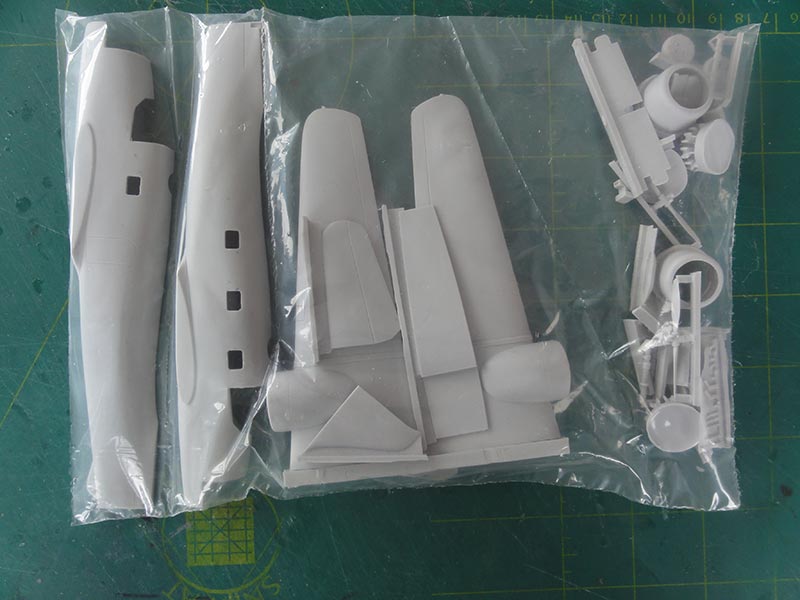
The resin parts are nicely done with no visible air bubbles. Smaller components such as antennas, etc. can be located from drawings and real photos (see references).
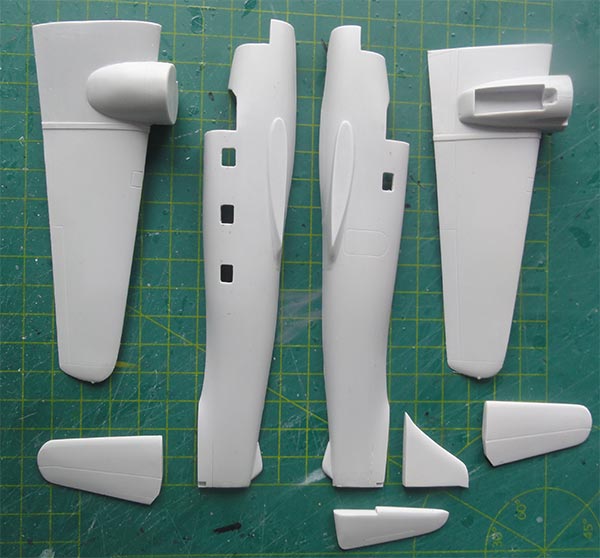
What is nicely done with the undercarriage gear struts is that they contain metal wires for additional strength to carry the model weight.
The kit decals are for 2 schemes:
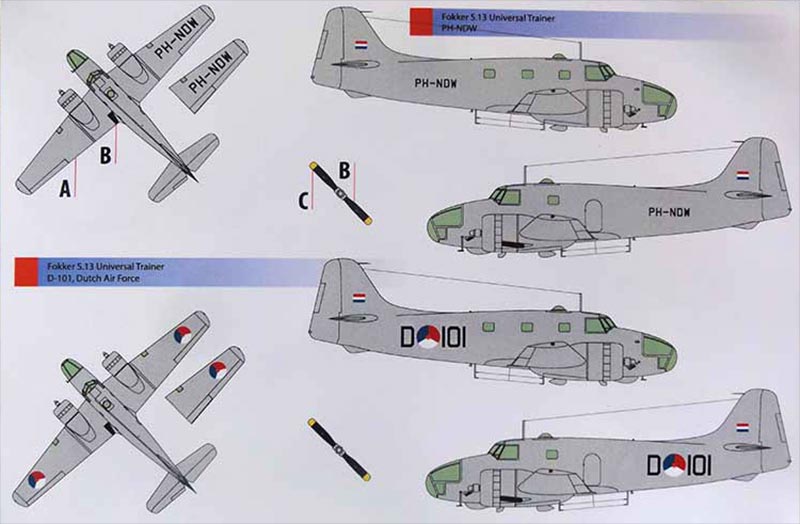
(1) "fake" S-13 in Royal Netherlands Air Force "D-101"
(2) PH-NDW Fokker livery
The build instructions in the kit is only a limited A4 page. The structure of the model is not immediately clear if you are not an experienced model builder. Therefore I made a sketch of the construction of the main components, seen here ...
------------------------------------------------------------
(c) COPYRIGHT MEINDERT DE VREEZE (MdV)
I used thick Zapp-a-Gapp superglue throughout the assembly.
As with any resin model, you must first remove the casting blocks from the parts. This often requires sanding and sawing for the larger parts. Resin dust can cause a serious allergic reaction. Take preventive measures here: wear nitrile gloves, a face mask and saw and sand UNDER WATER in a tub.


PREPARATION OF MAIN PARTS
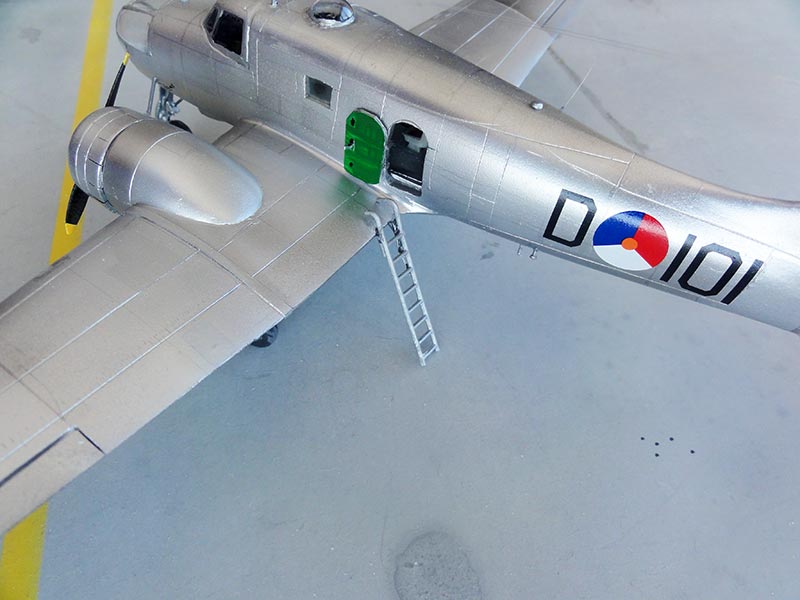
On various photos of this only S-13 it seems that the shape in the fuselage towards the vertical tail should be a bit more hollow. Therefore, with some sanding with a sandpaper folded about a round bar this was improved on both halves. Furthermore, it was decided to open up the cabin door by first drilling a hole for a start and then curving the opening with a modelling knife.
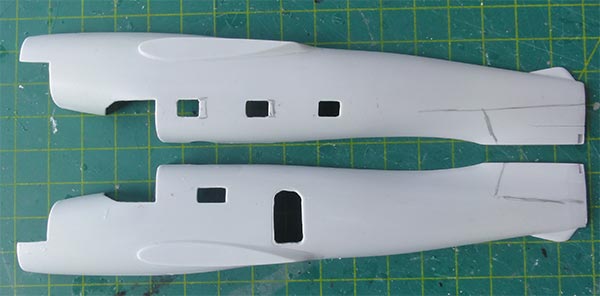
The cabin windows to port and starboard all seem to be located about 2 to 3 millimetres too far forward. It was decided to adjust these (but you can also not bother). Putty and sanding was also needed here.
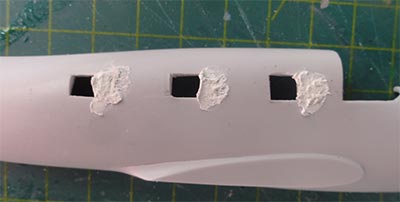
In each wing leading edge there should be a landing light; so it was decided to cut open the notch in each wing halve. The notch was filled with a piece of transparent sprue cut in shape and than sanding in profile shape. Finally, some polishing was doen and now a nice clear leanding light is seen in each wing halve.

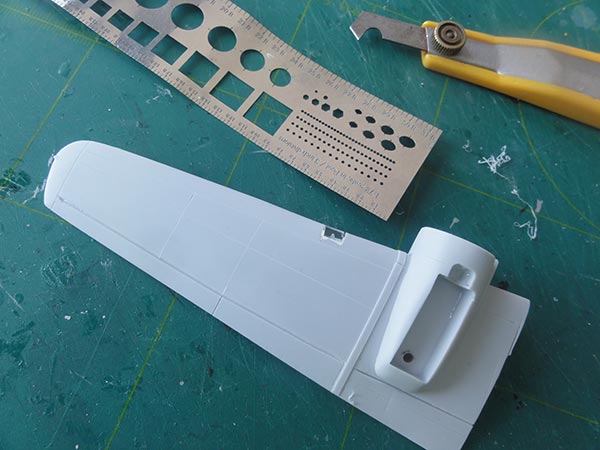
For the main assembly, some panel lines were also engraved with a scriber using a flexible ruler.
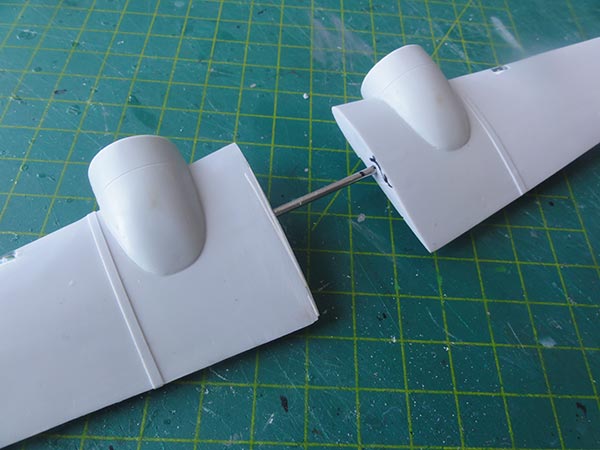
The wing has two halves and they are quite massive. That's why I used for added strength a metal spoke that runs through the fuselage and go into the wing halves after I drilled holes. The alignment job is well worth it.
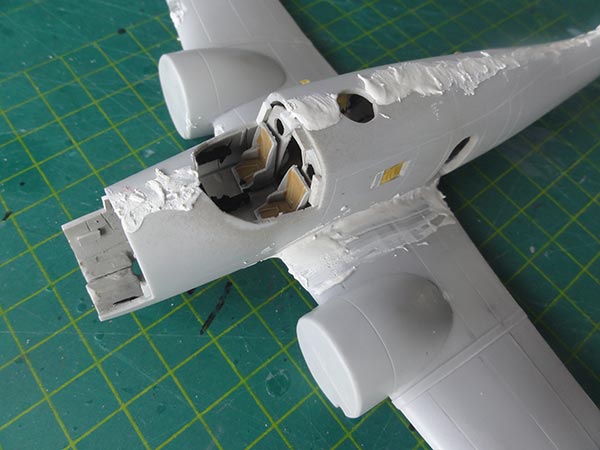
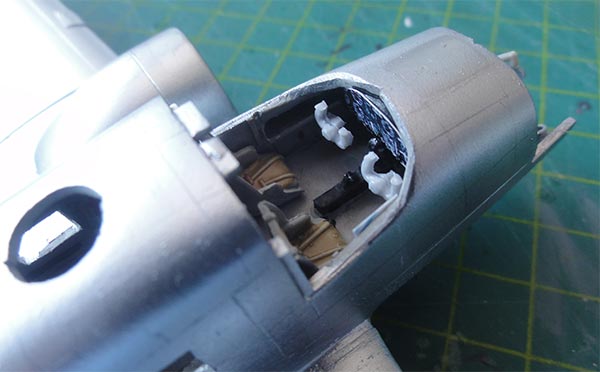
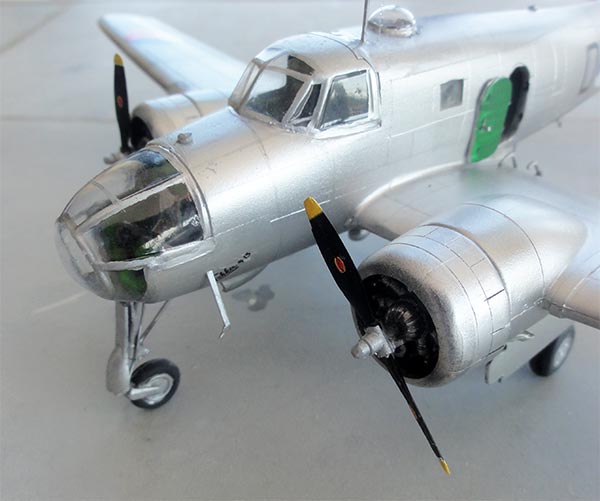
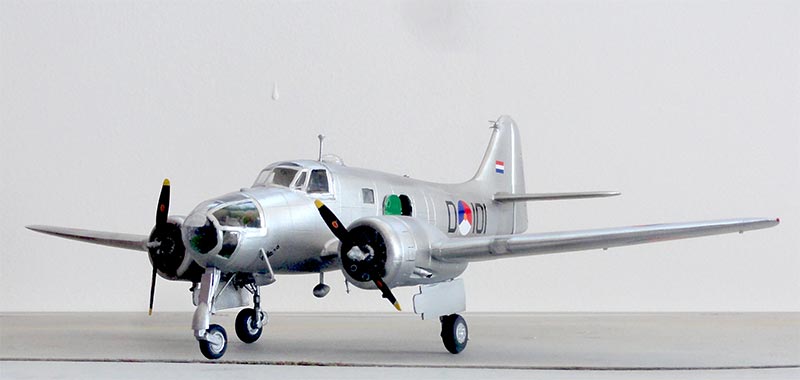
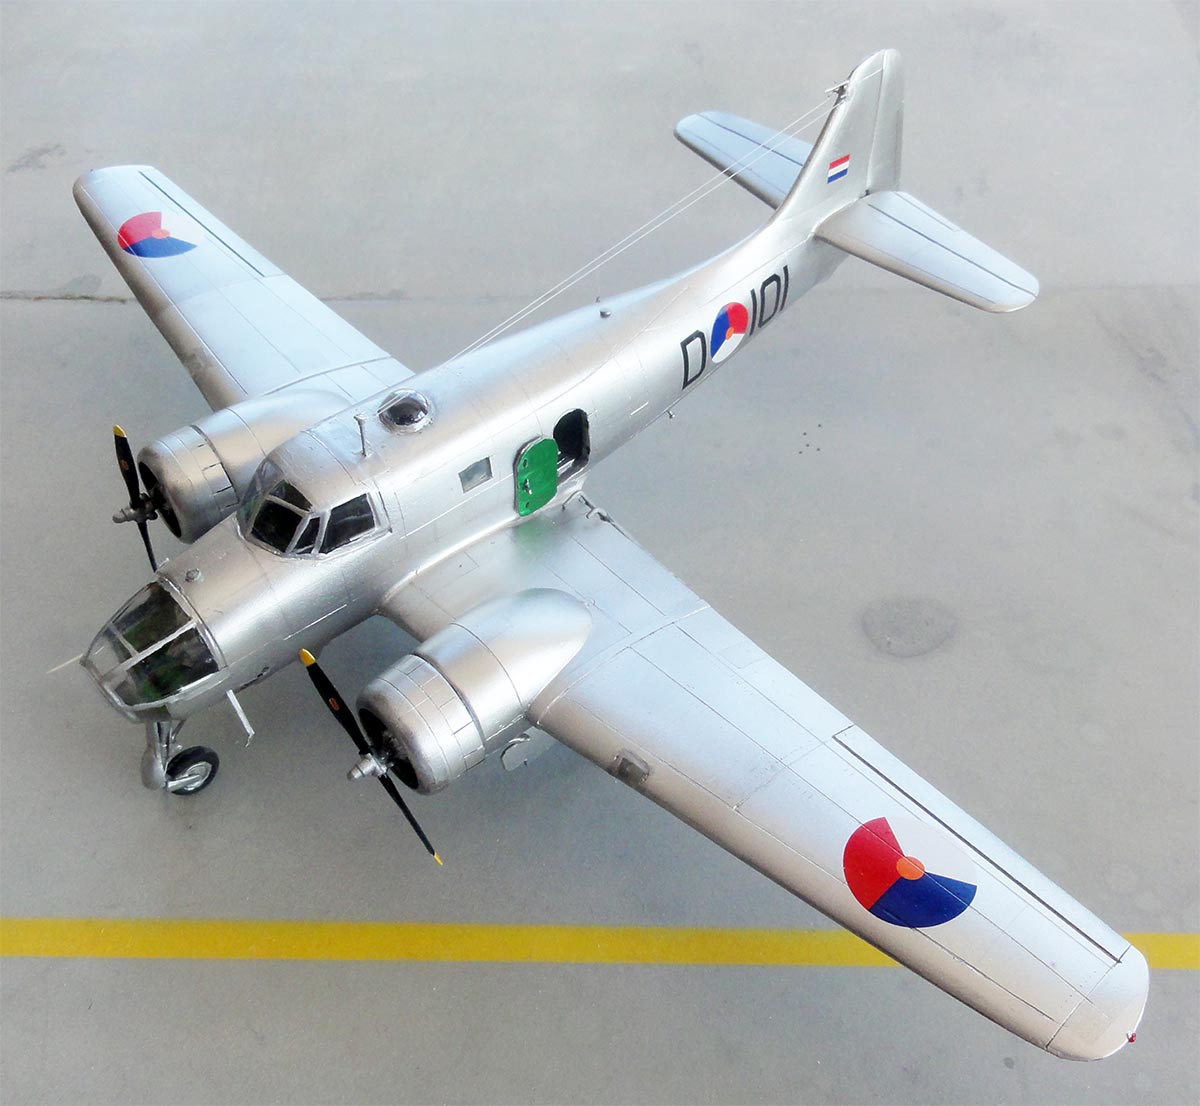
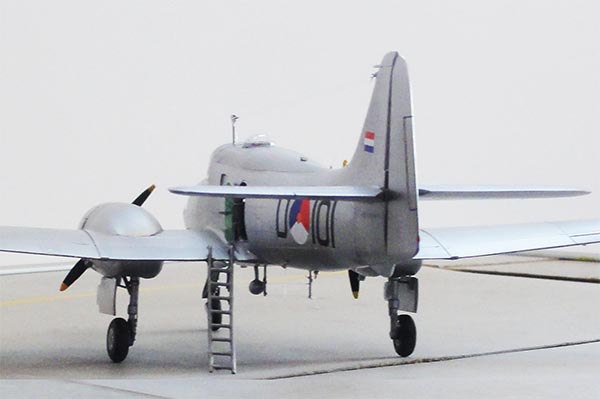
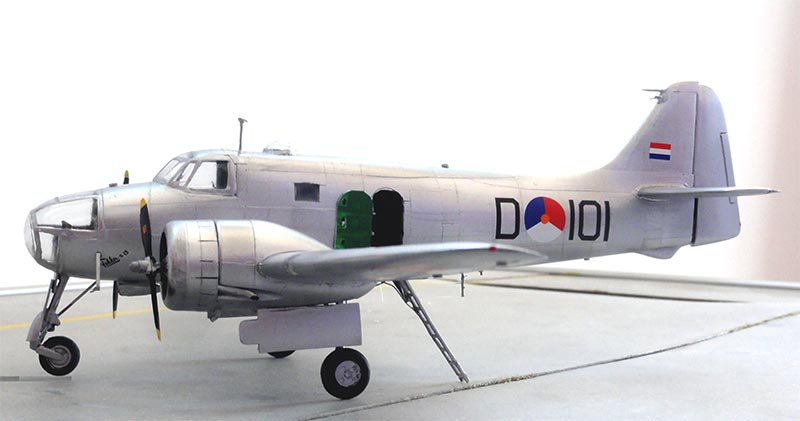
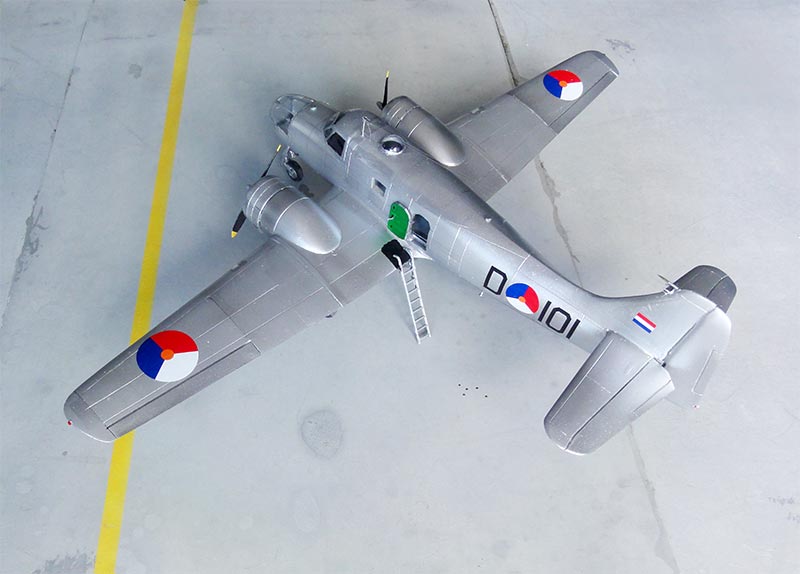
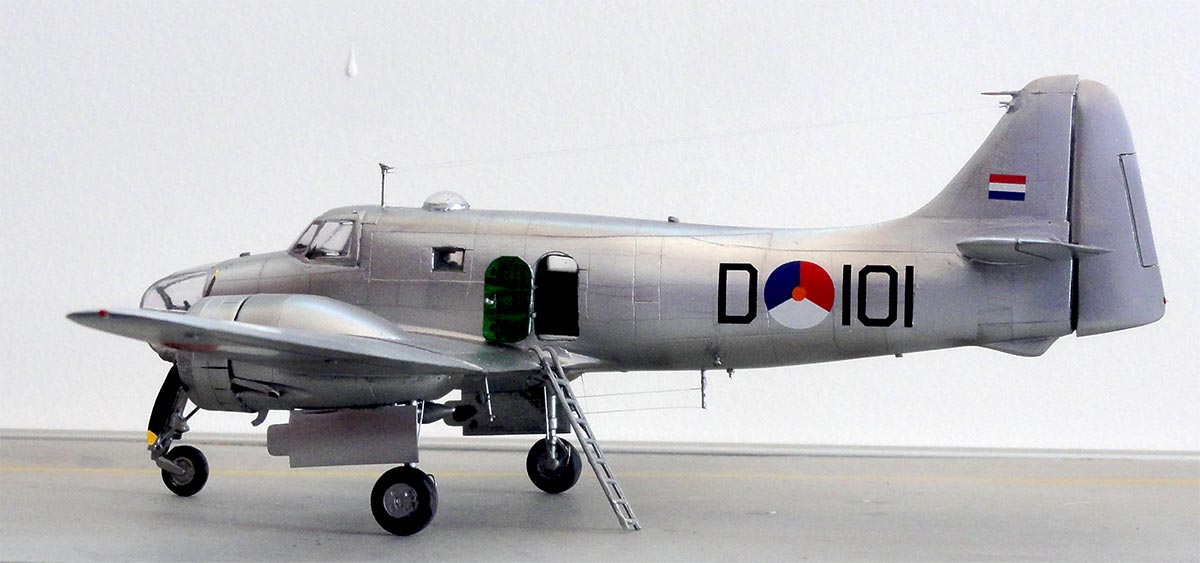
It was decided to make the model in the scheme of fake Royal Netherlands Air Force S-13 "D-101" and add some details in the cabin with the opened up door.
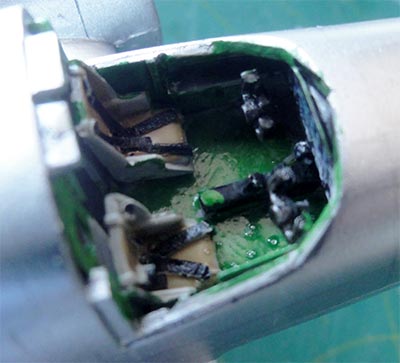
Though probably this single S-13 did not have the envisaged interior, based on a cut away drawing, some bits were made from scrap like adding 5 seats and so on. A bulkhead with cockpit door and a few holes was made from plastic card and added aft of the pilot seats.
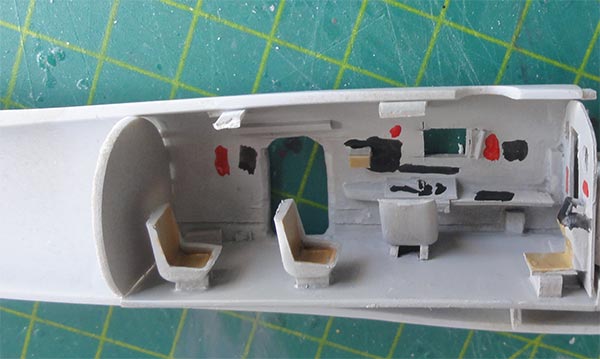
The cabin interior was painted a light grey, but it may also have been interior green. But the cockpit walls and nose insides were later painted interior green from the outside.
A nose wheel bay was made of plastic sheet and the fuselage halves with interior were then glued together, these fit neatly.
The fuselage was closed up with the painted interior protected with tape.
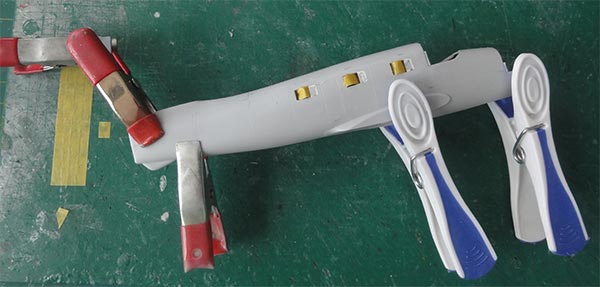
And the wing halves with the spoke support and let to dry. Some filler is needed at the joints and alignment is essential with the centre wing section having no angle as well.
Some putty and sanding followed next.
NOTE: it was decided not to add the vacuform transparent parts at this stage. They are rather thin and vulnerable.
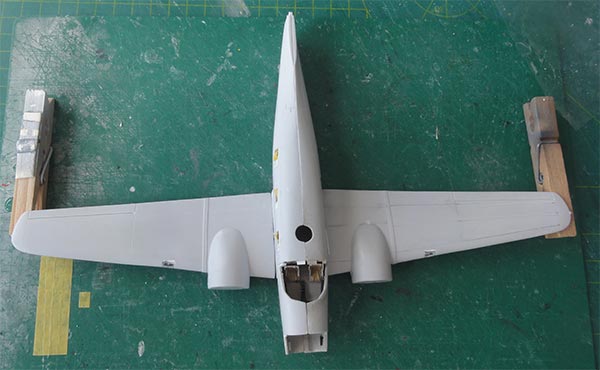
When done, the vertical tail set and puttied. Next was the horizontal stabilizer with no anhedral/ angle. I used a metal pin here as well.

The left stabilizer is probably the one with the trim tab.
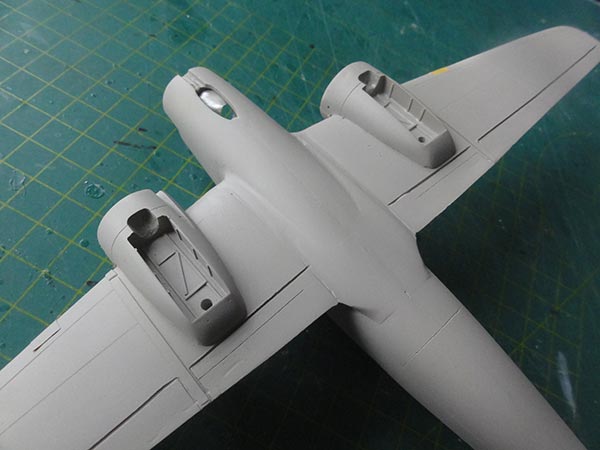
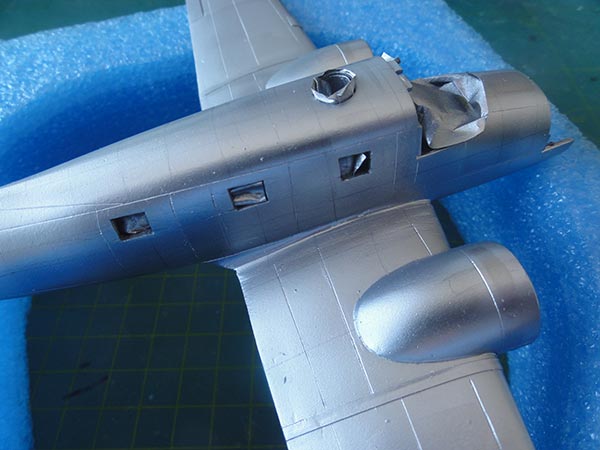
The engine cowls with my kit differed by 1 millimetre in diameter so one did not fit flush with the rear wing fairing. I solved this by sawing in the cooling cowl flaps of the too narrow cowl and very carefully bending these outwards. Now each cowl reasonably fits on each wing fairing. I did not yet set the cowls, first painting will be done.
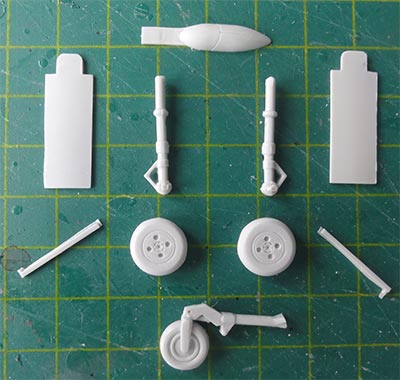
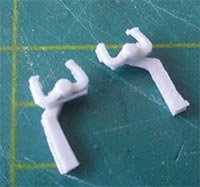
In the main gear bays, some strips were added to suggest extra detail. For installing the main gear struts, in each gear bay a hole was drilled 2 mm deep. Also drill a hole in each main wheel.
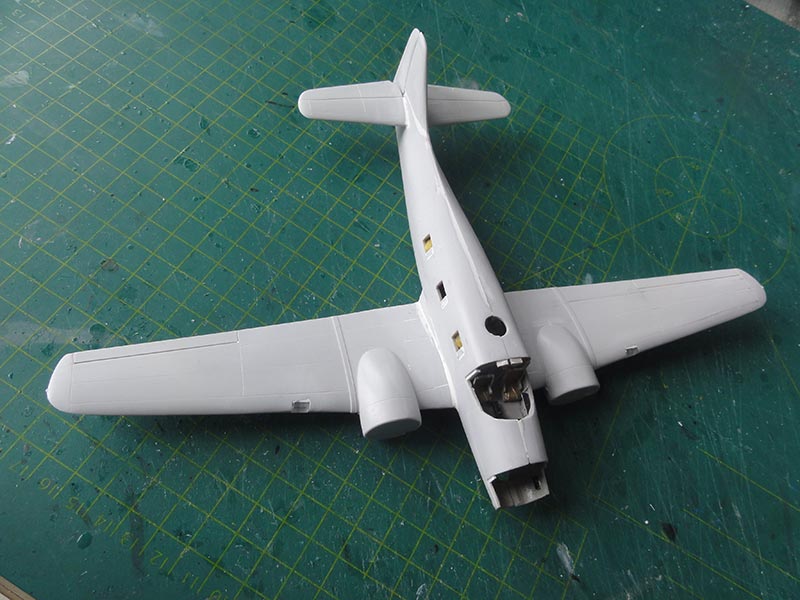
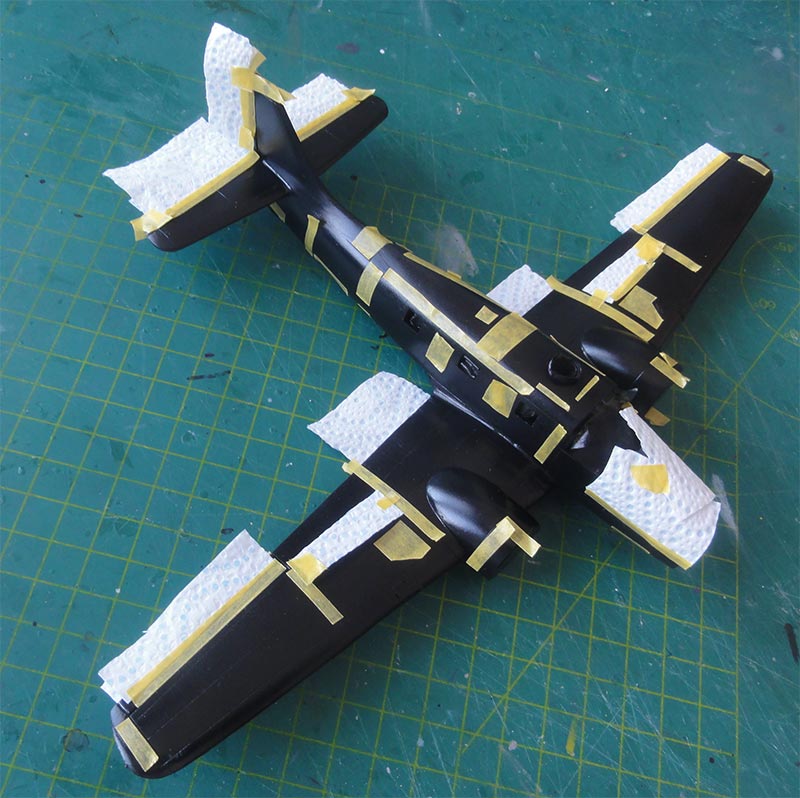
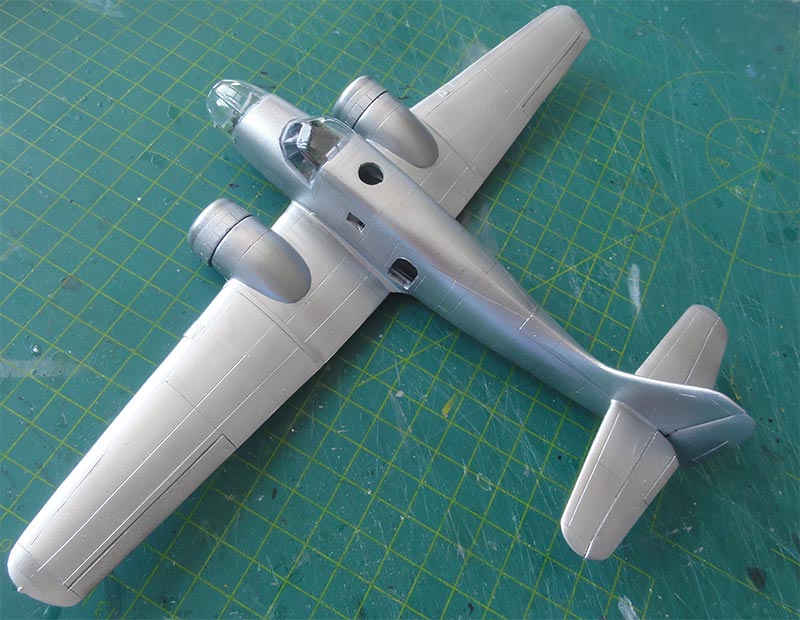
Main components assembly of the model was now ready. The model was masked and got a grey base colour with Revell 75 steingrau Aqua acrylic to check for any flaws and small gaps. Any flaws were then repaired with putty and sanding.
THE COLOUR SCHEME


The model was ready for the paint scheme and opted was the S-13 scheme of the "fake scheme" for the Royal Netherlands Air Force "D-101". This colour scheme is a challenge, because the real aircraft has different tinted alloy metal panels and is thus not painted monotonous silver dope. Silverdope is however present on the control surfaces because these were covered with linen.
Usually I use the ALCLAD enamel paint system but not this time. Vallejo has several acrylic based metal paints. Still, first came a coat of black gloss for a "deeper" metallic effect. But still I used my special trick to avoid masking metal painted surfaces for different paints: several panels (which are still black) and looking at photo' s were covered with bits of masking tape.
Then a first layer of Vallejo 77.701 metal aluminium thinned 30% Vallejo thinner 71.061 with a drop of flow improver 71.262 was airbrushed.

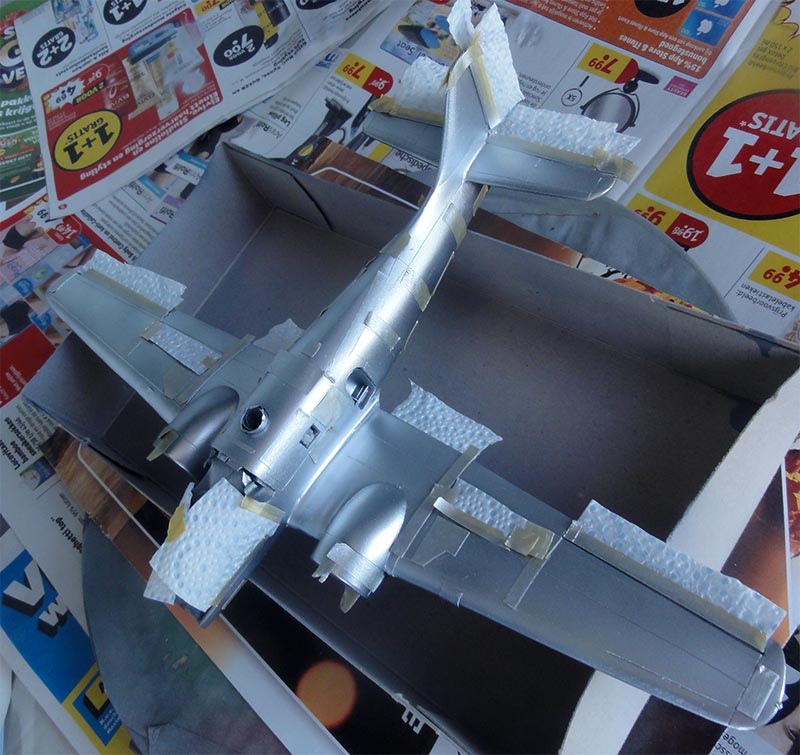
After the first layers covered the model, with fine tweezers the masking tape was peeled of the masked panels, followed by another paint layer of aluminium again. The effect is that you get various subtle light and dark shades get on the model.
The two resin Wasp radial engines and cowlings were also airbrushed after each got a hole drilled for the prop.
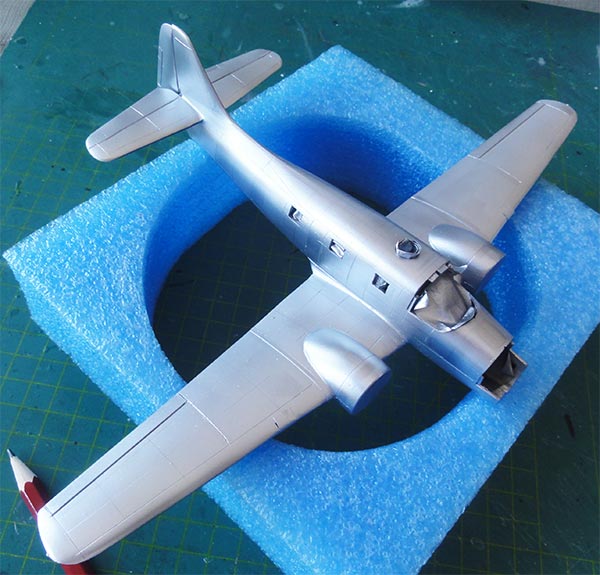
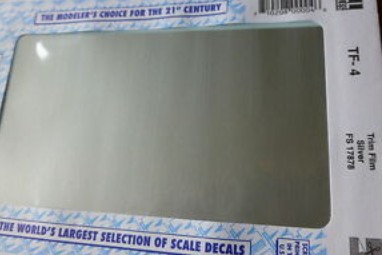
Furthermore, bits of Micro Sale metal decal F-4 was set on various locations to get still another effect; you can also use the decal to hid any small remaining irregularities such as scratches in the paint work. It looked fine to continue the built.
Main painting was now done. Time for cockpit and transparencies.
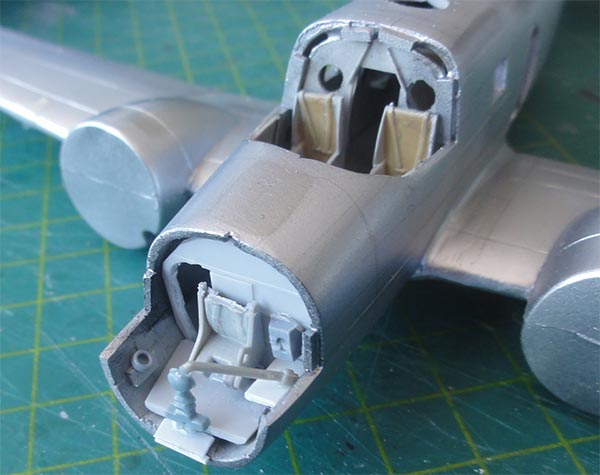
The cockpit can still be reached as the cockpit windows and hood were not set yet. The nose interior section was given also details with a small side table and bomb aiming device. In the nose I added considerable nose weight to avoid tail sitting (later I found still not enough!).
The beautiful kit seats and steering wheels were added. I used a decal sheet from the spare box for the instrument panel though nothing of it will be visible later on.
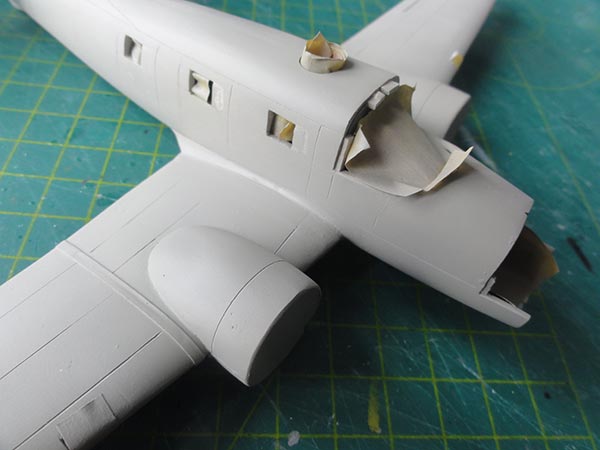
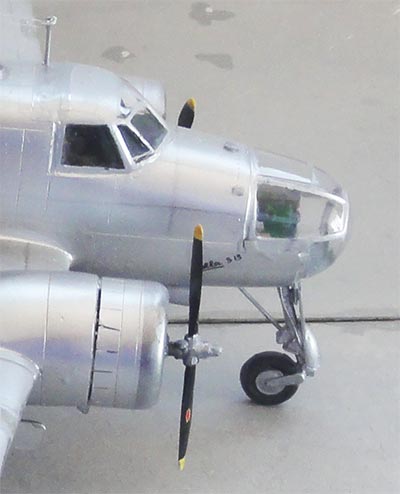
The transparent cockpit windows/ hood and nose section were now placed. These are very thin vacuform parts and require very carefully aligning and cutting with fine scissors. (In case you make an error with the transparent parts, in kit are extra spares to retry).
IMPORTANT: note that the nose section the moulded horizontal panel line does NOT follow the fuselage contour. So you will need to retain a portion of the nose transparency to get a proper fit.
The cockpit windows/ hood fit neatly and includes the cockpit roof section. This helps to get a nice joint with the upper rear fuselage. Some plastic strips were applied in the edges to help gluing the transparencies and get stronger joints.
Use only very sparsely superglue to avoid fogging” and all gaps and edges were closed with white glue. It was also needed to cover some ridges with the metal Micro Scale decal. Let dry for 24 hours.
The frames and edges were than hand painted aluminium with a very fine brush. This needs a steady hand. Also some tiny spots were airbrushed with again the Vallejo aluminium paint.
The rear cabin windows were closed up with transparent Microscale Kristal Klear.
The Wasp radial engines sit too deep when set in the cowls, so each engine was set on a round block 3 mm thick. I also had drilled a hole for the propeller shaft in each radial engine. Thereafter, the slightly modified cowls were set on each wing fairing. Inside the cowl, also 2 small missing intakes were set made of open tube, these are probably oil cooling intakes.
At the nose section and fuselage spine, some small bumps were made of thin card and painted aluminium. On the real S-13 some vertical and horizontal rivet lines are seen, these were suggested with a soft HB pencil.
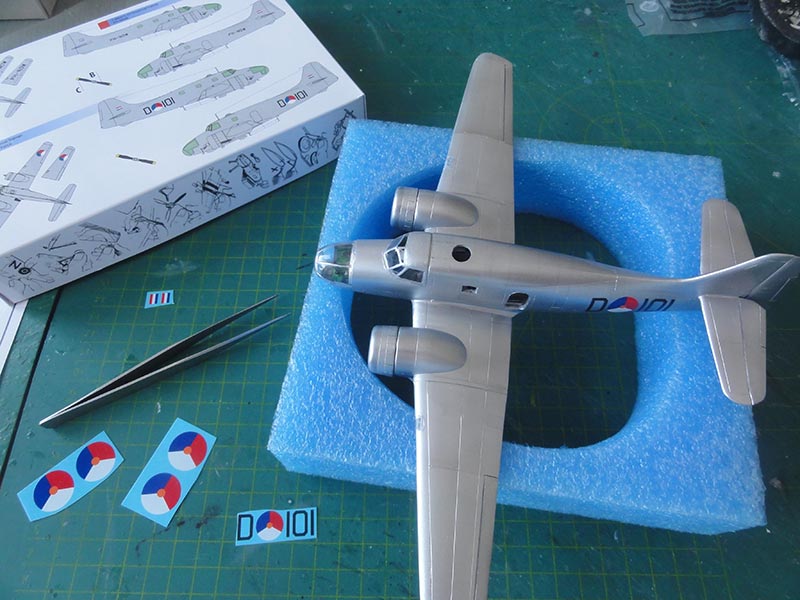
The decals for the “D-101” were now applied, please note that the surfaces are already glossy. Be careful as the decals are very thin, so slide these off the wetted decal paper onto the model.
COMPLETING THE MODEL
The finishing of the S-13 model was now done. What now takes considerable time is to add the many antenna wires that you can clearly see on the real S-13. Thin fishing line glued superglue was used and metal needles for the masts with holes drilled these. The long dual antenna wires running from cockpit to tail have a mast that is set slightly off set. At the vertical tail is a cross piece and also a pitot tube which was made from a needle. Furthermore, the “D-101” had a short antenna on the right rear of the fuselage spine.
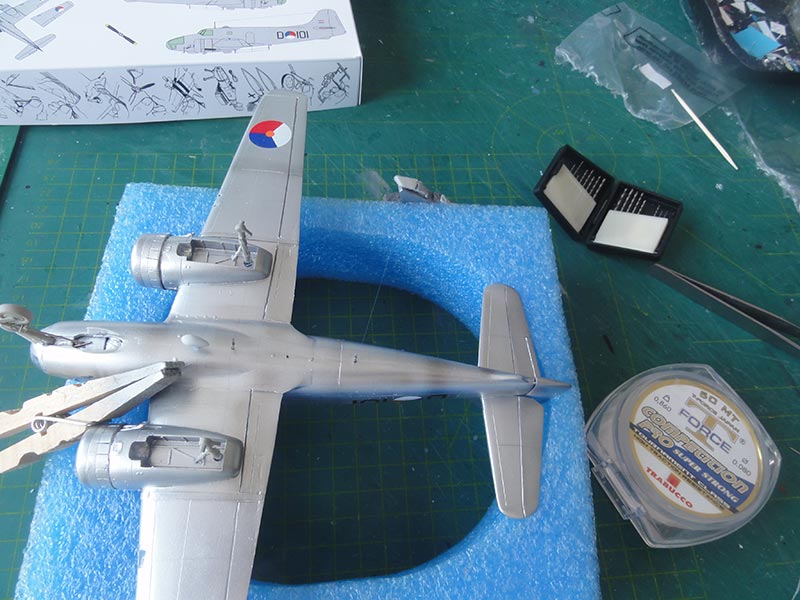
The undercarriage is fine as per kit but the struts got some extra retraction struts and some small gear bay details from scrap. The undercarriage was painted aluminium. The nose bay doors have also a curved shape and these doors need be sliced from the single part provided. The colour inside the wheel bays is not certain, I simple assumed these to be also aluminium (and not interior green). The wheels were also set.
 .
. 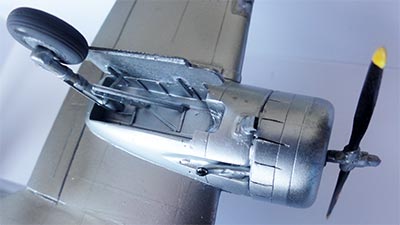
The 2 air scoop parts behind the lower engine cowl are a bit too large so new ones were made from plastic. (Not always these scoops are fitted however). The propellers in the kit are OK but the noses were sanded in a round shape. The propellers are black with yellow tips.
I now found out that there was still too little ballast in the nose. But I was able to solve that by placing a ladder near the cabin door that I opened. I found the ladder in the spare box and it keeps the model on its nose… don't tell anyone!
The anti-collision lights were painted at wing tips and a small one added on the lower rudder, tips got a drop of Kristal Klear.
Finally, the model got airbrushed a thin layer of gloss Johnson Future/ Pledge varnish to protect the decals. While airbrushing protect the transparent cockpit and nose.
A very nice model of the Fokker S-13 is now in the collection and a real "must have" for the Fokker Aircraft collector.
- Avia, monthly magazine, no. 1972-1 , Wijt publishers (in Dutch) .
- Luchtvaart, maandblad April 1989, article Thijs Postma (in Dutch).
- Piloot en Vliegtuig, blad no. 2009 -10 (in Dutch).
- The Aviation Historian, Volume 18, Nico Braas, article, 2017 (in English)
- Modelbouw in Plastic magazine, M. de Vreeze, IPMS Nederland 2022-1 (nederlandstalige versie van dit verslag).
Internet:
- my Fokker S-13 first review on IPMS.NL
- real Fokker S-13, NedMil information on IPMS.NL

(c) Copyright Meindert "designer"/ All rights reserved. Your comments are welcomed by webmaster
Created this page
February 17, 2021