Roden

Pfalz D.IIIa model kit in 1/32 scale
Luchtvaart Afdeeling (pre-decessor Dutch AF)
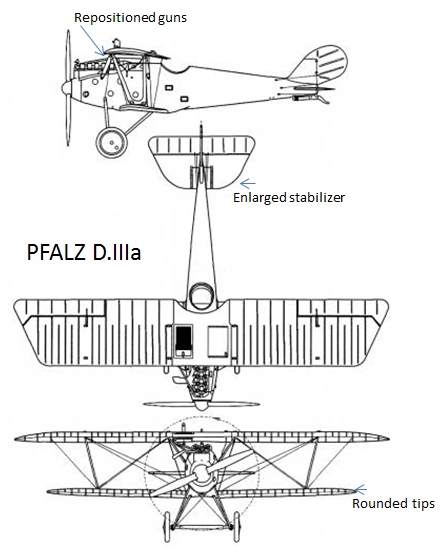
The Pfalz D.III
was a German biplane from the beginning of 1918. It saw extensive service
in the Great War. The type flew first in 1917 and turned out to be a pretty
good design. The Pfalz D.IIIA got some modifications as compared to the
original D.III. First, the lower wing got rounded wing tips. The horizontal
stabilizer was a bit enlarged with a rounded leading edge. During maintenance
it turned out that the machineguns were a bit difficult to get to, so they
were repositioned and set more in the open.
![]()
![]()
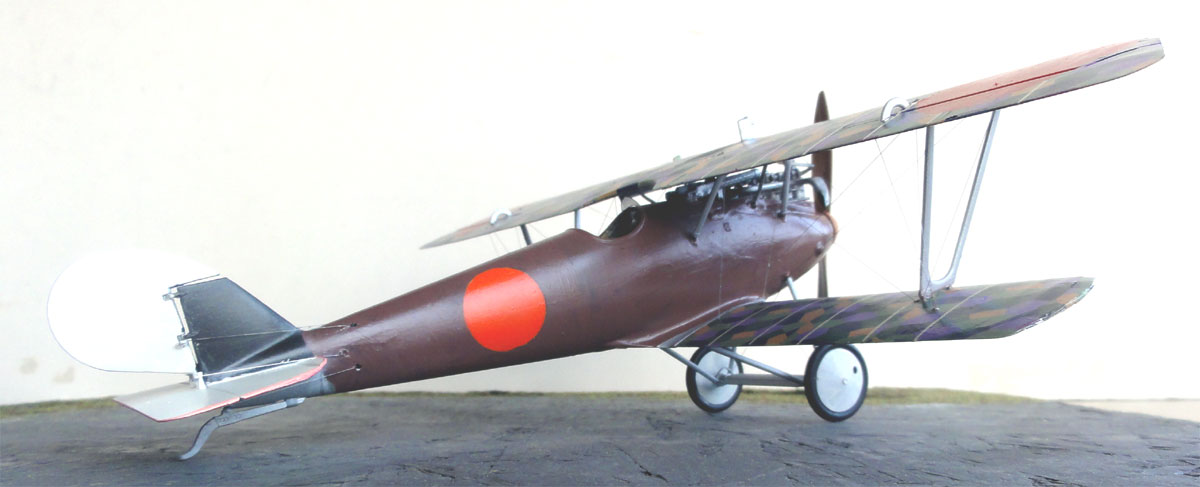
A German D.IIIa
flying above Belgium was dis-oriented and landed on Dutch soil near the
village of Schoondijke June 1918. It was interned and got the Dutch orange
markings and registered PF-225. Look at the IPMS NL for more information: NEDMIL
Modelling report
series
of interned aircraft for the Dutch "Luchtvaart Afdeeling"
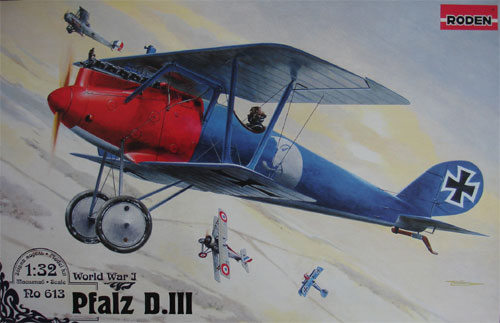
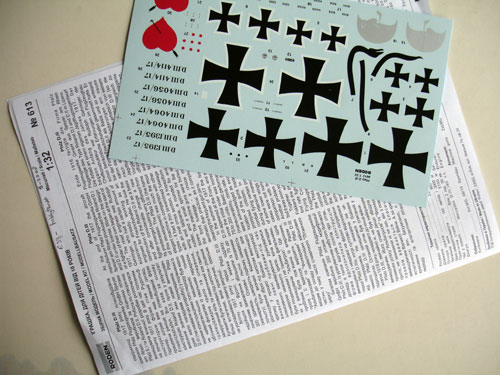
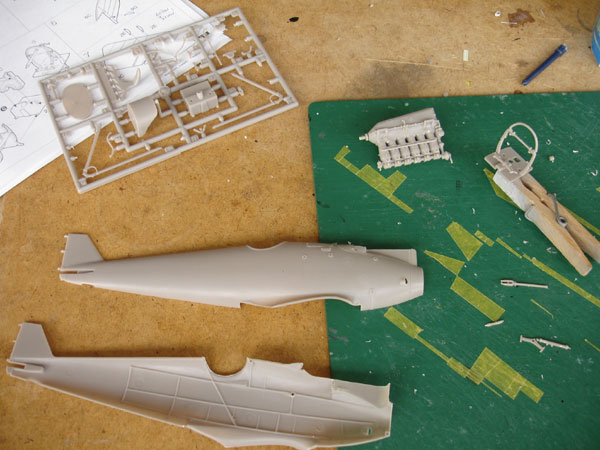
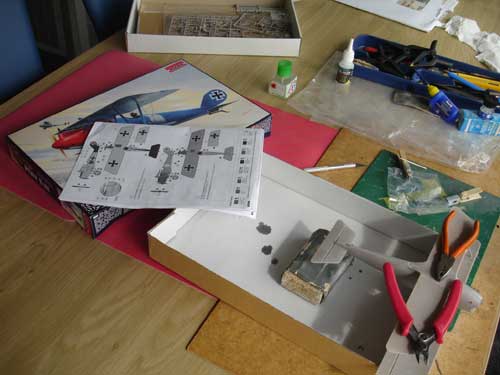
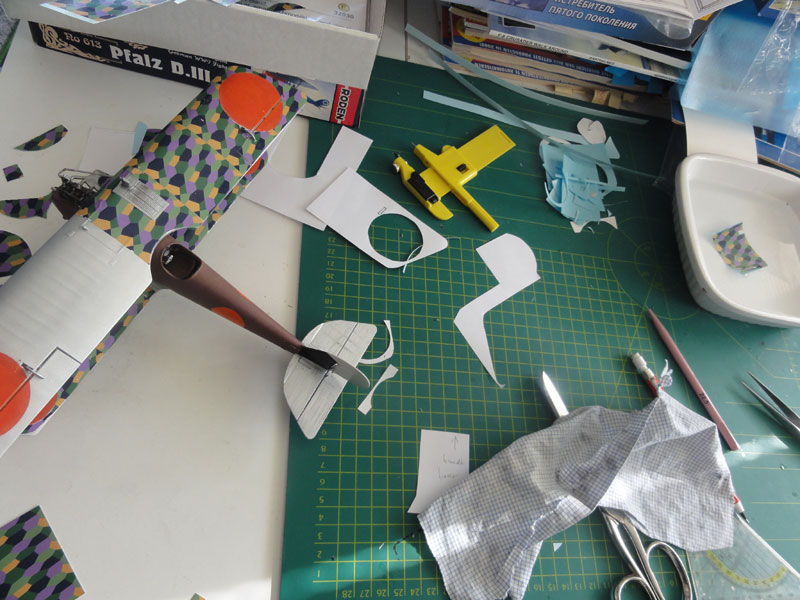
The RODEN kit on 1/32 scale of the Pfalz D.III (no.613) is a good kit. The parts and details are fine and although no etched metal parts are provided, it can be made into a nice model. The markings are only for colourfull schemes, but no lozenge decals are provided. A slight conversion is needed to make a D.IIIa.
NOTE: WingNut Wings has issued a 1/32 model of the Pfalz D.IIIa, but the RODEN kit after some conversion is fine as well.
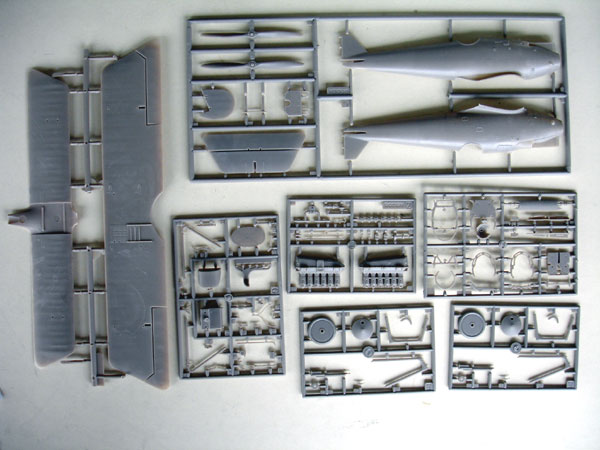
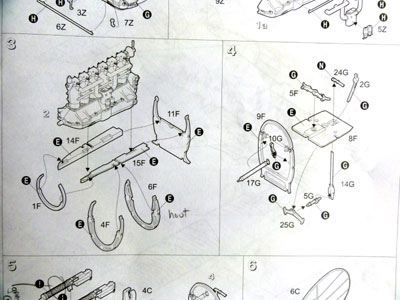
Using the kit instructions, assembly
is no problem, but as expected most work is in the rigging of this biplane.
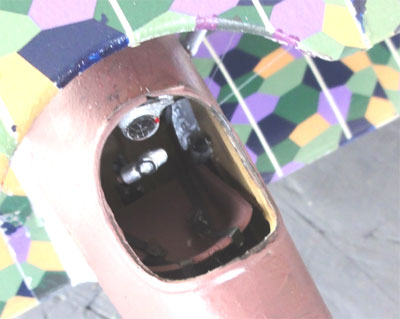
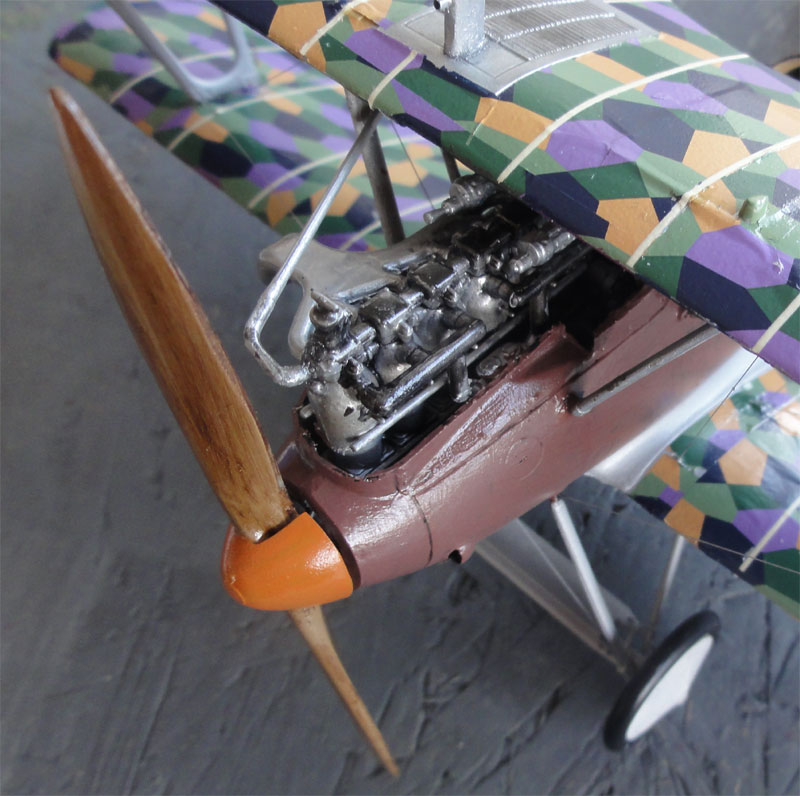
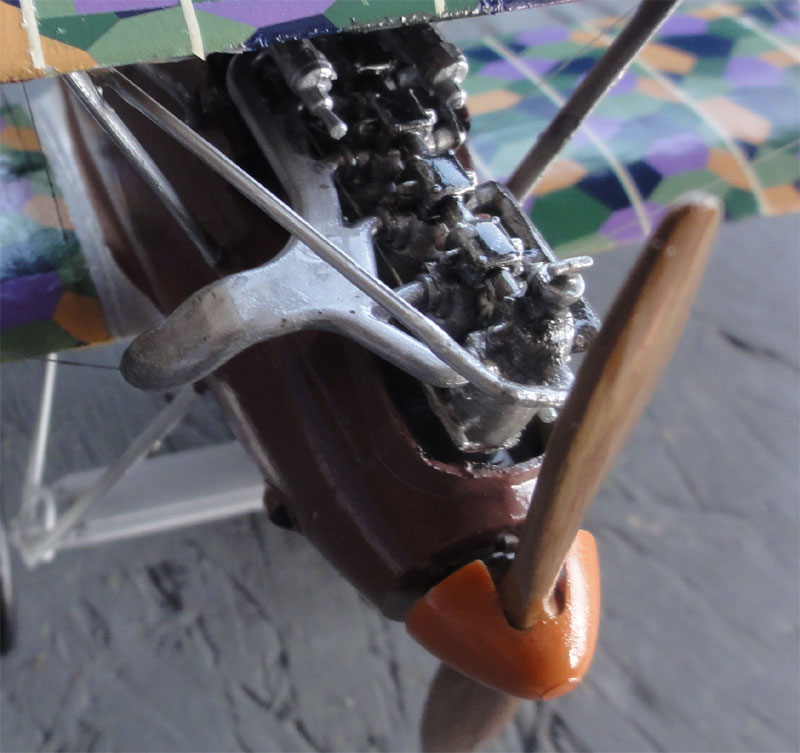
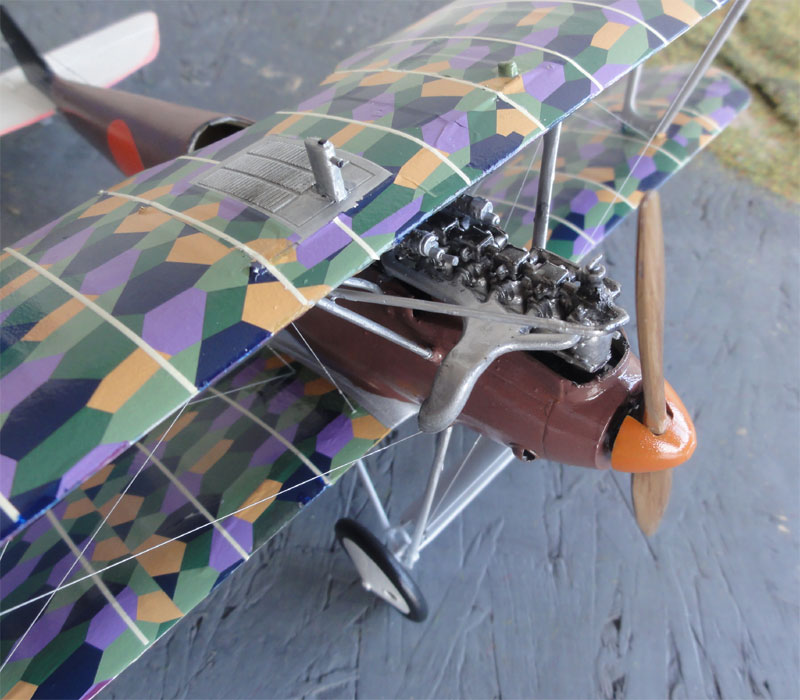
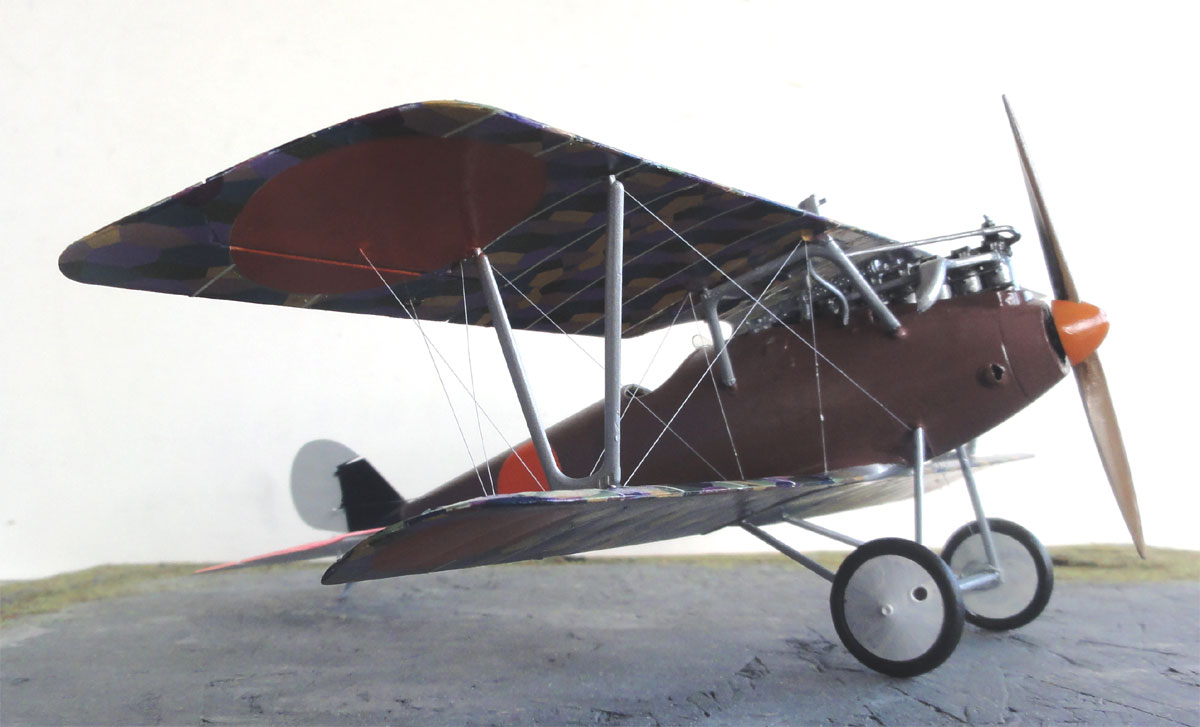
Engine and fuselage internal details
are fine.
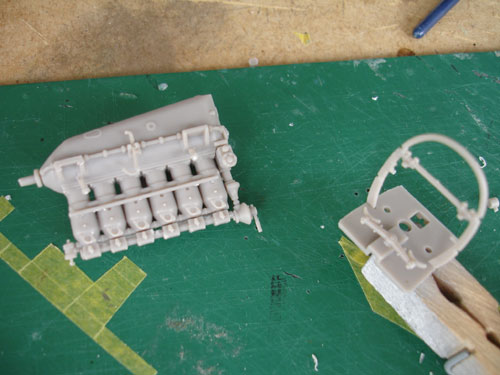
The Mercedes D.III motor is well
detailed, I only added some wires and some different metal colours.
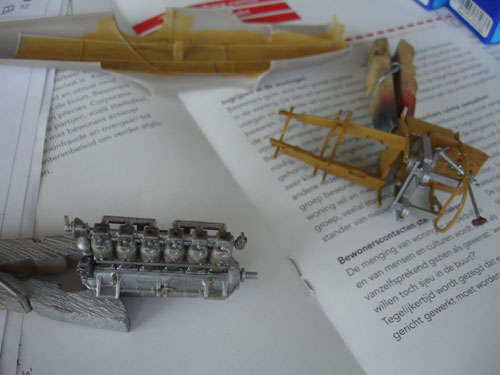
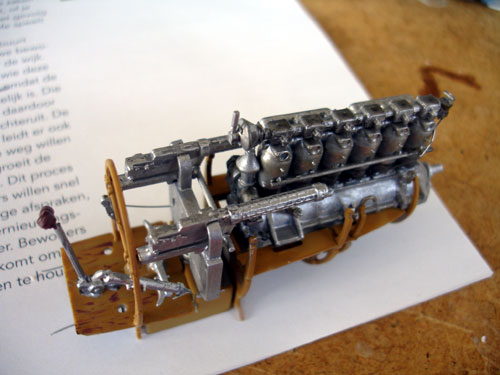
At the fuselage halves rear ends,
I drilled some holes to set the control cables later on. The fuselage halves
took some care to get them well joined.
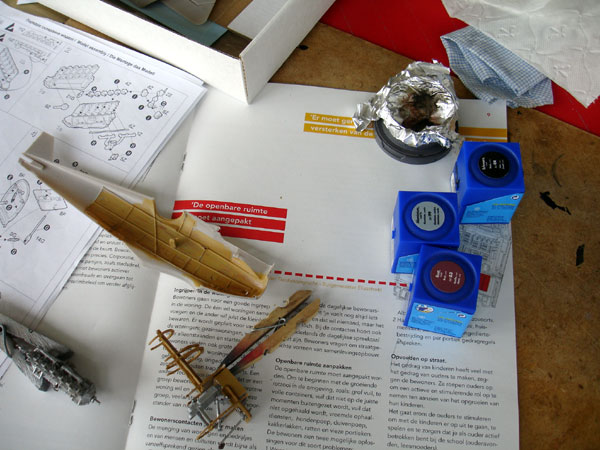
The frames got a wood colour and
with dry brushing the wood grain was suggested. Interior with frames and
floors are provided in the kit.
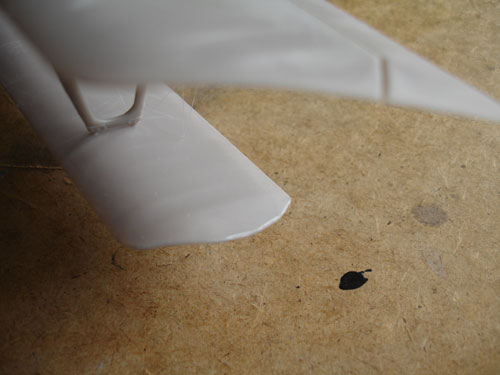
The lower wing wingtips were filed
rounded as appropriate for the D.IIIa
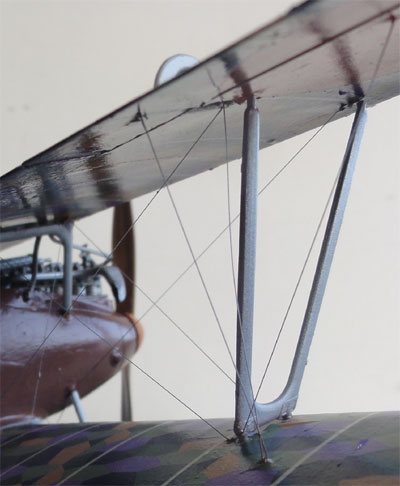
For the rigging I used the technique of rigging thin fishing line through drilled holes. So the various holes were drilled in the various surfaces like the wings.
Glueing a fishing wire of enough
length with super glue, it was rigged through the appropriate holes, starting
from inside out. The wire was kept under "tension" with a cloth peg and
glued and set. Do one wire at a time.
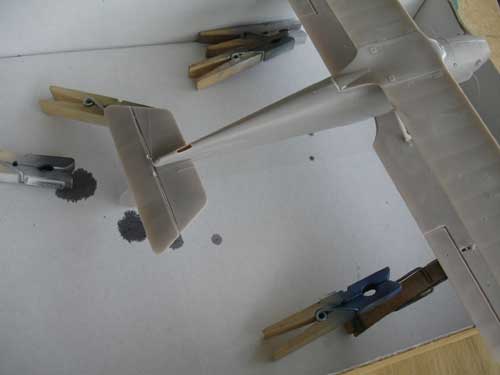
Fortunately the wing struts are of
correct length and can be set in quickly place. I later on discovered that
it would have been better if I had painted the wings first and applied
the LOZENGE decals, BEFORE the doing any wire rigging.
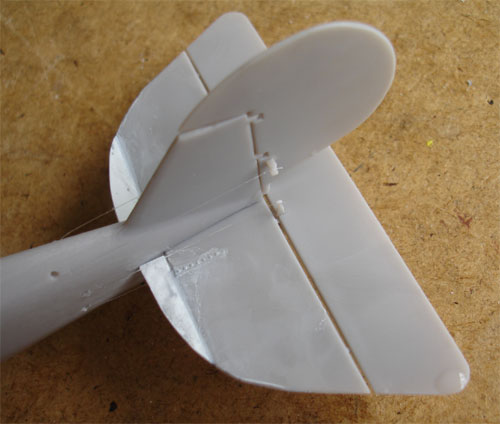
The stabilizer as needed for the
D.IIIa was enlarged with some card, this was blended in with putty. The
leading edge was filed round.
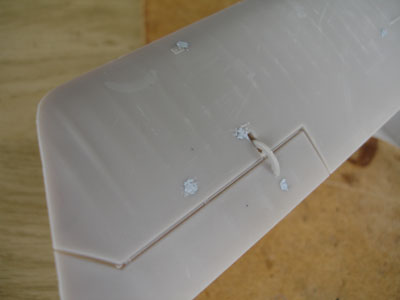
After all rigging, the holes were filled at the "end"sides (so on top- and lower- wing surfaces) with putty. This was sanded flat when dry.
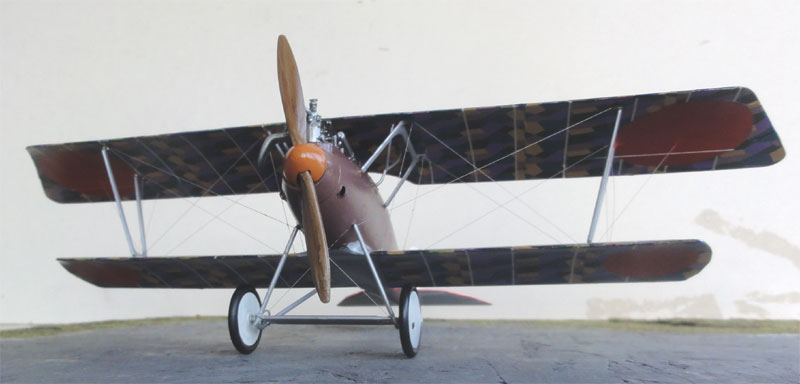
Next was to apply a grey base coat.

Now it was time for colouring the interned Dutch D.IIIa.
The orange LVA markings were airbrushed after masking the circles with masking tape.
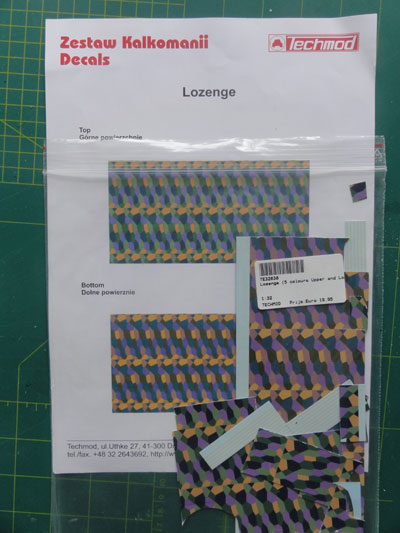
Establishing the rest of the colours was not easy. At the time "photo" glass plates were used and interpreting the colours from these B&W pictures is really confusing. It is better to use marking information from the time and pieces from museums of the lozenge and construction.
Usually German Pfalz planes got an alumimium dope sheme with struts wood grain gloshed and individual planes colourfull markings. The Lozenge camouflage pattern was also introduced with various colours. John of the Dutch IPMS told me he had discovered glass plates with lozenge pattern seen on the single Dutch D.IIIa interned.
Richard of the Dutch eerste wereldoorlog forum mailed me that Sergey Vlasenko did some research for his paper cardboard model, also based on discussions in the Aerodrome forum.
I settled for the following Dutch D.IIIa colours:
Lozenge pattern with 5 colours on
wings (lower surface light colour, upper surface darker). I used
lozenge decals from TECHMOD 32030.
Fuselage: mostly dark red-brown, I
used Revell Aquacolor nr.85 ;
Horizontal stabilizer: white with
red leading edge
Rudder: white
Vertical tail in front of rudder:
black
Lower fuselage area near landing
bar: aluminium dope
Struts of wing: aluminium dope
Wheel covers: white
Mid section lower wing at fuselage:
aluminium dope
Oil cooler on wing top: metal
Propeller hub: red-brown
Engine: various metal colours
Tyres: tyre black/dark grey
![]()
The ribtapes (using white decals from a WingNut Wings decalset) were not forgotten.
 ..
..
The cockpit only got a small instrument,
the seat got some belts with etched metal buckles.
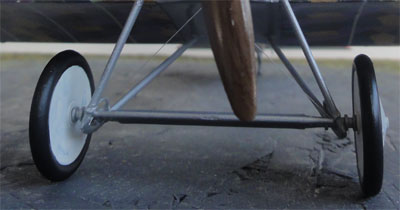
At the gear struts, some rigging
was also added.
 ..
..
The propeller first got a coat of wood brown, a couple of gloss varnish coats of Future and than with a sponge some darker brown wood grain was applied. The engine exhaust pipe end was drilled open.
The LvA registration "PF-225" could not be found on pictures, so I left it as I had no evidence if and where it was set on the airframe.
As the lozenge decals do not perfectly
match and leave some gaps, these were filled in with the paint brush with
appropriate colours mixed to match the lozenge pattern colour. A real challenge
to match the colours....
![]()
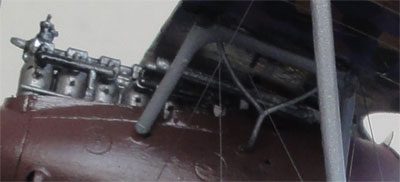
The result....

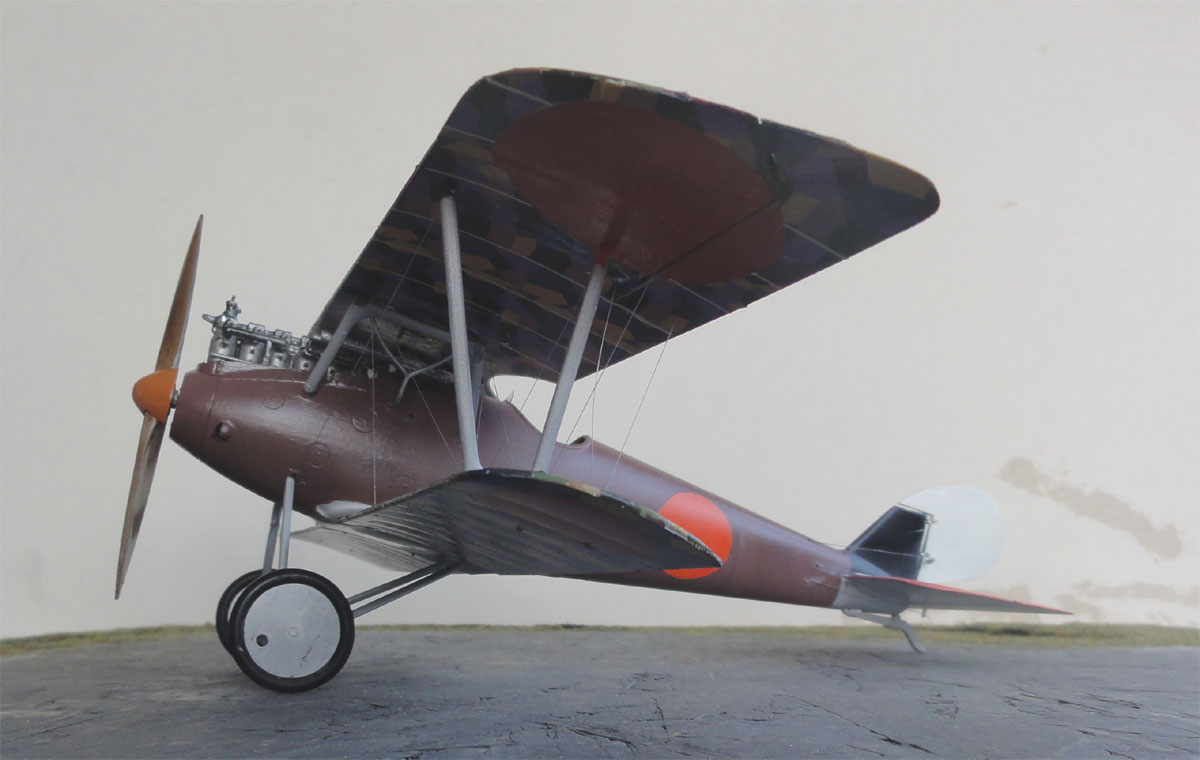
A couple of control cables made from
fishing wire and set in the open drilled holes can also be seen at the
fuselage end.
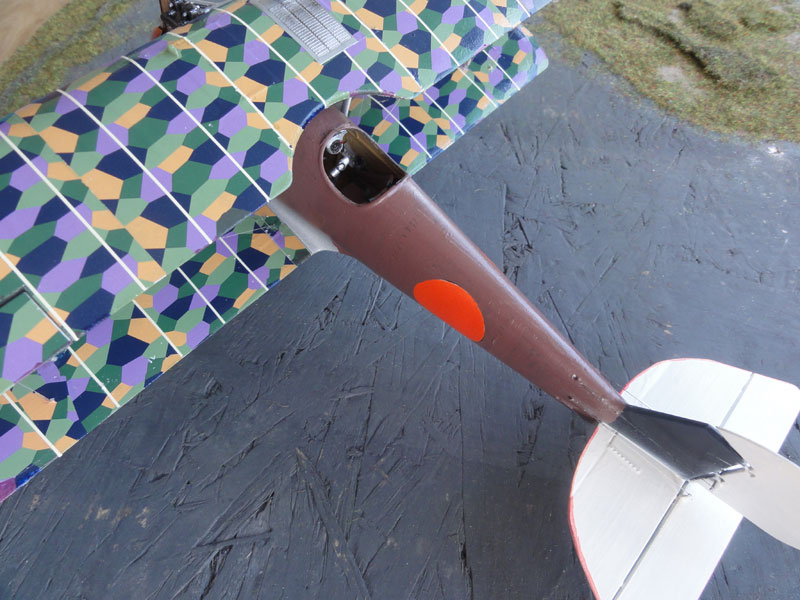
The red edge on the stabilizer can
be seen here as well.
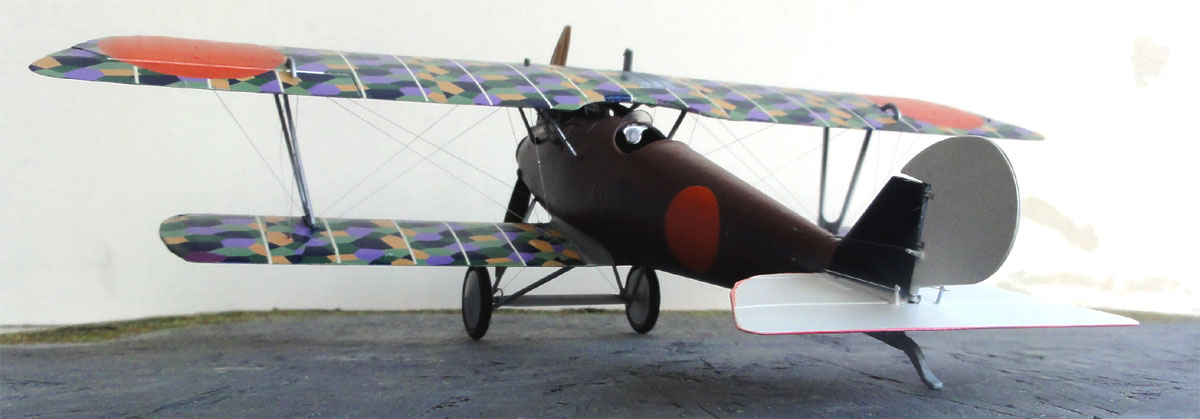
A nice model of the Pfalz D.IIIa in 1/32 scale as interned and subsequently used by the Dutch Luchtvaart
Afdeeling (LVA), 1918-1920
References
- Pfalz D.IIIa, WindSock datafile
no. 30
-
- IPMS Nederland, Internet site NedMil
on Dutch interned plane (for members only)
Back to 1/32 scale Models.......

(c) Copyright Meindert "designer"/ All rights reserved. Your comments are welcomed by webmaster
Created this page
June 22, 2011