RNeth.AF
[ Page 2 ]
NF-5A model in 1/32 scale kit review ? modelling report
The next step now is to merge the forward kit cockpit section to the resin aft section. Unfortunately there is a height difference, the resin part is about 2 mm less heigh. I sorted this out by removing a slice at the upper rear spine on the two plastic fuselage left- and right- parts A1 and A2.
I also found that there would be less tension if you would make a cut and remove some plastic at the aft upper horizontal floor on part A8.
A very strong joint as a lot of handling would be needed because sanding would be a massive effort. Using two-component glue and various plastic strips I managed to get a strong bond and also suggest not to fit part A11.
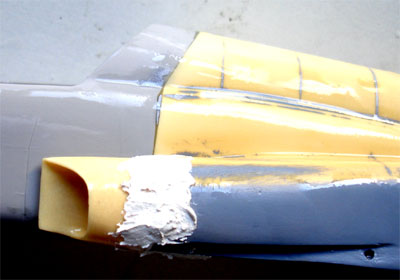
The joint area was sanded and puttied to get a smooth result.
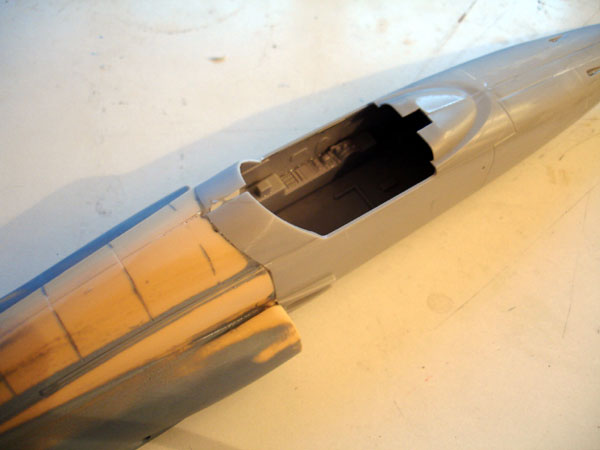
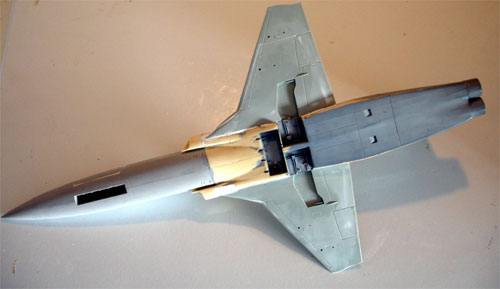
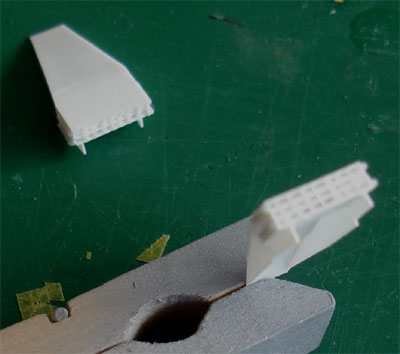
Next are the Belcher Bits resin intakes.
These required removal of resin at the aft surfaces through sanding. I
also had to remove height on the small side air intakes and boundary layer
area moulded on the fuselage parts A1 and A2. It is essential to have a
smooth joint on the visible intakes sides to the aft resin fuselage. I
also found the height of the intakes to be a bit too heigh, particularly
on the right intake. Some card was glued on the aft and lower area. Sanding
and puttying was necessary here quite a lot.
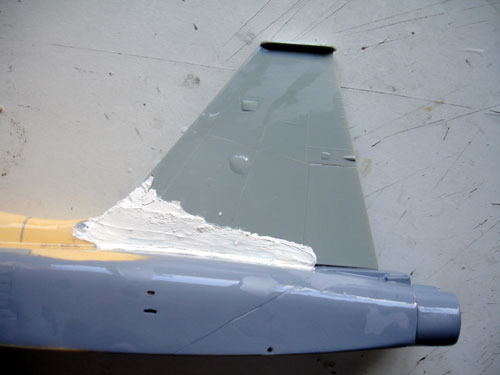
The aft vertical tail consists of
converted plastic parts C19 and C20 of the kit. It turned out that the
depth needs some extra strip inside to match the resin tail fairing at
the joint. I added metal wires glued into drilled out holes for strength
and it took quite some effort to get the tail perfectly vertical. I ended
up by having to add large amounts of putty to get a smooth result.
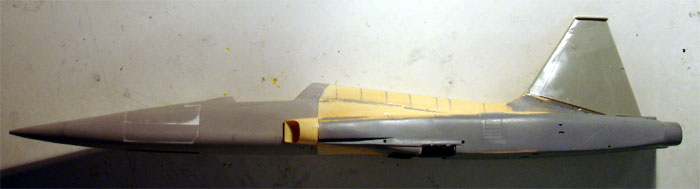
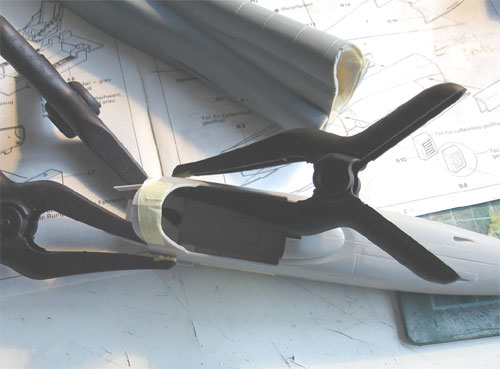
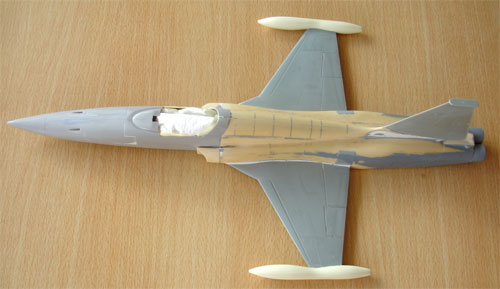
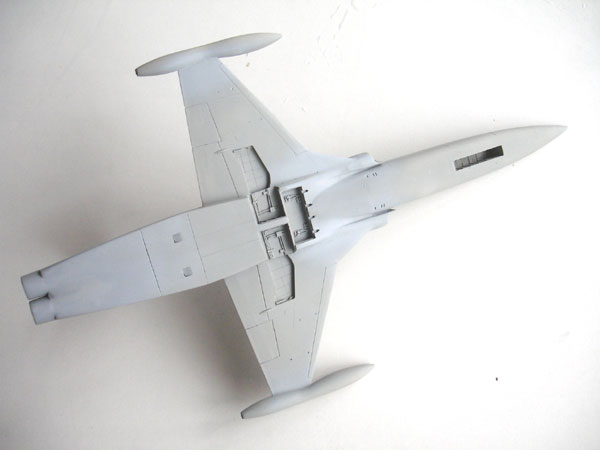
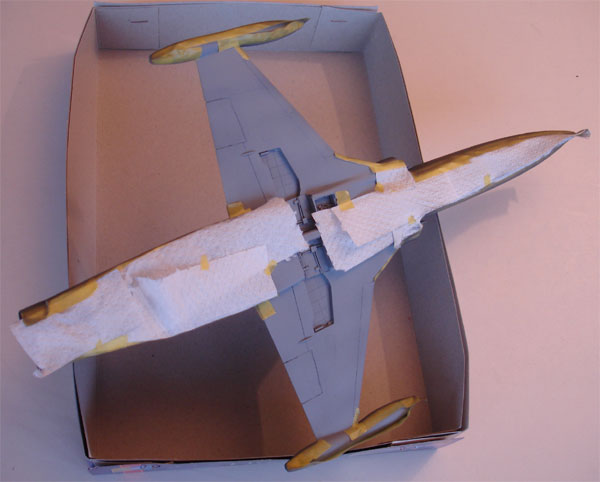
The next step is to fit the converted
wings to the fuselage. Again to get a good joint and horizontally aligned
wings, metal wires were used. The wing should be perfectly horizontal with
no anhedral/dihedral.
![]()
The wing-fuselage joint also needed
obviously some putty.
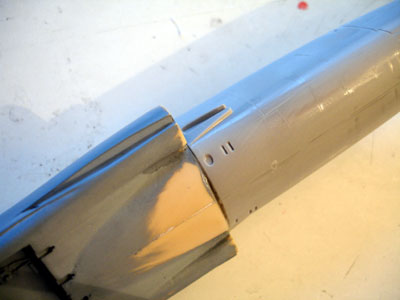
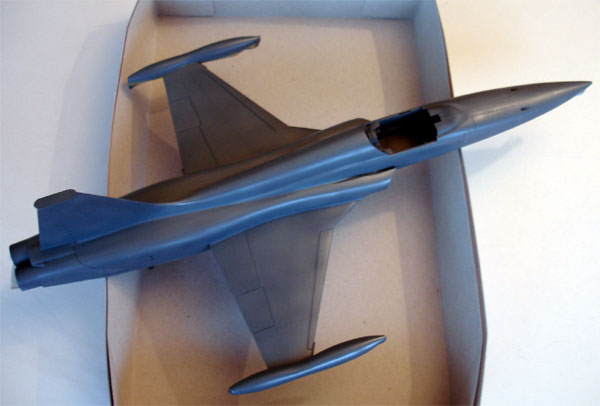
Next, the supplied resin tip tanks
were added; note these are quite different from those used on the F-5E.
Make sure they are fitted horizontal and parallel. I also drilled out two
holes on the rear fuselage to take the two horizontal stabilizers later
on.
![]()
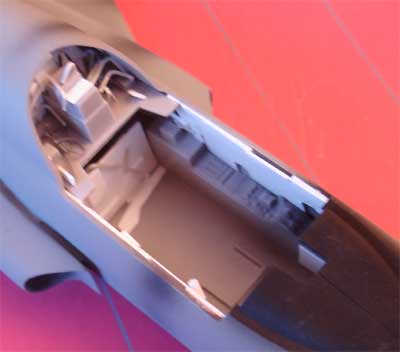
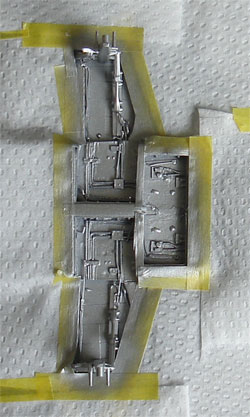
Cockpit
On all F-5 planes, customizing on
the cockpits and instruments took place depending on the particular air
force needs, so you will see a lot of different instrument panel configurations.
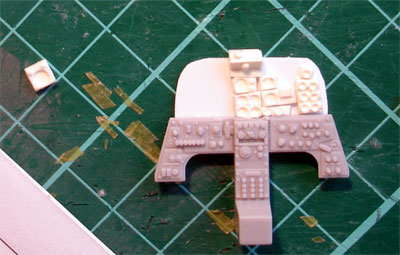
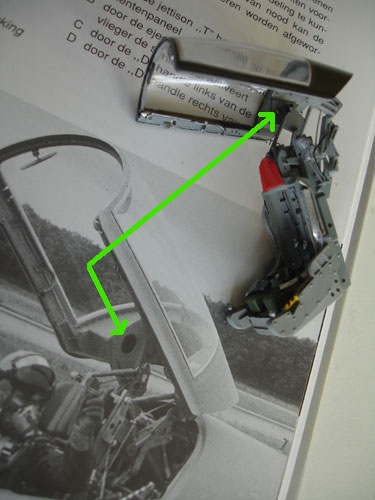
For a Dutch NF-5A also the cockpit
instrument panel is quite different from both the plastic F-5E part D24
and the resin CF-5A part supplied. I used a drawing
from the NF-5 Flight manual.
![]()
All resin instruments were separated
with a small razor saw, a new panel made from card, and re-arranged. For
the Dutch NF-5 particularly you need to add the moving map display.
Here you will see what I mean...
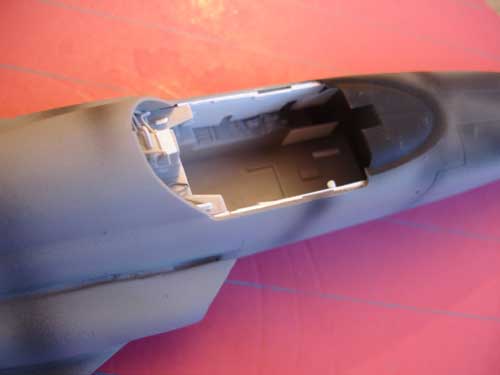
The cockpit also needs more details
on this scale.
This turned out to be OK.

In order to suggest some weathering,
black lines were sprayed on to suggest a wash inside panels and moving
surfaces gaps later on. These will show through later on when the camouflage
is added.
![]()
The cockpit now got some extra detailling.
The sidewalls need some extra depth; this was made be creating a double
wall with some thin card.
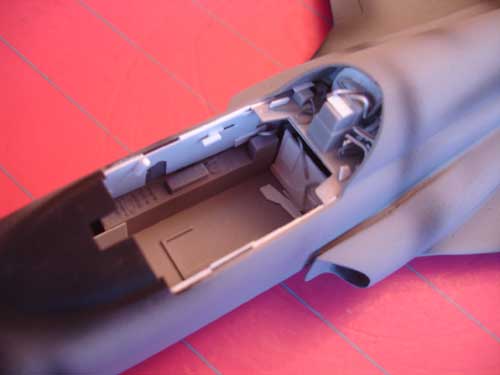
The area behind the seat got some extra wires and plates from card and stretched sprue. The instrument panels still need to be detailed.
 ..
..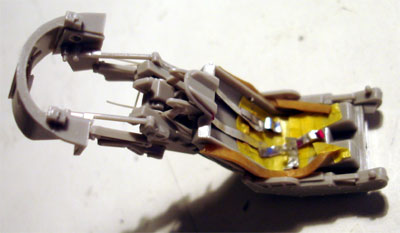
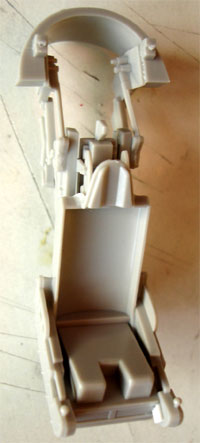
The seat itself can be used as provided in the kit. Only some extra details are added with sprue, wire, plastic. Open up also a hole in both sides of parts #D36 and D1+D2 as seen here.
The whole excercise does not take a lot of time and enhances the model.
..
The seat is pretty simple in F-5 aircraft and also used in the Dutch NF-5. (on the left you see a F-5E seat made for my F-5E agressor model).
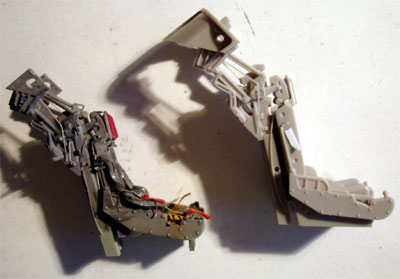
The cockpit detail painting and finishing was set aside for later
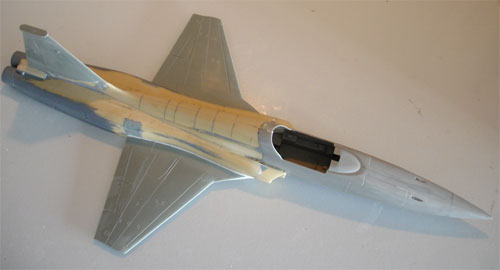
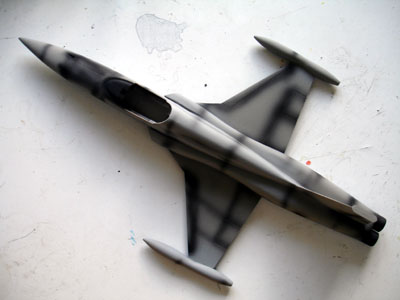
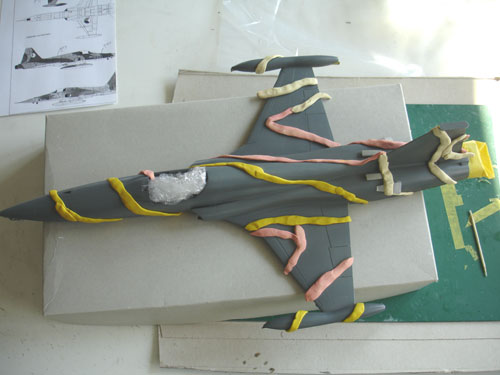
Next, the NF-5A model was ready to get its final surface colours.
The scheme choosen was the first scheme as used on the NF-5 type. Later, several other schemes were also used, but the plane as it flew in its first scheme remembered me of how I saw it first at Dutch AF air shows in the nineteen seventies.
This comprises a fresh camouflage scheme with light grey undersides and a Dark green and Dark grey camouflage on upper surfaces:
For the Light
grey RAL 7001 : you can use Humbrol 128 or Xtracolor
X255 (lower surfaces).
For the Dark
green RAL 6014 : Humbrol Xtracolor X251.
For the Dark
grey RAL 7012 : Xtracolor X207 or Revell 77.
During air force service especially the dark grey colour quickly faded on mostly the horizontal surfaces with the colours becoming lighter. For the faded grey DACO has a colour readily available as for the "Hunter". (Alternatively you can use mix in some white paint with the fresh colours).
All enamel colours were thinned with 60% paint, 20% thinner and 20% white spirit.
First, the model was first given an undercoat of light grey RAL 7001.
Masking and
spraying takes some time and effort, but the results are worth it!
Do not forget
the underwing stores, pylons and undercarriage doors outher' surfaces!
After 24 hours,
the horizontal demarcation line was masked off with Tamiya masking tape
Next, the upper
and side surfaces first a coat of the darker grey Revell 77. Than, on the
upper horizontal surfaces the DACO slightly less dark grey was sprayed
on most areas. This gives the model a good look as the vertical surfaces
(eg. under the vertical tail and at the light grey demarcation) are still
the darker grey.
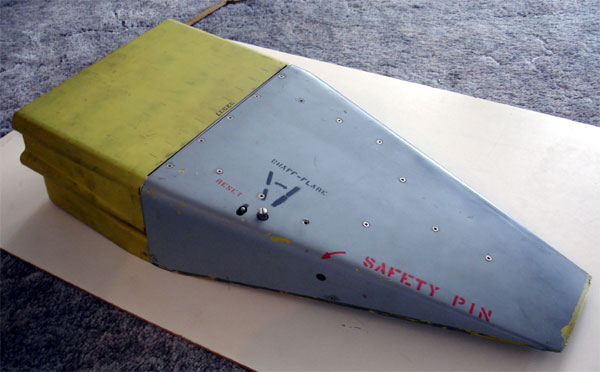
Dutch NF-5 planes usually carried later in their service career the AN/ALE-40(N) dispenser for either chaff or flare.
More info here...
It was decided to add this also to
the model with some scratch modelling.
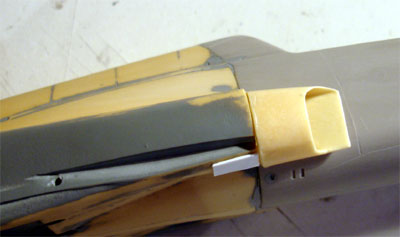
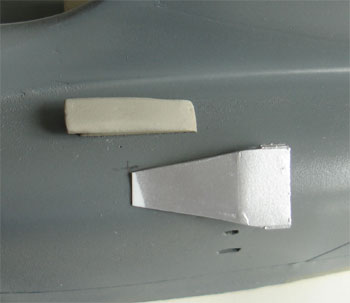
The Dutch
N-5 dispensers were made from card with the very fine grid at the rear
sides. An original dispenser was used
to check how this should be done.
 .
.
 .
. 
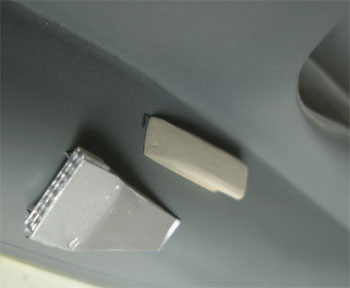
The dispensers
were mounted on the aft fuselage; also seen are the intake scoops as
provided by Belcher Bits. Also on the lower aft fuselage next to the tailhook,
two small scoop intakes are provided in the Belcher Bits set and also used
on the Dutch NF-5.
CAMOUFLAGE
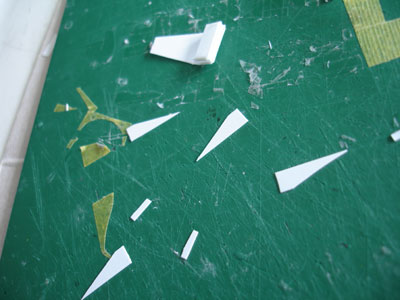
The green of the camouflage pattern was now added based on several drawings (including the one seen here); flexible clay (like Blue Tac) was used here to get a smooth demarcation. The camouflage colours used are indicated on the previous page.
The main camouflage pattern is now on the model.
Also the gear bays, after being detailed with some sprue and rod, were sprayed silver.
 .
.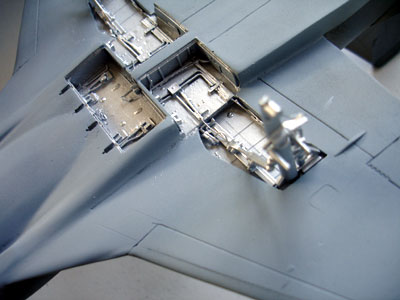
The main undercarriage is similar as on the later F-5E, only the kit parts were detailed with some extra brake and oil piping.
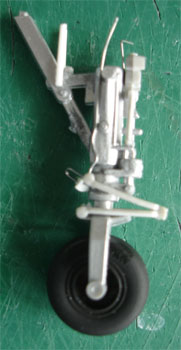
The nose gear
leg however of the NF-5 is different than the leg of the F-5E and F-5A.
The leg on the NF-5 could be extended and the anti-torque scissor is at
the rear. Also there are some small detail differences. These were catered
for using the kit part #D21, but cutting and adding some rod and metal
wire for the brake pipes. The nose gear strut part and its
small aft door got two small rods for the door-retraction mechanism in
stead of the single stub of the kit part.
To next [ Page 3... ]

(c) Copyright Meindert "designer"/ All rights reserved. Your comments are welcomed by webmaster
Created this page
December 2, 2006