[ Page 1 ]
[Page 2]
The Mirage III (or Mirage 3) was the French answer to a requirement for a supersonic jet fighter aircraft in the fifties. It was fitted with a large delta wing which became a trademark for the famous Mirage series. Delta wings were used beacuse of their good high speed capabilities at the cost of low speed field performance. You will find no horizontal stabilizer on this plane!
The Mirage III can be considered a competitor of the American Lockheed F-104 Starfighter and adversary of the Soviet Mikoyan MiG-21 in the Cold War.
Of the Mirage III various variants appeared including the Mirage V ground strike fighter. Usually the engine was a SNECMA Atar 09 version with afterburner. Intakes have a moveable half shock cone. The ejection seat is usually a Martin Baker RM4 seat (licensed built by the French Hispano Suiza). Usually canon armament was two 30mm DEFA cannons below the intakes.
The versions are:
Mirage IIIA was a pre-series of 10 aircraft first flown May 1958 and exceeded MACH 2 at 12,500 m altitude.
Mirage IIIB was a two seat version of the A with no radar and a fuselage 60 cm longer to seat the crew. It first flew October 1959 and 61 were built (most for French Armee de l'Air , Peru got 2, 2 BL for Lebanon, 3 BS aircraft for Switzerland, 3 BZ for South Africa).
The Mirage
IIIC was the main first operational all weather interceptor and flew first
October 1960 and had a Cyrano Ibis radar. Optional was SEPR 841 rocket
for dash speeds below the lower rear fuselage. Usually one missile Matra
R.530 was fitted and often two 30mm guns. Ground attack missions were also
possible. First order of 95 for French AF and also for Swiss AF with a
total of 244 built, including CJ for Israel with different equipment from
1963, 16 CZ aircraft for South Africa.
Mirage IIID
was the two seat version of the O for the RAAF. Some also delivered to
Lebanon, DP with 3 aircraft for Pakistan.
Mirage IIIE version was the long range fighter bomber with the SNECMA Atar 9c engine and optional SEPR 844 rocket. The E had a fuselage that was 30 cm longer in front of the intakes as compared to the earlier C versions. It is easily seen at the cockpit sides. Often a Doppler is fitted below the nose and the radar was the Cyrano. Over 360 aircraft were built with first delivery started beginning 1964. Sub-versions of the E include: EL for Lebanon, EP for Pakistan, and EZ for South Africa delivered 1965 period. The Mirage IIIO was for Australia and had some other systems.
Mirages also got variations in the dorsal fin at the vertical tail and could carry various stores like fueltanks, bombs etc.
Mirage IIIR is a reconnaissance version of the E. It had 5 Omega camera's in the nose and no radar. The RD had a Doppler below the nose and could carry big 370 gallon tanks. Other deliveries of the R were 3 RP for Pakistan, 17 RS for Switzerland. The RZ was similar to the RD and for the SAAF.
Mirage III S
was the "E" for Switzerland with other systems and license built in Switzerland.
(Mirage IIIT
was an experimental version with an increased fuselage diameter as part
of the VTOL program).
Mirage 5 or Mirage V is a ground attack version derived from the E and no radar fitted flying under VFR. It had simpler systems and probably a simpler landing gear but had no less that 7 stations to carry stores. Some could also fly as interceptors with the Sidewinder missile. The Mirage 5J was for Israel.
Mirage 5BA was for Belgium with again no radar but with a better navigation system. The BD was the two seater for Belgium and the BR the recon version with 5 Vinten camera's. It had an arrestor hook and SABCA made the type in license. Later on, it got ECM systems and flare dispensers.
Mirage 5P was for Peru based on the 5.
See also the References below....
![]()
The Revell kit in 1/32 scale of the Mirage III was issued long ago in 1975 and appeared in various kit boxes. The Mirage III in the kit is of the later Mirage III series.
The basic shapes are all there in the grey aluminium coloured plastic with mostly raised panel lines. You get an engine to be fitted into the fuselage and a selection of stores with fuel tanks, bombs and missiles. All parts are rather basic and crude in some areas like the missiles.
 ..
..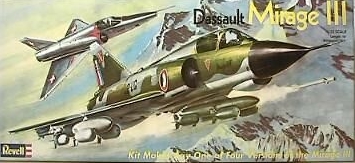
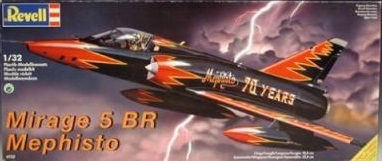
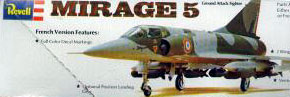
Recently, the some kit popped up
as Revell re-issued it in several boxes like the Belgian Memphisto scheme
(on the left). It also came in a traditional box (#00185-389N)
seen on the right.
The last #00185 kit one comes with superb decals for not fewer than 9 planes of 3 airforces:
- French AF Mirage IIIE , 2e escadre ALSACE 1965 (camo)- French AF Mirage IIIRD, 33 escadre reconnaissance, MOSELLE, 1965 (camo)
- French AF, Mirage IIIE, 3/3 escadre ARDENNES, Nancy 1974 (camo)
- Swiss AF, Mirage system test plane, 1968 (metal)
- Swiss AF, Mirage IIIRS reconn, Fliegerstaffel 10, Lucerne 1969 (metal)
- Swiss AF, Mirage IIIS, 16 squadron, Buochs, 1969 (metal)
- Swiss AF, Mirage IIIRS, 10 squadron, Payerne, 1990 (camo)
- Australian AF, Mirage IIIO no 79 squadron, RAAF Butterworth Malaysia, 1988 (camo)
- Australian AF, Mirage IIIO, no 79 sq, RAAF Butterworth Malaysia, 1988 (splittern pattern)
The kit parts need cleaning up and careful removal of their sprues so use a good cutter here. Remove the flash and use sand paper to smoothen things up. The canopy parts are thankfully cristal clear.
Instructions of Revell are acceptable
and typical of the age with some colour info. Colours given are generic
in nature.
----
A couple
of models will be made of this kit.
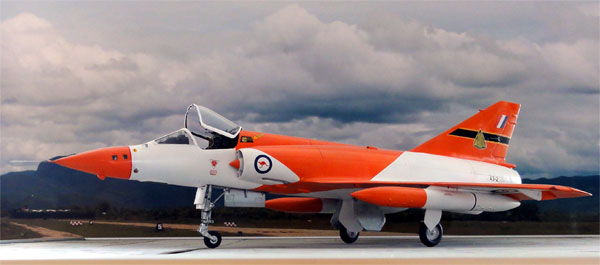
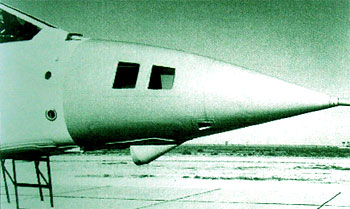
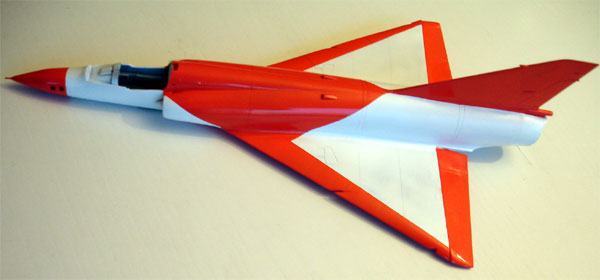
[1] First I selected to make an Australian
test Mirage IIIO of the ARDU (Australian
Research and Development Unit) test squadron based in Edinburg Australia
1985. This plane has some special modifications like camera windows in
the nose. It sports an attractive white and orange livery.
[2] The other Mirage IIIE model will
be made in parallel and will be for a traditional French Air Force Mirage
in a metal finish with red detail markings. Obviously this must simply
be in the collection seen in many photos in the past! (I will try to
make a model of the French AF of EC 2/13 ALPES
as based on Colmar France in 1965; this means I have to search for decals
or make my own).
![]()
Lets look at the kit now to create
the models [1] and [2]
STEP 1
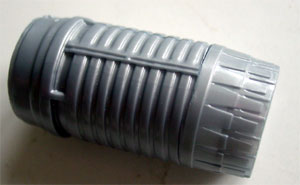
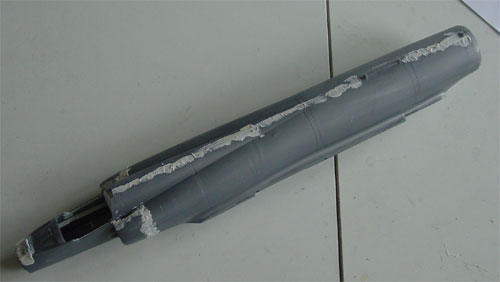
Engine
The kit comes with a simple engine.
I installed the engine only to get a long exhaust pipe, but used only half
the pipe length. Prior to installation, I added some details at the afterburner.
The rear part of the fuselage needs some sanding to get a smooth result.
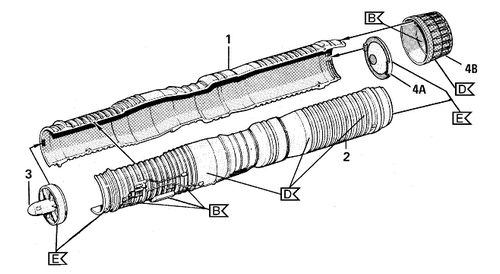
Although the exhaust itself is a bit
simple, I will use it and use various metallic colours here. Alternatively
you may buy an aftermarket set that provides you with more details on the
insides on the exhaust. If you make a Mirage IIIO, it may be an idea to
get a F-104 engine exhaust from another kit.
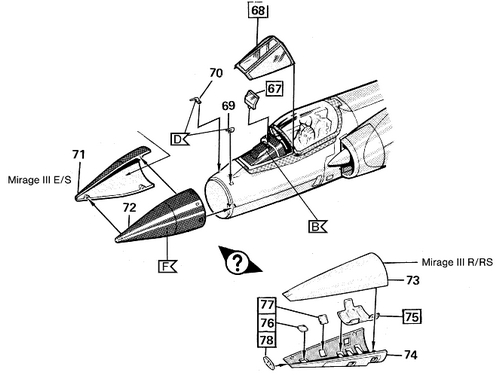
STEP 2
Cockpit
The kit's cockpit and the ejection
seat is very basic and needs a lot of work.
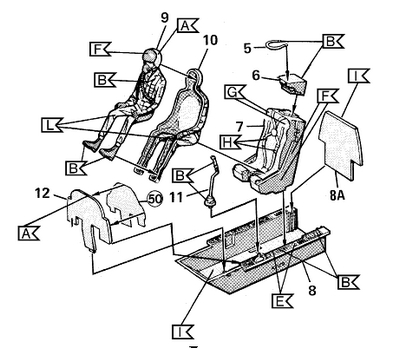
First, I got a resin replacement seat
from High Planes (kit AC3201). The seat looks
very similar to a Martin Baker seat as found in many Hunters.
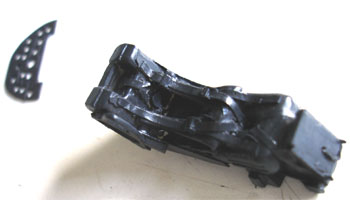
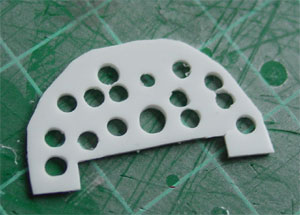
The edges on the cockpit sides were
made thicker with plastic card. The instrument panel was made from card
and I will use home made instrument decals to add detail. Also I added
detail onto the side panels like a throttle. The rear bulkhead was also
a bit detailed. Overall, the cockpit is small and pretty dark, I used "tyre
black" in most areas.
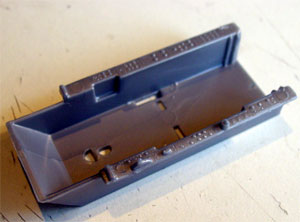
STEP 6
Fuselage assembly
I made an internal "tunnel". This
was an effort that turned out not really needed.
The nose is a separate part and does
not fit well. I needed to do a lot of sanding to get a smooth and symmetrical
result. (Revell supplies you with parts for an extra option for a recon
camera nose). The fuselage joints needs putty and you will need to remove
some ejection pin marks.
Intakes are a bit simple. I added
the supports between the backing plate and the fuselage. Also, the back
of the triangle lip was covered with card and putty.
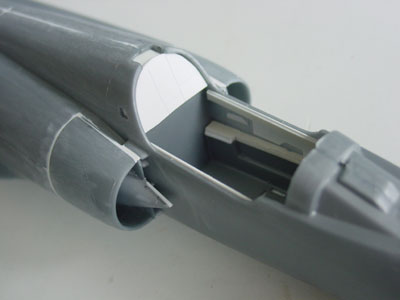
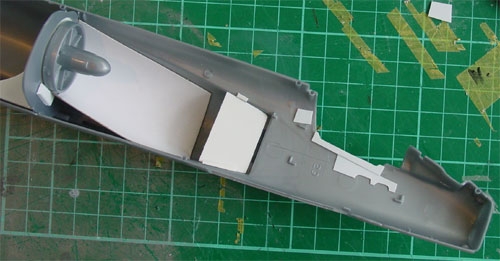
The cockpit area, will be detailed
later on.
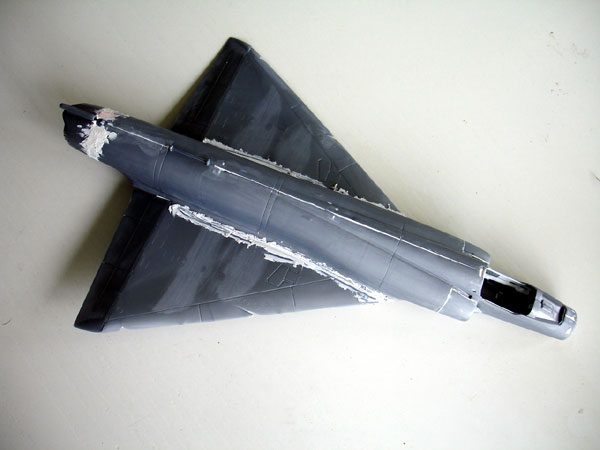
The lower fuselage needs quite some
filling...
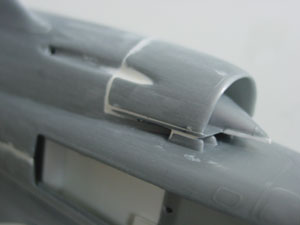
The model offers 2 different noses.
The conventional nose was used, but....
1/ For model [2] typical
of most Mirages in step 14 the doppler radar part # 88 was used.
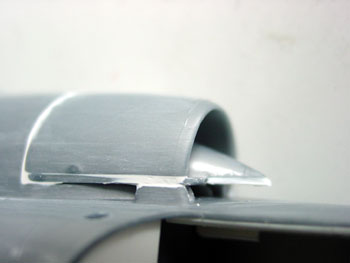
The ARDU plane (Model [1]) has a smaller antenna fairing. Some plastic
card was added here (and not part 88) as seen below:
2/ I also drilled open
a small hole in the starboard lower fairing at the tail of both models.
Revell indicates this as decal #A39.
STEPS 3-5
Undercarriage
The wheel legs need more detail and
look at real pictures to improve them. The wheel wells cried for detail.
I added various pieces of card and
sprue. On most Mirages the doors actually are open when they are parked
on the tarmac.
STEP 7-10 Stores
Assemble the stores you want to use.
(I haven't seen the bomb configuration as shown in Instructions' Step 8
on a real Mirage, but may be it has been used).
The crude Magic missiles suggesting "Sidewinders" are best replaced!
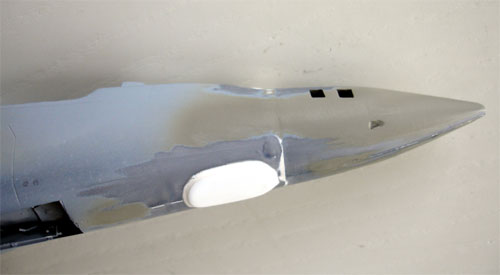
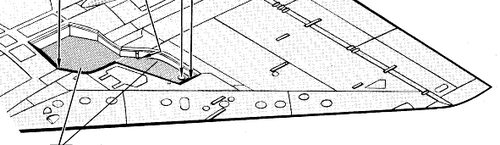
STEP 11 Nose
Not needed is the recon nose; the
normal nose doesn't fit very well. For the model [1] of the ARDU, I drilled
open 2 holes on both sides on the nose and added a small open scope fairing
under the nose tip. I assume that some camera's are equipped in the nose.
![]()
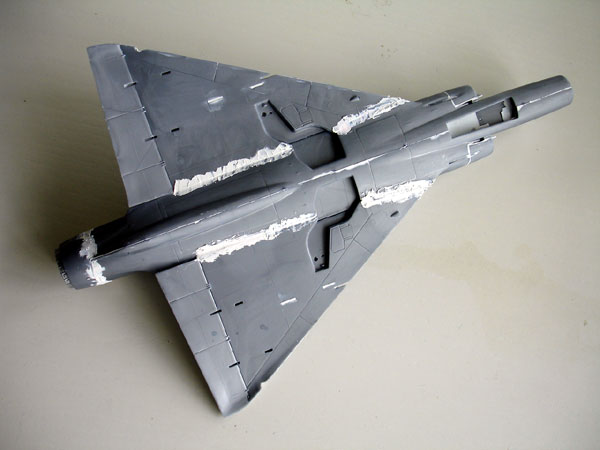
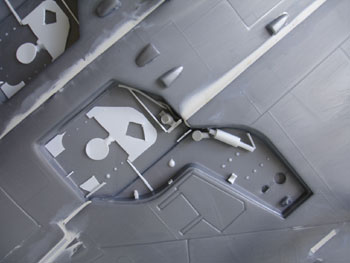
STEP 12
Vertical tail
+ WIngs
The tail seems OK for the versions
to be build. I know that on some kits (eg Mirage V) Revell added a correct
vertical fin with a leading edge extension at the base as seen here......
There is a need to position down the wing trailing edge flaps as they droop down for a plane parked on the ground. I simple made some cuts and scored the panel lines and than bended down the flaps. When you fit the wings, you will end up with large gaps on the lower sides. Add card and plenty of putty here.
STEPS 13-16
Leave these for after you painted
the model.
STEP 17
Adjust the flap fairings as you drooped
the flaps; make cuts, sand off and glue at an angle.
![]()
DECALS and
FINISH
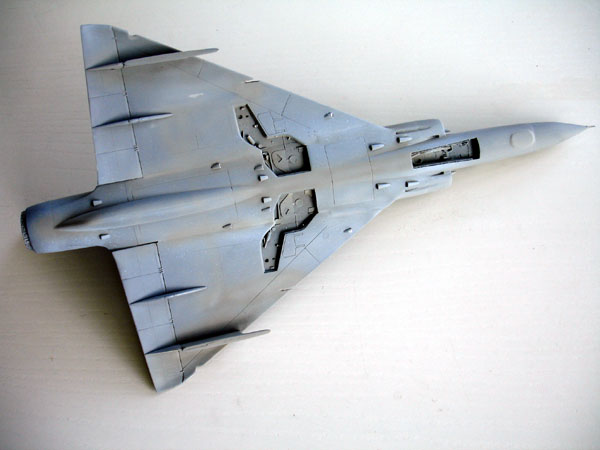
Prior to colour finishing, the overall
model (below here model [1] is seen) was given a light grey coat to check
for any flaws
Model [2] was given after correcting
the flaws with putty, an overal metal coat using ALCLAD
II Metalizers. I
used "highly polished aluminium" on the majority of the airframe surfaces
and darker titanium in smaller areas.
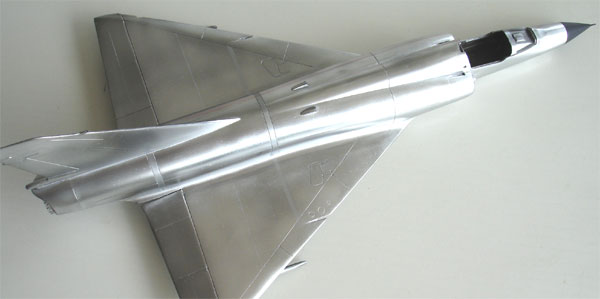
There are not that many different
metal colours on the real Mirage III, masking was very limited and so this
can be relatively quickly done. Buffing the coating will give a noce shine
to it.
![]()
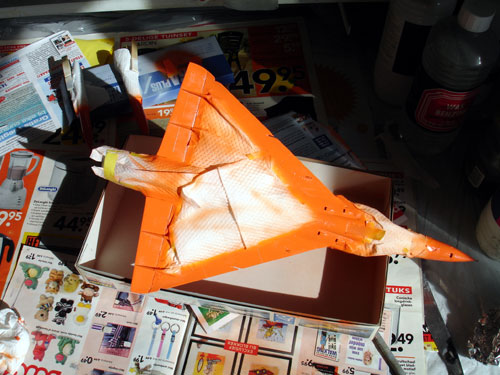
Model [1] got the orange scheme of
the ARDU test flight. After the white satin colour (using Humbrol
#130 ), the orange split pattern was masked off using Tamiya
tape and the orange airbrushed
using
Humbrol #18. 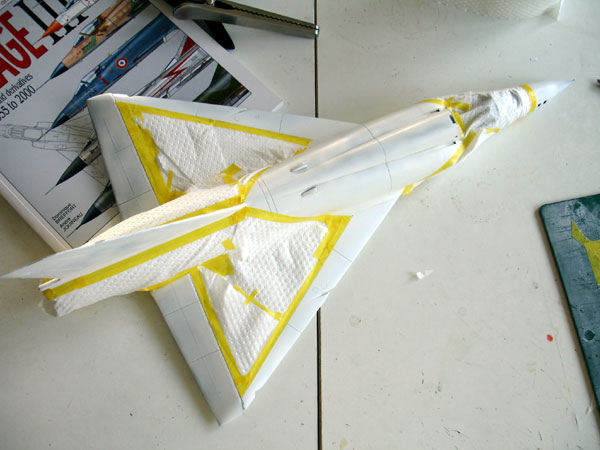
Next steps are putting on the decals
and details etc.
To next Mirage
[
page 2 ] .....
References:
MIRAGE III, Planes and pilots series, Breffort & Jouineau
Excellent! with lots of colour profiles and many beautiful pictures
Mirage V, Lock on no 11, Peeters, particularly for detailling (there is much common between the III and V)
Modelling the Australian Mirage IIIO, Alan W.Hall, Airfix magazine July 1969
IPMS Belgium, KIT 54 magazine, 1984 with drawings
On the internet: use Google to search! plenty of stuff!
such as Walk Around Swiss Mirage IIIS:
http://www.master194.com/photo_avion/mirag...uisse/index.htm

(c) Copyright Meindert "designer"/ All rights reserved. Your comments are welcomed by webmaster
Created this page September 20, 2006