[ page 4 ]
Dassault Mirage 2000 kits in 1/72 scale: kit modelling report of Italeri/ Revell and Heller kits
page 2
page 3
page 4
... continued from page 3...
As expected, also the French HELLER company released kits of the Mirage 2000. A very early single seat kit #354 was released in 1979 as AMD (Avions Marcel Dassault) Mirage 2000. It has raised panel lines and is basic with about 40 parts.
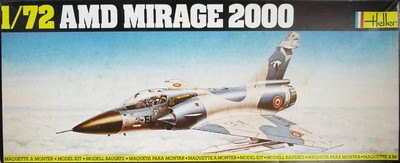

This old kit is still somewhere in the "stash"....
Based on that kit, Heller made another mould for a double seater:
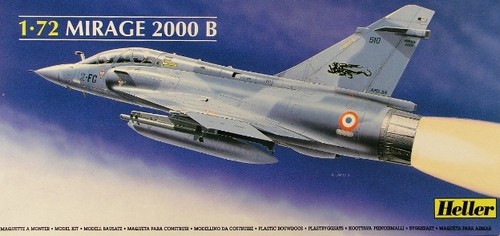
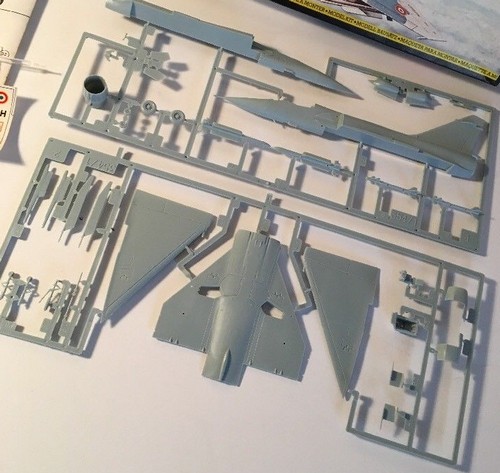
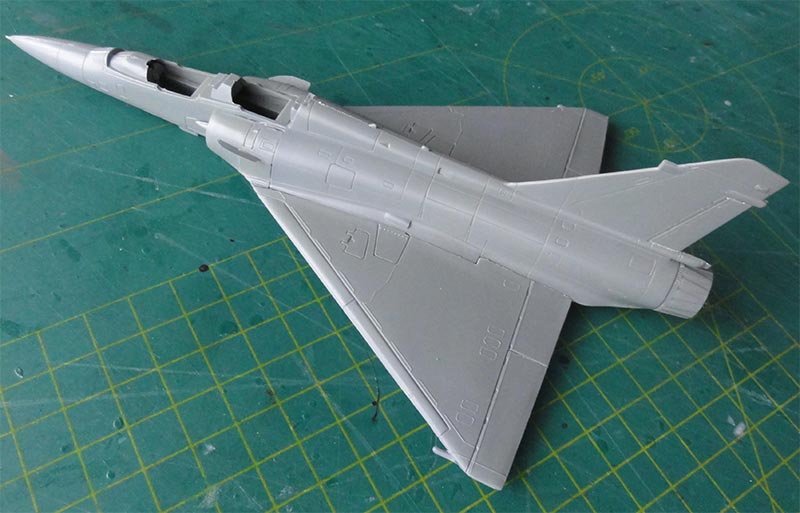
First kit I had was the Mirage 2000B kit no. #80322 from 1991.
There are again some 40 parts and a single one piece two seater clear canopy. The kit is simple and has a central fuel tank and a bit crude Magic missiles. The panel lines are a mix of raised at the wing (similar to single seater kit) and engraved at the new fuselage.
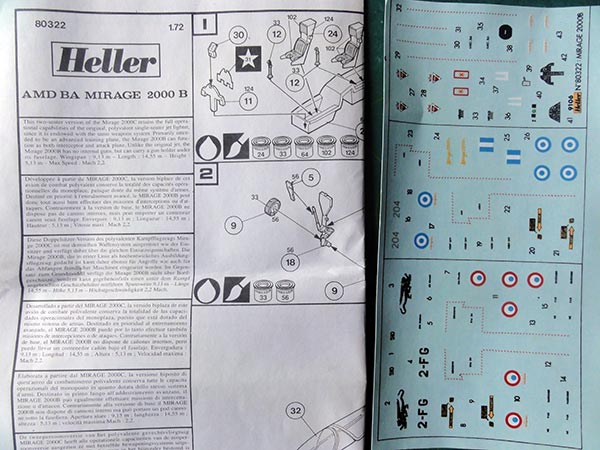
The basic kit decals are for 2 first generation Mirages:
- Armee de l'Air camouflage scheme , of EC 2/2 Cote d' Or, Dijon 1990;
- Greece / Hellas camouflaged, no. 301 / 302 squadron of 144 Wing based at Tanagra 1989.
The French roundels are unusable as they are printed terribly off center. There are stencils in French and in English (for the Greek model).
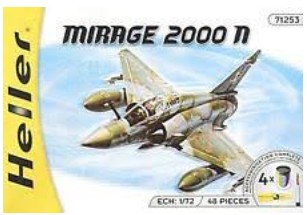
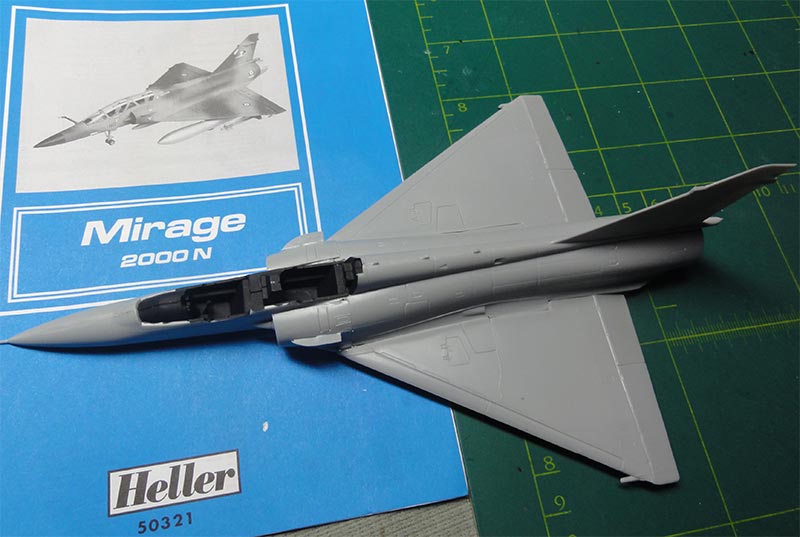
I also had a Mirage 2000N ("Nucleair") kit #50321 that was released in a model set with paint, glue and a brush. It has the same parts as the Mirage 2000B but...
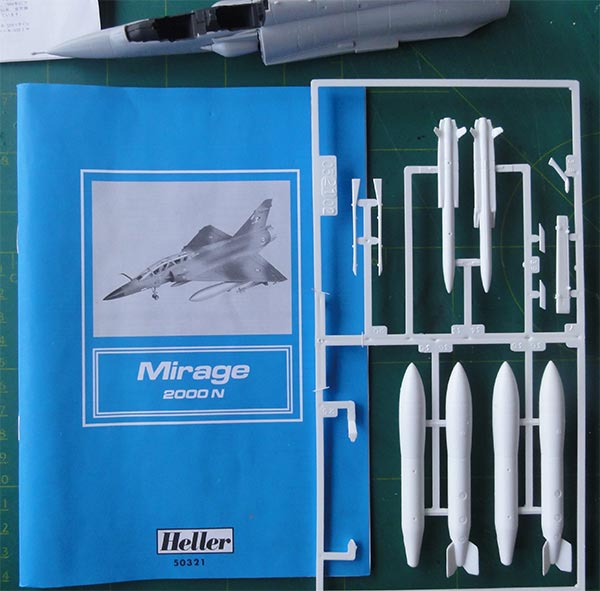
... also in the box a ASMP nuclear missile with its central pylon and also 2 bigger long range underwing fuel tanks. Nice goodies for the -N version!
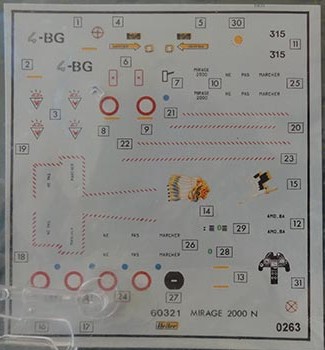
Kit decals are for only one Mirage 2000 Armee de l'Air camouflage scheme of EC 22/4 "la Fayette". (printed on the sheet is no. 60321 but it is the set in #50321). It is still a first generation Mirage. At this decal sheet the "French" blue roundel dots were luckily printed separately to avoid misprinting off center.
The Heller kits are over 2 decades old and the plastic is typically soft as in most HELLER kits.
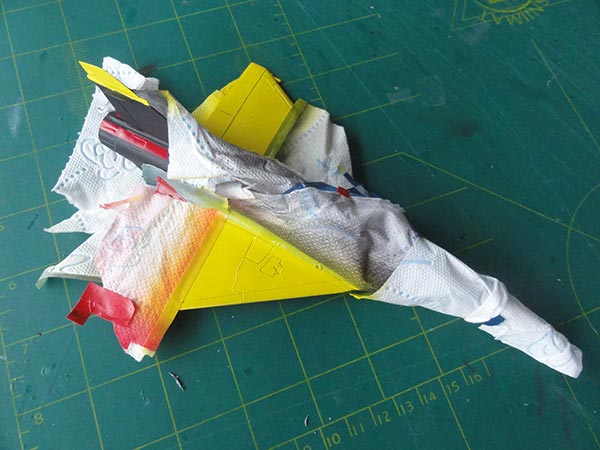
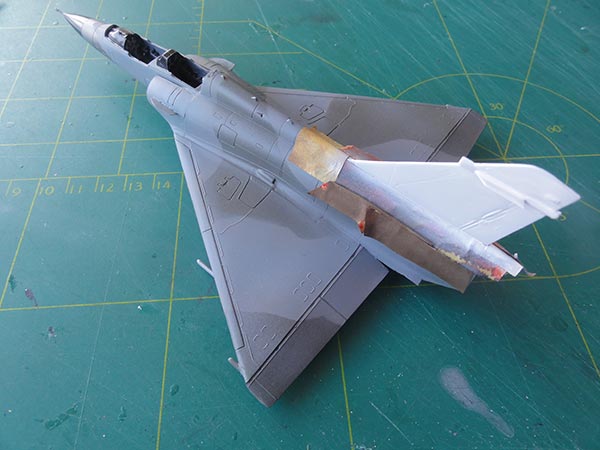
I decided to do a straight forward assembly of these 2 double seater kits as "early generation aircraft" but to add small details from scrap.
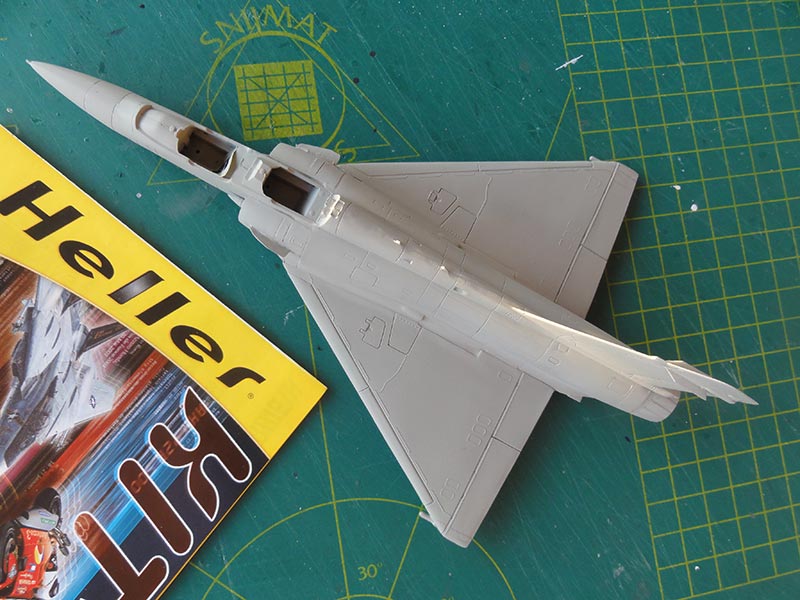
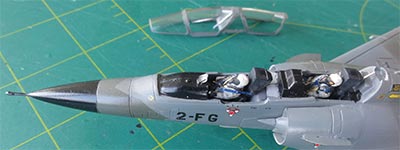
Inside the fuselage I added some nose weight before assembly. The cockpit needs extra detail but this can added later on. Also, I will replace the ejection seats.
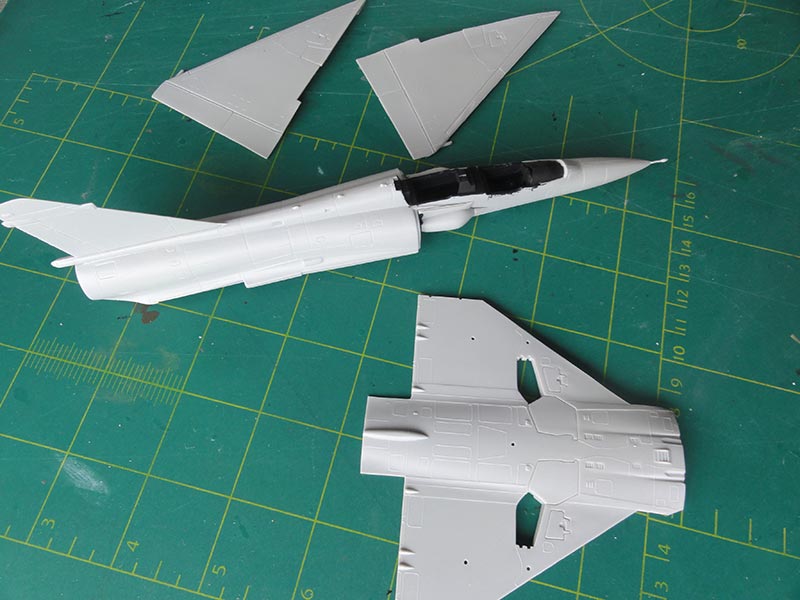
Note the standard RWR stubs at the wing tips and the standard fairings on the vertical tail as per kit. The chaff fairings for a modernized aircraft aft of the trailing edge were added with thin card.
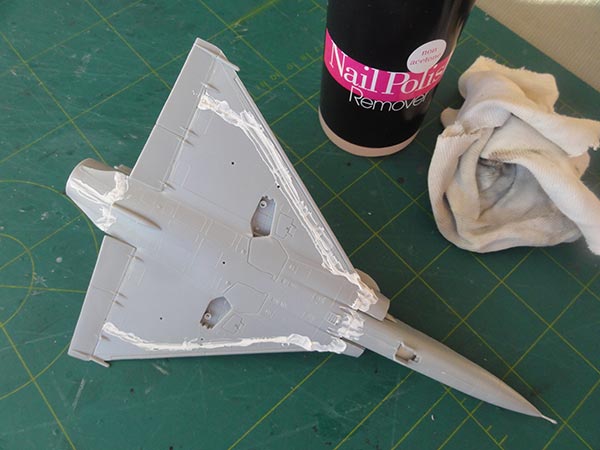
Some filler / putty was needed at smaller joints and ridges. Sand smooth and after that a grey base coat was airbrushed.
The lower surfaces need also some filling at long joints. Remove the filler when dried with nail polish remover (the one without acetone) to retain any raised panel lines.
So two kits were made.
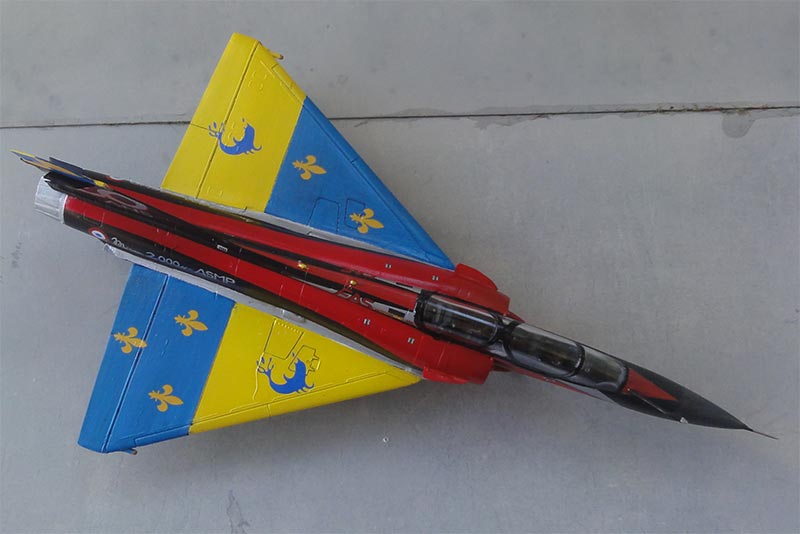
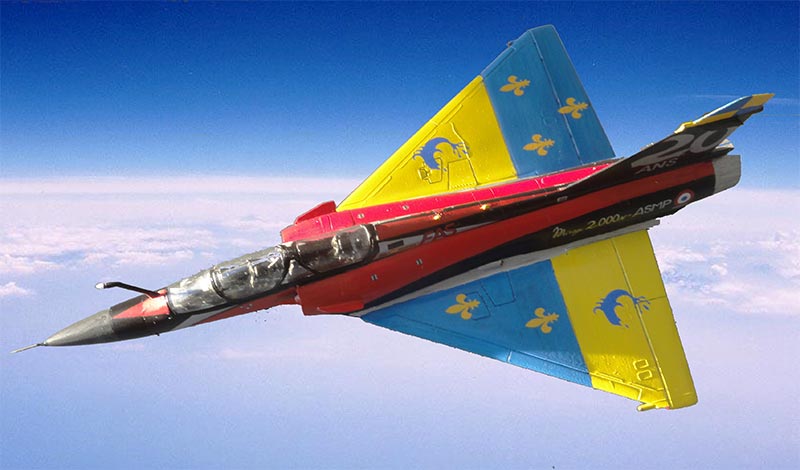
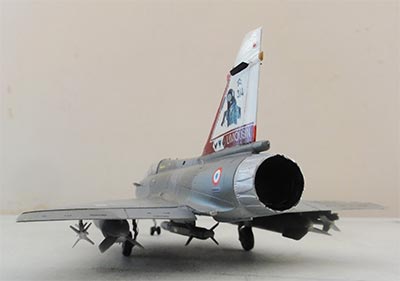
(1) the first kit made in a 20 years celebration Armee de l'Air Mirage 2000N in a colourful scheme in 2008 with a SYHART decal sheet 72-064.
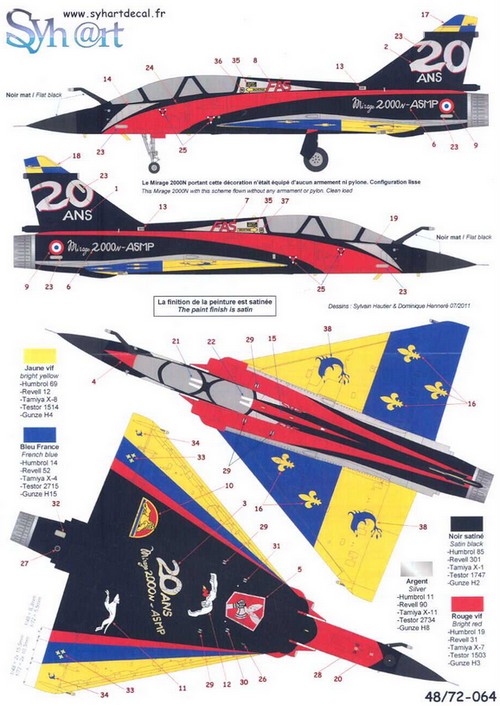
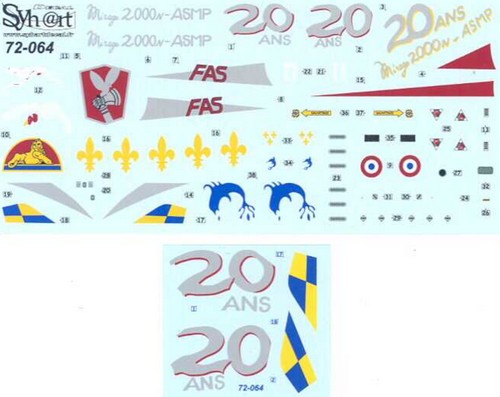
The smaller included decal sheet is a correction.
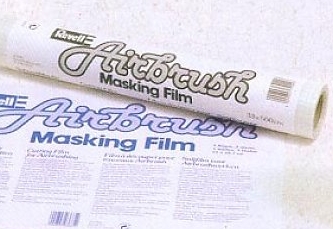
The various colours need planning to apply with the airbrush and masking between each pass, using Revell Film and masking tape.
I started with a white base coat. It is only a base so does not have to be perfect.
- Next after masking was airbrushed RED using Gunze Sangyo H3 gloss acrylic.
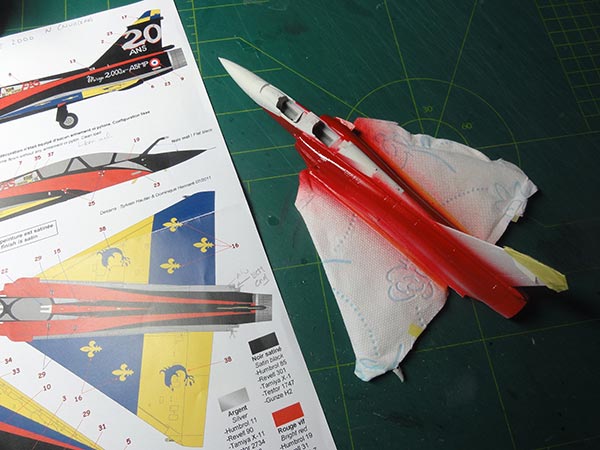
When dried, make masking tape cut in shape using the SYHART paper pattern to cover the red. The wing and vertical tail tips were also masked off.
- Next the black coat was airbrushed, any brand will do.
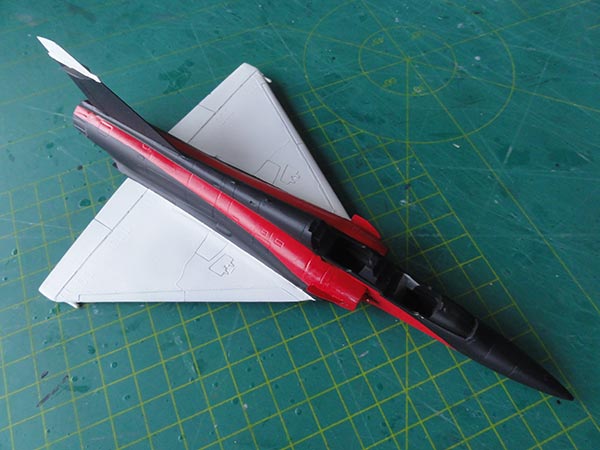
The model was again masked and the yellow airbrushed using Gunze Sangyo H4 yellow acrylic.
- The yellow was masked and next came the blue; here I used Gunze Sangyo H25 (but if you have H15 use that one).
- The long aluminium striping on the fuselage was hand painted with a brush in aluminium colour.
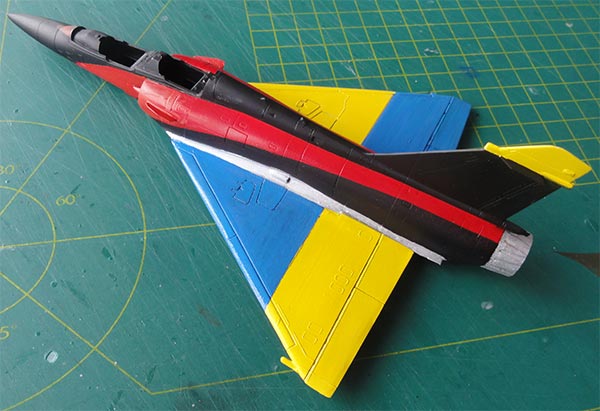
The scheme takes quite some effort but the result is worth it.
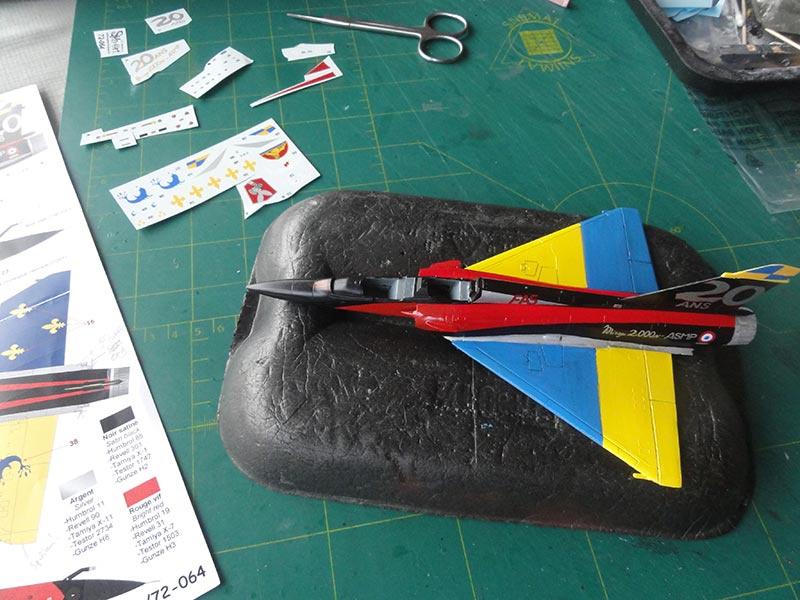
The model surfaces were glossy, so ready to get the SYHART decals. No national insignia were needed and no smaller walkway lines for this "20 Years" scheme.
The SYHART decals are thin and good. Apply as usual. The large tail decals #2 and 23 are the new larger ones on the small sheet and still need trimming to fit.
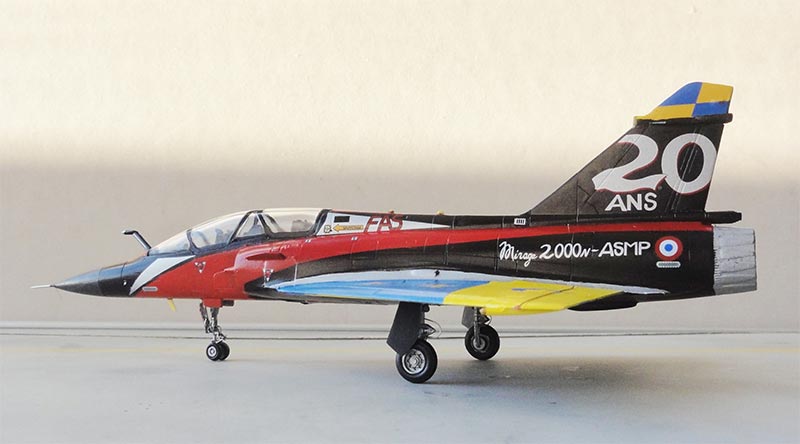
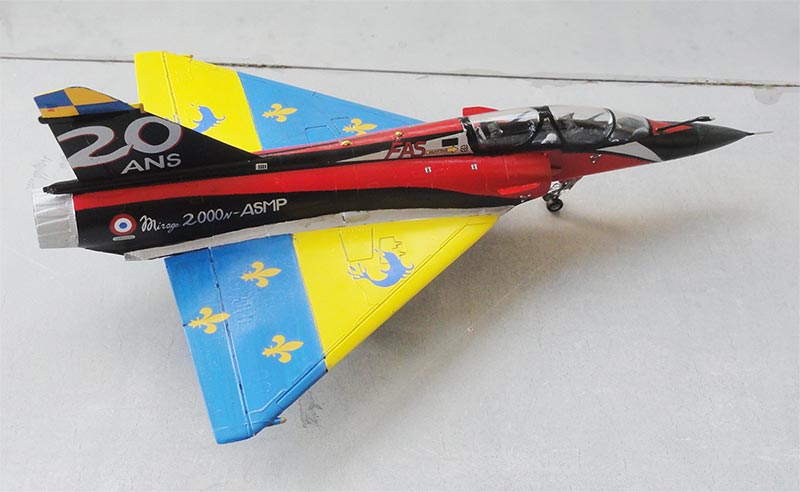
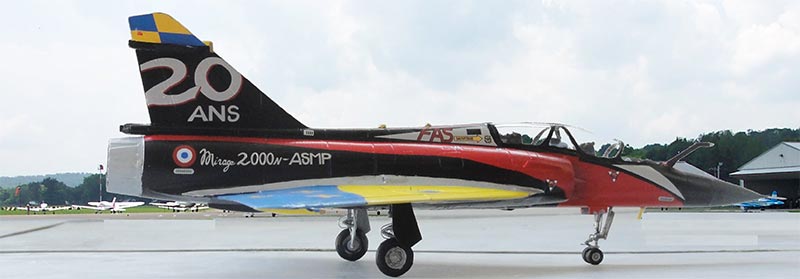
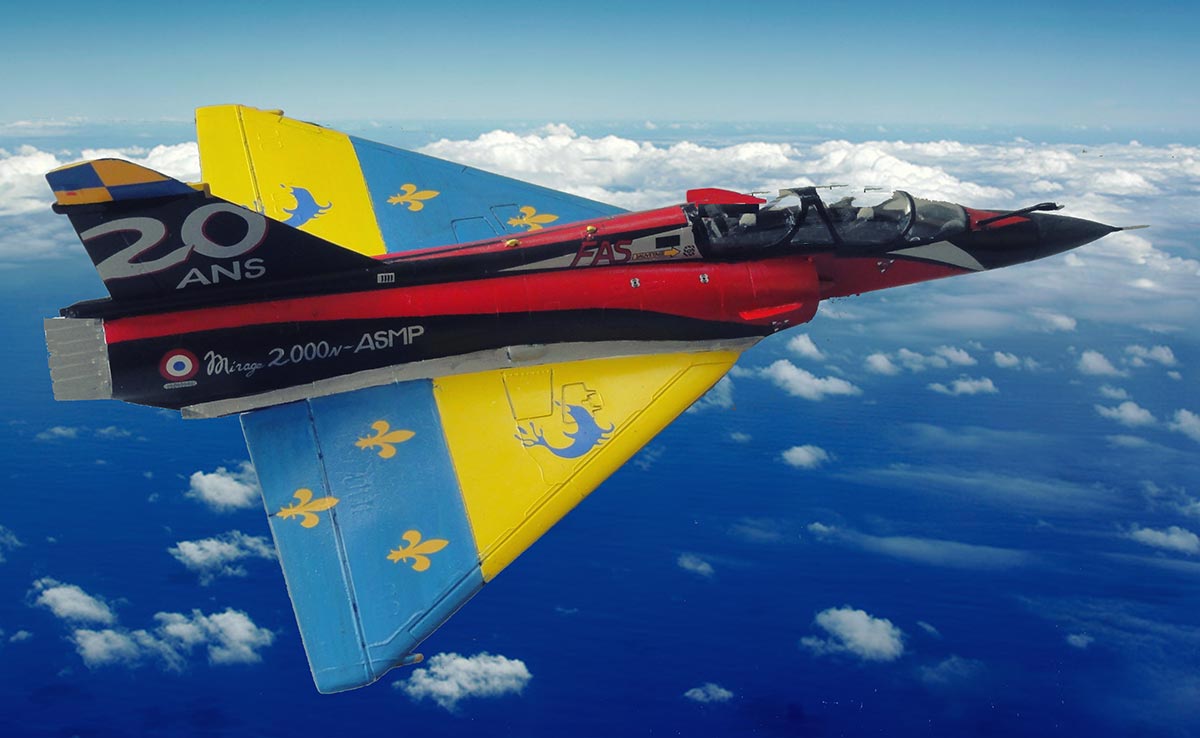
Now the rest of the kit was handled. The cockpit canopy would be set closed so only some cockpit details from scrap were added.
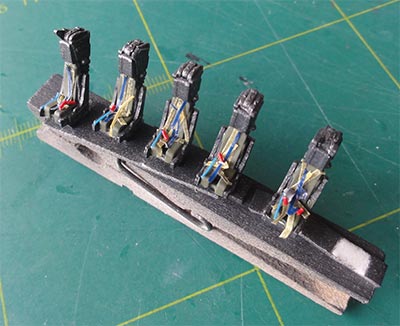
I replaced the kit seats with far better spare ones of the Special Hobby Mirage F-1: the Martin Baker F10Q seats.
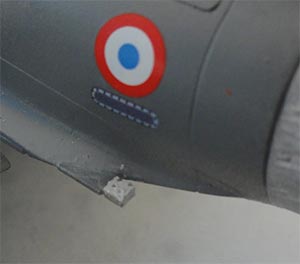
Note also the small red tri-angle on the nose, this is a decal. The in-flight tank probe was added than on the nose as well as a nose pitot seen on first generation Mirages, made from a metal needle. (on later Mirages this pitot was not present).
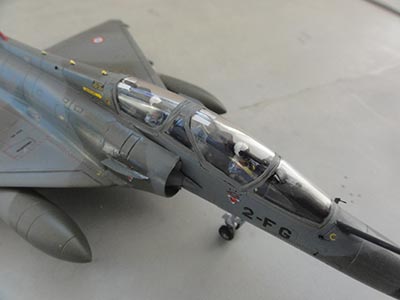
The canopy frames are black and were hand painted with a brush. When dried, the canopy can be set in place and the small gaps were closed with White Glue. When dried, paint these black.
The landing gears were installed as per kit, some hydraulic wires suggested with thin metal wire. Anti-collision lights were painted on the wing tips red and blue and and two red lights at the vertical tail. The smaller antennas were painted yellow.
The model was kept "clean" with no pylons and no fuel tanks.

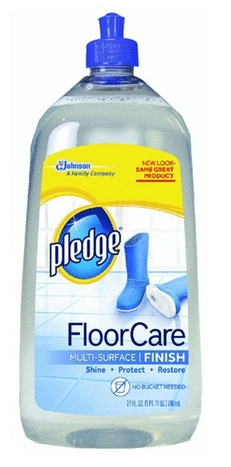
Finally a gloss coat of Johnson Future / Pledge was airbrushed and that completed this model.
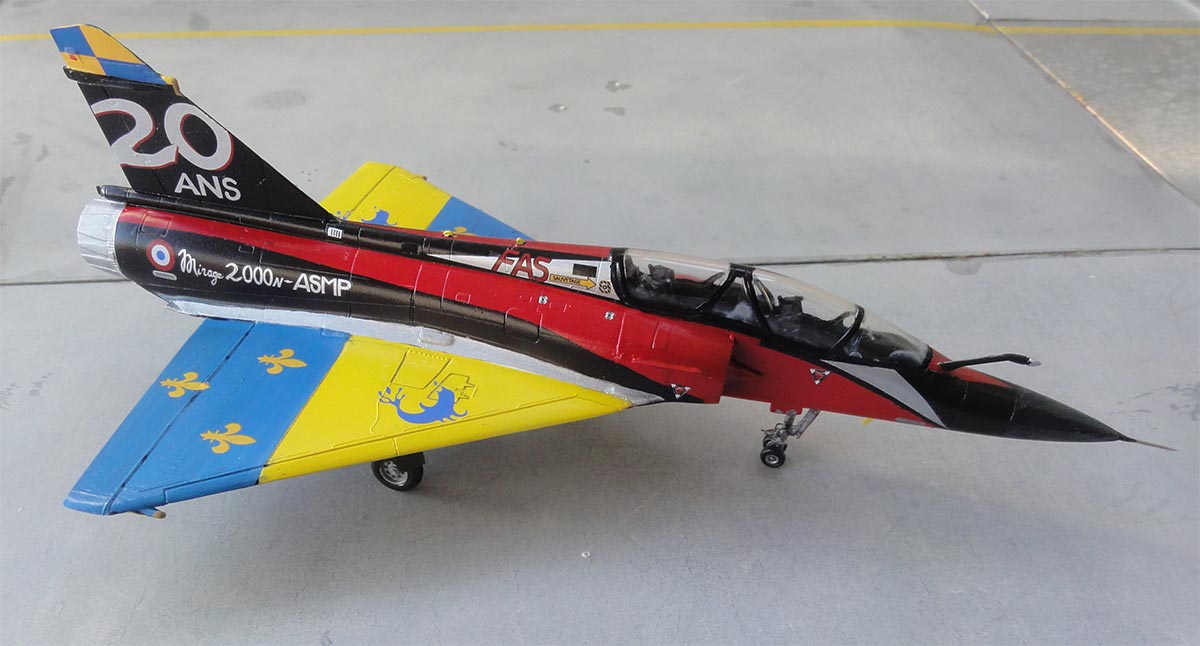
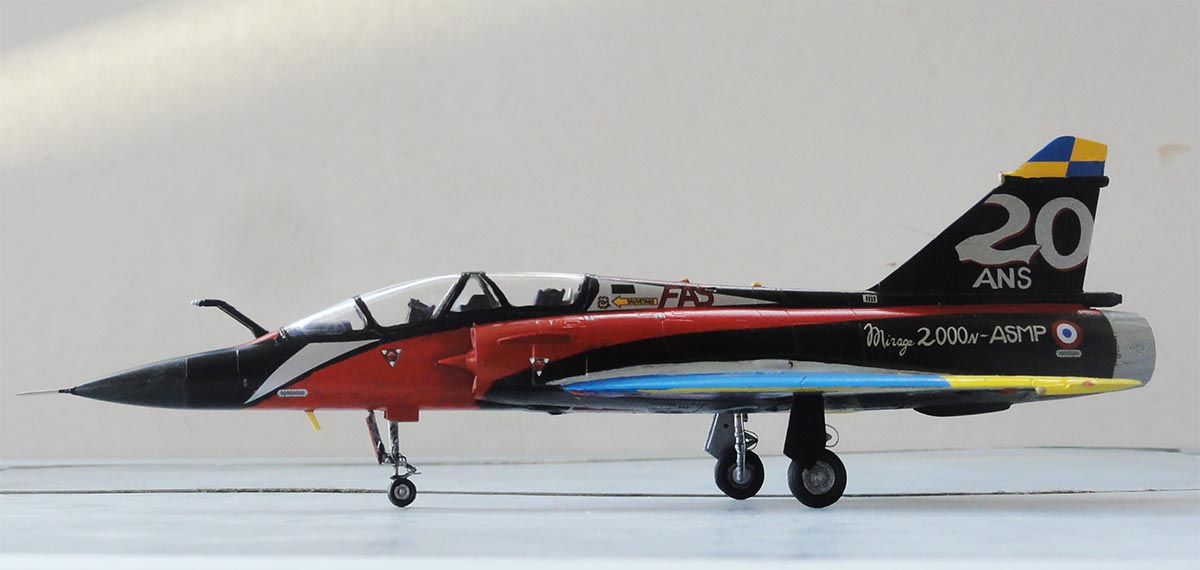
Armee de l'Air Mirage 2000N 20 years
.... in a scenery...
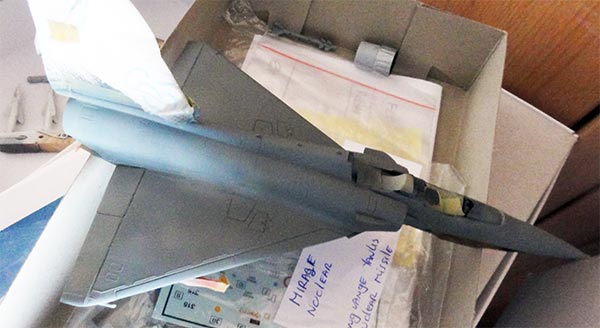
Another 1/72 Heller Mirage 2000N kit was made, similarly assembled as described above.
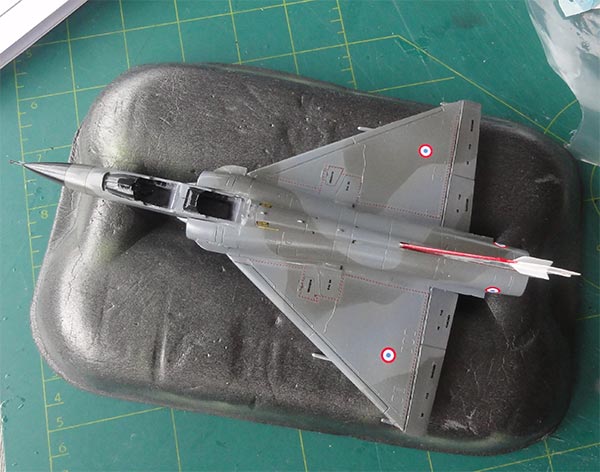
It will be finished in the standard Armee de l' Air Mirage 2000N with an ASMP nuclear missile. This older generation Mirage 2000N still had the nose pitot and the standard fairings at tail- and wing tips.
The kit itself was assembled as described above for the standard Mirage 2000B. The 2000N version was very similar but with other internal systems for its nuclear role. The pylons for the ASMP and long range tanks were also set in place as they would get the paint as needed.
I also added the 2 chaff dispenser fairings on the fuselage sides aft of the wing trailing edges. These were made from thin card (similarly as described here for the previous made Mirages). I also drooped down the trailing edge flying surfaces a bit.

I found many inspiring nice schemes/ drawings made by Mr. "Michel" on this page/ blog at http://miprofiles.unblog.fr/2014/12/17/mirage-2000n [ Courtesy Mr. "Michel", Merci!]
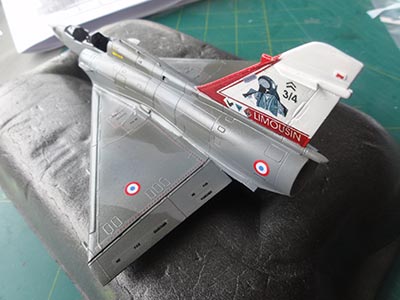
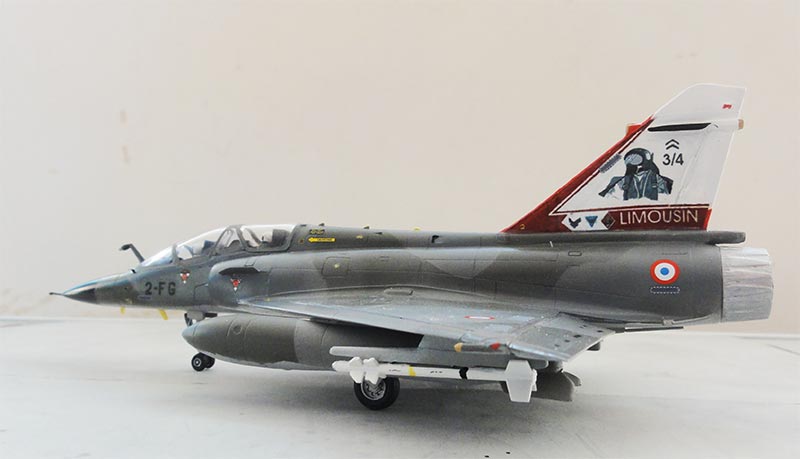
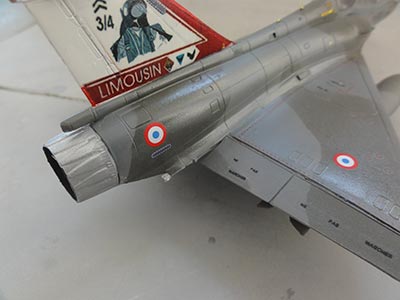
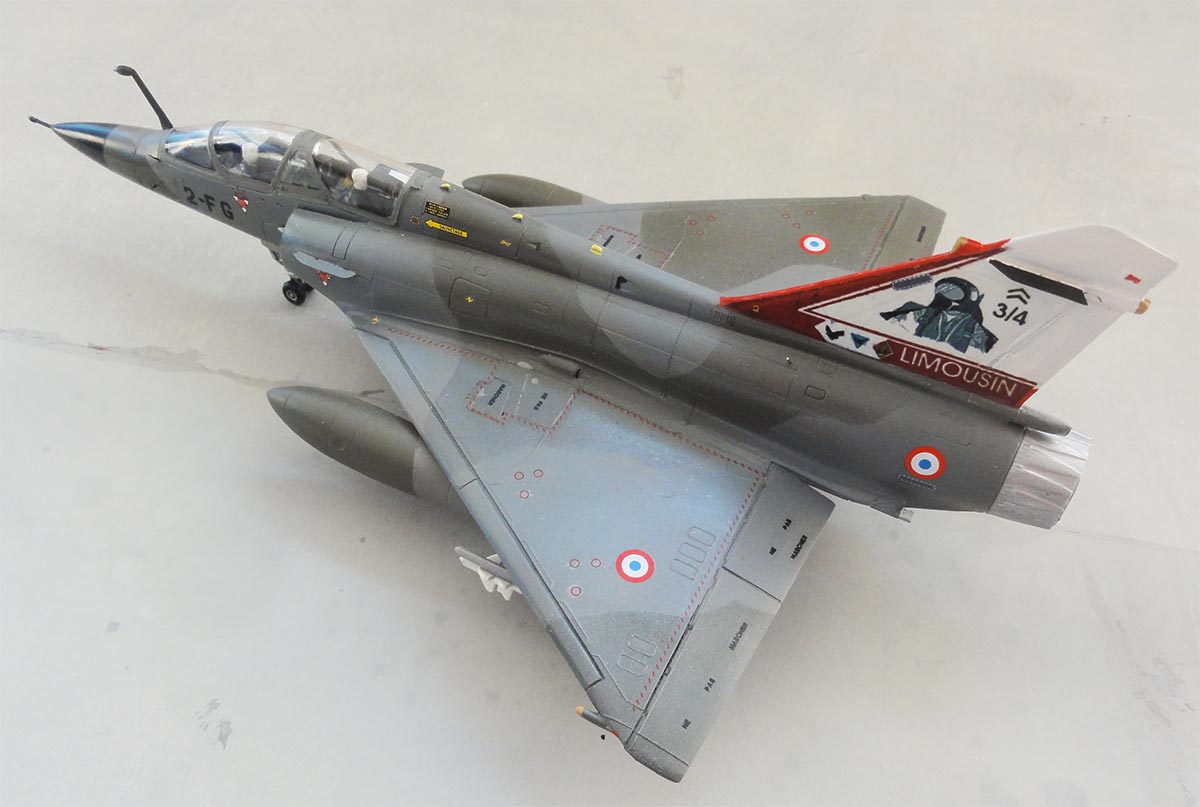
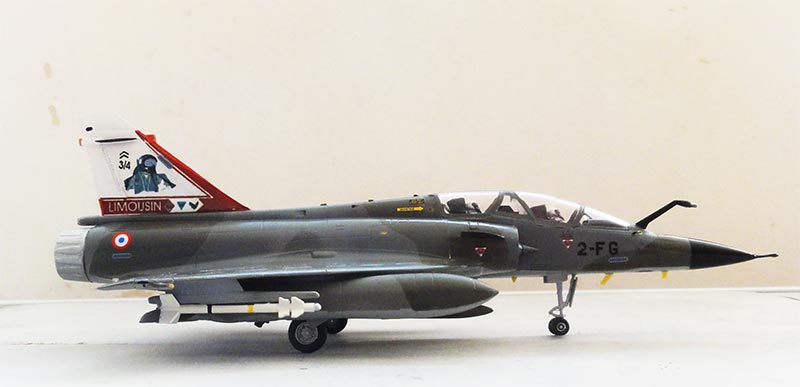
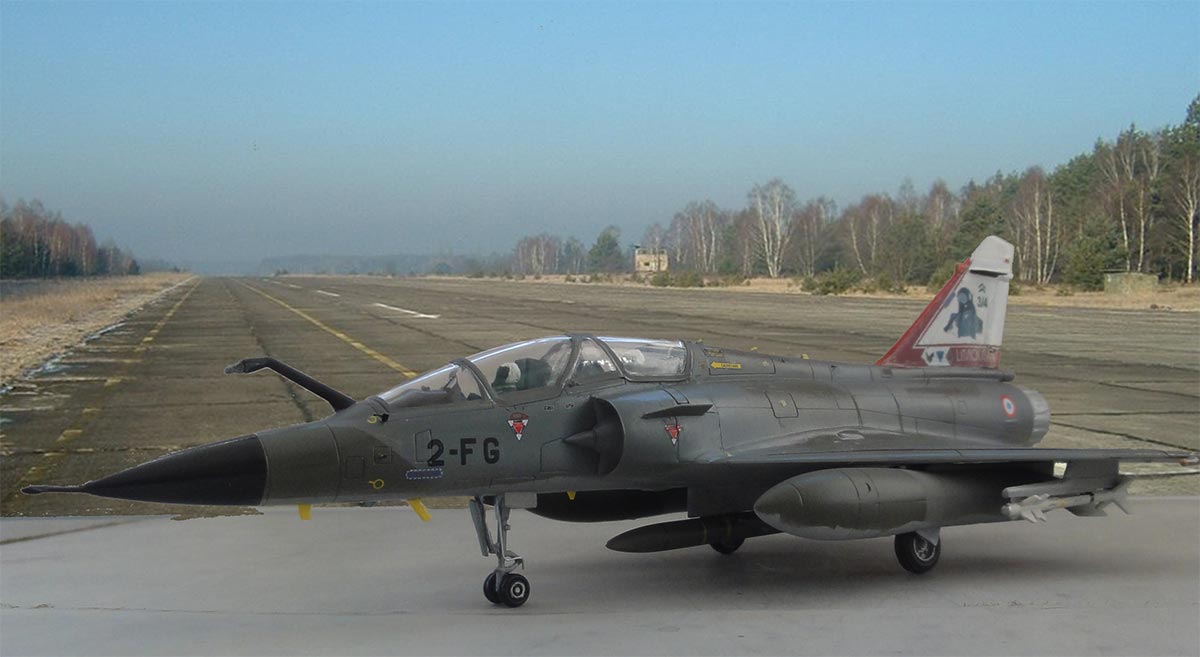
A colourful Mirage 2000N was the one from "EC 3/4 Limousin" as based at "Istres le Tube" in 2004. The particular aircraft has the standard Armee de l'Air scheme but with a special drawing on a white tail. It was decided to finish in this scheme.
But first the standard Armee de l'Air camouflage colours were airbrushed. Masking was done between coats with Revell masking film and tape.
I used these:
- lower surfaces a mix of Revell aqua 371 light grey with 20% aluminium mixed in;
- after masking the lower surfaces.... upper grey approx. FS36231 Gunze Sangyo 317 acrylic than followed;
- after masking.... upper green pattern approx. FS34079 using Gunze Sangyo 309.
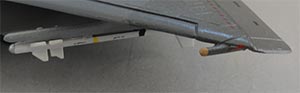
The long range fuel tanks in the kit were also given these colours. The ASMP missile was given an aluminium coat.
A Spirale chaff dispenser fairing was added aft of the wing trailing edges on both sides.
As the tail would get a special drawing on a base white tail, the tail was airbrushed white.
HOME MADE DECALS
A tail section of the drawing found on the internet was printed on first plain paper. I measured the needed size for 1/72 scale. When resized in my graphics program, it was again printed to check the correct size. I made 2x2 detail drawings and the starboard and port drawing needed changing as the LIMOUSIN text is mirrored, this was done with the photo edit program.
When it seemed good, the drawings were printed on Bare Metal Foil White decal sheet, in my case for inkjet. Leave a set to dry for 48 hours. On the printed decal, no less than 5 coats of Johnson Pledge / Future varnish was airbrushed. This should protect the printed inkjet inks. New followed a coat of Microscal Liquid decal film applied with a wide brush. The prints were ready after 24 hours drying for cutting an applying to the model tail.
The tail leading edge painted was brush red. The red would blend in the drawing decal to be made. The white portion of each decal was cut away above the antennas on the tail.

Before applying the various decals, the model was given several coats of Johnson Future/Pledge gloss varnish with the airbrush to avoid "silvering" ( = spoiling how the decals look afterward as tiny air bubbles are trapped below the decals ).
I used for the remainder some kit decals but many came from the Revell Mirage 2000D and Italeri decals of previous made kits. (the French Heller roundels were "off center" printed and were unusable). The standard stencils and markings like red striped walkway lines for an Armee de l'Air Mirage 2000N were applied.
The remainder of the model with the gears etc. was now to be completed.
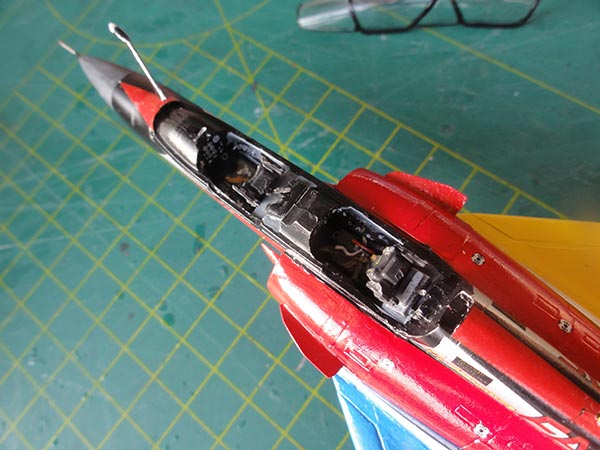
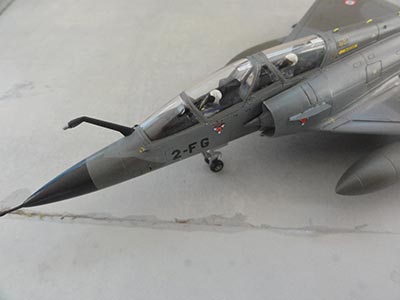
The cockpit interior was given the final coats, I used medium grey on most inside cockpit panels and consoles. The canopy would be set closed so I used some trimmed kit seats and added straps. (not better seats, these would be hardly seen).
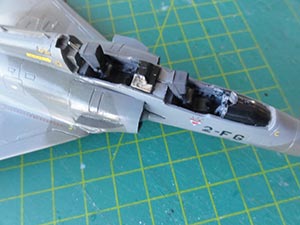
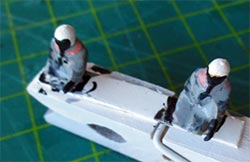
The Heller kit has a one piece canopy and I decided to set this one closed on the model. Also, I found 2 reasonable pilot figures in the spares box. I had to remove their legs to fit them in. These were installed along with some harnesses made with decal stripes.
 ..
.. 
The frames on the cockpit canopy were painted. Inside 2x2 stripes are seen at the hinges. When dried, the canopy was set on the model. The fit is not too bad, I used white glue to close the gaps. When dried, paint with a fine brush in the surrounding camouflage colours. Also, a small structural rod was added at the intake upper lip on both intakes.
Now the landing gear bays were painted dull aluminium and when dried the gears installed. Other details were added such as the ASMP and long range tanks and a Magic missile.
A Spirale chaff canister made from a plastic bit was set onto the added chaff fairing.
.. 
I also saw an arrestor hook under the tail and this was made from rod and added below the aft fuselage. Some small antennas were set under the nose and upper spine and painted yellow. The nose pitot and tank boom was installed.
Anti-collision lights were painted and finally a gloss coat of Johnson Future / Pledge was airbrushed and that completed this model.
FRANCE ARMEE DE L'AIR

Back to 1/72 Models
(c) Copyright Meindert "designer"/ All rights reserved. Your comments are welcomed by webmaster
Created this page on April 12, 2018