[ page 2 ]
Mig-23 model in 1/32 scale of TRUMPETER CHINA
... continued from Page 1.....
The tail pipe section was used straight
out of the box.
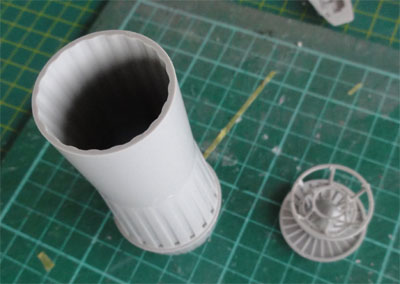
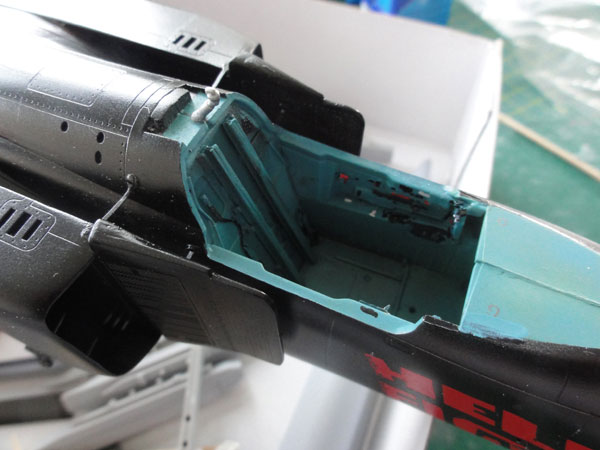
Engine assembly is Step 12 in the instructions. I decided to keep the engine separate.
The engine was made from the kit parts, except for the rear tail pipe as I needed Parts Q5, Q7 (see Steps 18 and 19 of the instructions) for the rear fuselage. I was lucky to find some similar parts in the spare box. I used part "tail sprout I" on the model, the spare one "number II " on the engine model. Some extra wiring was added on the outside. The engine got some varying hues of metal coat of Alclad applied with the air brush.
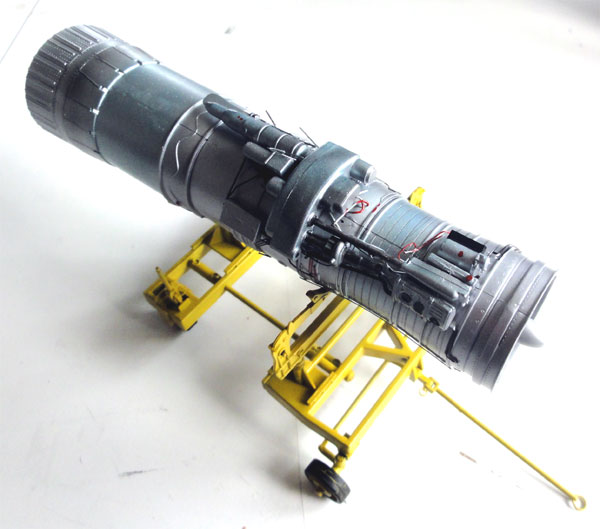
The nice looking R-29 engine is seen
here.
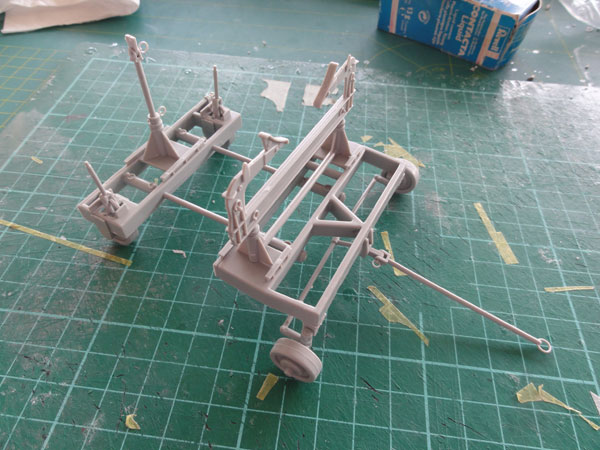
The yellow dolly for the rear fuselage
is not used, as the rear fuselage was not seperated. I will use the engine
dolly to show the engine although not correct off course.

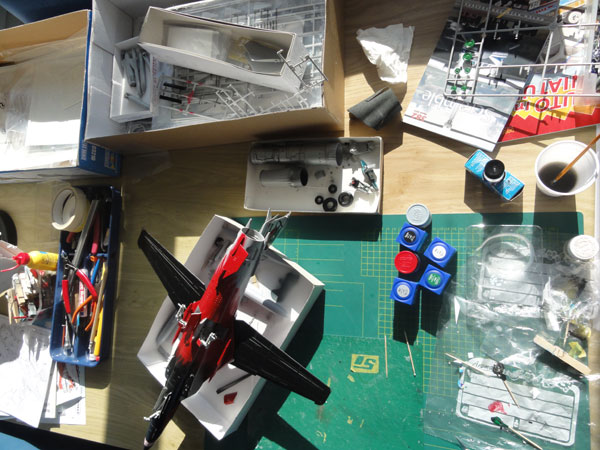
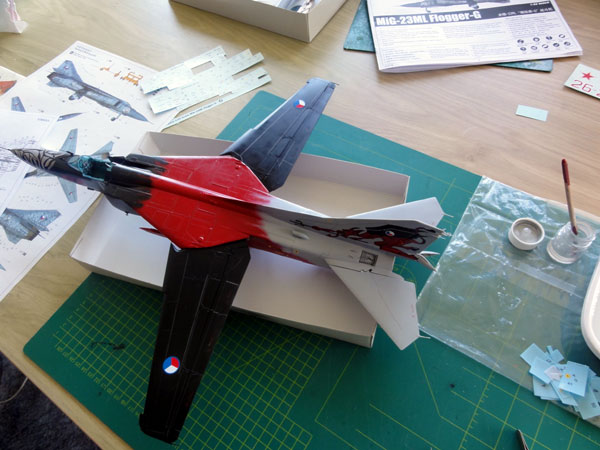
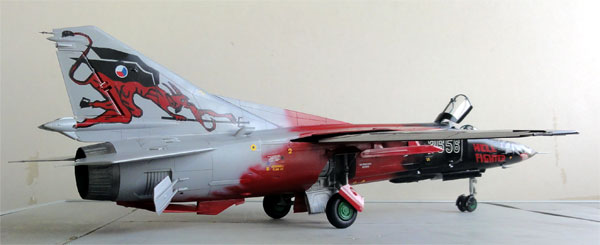
Markings and Painting
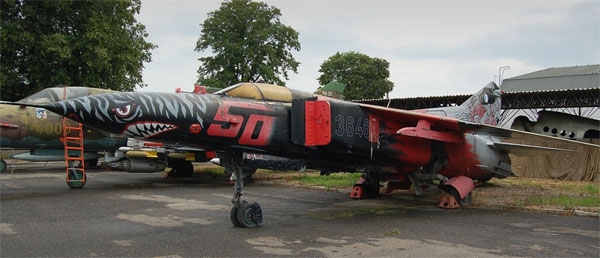
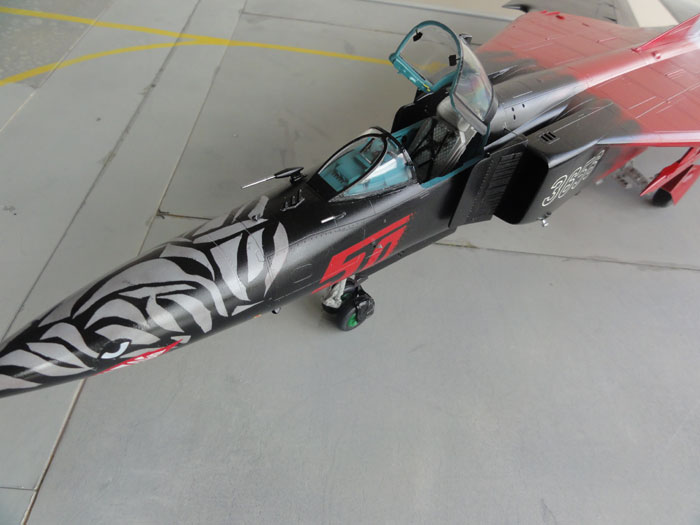
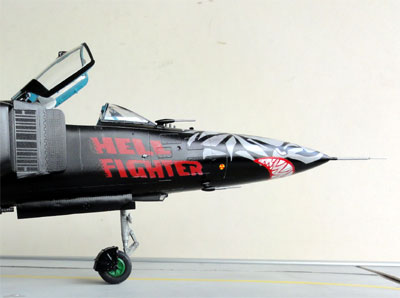
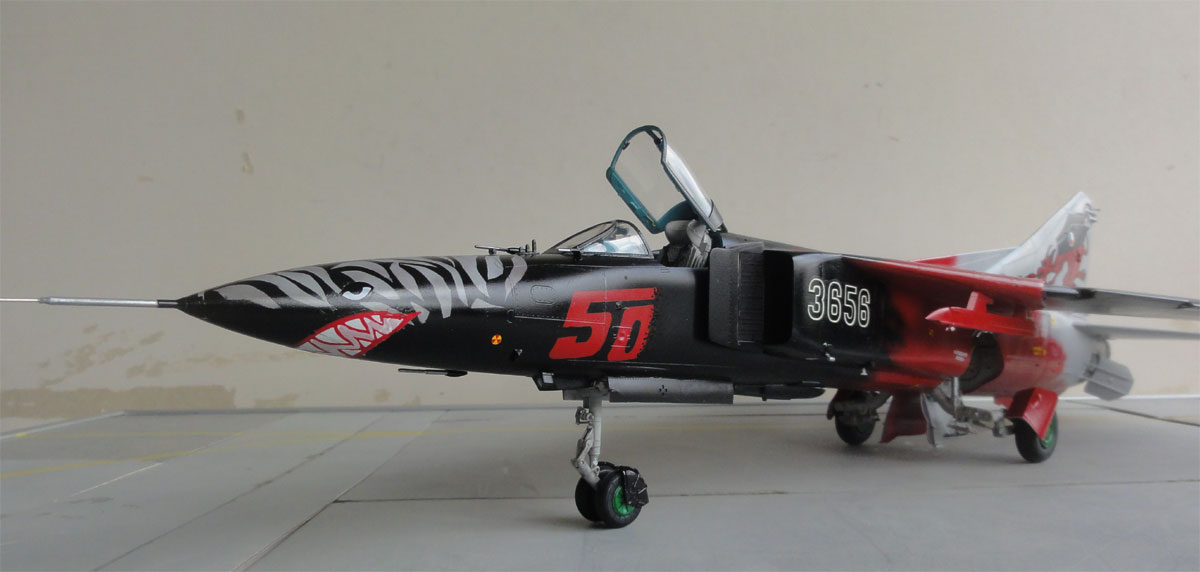
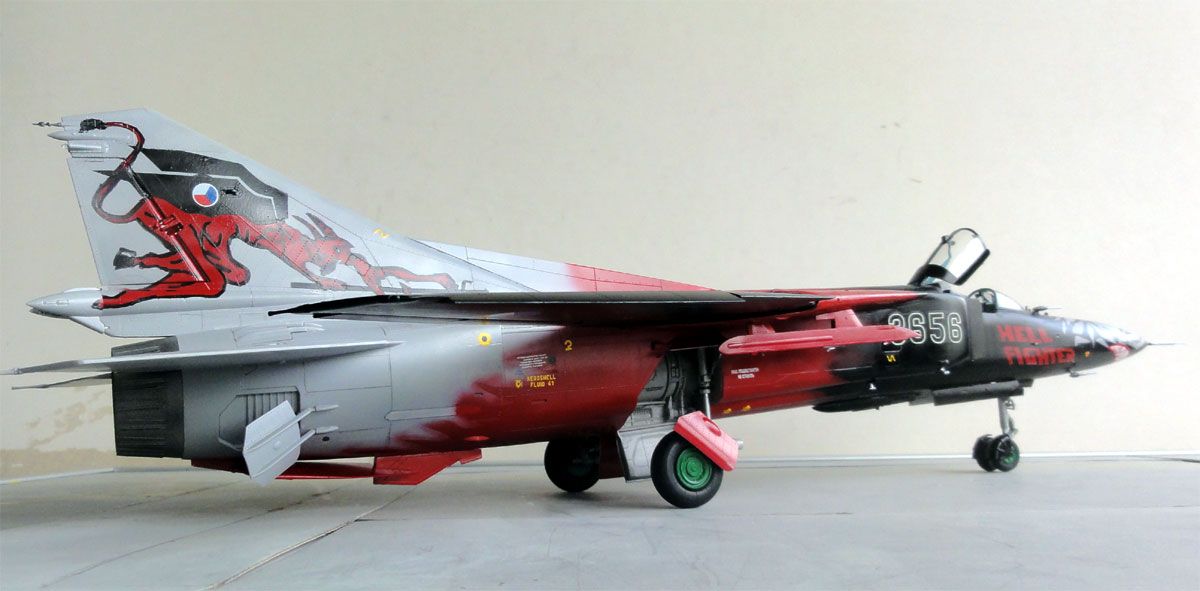
It was now time for the markings and details of the Czech AF HELL FIGHTER paint scheme. From the internet, numerous pictures can be found. I also had some pictures I took at Kbely museum, Prague, Czechia.
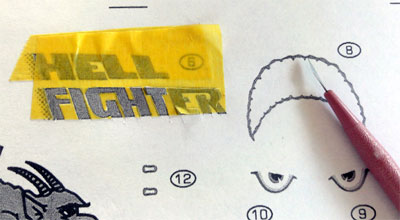
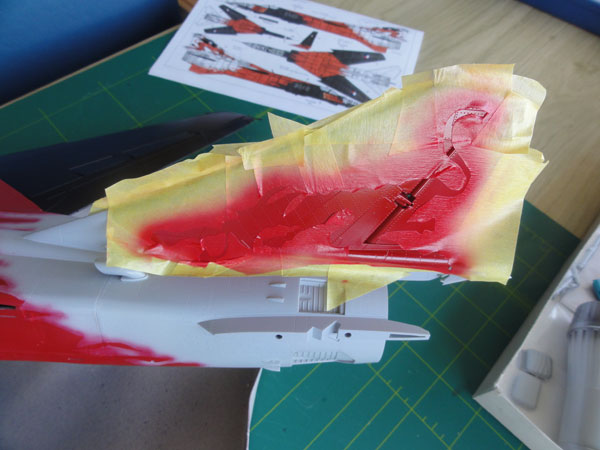
I was not willing to pay large amounts of money for a couple of decals, so decided to make my own through masking and airbrushing. I used fine Tamiya tape for the masks.
I first made op paper patterns for the HELL FIGHTER markings I got from a 1/72 MiG-23 MF kit from RV Aircraft kit no.72001. These decals were enlarged with a photo copier to 1/32 scale by enlarging it to 225 %. The pattern was used to as guide for the size of the masks.
I started with airbrushing a red base
coat on the model.
 .
.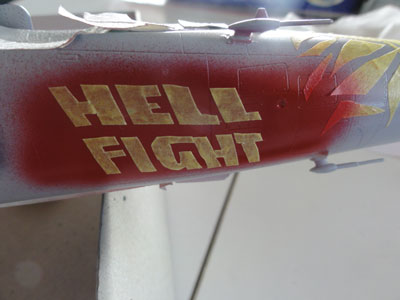
With a surgical knife, I cut out
the patterns. These were positioned on the model.

Then, I set the patterns for the rear
fuselage "fires". When done, the model was sprayed gloss black were appropriate
using acrylics from Revell.
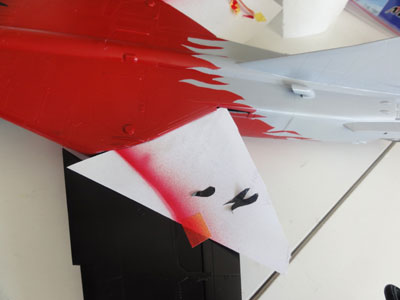
The rear "fires" pattern and mask
is seen here as well. After that, some "overspray" was applied as well
with the airbrush.
 .
.
The result, starting to peel off
the mask. The dots on the 50 number will be applied with a permanent marker.
Note: Small pitot tube (E) still to be added, as well as "odd rods".
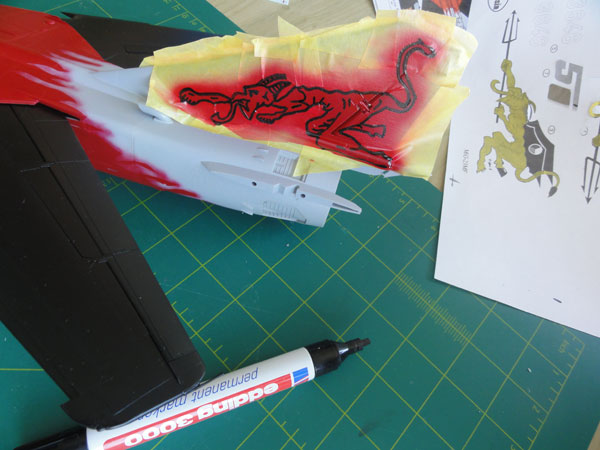
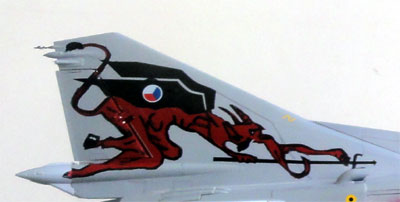
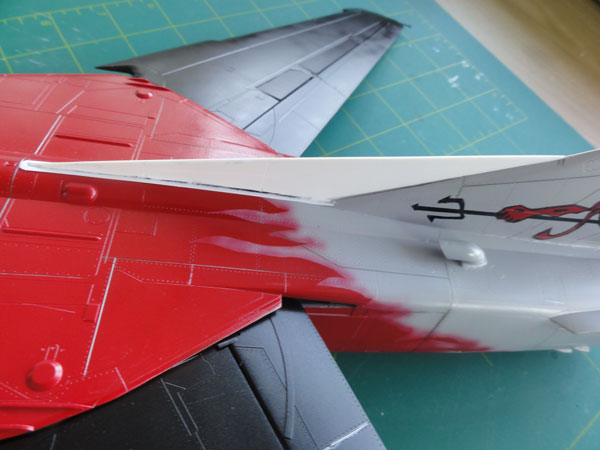
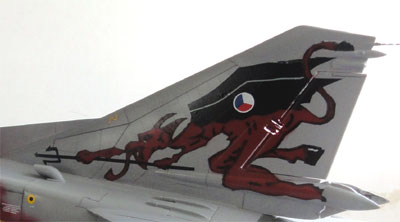
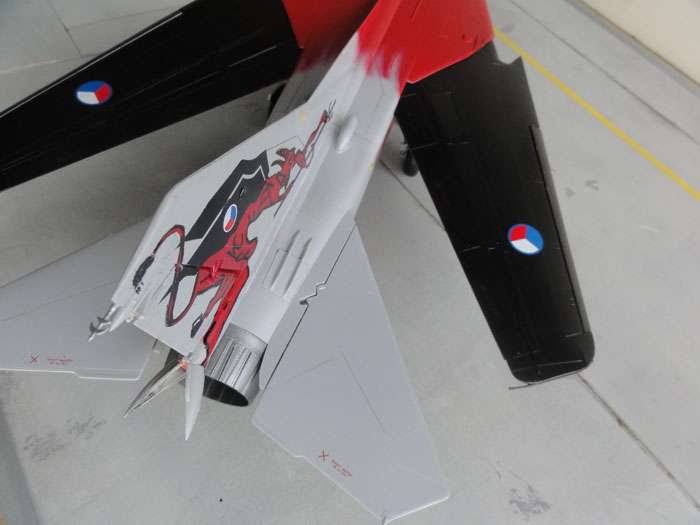
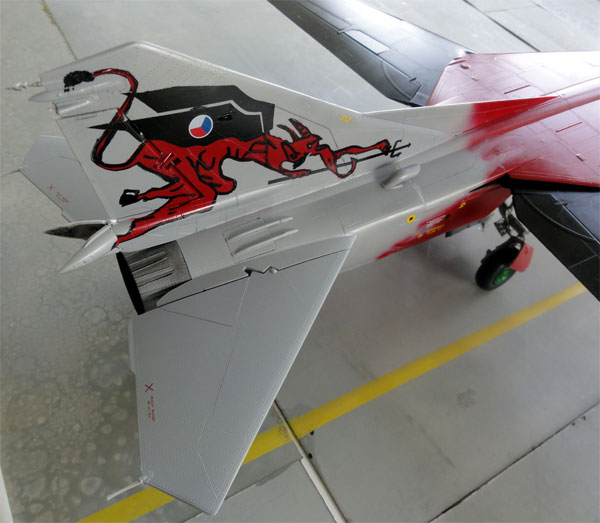
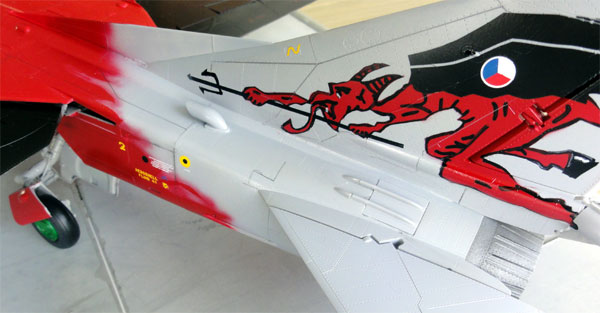
The red devil on the tail was made
in a similar fashion, masking and spraying.
 .
.
The black edges were carefully applied
with permanent black marker.
 .
.
The black areas in the marking were
made with spare black decals cut in shape, the small Czech roundel came
from the spare decal box. And here the result...
.
![]()
As noted earlier, I forgot at this
stage for "some reason" to make the MF conversion of (A) longer finbase
of the vertical fin.
NOTE: TRUMPETER now has issued later on this variant as well as kit no. 03209 of the MF. If you buy this kit, this will reduce the conversion work.
From paper card a shape was made as
template to make the longer finbase. When it looked to fit OK, this was
made from plastic card, sanded in shape and fitted on top and in front
of vertical fin.
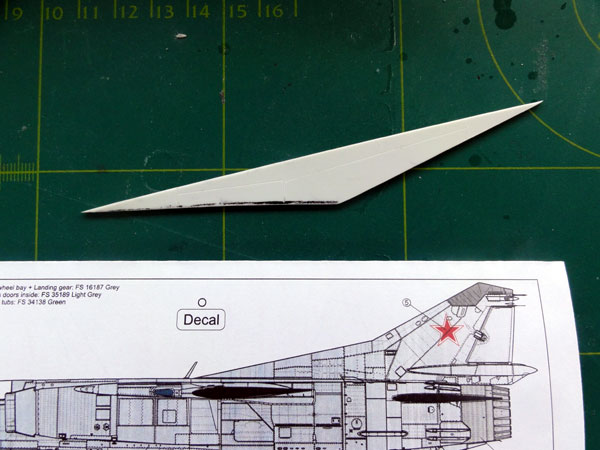
The longer fin base was simply installed
and the gap filled. It will be sprayed red and grey later on.
 .
.
For the MF variant I also also forgot
earlier the modification for the (L-) "cable duct fairings" at tail section
below horizontal stabilizers. These were made from card.
The folded ventral fin from the kit was simply added as well.
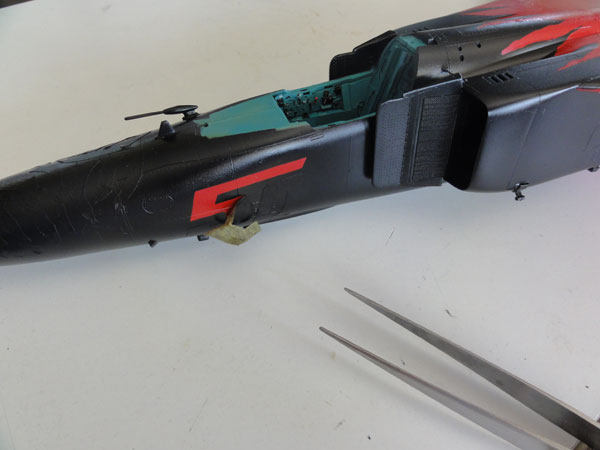
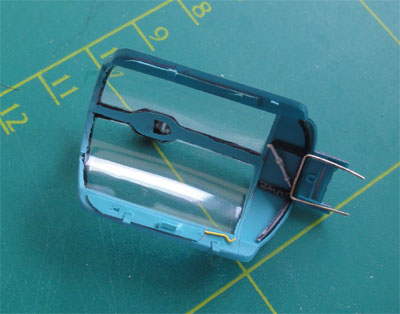
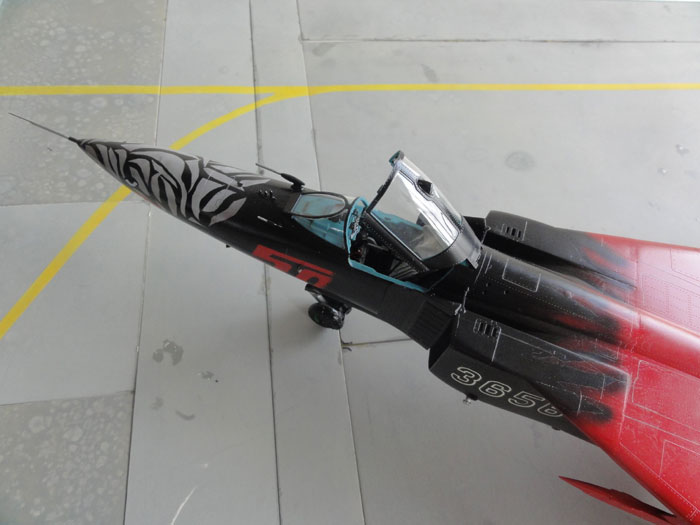
Inside the canopy some extra detail
was added made from thin card as well as some metal wire to set it in position
and to keep it detachable. Aft of the canopy two small holes were drilled
in the fuselage spine.
 ....
....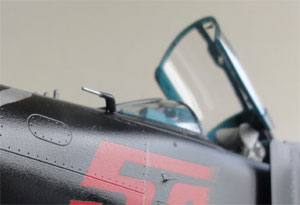
In the spine at the canopy "hinge",
I drilled 2 small holes to hold the canopy. Some fine wire was glued on
the canopy to set it.
Small mirrors were added as well,
nicely included in the Trumpeter kit (see Step 25 in the instructions).
The small MF pitot tube (E) was added,
found in the spares box and the AoA vane slightly repositioned. Also the
"odd rods" antenna of the MF , modification (C), was added in front of
windshield, so do not use antenna part H15.
Adding the decals was the next step. First, the model got two coats of gloss Johnson Future /Clear.
Note that for the HELL
FIGHTER the amount of stencilling is very limited. Also, no
weapons / stores are needed, saving a lot of work on this model. For the
big number on the intake, I could not find correct number decals, so I
settled for a couple from the spares box, although not entirely correct
as it reads 3656 and not 3646.
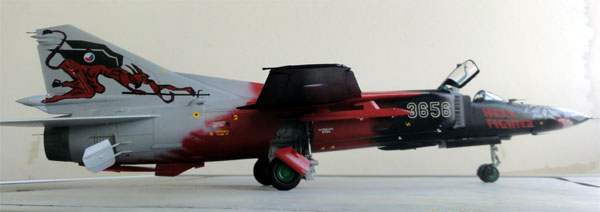
The various parts were added, like
gun pack, undercarriages and opened up parachute doors at the tail base.

A brake parachute was suggested with
a piece of a orange plastic bag.
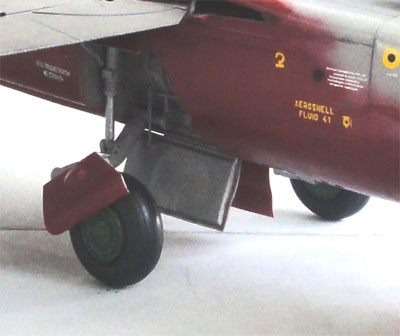
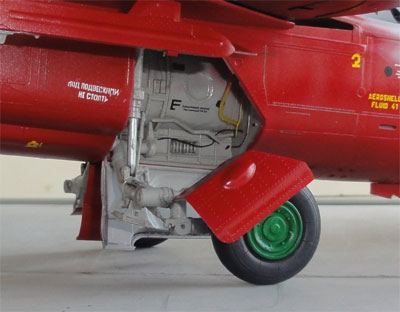
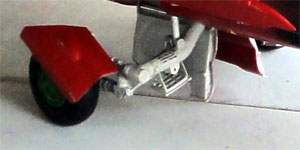
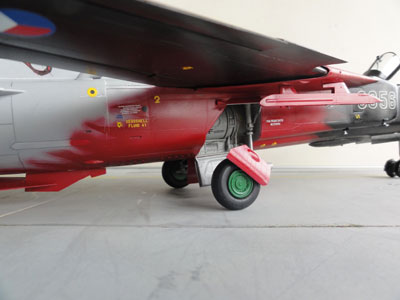
The assembly of the undercarriage was no problem as shown in the instructions, I used the metal parts for strength. Remove the moulded edges on the parts with a file. The gear legs were sprayed light grey, they are about FS 16187 (so not silver).
For the MF, use the alternative nose-wheel doors in the kit (parts A1 and A2), modification (G).
 .
. 
I also now finally did the smaller
changes for the Mig-23 MF :
D- AoA vane on left fuselage nose was set slightly at different location below windshield
F- the sensor fairing below nose (part V3) was sandded slightly in different shape
H- I did not fit not 2 sensor pairs below intakes, but single sensors (parts H19)
I- use single sensor , part H11 and H122 not needed on intakes
K- fueldump pipe (part G27) is not needed
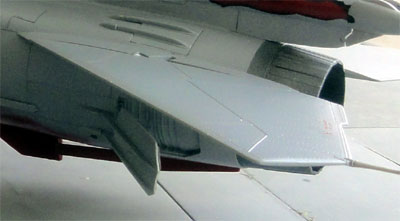
The air brakes were set closed on
top and the lower brakes set open.
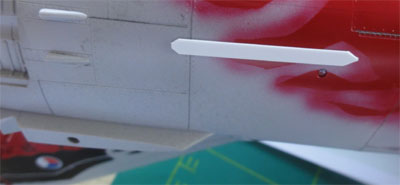
The panellines were slightly scribed, removing some paint to suggest weathering which was kept to a minimum for this fresh display aircraft.
On the undercarriage legs, some wash was applied as well as in the gear bays. For the HELL FIGHTER, only the two inboard pylons were added. (Contrary on what I have seen on internet, the shapes seemed OK to me).
That completed the model!
![]()
 ...
...
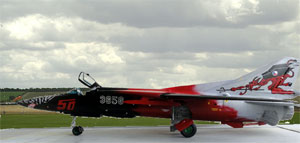
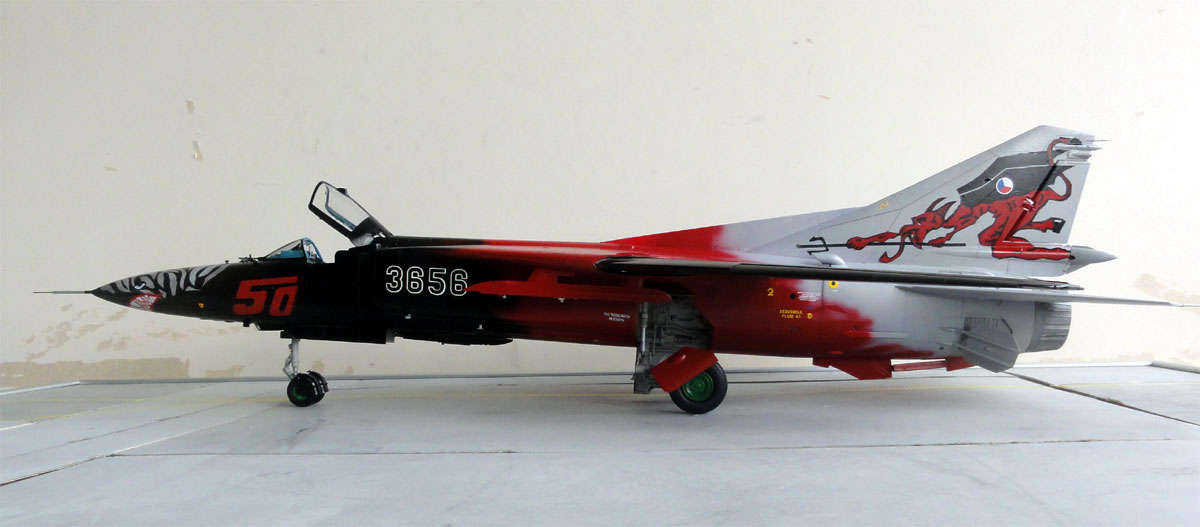
The 1/32 MiG-23 MF with special home airbrushed scheme "Hell Fighter" is now a special model in the collection.
Back to 1/32 scale Models.......
(c) Copyright Meindert "designer"/ All rights reserved. Your comments are welcomed by webmaster
Created this page June 2, 2011