ART model
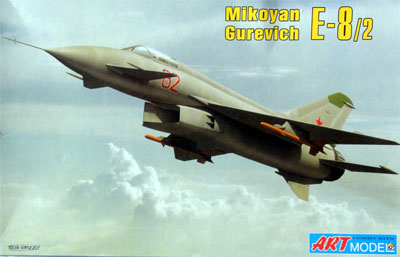
1/72 scale kit of the Mikoyan Gurevich YE-8 by ART model
OKB Mikoyan-Gurevich
designed end fifties, the E-8, as a more advanced fighter aircraft as follow
up derivative of the MiG-21. It
was to be equipped with a "Sapphire" radar in a large nose and advanced
air to air missiles. Developed under the "S-23" program (that resulted
in the later MiG-23), a large
new engine was to be used to give high supersonic speeds up to MACH 2.6
- 2.8. To fit the large radar nose and to have enough air throughput, the
air intake was set below the forward fuselage. Also a novelty was introduced:
two smaller canards on the nose. Designated E-8 (as the MiG-21F was the
E-7), two prototypes YE-8 were built and it flew in April 1962 for the
first time. An engine exploded during a high speed test flight in September
1962. Also there were other problems to contain the shock waves in the intake
leading to compressor problems. These problems could not be solved completely
and meanwhile the MiG-21 and the MiG-23 aircraft programs evolved further.
The E-8 program was cancelled.
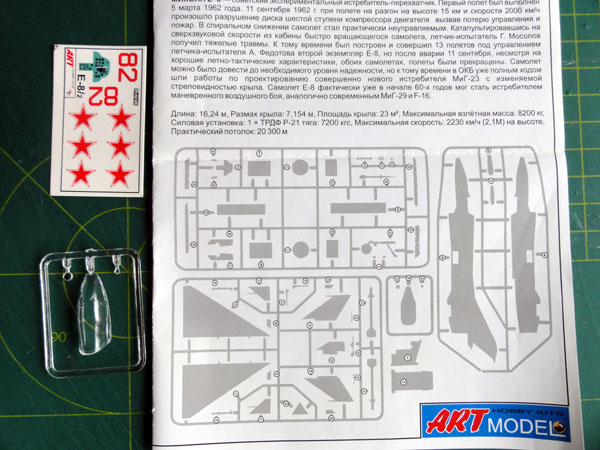
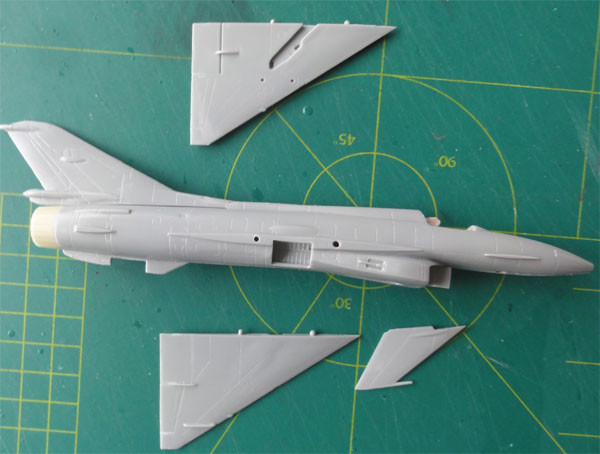
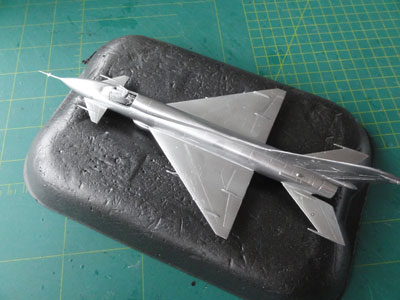
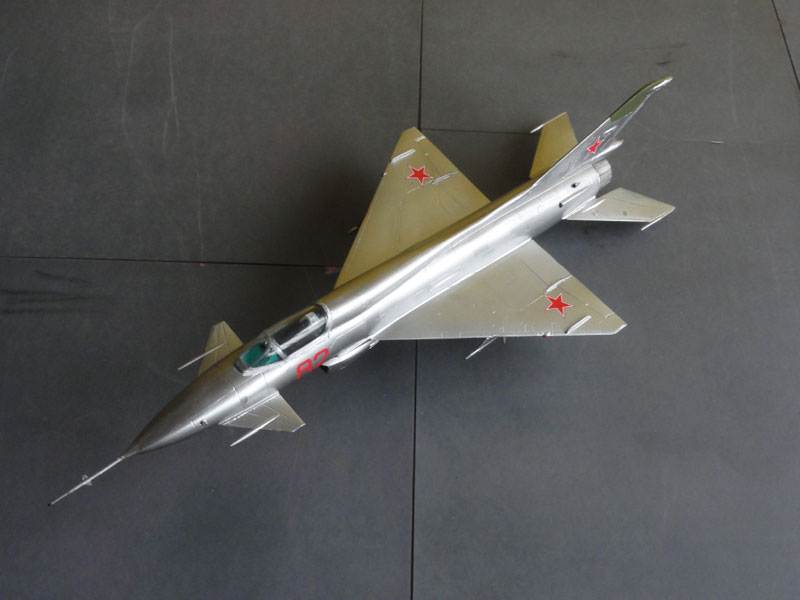
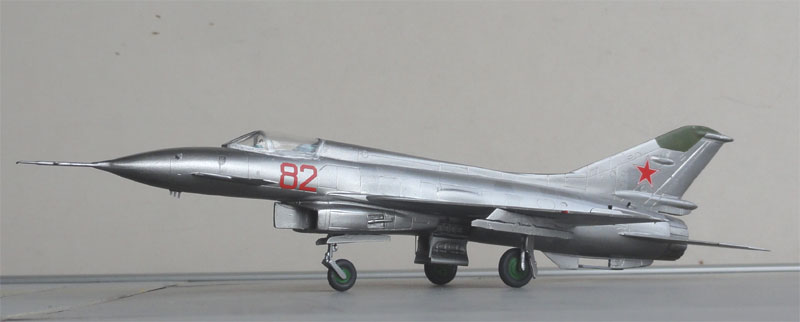
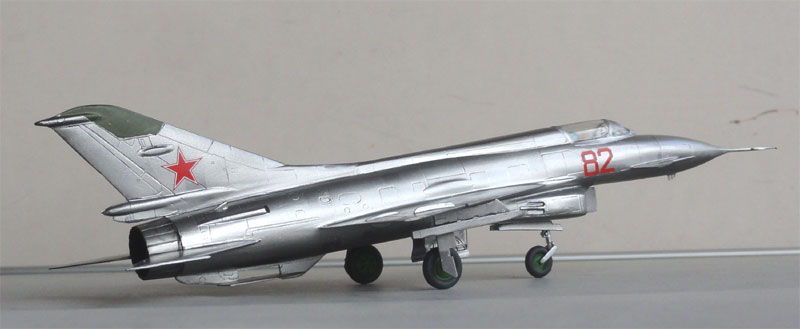
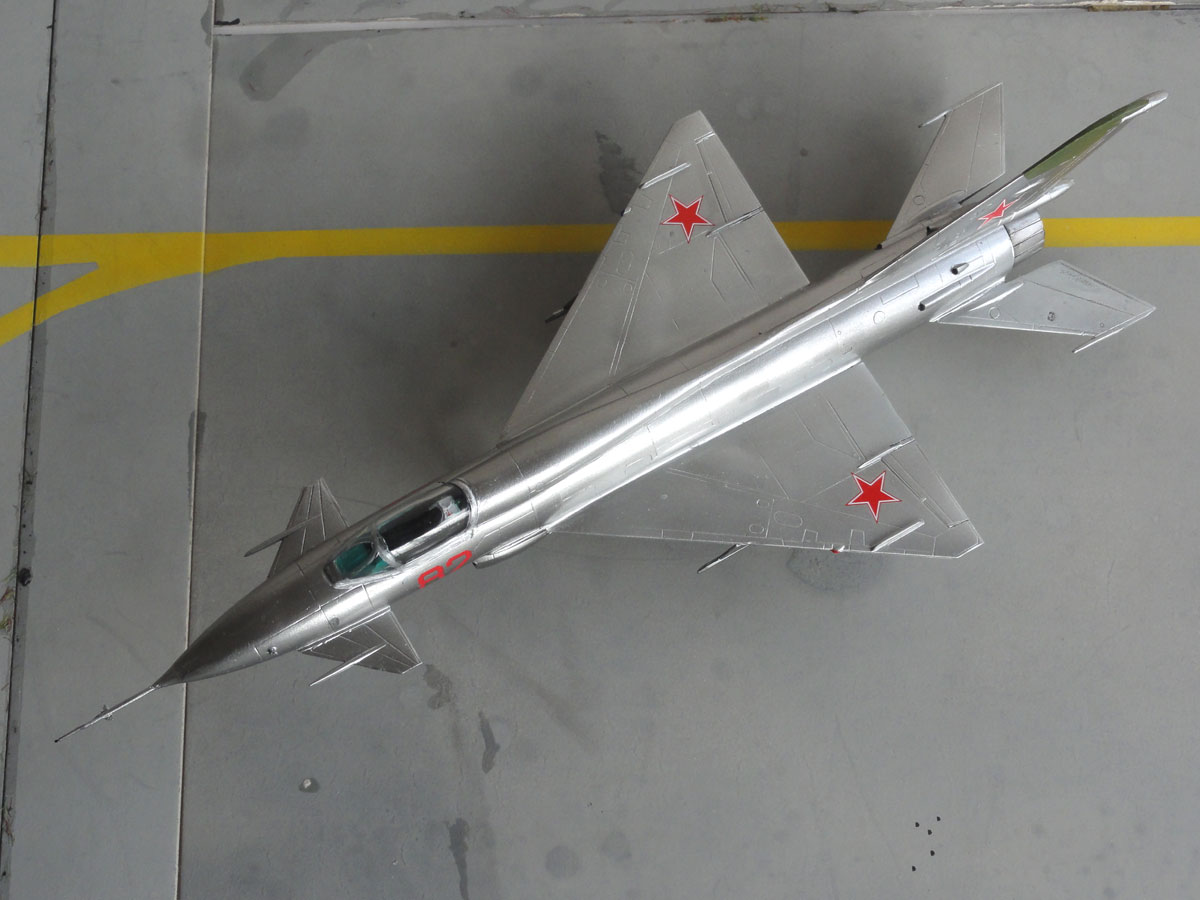
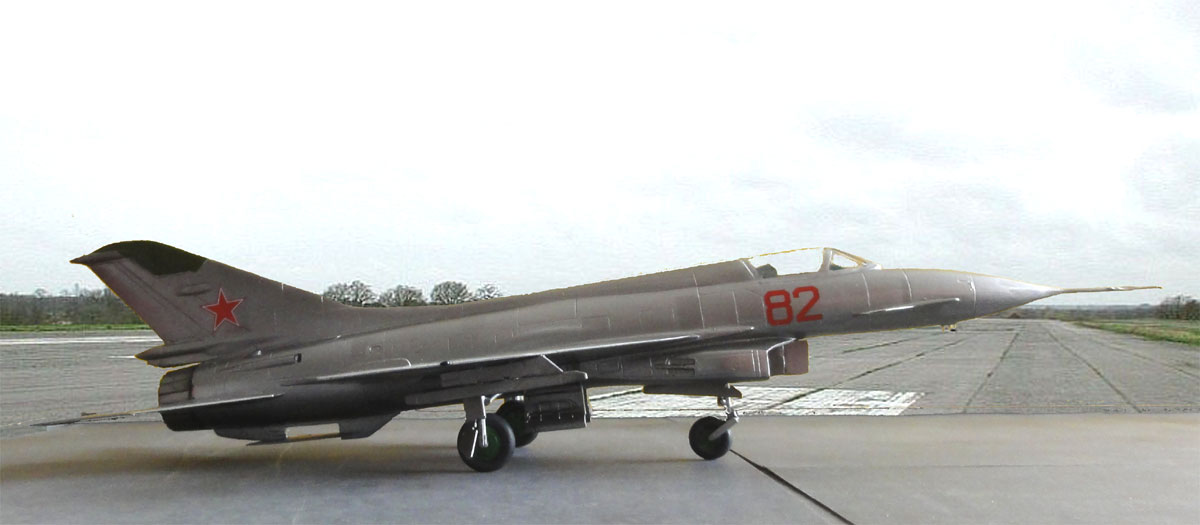
ART Model kit #7209 has issued a short run kit in 2012 and it has about 40 parts in light grey plastic. The canopy and wind screen are one piece. Some resin parts are included (not shown in the photos here), like a one piece cockpit tub with seat and the exhaust with nice inside detail. A small decalsheet for prototype "Red 82" is included. Panel lines are finely engraved.
The instructions are in a computer CAD style and not really clear. The positioning of the smaller parts is a bit vague.
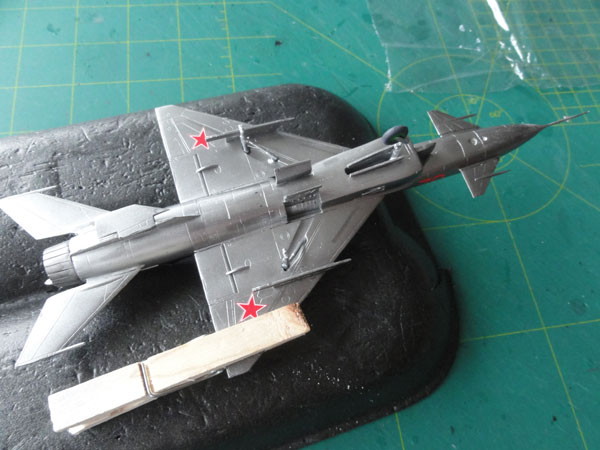
The overall assembly of the fuselage
needs quite some filler and sanding. Be patient here! I enlarged the holes
to strengthen the thin wing-fuselage joint.
 .
.
After main assembly the overal model
got a grey base coat. Any flaws were corrected with filler and sanded.
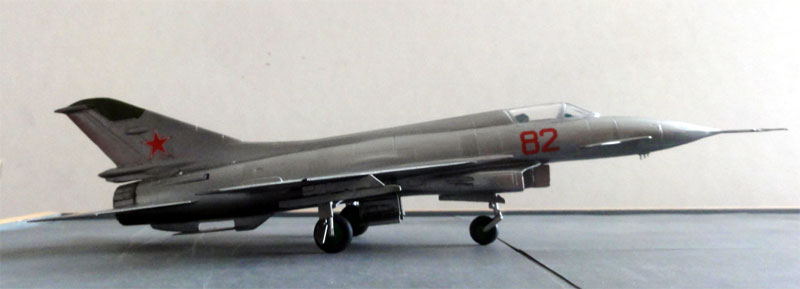
Subsequent polishing is needed as the real YE-8 was a "natural metal" prototype so it would be covered with ALCLAD II. (the kit instructions state a grey overall coat, but I believe it is natural metal as clearly seen on photos). This finish needs a scratch free surface first and the model also needs a GLOSS black undercoat (using Revell Aqua 07 acrylic gloss black or any gloss balck you have) applied with the airbrush.
A special trick was used to get slightly different sheens: when the black had dried, some black areas with masked of with VERY LOW tack masking film from Revell. Next, a few thin layers with the fine airbrush using ALCLAD II, in this case Gloss Aluminium ALC-105. Do not forget the smaller parts as well. After 3 minutes, the masking films at the covered areas were removed with a tweezer. Immediately, now these panels were lightly airbrushed with the same ALCLAD ALC-105 but not too thick.
This gives a DIFFERENT sheen and looks very good as on real bare metal
aircraft. So using this trick saves time a trouble as compared to adding
a different separate colour.
 .
.
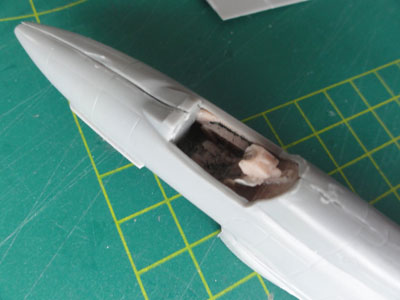
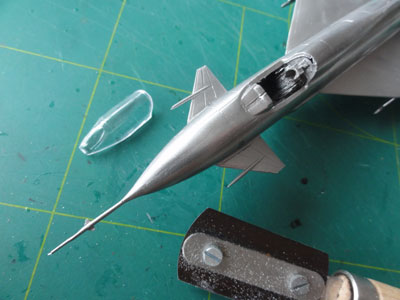
When dried, time for completing the
model. The resin part for the cockpit interior has enough detail and the
windshield and canopy as one part would be set closed.
The wind screen and canopy does not
really fit very well, I needed to cut away some plastic from the coaming
below the wind screen. Filler or white glue was needed to close the gaps
between canopy and fuselage, but first paint the cockpit interior.
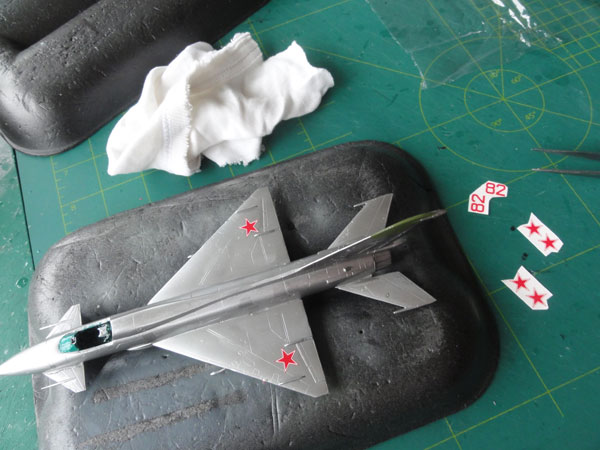
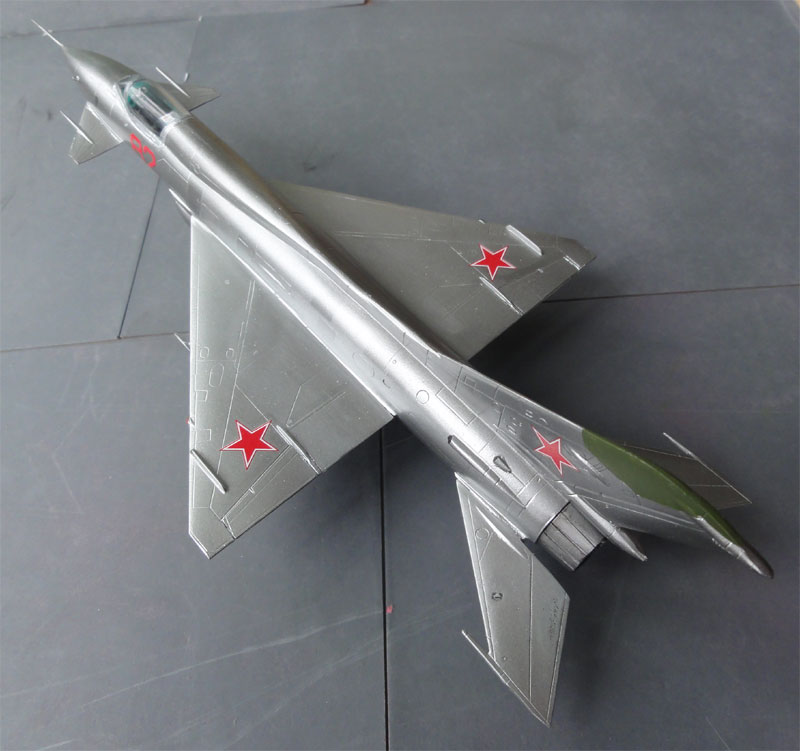
The interior was painted the typical
blue/green using AKAN 73005 acrylic. The antenna panel on the fin top
was painted green using Gunze Sangyo 340 acrylic.
The decals of the kit are sufficient
and applied. The ALCLAD coat is gloss so no problems here. Note that the
"Red Stars" should be in a slightly different position than indicated in
the instructions.
 .
.
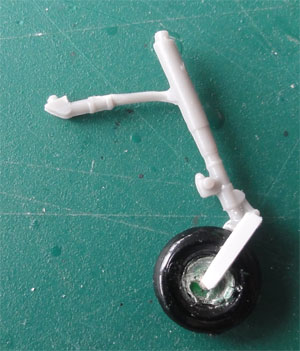
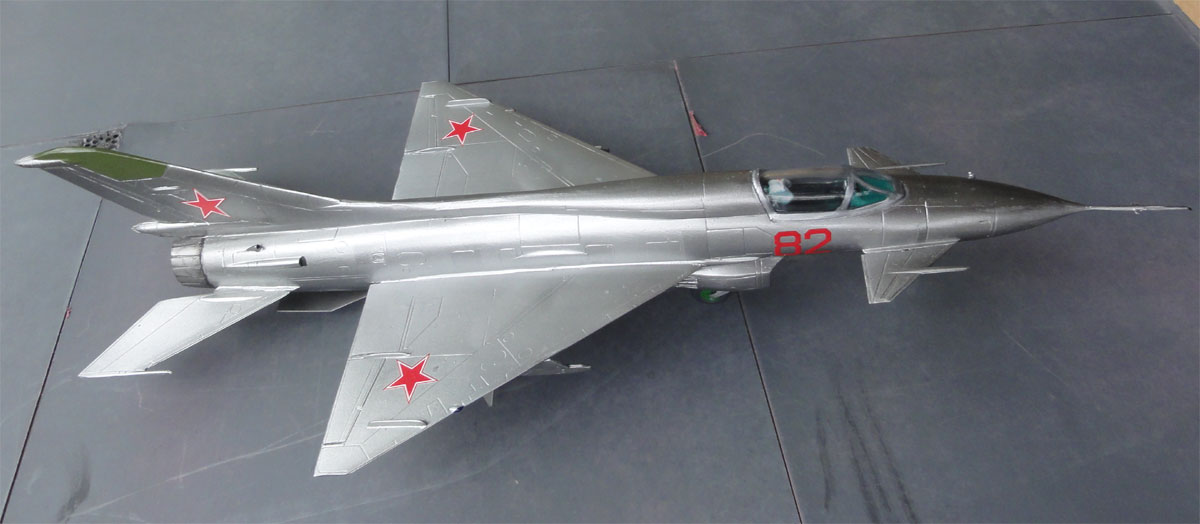
The nose wheel in the kit is much
TOO small and the nose gear leg was also reduced 4 mm in length. I replaced
the nose wheel with one found in the spares box. Also a new "fork" was
made from thin card after the wheel was cut off with the razor saw.
 .
.
The main gear legs are also 1 mm
too long and very simple parts, adding some stretched sprue details is
recommended. This was corrected on the model.
When all parts were installed, the
model got a gloss coat of acrylic varnish using Johnson
Future/ Pledge with the airbrush. That completed this nice YE-8 prototype
model in 1/72 scale.
.
 .
.
 .
.
 .
.
 .
.
 .
.
A very nice addition in the Soviet
Aircraft collection.
References
- OKB MiG, Butowski and Miller, Midland Counties Publications
- Internet (Russian page): http://airwar.ru/enc/xplane/e8.html
Back to 1/72 Models.......

(c) Copyright Meindert "designer"/ All rights reserved. Your comments are welcomed by webmaster
Created this page
April 25, 2016