Kit Comparison
Lynx model in 1/32 scale
..... continued from page 8....
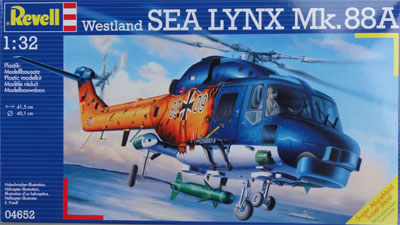
REVELL issued
the kit of the Sea Lynx Mk.88A (no. 04652) in October 2012. It has yellow
Lynx markings for a German Navy machine as well as other decals. This model
was used to do my conversion to the Dutch Lynx SH-14D.
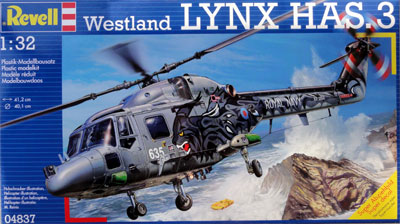
In February
2013, REVELL issued a different version of this kit (no. 04837), the HAS
3 :
 .....
.....
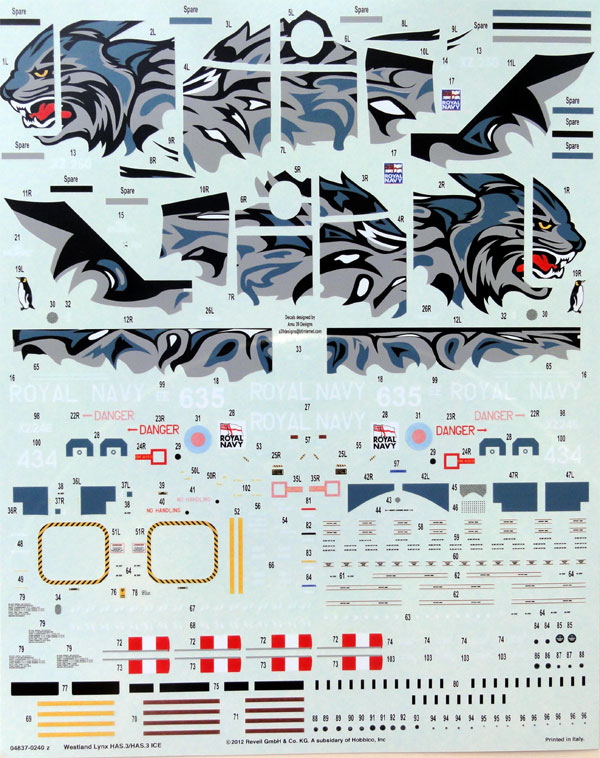
Decals for
2 schemes:
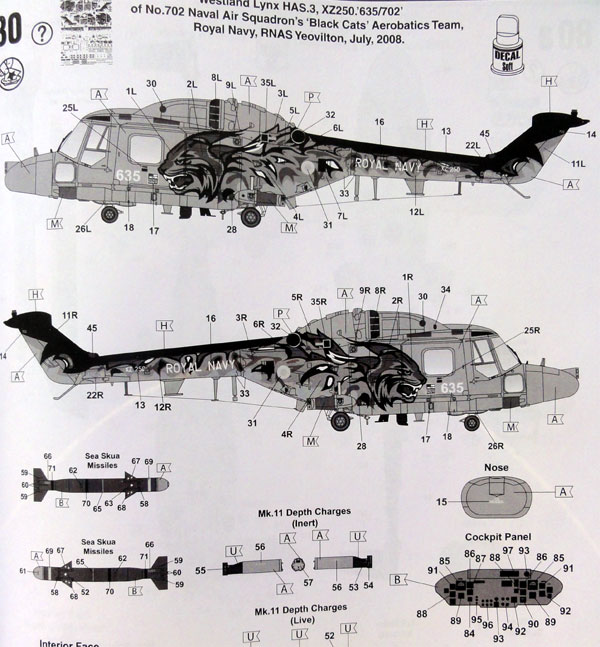
(1) Royal
Navy demoteam Black cats , XZ250 , no 072 squadron, Yeovilton 2008
(2) HAS
3, ICE, XZ246, no 815 squadron, as used during Antarctic mission 2001 from
HMS Endurance
among with some other "unidentified" sprues with parts.
| SPRUES IN DRAWINGS | Main sprue parts | Sea Lynx Mk.88A (kit 04652) | HAS 3 (kit 04837) | Remarks |
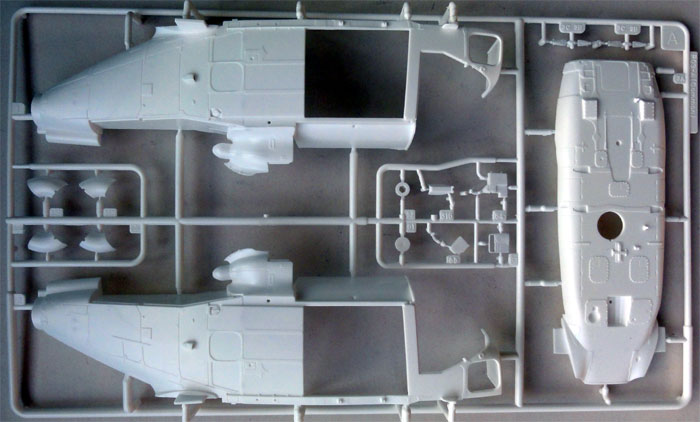
Sprue A (Revell common)
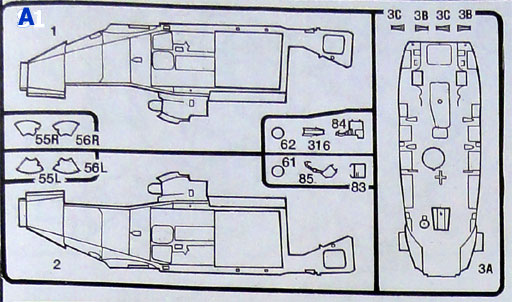 | Fuselage halves
Fuselage bottom | Yes
04652 | Yes
04837 | Also for SH-14D
(small change needed) |
Sprue B (Revell common)
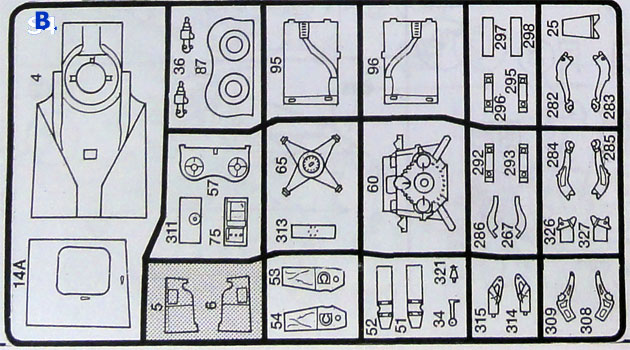 | Gearbox
Rotor fairing | Yes
04652 | Yes
04837 | Also for SH-14D |
Sprue C (Revell common)
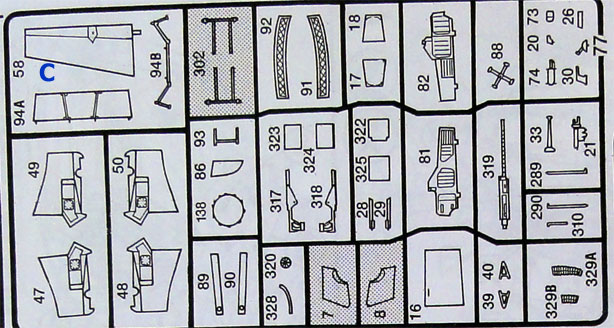 | Main gear fairings with ECM
Large span
| Yes
04652 | Yes
04837 | for Dutch Lynx like SH-14D:
Main gear fairings need modification Reduce stabilizer span |
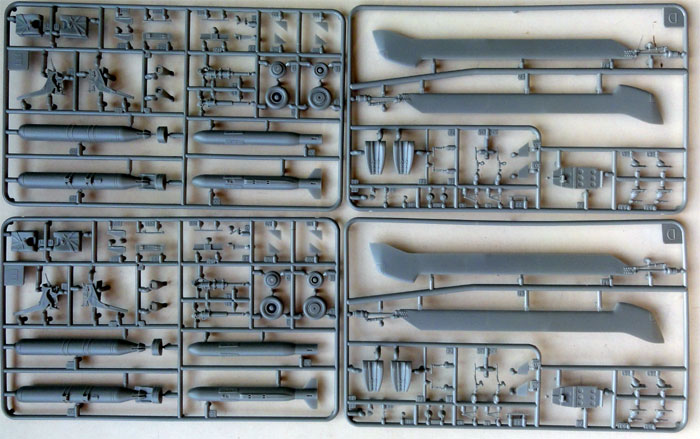
Sprue S2 (2x)
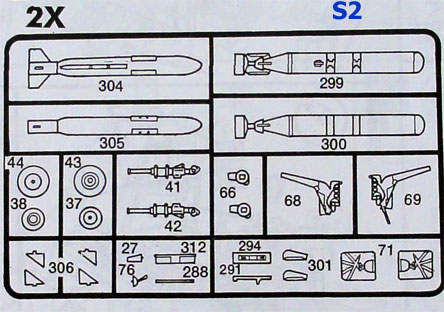 | Torpedo
Sea Skua missile Seat (2x) | Yes
04652 | Yes
04837 | (Optional SH-14D) |
Sprue S3 (2x)
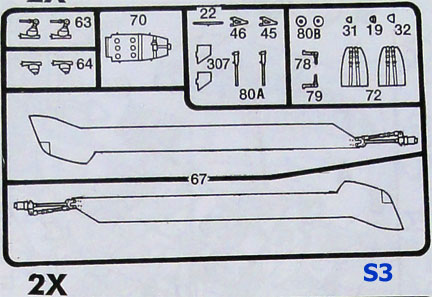
(sprue S4 = S3 ) | Main rotor blades BERP
(2x) | Yes
04652 | Yes
04837 | Good also for SH-14D
(BERP blades only) |
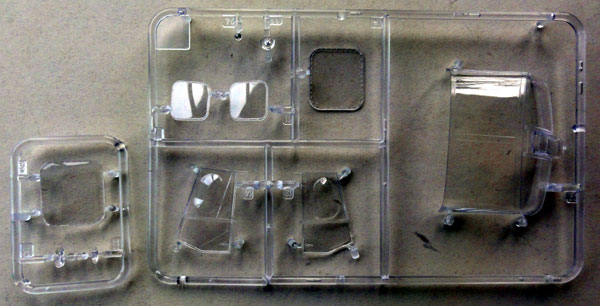
Sprue S5 (transparant)
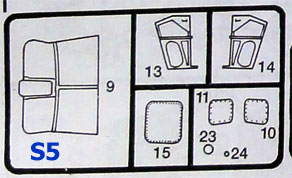 | Windshield
Front doors | Yes
04652 | Yes
04837 | Also for SH-14D |
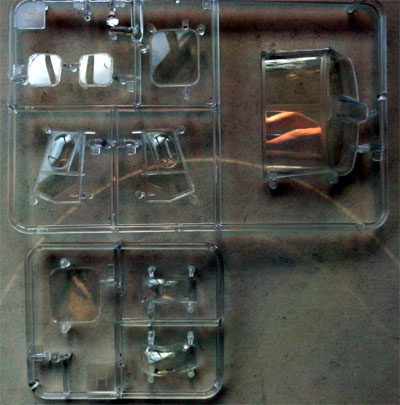
Sprue S6 (transparant)
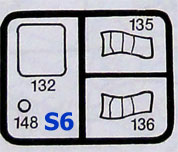 | door window
and "suggested intake grill" | n.a | Yes
04837 | may be usable for SH-14D |
Sprue S7 (transparant)
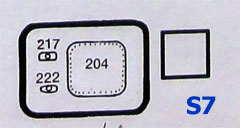 | door window | Yes
04652 | n.a | Also for SH-14D |
Sprue S8
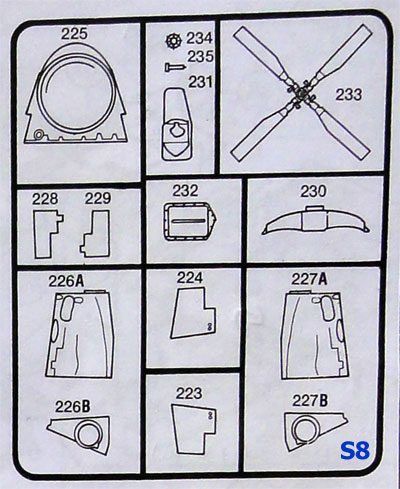 | Tail rotor (new type)
Sea Lynx with
| Yes
04652 | n.a | For SH-14D better to have Sprue 13
Nose not applicable and not usable (too pointy) |
Sprue S9
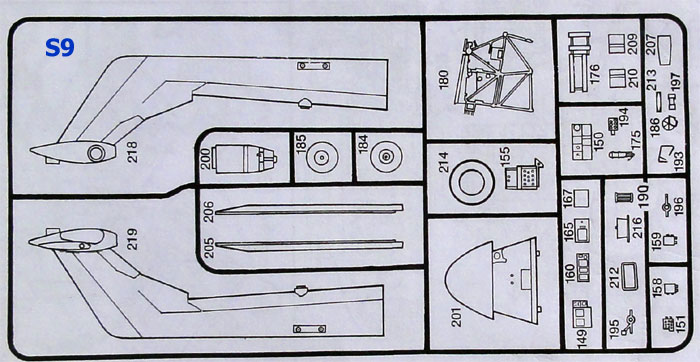 | Non foldable tail
Parts for sonar interior | Yes
04652 | n.a | For SH-14D,
better is to have Sprues S12 and S13 For Sonar interior required |
Sprue S10
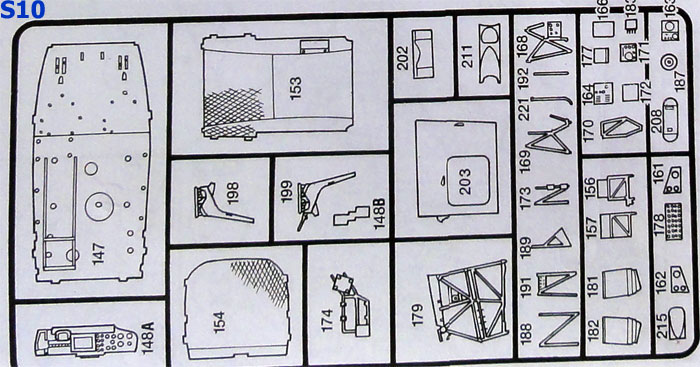 | Sonar interior parts
Slightly other Floor | Yes
04652 | n.a | Usable for SH-14D when sonar is desired
Sprue 12 can also be used for no sonar interior |
Sprue S11 (not described in
any kit instructions)
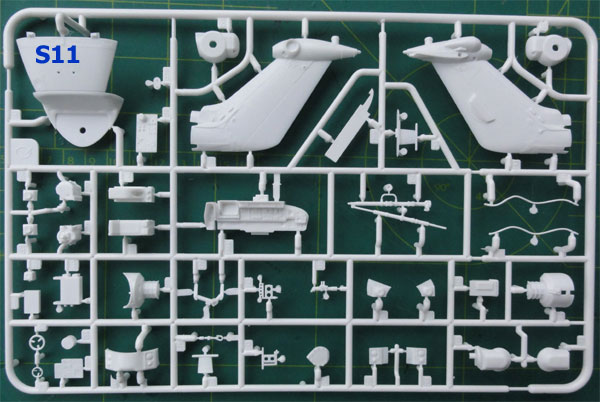 | This sprue
is not mentioned/ explained in instructions; looks appropriate for e.g
HMA8
Lower nose radar radome for HMA8 Foldable HMA8 tailfin Hoist parts
| Yes 04652
(but not described) | n.a | Instrument panel usable for SH-14D
But for other parts, Sprue s13 is better Also on sprue are Hoist parts |
Sprue S12
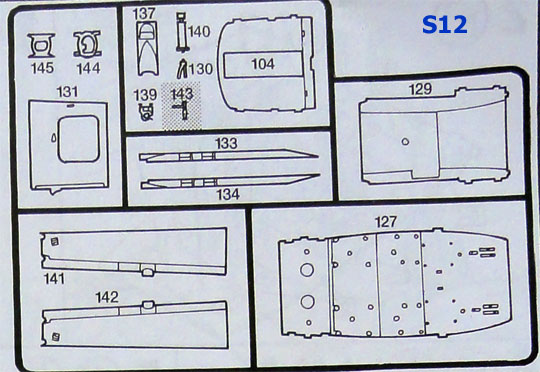 | Foldable Tailboom
Slightly different floor (no sonar gap) Other type left door Slightly different rear cabin bulkhead | n.a | Yes
04837 | Good sprue for SH-14D with foldable
tailboom
Cabin bulkhead #104 is applicable for SH-14D (can be covered with webbing on a real Lynx) |
Sprue S13
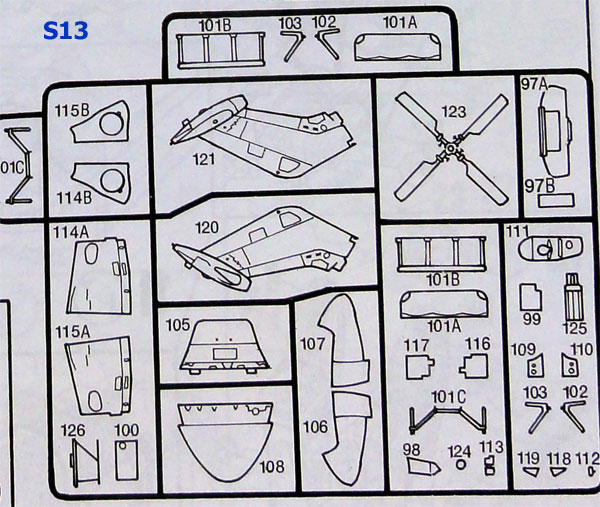 | Foldable tailfin with old style fairing
Old style tailrotor Lower HAS3 nose radome HAS3 instrument panel HAS3 engine fairing details | n.a | Yes
04837 | Good sprue for SH-14D:
HAS3 nose, which is too pointy for SH-14D Appropriate foldable tailfin with good top fairings Appropriate old style tailrotor Correct small changes to engine fairings (e.g. cowhorns and parts 116+117) Correct nosegear fairing #111 Instrument panel not applicable
for SH-14D
|
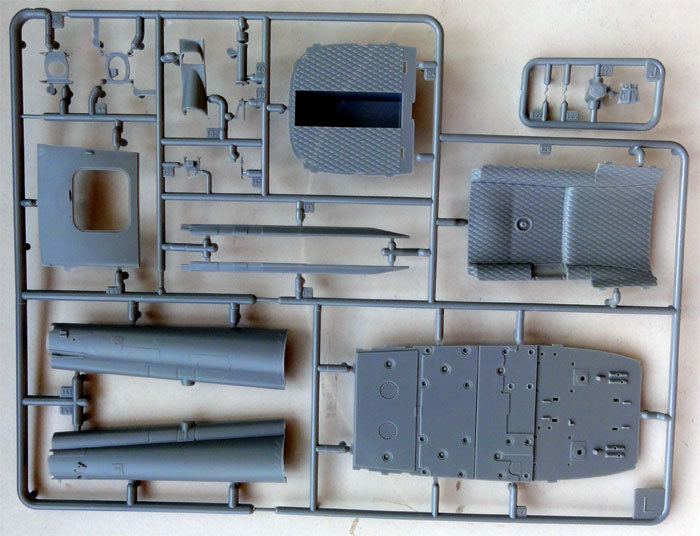
REVELL SEA LYNX MK88a (KIT 04652)
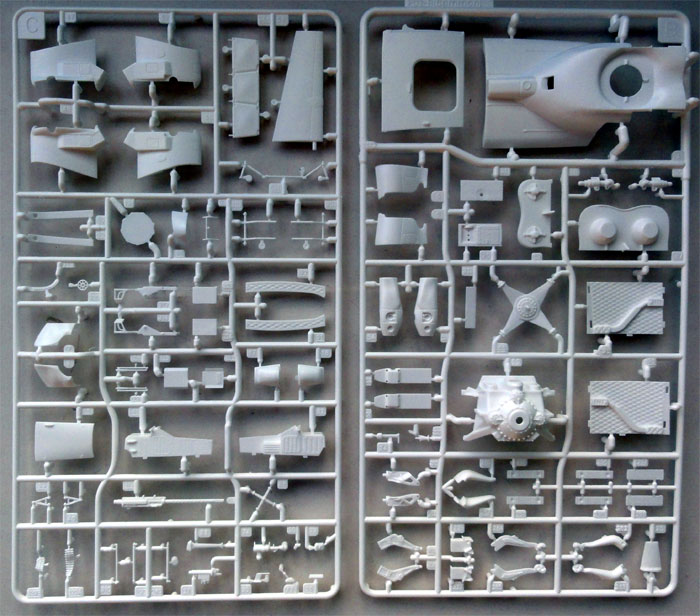
... and the anonymous not mentioned
sprue S11....
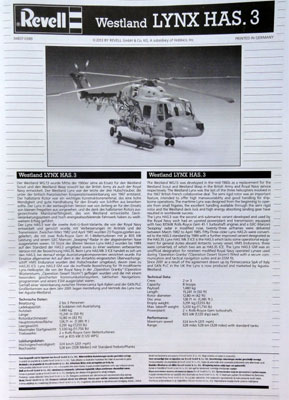
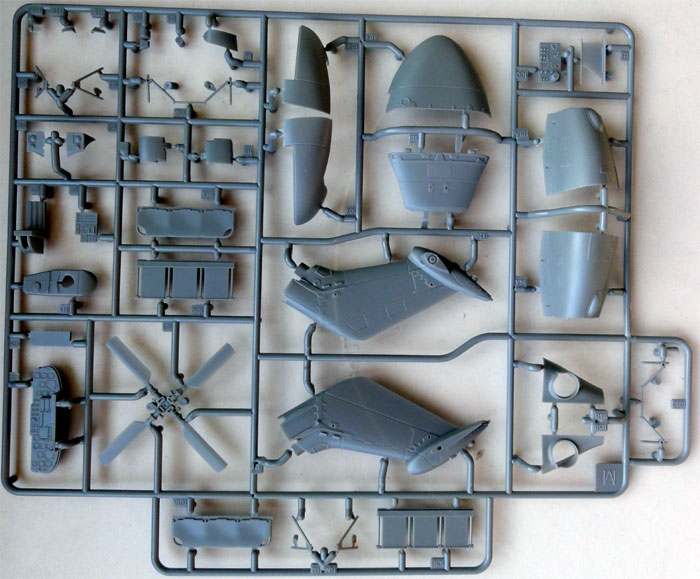
REVELL HAS 3 (KIT 04837)
The HAS3 kit parts are in white and
grey plastic.
 ........
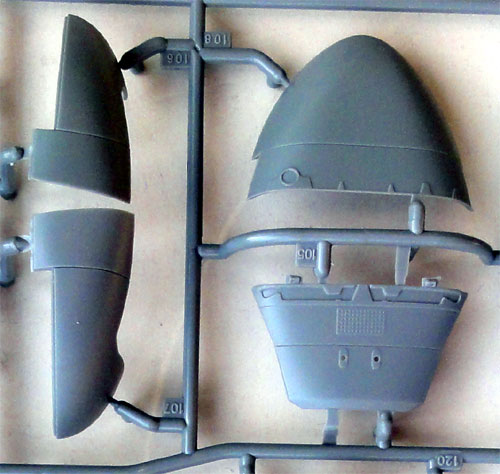
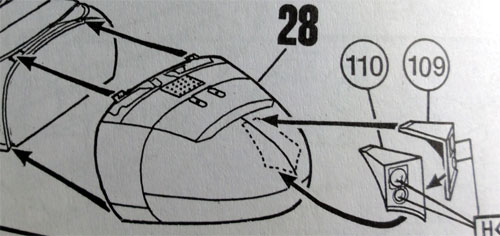
with the added ECM (?) fairing 109+110.
 ...
...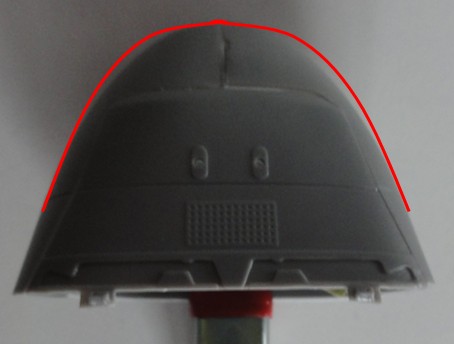
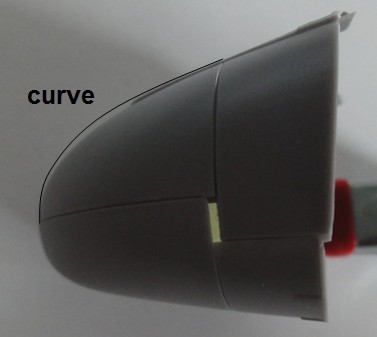
Looking at photographes, for Dutch
Lynxes such as the SH-14D, the nose looks different. The kit parts
look a bit too pointy.
Note that the kit differences are
very subtle and one can easily also use the kit parts.
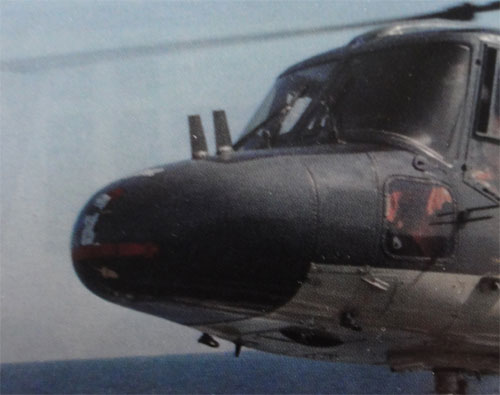
Lynxes were fitted with various noses
with different shapes. Also, many variations are seen on add-ons like FLIR
turrets, fairings, ECM stubs etc.
OK, if you want to make a Dutch Lynx like the SH-14D, what is the best approach?
Buy the Revell HAS3 Lynx kit (KIT 04837). If you are happy with the HAS 3 kit nose, leave as is. You need than to adapt the main gear fairings/stubs and modify the main instrument panel. No hoist nor a sonar is in this kit. But that is a configuration that was sometimes operational on real MLD Lynxes.
If you want a (yes, only slightly different) Dutch Lynx nose and parts for the simple main gear fairings, also buy my home made conversion set.
If you want an interior with sonar
equipment, console and operator seat, get ALSO the other kit Mk.88a. But
please note that the German sonar interior is DIFFERENT than the one used
in the Dutch Lynxes but the parts are handy for a conversion. This kit
will give you also the SH-14D main instrument panel. You also get the (not
in the instructions mentioned) hoist parts. But you still need to adapt
the main gear fairings/stubs.
Brief suggestions when modelling the
SH-14D when using the HAS3 kit following the Revell Instructions
Numbered Steps:
STEPs 1, 2, 3: follow instructions
STEPs 4, 5: another instrument
panel is needed, use part #266A from kit of the Mk.88a if you have
it. Also use part #234 mid console. Otherwise with card do a simple conversion.
STEP 6: probably not
needed
STEP 7: follow instructions
STEPs 8, 9: follow instructions but
leave off parts #128
STEP 10: follow instructions
STEP 11: follow instructions,
the other rear cabin bulkhead part #104 is OK also for a Dutch Lynx (it
is often covered with webbing and is hidden by canvas seats)
STEPs 12 - 15: follow instructions
for a simple interior, depending on interior configuration.
STEPs 16 - 20: follow instructions
STEPs 21 - 22: follow instructions,
the correct SH-14D fairings are in this kit.
STEPs 23 - 27: follow instructions,
the engine fairings are appropriate. Parts are there for even the "cowhorn"
intakes #118 + 119, see step 38A.
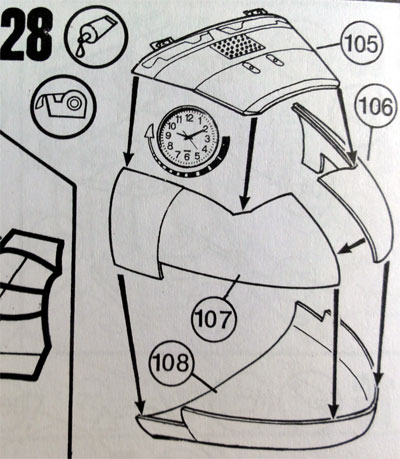
STEP 28: the HAS3 nose
looks a bit "different" as a Dutch Lynx nose on the SH-14D. You can
leave as is or use my home made resin nose,
look here for details....
STEP 29: follow instructions
but with slight modifications, see here what....
STEP 30: follow instructions
, nice is the new correct part #111
STEPs 32 - 34: follow instructions
, very nice with correct failing tail with correct tailboom, correct tailfin
fairings on top and good old style tailrotor. (saves a lot
of conversion work!)
STEP 36: follow instructions
STEP 37: the door is
correct, follow instructions
STEP 38: follow instructions
STEP 38A: follow instructions
, parts are there for even the "cowhorn" intakes #118 + 119.
STEPs 39 - 42: follow instructions
but only one antenna #27 needed, look here....
STEPs 43 - 46: the main gear
fairings/stubs need modification. I have some resin
conversion parts, look here.......
STEPs 47 - 50: follow instructions
with adapted main gear fairings
STEP 51: follow instructions
but parts #139, 113, 112, 24 are probably not needed
STEP 52: follow instructions
STEP 53: follow instructions
but make span of stabilizer smaller, look
here how.....
STEPs 54 - 55 : follow instructions
but look at the slightly different antenna configuration, look
here....
STEP 56: very nice are
the icing indicators #130, should be on both side. Follow instructions
STEPs 57 - 74: these steps deal with
stores like torpedo and machine sidegun, can be fitted to a Dutch SH-14D
as well. (The Sea Skua can not be fitted). Follow instructions as desired.
STEPs 75 - 79: follow instructions
for the later BERP blades on the Sh-14D as well, add rotor details
That completes the overall step-by-step
modelling suggestions.
.

(c) Copyright Meindert "designer"/ All rights reserved. Your comments are welcomed by webmaster
Created this page
February 3, 2013