Dutch naval air service
[ page 6 ]
Conversion of Lynx model in 1/32 scale
MARKINGS
Revell provides excellent markings including loads of stencilling but many of Dutch Lynx markings for this conversion had to be sourced from the spares box and other decal sets. Dutch roundels and small Dutch flags could be obtained from DUTCH DECAL set #72029 or can be obtained from an old IPMS The Netherlands roundels-set.
The KONINKLIJKE MARINE titels were retrieved from a home made decal set I had made in the past. Sorry, I have no suggestions for you here to make them yourselves, I was lucky to have made them in the past through an external given assignment using ALPS printer for a 1/72 KC-10 extender kit. For the 1/32 Lynx, this text is about 70 mm long.
The SH-14D had some adaptions are
to the sizes of lettering and roundels as compared to the older MLD paint
scheme (like of the UH-14 or SH-14C). Photographs were studied and dimensions
determined as follow for the SH-14D:
> roundels fuselage side: 12
mm diameter (smaller)
> roundel on top of fairing: 16 mm
> roundel on lower fus bottom: 16
mm
> helicopter number of pilot door:
height 4 mm (considerably smaller)
> SH-14D title: length 12 mm
Some numbers and letters could be retrieved from the decalspare box, particularly the Dutch MLD lettering from Dutch Decal sheets.
UPDATE: Dutch Decal issued a complete 1/32 MLD lynx set later in summer 2013. So you can purchase these, saving you a lot of work!
 ........
![]()
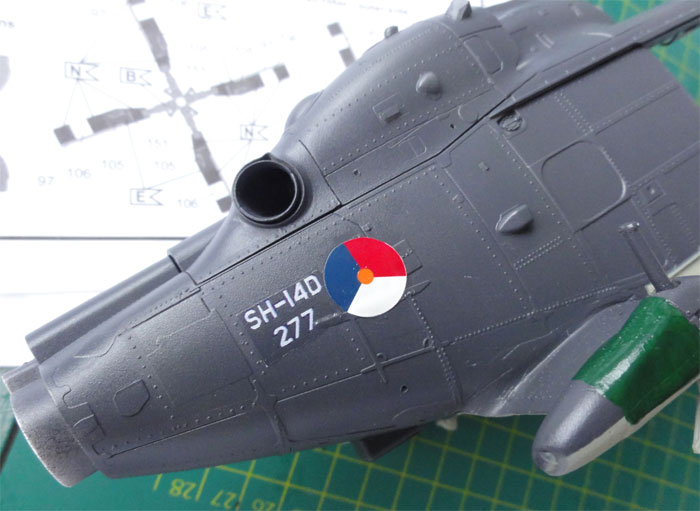
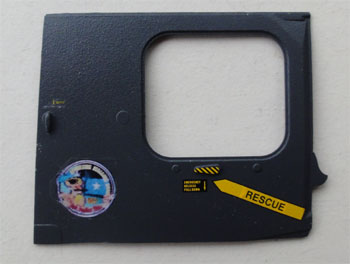
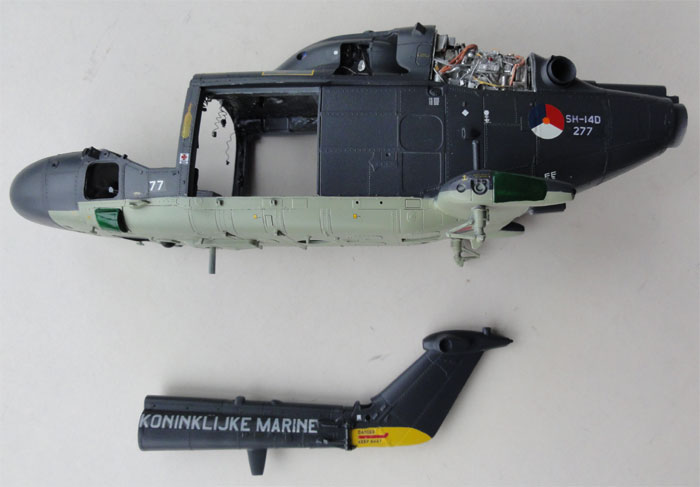
I liked a special markings SH-14D
Lynx, the "277" with VE2 Pink Panther Flight
logo on the sliding doors and nose. (note: this Lynx was captured with
its crew during the Libya war in 2011 on the beach while attempting a rescue
mission. It was shown on television worldwide. After the fall of the Kadaffi
regime, during 2012 it was returned to the Netherlands. ).
This model will be made in a earlier
scheme of the "277".
These desired markings for the Dutch SH-14D were not (yet) available. Hopefully Dutch Decal or FLEVO DECAL will come to the rescue for other Dutch Lynx modellers. My decals were home made, using high resolution photographs and each scaled to 1/32 size with a Photo Processing program. Once doubled checked to size, a high resolution print was made at my home CANON MP610 PIXMA printer at 150 DPI using Baremetal Foil White Decal paper. Set the paper type on the printer to "gloss photo paper".
I did a new trick while making the marking decals, as follows:
1. Scan an extra
dark sea grey part painted on the photoscanner. I used the airbrushed
sliding door.
2. Scan at at least 600 DPI. This
gives a correct hue/paint pattern
3. this paint pattern is used as
background for the home made markings.
4. Create the marking, to correct
size, on this background with your photo editing
program in at least 600 DPI
5. Print a rough plain copy on plain
paper first to ensure correct position and size.
6. I used BareMetalFoil gloss white
decal print paper, so set the printer paper setting to "gloss photo paper"
7. Stick a piece of decal paper at
the printed area onto the printed plain copy with tape
8. Print....
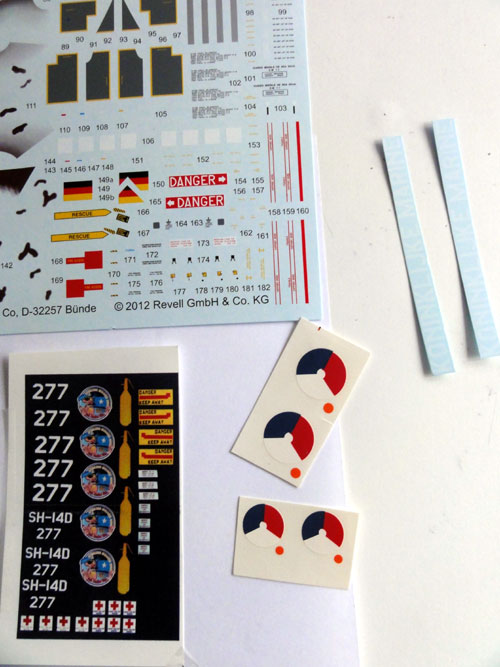
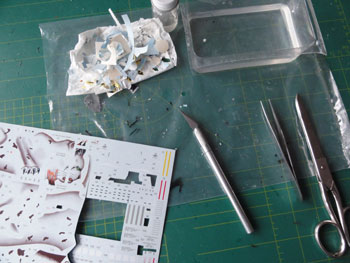
Here the decals are seen, with some
spares as well... The Dutch roundels came from a Dutch Decal sheet.
9. Let decals dry 4 hours
10. Add a light coat of protecting
varnish, I use GUNZE SANGYO H30 clear gloss varnish acrylic
11. Apply only a light coat each
time! Wait 1 hour between each coat.
12. Add no less than 4 coats!
13. After a day, ready to use, but
cut NOT along the marking edges but leave an 2 mm seperation EDGE!!!!!
All markings are printed at a single
large piece of decal paper, so you need to cut with scissors each marking
decal you want.
Again, do NOT cut each decal
close at their edge! Use adequate room as you will always damage the edge
Apply to the model as a decal
Finally: as the marking decal is on
a (in this case Extra Dark Sea Gray) background, blend in each marking
with a fine paintbrush in again painting the Extra Dark Sea Grey. In this
case GUNZE SANGYO. Hope for
a steady hand.
This trick will blend in each marking
on the model!
After applying all other decals as
well, give the model the desired usual protecting coat of gloss (or matt)
varnish with Johnson Future/Pledge or Gunze Sangyo Clear varnish (what
you have) using this method...
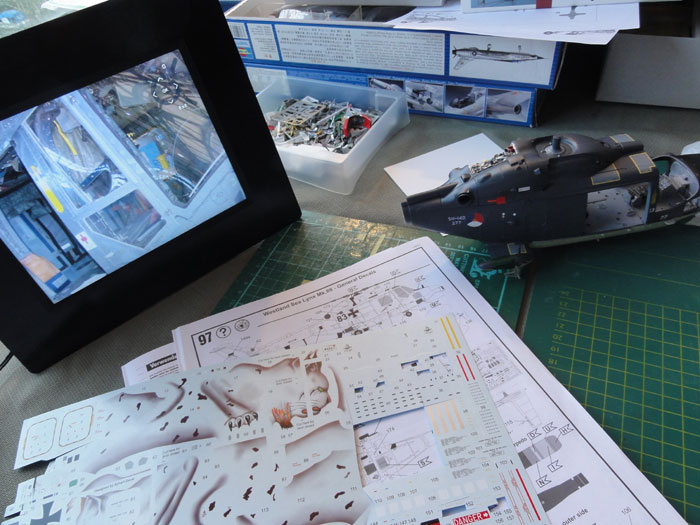
During decal application, I used a simple photopicture frame device with USB stick, I had all the (downloaded) photos from the IPMS NL Walkround on the USB stick. (You can also use a tablet or Ibook with connection to the Internet, this will not require a download....). This is the new "alternative" to the traditional book on the table.
So during decal application, I had
the photographic information ready to use.
 ......
STEPS 52-53
Glass windows and windscreen frames and edges were now handpainted in Extra dark sea grey, while not yet fitted to the model.
This is the easiest way as the edge is well marked and they can be turned and handled by hand. When in doubt of a steady hand, simple mask and spray is the alternative.
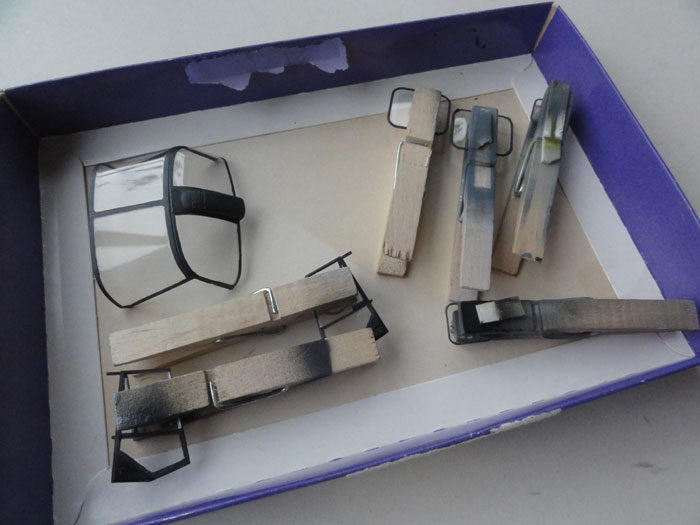
Note the clothes pegs to handle the parts
On to next [ Page 7... ]
Back to 1/32 scale Models.......
(c) Copyright Meindert "designer"/ All rights reserved. Your comments are welcomed by webmaster
Created this page January 12, 2013